About me
I’m Pablo Daniel Ruggeri Acción, I’m a 27-year-old Industrial Designer from Argentina and a 3D lover. Even though I've learned a lot from studying Industrial Design, I learned most of what I know (especially everything related to the 3D universe) in an autodidact way. My constant curiosity about everything is the force that always keeps me motivated to learn. I love to constantly be observing and thinking about how to improve everything that surrounds us.
Aside from this, I love science, art, and philosophy. That is why I’m really a sci-fi fan. I believe it's a great fuel for our minds to stay creative, it is a great passion booster and, in my opinion, the best boundary pusher we have nowadays, which is something crucial for us.
Last but not least, I’m currently working as a Teaching Assistant (in subjects like Innovative 3D Design) at the university I graduated from and I am working as a remote freelance artist occasionally.

Learn more on qarnot.com.
Project introduction
This project was done in my spare time to advance my rendering (material creation, lighting, and composition) skills. Some days I could work for a few hours, while others just a few minutes. Anyway, what kept me going was having a set goal. I wanted to experiment with studio lighting but adding a bit more flavor to the formula. However, I had no exact “vision” of what I wanted when I started, it was a very exploratory project and the idea got refined along the way. Also, I wanted to do something with an electric car but didn’t know which car to choose. My decision was between the Lamborghini Terzo, the Polestar 2, the NIO EC6, and the Tesla Roadster. Then, after letting it “settle in my mind”, I started to like Tesla's (and SpaceX's) connotation and used this project as an excuse to play with it.
Once the path of the project got roughly defined, it was time to start creating in 3D and refining the idea!
But before we dive into the Behind the Scenes, here are 2 notes:
- The software used was Blender 2.83.2 + Luxcore 2.4 + Photoshop. Even though some things might be specific to Luxcore, it will be more of a general walkthrough of the process.
- In case you would like to take a closer look at the process, I recorded the full project and you can see a timelapse of it (it is my first video, though) on YouTube! The link to it is at the bottom of the article.
3D model preparation
The first step for creating a good render, as any food preparation recipe advises, is to ensure that you have great quality ingredients!
That is why you have to take the time to search for good models according to your needs. In my case, I was interested in creating renders just from the exterior of the vehicle, so a schematic interior was ok.
Aside from the level of detail, in the automotive render area, the main factor to determine if a model is “good or not” for renders is its surface continuity. This is because in later phases you want to create a studio that, when it is reflected by the vehicle’s surface, doesn’t make distorted reflections that interrupt the sight path flow when observing your final image.
It is said that CAD models tend to be the best ones, but there are many polymodeled (most of the car models are done in this way) cars out there that are fantastic. Also, getting accurate CAD files is either very hard to find or very expensive for personal projects.
Anyway, I personally like the ones done directly in mesh format because they also tend to have some minor bumps in its surface that boost the level of realism. Real-life cars have those kinds of imperfections. If everything is way too perfect, your eye will instantly notice it.
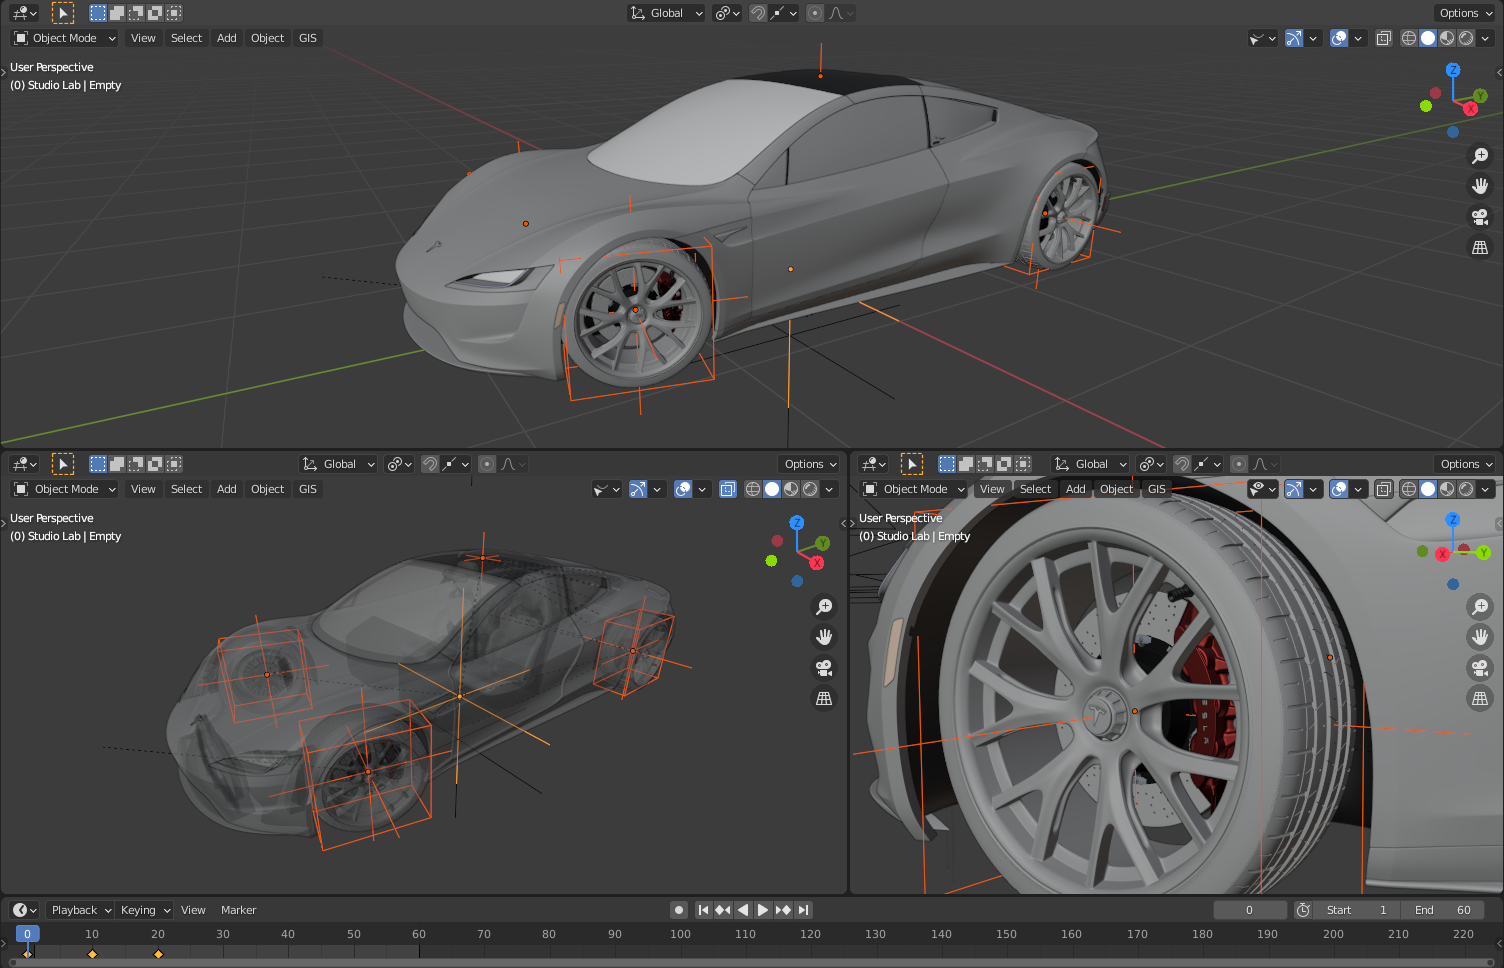
After getting the model, I fine-tuned some parts, changed the interior seats (grabbed them from another car that looked similar), and replaced the tires for some highly detailed ones I found for free (each resource I used is listed at the bottom at the article with its corresponding author credit).
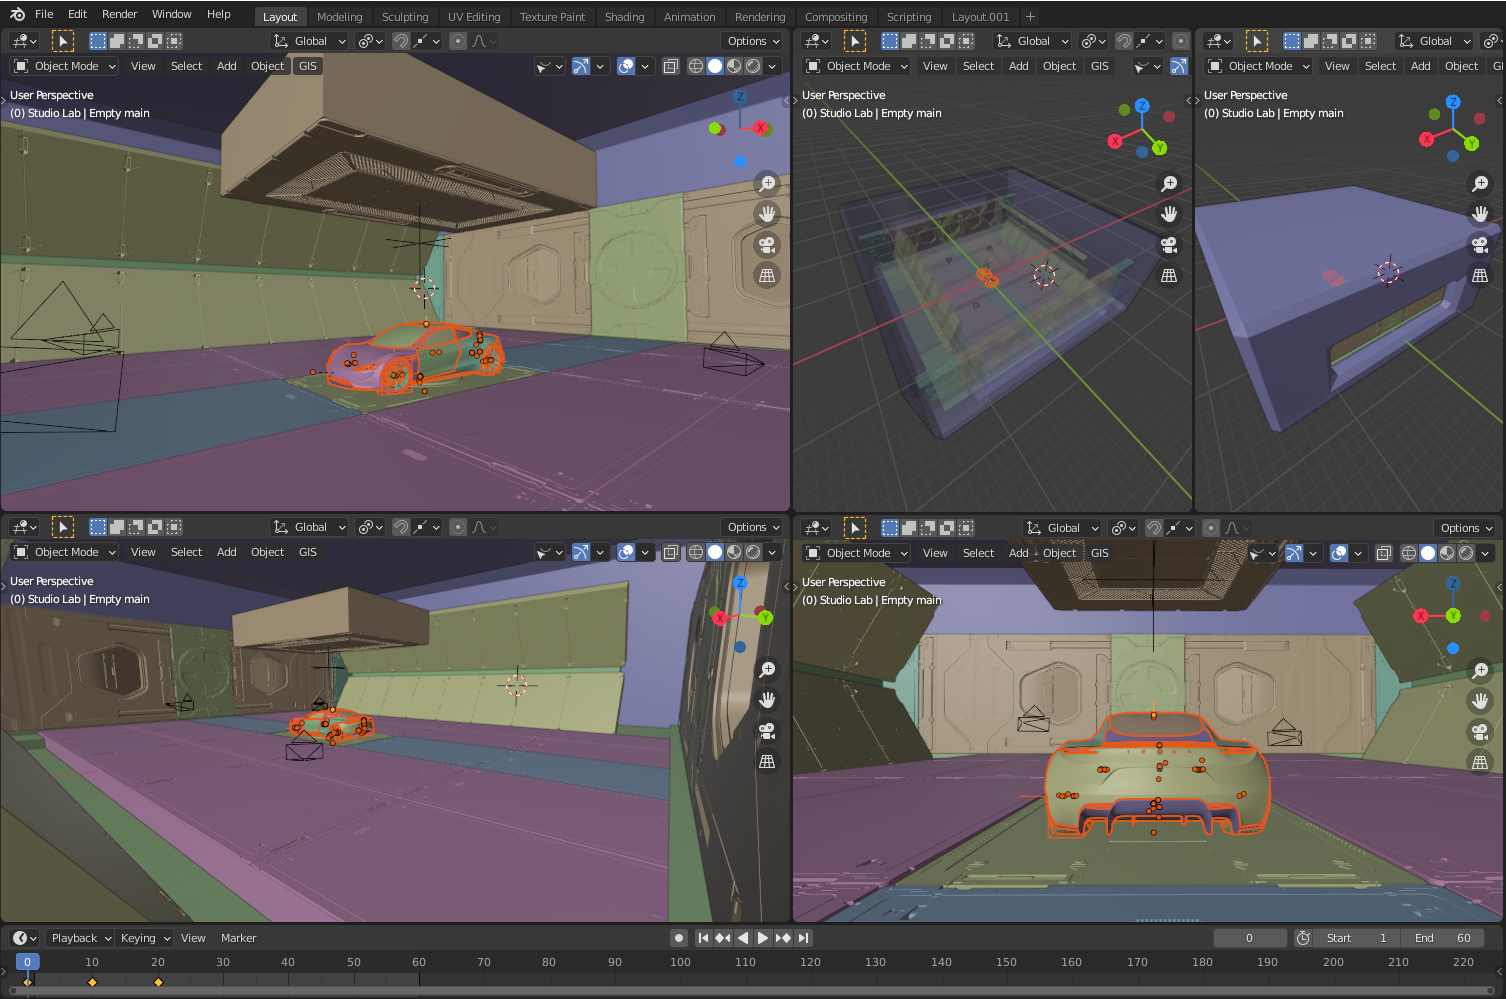
Also, I made a small rig to control the different parts of the vehicle. I checked if the overall dimensions were correct, reset the objects' scale, position, and rotation, and created some empties to link the different parts to them. Lastly, I animated the front wheels’ direction rotation to avoid constantly changing them later when choosing the camera angle (with this method you just set the camera and move to the keyframe that best suits the render).
Basic lighting
After the model was prepared, I created a simple neutral lighting condition. By doing so, later when creating the materials, I was sure that I was not going to get a biased shader setup.
For this purpose, basic studio photography rules are the ones that apply, such as no tint in the light, and a good balance between light and shadow. If everything is way too white, it will not be correct.
To achieve these lighting conditions I used one of the gradient maps I created as a .hdr file to give the general illumination.
Additionally, I created some small area lights as if they were flashlights to help me focus on certain areas. These lights help you to spot better if the bump height of your setup is correct, and also to check if the roughness map is working properly, among other things.
Once you have chosen a lighting setup, it is convenient to keep it like that during the material creation process to avoid adding a variable when determining the final look of the material.
Aside from this, I used some sky HDRIs that I created (you can find them here if you are interested) to perceive the car materials in a more natural situation. Our eye is very used to observing objects in these situations and unrealistic material behaviors are immediately detected.
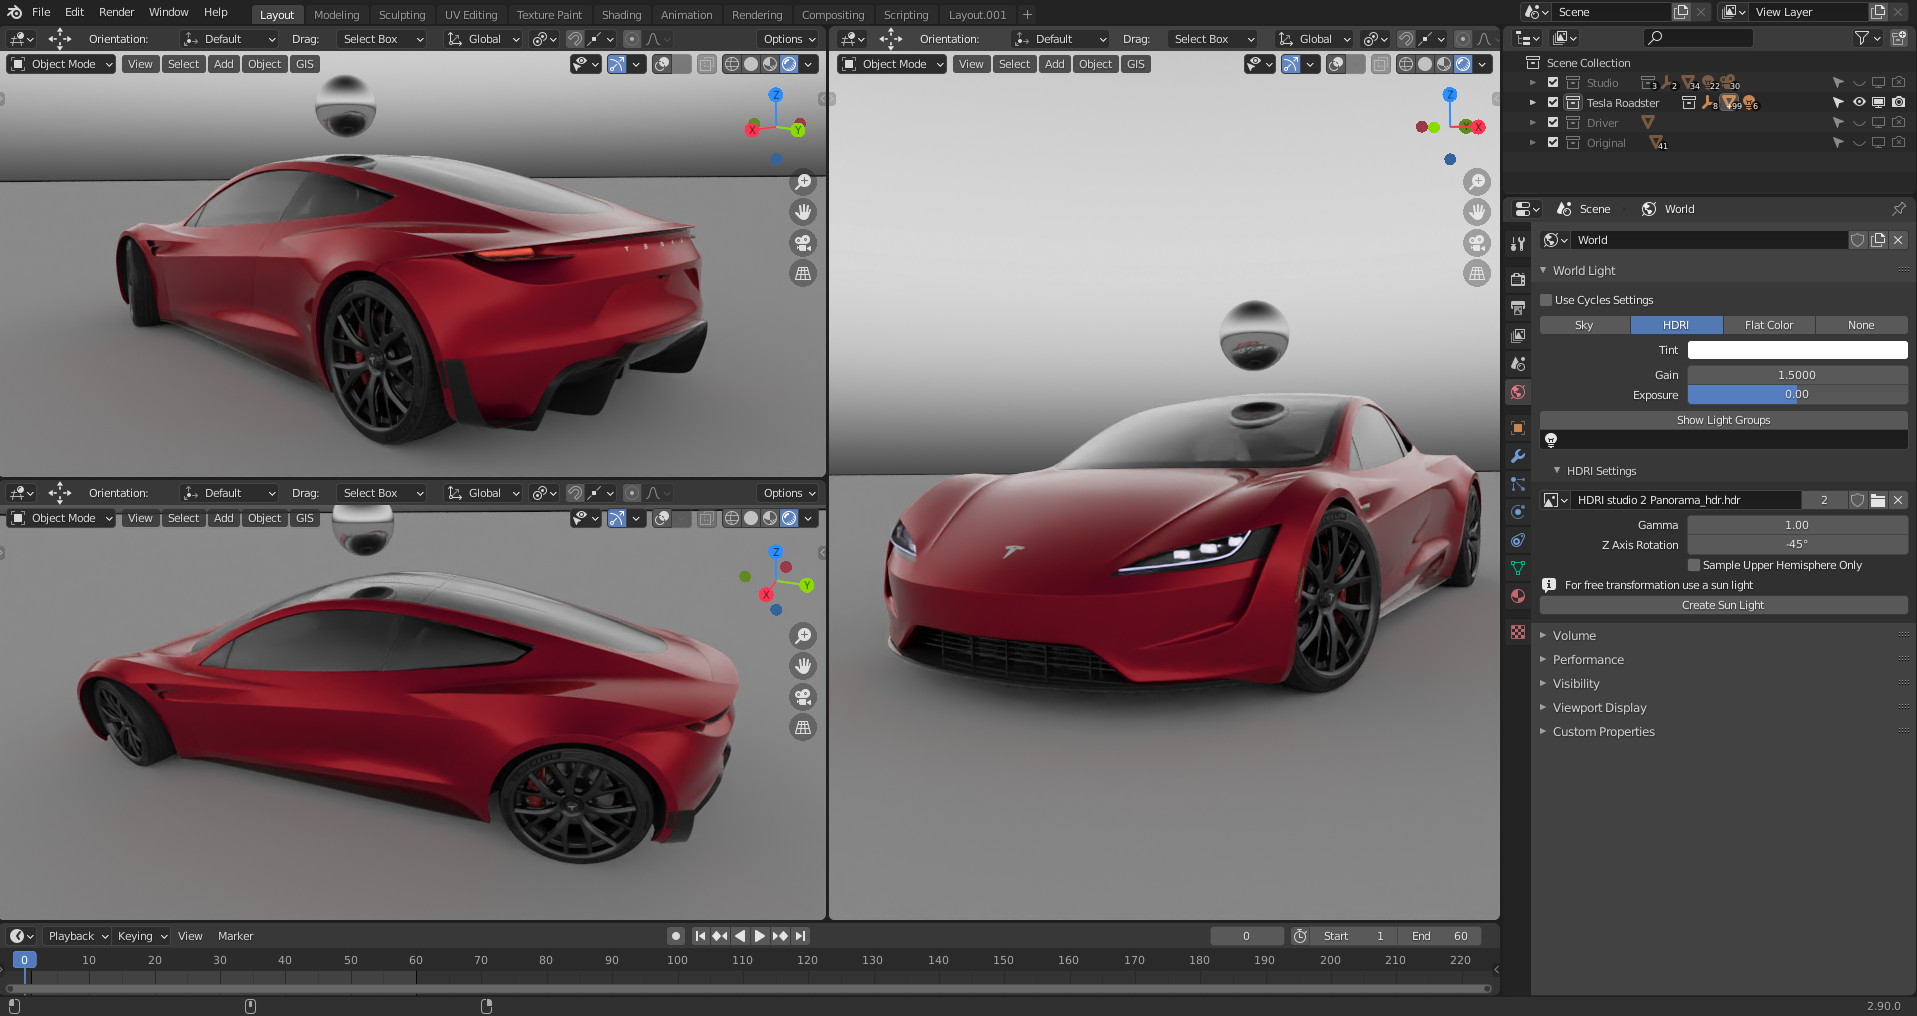
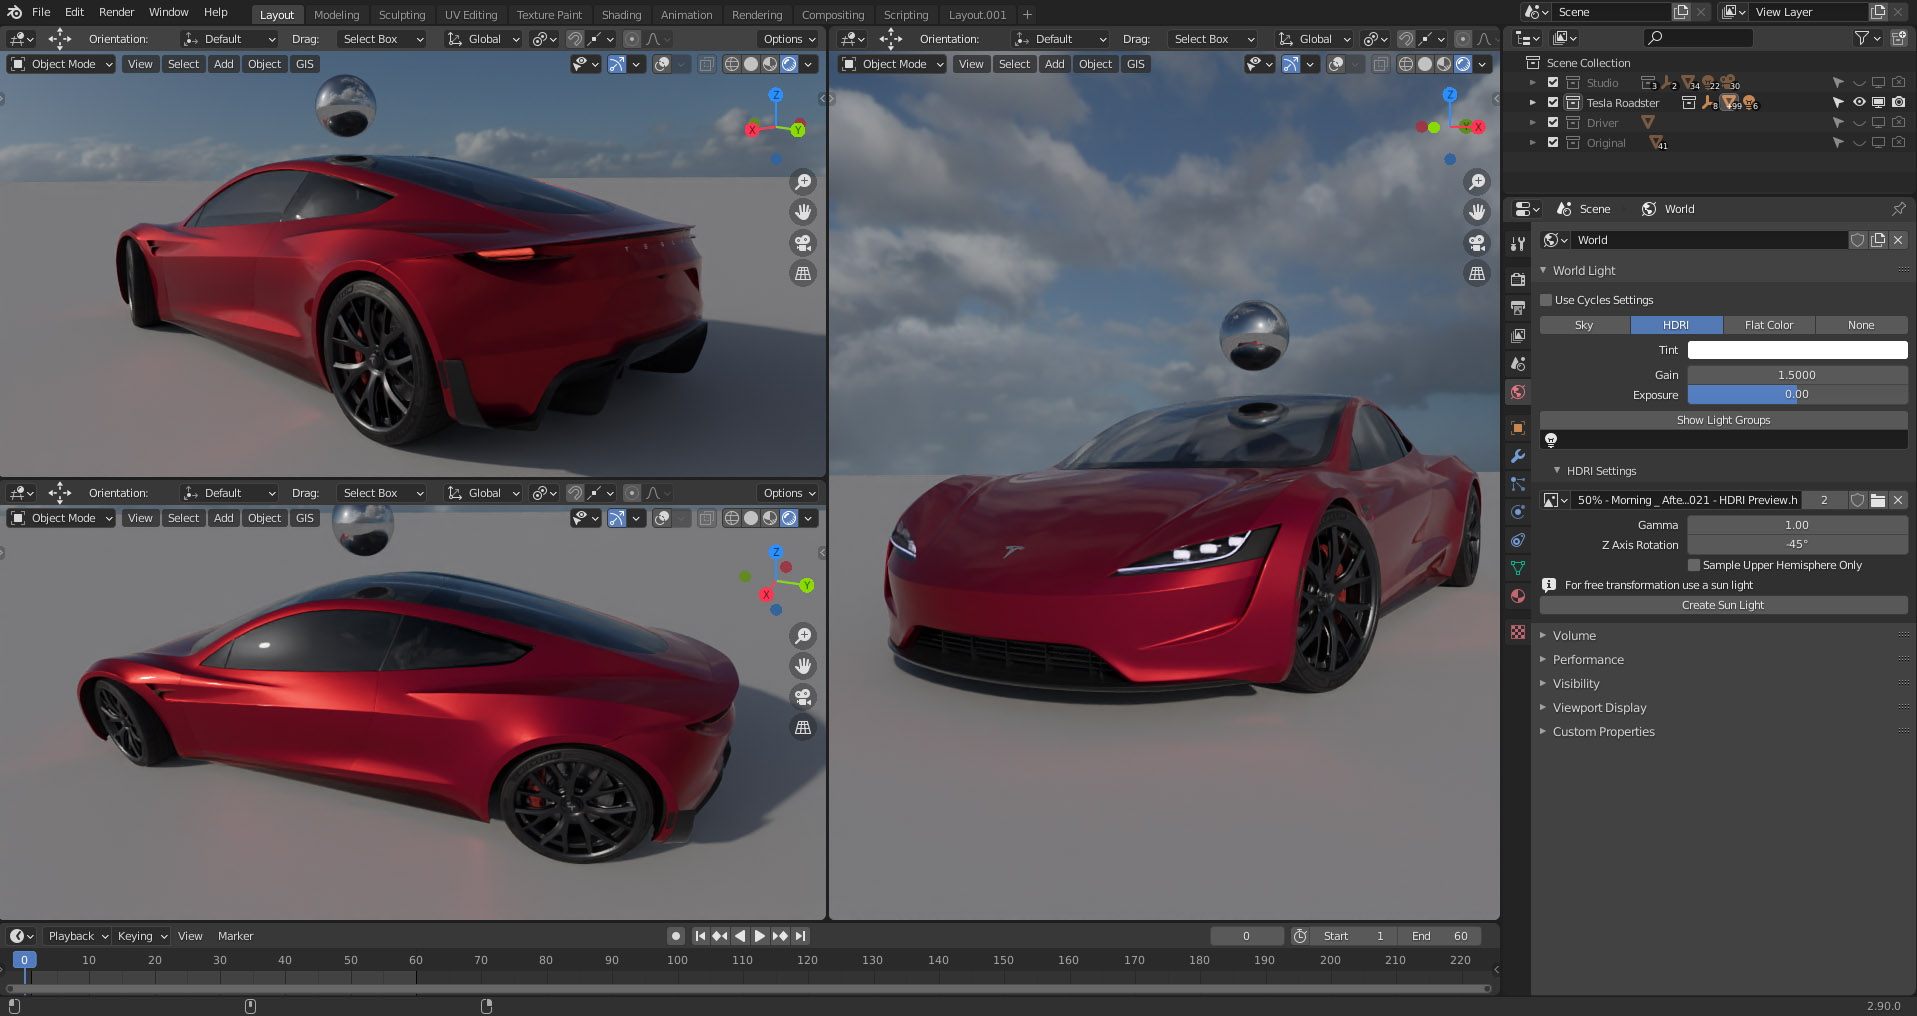
Finished model rendered with the HDRIs used for the basic light
Alternating between these two lighting conditions (but always prioritizing the studio one whereas using the sky one just for overall check), I could start creating the materials.
Creating the materials
All the materials were done from scratch. Despite already having some good materials in my library, I decided to do it this way in order to learn new techniques and approaches. These spare time projects are very good excuses to explore and experiment, a thing that doesn’t generally happen when a client arrives and has a strict deadline.
As I mentioned previously, having good ingredients (textures in this phase) is mandatory for getting good results. Again, you can check some of the ones I used in the last part of the article.
That being said, I started creating each material. When creating materials, I try to concentrate on each material one at a time. However, when I think it is almost finished, I jump to another one, and so on. I never say “it is done” after the first “setup pass”. I find this useful in my workflow because by doing so, it is possible to observe the parts from different angles that might not have been checked when I was focused on that piece/material.
Aside from these tips, here are few commentaries on the main shaders of this project
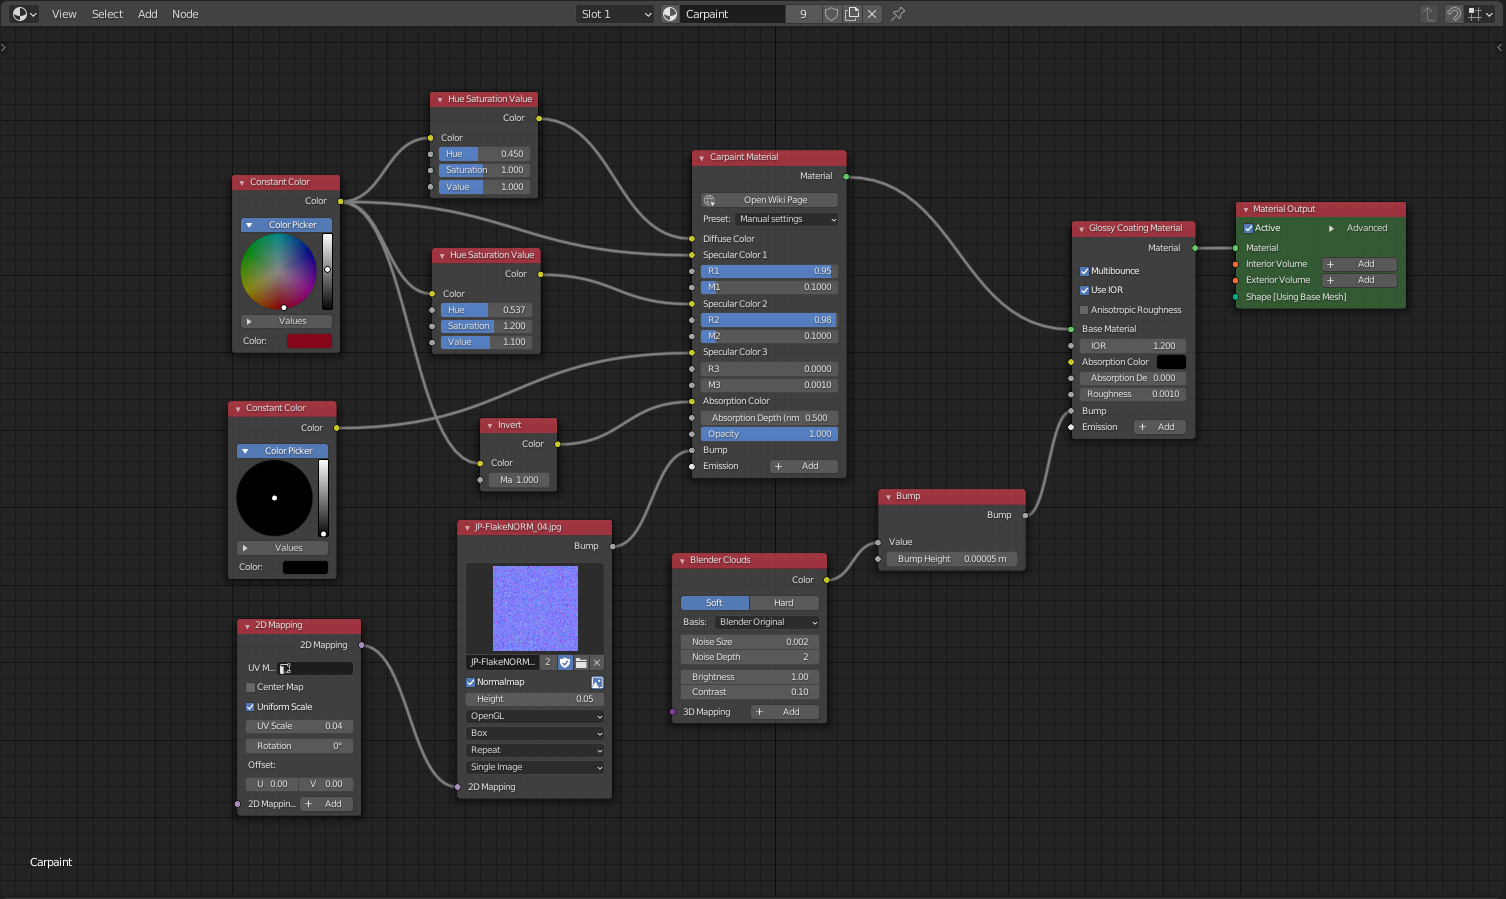
Car paint
The main things to consider when doing a car paint is the metallic base material and its clear coat over it (fresnel effect + orange peel). Doing the metallic part is pretty easy. In this case, I used the “car paint” shader that Luxcore has. This shader has the characteristic of giving you a couple of metallic layers to create a more interesting car paint. The main color was determined with a constant color node and I used slight variations in hue/saturation (a little more orange-red for the highlights and a darker pinkish red for the shadows) to give the color more depth than if it were just a plain color. I decided that a good way to do this was by setting the colors with HSV (hue/saturation/value) nodes so that as I changed the base color, the rest would shift proportionally as well.
The next most important thing to set is the clear coat. Even though the shader from Luxcore already has a clear coat option, the fresnel effect it has as a default makes it look very shiny (and too unnatural for my taste). The fresnel effect in the clear coat of car paint is “very pronounced”, which means that the faces that are perpendicular to the viewer’s point of view are not as reflective as the ones adjacent to their point of view. This fresnel effect is something that (right now) can’t be controlled directly in that shader. That is why I decided to disable that effect (by setting its value to zero and color to black) and to use the material as a base for the “coating material” where you can control this effect by decreasing or increasing the IOR value. I found that a value around 1.2-1.4 works well (the higher the number, the shinier it will look from all angles).
Some bonus tips are:
- Add a normal map to simulate the micro metallic particles.
- Add a very small “noise texture” (Blender cloud) in the coating bump slot to create the orange peel effect.
Tires
The tire material is not that difficult to do. However, here are a few considerations I always keep in mind when working on tires.
- Don’t set the material’s color to full black—there is no material on earth that black. Always keep it as a very dark grey. The same applies to white materials or color saturations.
- The tread part always tends to look drier (rougher) than the sidewall part, and there should be a transition between both parts. In my case, I used a gradient map.
- Get high-quality sidewall maps (above 2k at least) and pay attention to mirrored wheels (because the text will look inverted).


Headlights and taillights
Of all the materials that a vehicle has, the lights are the most difficult to replicate. Generally, you have to play with the shader parameters and some auxiliary lighting, as many times the emissive properties of the shaders aren’t enough.
Also, as I previously mentioned, getting a realistic looking render will depend on whether you have a good model or not. Fortunately, this car had great modeling attention to those parts.
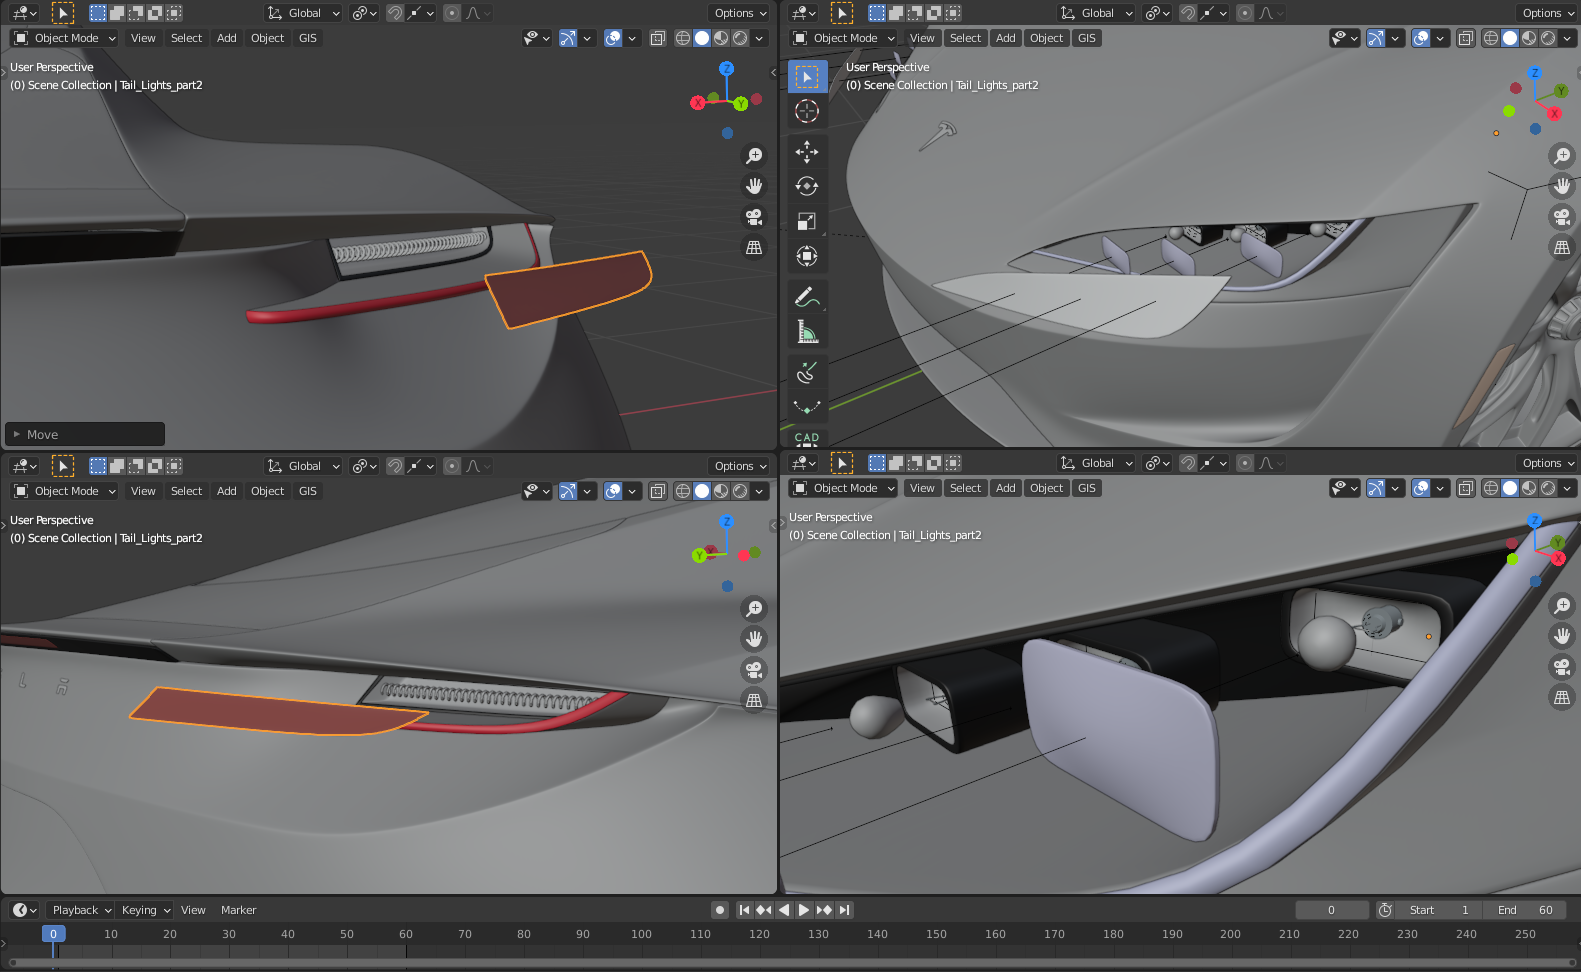
However, even though lights are very hard to represent, following the same logic as in real life will give you a very good result. The best way I found is to set the filament to a white emissive material and then the glass tint color will do the rest. Also, I reinforced the illumination effect with some small area lights placed inside each lamp.
Basically, you need to get a transition from white to a certain color to make it look illuminated. If it is full white or completely red it will not look correct.
Finally, the last touches were setting a glare effect pass to use later in post-production and using the newest “thin-film” option to create that rainbowish noise layer over the headlight’s main clear plastic.
Sci-fi studio creation
Once the model and the materials were set up, it was time to start with the final steps for creating the image.
I wanted to create a series of studio renders but, as I mentioned in the beginning, I didn’t have a clear idea of what I wanted (at least the first series I was going to be doing with this model). I also had in mind the innovative and high-tech concept that Tesla connotes to me but did not have a particular way to represent it.
While I was preparing the model, I started to gather reference images of different things.
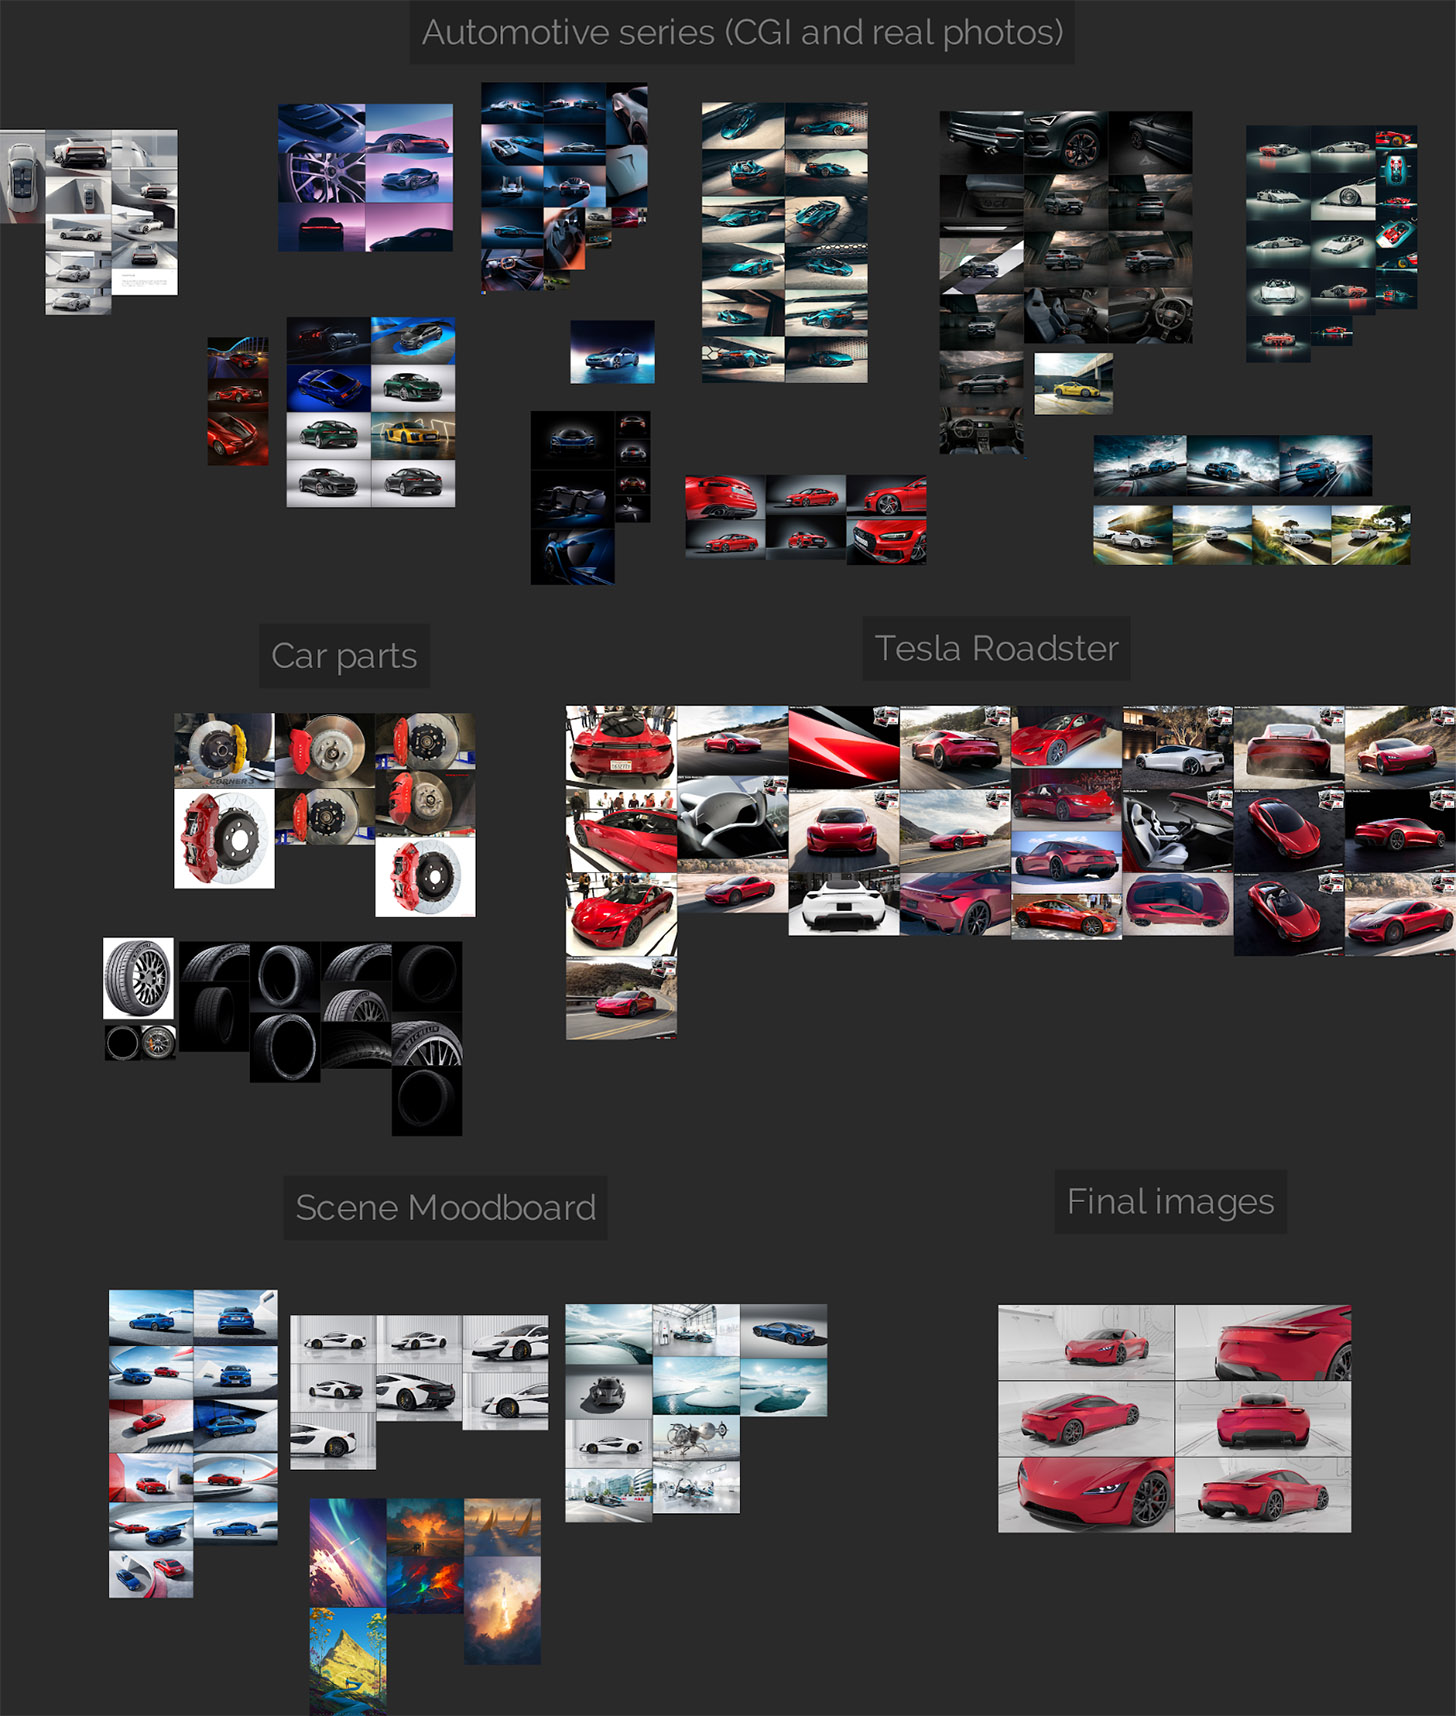
Overview of the Pureref I created for this project
The main references were: different automotive series created either by great 3D artists or automotive photographers to see how they represent their ideas and what they focus on, references from the car itself, details of some important car parts, and I collected a bunch of other images to create a scene mood-board that made my spider-sense start to tingle.
After doing this research, and letting the ideas combust and settle in my mind when I was about to sleep, I started to visualize the final renders. I took a pen and a paper and sketched a few things to remind myself of these idea flashes. They are extremely rough sketches and a few notations, but they are enough as this is a personal project.
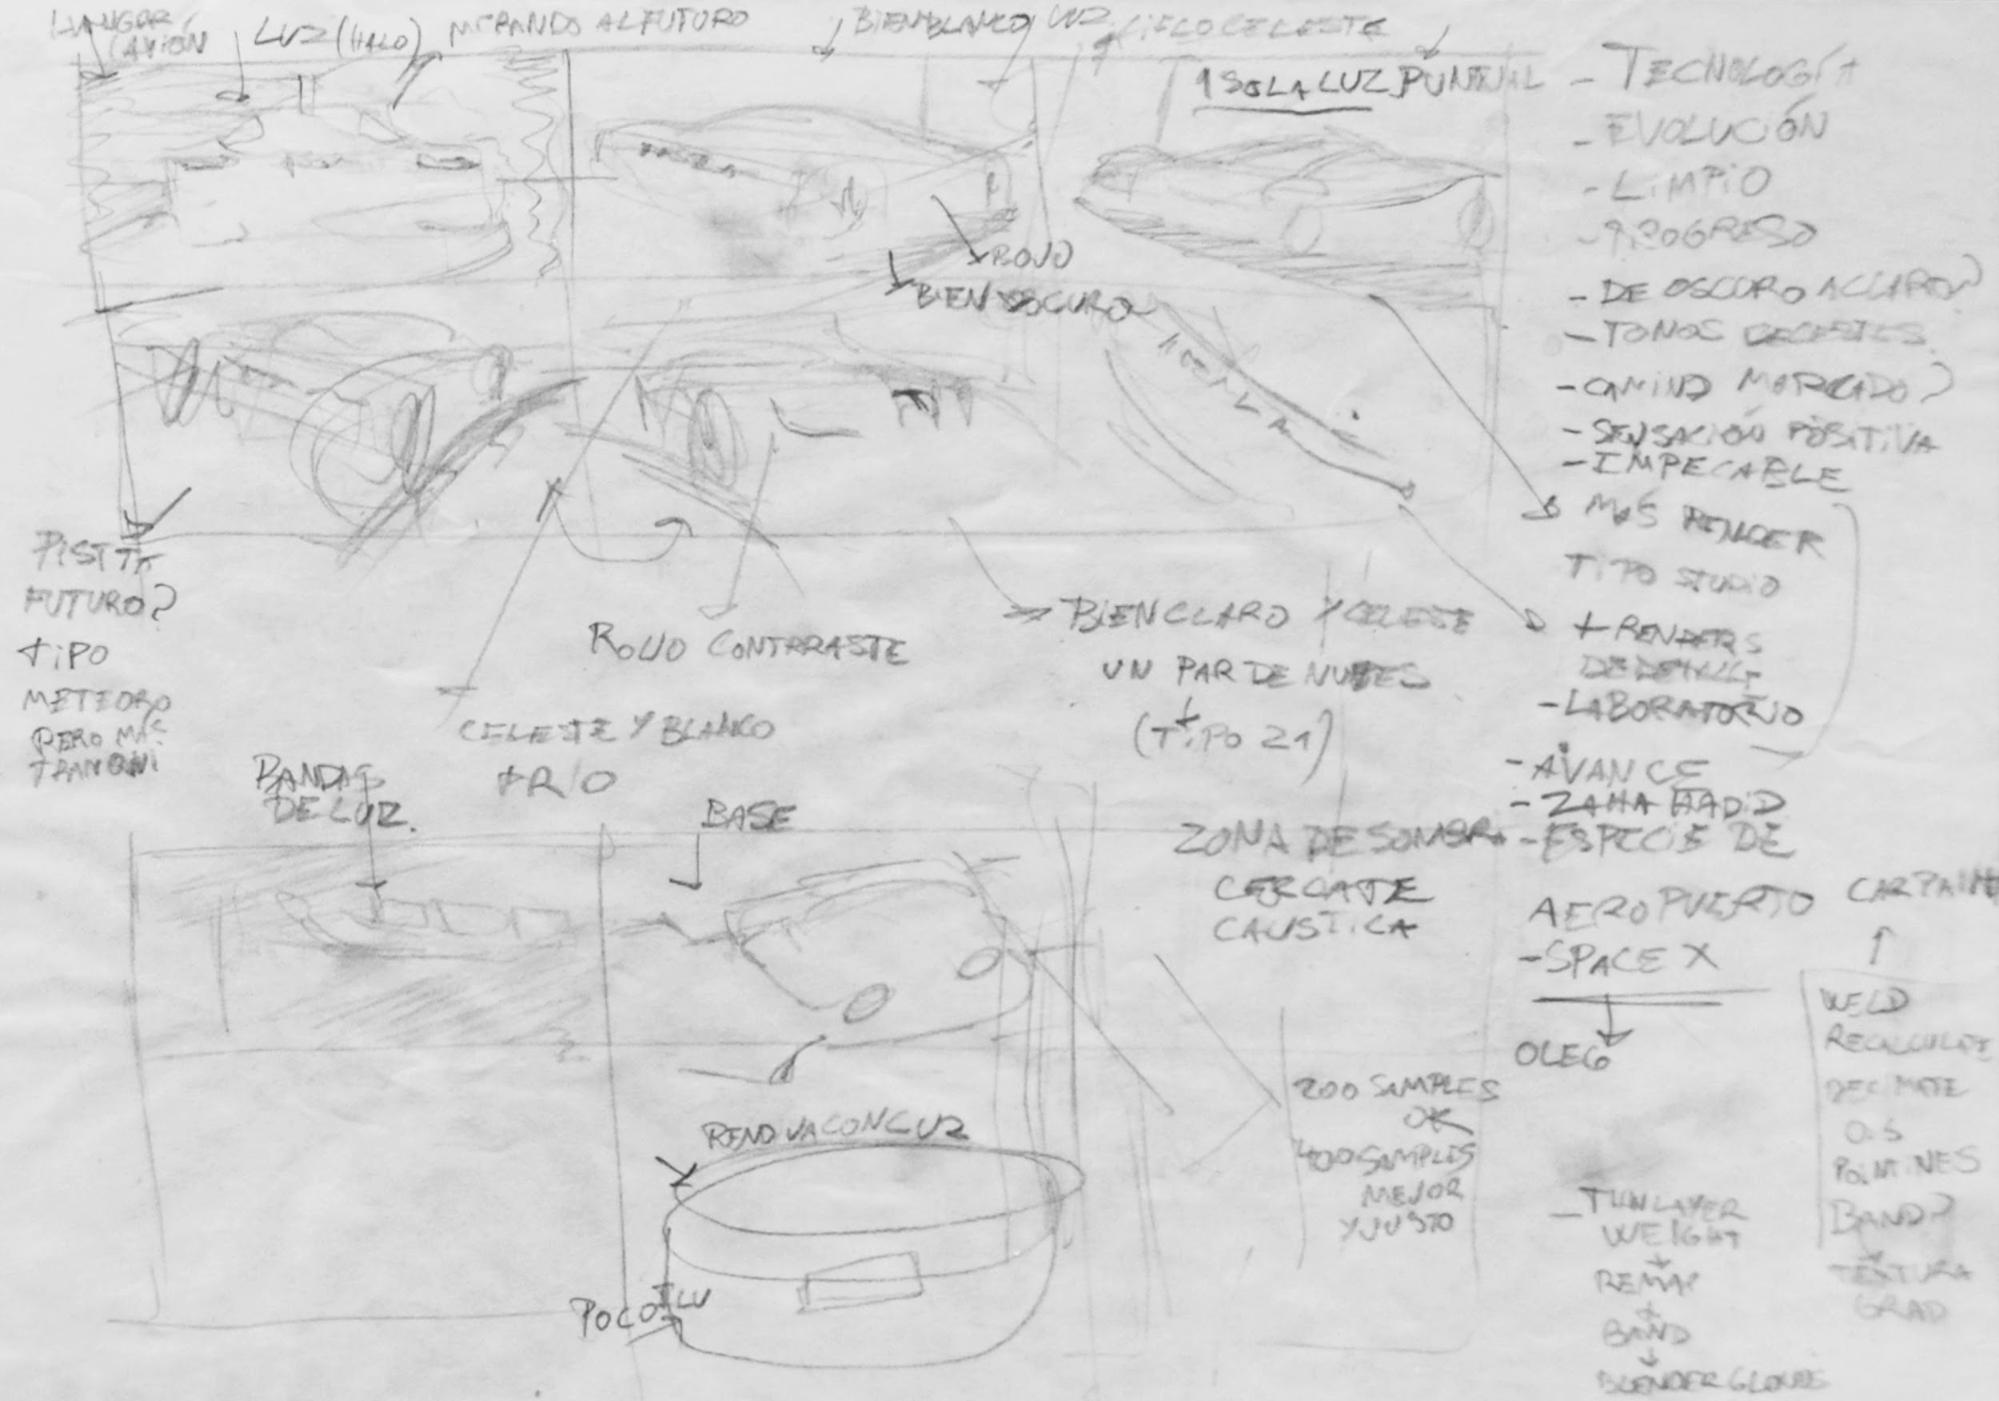
Yes, ugly sketches and illegible notations are part of the process!
The most relevant notations were:
- A sci-fi futuristic ultra-clean hangar-laboratory should be the place.
- The overall color should be white to connote balance and rationalism. However, somehow, it should have some contrast, because otherwise the car shape will be (imperceptible as it would be reflecting pure white) and very dull.
- It should be built with panels that should reflect accuracy and at the same time evoke technology perceived as futuristic.
- I wanted to create a subtle connection between Tesla and SpaceX.
- It should be a closed place to allow for multiple camera shooting angles.
After these main considerations, I started to create the 3D model of the hangar, kitbashing some great sci-fi panel models I had bought. I decided to give it a relatively large overall size so that I could play with light later and make certain areas darker than others. Also, I decided to give that “V” shape to the wall panels to avoid creating a “simple boxy hangar”.
The material selected for the panels was a very simple light grey rough plastic. It wasn’t convenient to make them almost white because they would have looked overexposed with the lighting.
Lighting and camera composition
Generally speaking, white studios are very difficult to handle or at least in the way I wanted to do it. It is very hard to create enough contrast to direct the viewer's attention and also define the car’s shape when it gets reflected. I had, however, an ace up my sleeve, which is the car’s color. The car paint of this Tesla is red, and this color is perceived as a low luminance color. This was one of the keys to make the figure pop up and separate it from the background.
Aside from this, I decided to structure the scene lighting in the following way.
- Overall lighting
- Big area lights illuminating the scene indirectly (they are pointing at either the panels or walls to create soft gradients). Also, I wanted to illuminate the space equally, to evoke that laboratory feel.
- Car lighting
- Small area lights (acting as spotlights) to create sharp shadows and to create the specular red variation of the different metallic layers of the car paint.
- Planes with a gradient emissive property (pointing towards the car with the “track to” constraint) used as softboxes. These help to boost the definition of the car surface but they have to be used wisely as they tend to “wash out” the figure (in this lighting condition).
- And some planes with a dark material to darken certain areas.
In relation to the camera positioning, I wanted to show the car as a figure but also make the background a bit of a protagonist as well. I used the rule of thirds (but just as a very first guide) and played with the overall visual balance of the elements. I didn’t center the car in some of them to avoid visual monotony in the series. Also, I tried to use 40-120mm lenses to avoid very distorted representations and to make the images look a bit more “axonometric”, technical, and rational. The final touch was to fine-tune the camera position to improve the sight flow, taking advantage of the continuity created between the lines of the background's panel divisions and the shapes of the car.
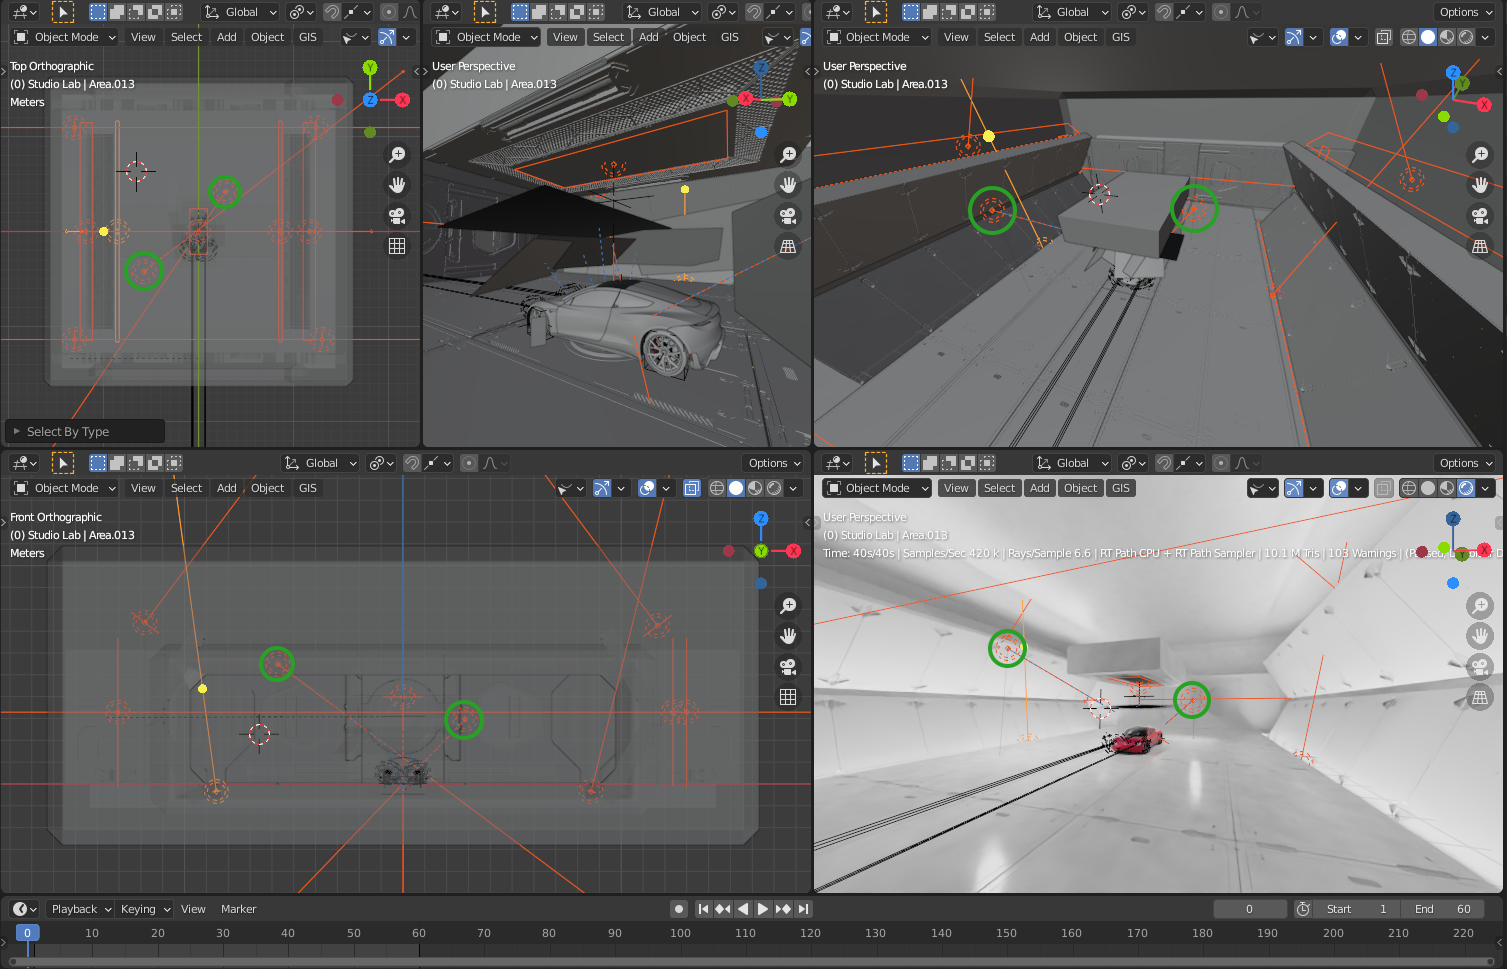
The lights circled in green are the ones set as small area lights acting as spotlights. The rest are big area lights.
The post-pro for this project was very subtle. I retouched some wavy reflections, boosted a bit the headlight and taillight parts using a glare pass, and added a subtle DOF using the Z-depth pass.
Final notes


As I mentioned in the beginning, here is the timelapse of the project!
I hope you find this info useful! If you do, it would be great if you follow me in any of the links below! There you will find more projects you may like and I will appreciate it a lot :)
And lastly, I want to thank the community, to everyone who posts a question in a forum and to the ones who answer it, to everyone that makes tutorials, and to the Blender and Luxcore devs! Also, thank you for this opportunity and for featuring my work! Thanks to my family for keeping me motivated with every project I have.
List of resources used in this project and credits to:
Special thanks to Giuseppe Difilippo for the tire 3D model, Jeff Patton for the car paint flakes normal maps, Adán Martin for the carbon fiber texture, André Matos for the sidewall texture, and Oleg Ushenok for the sci-fi panels kit. The Tesla Roadster 3D model is from Blender Market.
About the Author
 Pablo Daniel Ruggeri Acción, Teaching Assistant, Industrial Designer and 3D Artist working currently as remote freelancer open for opportunities!
2 Comments
Very nice. Congrats
really cool