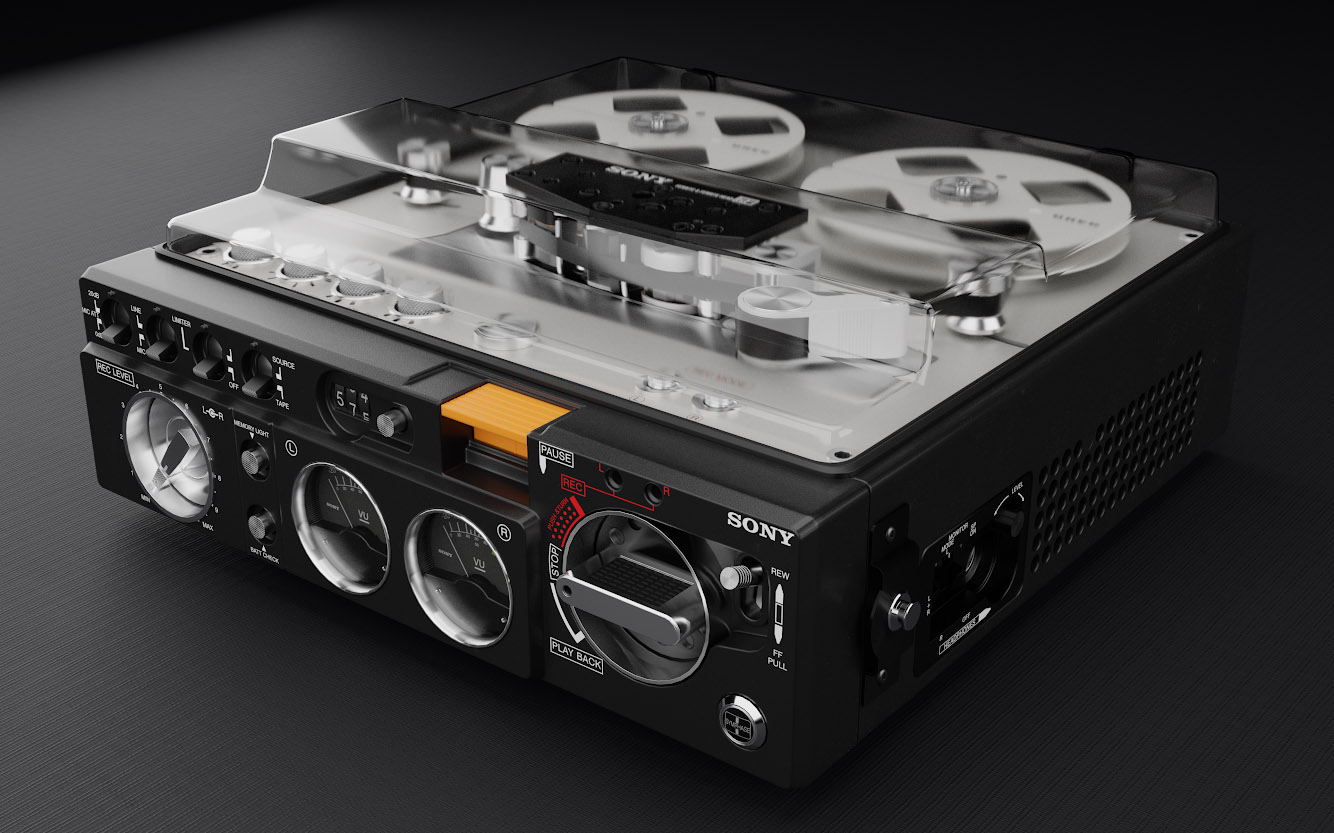
Behind the Scenes: Mindhunter Sony TC 510 2 Tape Recorder
My name is Borys Kępczyński. At the time of writing this, I am attending the second stage of architecture studies in Wroclaw, Poland. I’ve dabbled in 3D since the beginning of my studies 4 years ago. At first, I mainly used Sketchup and AutoCAD for basic representations of my architectural ideas.
Somehow during one of the late-night tutorial binges, I stumbled upon the famous donut tutorial by Andrew Price, and ever since I have been hooked. Within a fairly short amount of time, I managed to go through ludicrous amounts of tutorials on many different topics. Gleb Alexandrov, Zach Reinhardt, the aforementioned Andrew Price, and Steve Lund were probably the most important for my development as a 3D artist and, thanks to their work, I’ve managed to improve my skill set.
[sponsor id=”qarnot”]
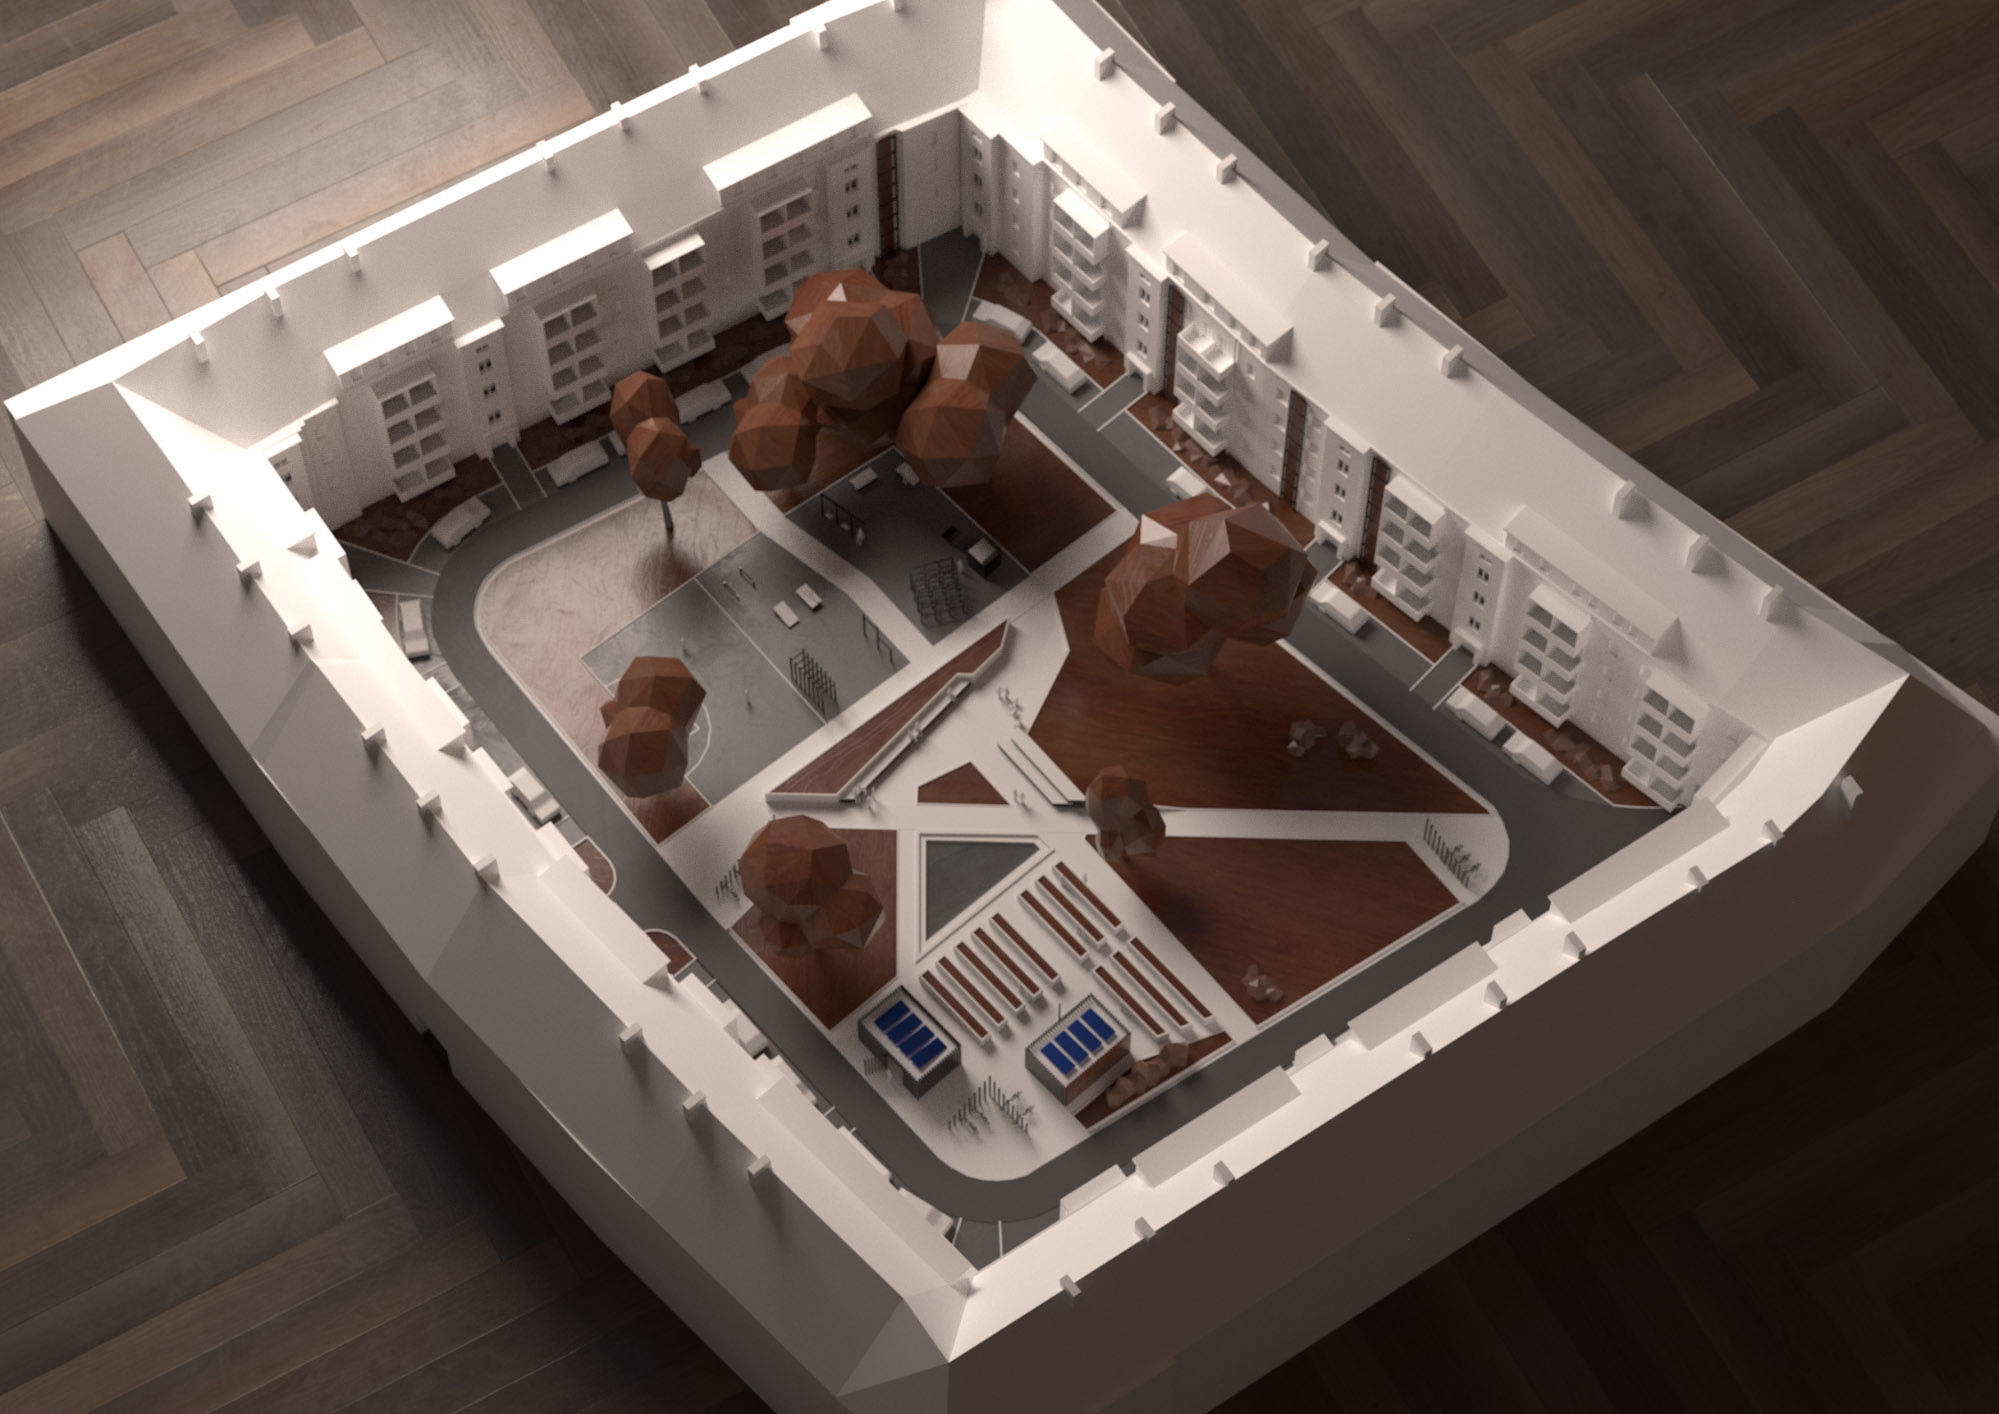
Besides my studies, I also freelance a bit as a 3D modeler recreating designer furniture for architectural visualizations.
Today I am mostly interested in creating highly detailed models of products for closeups and pack shots. I pay special attention to lighting my models and consider it a “make or break” factor for a lot of 3D models. For most of my work, I use Blender, Photoshop, or Illustrator for decals. Sometimes, for detailed textures, I use Substance Painter. For fabrics, I use Marvelous Designer.
Motivation and inspiration
Creating 3D artwork for me is a way to, to some extent, possess the subject of the artwork. I often see a product that I adore but, for different reasons, I cannot have it. In the case of this tape recorder, it is a fairly rare model and it wouldn’t make sense to cram my student apartment with all the design icons I fancy. So, by recreating the product in 3D I find a way to make it, at least in some part, mine. I also do it to things that I own in an attempt to archive and digitally preserve them. Recently, in order to preserve it, I created a faithful digital replica of an old road bike that I own (and which probably should be treated as an antiquity) and that is regularly ridden by my partner.

The intro for the universally acclaimed David Fincher’s series Mindhunter is an obvious inspiration for this piece. I never skipped this intro because watching the great camera work on this beautifully lit and preserved Sony tape recorder brought me so much joy. What can I say? I fell in love with both the show and the intro so deeply I had to make part of it my own.
I would love to give you a step-by-step photo tour but, undisciplined as I am, I saved over the first drafts of the project. Instead, I will try to describe my work process as accurately as I can and illustrate only the later stages.
Modeling
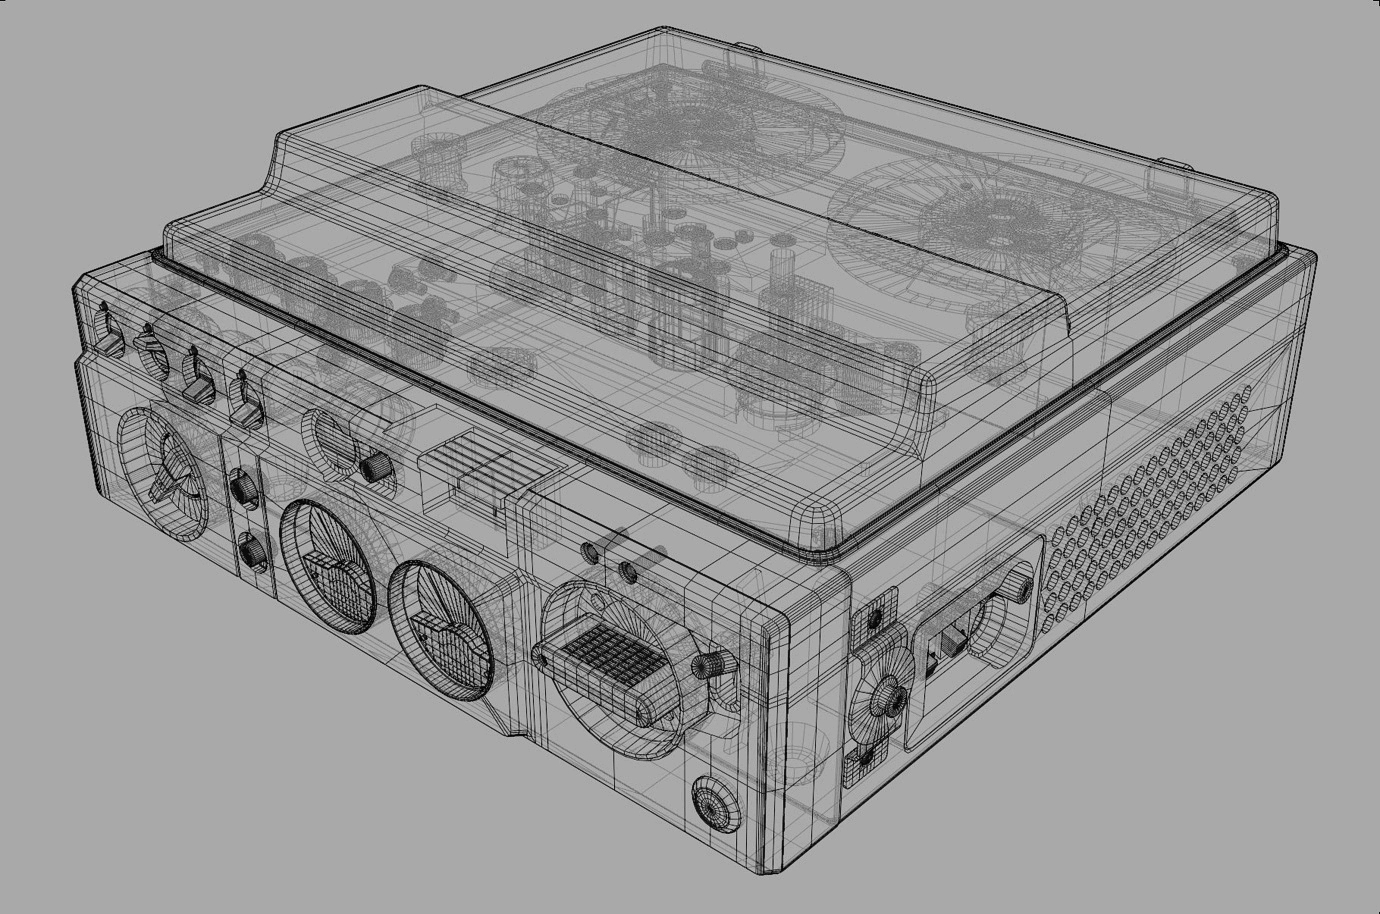
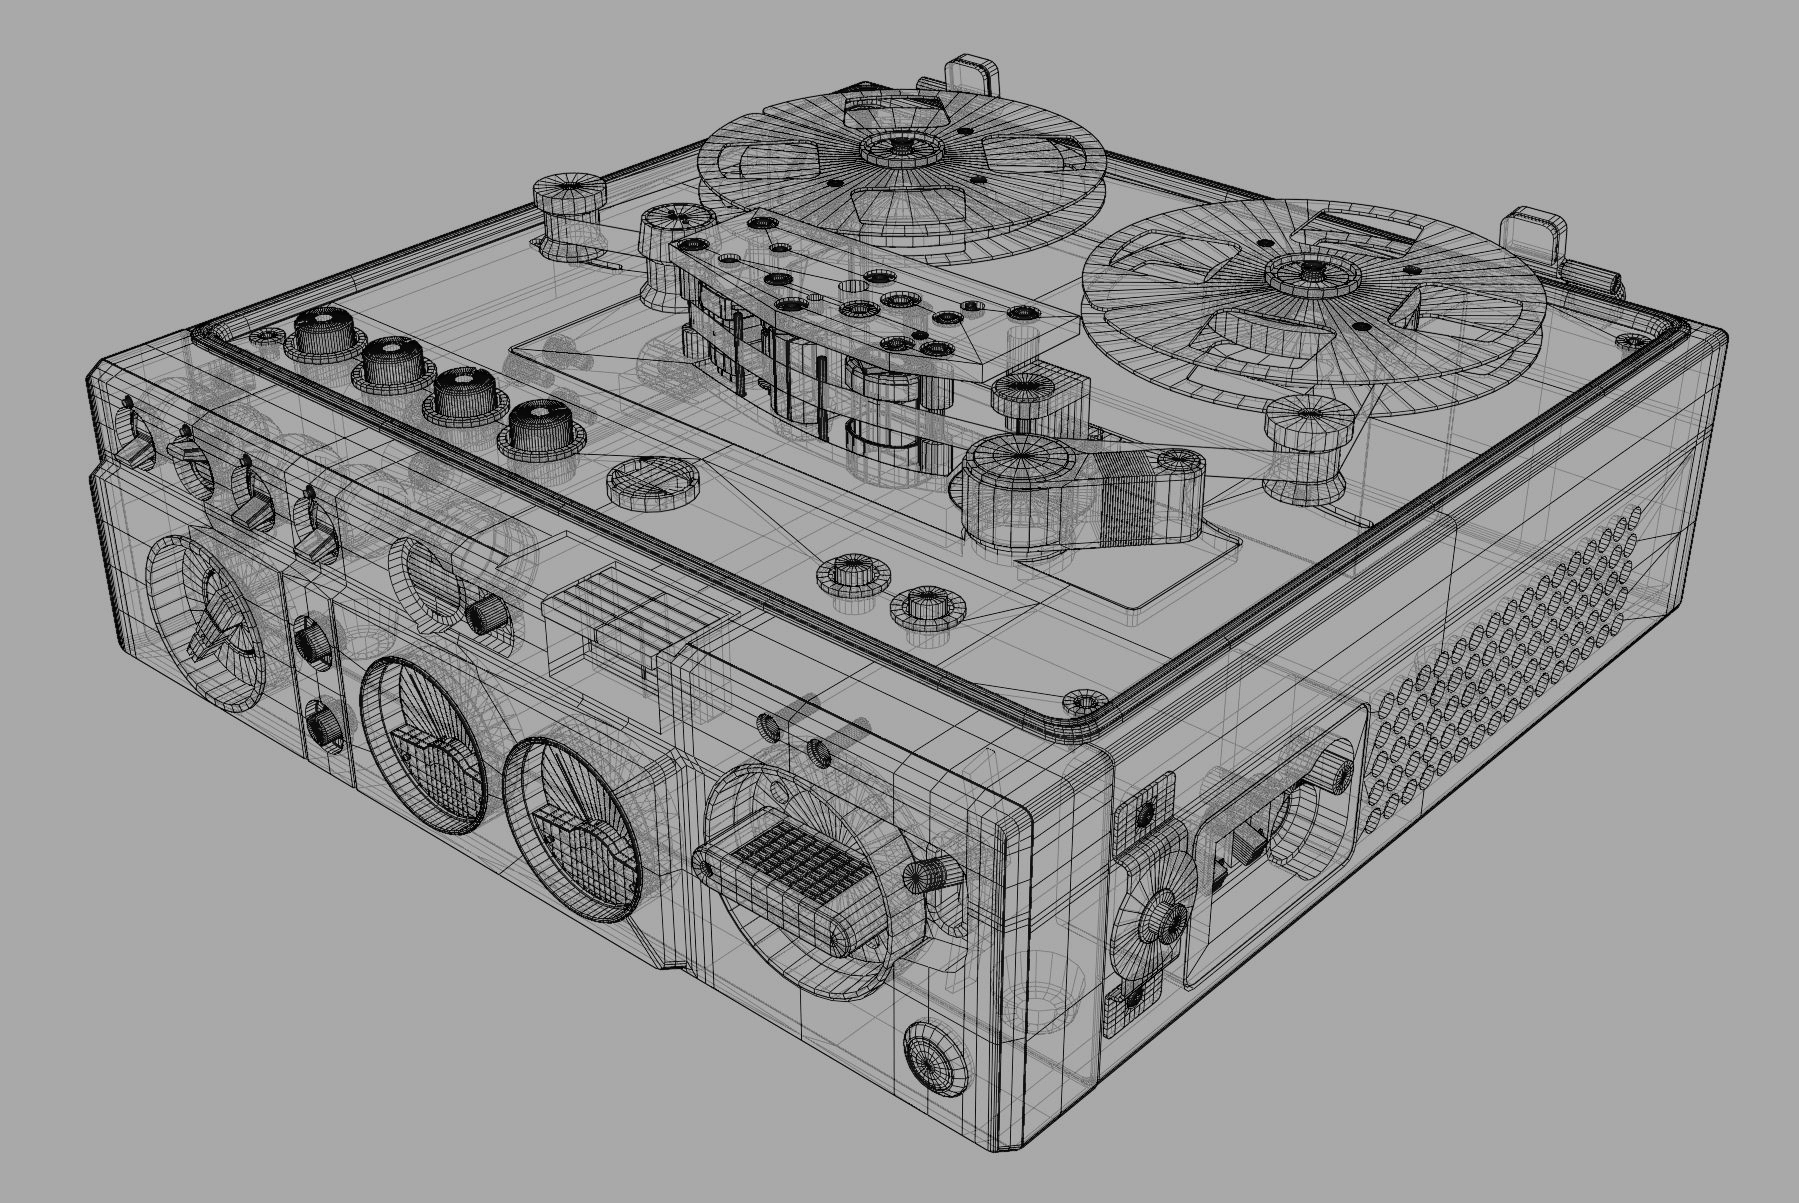
First, I started by blocking in all the major shapes. I learned about the importance of this step some time ago and it cannot go unmentioned. I try to always block out the model before getting into the more detailed work. It saves me a lot of headaches later on in the process. It’s way easier to iterate on simple throw-away meshes while trying to get the proportions and ratios right.
This model was created using a boolean workflow. I wanted to test the new, at the time of creation, bevel shader. It’s a great tool for lazy people with lots of processing power—it virtually eliminates all the problems one can have with bevels while working with booleans. It nicely rounds sharp edges and is almost indistinguishable from the real thing. The only drawbacks are that it slows down rendering times and you can’t set a limitation on the bevel angle as you can with the bevel modifier. That’s why it creates this stepping issue that you can see on the corners below.


Although I think this issue could be alleviated by adding more geometry.
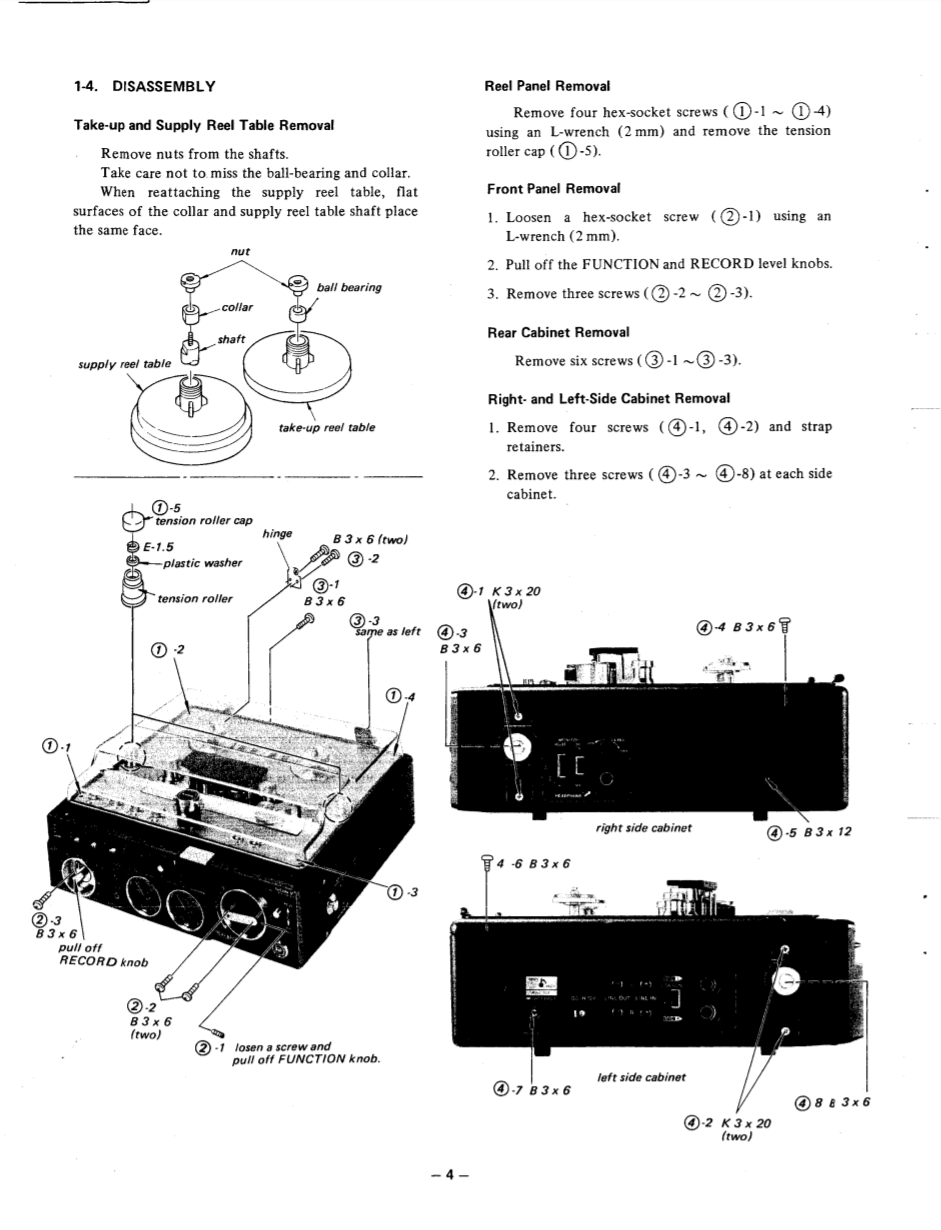
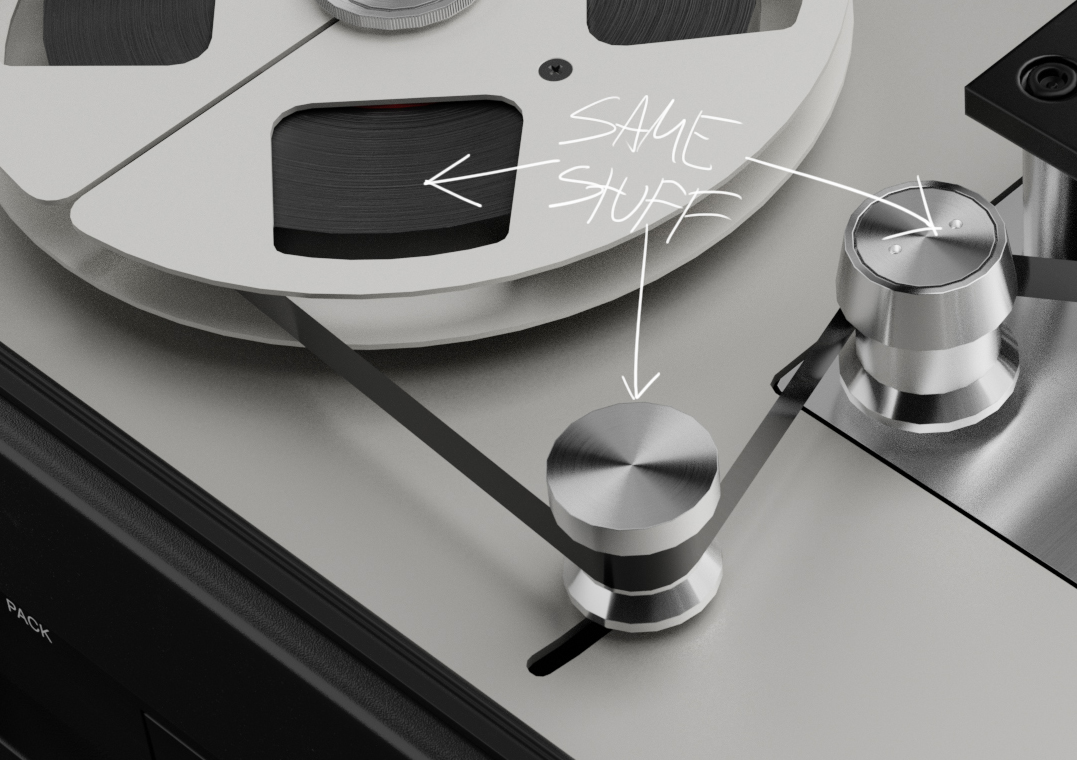
After I blocked out the proportions, and since I didn’t have to worry about the geometry too much, I started cutting away with a lot of boolean operators. Today I use Boxcutter, which is a great addon, but at the time of making this model, I stuck to the built-in Bool Tools addon. At this stage, it was crucial to have a good reference. I used mainly a video from Techmoan: Mindhunter Tape Recorder Interview Kit – Recreated, which is a good watch all on its own, as well as some parts of the original service manual.
Materials
The materials for this piece are fairly simple procedural shaders created in Blender. The boolean workflow made the process of UV unwrapping the whole thing both pointless and counterproductive. Because of that, I had to rely on tiled image textures as little as possible. The outer case material is just a principled BSDF with some roughness and some surface imperfections multiplied by a fresnel mask for dust and a high scale noise texture for bump. Glass casing is just a basic glass shader, which, in this case, was sufficient.
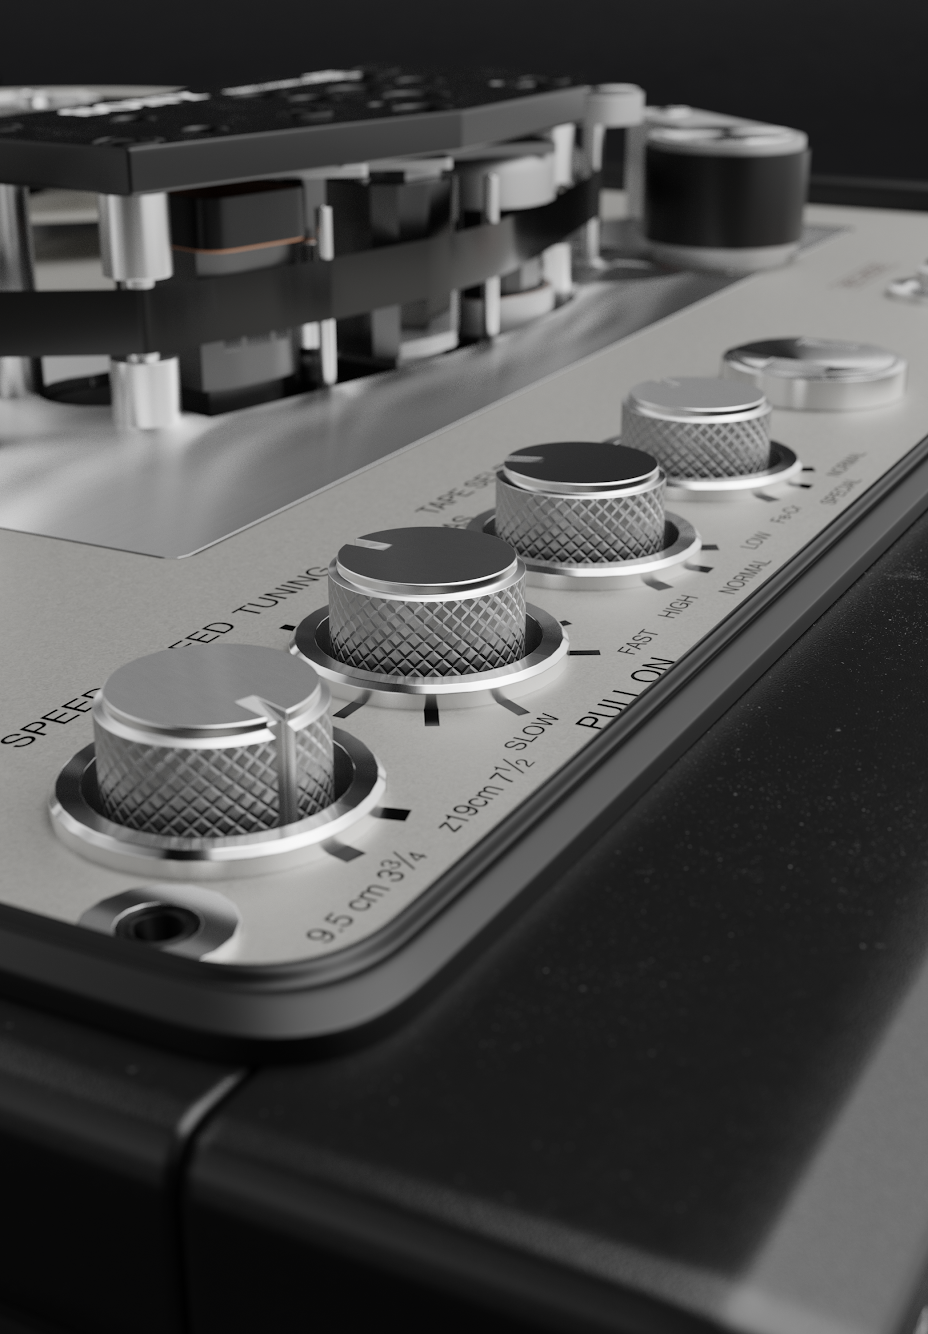
I created the grooves on the dials by baking a normal map on a flat plane. The only difficulty was making sure the map was seamless, and that it was correctly applied on the knobs.
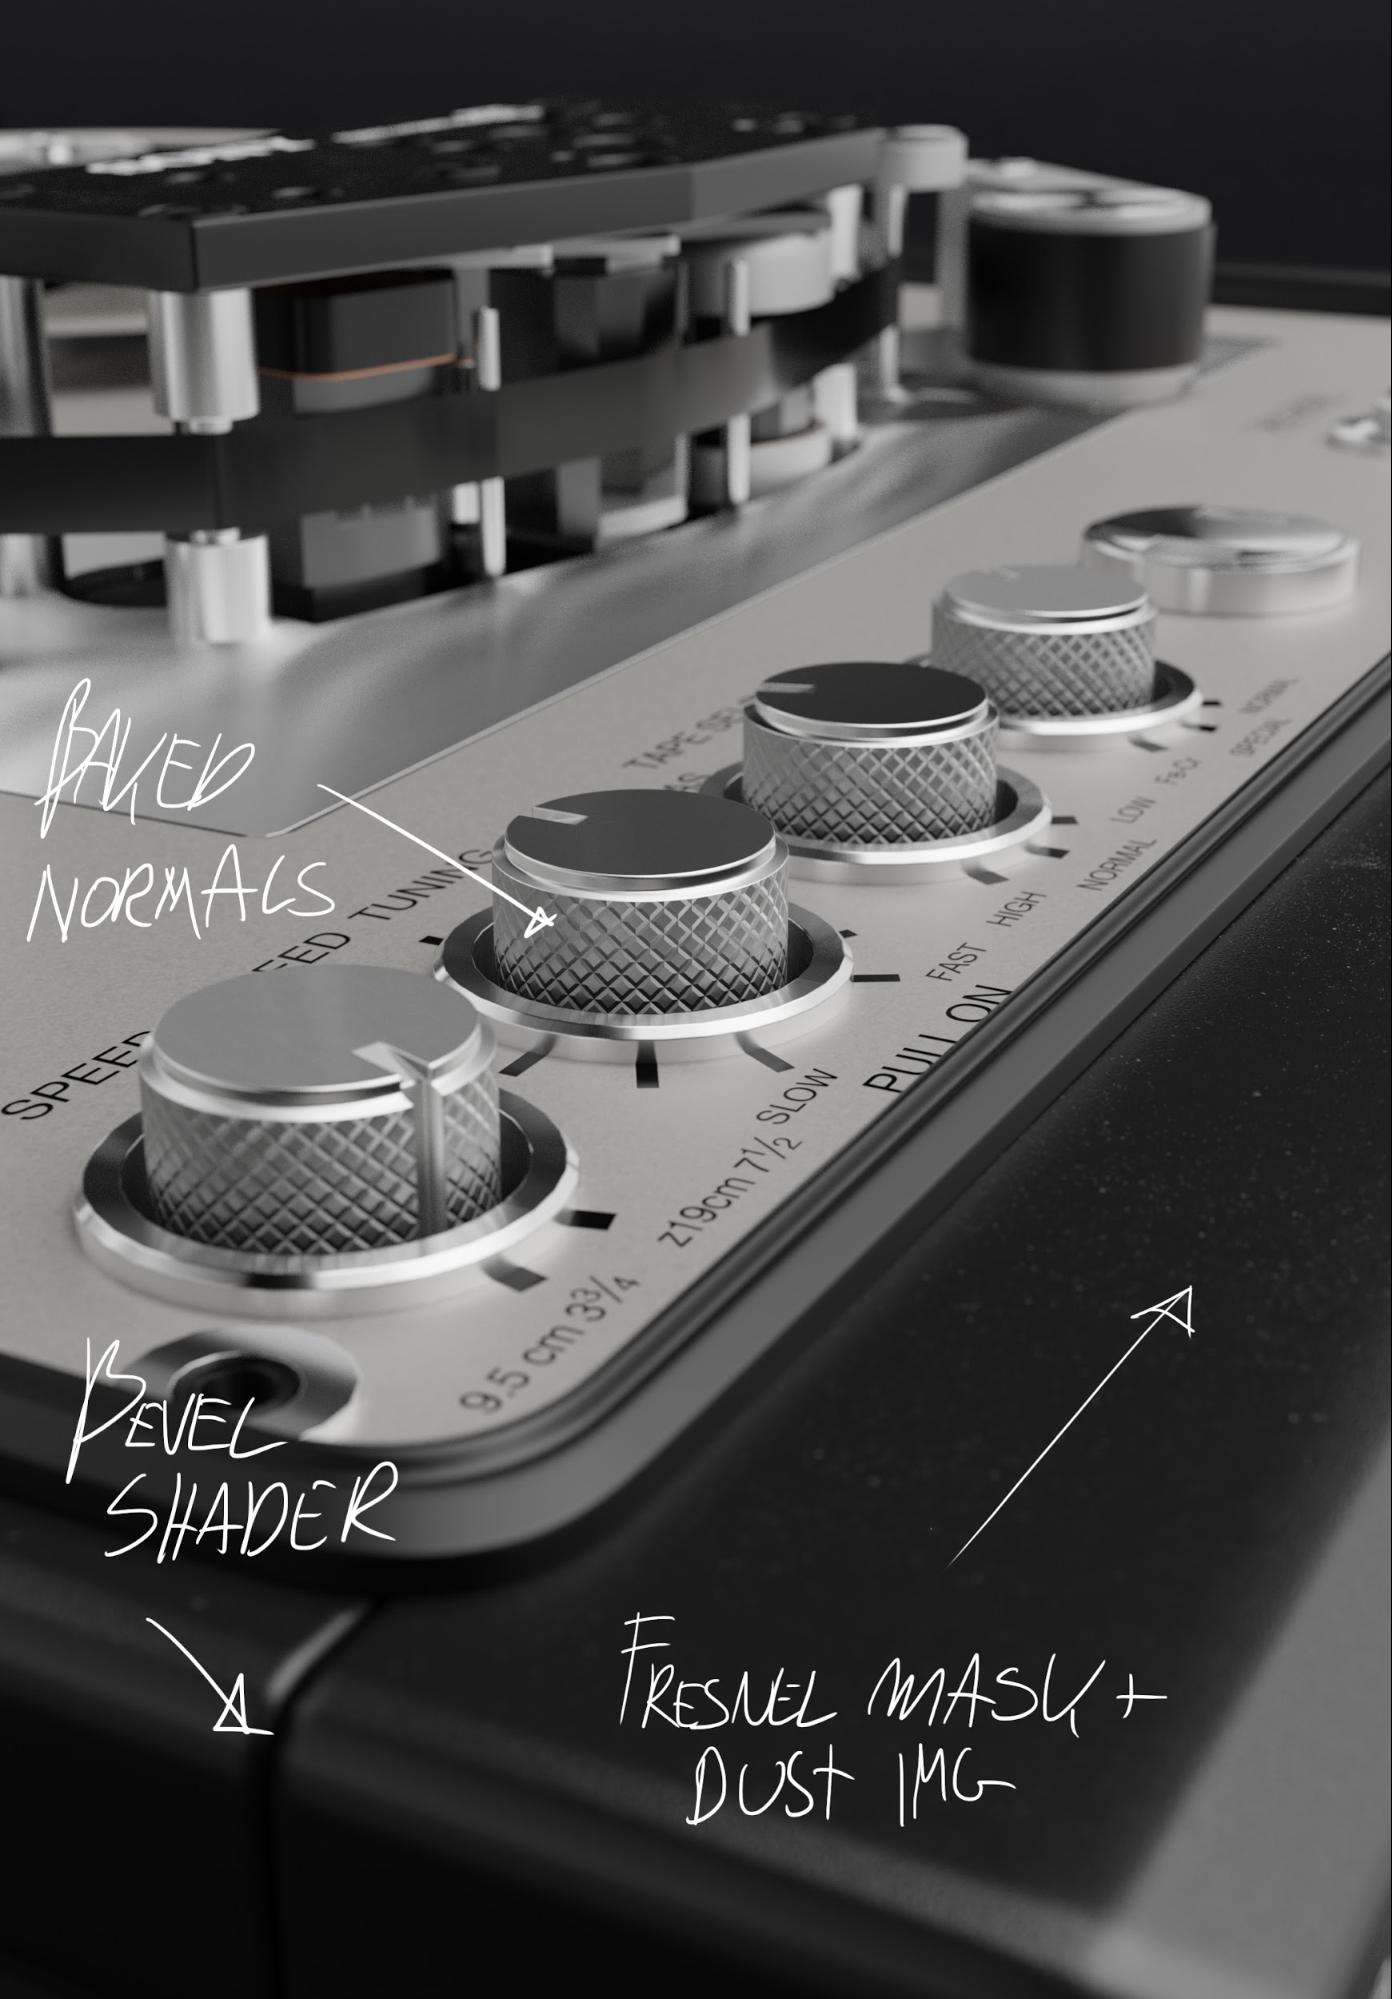
I took a noise texture elongated on the y-axis and wrapped it in Photoshop to make it circular. After using it as roughness for the anisotropy shader, I achieved the material for the machined knobs and reeled tape.
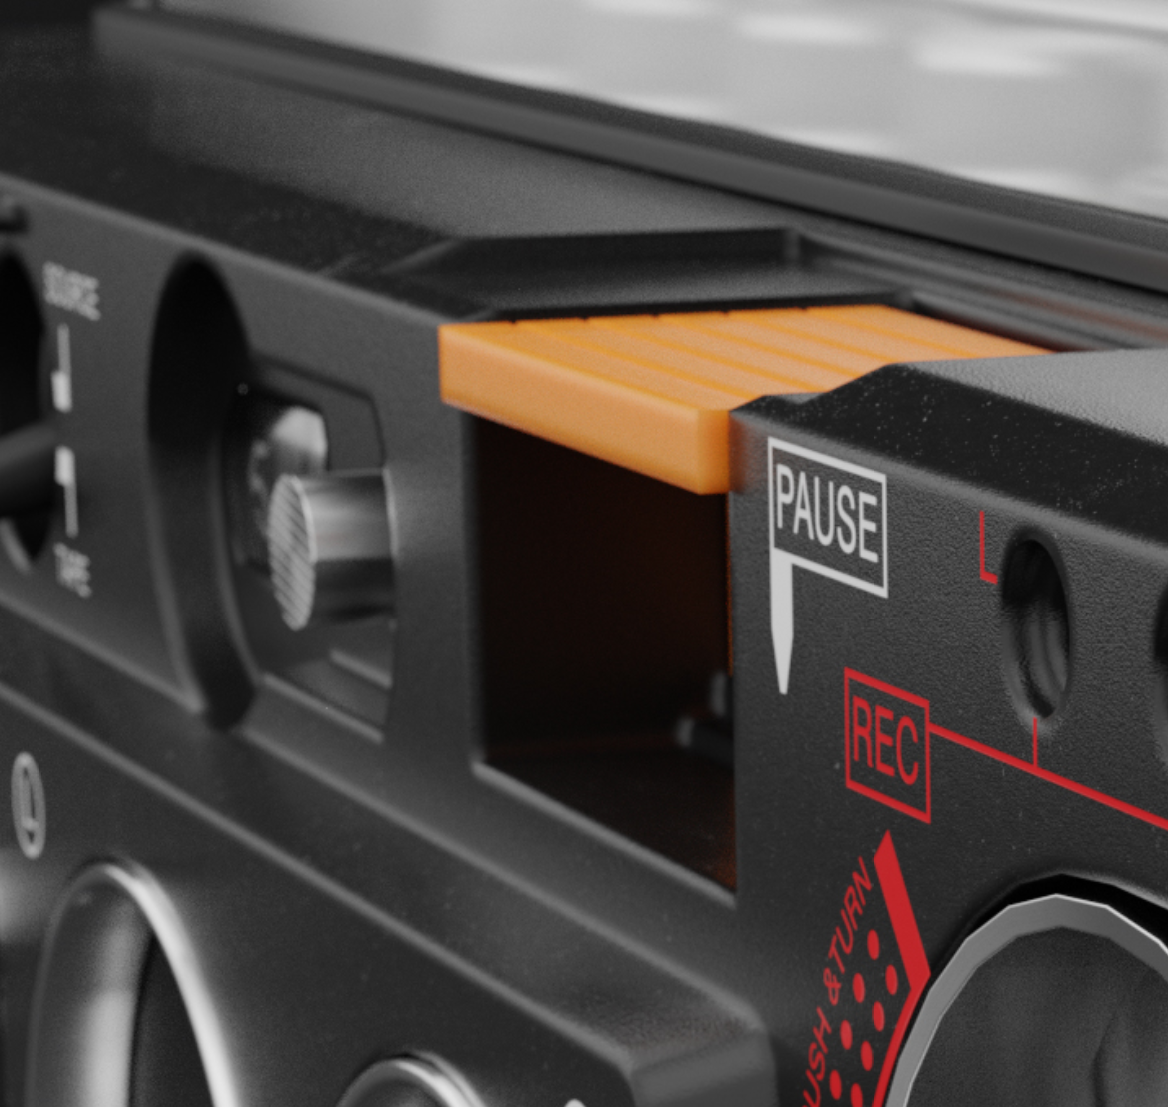
The orange pause button was an important accent so I gave it a bit of subsurface scattering, which can often make plastic materials a lot more realistic.
I created these decals in Illustrator—for my more recent works I stick to Photoshop simply because I’m more proficient with it and the final effects tend to be indistinguishable. Originally, these decals were 6k, which was probably overkill, but I wanted them extra sharp. I love using them in png format because I incorporate the alpha transparency channel for bump and subtle colour changes. The fonts are usually free fonts from dafont.com that roughly match the original. I must admit, I am guilty of spending way too much time looking for the right fonts. Applying the decals mostly involves mix shaders controlled by the alpha channel of the decal.


Lighting
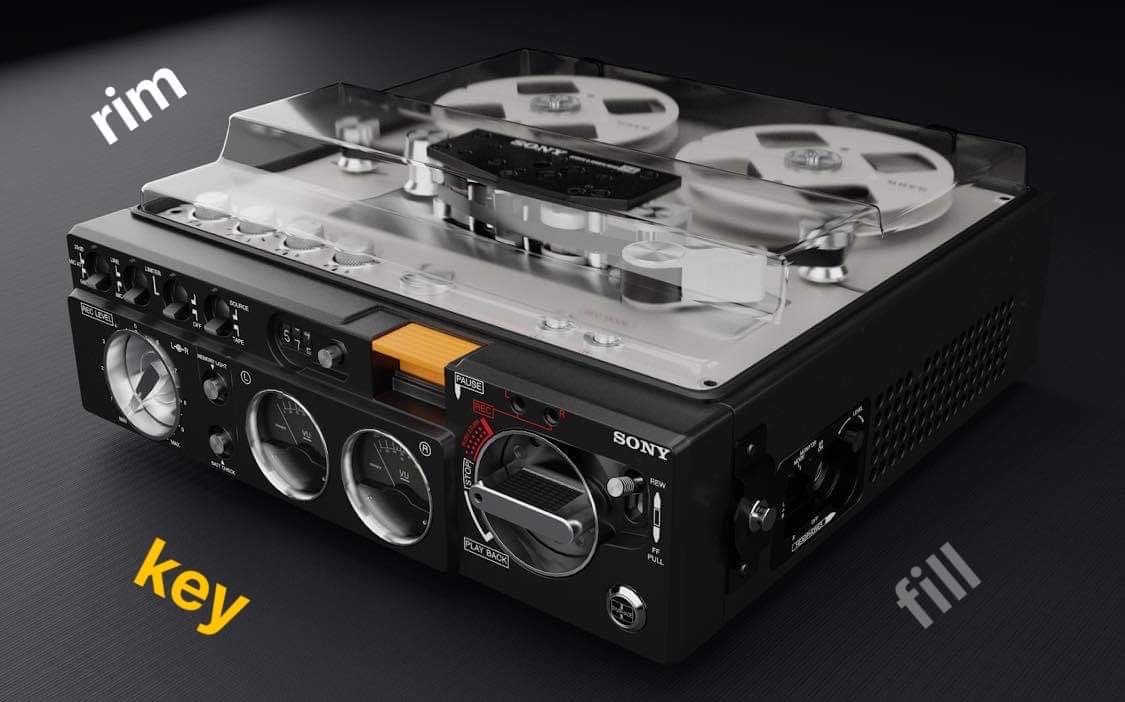
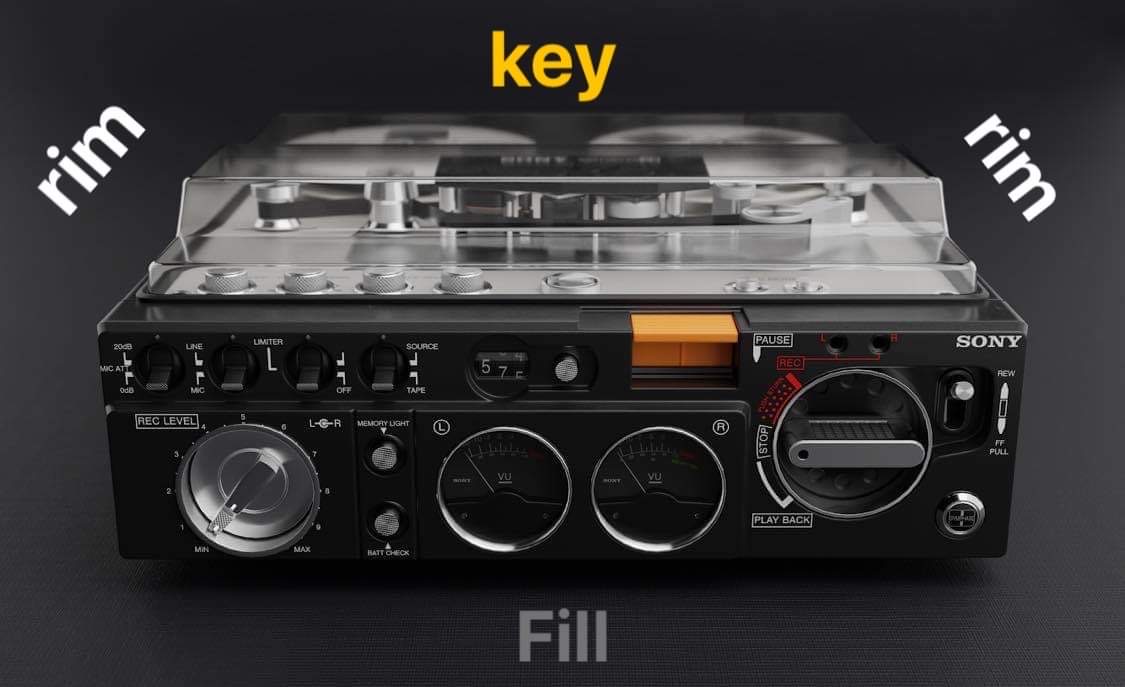
When lighting the objects, it is very important for me to get the silhouette as clear as possible. Rim lighting can be an extremely useful tool for that as it separates the object from the background. Just adding a fairly strong, small-sized lamp on the opposite side of the camera can do the job. The small size of the light source is crucial because the smaller it is, the sharper the reflections it generates.
The next step for me is the key light which is the brightest and reveals the most important details of the model. I usually use the area lights or the spotlights for a more selective approach. I also tend to make them fairly small in order to generate a sharp visible cast shadow.
The fill lights are there to make sure that the normally occluded parts of the model are visible. For that, it’s important to use a big light source to get a softbox effect. It is also important to remain fairly conservative with the strength of the fill lights. You need contrast in your lighting in order to keep it interesting and dynamic. For a long time, I had a problem with wanting to show my hard modeling work all at once. It often resulted in low contrast images that lacked visual interest.
I also tend to change my lighting scheme for every different take. What might work with one camera angle often doesn’t for another so it’s often a good idea to mix things up. I didn’t use any HDRI as for the studio setup you don’t usually want any environmental lighting.
For every angle I rendered, I added some depth of field. I used a fairly high f-stop to keep the effect subtle. Although I wanted to make the closeups look as if they had been shot with a zoomed-in lens, which is why the f-stop on these is lower. I used the medium high contrast visual preset, kept the resolution fairly high, and set the sample count high enough so that the compositor denoiser wouldn’t generate any artifacts.
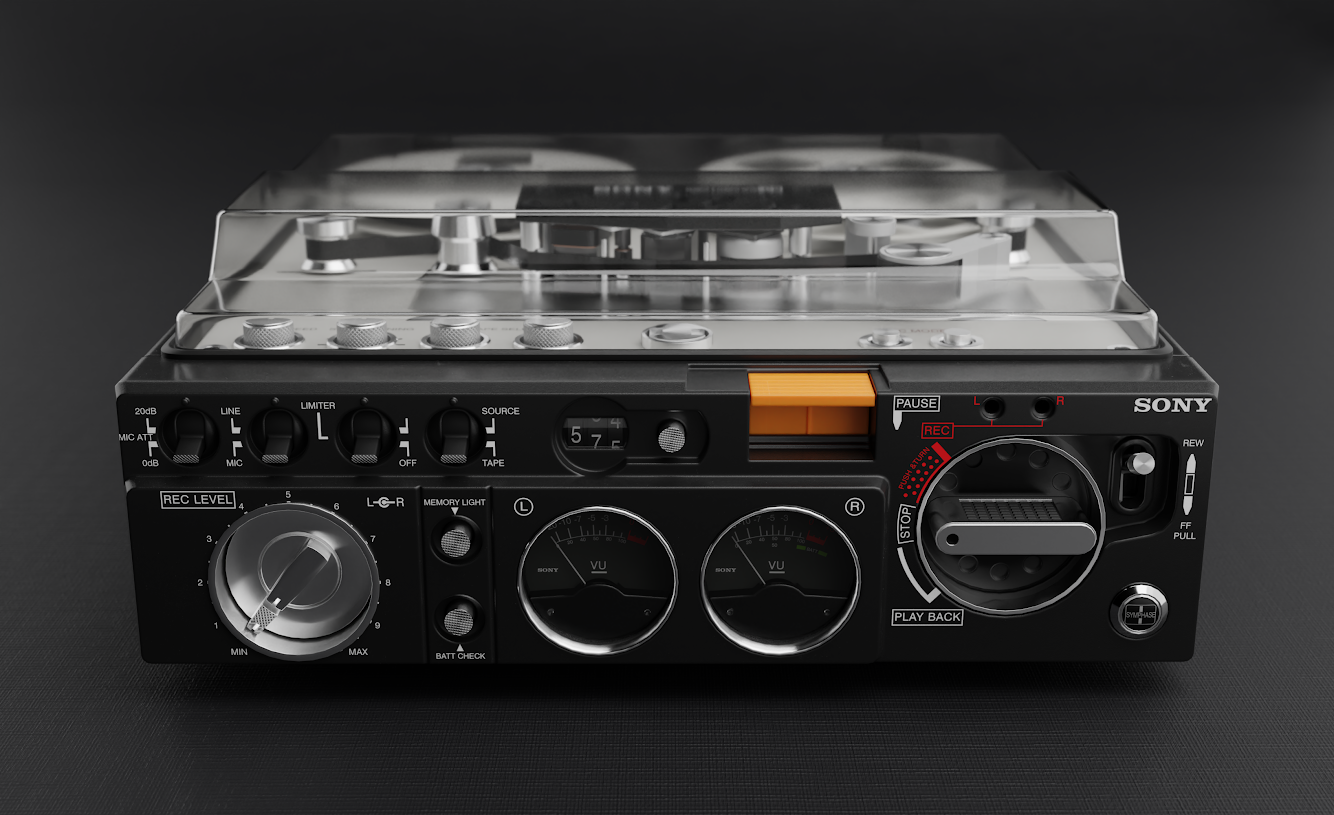
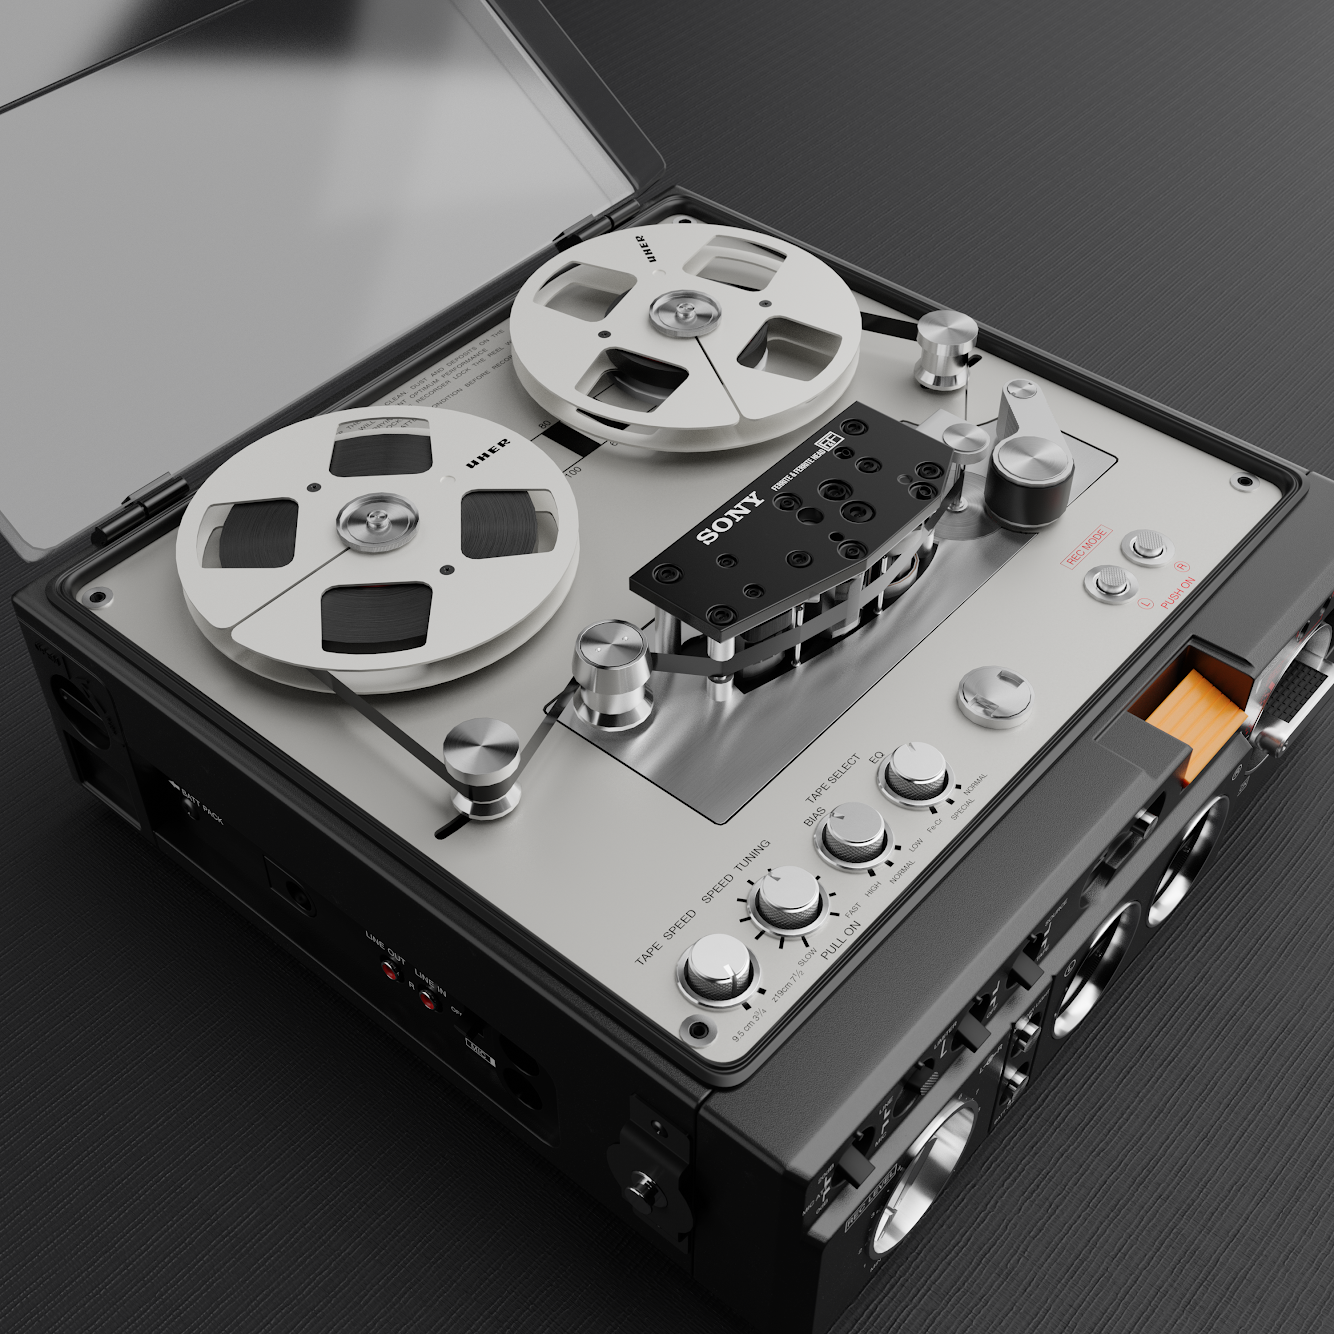
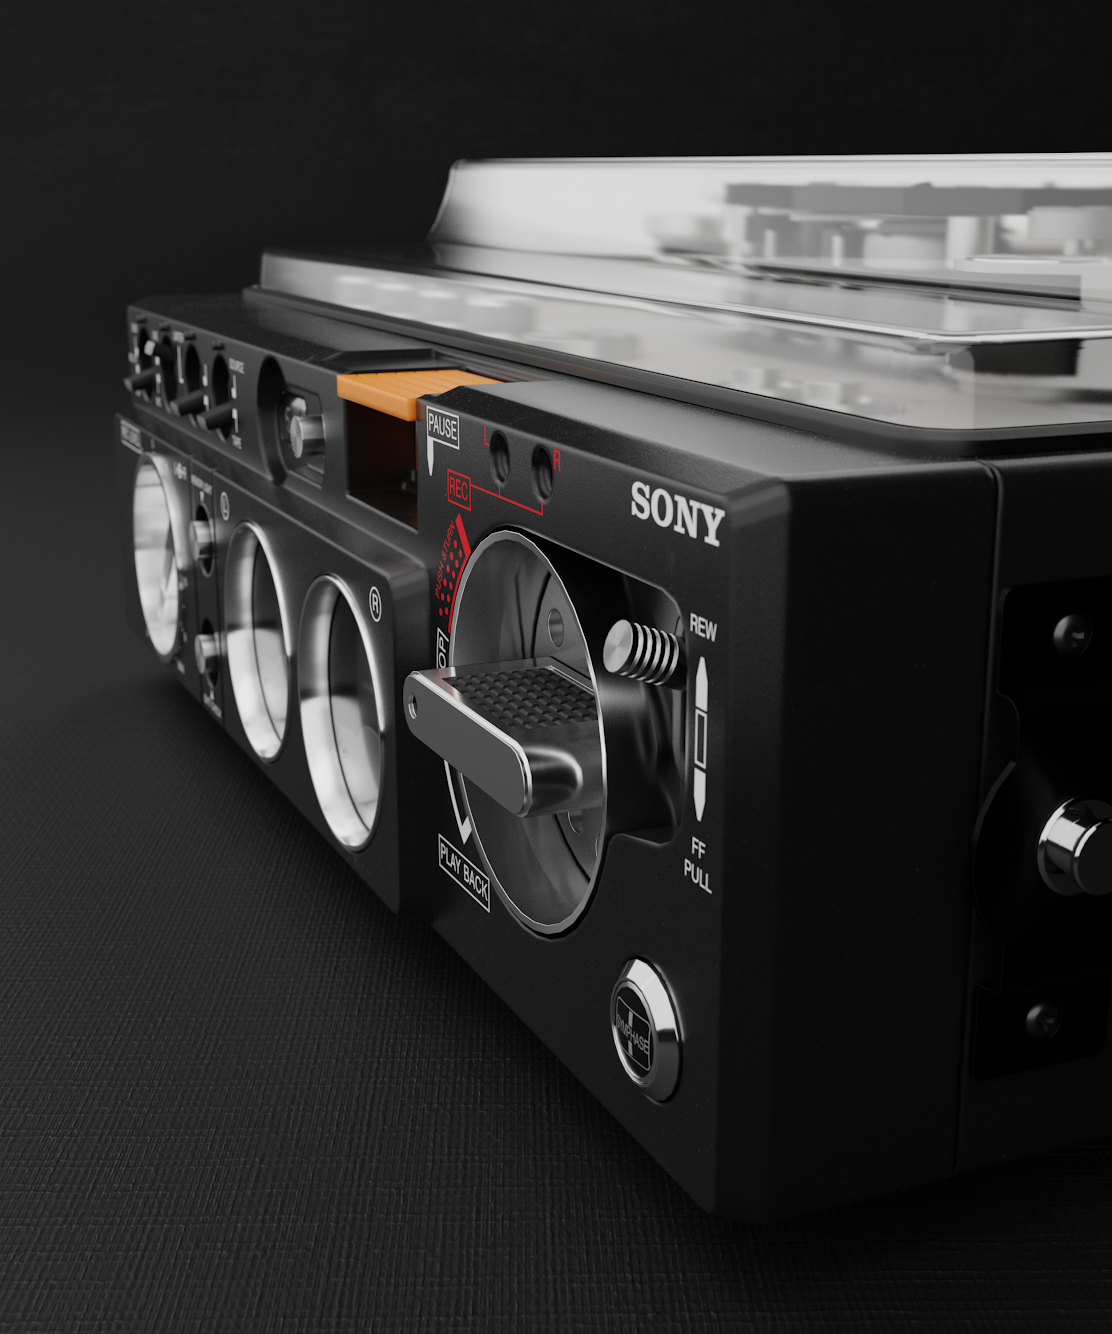
Here are the final renders.


About the Author
 Borys Kępczyński creates high detail 3D models, product renderings, interior renderings and components for all of these. From time to time he works on something silly.


Hi Abby – very nice read. Thanks for point us to Borys Kępczyński’s work.
Cheers
Arnaud