Behind the Scenes: Simple Room

My name is Simon Leprat, I’m a 22-year-old French graphist. I have been living in Rennes for my studies for 2 years now. I’m studying 3D pipelines and group work at Creative Seeds and am specializing in environment creation using Maya, Houdini, ZBrush, and some other tools, but I still like to get my hands on everything.
Initially, I started to learn 3D as an autodidact on Blender when I was 14. Since then, I haven’t stopped learning and exploring other softwares and techniques in order to improve my workflow and knowledge (and also because I like being curious c: ).
Motivation
Some people at my school wanted to learn Blender among the other softwares that we are studying. Since I’m using it for several school and personal projects, they asked me if I could teach them some basics.
After some discussions with my mentors on how it could be done, we had the idea to set up a workshop outside the school schedules which I had the pleasure to lead with a friend.
We decided to recreate simple photos found online. The goal here wasn’t to perfectly match the original picture but simply to create and put things from several pictures together in order to understand the tools, navigation, and Blender’s logic.
Inspirations
My principal inspiration was George Turmanidze’s work, which I find incredible!
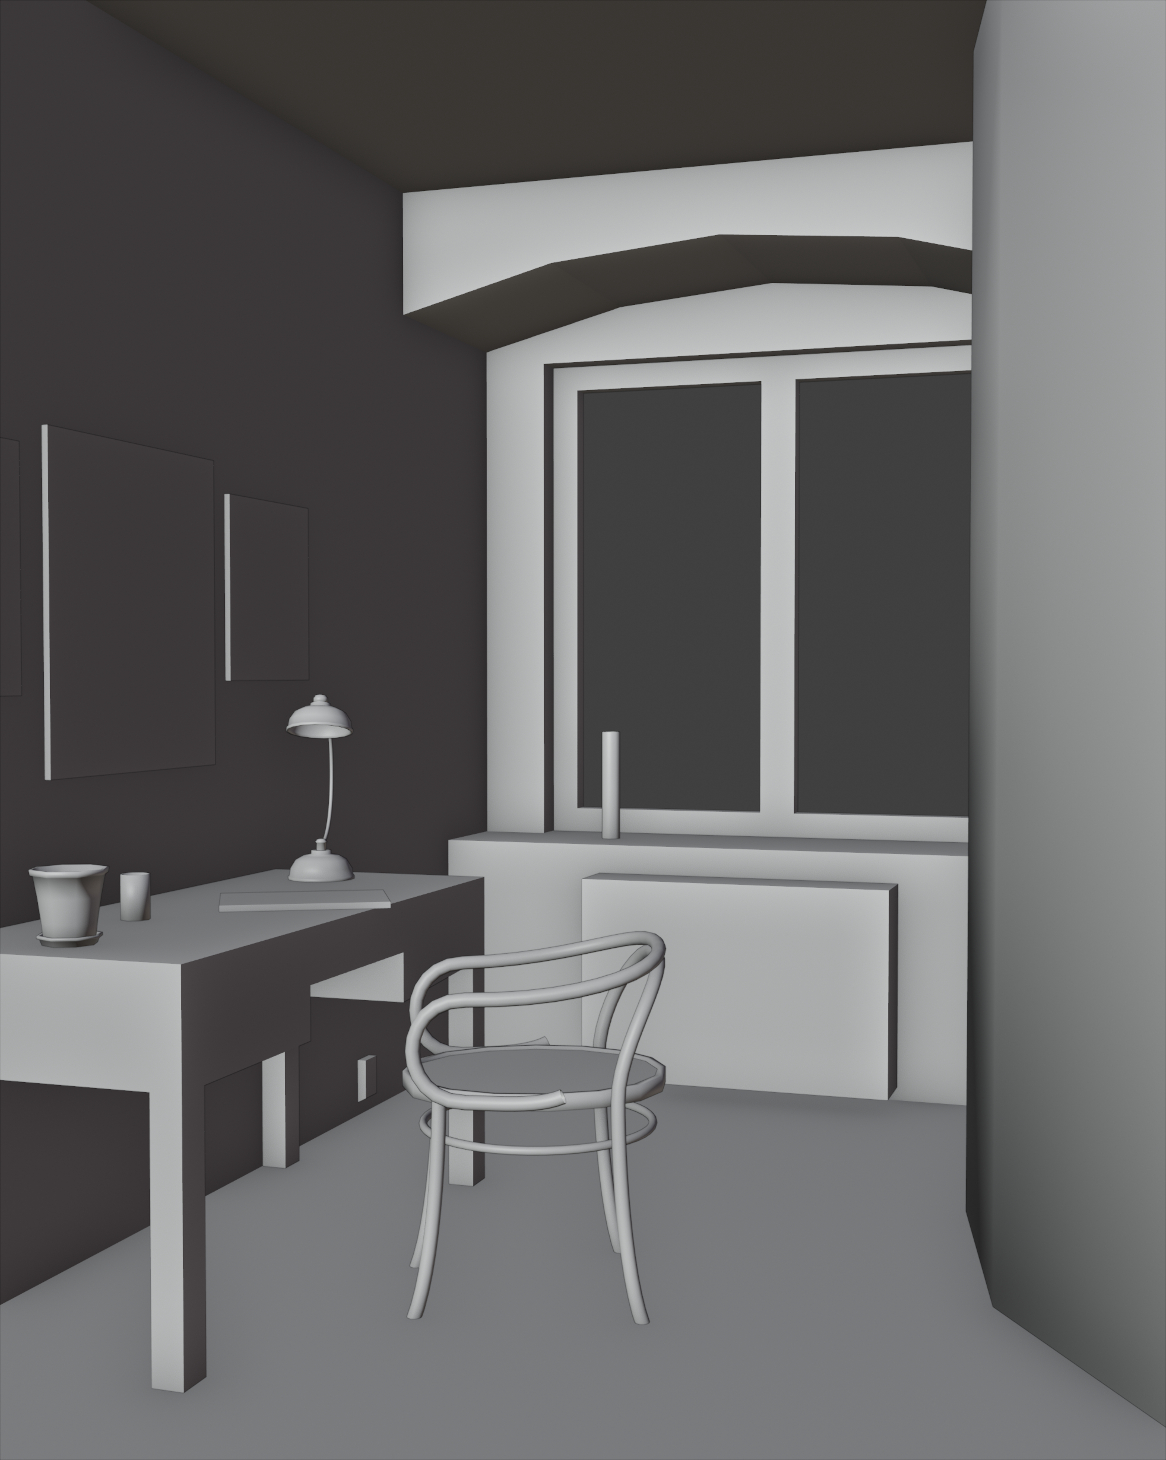
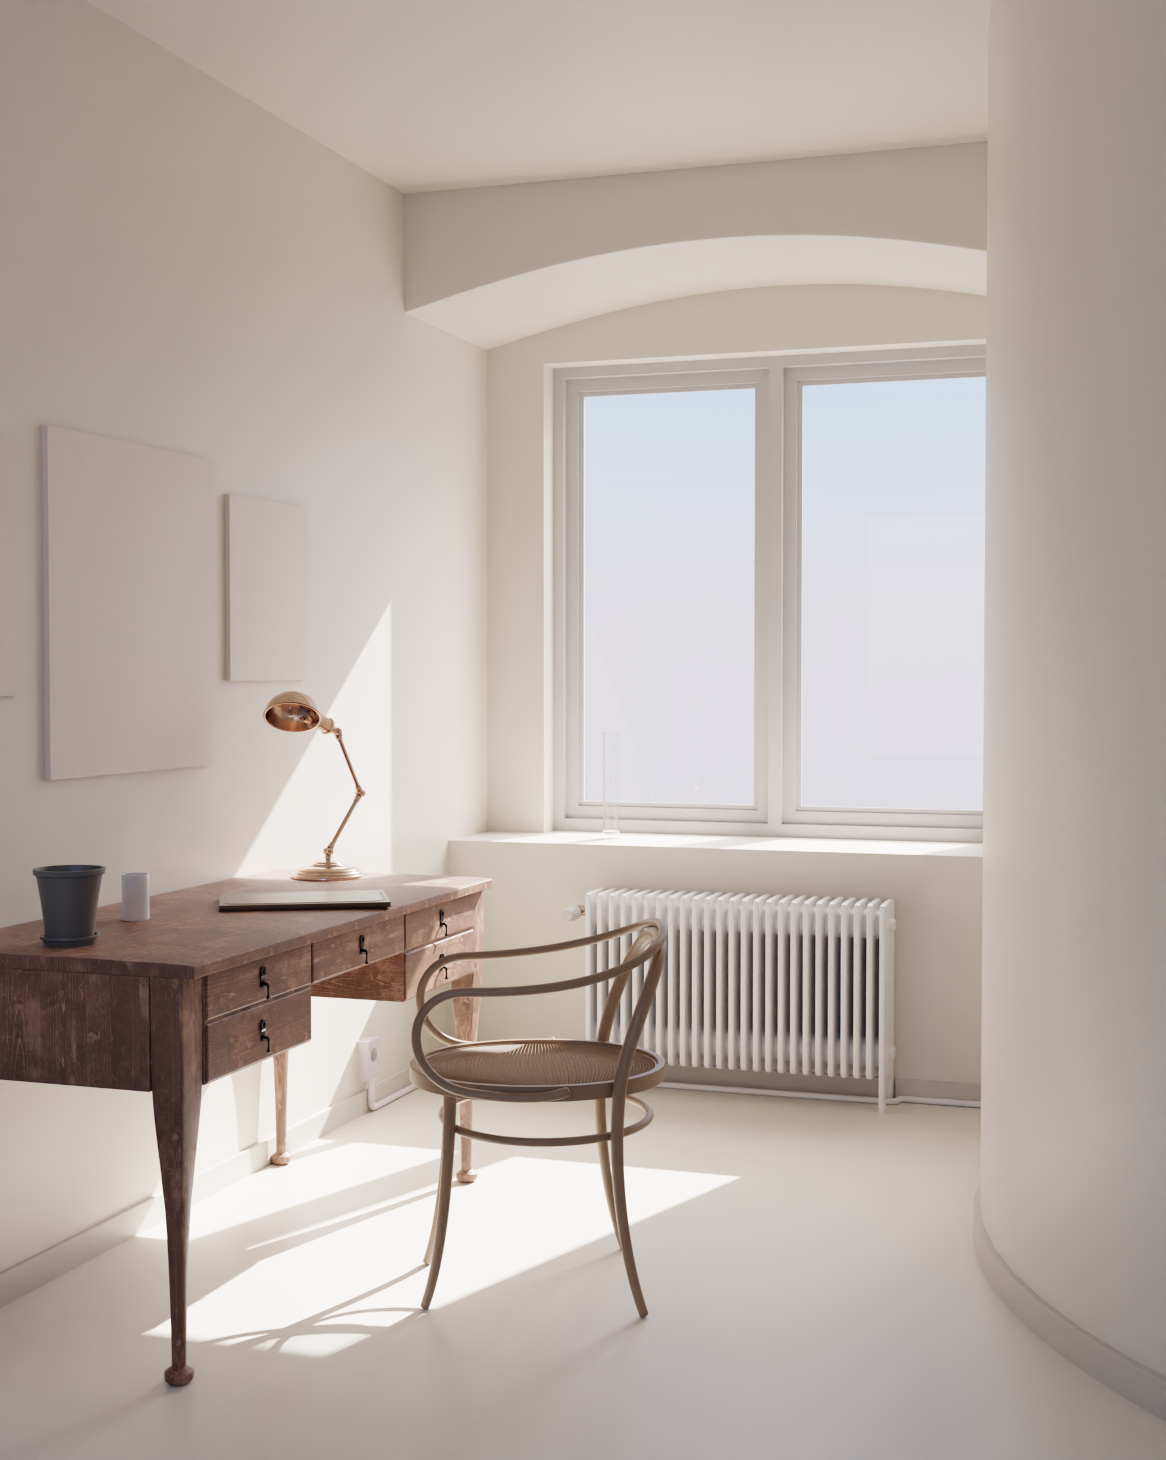
And this picture:
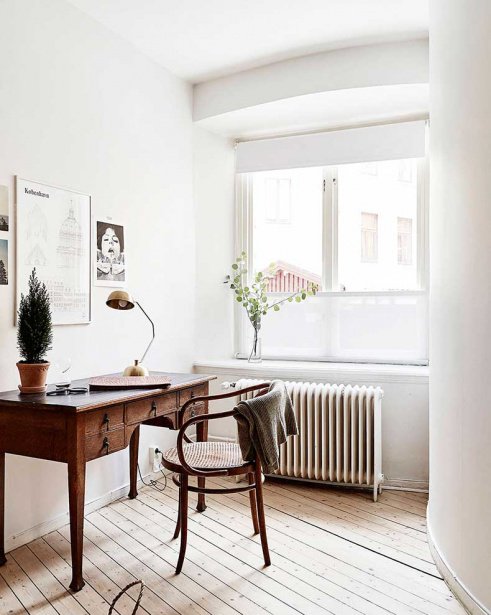
It’s a simple but nice composition with good lighting and with only a few elements.
Tools
The entire goal of this workshop was to cover a big part of the lookdev side of Blender, so all the modeling, set dressing, shading/texturing, lighting, rendering, and compositing were done using the software.
I also used fSpy to roughly match the focal point and perspective of the original pic and Gimp to modify the textures a bit.
Matching the original perspective
With fSpy, I was able to quickly establish a vanishing point by matching segments for both the X and Z axes with lines in the picture, which generated for me all the needed camera parameters.
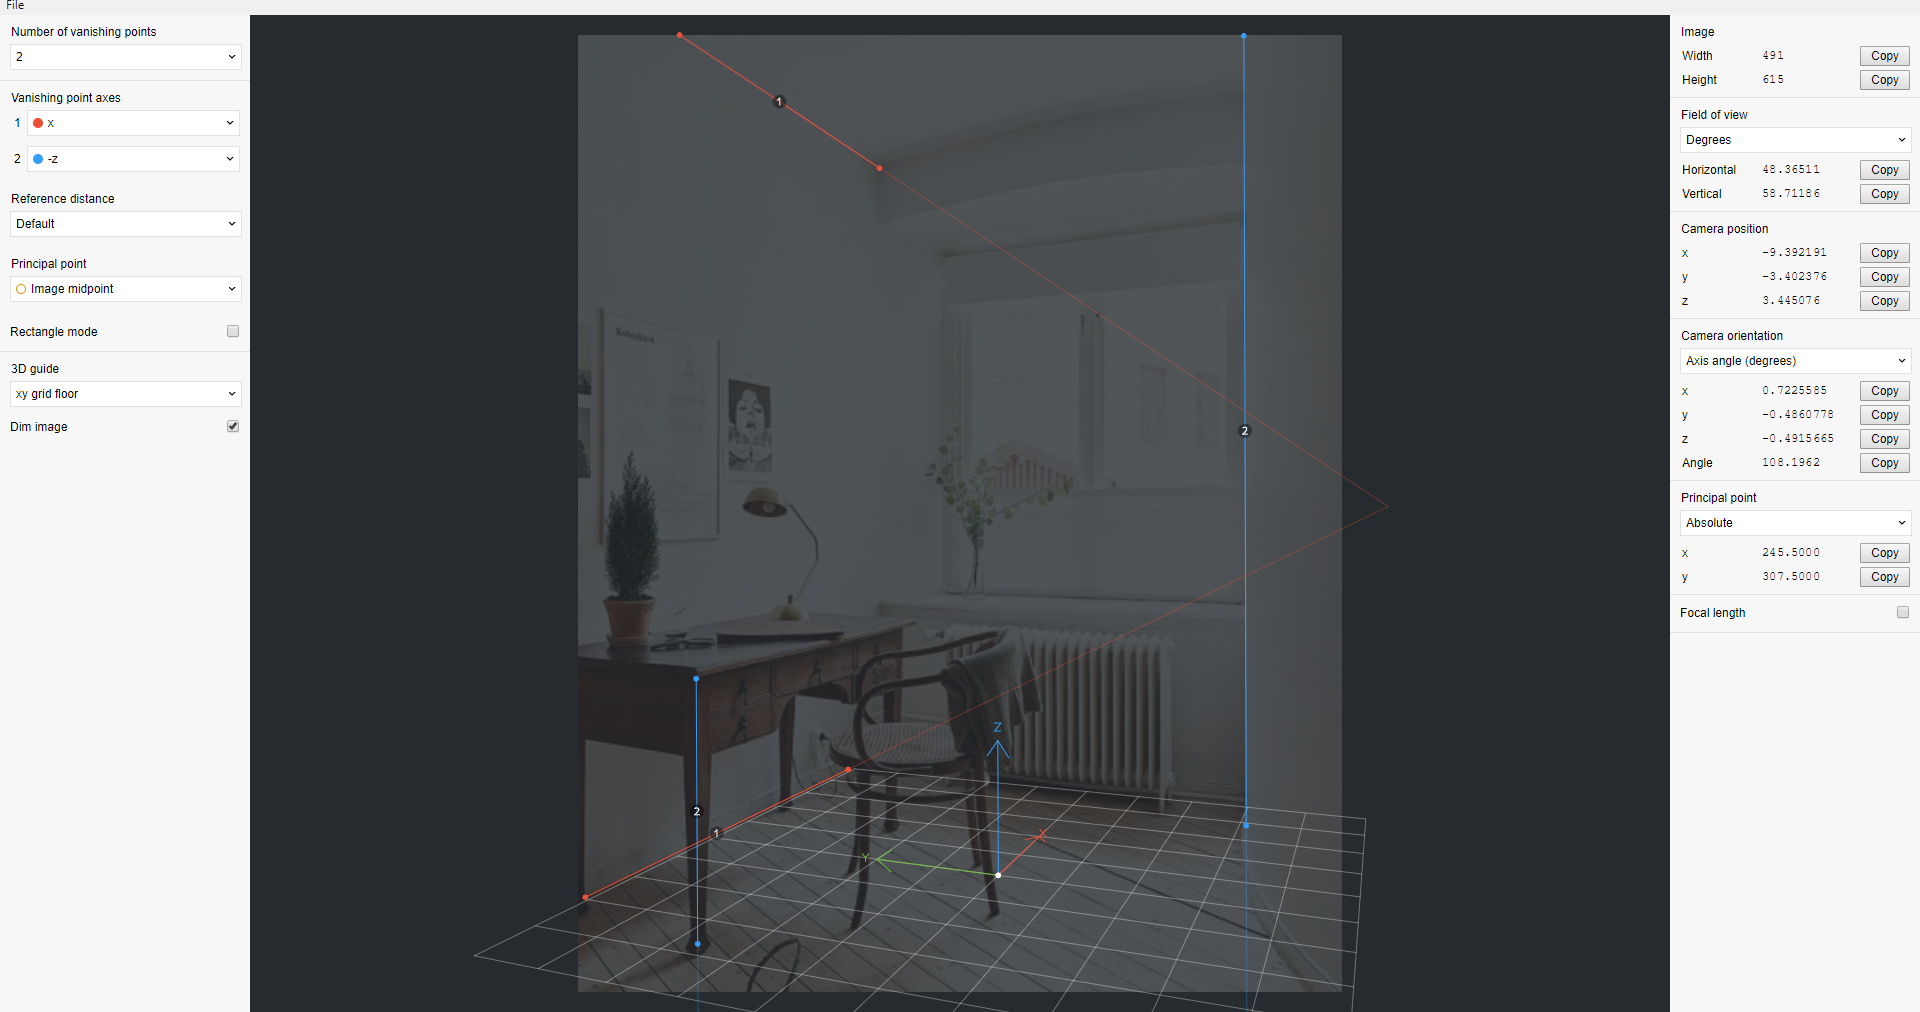
With the fSpy add-on for Blender installed, I can easily import my generated camera, correctly placed, and set it up directly in the viewport (sometimes though, it is necessary to adjust the settings a bit in order to match the reference more closely).
Posing the basic shapes
fSpy automatically puts the reference image in the camera, so it is extremely simple to start creating the main shapes.
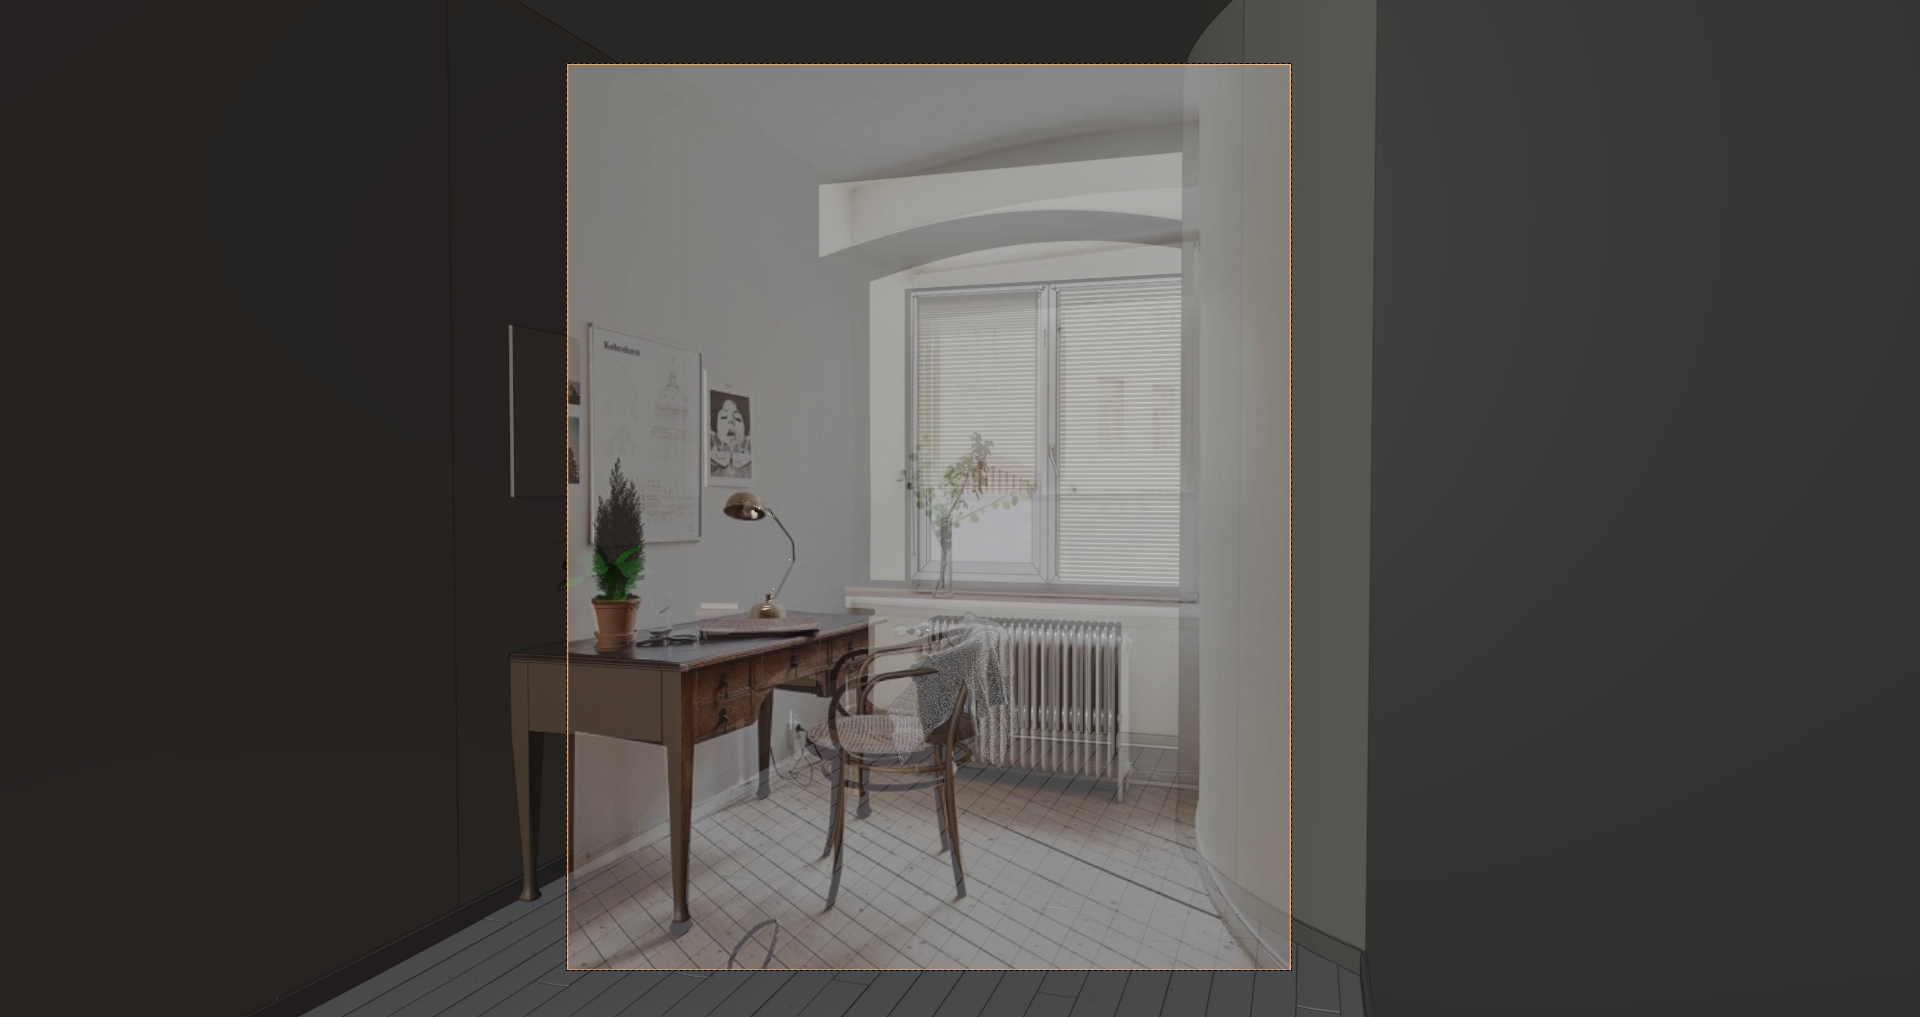
Of course, from version to version, I adjusted the placement of some of the elements and changed the focal length to achieve something that I liked more (remember that it’s only a reference—at some point, you can take some liberties and start improvising).
Proper modeling and setting up the workflow
With those main shapes posed, I could now start to properly model all the assets!
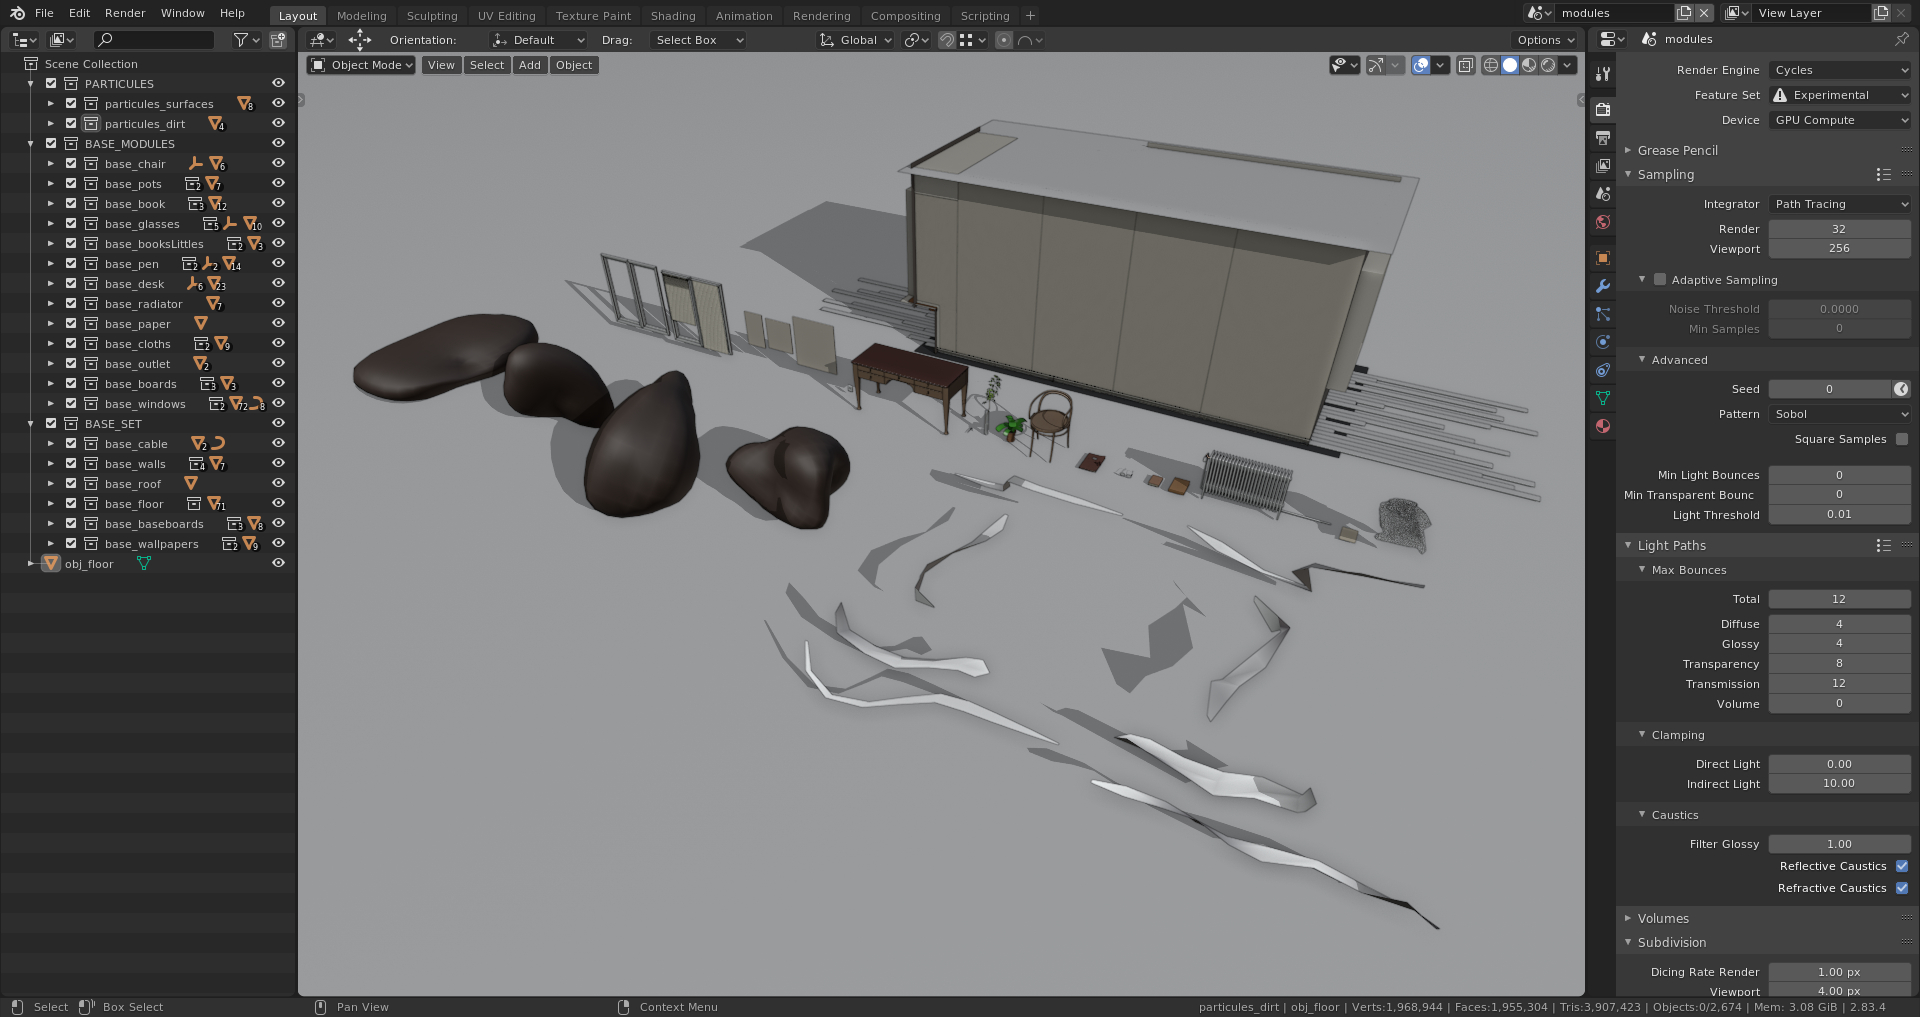
For that, I started to organize my file by splitting it into two different scenes.
One scene, the “modules” scene, was for asset creation (modeling and texturing/shading):
And the other scene, the “setDressing/lighting” scene, was for assembling all the modules into the final set:
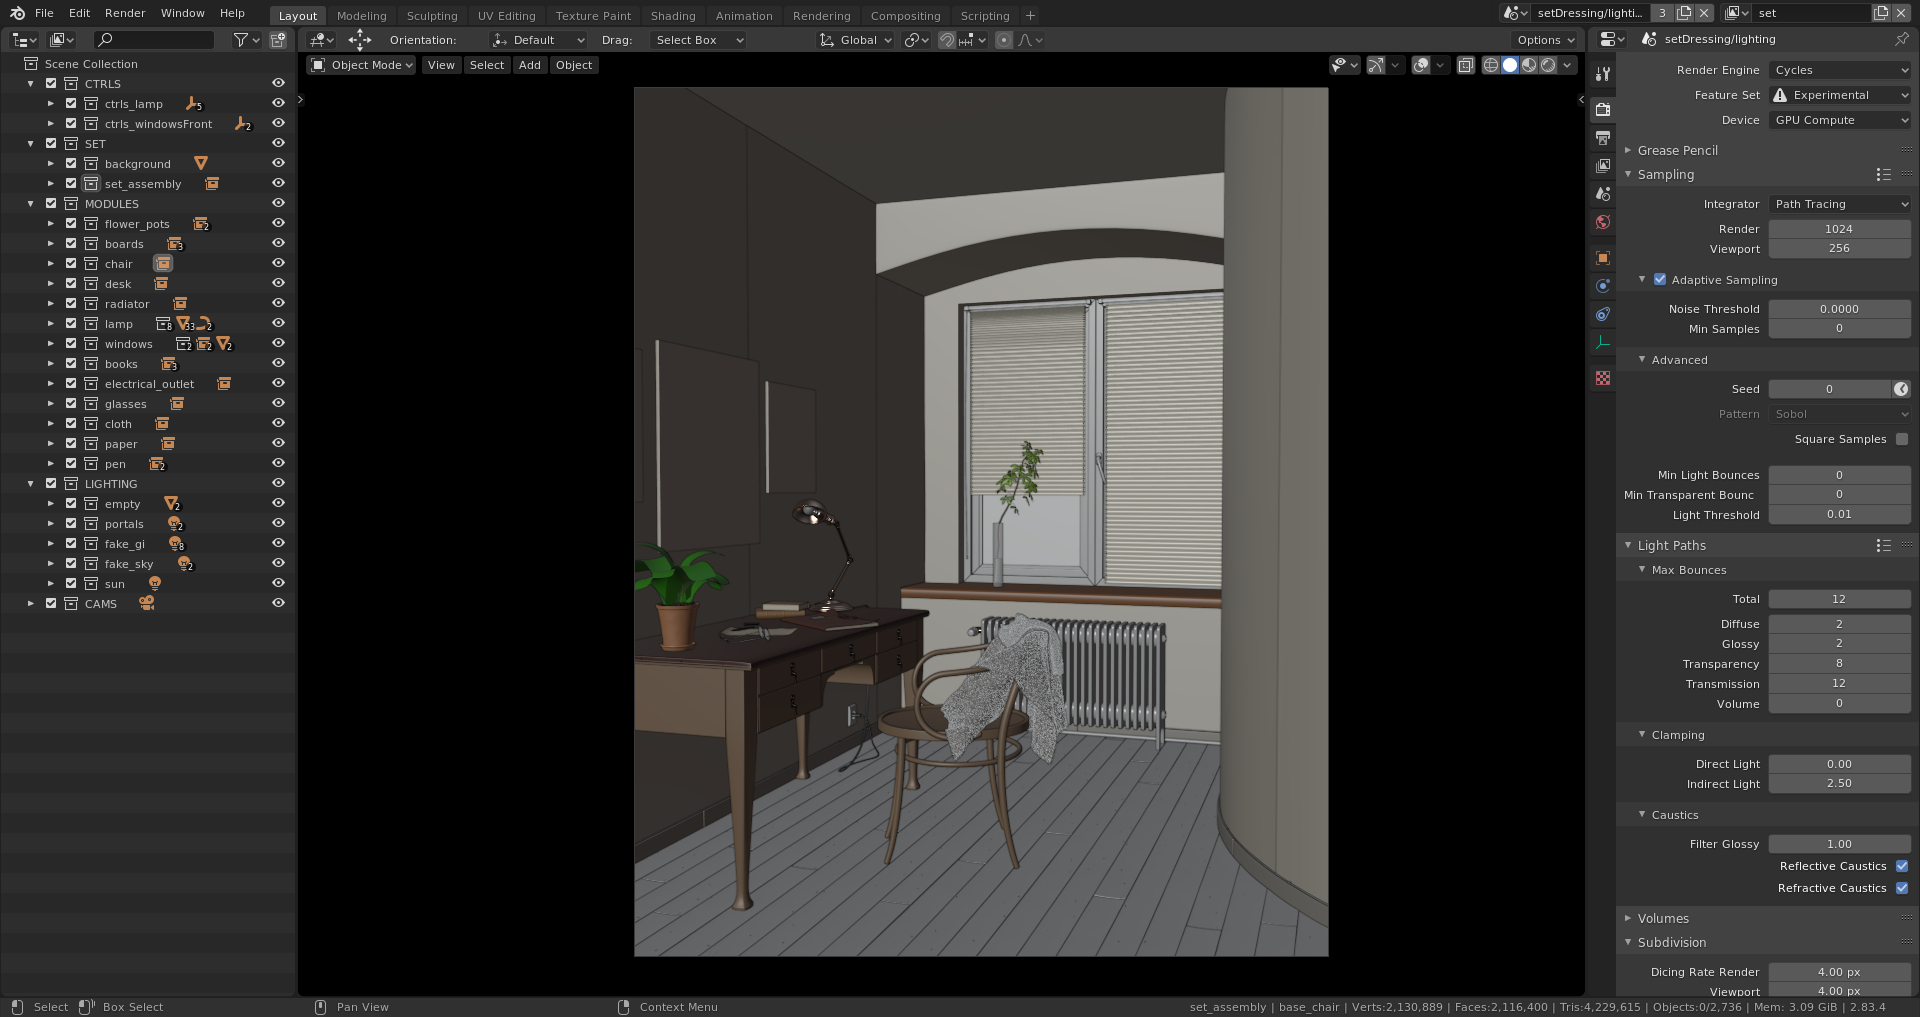
I also used that last one as the lighting scene since I like to be able to manipulate everything directly with the render preview and instantly see the result.
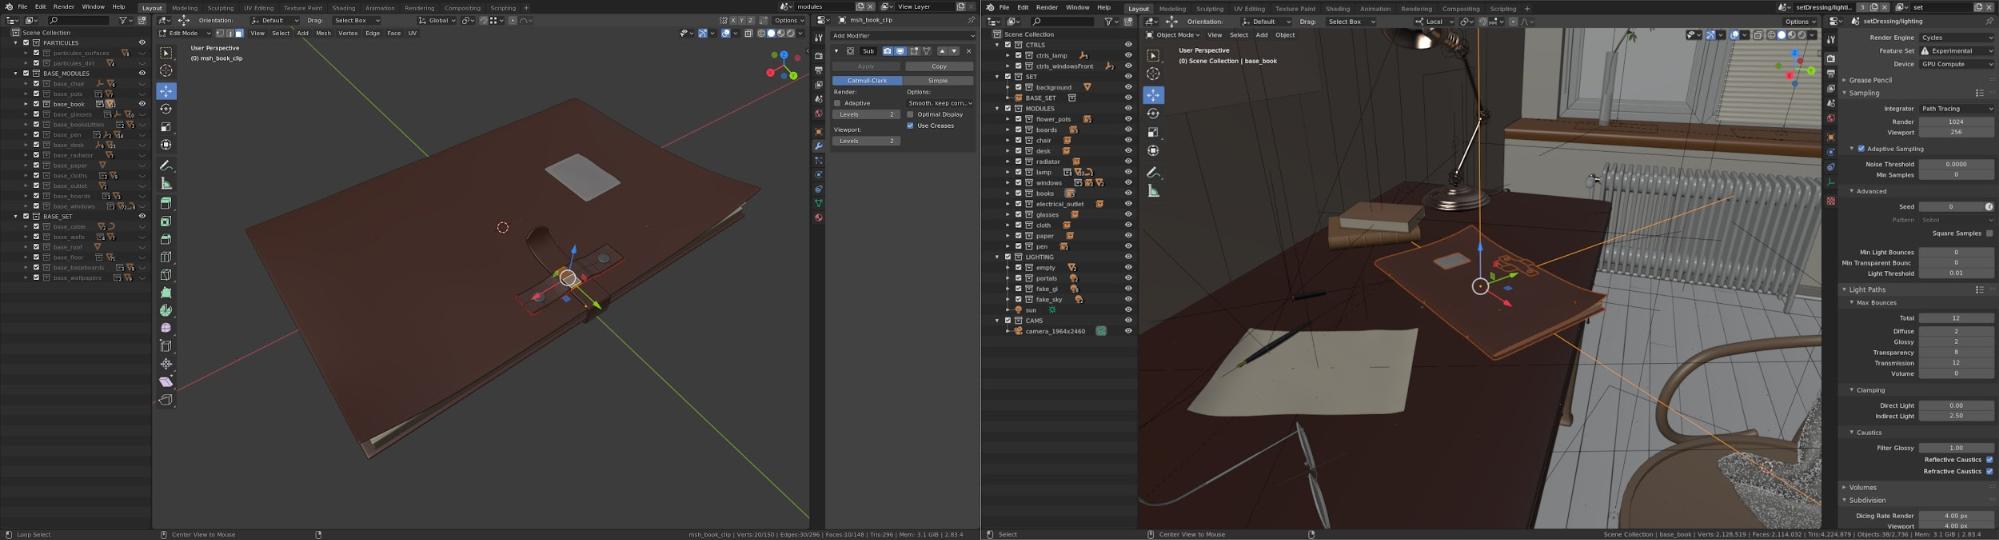
With those two scenes set up, I could then properly model anything at the center of the world, with good orientation and scale while having every module already placed in the set.
Since the “setDressing/lighting” scene gives me real-time feedback, it’s a very powerful workflow when you have a second screen.
The only assets that I made directly in the “setDressing/lighting” scene were the lamp and the window handle. Since I had made a very simple rig to control them, I also wanted them to be interactively changed in the render preview without having to deal with more complex instancing or linking from one scene to the other.
Note that this workflow is nice for a small project with only a few assets like this one. The file can contain everything without becoming too heavy.
If the number of assets had grown too much and started to slow down my creation process, I would have split up the entire project into individual files per asset, then linked everything into a final file.
Refining the modeling and starting lighting
As I continued modeling by adding details and completing the asset list, I tried to follow a simple rule: modeling every object as it is made in the real world. That means that if an object is composed of several different parts, I would model every piece individually.
I also set up very basic lighting. Having lighting at this stage, even if it’s simple, is crucial. It gives you a better representation of your shapes and composition; it’s a big factor that may affect a lot of your choices as the project progresses.
Finally, I set the LUT that I was going to work with in the color management panel. I would not change it until the end of the project. Here I used the “Filmic Medium High Contrast” LUT.
Shading & texturing
I mixed three different texturing techniques in this artwork. Full procedural, semi-procedural, and full bitmap.
Some examples:
The wallpapers were generated with a “magic” texture node for the small pattern, then combined with a larger noise texture in order to have some distortions.


The wood planks were generated with semi-procedural texturing. I first started with a very basic wood texture. However, with this set up, the wood pattern looked obviously tiled across all the planks. I fixed it by mixing two different wood textures with a noise texture, then randomizing the UV position and rotation for both the wood textures and the noise mask.
Then, I wanted my planks to be covered by white paint. For that, I just pushed the albedo values very high to create a mask from them. I only wanted some wood to be apparent in the cracks.


The desk leather material has also been procedurally made. I used a voronoi texture set on “distance to edge” then distorted it with a simple noise texture set at high frequency by plugging it into the voronoi “distortion” input. I could then colorize it to generate the albedo.
Next, I added a very simple noise texture to give a bit of general distortion to the surface.
From the angle that this texture would be seen in the final render, something fairly simple like this was enough.


At some point, every procedural texture had been baked. The fewer nodes in the scene, the better!
Overall, I tried to clamp all my diffuse values around 0.800 and roughness values around 0.500 or 0.600 maximum. Extreme values tend to produce more noise and slow down the render times in some situations. Furthermore, they can break the realism at some point, which I try to avoid.
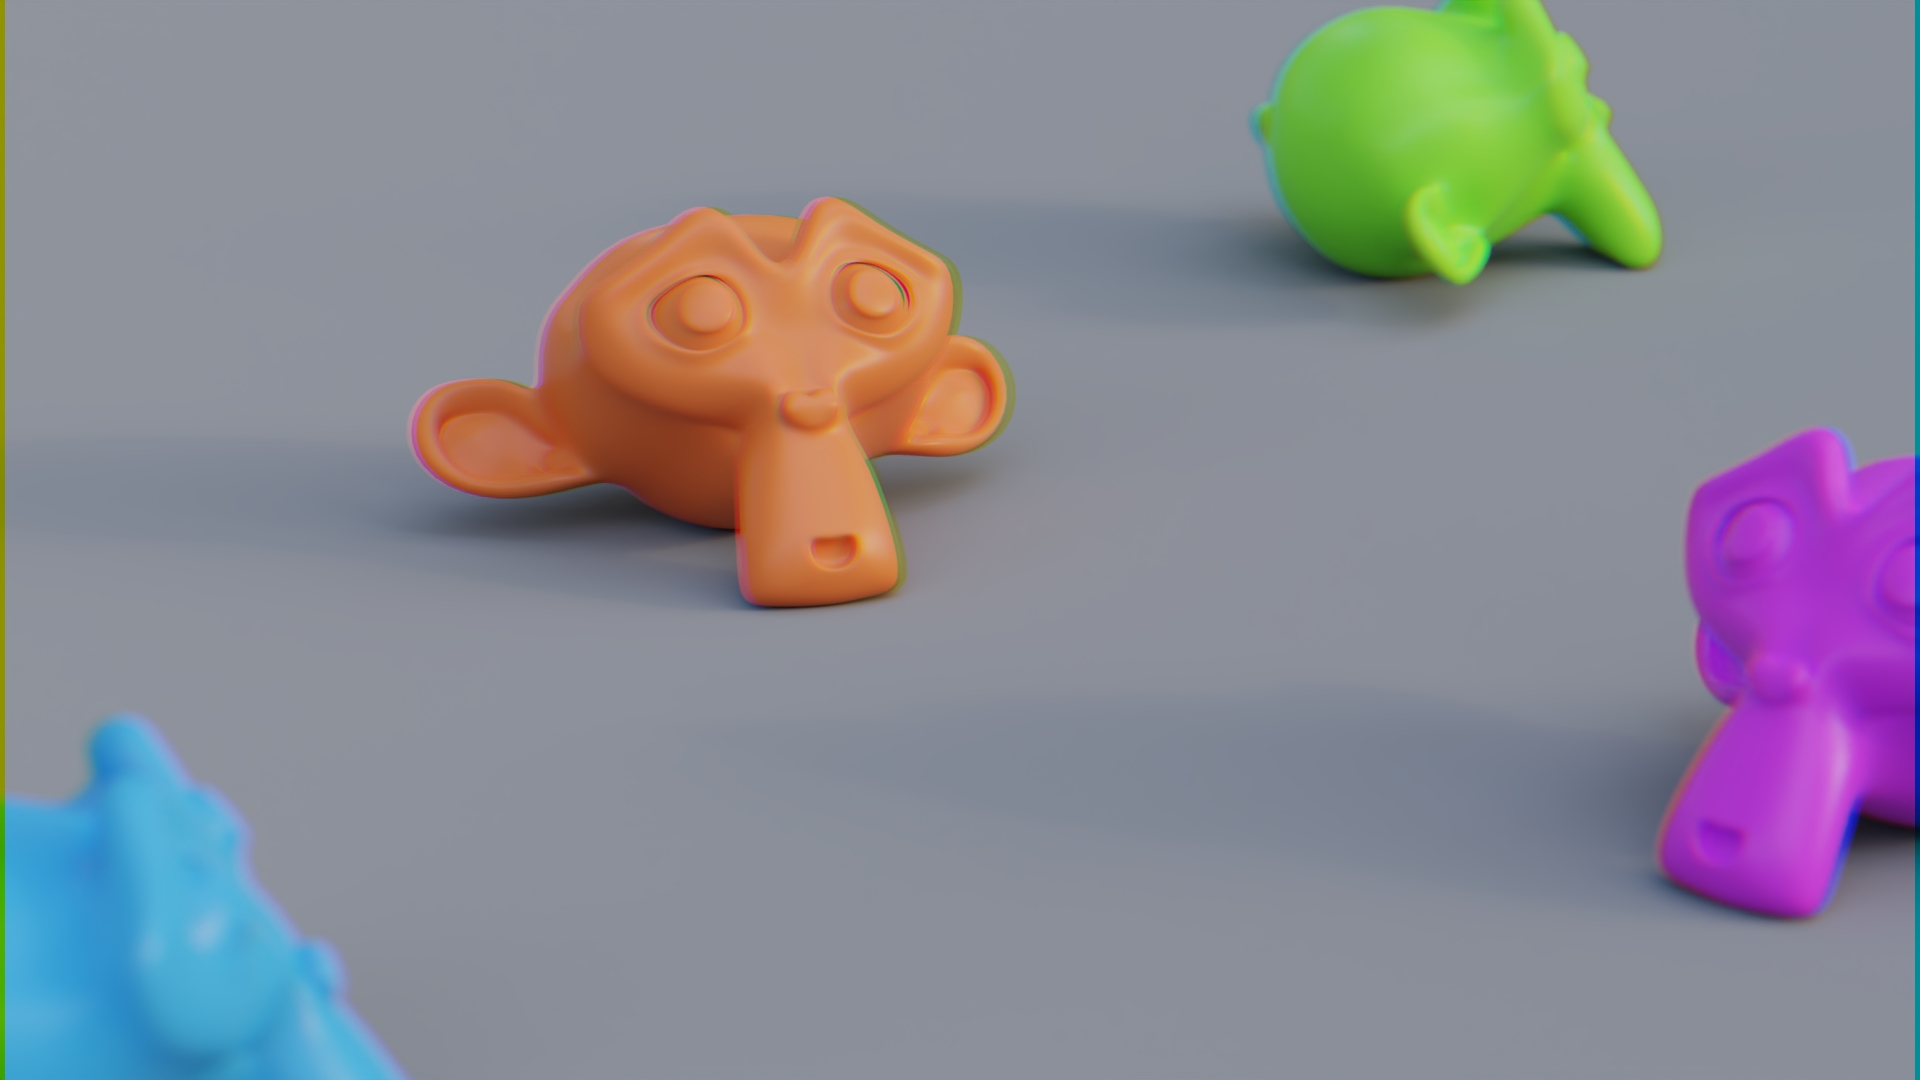
Reducing the noise and render time
Rapidly, the brute force way of lighting the scene became too noisy and slow. To fix that, I clamped down both, some of the bounces and the indirect lighting intensity:
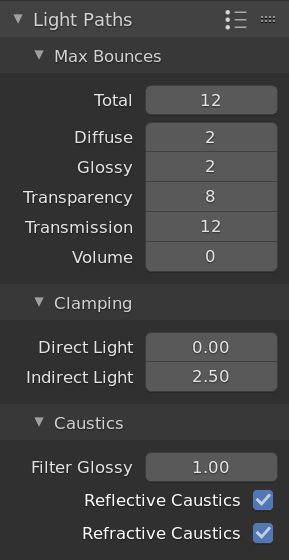
This approach resulted in a darker image but with less noise and quicker renders (notice that I intentionally left the caustics on, since without those the image would have been even darker and I would have lost some of the realism that they contribute to).
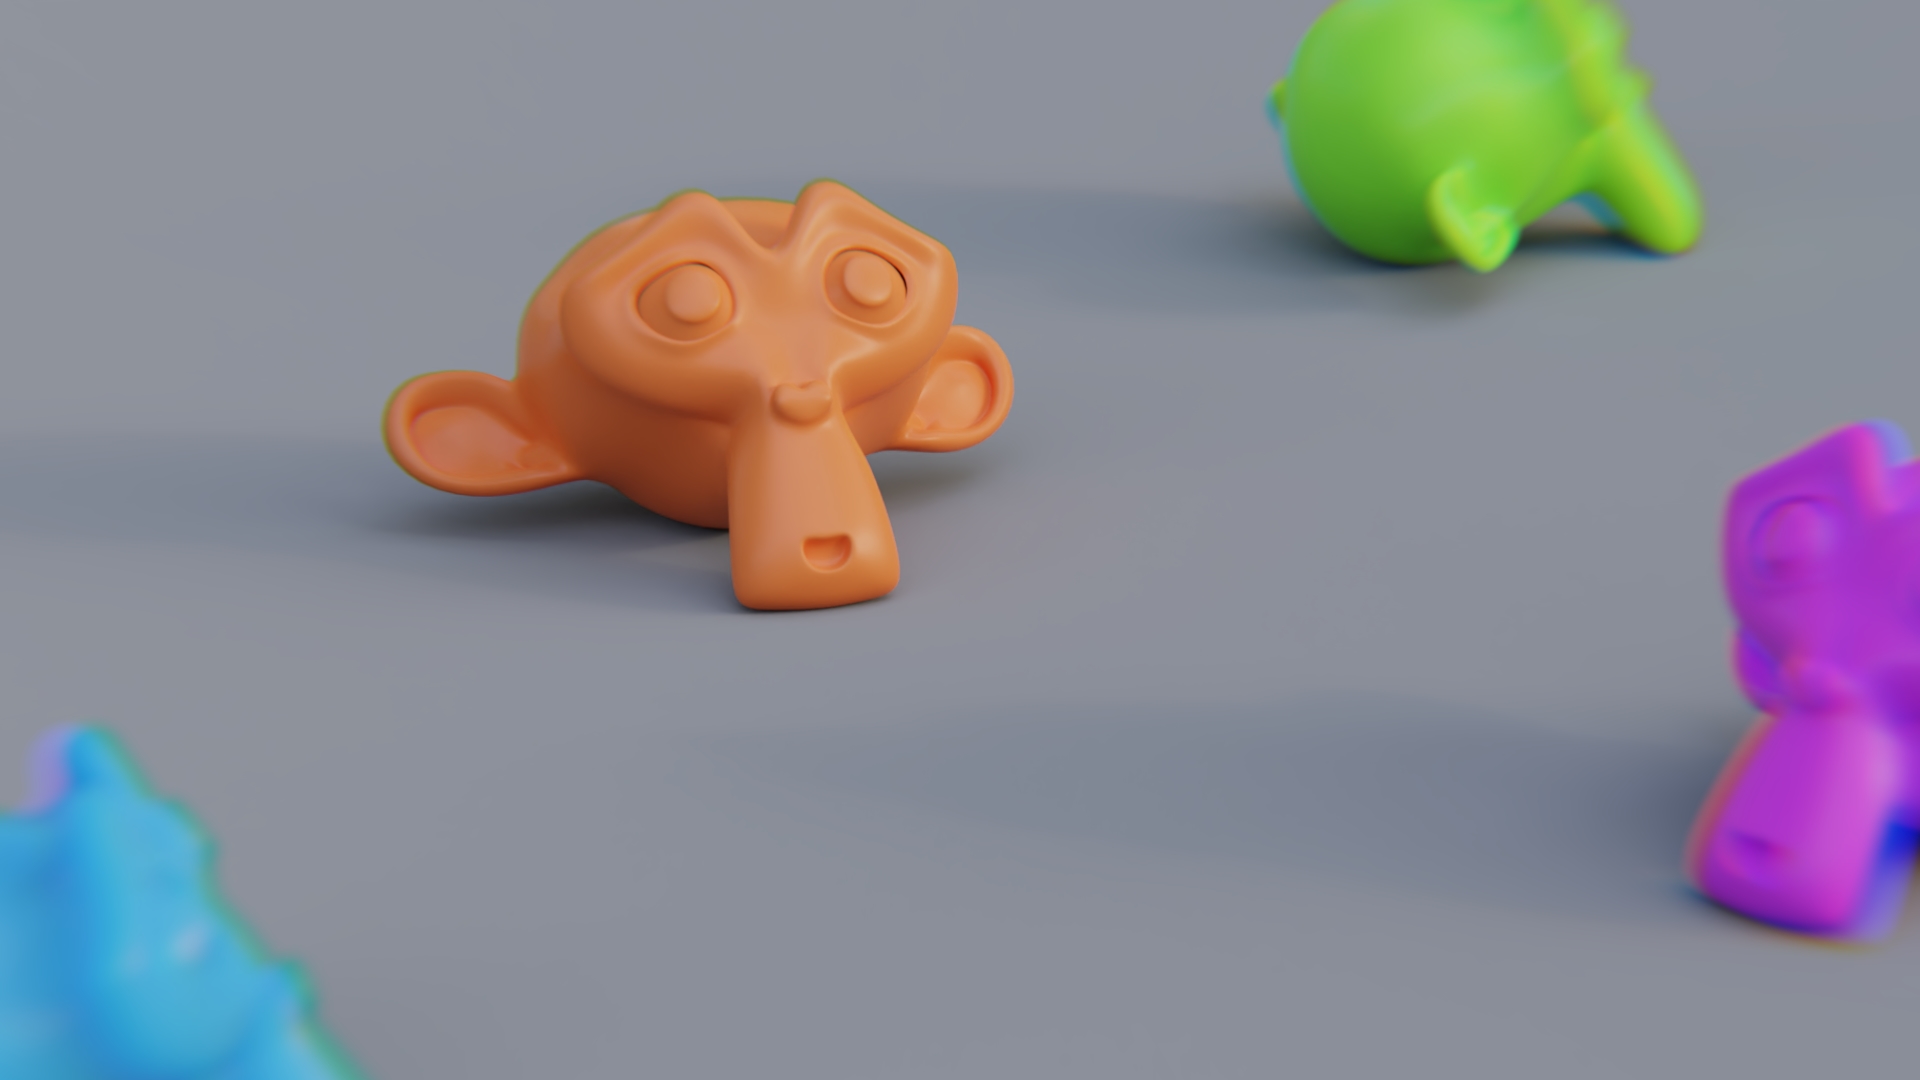
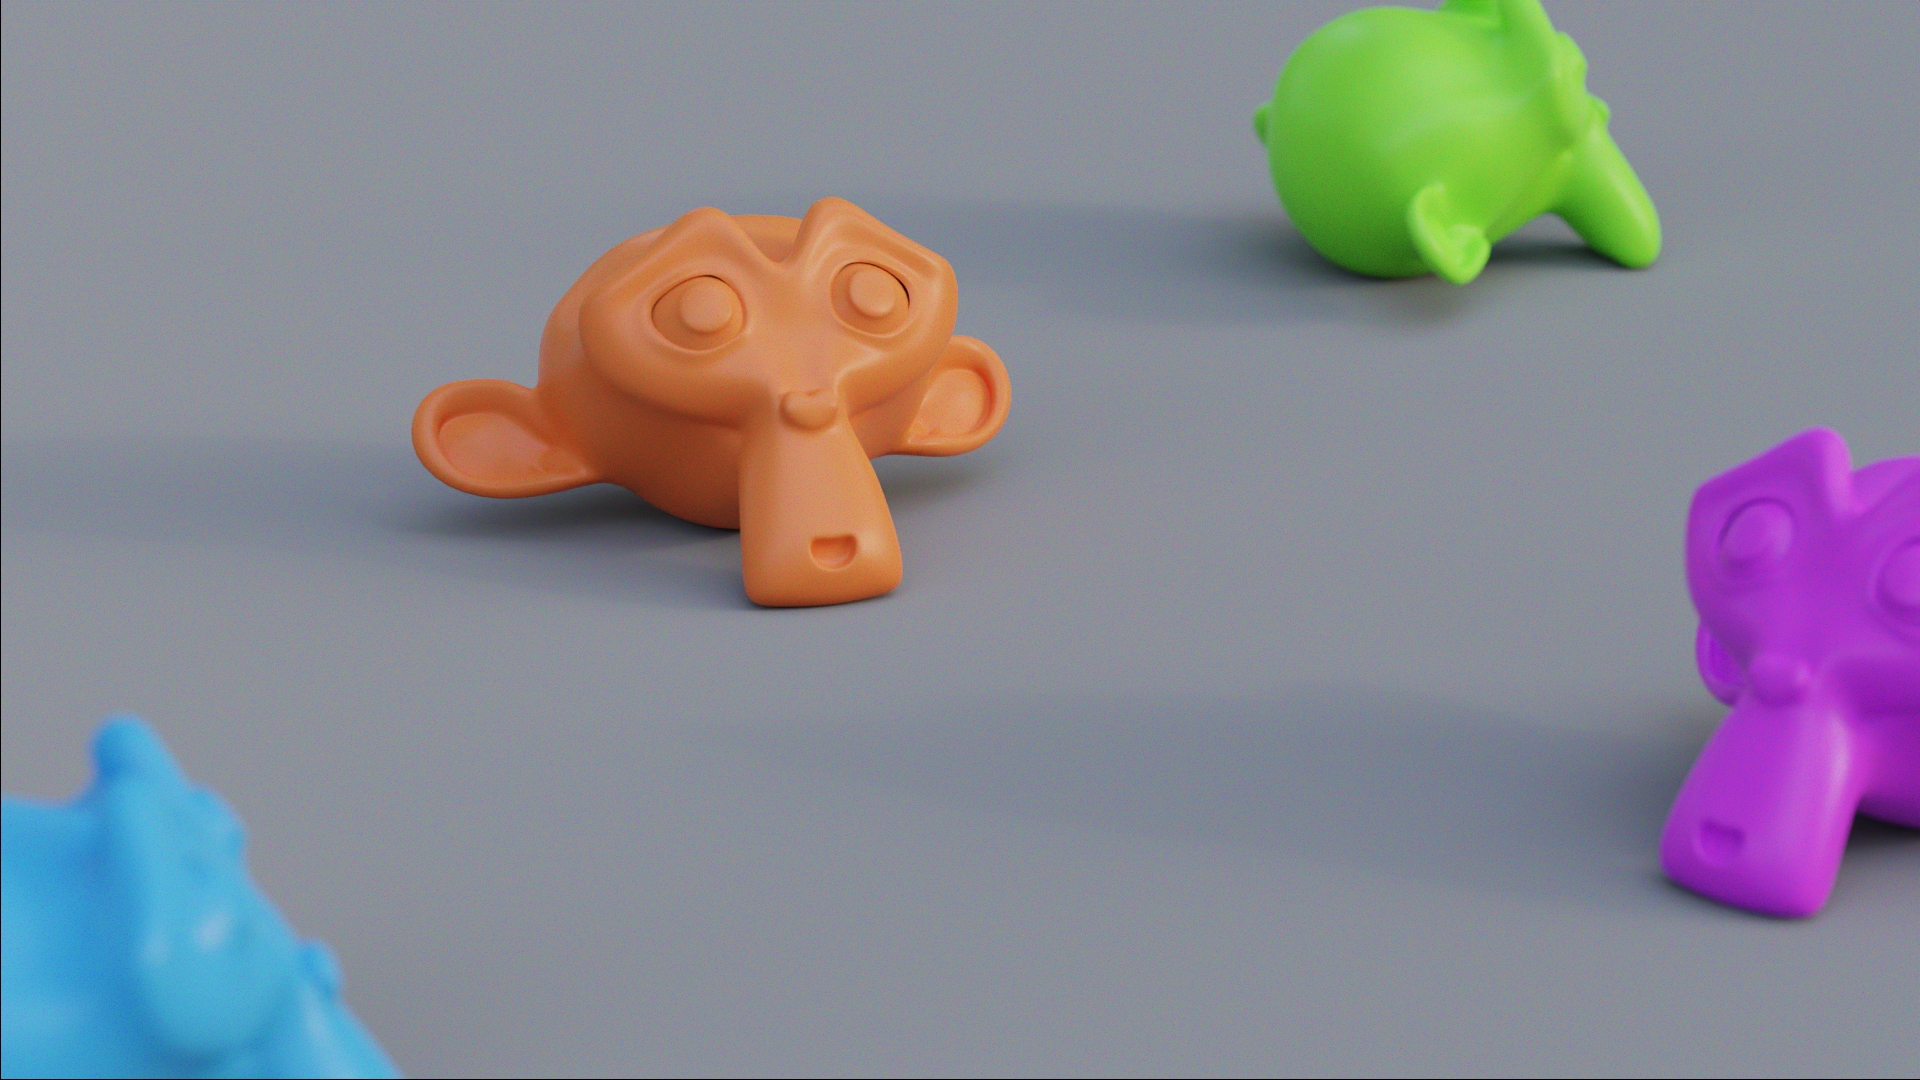
To bring back the indirect lighting, I faked it by hand placing area lights where the sun was hitting. I tweaked their scale, color and intensity to match the overall look and indirect shadows of the brute force reference.
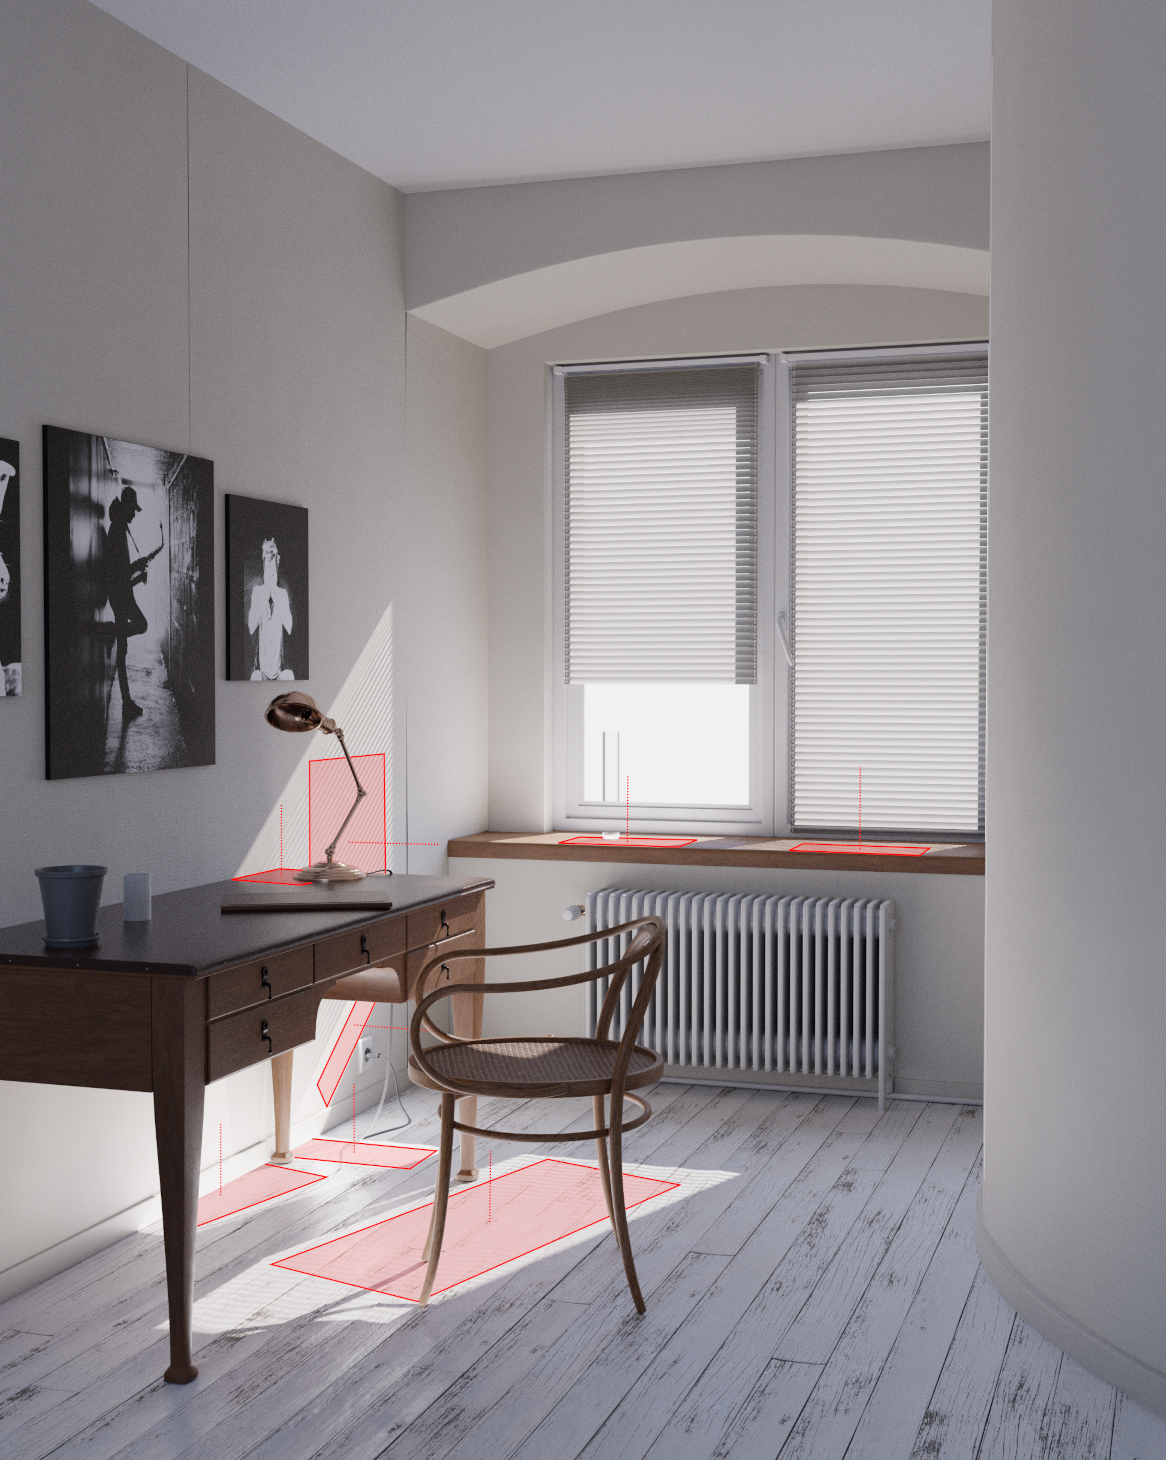
By faking the GI like this, the noise and render time were reduced by half for an equal sample count.
Here is a small comparison between the brute force version and the faked GI:
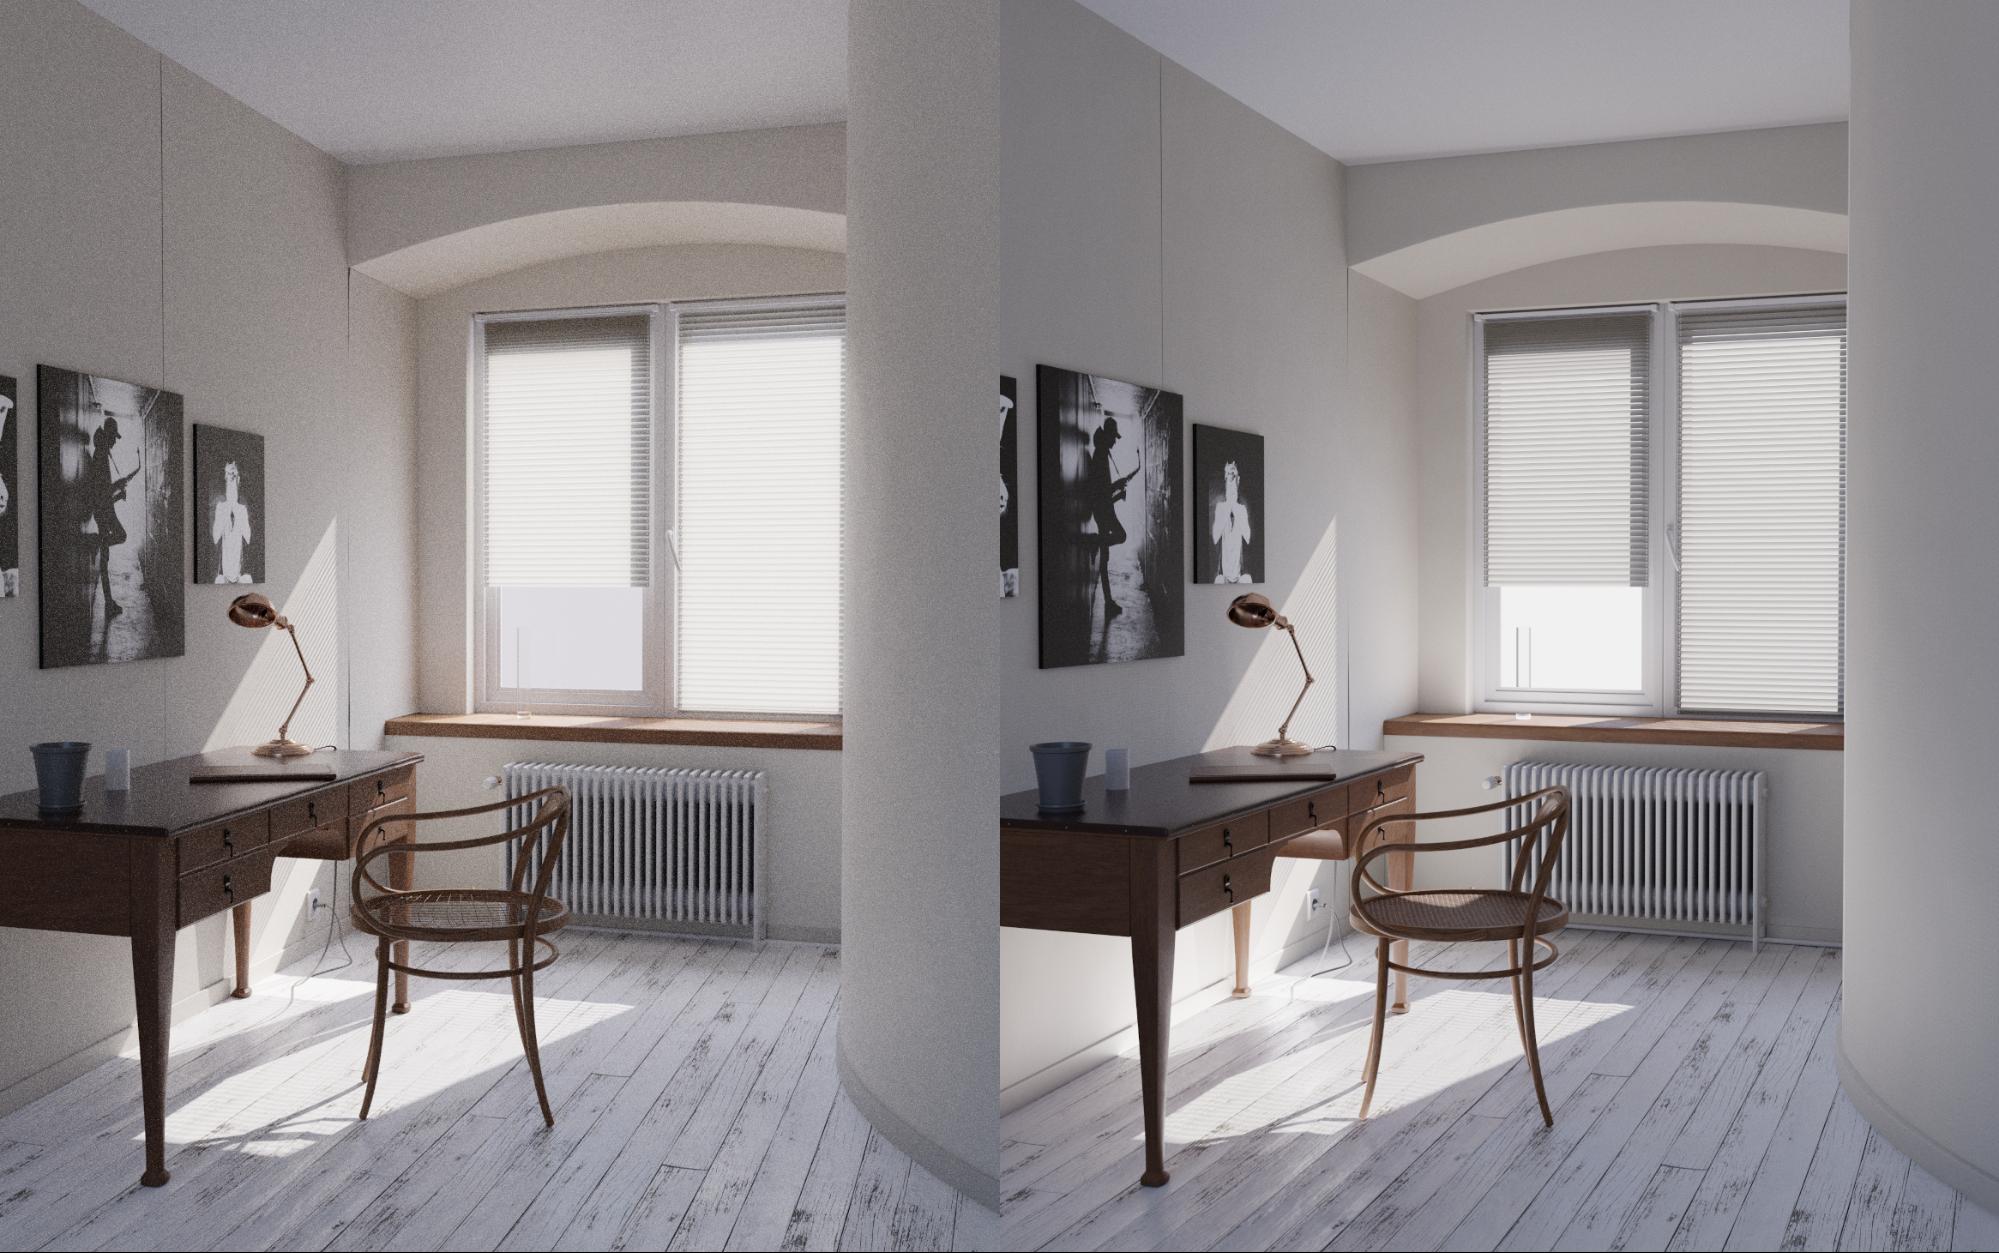
Of course, matching the original lighting was not perfect on the first shot. I tweaked the lights until I was satisfied with the result.
Surface particles
For the fine visual details, I scattered some particles all over the assets.
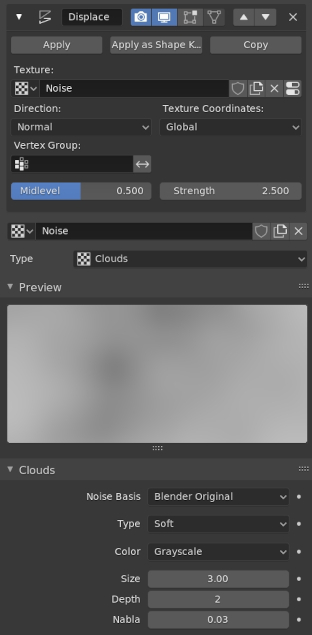
Each particle on its own is extremely basic. They are simple planes with a few subdivisions, a displacement modifier applied to each to create some variations, and a simple translucent shader.
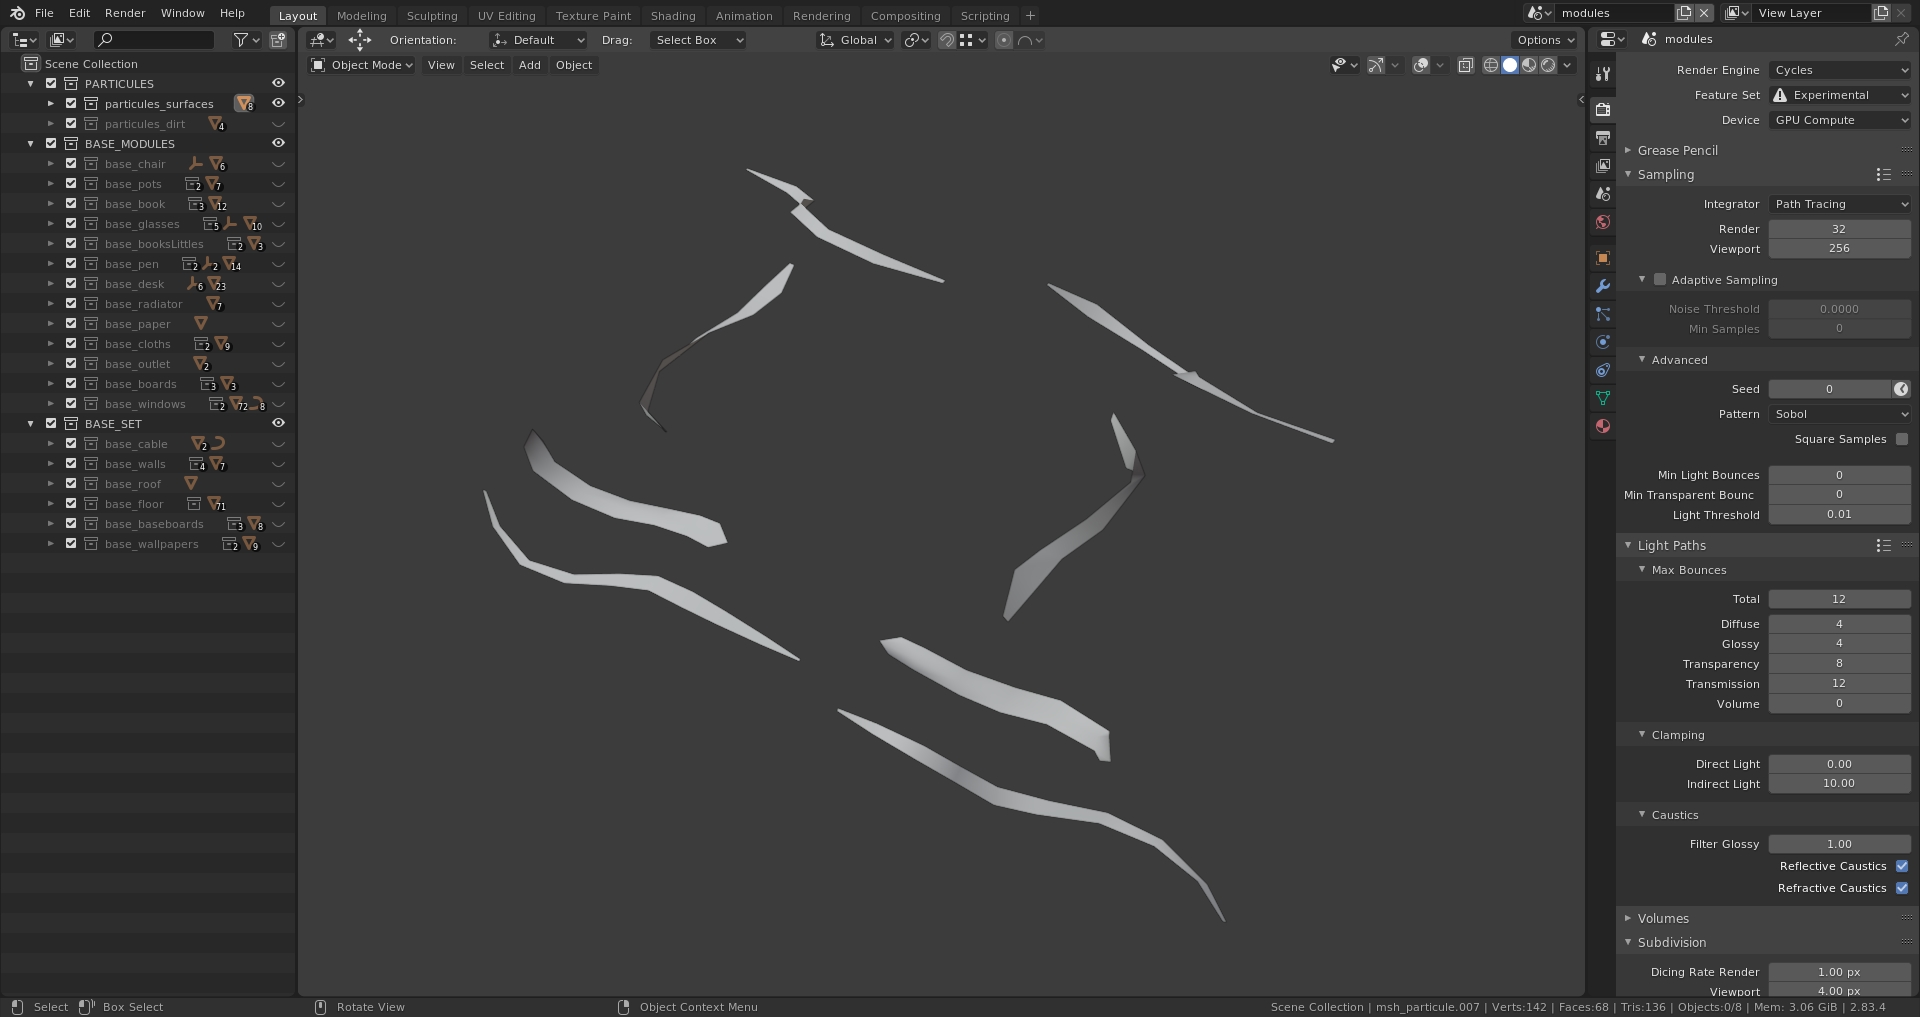
Since I used the same noise texture for each modifier, all the particles would be deformed the same way by default. This behavior can be modified by changing the “texture coordinate” parameter of the displacement modifier from “local” to “global”. This way, the texture used becomes “volumetric”. So, if any particle were translated in any direction, the displacement would follow the noise shape instead of the object.
This is really efficient with a noise texture set at a low frequency—it generates very large details then randomly displaces the whole particle instead of a small part of it.
Finally, I applied particle systems on some surfaces where those details would have been visible (ground planks, seat, cloth, desk, books, under the window, etc.).
I used the particles collection as the scattered element then chose to randomly pick one model for each generated point on the surface.
However, details like these need to stay moderate! It’s easy to overdo such effects.
Rendering
The final render was made with Cycles set at 1024 samples with adaptive sampling turned on. I also enabled both GPU and CPU with a 32 pixel bucket size for tiled rendering.
In the view layer properties, I enabled the denoising data and the object cryptomatte passes along with the default beauty one.
Since the final image would be quite large (3928 x 4920), I preferred to do the compositing pass in another file to avoid too much slow down due to memory impact. I chose to output the final render and all the needed passes in an “OpenEXR Multilayer” format.
Compositing
This step was quite simple. I applied the open image denoise using the denoising data and some other basic effects like color corrections, vignetting, and so on.
I also added some glow by stacking three “glare” nodes together in order to produce a gradual glow:
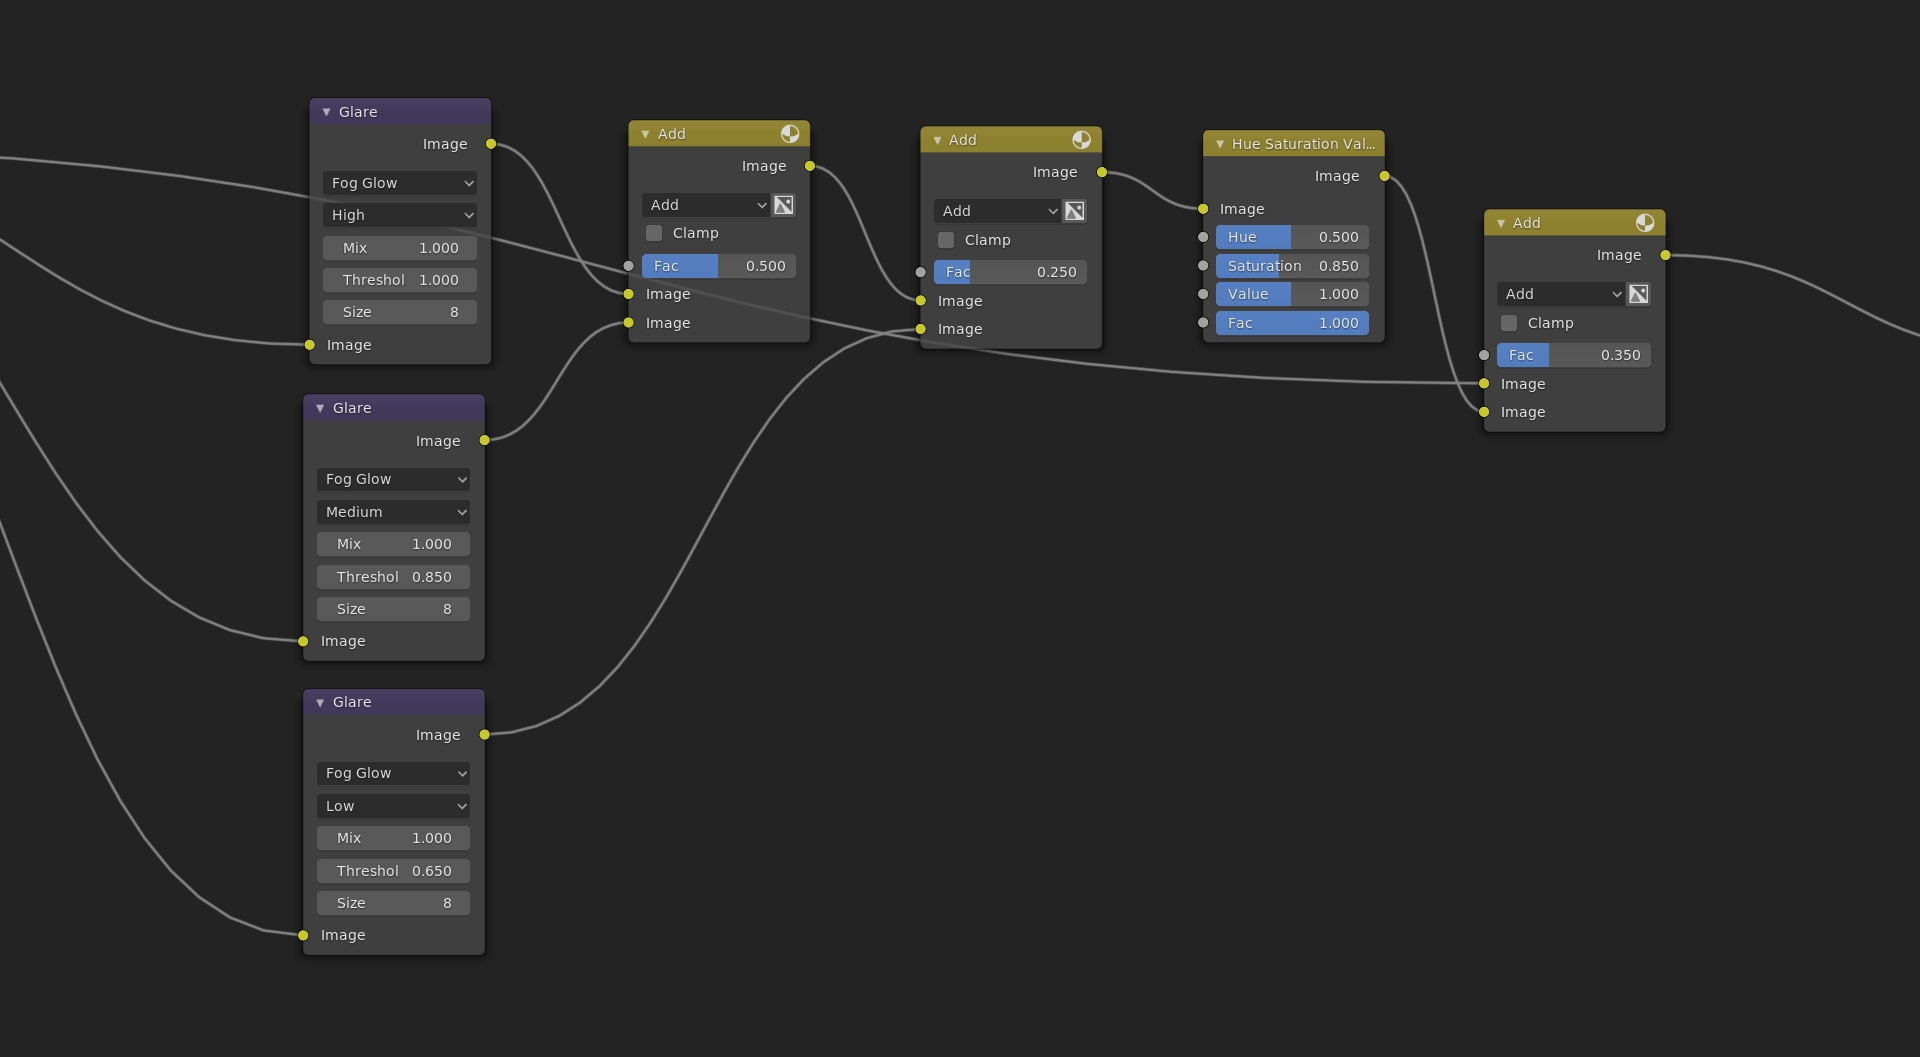
Like this, I could precisely control the impact of each glow individually. And finally, I used a master control to choose how much glow I wanted to apply on my image.
The final touch was to add some lens distortion, chromatic aberrations and grain to unify the final image a bit more and prevent eventual banding:
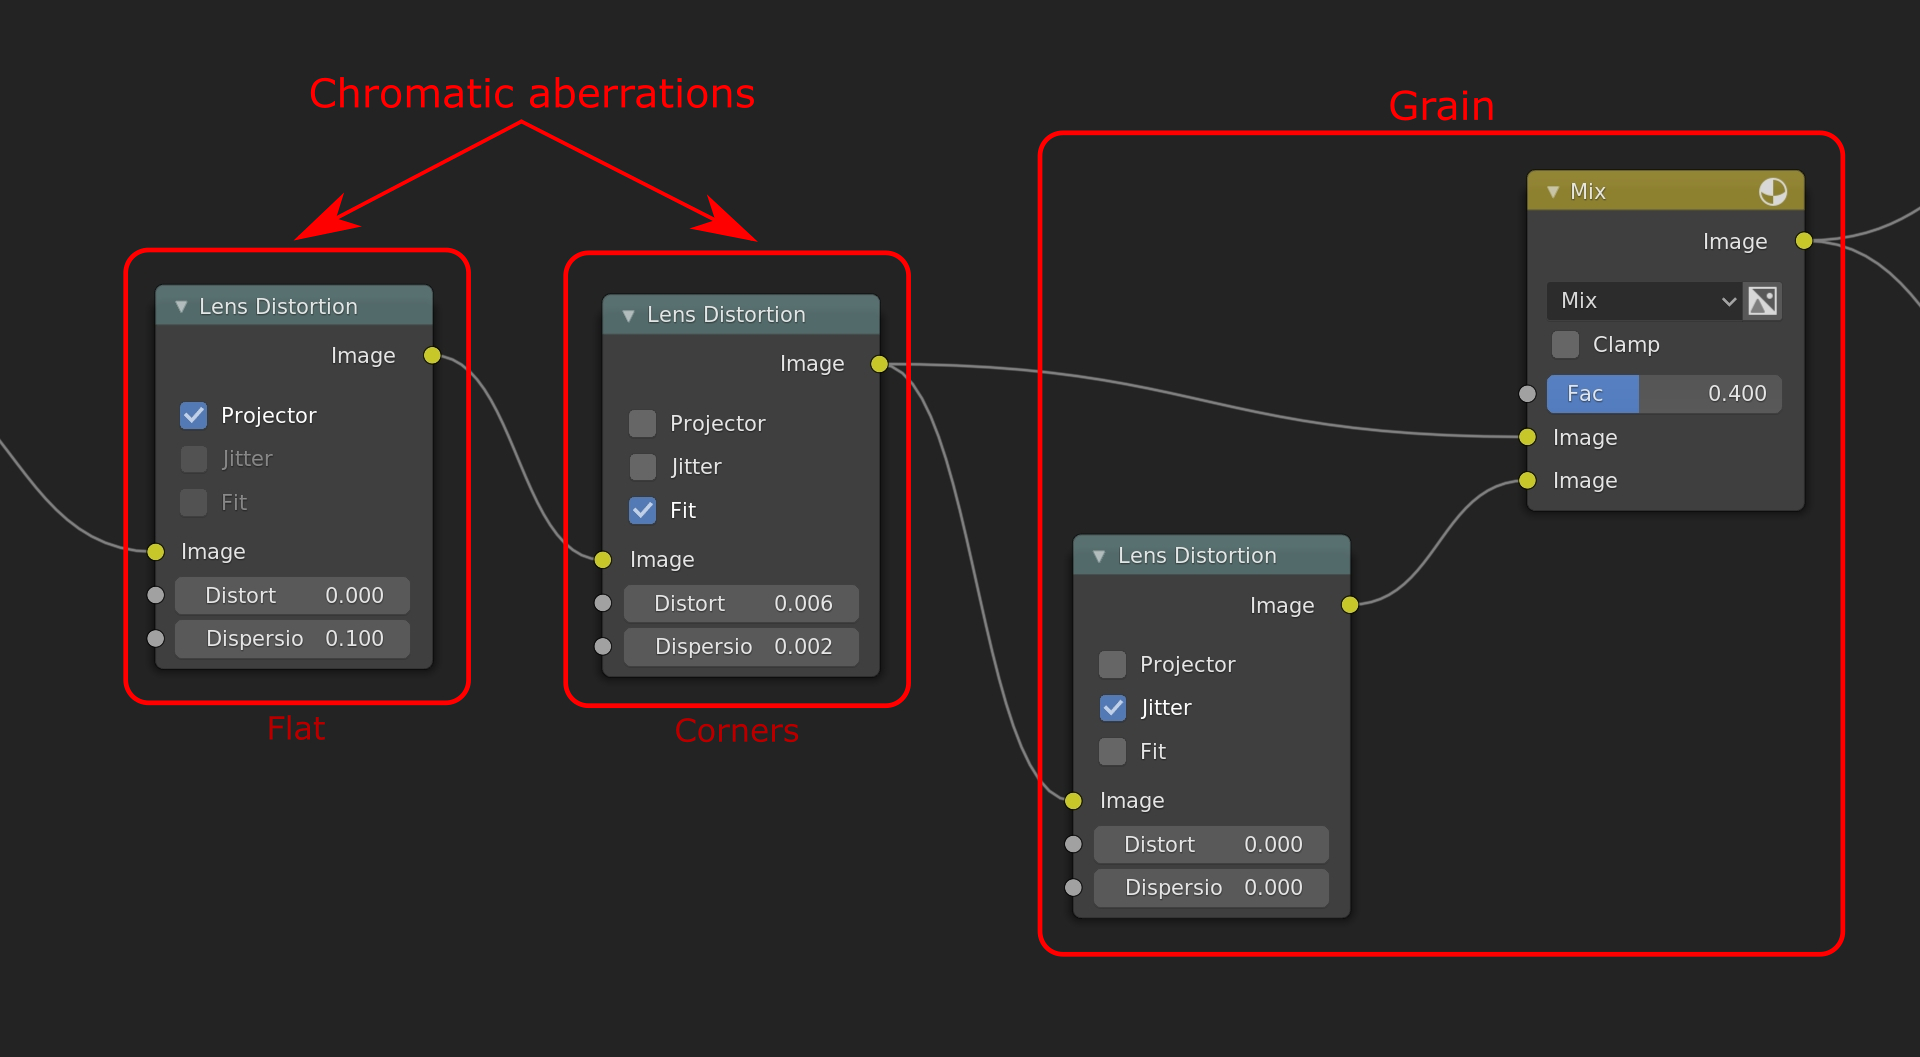
Here I used the “lens distortion” node, which offers some nice controls.
First, I generated the “flat” chromatic aberrations that produce an individual shift of the RGB channels on the entire image:
Next, I generated the “corner” chromatic aberrations that do the same thing as the “flat” ones, but are localized at the corners of the image:
Lastly, I generate the final grain by checking the “jitter” checkbox on the “lens distortion” node. It gave me an RGB noise all over the image, which I could control by blending it with the previous node:
Of course all of these examples are highly exaggerated for demonstration purposes. Again, like the surface particles, these effects have to stay moderate.
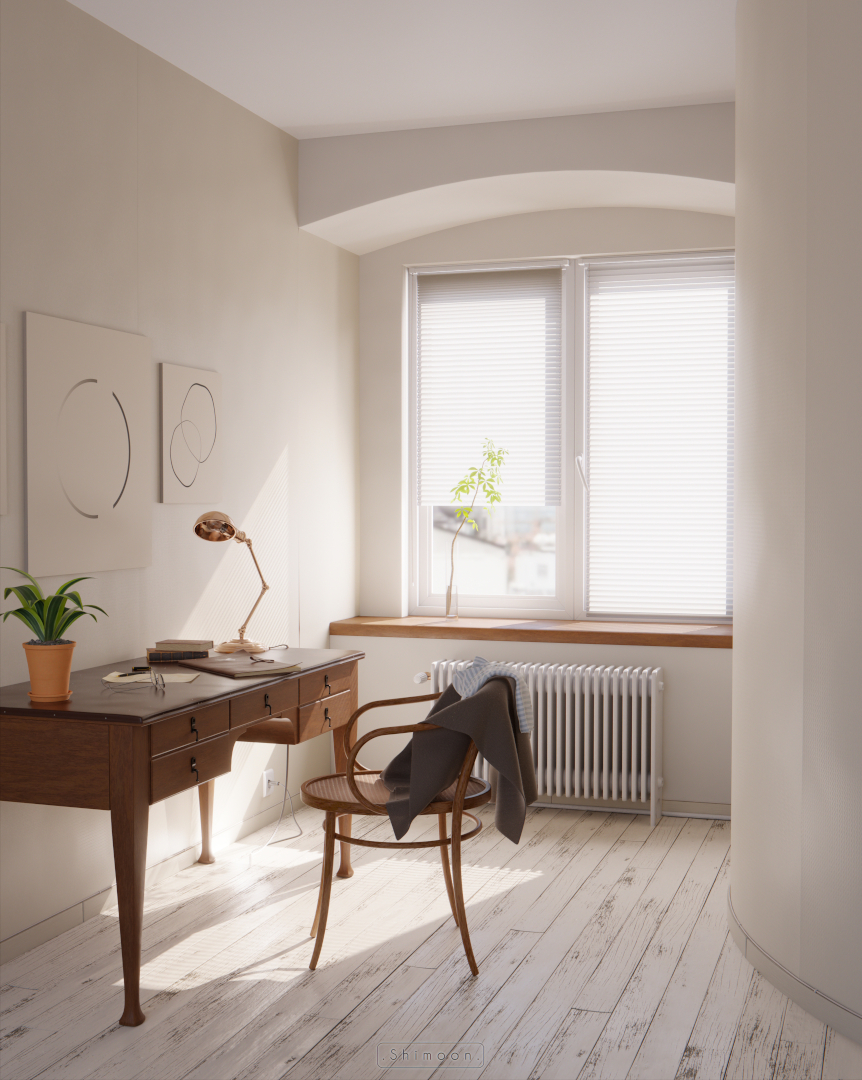
Here is the final image:
You can watch the overall Cycles breakdown here.
EEVEE shots
The EEVEE conversion wasn’t hard since both engines are compatible in many ways.
However, some parts needed more work than others, especially the lighting. So I duplicate the initial file to make one dedicated to EEVEE.
I reworked the scene a bit in order to make it work well in all the shots and to match as closely as possible with the Cycles version.


You can watch the very short film here.
For the full resolution, please check the original post here or on my ArtStation.
Finally, I would like to address a very special thanks to my mentor Jean-Michel Bihorel, for his support and advice throughout this workshop!
About the Author
 Simon Leprat, 3D modeler and lookdev artist.


