
Behind the Scenes: Rivers Castle
About
Hi there! I’m Felipe Torrents and I’m from Asunción, Paraguay. I’m working as a freelance 3D generalist making science-related animations for a Spanish agency. I worked on advertising for a fairly long time and I’m slowly trying to specialize in environment design.
I did a few things with Blender since the 2.42 version, but I went all-in with it when the 2.5 roadmap was announced. I’ve been following its development since then.
I’m self-taught and owe so much to the amazing Blender community.
Inspiration
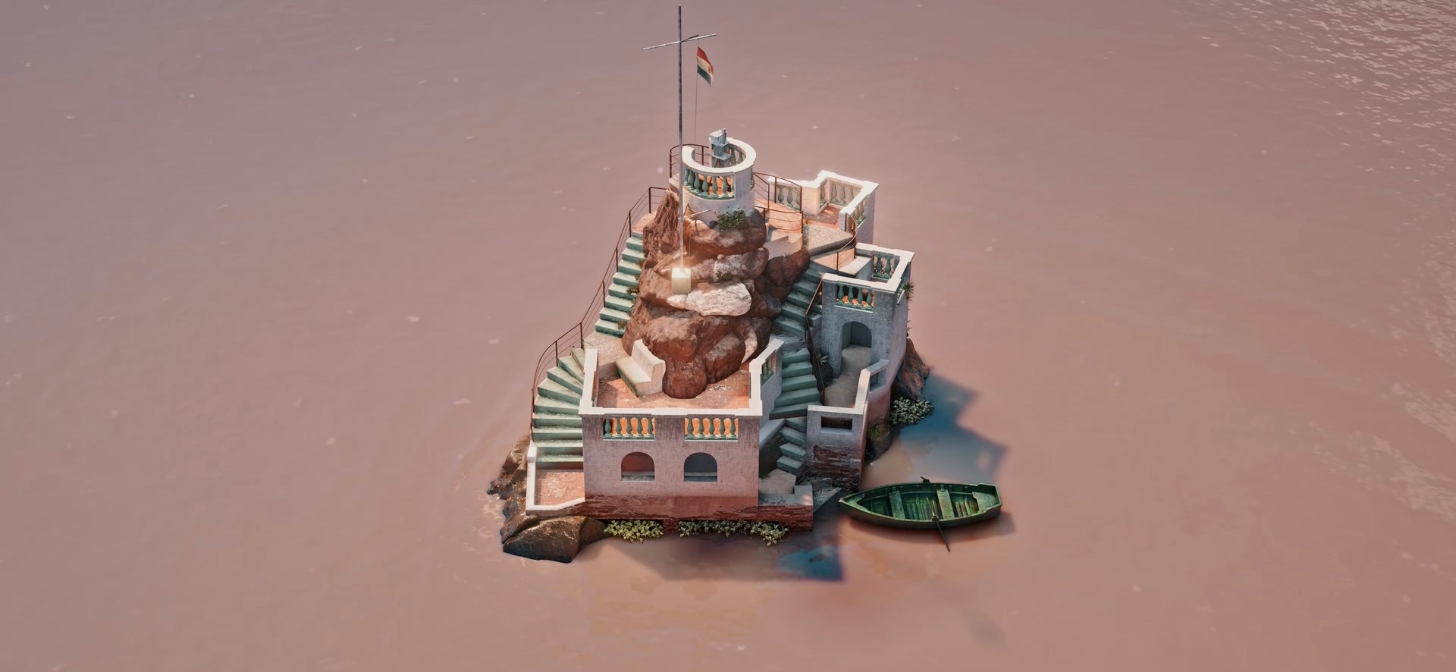
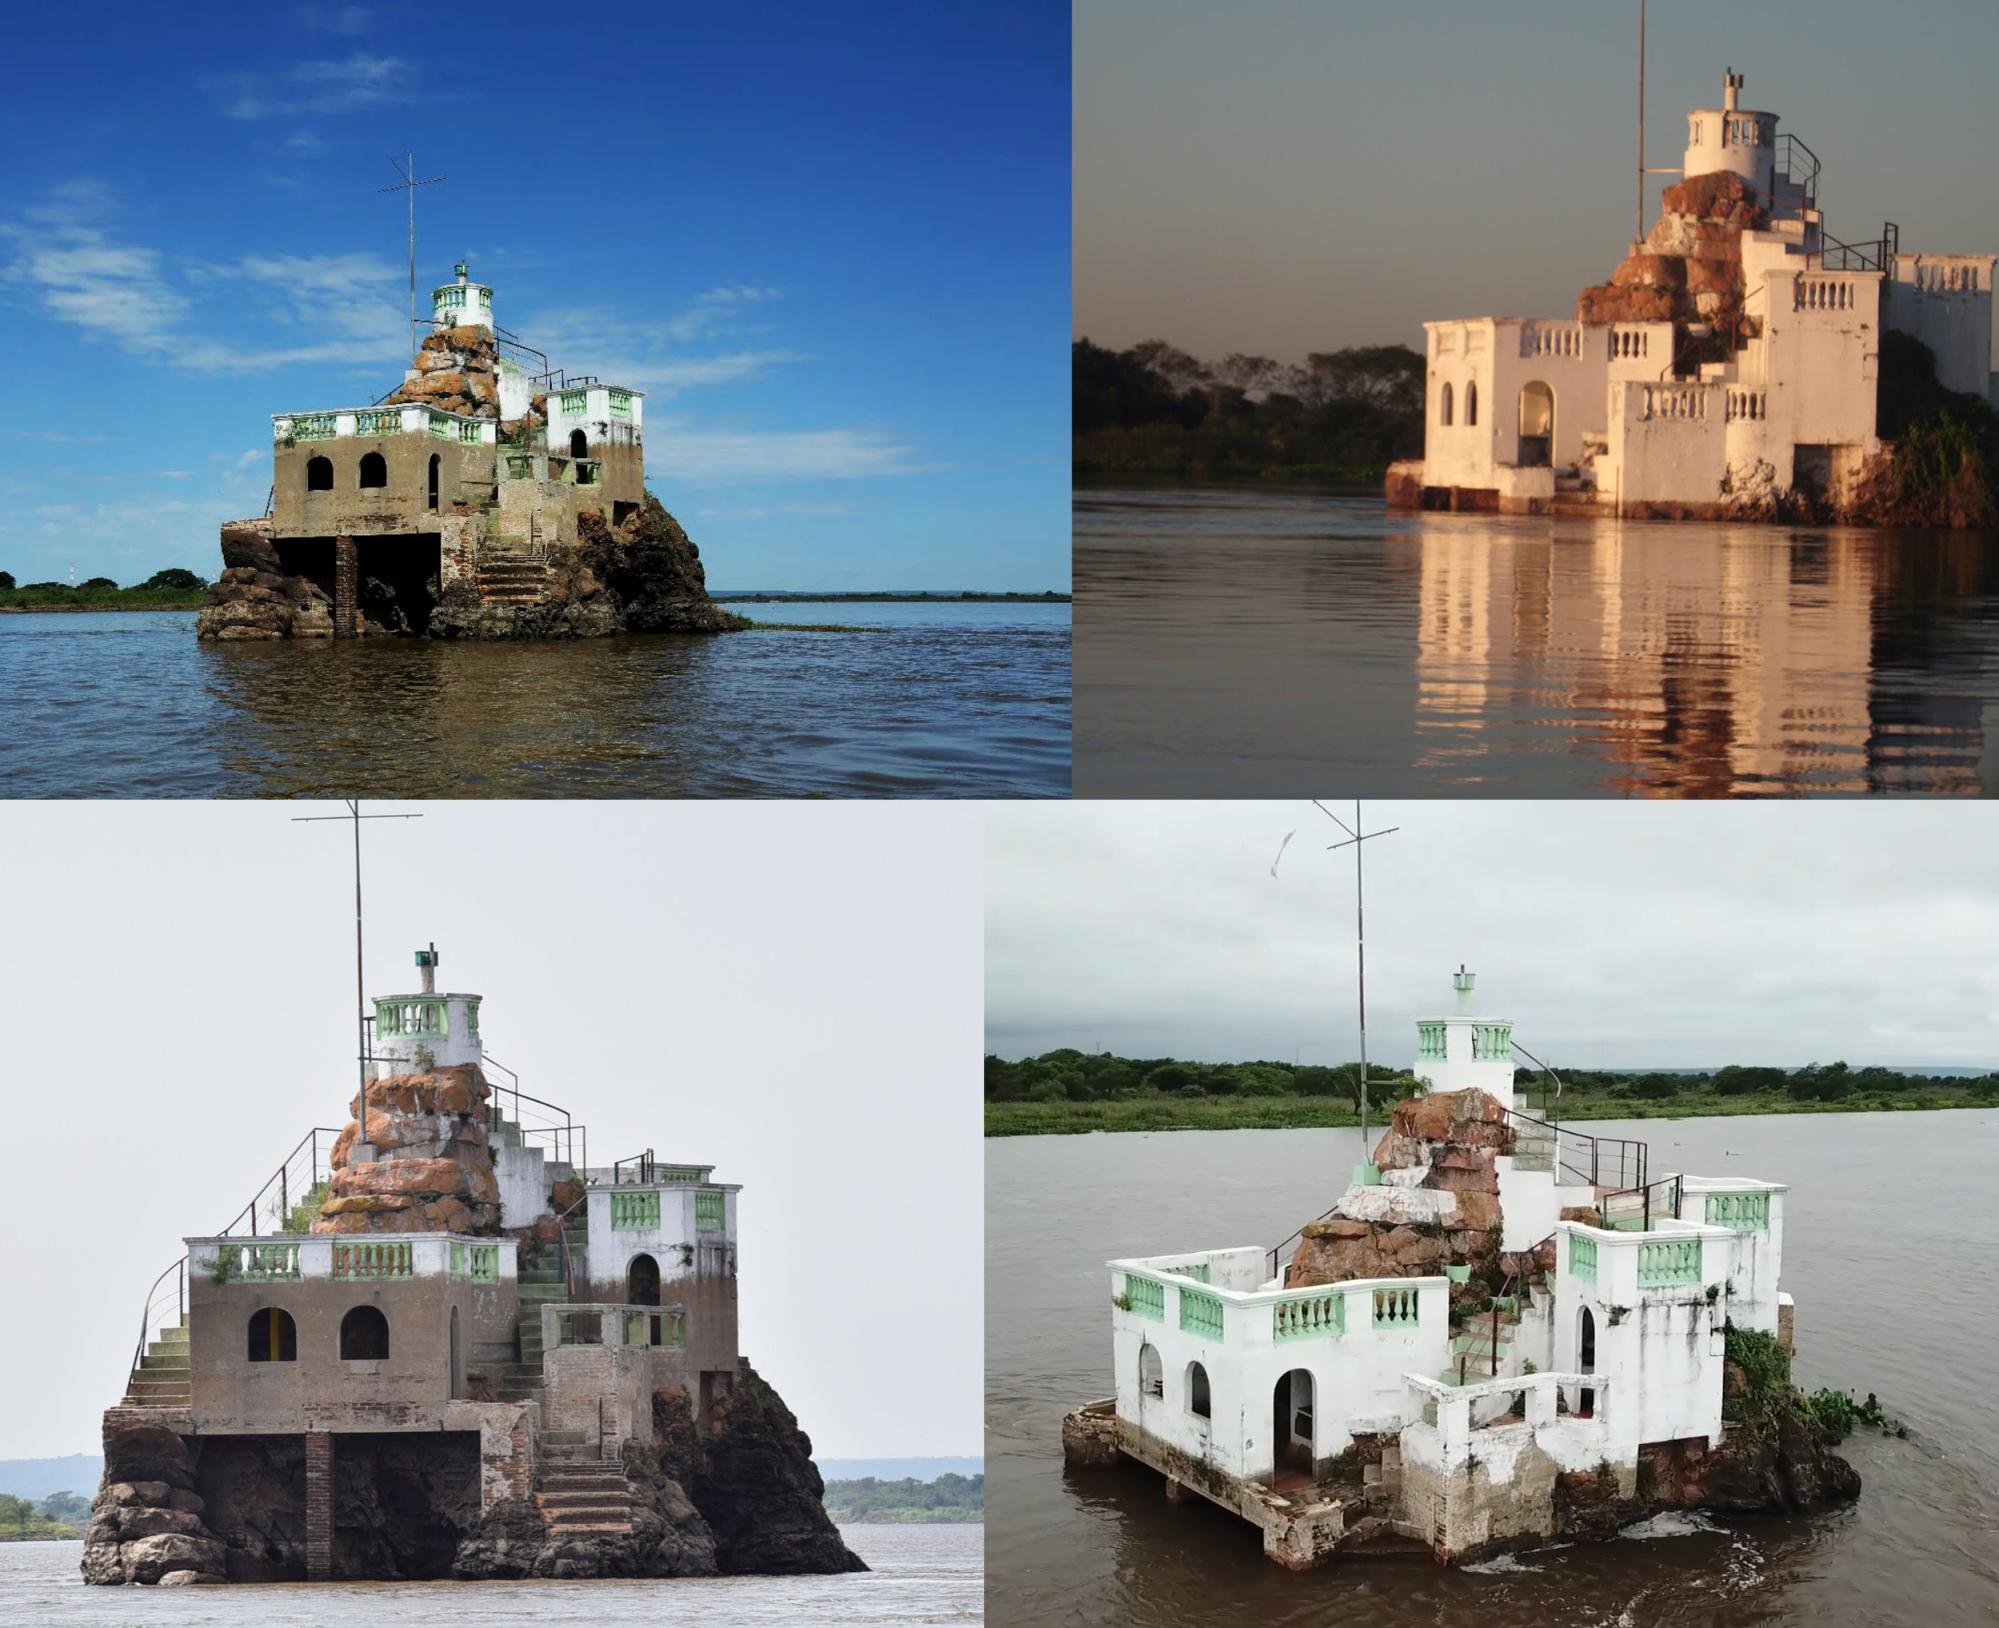
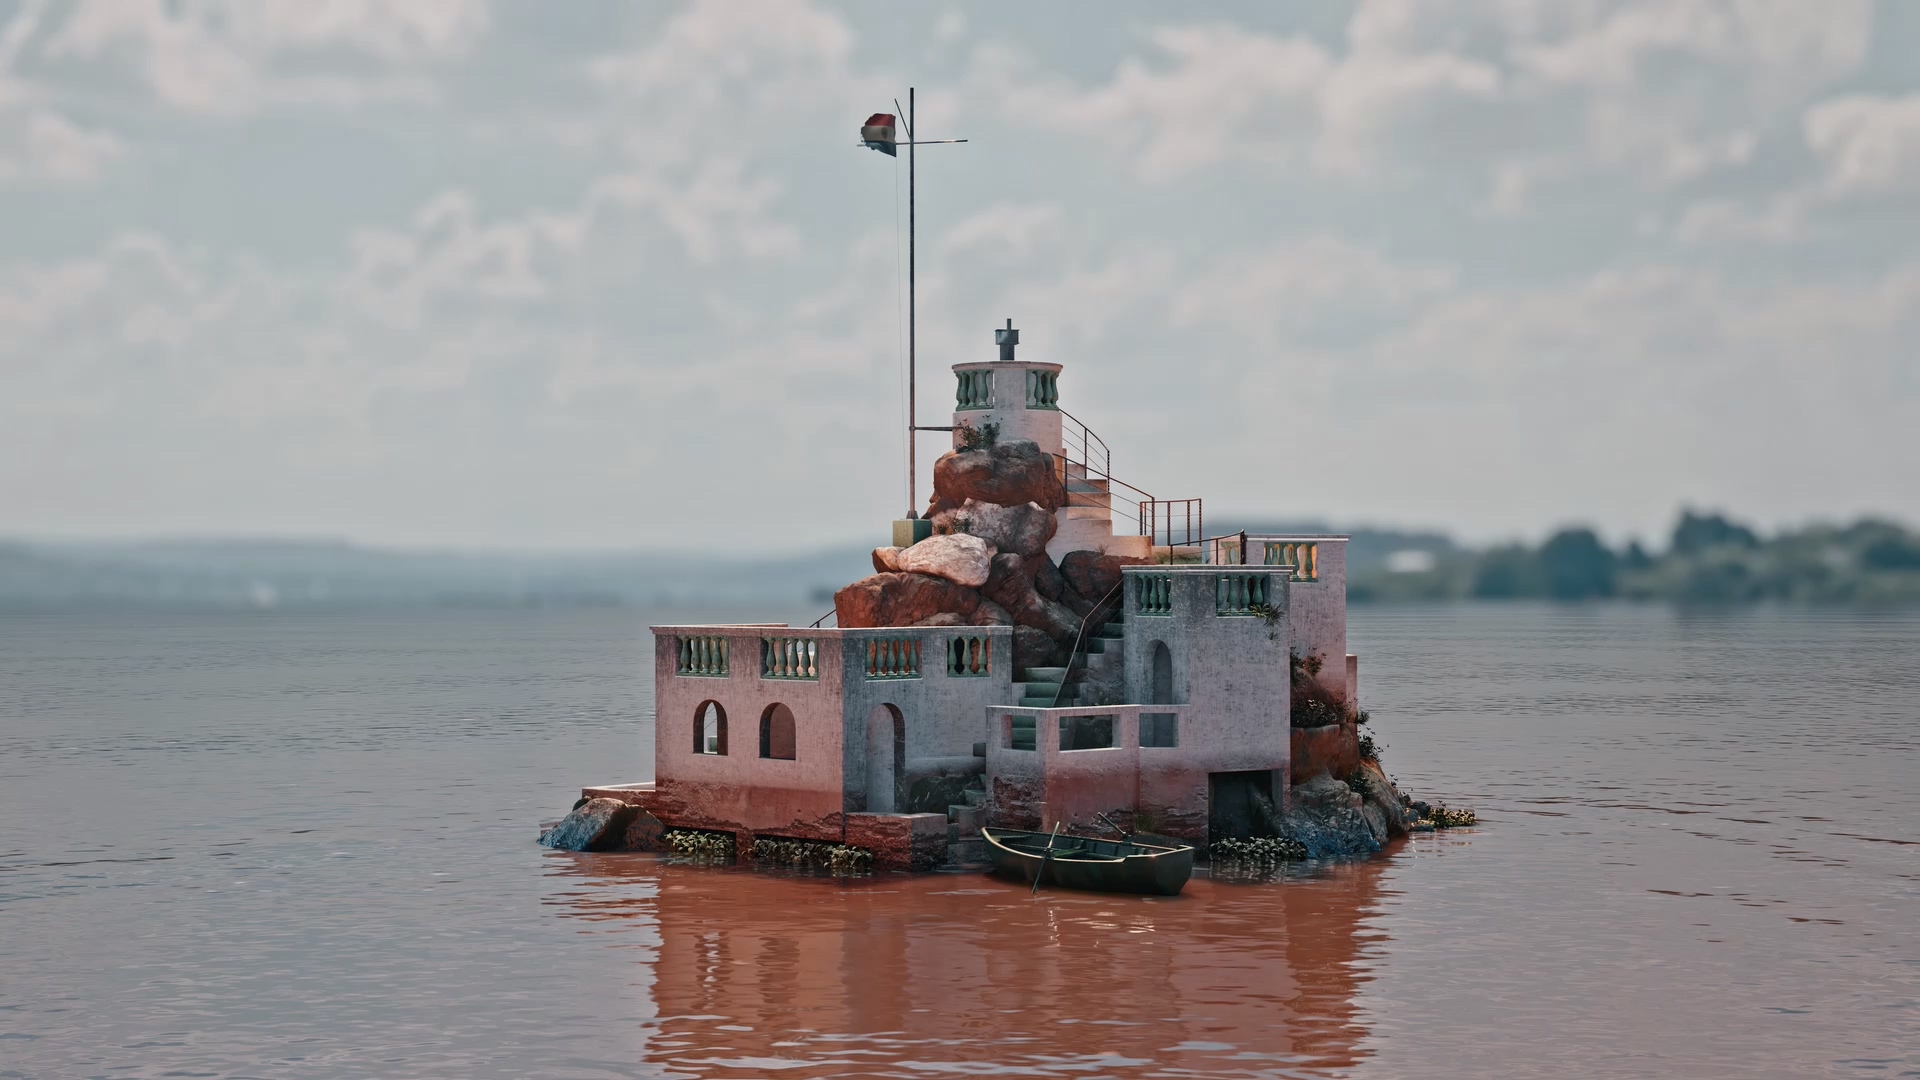
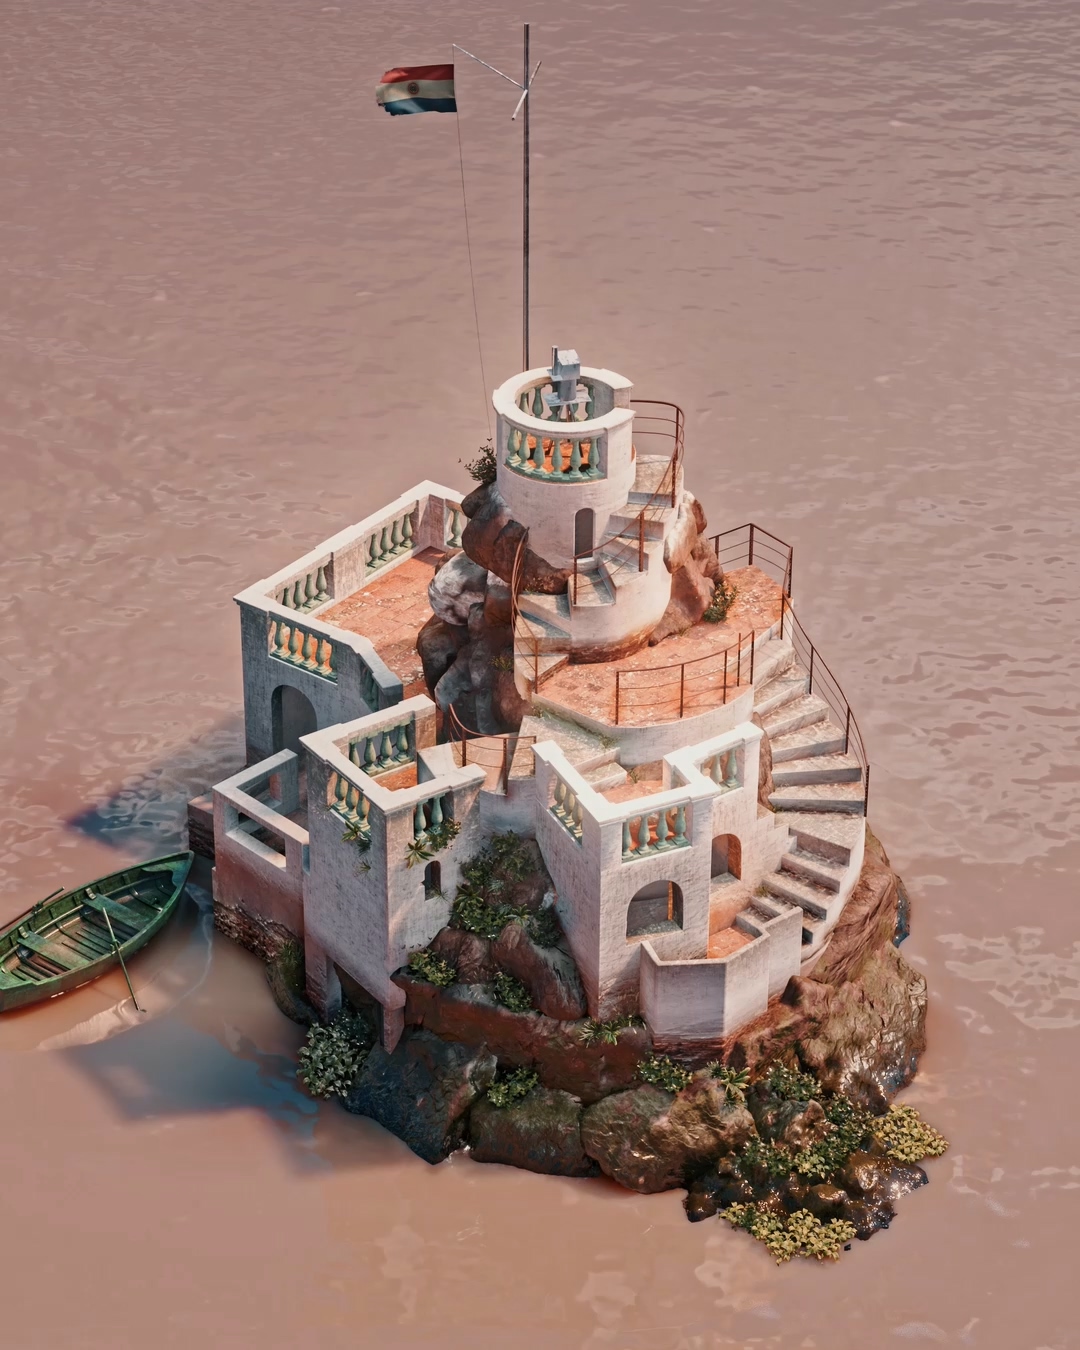
I always get inspired by local old places. One day I stumbled upon this Castle in the middle of the river and couldn’t help but start a new hobby project. I gathered all the visual references I could find. Unfortunately, I couldn’t find good photos of the place at low tide when the lower rocky structure is visible.
Photogrammetry
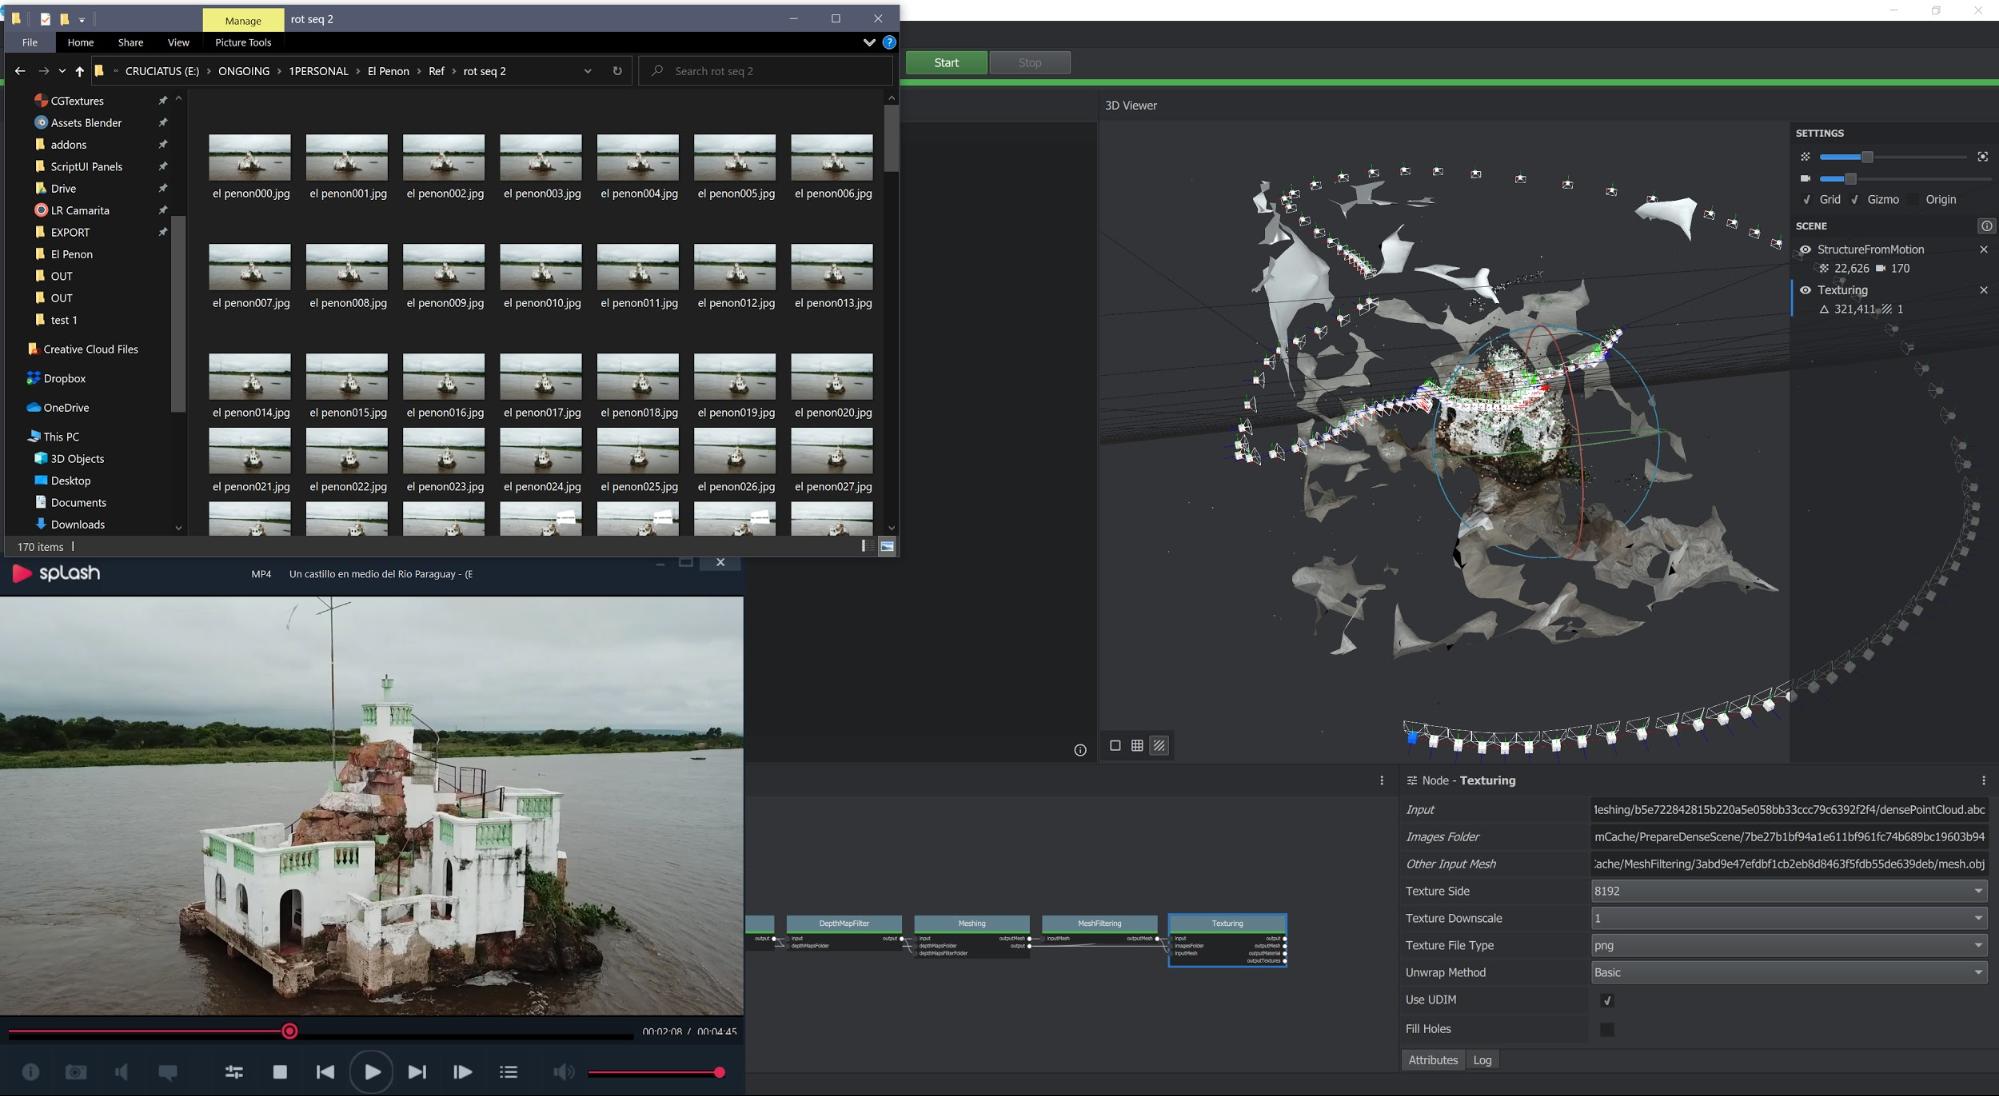
I found a drone shot of the place on YouTube that didn’t have edit cuts and was smoothly flown in a circular trajectory and at different heights. I extracted and selected around 170 frames and processed them with Meshroom. The model came out pretty decent but far from the quality needed for a final render. That pushed me towards trying to reconstruct the castle on top of the photogrammetry model.
Modeling
The crucial thing about this modeling process is that it would have been much more difficult to eyeball the whole scene without any kind of blueprint or flattened telephoto shots. It contains many occluded and difficult corners that make more sense in the scanned mesh than observed through the video. So I started blocking out the main forms without any fancy retopo tools, just cubes because the model could be way off at times. So the photogrammetry model made it simpler to get the big shapes and proportions and the video reference was useful for smaller details.

Texturing
The painting process was done almost entirely with triplanar projected textures masked by vertex colors. This method usually lets you skip the UV unwrapping and keep a fairly procedural workflow. Unfortunately, I had to apply all the booleans because they modify mesh component indices and the vertex colors get weird results.
The textures were all mixed with dirt, damage, and paint vertex masks. The leak mask was generated procedurally using the ‘Mask Tools’ add-on. The caustics section is an animated 4D Musgrave masked by the global Z position so it only appears near the surface of the water.
All the textures are from textures.com and I used crazybump to generate their respective normal maps.

Water shader
The water shader took quite a lot of experimentation and is a bunch of noises distorting each other to simulate water current. There are 2 water shaders, one for the small block, and one for the bigger water body that extends much further. They only differ in the waves texture explained below.
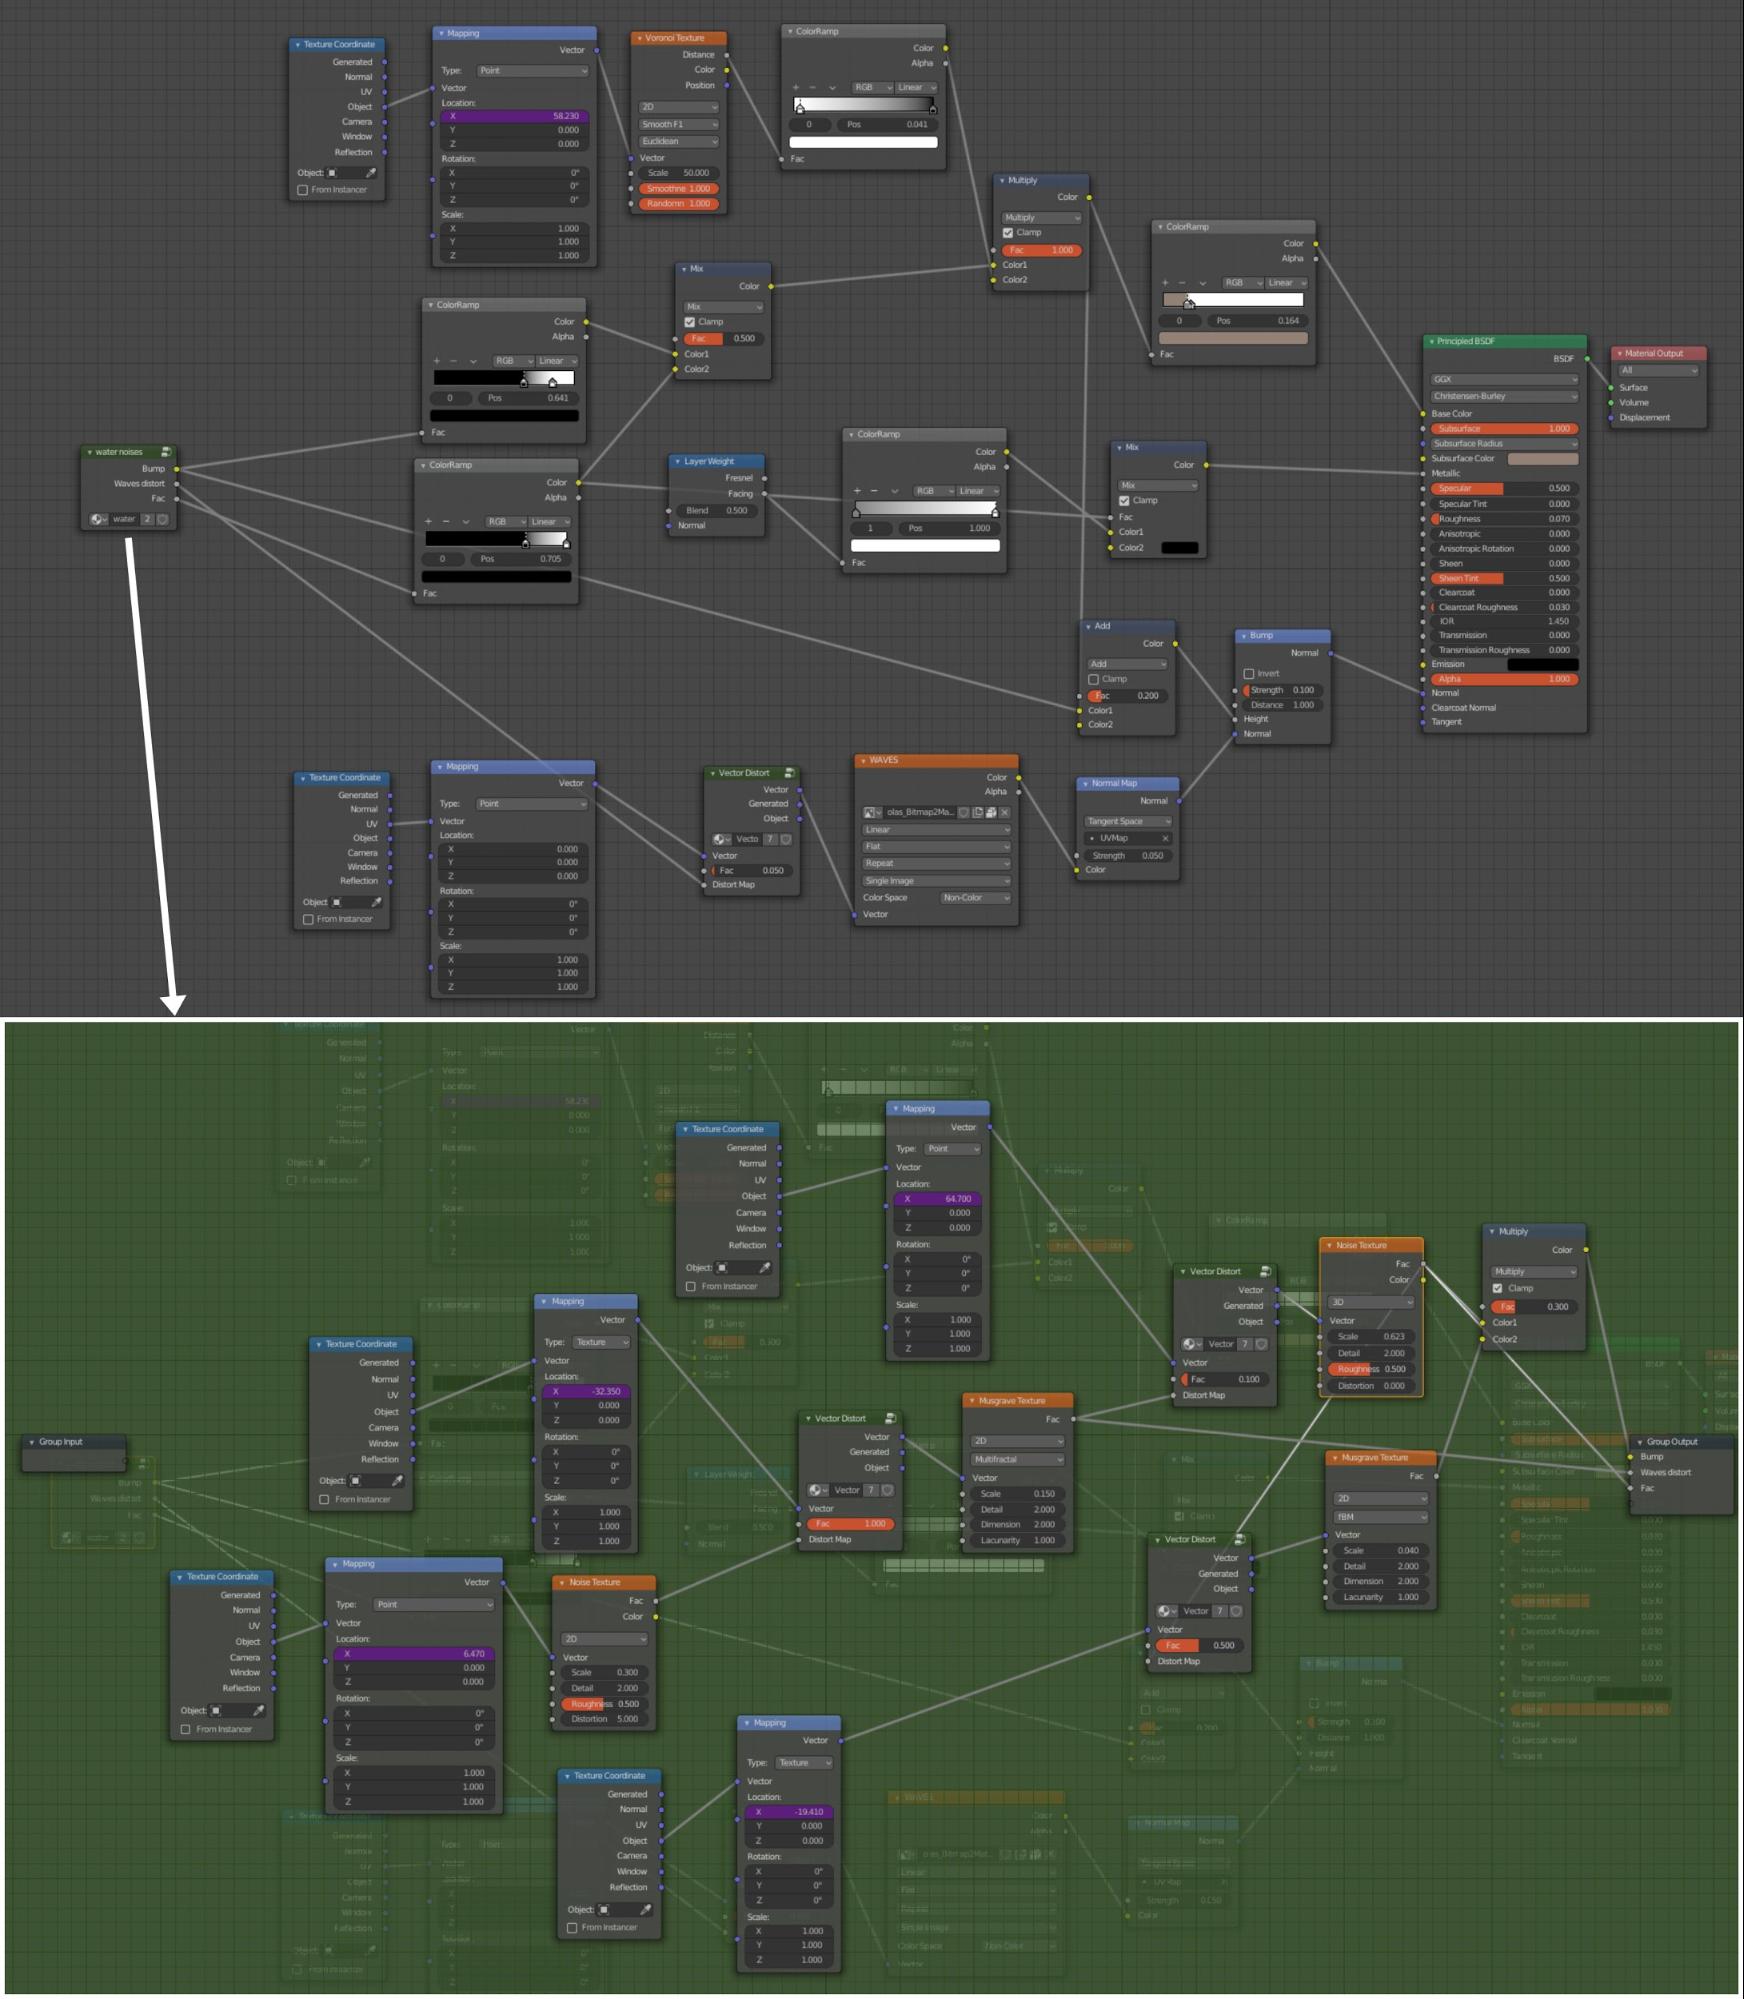
Lastly, I painted the collision waves height map using Affinity Photo’s liquify tool and generated the normal map for them with Crazy Bump. These waves were later distorted by an animated Musgrave node so that they don’t stay still. It’s not perfect, but it was better than nothing.
Lighting
For the lighting part, I supplemented an irradiance volume with soft area lights, mostly with very warm colors, to simulate light bounces and achieve more realism. I planned from the very beginning to use EEVEE for the entire process.

Render
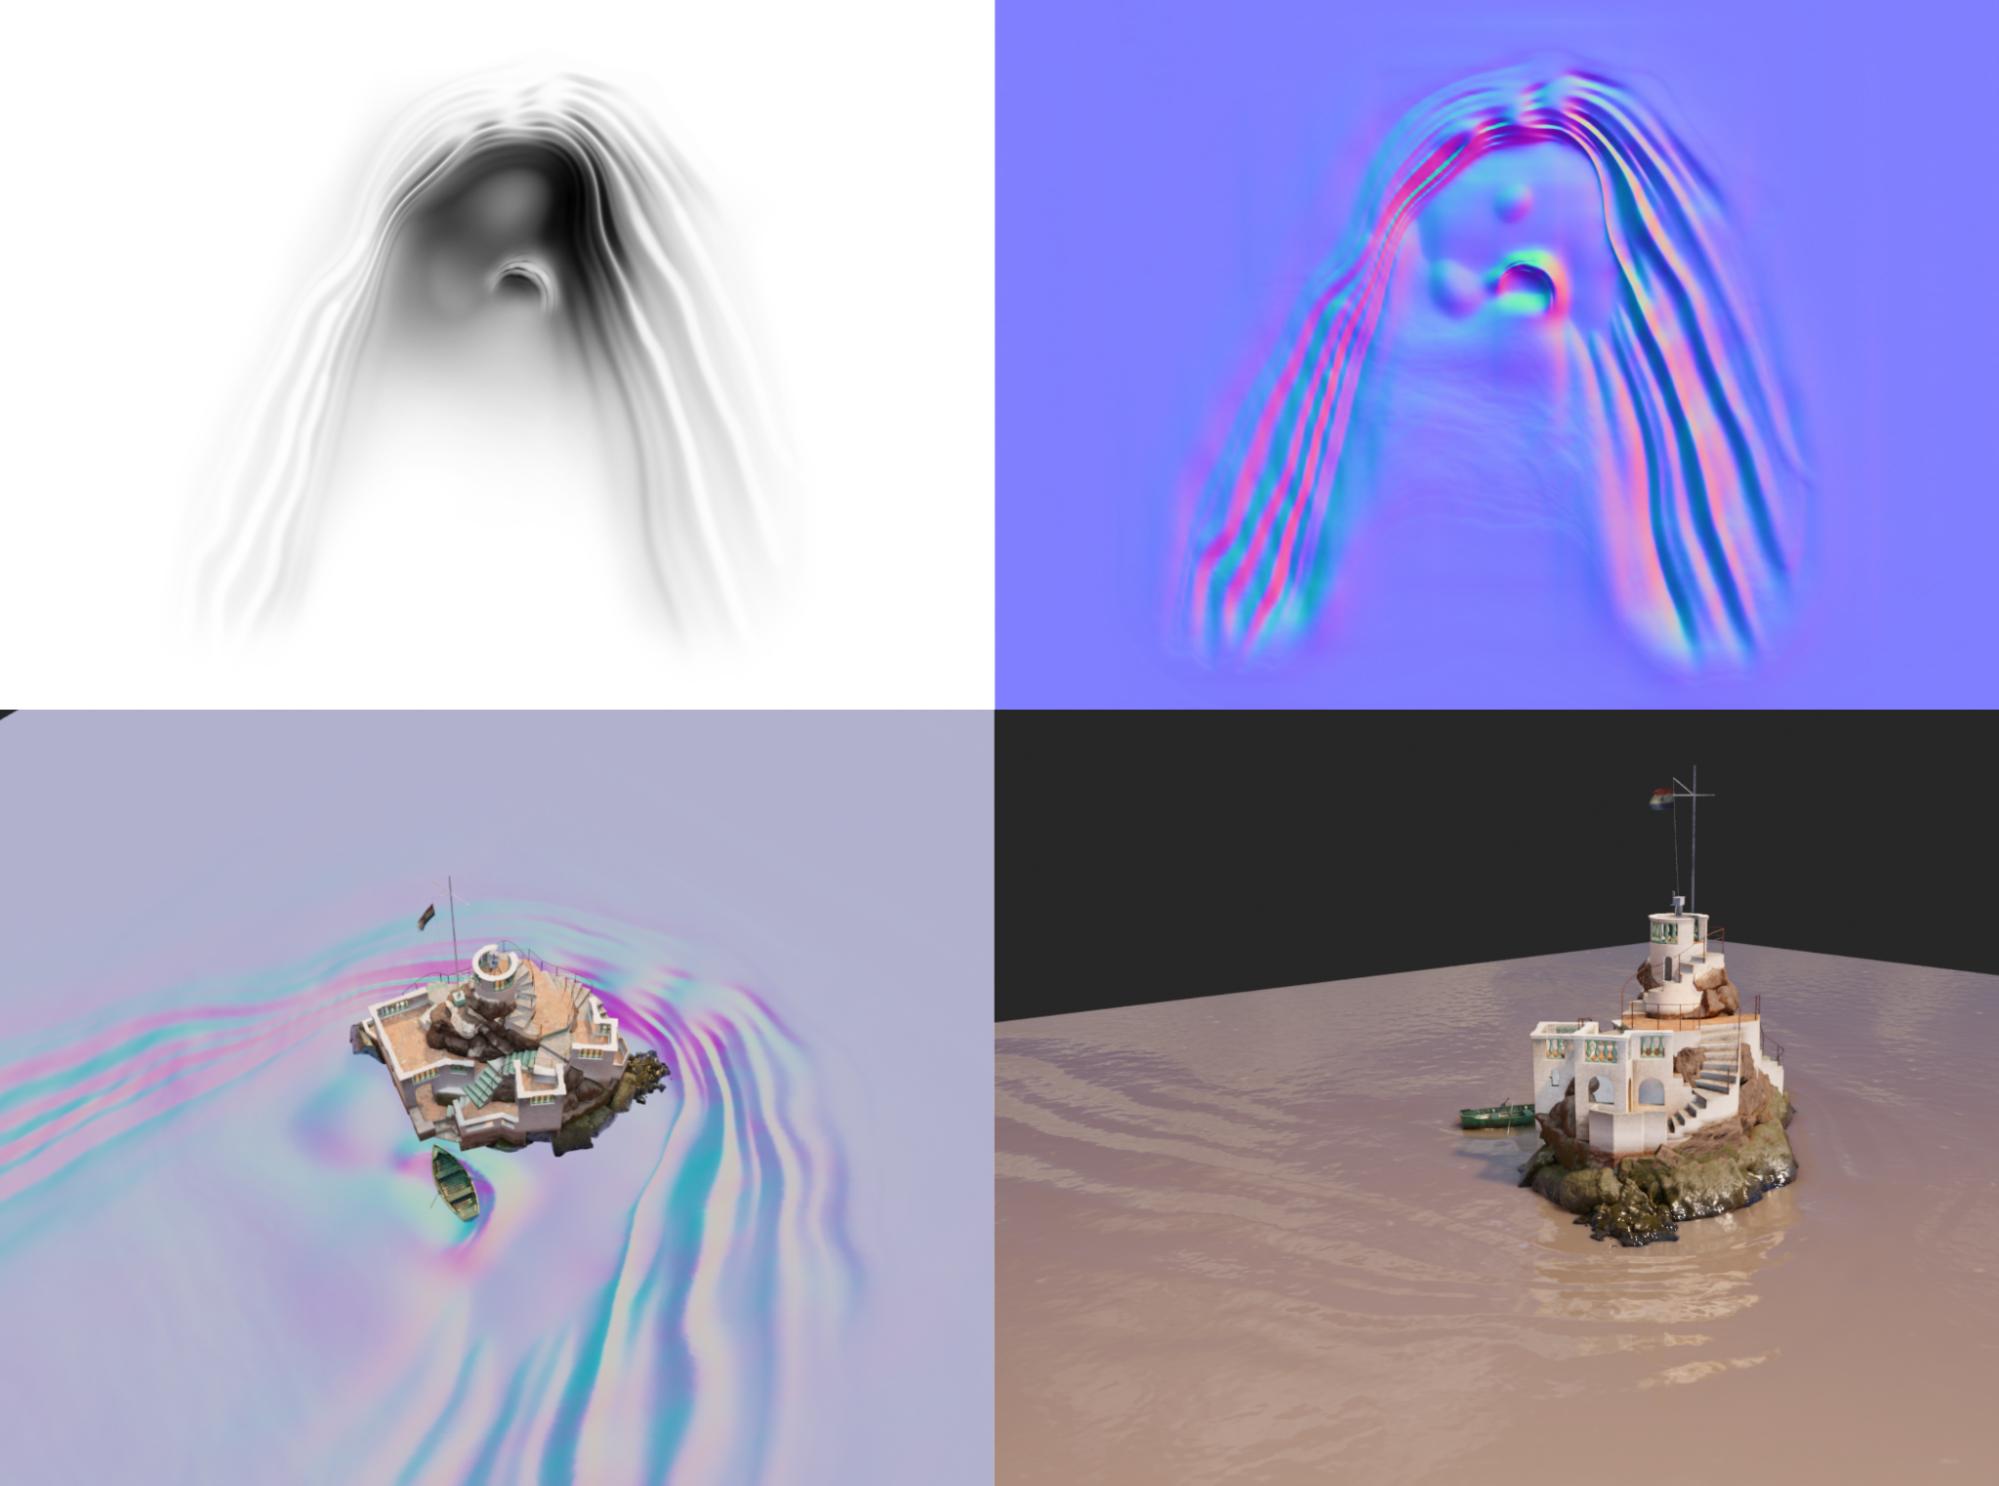
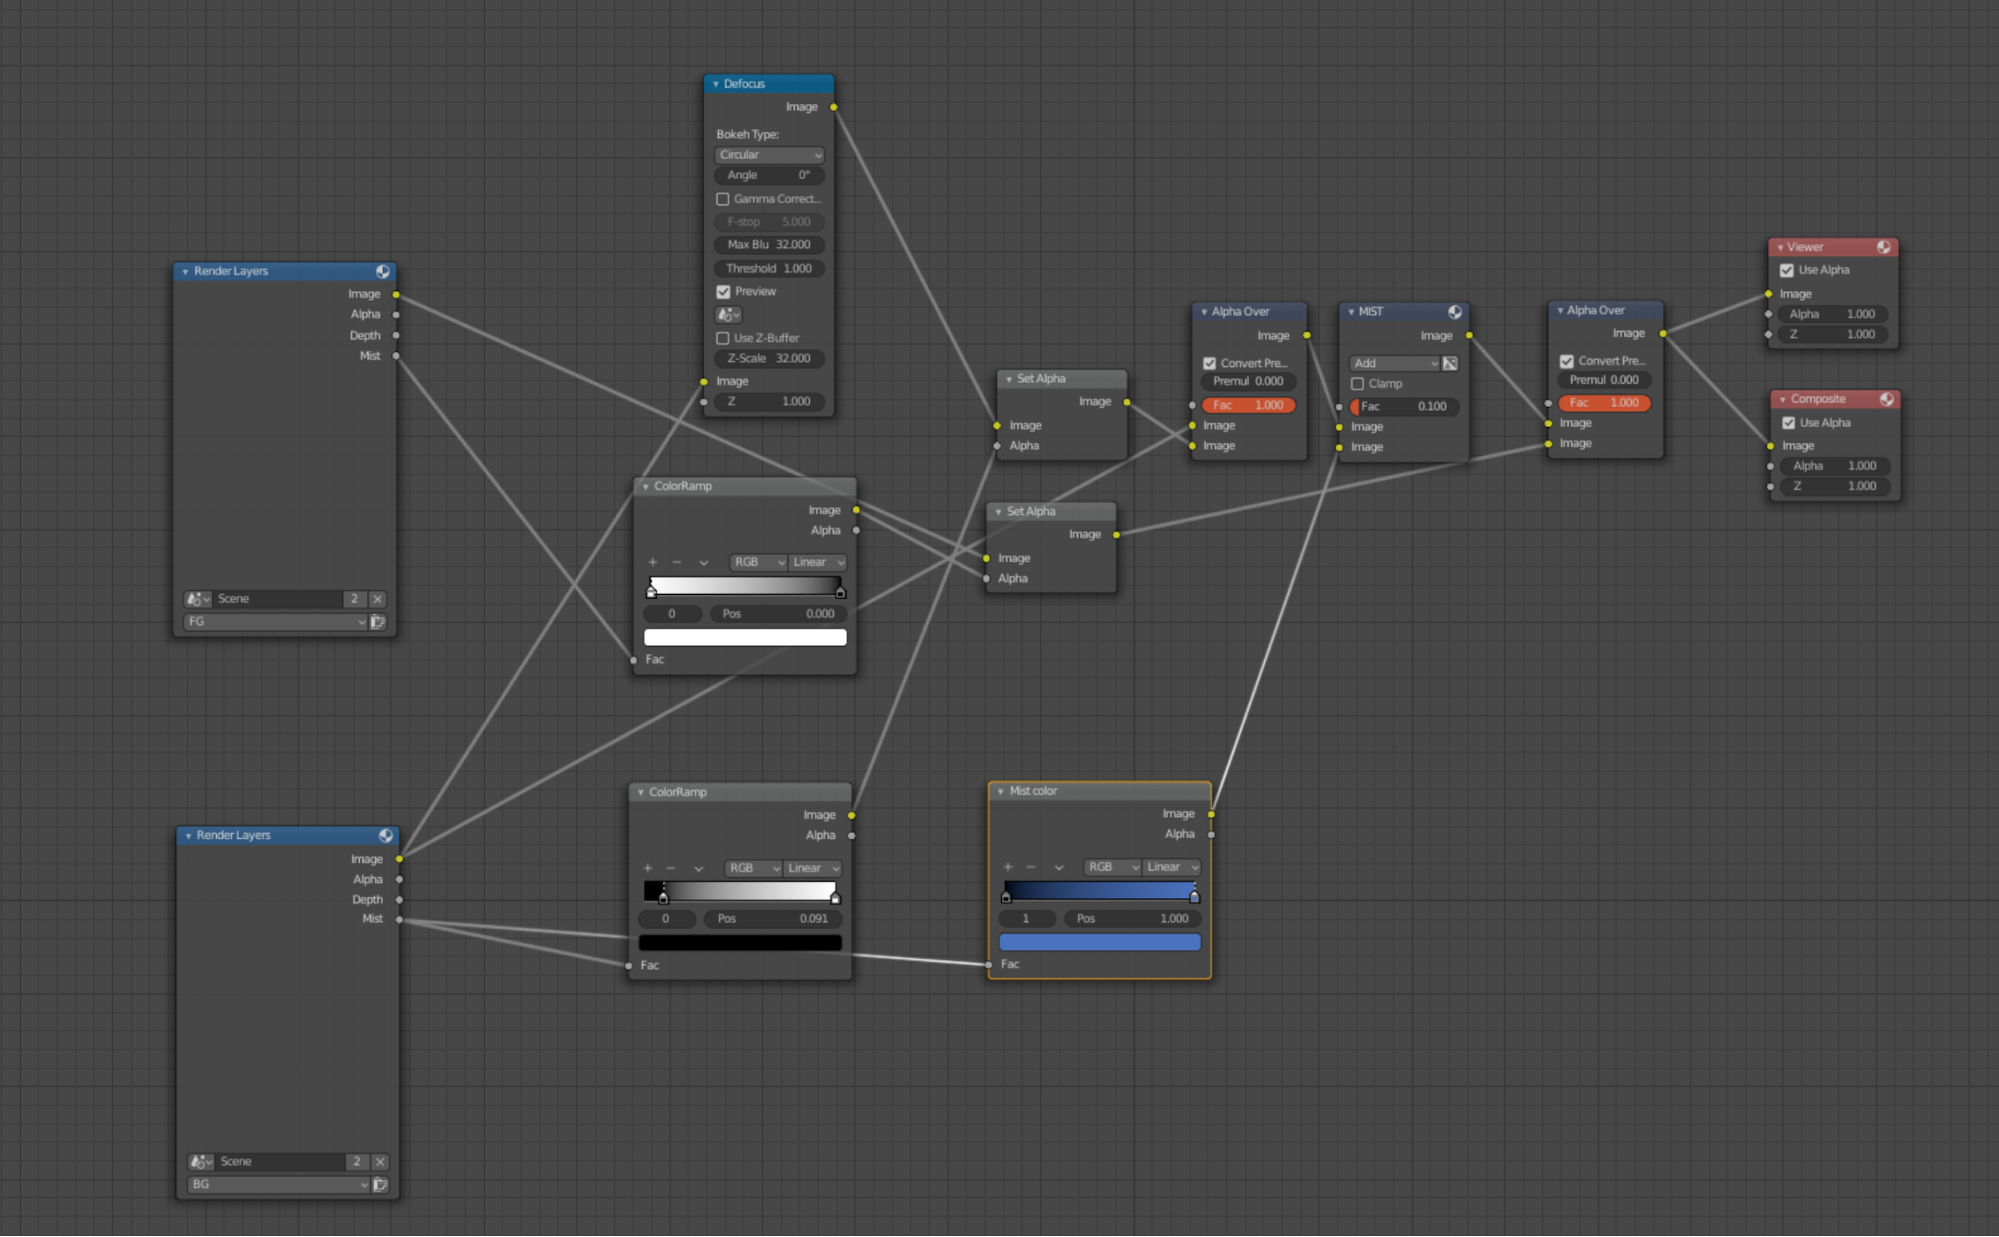
For the final compositing, I rendered in 2 separate render layers. One for all the 3D stuff in the main render layer, and the HDRI background in another layer, so it could be blurred freely. The defocus node worked better this way, producing better borders between focused and defocused zones.
The mist pass adds a bluish tint for a better sense of scene scale.
Render times varied from 30 to 45 seconds at 5760 x 3240px. I wanted to go for 8k but it made my GTX 1080’s 8gb memory completely full and ended up taking ages to render, even via command line.
Color grading and sound was later done in DaVinci Resolve.

Dual GPU and EEVEE
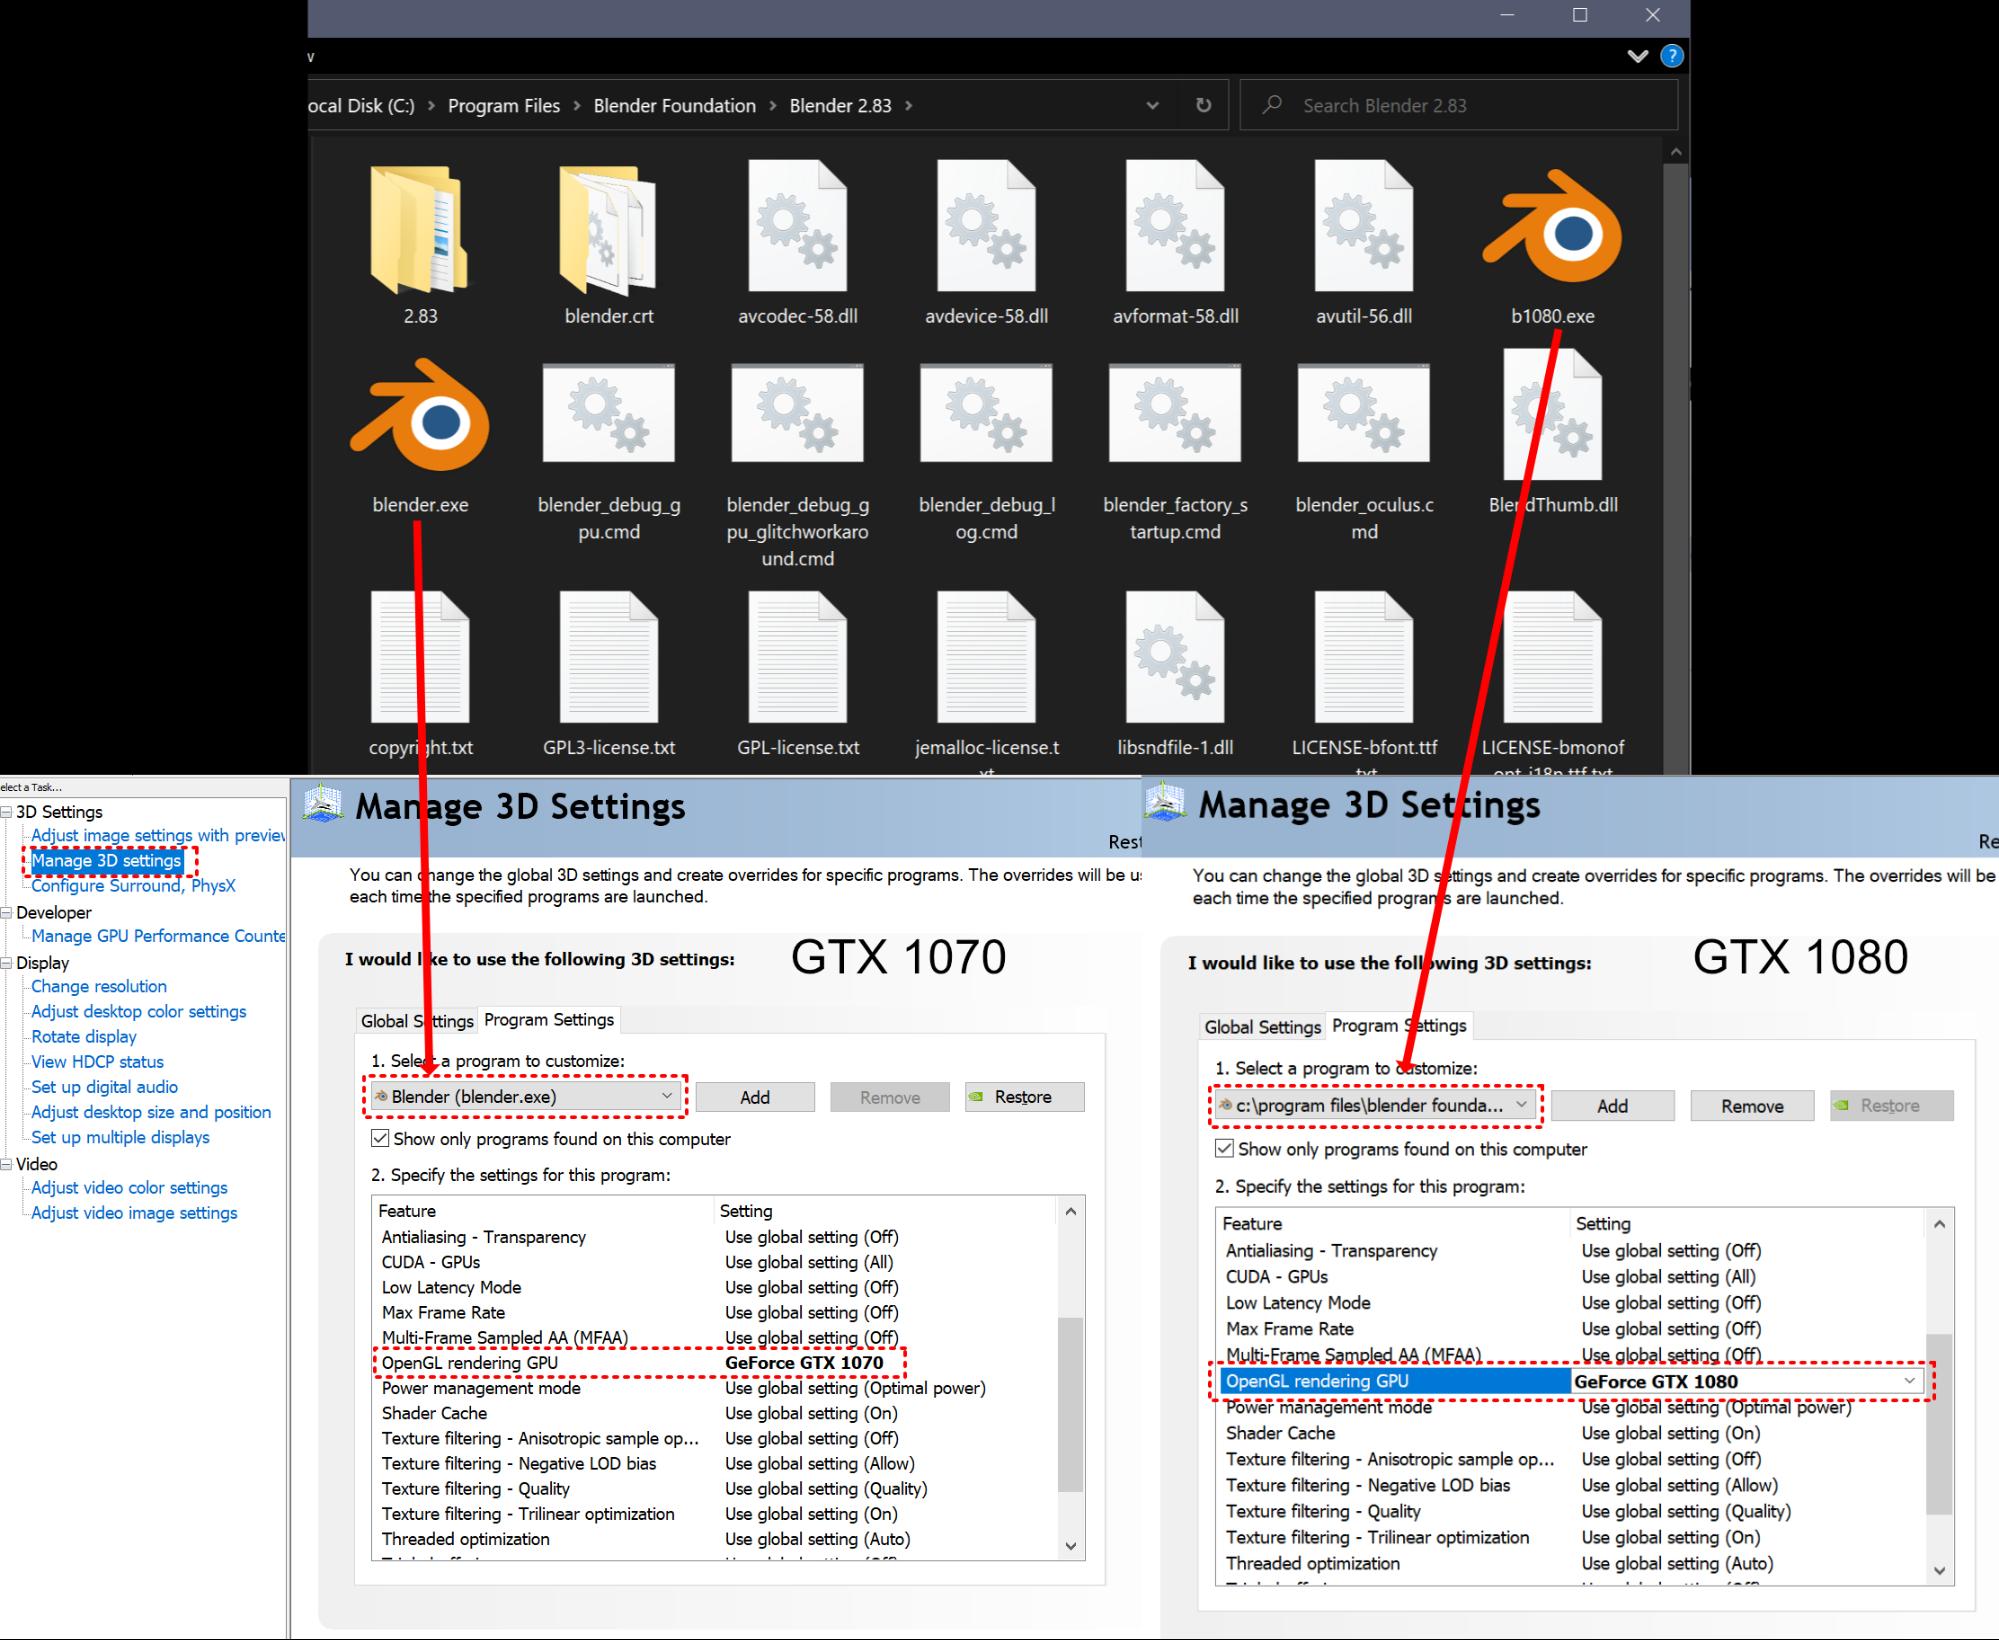
Lastly, here’s how I make the most of dual GPUs and EEVEE. I made a copy of the Blender executable and renamed it to b1080.exe. Then I created 2 separate profiles in the Nvidia control panel for each exe. I only changed ‘OpenGL rendering GPU’ so that each instance used a different GPU. It didn’t matter where the Blender executables were located—if the file names match, Nvidia will assign the profile. This way it only has to be configured once and it works with the official and experimental builds located in the downloads folder. You have to make the copy and rename them for each Blender installation though.
I combined this with B-Renderon, a render manager tool for Blender. This way I could get some stuff done while the 2nd GPU was rendering.
Hope you like it!
About the Author
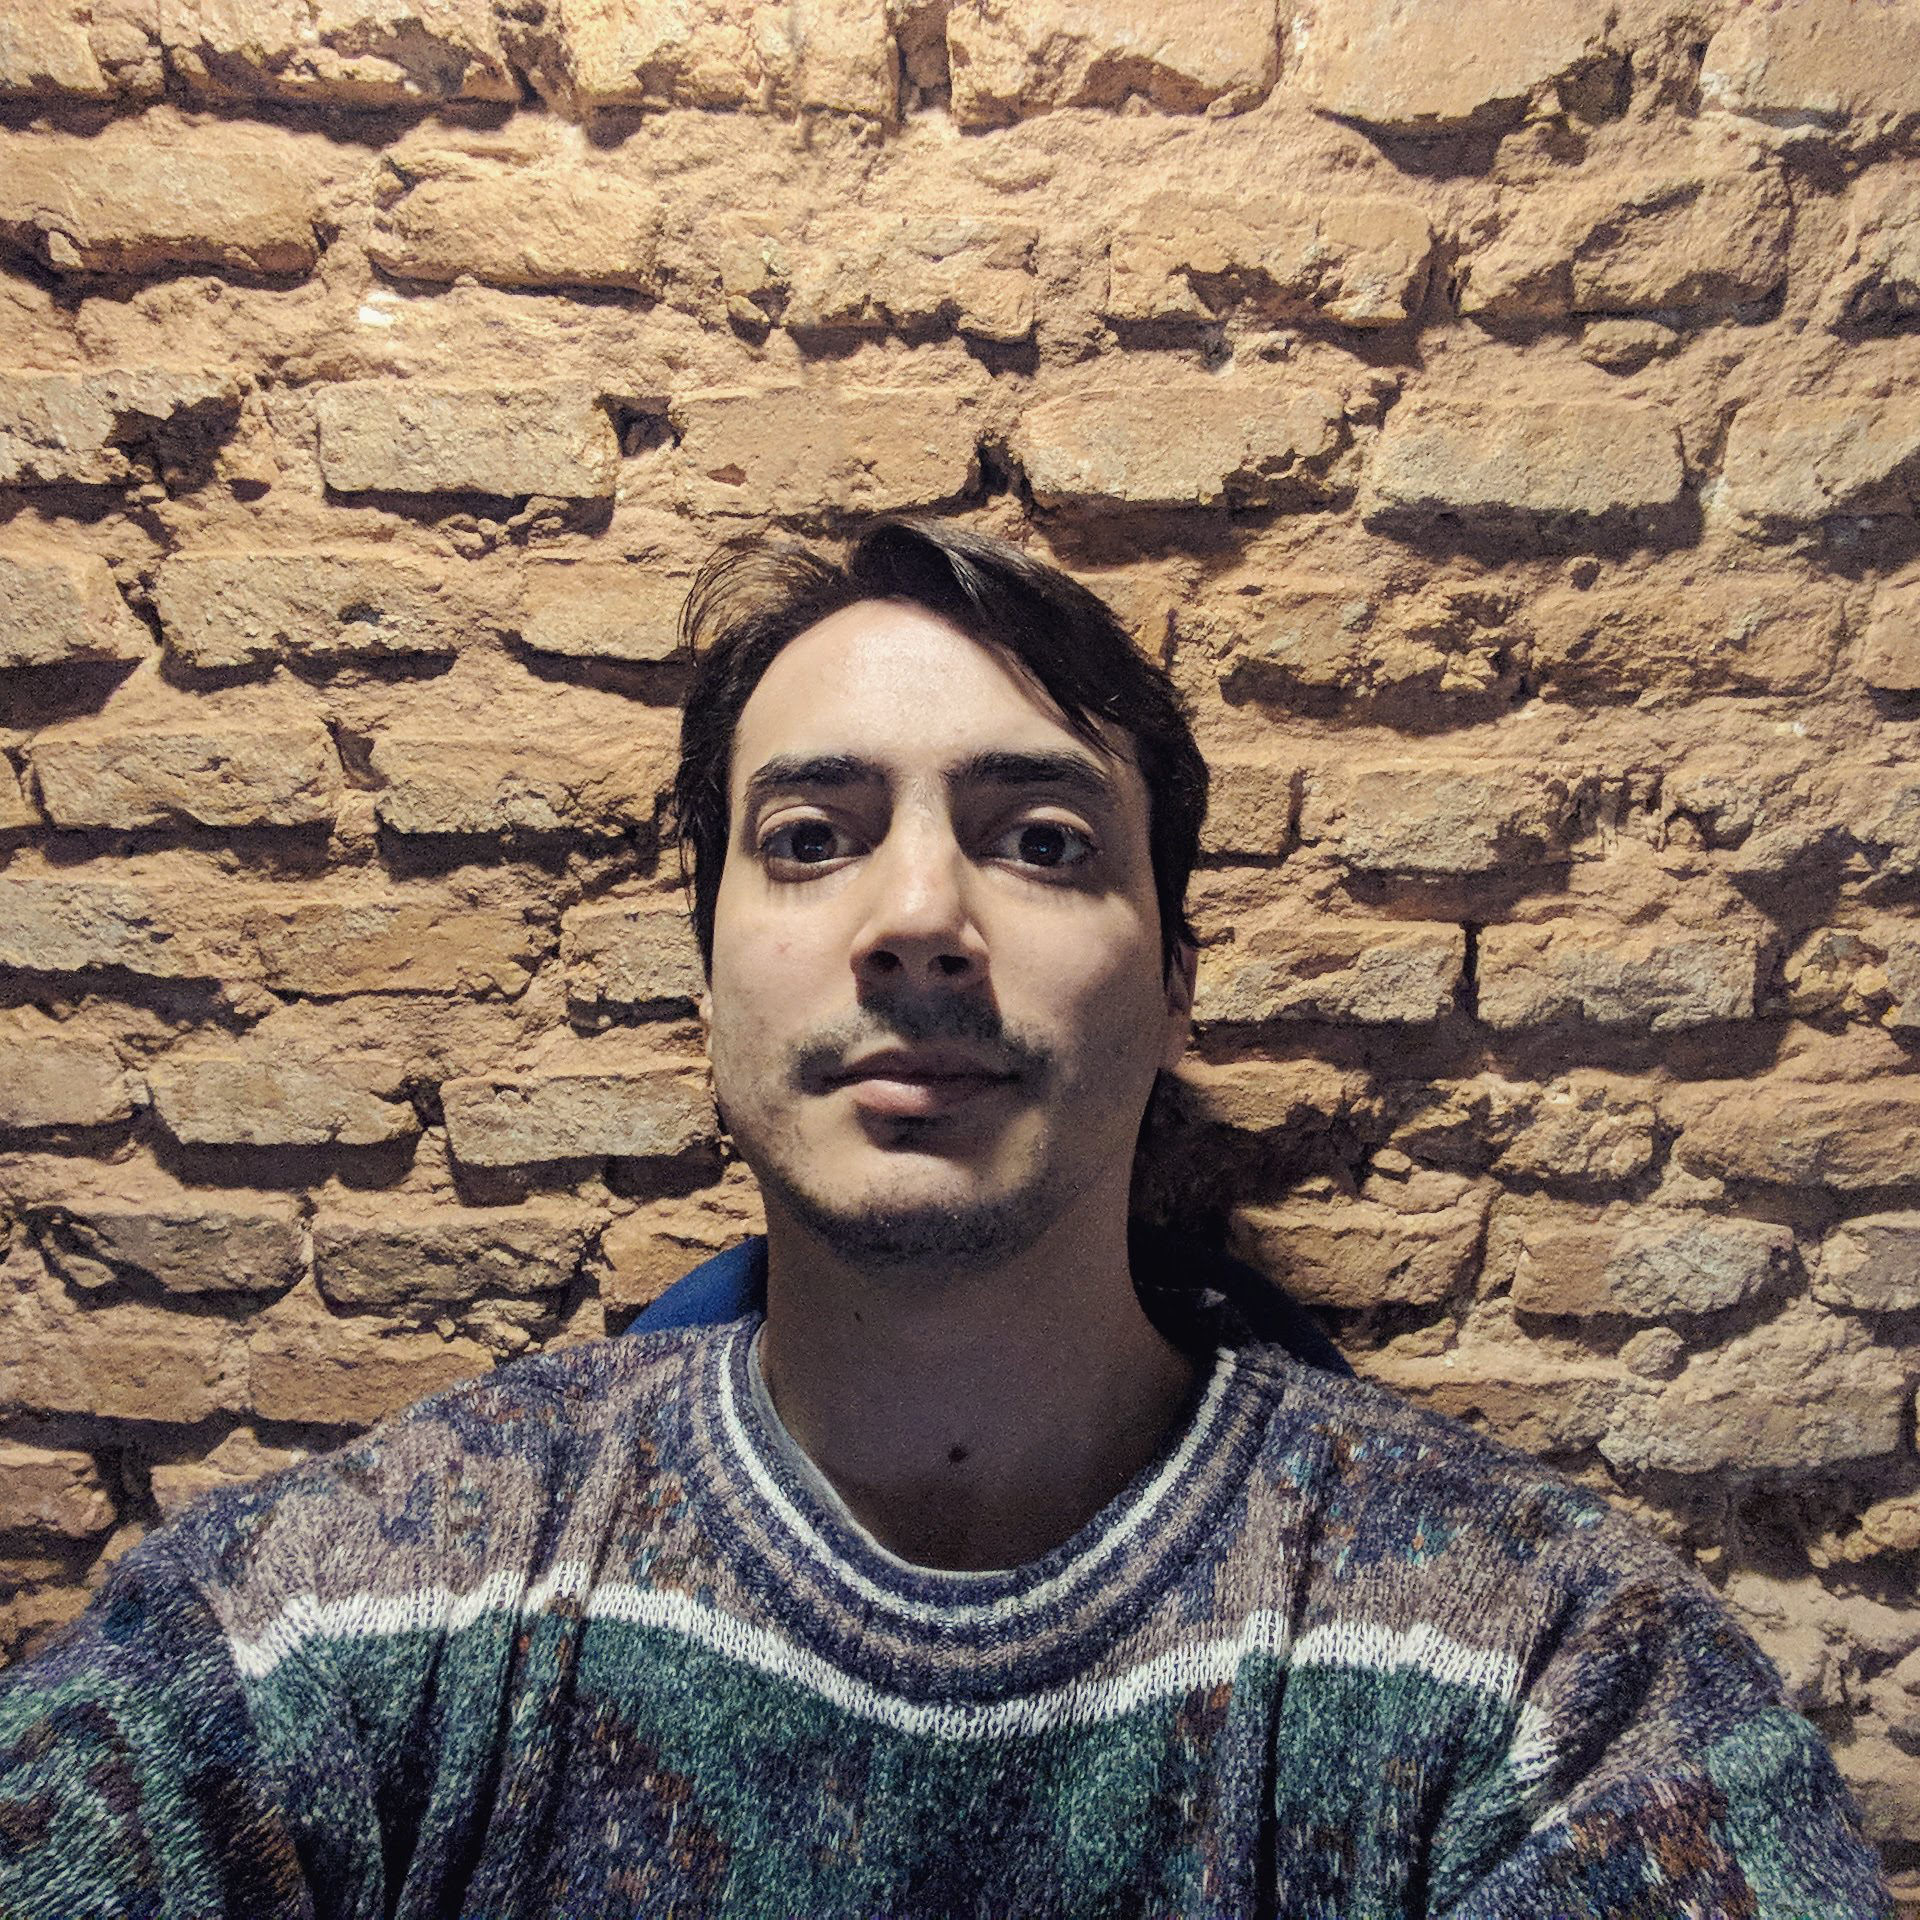 Felipe Torrents, 3D artist working on science-related explainers. I love creating 3D environments, taking photos, and playing drums in my free time.


