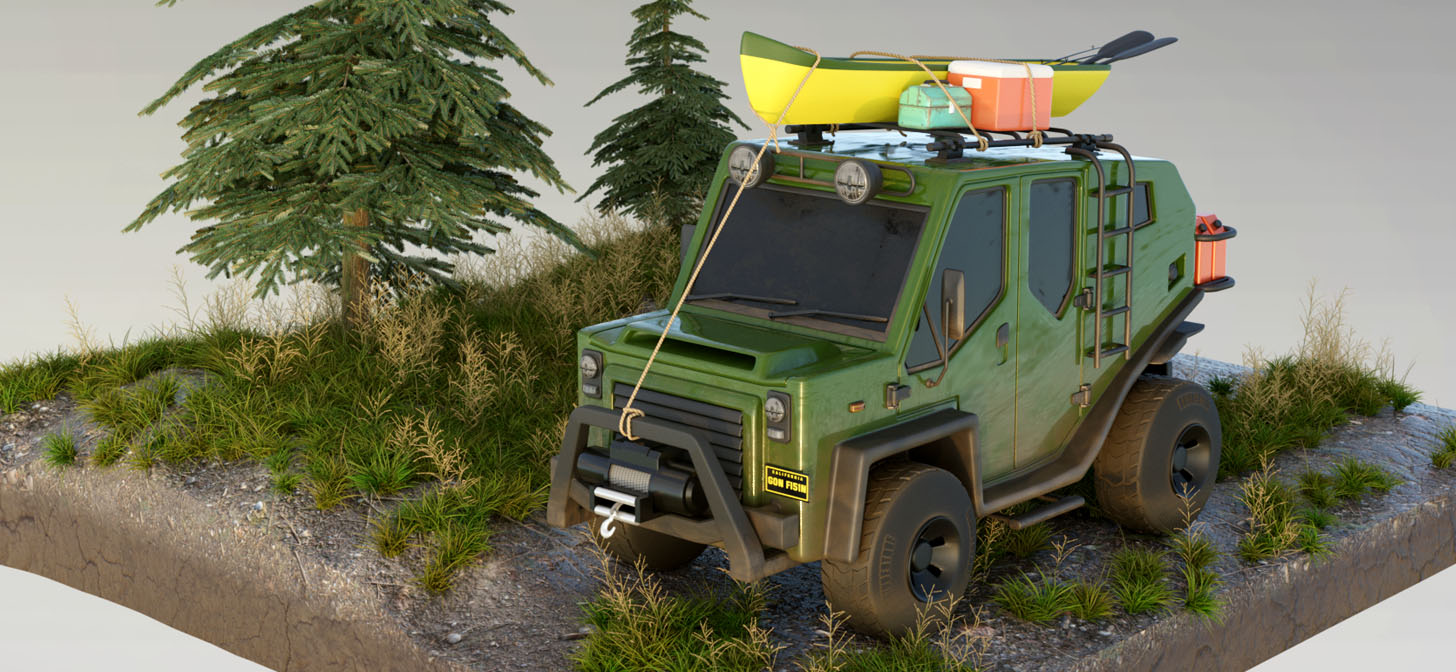
Behind the Scenes: Adventure Truck
Who I am
My name is Jared Mondragon. I am a 26-year-old digital artist working in southern California for the past six years. I was drawn to art at a very young age, originally beginning with traditional mediums and gradually moving to the digital arts. 3D modeling has been my obsession for the past five years and I am really enjoying learning more about it every day. I specialize in mainly Maya, Blender, and Fusion 360.
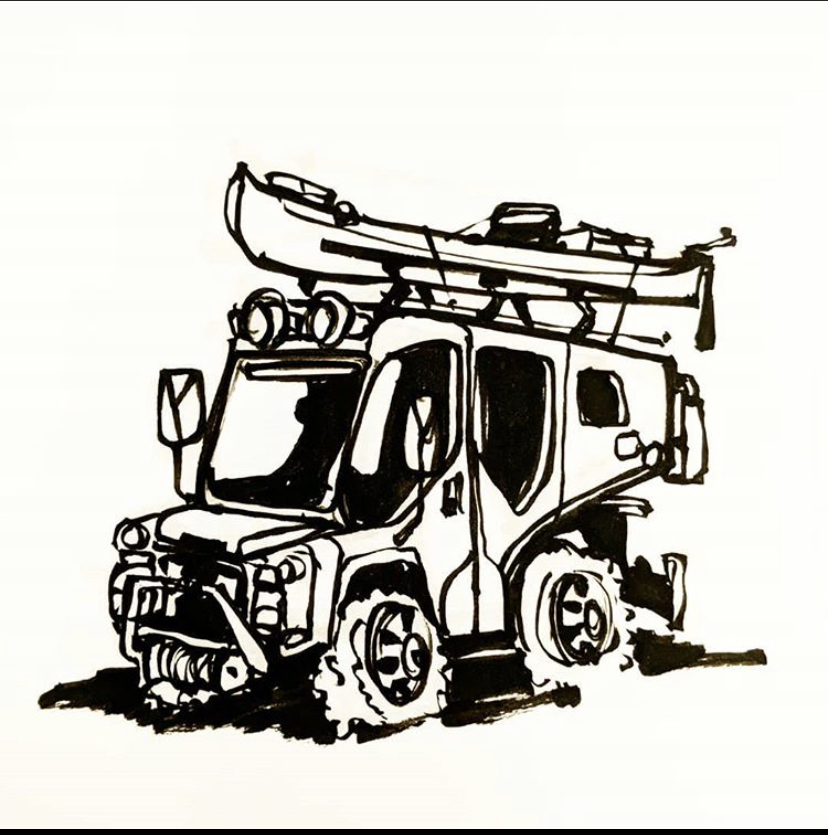
The Adventure Truck project
This project was inspired by the work of @phimonkey on Instagram. He does really amazing sketches of stylized vehicles and I wanted to take a crack at converting one to 3D.
This leads me to my first step before I start any project: Reference.
Reference is key to the success of any project. Your brain can only remember so much, so having reference and using it wisely allows you to become inspired and to have a goal in mind rather than just making up things as you go. A loose sketch or a collection of images will help guide you while working on your design.
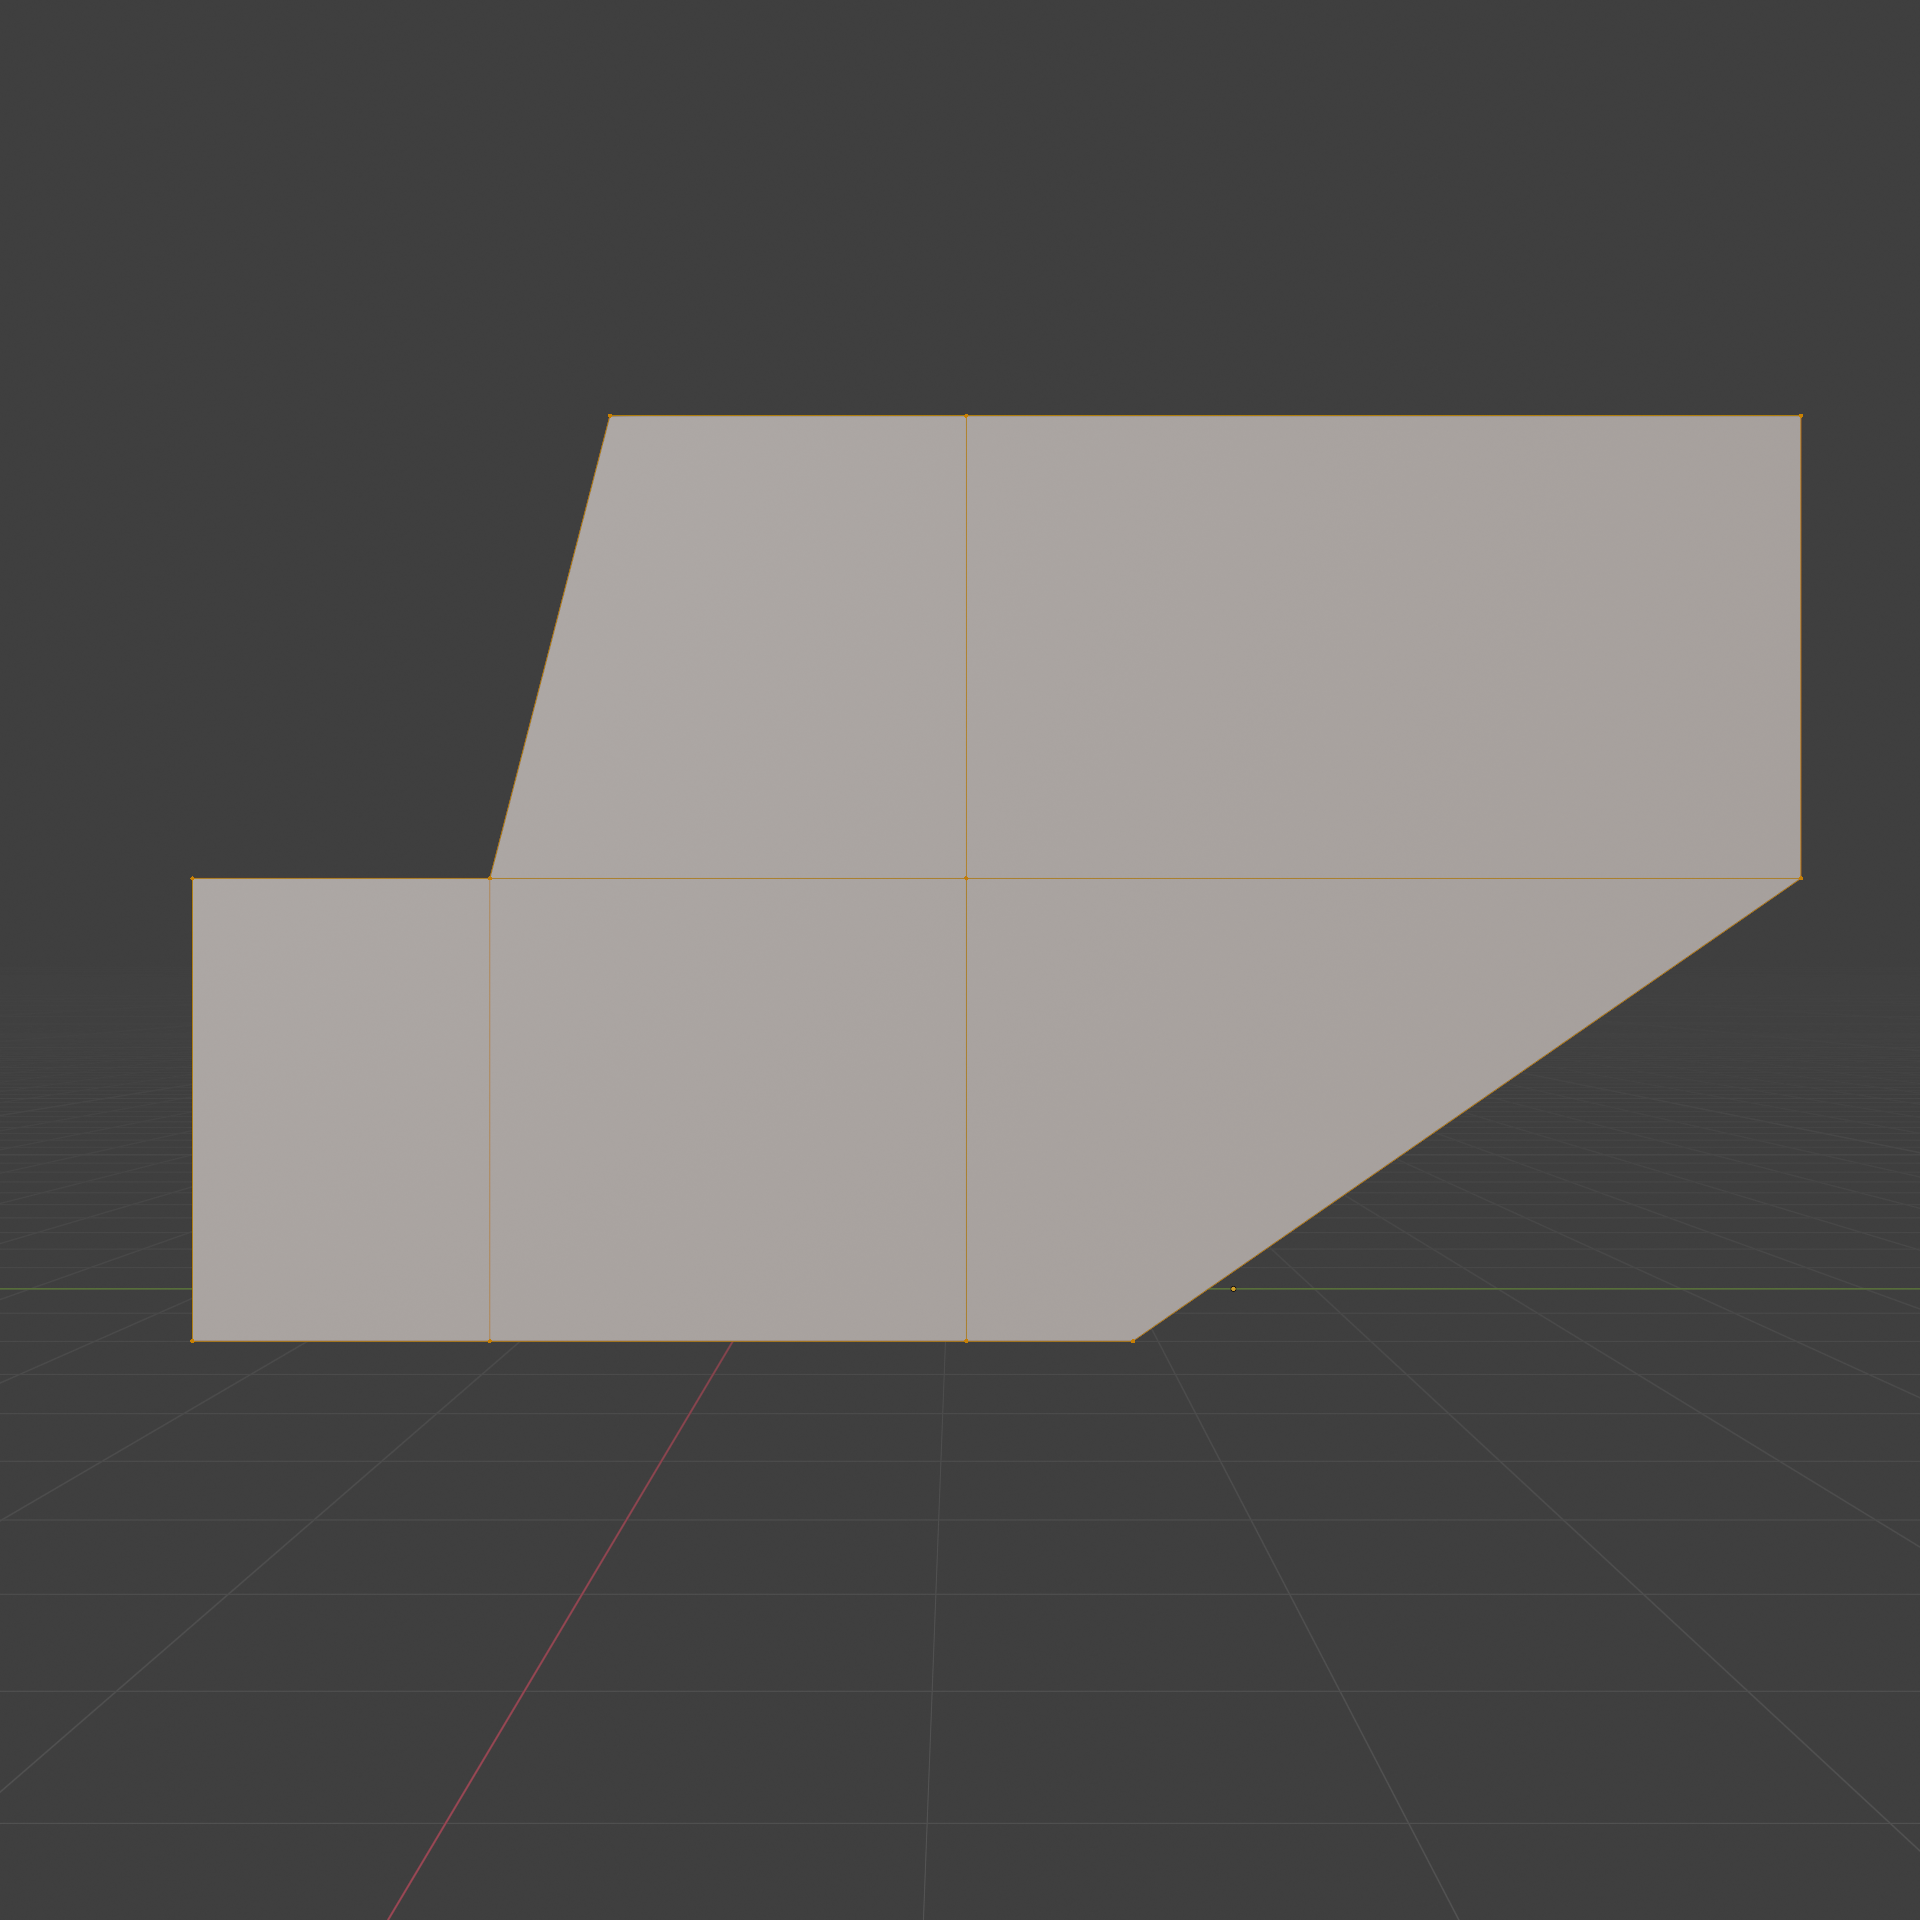
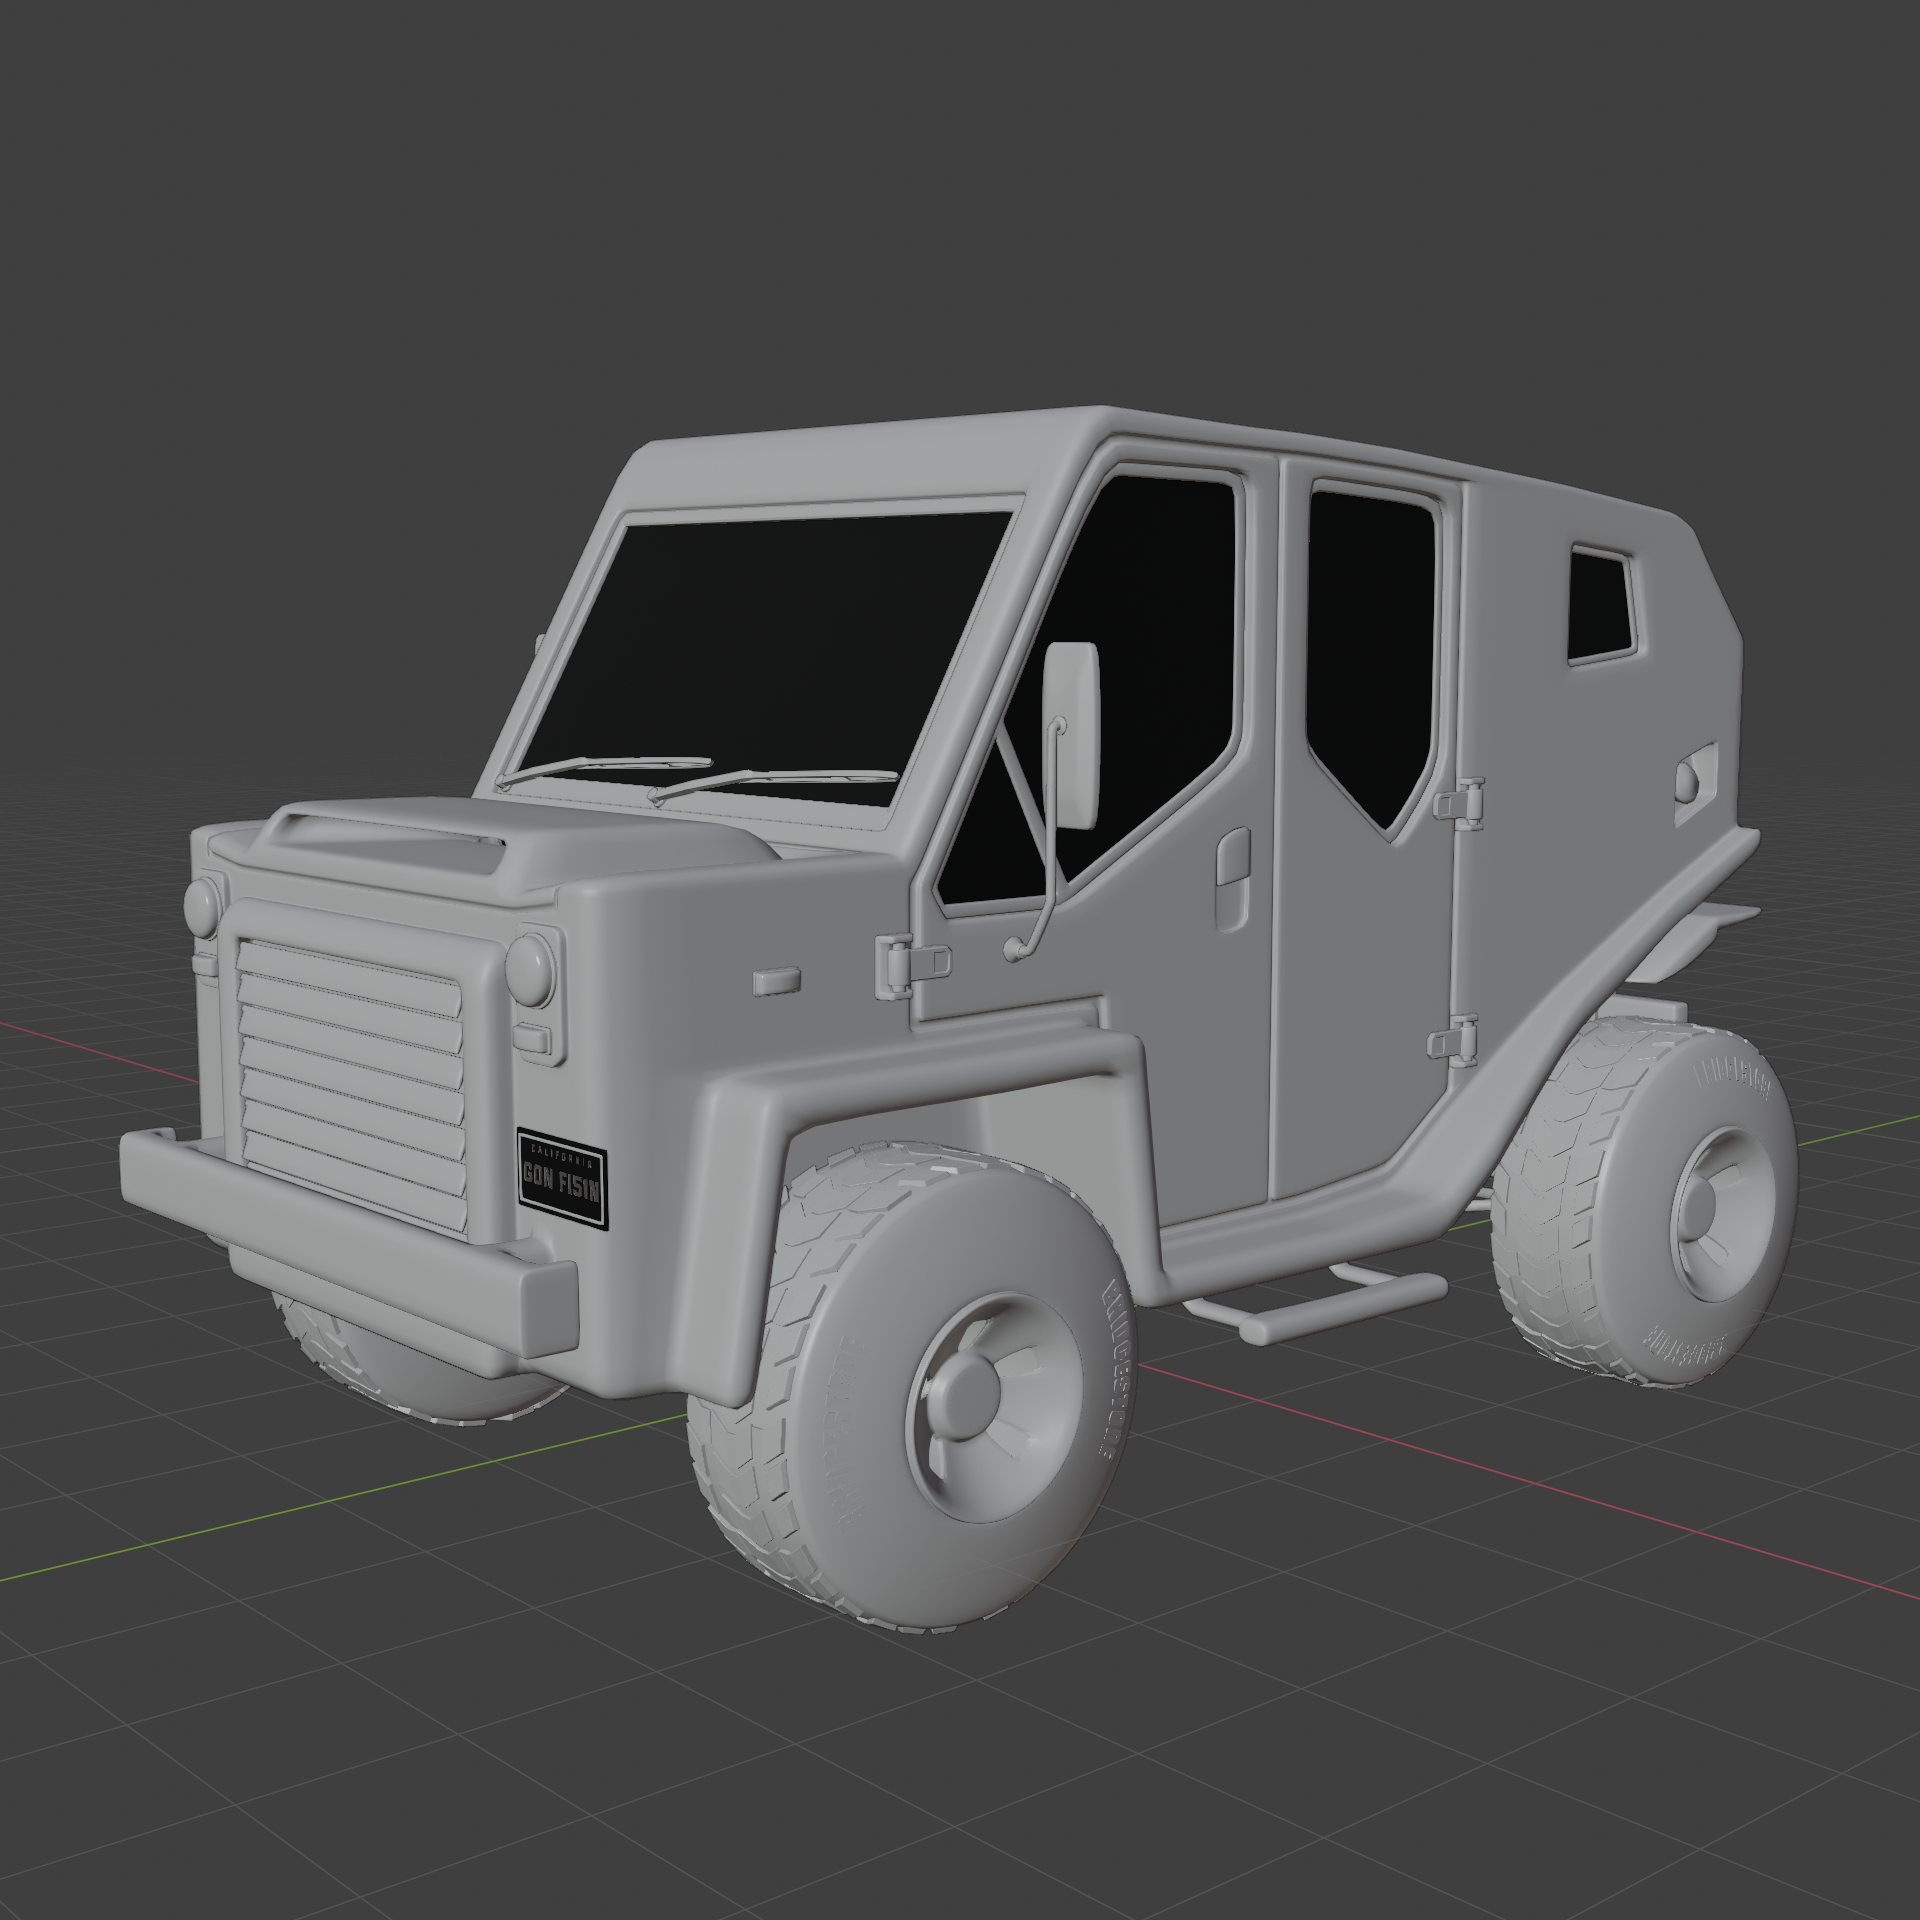
Shape blockout
For this project, I began modeling the basic shape of the truck using Blender 2.8. I break down each object into its simplest form and slowly add details. Starting simple allows me to see the main shapes and get a better feel for the overall scale, proportions, and composition of the piece.
Detailing
Once I am happy with the proportions of the vehicle, I start adding details. However, the sketch I was basing my model off of is very simple, so I go online and look up additional images to fill in all the details. One of my main goals while creating this model was to practice my Subdivision Surface Modeling, thus limiting myself to modeling with only quads. For this reason, I separate more detailed areas of the model from the main model because they will contain more geometry than the rest rather than adding a large blanket amount of geometry to the whole model.
Dress-up / Story
Now that I have all the main shapes and some secondary details on the truck, I begin dressing up the model by adding accessories and more complex areas of interest. Adding these accessories helps create more interest and tells a story about the truck.

Shading
Finally, it’s time for some color. The shader set-up for this model is relatively simple—it consists of a shiny green color for the paint mixed with a brown muddy material. I mask the mud material by using a gradient texture mixed with a noise texture so that all the mud is located on the lower half of the vehicle.
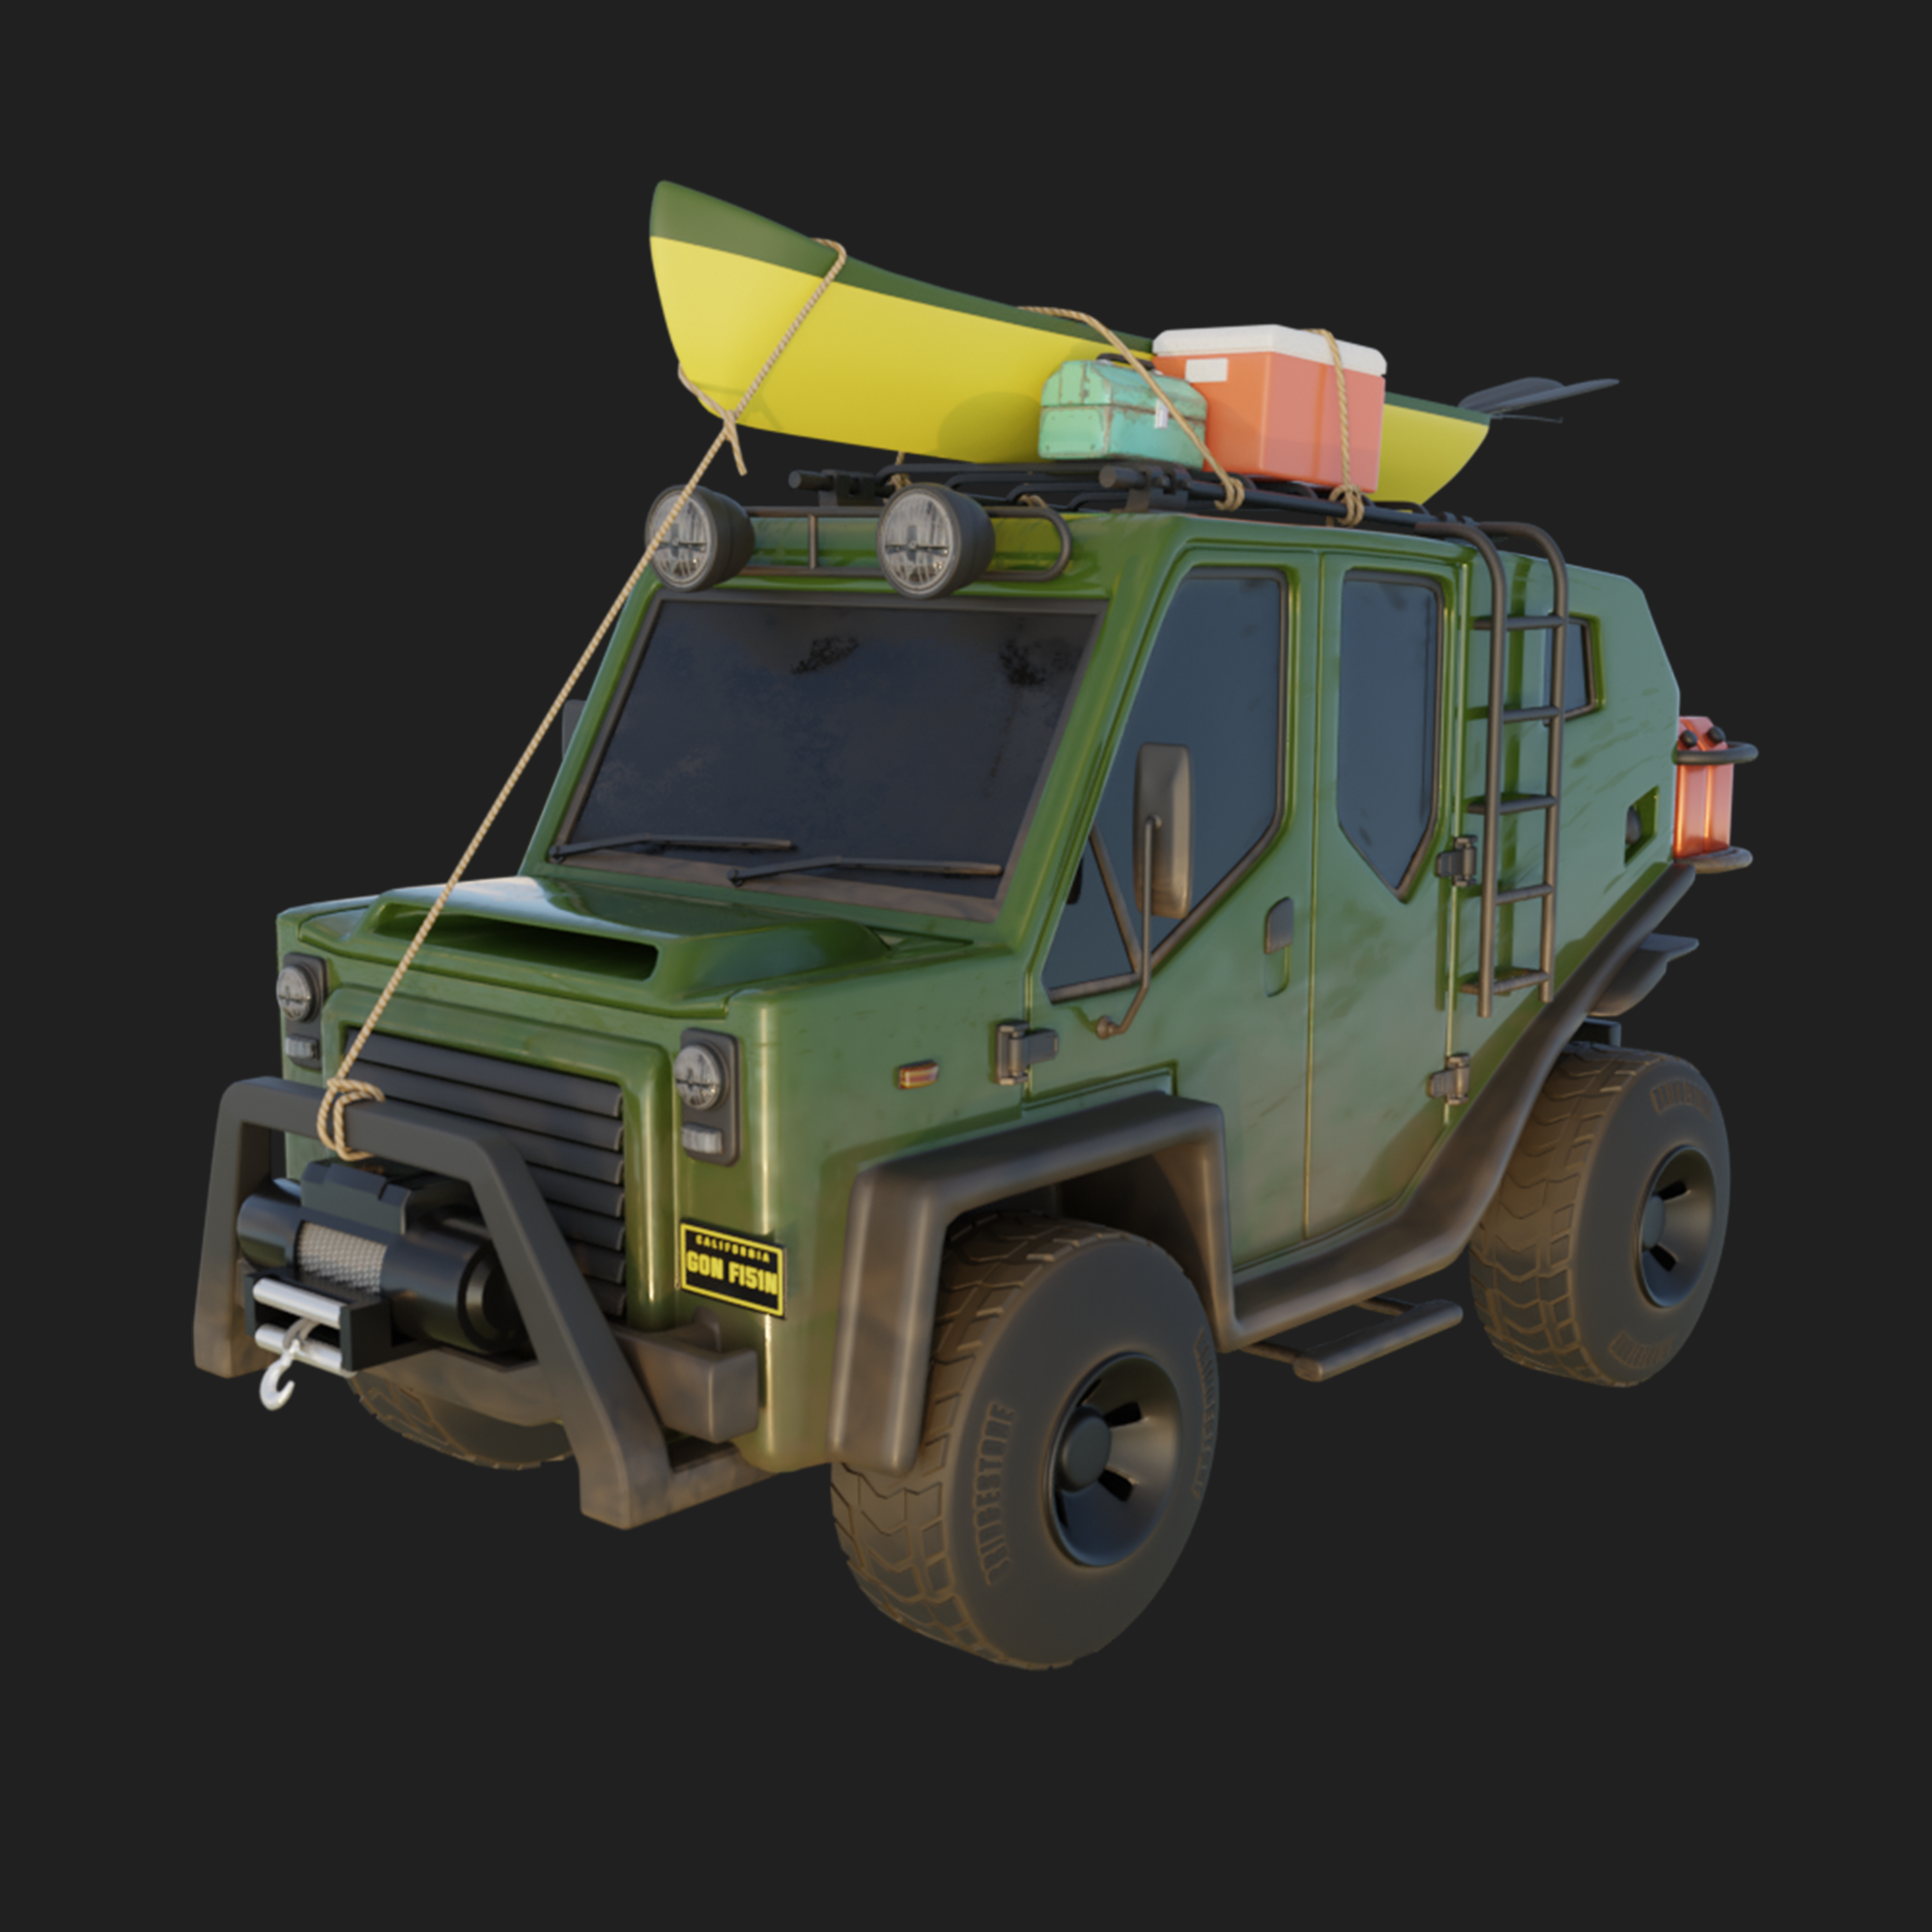
Final touches & rendering
To finish this piece off I wanted to have a bit of an environment to set the truck in, but still wanted to keep a bit of the stylized feel. Setting the truck in a simple environment helps tell some of the story and bring more interest to the viewer.

About the Author
 Jared Mondragon, DIGITAL ARTIST| CREATOR| 3D MODELER


