
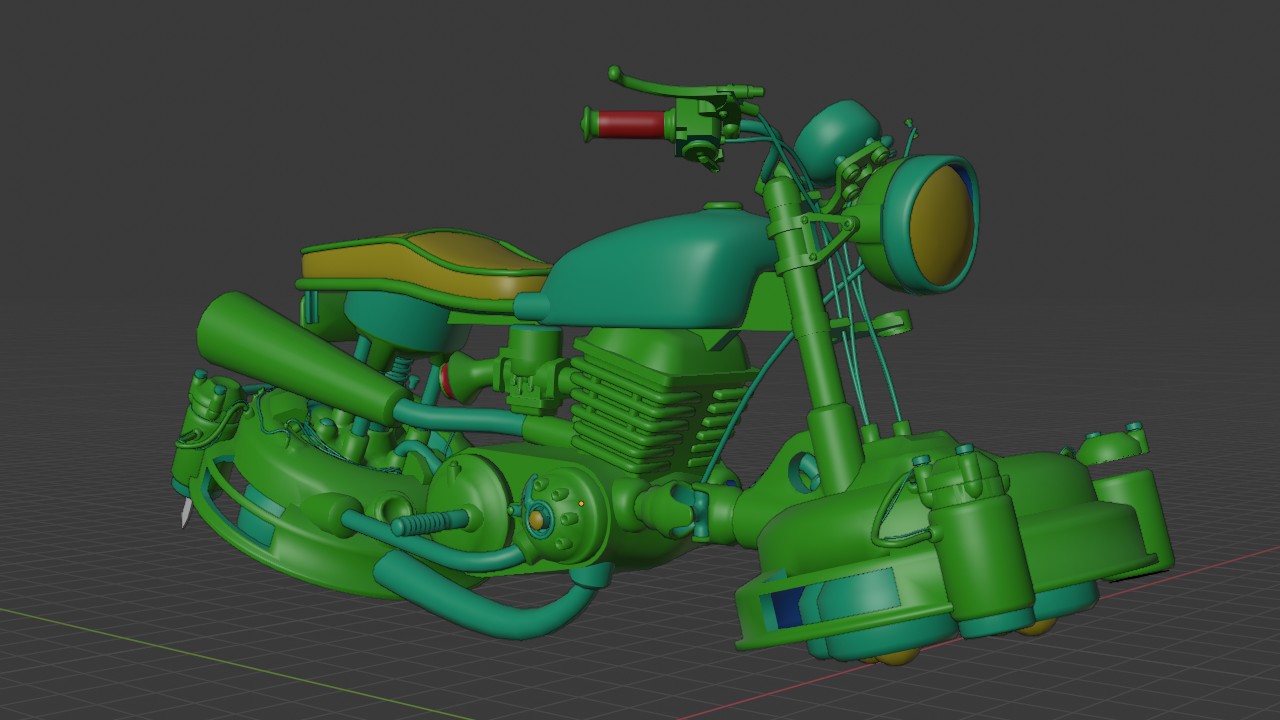
Behind the Scenes: Project Anima Hoverbike
Hi all, I’m Yousef Charles, a self-taught prop artist living in Alexandria, Egypt, here to talk about how and why I made this hoverbike.
Let’s start with the why. Having been told by several people that I should probably show that I can make props other than guns, I stumbled on Polycount’s 66th Bi-monthly environment art challenge. Upon seeing the “Hard-surface Prop” concept of that challenge, I immediately decided that this was what I would be creating for the next 3 weeks. Now let’s get into the “how”…
Reference Collection
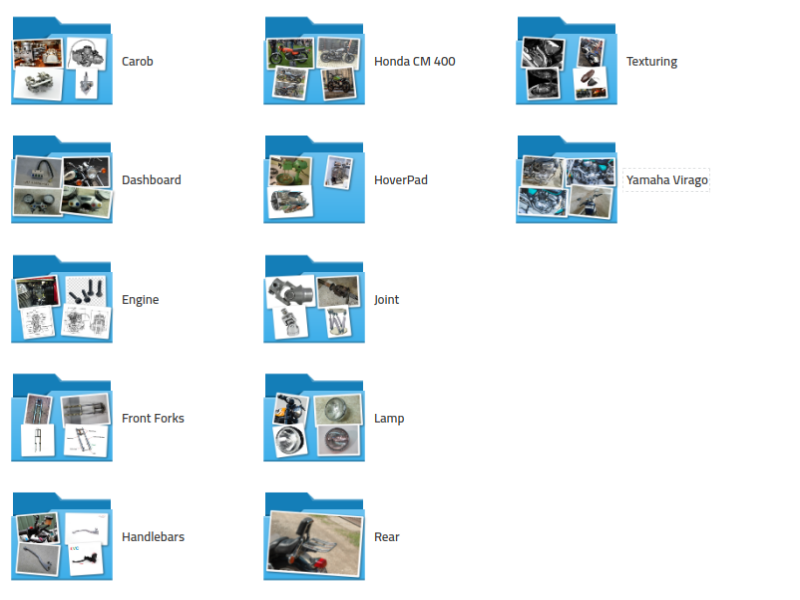
Reference collections can feel like one of the least demanding processes of creating a 3D asset, to the point where it seems like it’s okay just to rush it, but it’s actually not ok. Sooner or later deep into the modelling process, you are going to run into a part of your prop that looks a bit… weird or strange and is going to give you panic attacks trying to model it. I didn’t follow my own advice, at least not until days later. But I’m getting ahead of myself.
I started by examining the concept. The concept artist had nicely mentioned that the engine was based on the Honda CM-400 and the dashboard was based on the Yamaha Virago. So naturally, I went and downloaded a profile shot of the Honda CM-400, looked up the dimensions of the Honda for scale reference, did a half-assed job of collecting references of the Virago, then just downloaded a jet engine diagram of the hover pad for some reason.
The skimpy reference collection at the beginning didn’t prove a problem for the rudimentary blockout. But it did very much become a problem when I did the more detailed blockout pass.
The problem I foreshadowed in the beginning, the part that ended up giving me an anxiety attack over not being able to model it properly, ended up being the “carburetor”. Of course, I didn’t know it was called a carburetor at the time. After a period of time longer than I’d like to admit, I decided to admit defeat and go on a 3D Discord and just ask what this part was called. At that point, I finally got a handle on what I was modelling.
What I should have done from the start, and what I ended up doing shortly after that incident, was go look up a diagram for motorcycles and in turn look up all the parts individually and download pictures of them for reference. I ended up doing this for both the Virago and Honda CM-400.
How I handled the references for the fictional part of the concept, the hover pad, was to just get a random image of a 1950s washing machine and some other low-tech sci-fi images.
Modelling
Usually, the way I go about modelling a complex prop like this is to go through two passes of blockouts, a high-poly pass and then a decimation/UV mapping pass.
Here’s a breakdown going through each pass in detail.

Rudimentary blockout: While in this phase, the only priority is to get a feel for the proportions. Nothing else matters, just primitive blocks and cylinders. Getting this wrong would lead to everything modelled after this pass looking too big or too small and generally “off”, completely shattering the illusion. It’s not a fun phase but it’s very important.
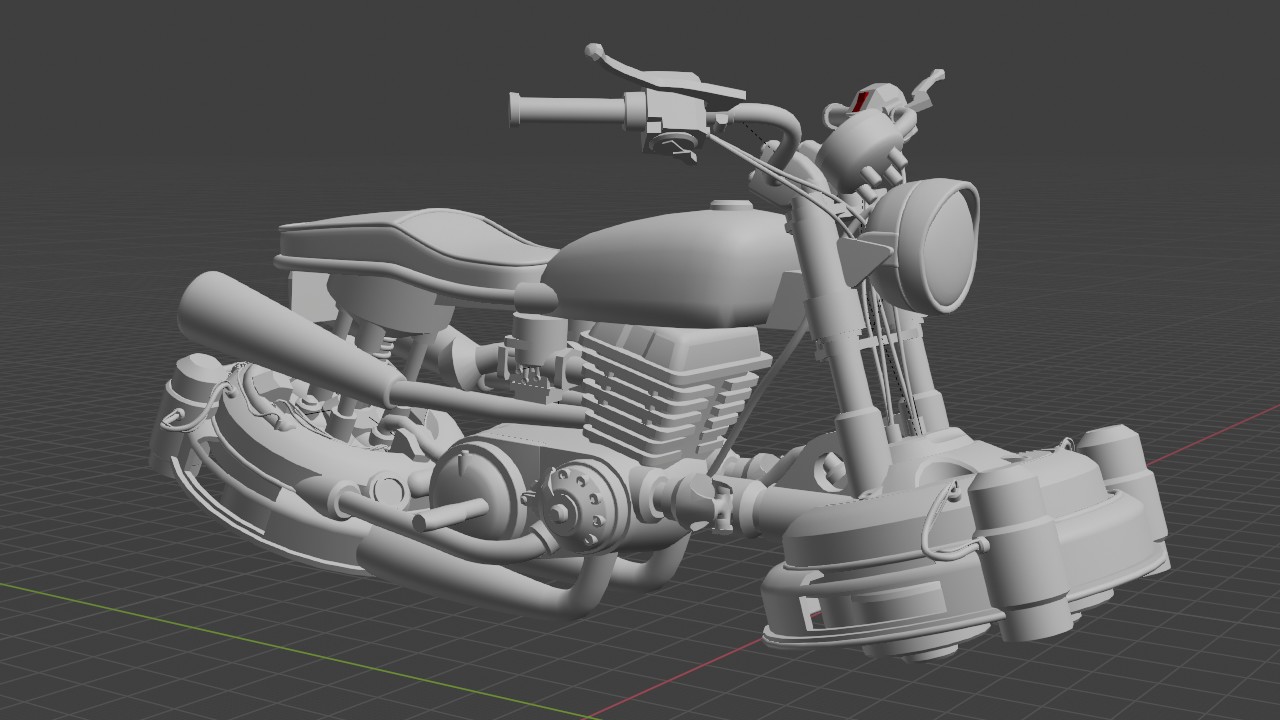
Detailed Blockout: This phase is where I’d experiment with the forms, looking at the references, going to each group, and adding detail one by one. It’s a very “artistic” phase and it can be fun but it can also be overwhelming at times, knowing that if something doesn’t look good at this stage, no amount of fancy bevels or subdivision would make it look good suddenly.
Tips
1. Hard Ops and other macro toolkits are great for blockout phases. Anything that helps remove time from scrolling through various menu bars or toolboxes is great and adds a lot more value than you’d think.
Which one of the two do you think would get irritating faster?
- Hitting Shift + Q > Sharpen, on a pie menu
- Going to “Select > Select Sharp Edges” then “Edge Specials (Ctrl + E) > Mark Sharp” then going to object data, then hitting the auto smooth checkbox
Self-care is important.
2. Do everything as non-destructively as possible. At this stage, nothing is set in stone, expect to make changes a lot. Make it easier on yourself by making these changes easier to make.

(the same technique above can be used to make non-destructive spheres, by having the primitive be a cylinder, instead of a box.)
3. Pretend topology doesn’t exist during this phase. If you block things out while taking into consideration the effort it would take to make a subdividable mesh out of it, chances are, you’ll end up with a very blocky uninteresting mesh. So don’t bother joining anything, don’t add any subdivision surfaces or fancy bevels, just think about the forms only. Remember, if the forms aren’t good, no amount of sub-d will fix that.
High-poly, this is the most fun phase for me. This is where I take all the forms of the blockout, and join them, smooth them, and retopologise them.
For this project I decided that I wouldn’t use any bevel modifier, crease, double subdivision, remesh, etc. trickery. Just straight subdivision modelling. Using basic modelling tools like the knife, loop tool, inset, etc.
Not that I have anything against the newer and often higher quality, time-saving methods but it is still important to know how to polymodel without all these widgets. Sooner or later you’re going to have to model something when you can’t just hit the remesh modifier and expect something good.
Tip
Missed opportunity for the blender dev team to make the 3D cursor tool 9000x more useful by default.
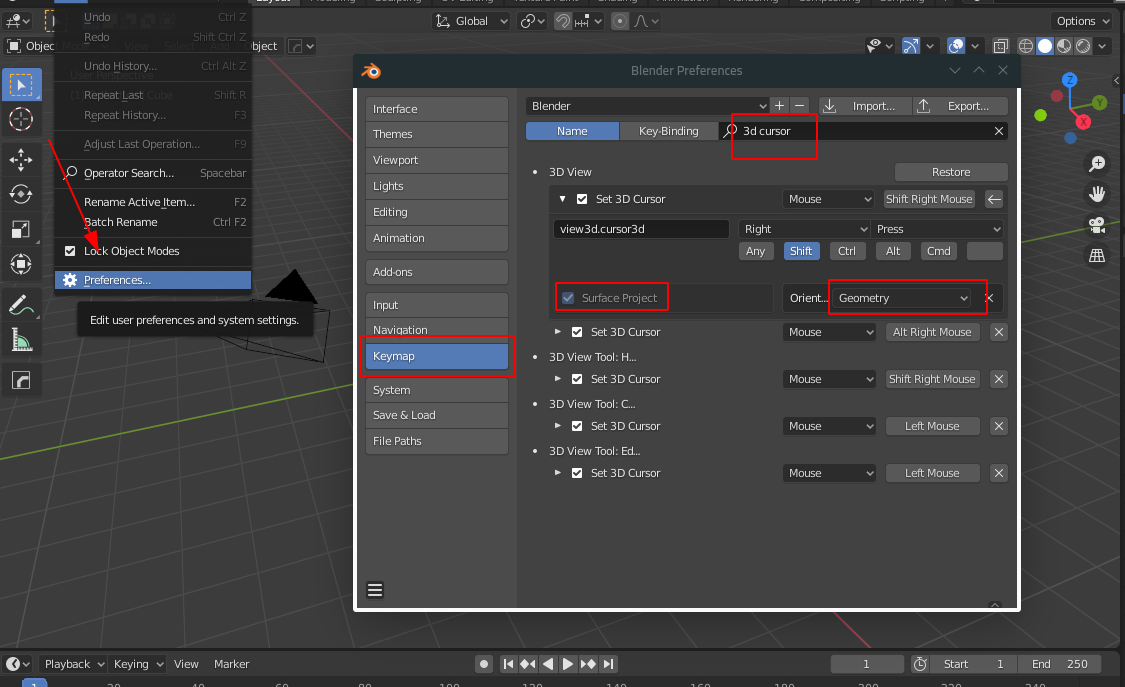
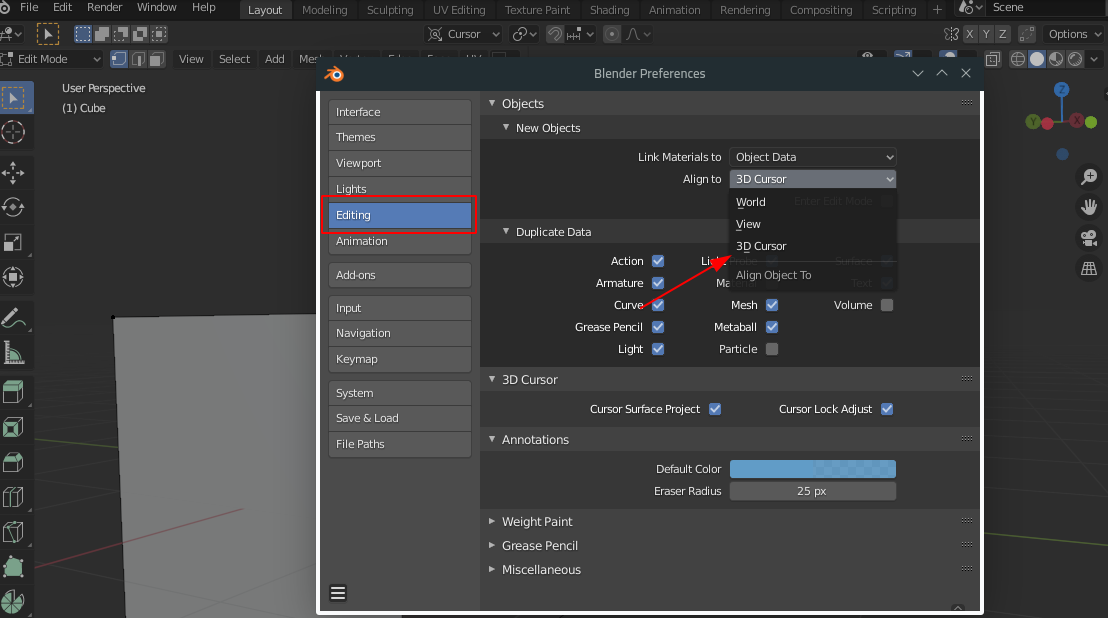
It’s like Modo’s workplane or 3ds Max’s autogrid (kind of), I love it.
Add “Object > Transform > Align to Transform Orientation”, and “Options (it’s on the far right on the top toolbox) > Origins” to your quick favourites or as shortcuts. They’re awesome tools and they allow you to do things like this, quickly.

(It’s a bit buggy at times but it usually works out better or at least, good enough in most cases.)
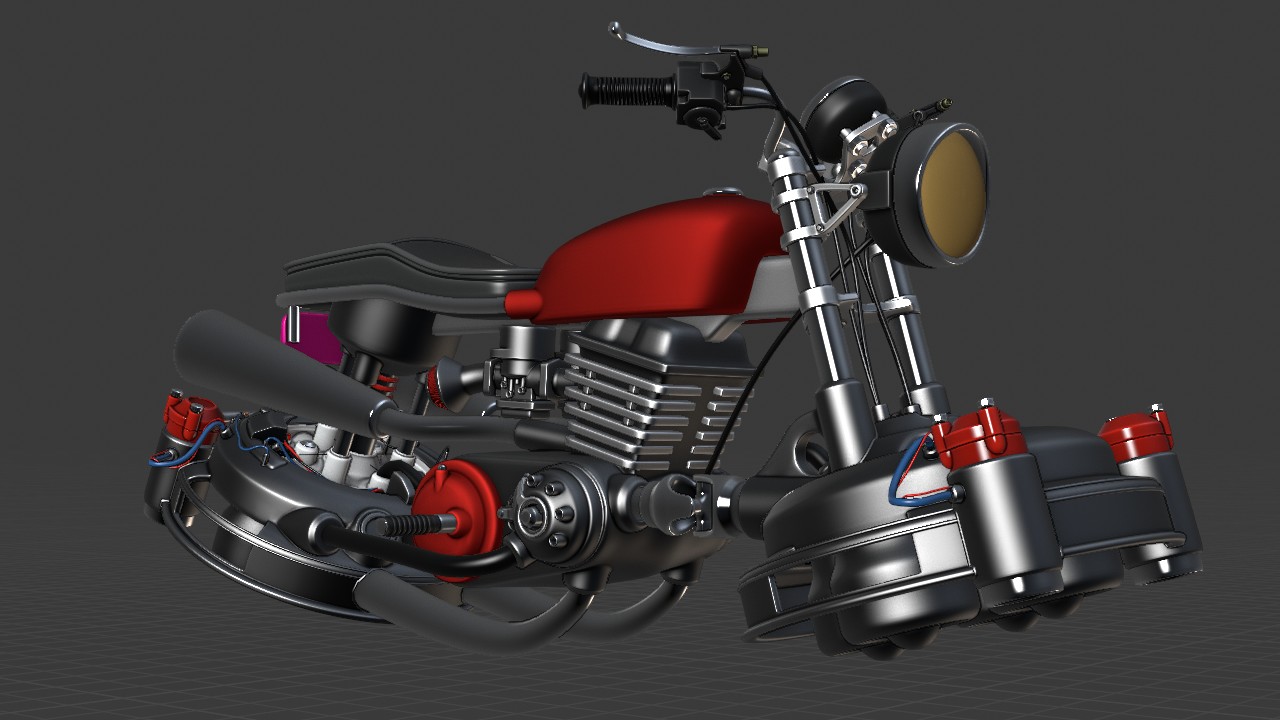
Decimation and UV Mapping
This step isn’t very glamorous, but it’s necessary. This is supposed to be a game prop, after all.
The decimation is very straightforward. Just dissolve some edges, apply subdivision in some areas and remove all the unnecessary loops then add seams. There’s nothing special going on here.
If you’re wondering what the weird colours are for, I have a different texel density for different parts of the mesh, 6 levels, 3 being the baseline. By default every object gets 3(green), then it’s increased or reduced based on a hierarchy of factors.
Camera Visibility > Texture frequency > Repeatability > Unique Details (does this object need stamps,decals,etc)
I go into this in a bit more detail in this article I wrote on tumblr.
This is something that I kind of regret doing, I really over complicated it, I should have kept it at just 2 or maybe 3 levels, not 6. But it’s too late for that.
For packing, I actually didn’t do it in Blender. I did it in the newest version of Substance Painter (2020, as of time of writing), which has an option to automatically pack UVs that you can then export through file > export.
Texturing
To be honest, there isn’t much interesting going on in the texturing department. But a few people asked me to explain how I textured the leather seat. So I’ll discuss that and how I did the headlamp texture, as well.
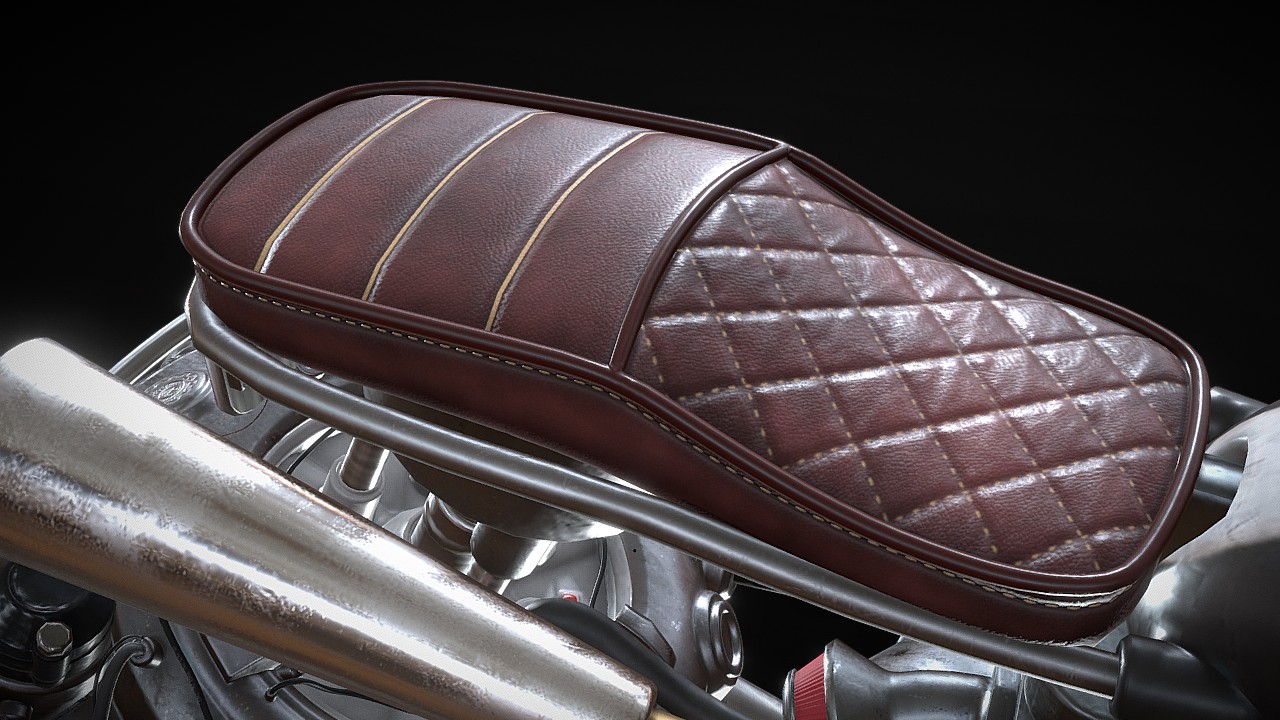
Leather, The base is a reddish-brown colour I picked from a random jpeg of a leather seat. Multiple fill layers with the leather grain, each with a slightly different rotation/seed to sell the illusion that these are different patches of leather stitched together. The stitches on the top and sides are done using Color ID bakes, the diamond stitches were done with a “plastic fabric diamond” material that comes with Substance Painter 2020, I think.

The headlamp, the tail light and headlights were textured in Photoshop. I basically took a real headlamp then tried to reverse engineer a height map out of it, then blurred it just a bit before converting it to a normal map using xNormal’s Photoshop plugin. It’s really straightforward and worked out a lot better than I expected.
Tip for Substance Painter users working with low-end hardware. I discovered this technique after making this project, so I didn’t use it here, but I wrote a polycount thread about a technique to make Substance Painter more usable on low-end hardware. It’s very unconventional and tiresome but it most certainly would have helped with the texture quality of this bike.
Presentation

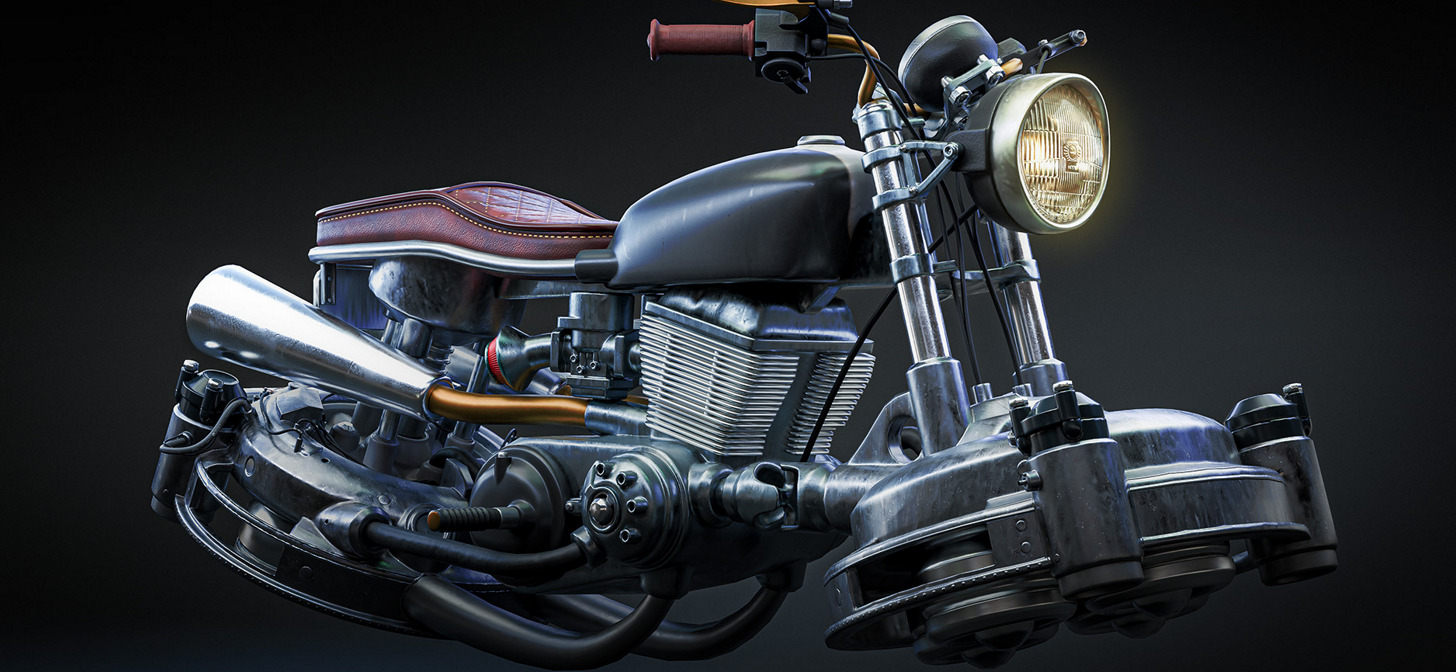
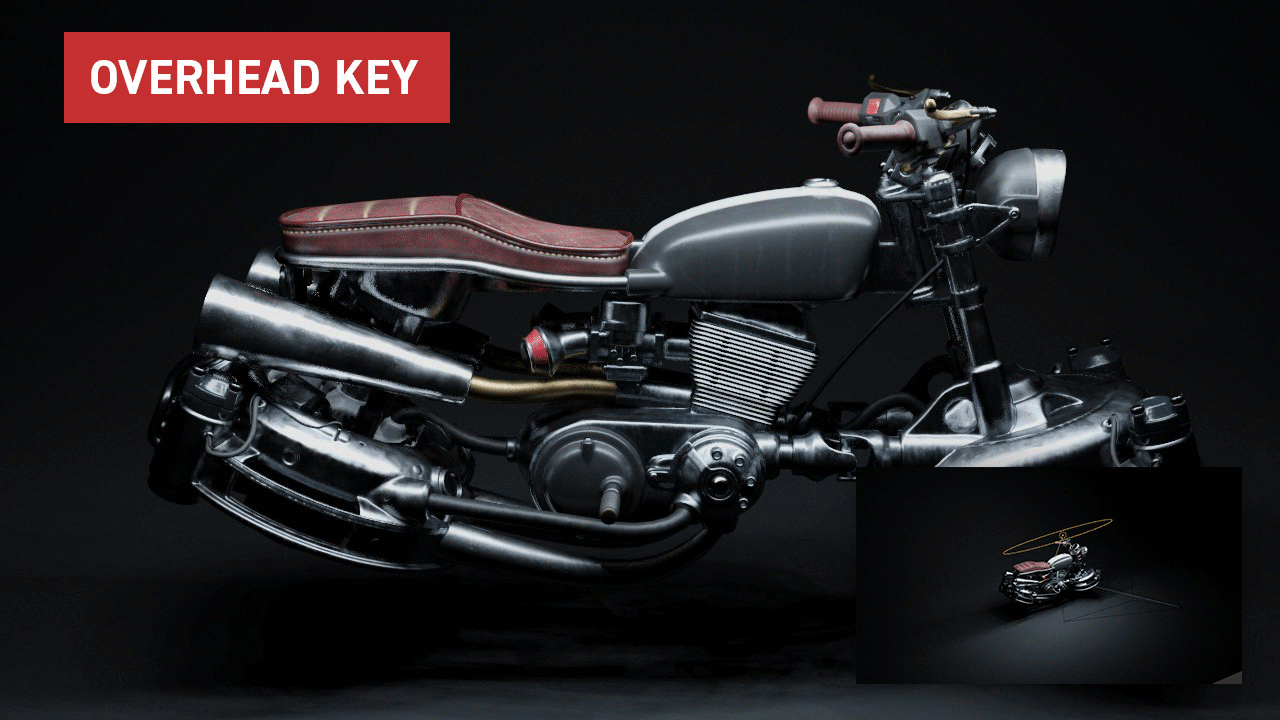
My personal favourite phase in 3D prop creation is presentation. The phase where I pretend to be a product photographer and the prop I created is my product.
It would really suck to spend 30 days working on something only to have it be bogged down by a bad looking flat render, so I put a lot of effort into lighting and rendering my models. I decided to go for two scenes, the standard studio setup that I always do for all my models and a more unique street scene.
I’ll go over the studio setup since I think that ended up being more photogenic.
The first thing I do is model one of those “seamless background” boards you see in almost every product photography setup. It takes no effort to model, and it works great for making your prop feel like more than just a random object floating in space.
Next, I do the standard 3-point lighting setup you’re no doubt already familiar with. Key light at 45 Degrees from the camera (in this case 45 degrees from the top), fill light at one of the sides, rim lights at the back, and some extra lights to accentuate form in certain areas.
(Note that I rendered with Cycles, not EEVEE in the final render.)
I render at 1024 samples with denoising turned on, because I don’t have a powerful PC and any render at a reasonable resolution/sample count will take a lot of time. I render each angle with 6 files: Raw, Depth, Ambient Occlusion, Normal, Transmissive, and Normal passes with a cryptomatte to separate the background for compositing reasons. All are saved as lossless OpenEXRs.

Then I get to work on post-processing the renders in Photoshop, using the camera raw filter then overlaying the AO, using the background matte or depth pass to darken the background.
And that’s how I created the hoverbike. I hope this making of wasn’t too incoherent and you learned something from this.
About the Author
 Yousef Charles, Just your average prop artist.


Thank you so much!!