

About
My name is Carlos Sosa and I’m a 3D artist from Quito, Ecuador. I dedicate myself mostly to education, as I work as a 3D instructor and career director at the Multimedia Design program at the Metropolitan Institute of Design in Quito.
I’ve been doing 3D for almost eleven years. I learned Blender at a small animation studio in Porto Alegre, Brazil, and since then I’ve been learning mostly through tutorials and personal projects. I consider myself to be a self-taught artist.
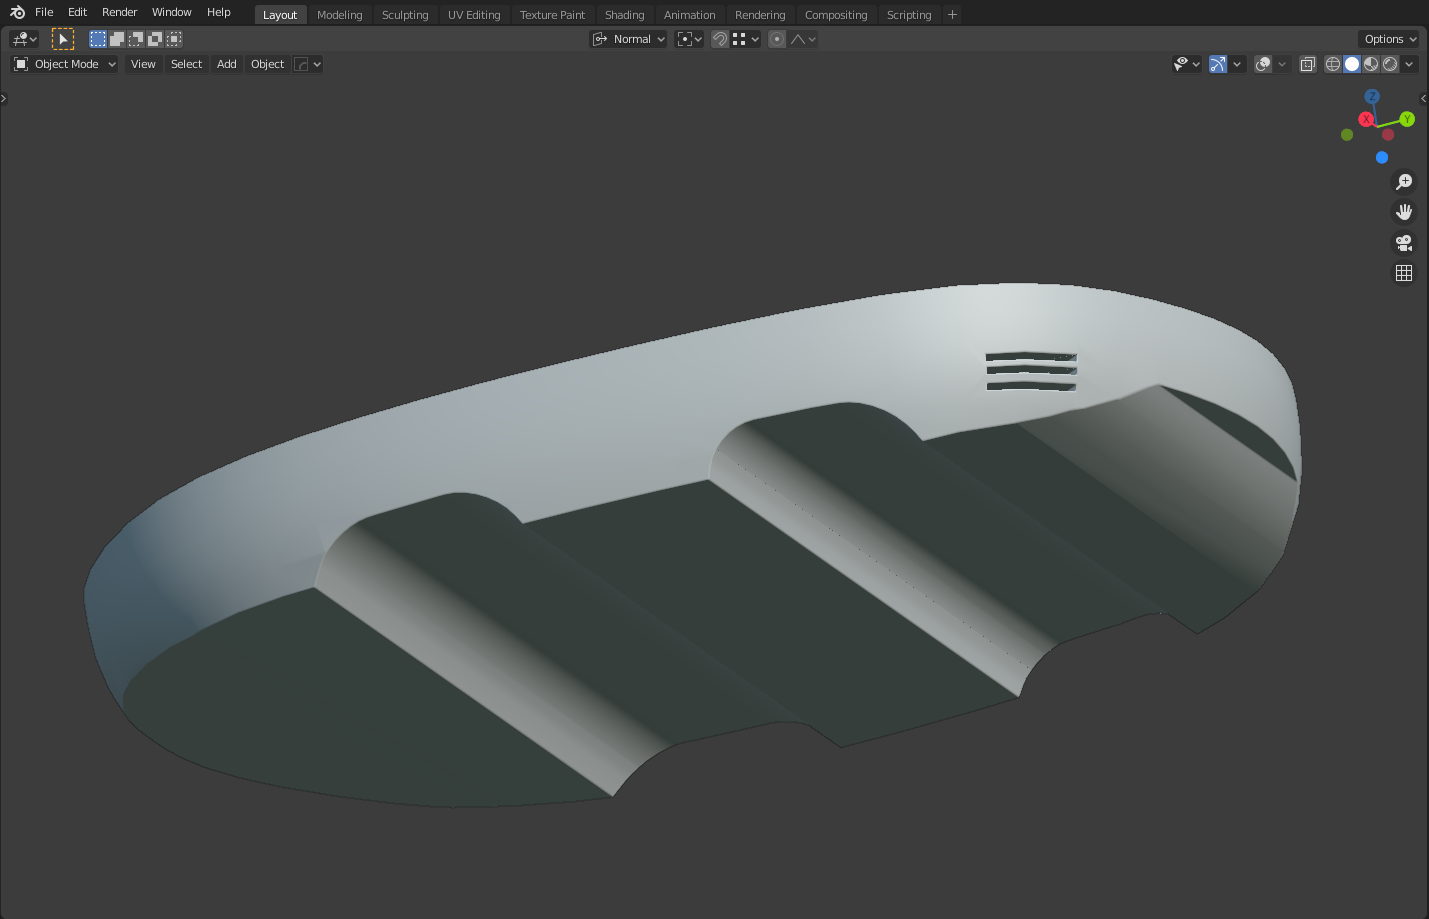
Ladybug Unmanned Scout Unit
I really enjoy hard surface modeling and I think Blender has some amazing tools for that purpose. I’m a very big fan of science fiction movies and sci-fi art like vehicles and weapons.
Inspiration
Recently I have started to use nature as an inspiration for my designs. Likewise, I started to create a series of vehicles based on insects. Besides, my girlfriend is a biologist so she has shown me some amazing species that I didn’t know before. For this particular project, I thought of making a vehicle inspired by one of the most well-known insects and one of the most colorful and beautiful, the ladybug.
Tools and process
I used Blender 2.82 for this model.
For modeling, I used the Fast Carve add-on, which is free and has some really amazing options. It helps you make boolean operations very simple, and with the bevel and mirror options included in the add-on, you don’t have to go back to the modifiers panel anymore.
After the modeling was done, I used some custom metallic shaders for the different parts of the model. Additionally, I used the old and always trusty Painted Metal Megashader by Mike Pan.
As soon as texturing was complete I used Cycles for rendering and took out various render passes to use in compositing later. Finally, I put together the whole image using Photoshop and I made some small adjustments and color corrections.
Focus: Refining shapes
I will focus on how to add some details once your main shapes are established. I will use the Fast Carve add-on to make some secondary forms and add small details to a piece of the vehicle. The benefit of this method is that I can make booleans on objects that have the subsurf modifier. As a result, I will have objects with curved forms and sharp corners due to the boolean operations that the Fast Carve performs. In contrast, trying to get these sharp corners and edges using only the Subsurf Modifier would result in a very complex process.
This is my base shape for the bottom of the vehicle. This piece has a subsurf modifier. Now I am going to carve some secondary shapes.

Next, I build a simple secondary piece that I will use to extract from our main shape.

Once I have both pieces, I will proceed to use the Fast Carve add-on. First I select the secondary piece and use the eyedropper to select my main shape. The second step is to uncheck the Apply Immediately box on the add-on so that I can perform a non-destructive operation and still have access to the modifiers in the future.
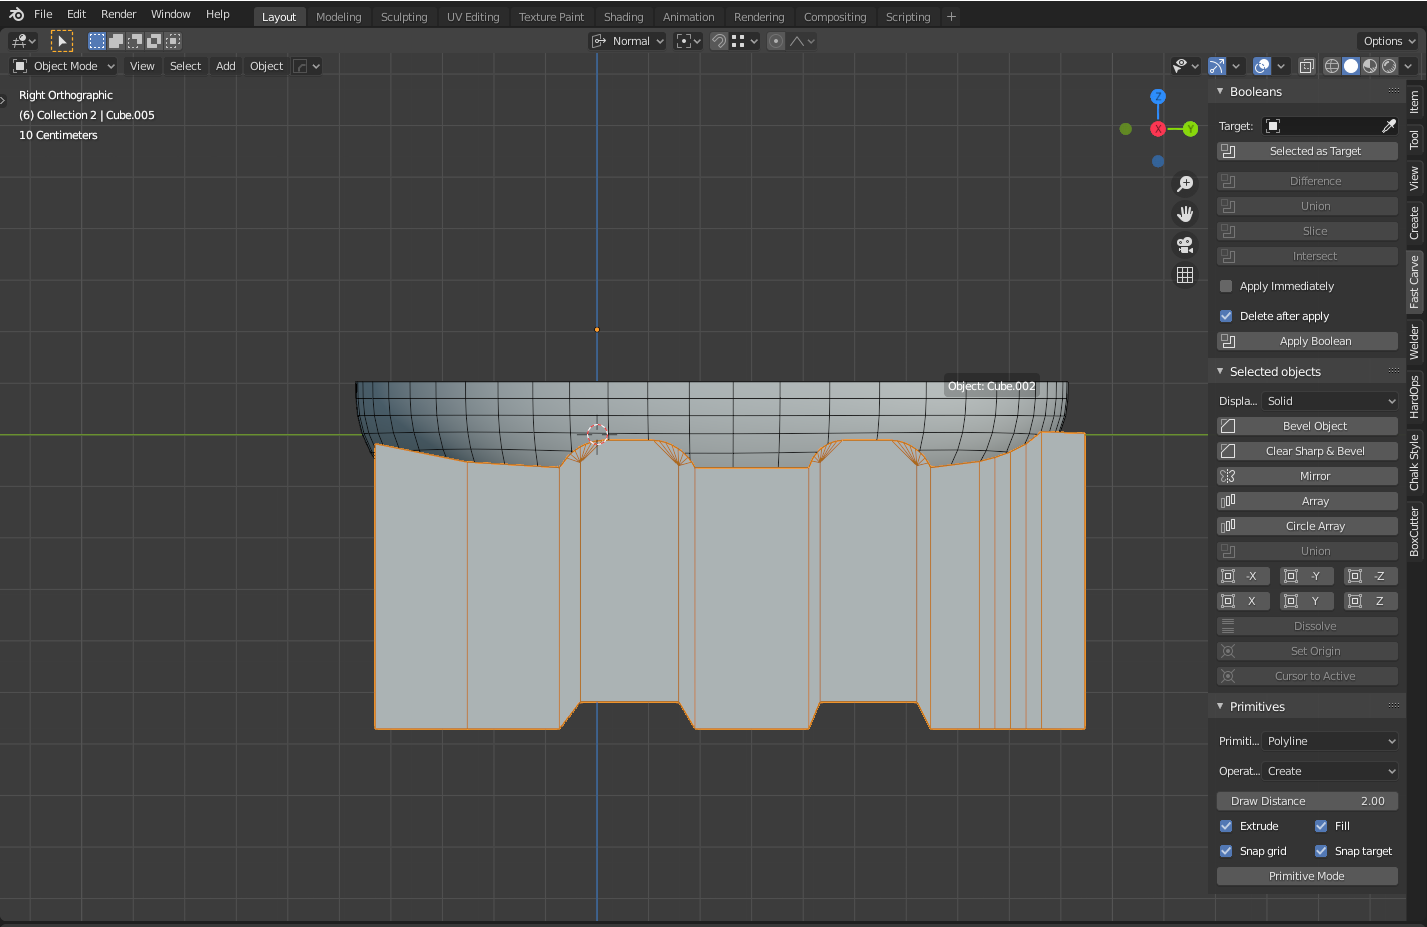
As soon as that is ready, I select the operation that I want to do. In this case, it’s a difference operation.
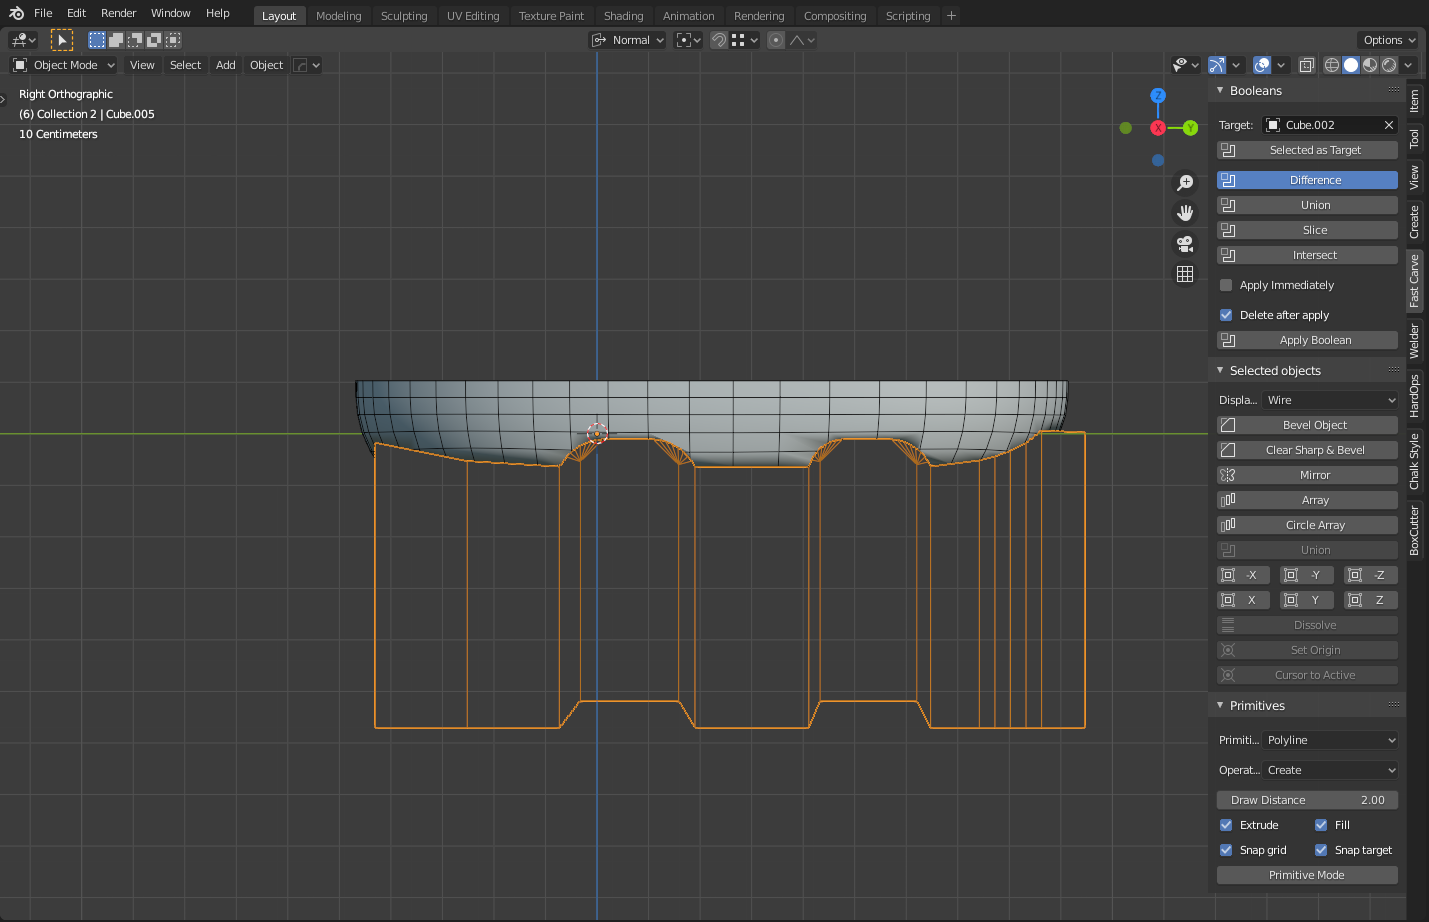
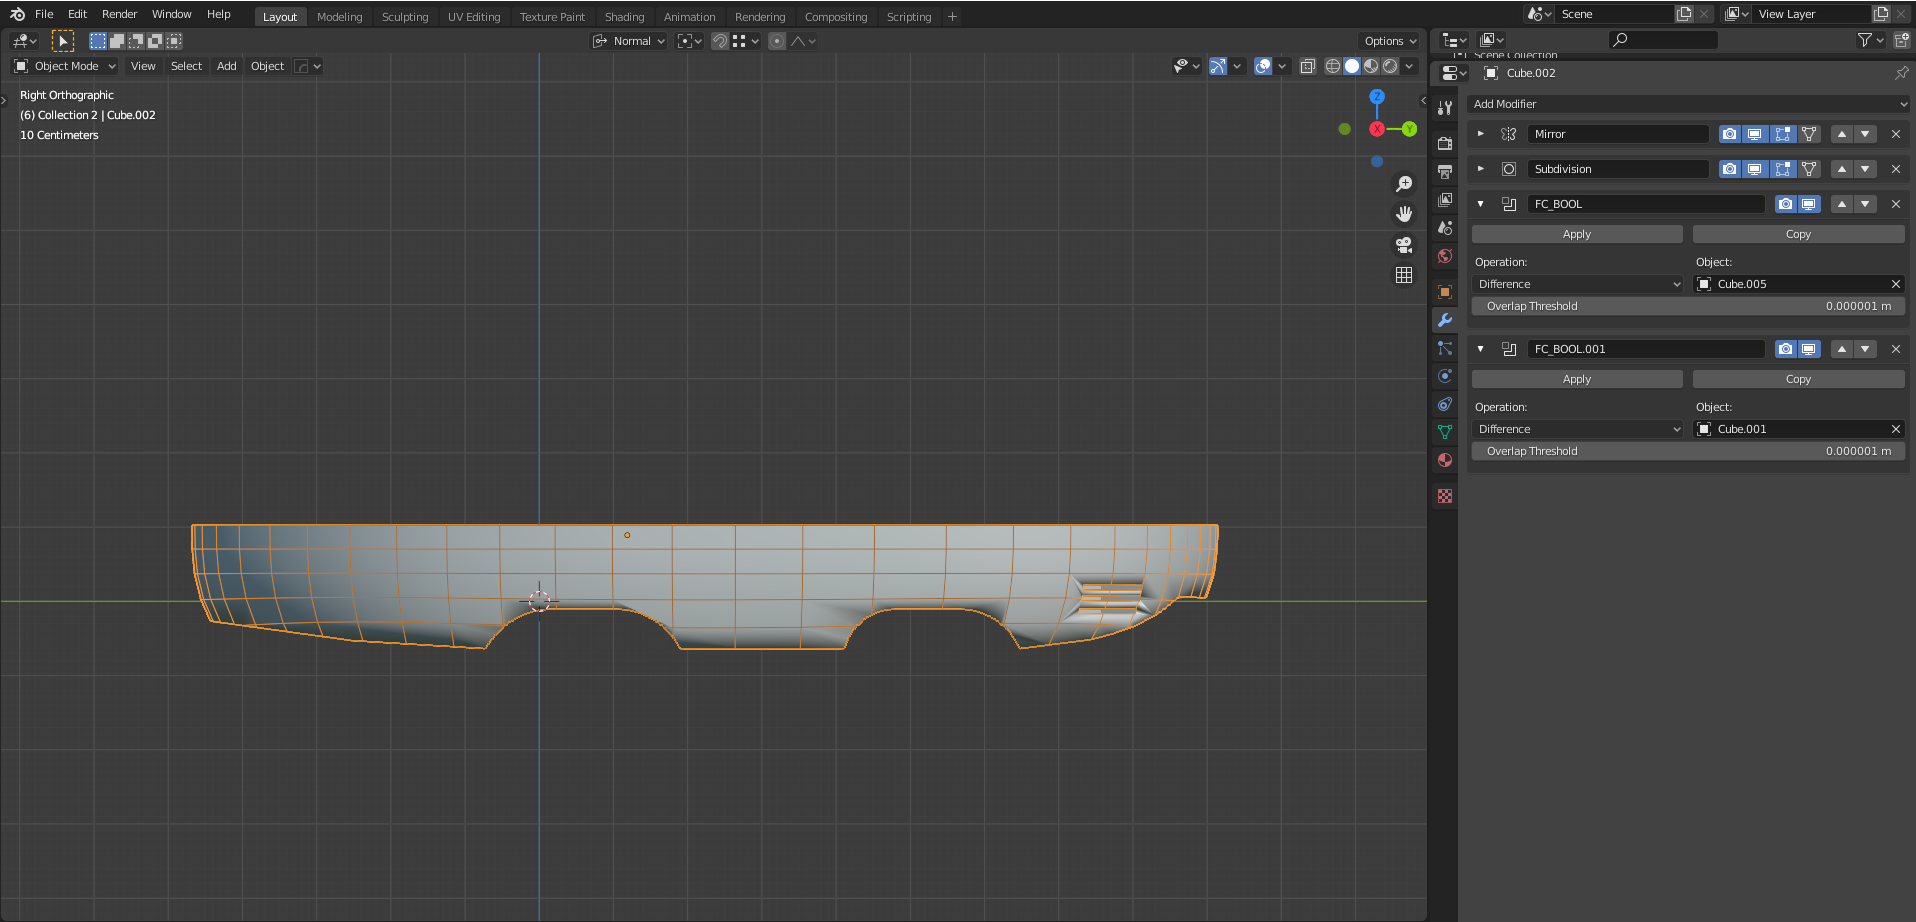
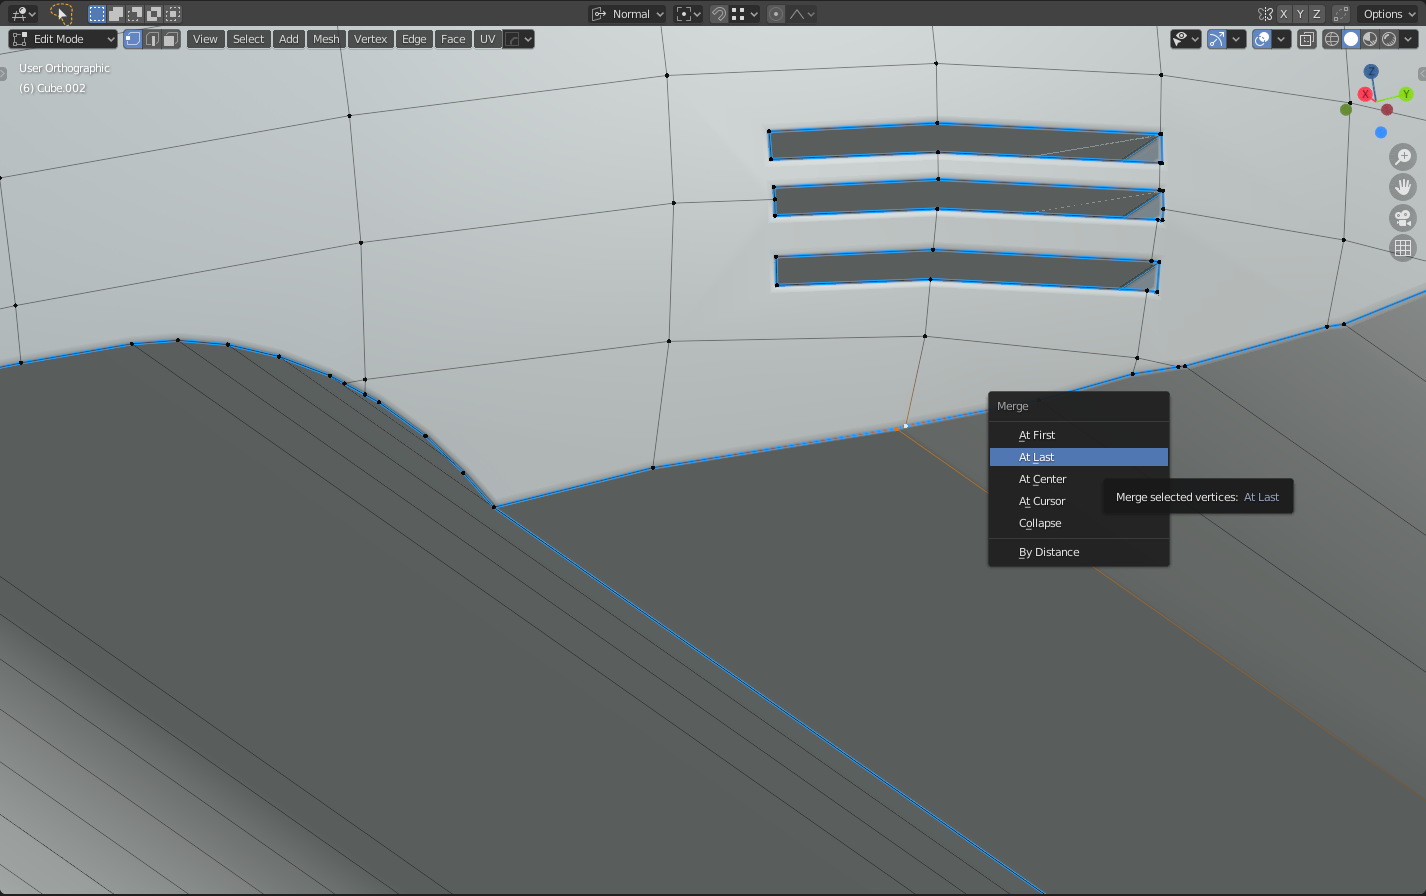
The nice thing about doing it this way is that I can modify the mesh of the secondary object at any time and still carve on the base object. In this example, I go into edit mode to move some vertices of the secondary shape to cover the front part of the main object. In the modifiers stack, I find a boolean modifier named FC_BOOL that is beneath all the other modifiers.


I hide the secondary object using the H key. In addition, I add some more details to my base mesh using the same method. Now I add some panels that will look like a ventilation system. The process is the same as in the previous steps. Another boolean modifier will appear on the modifiers stack.
The object will look like this. The edges are not clean and there are some shading problems with the object. This happens because of using the subsurf along with the boolean modifiers.
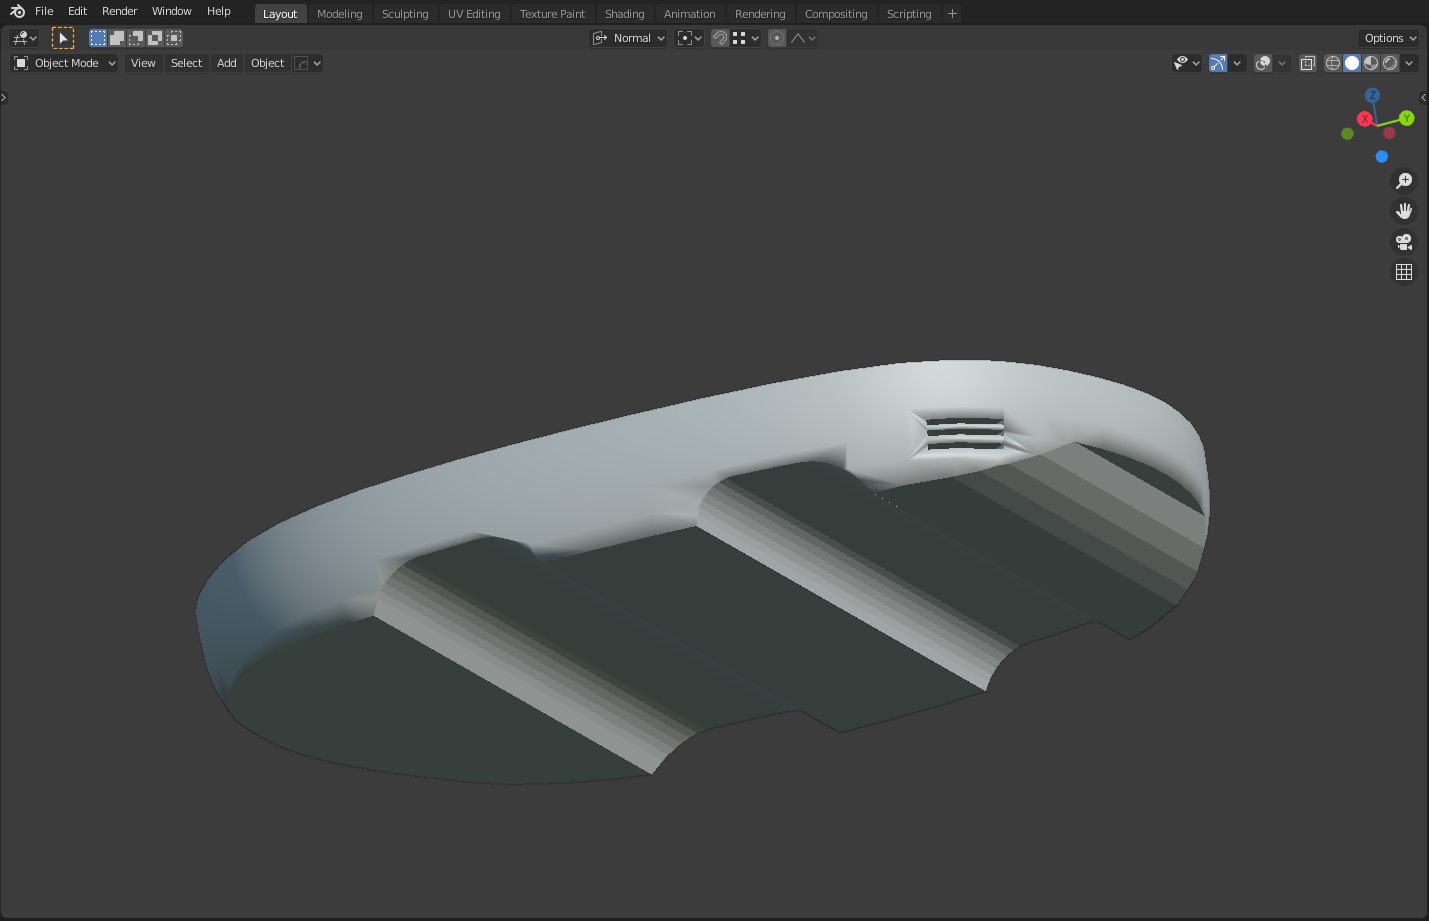
In order to correct this, I need to apply all the modifiers on the modifiers panel starting from the one at the top. Once that is done, I can go back to the Fast Carve add-on and bevel the edges. I lower the bevel amount to avoid any artifacts.
Finally, to fix some shading issues, I enter edit mode and start getting rid of double vertices or merge nearby vertices that cause problems. I do this using the M key in edit mode.
That is it. I have finished one of the pieces of the whole vehicle. All the parts have been built using the same principle of starting with a main shape, then adding some secondary detail using boolean operations with the Fast Carve add-on. After adding the initial details, I add tertiary details using the same technique.


I hope you have found these tips helpful for your 3D modeling. Be sure to check out my work on Blender Nation or on my Instagram. Cheers.
About the Author
 Carlos Sosa, 3D Artist
2 Comments
i love this!
Thank you guys!!