

Hi everyone! My name is Sergey Panayev, I'm living in Ashgabat, Turkmenistan, and I'm a 3D artist. I’ve been a Blender user for about 5 years.
I also, as most people did, began learning Blender from YouTube tutorials. Sometimes I tried to make my own concepts. Recently, I also often use Substance Painter to texture my models.
Inspiration
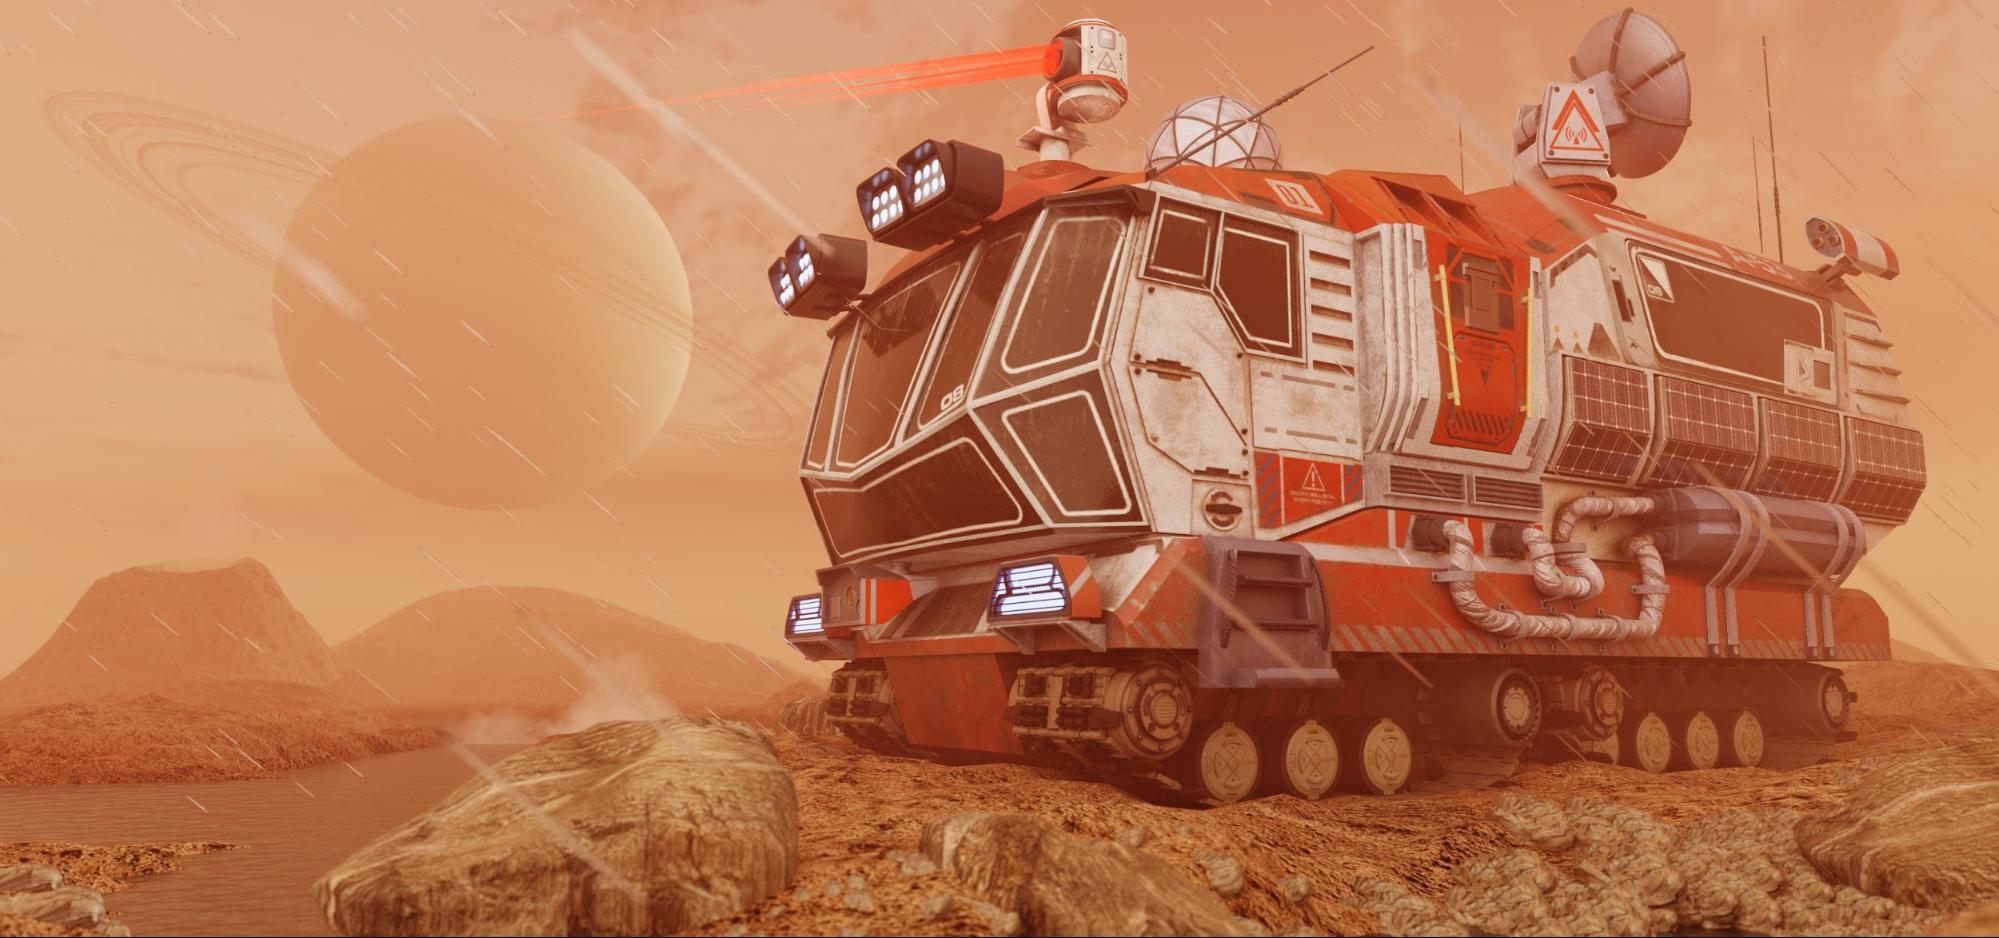
I had started to work with a planet concept, for which I would create a rover. I chose Saturn's moon, Titan. After reviewing the information regarding this moon (its atmosphere, surface, etc.) and considering its features, I tried to create a believable vehicle. My idea was to create an exploration rover, which could explore the atmosphere and surface of this moon.
Tools
For this work I used:
- Blender 2.82 to create the entire scene, composite and render
- Substance Painter to texture the model
- Photoshop to create some decals for the model and post-processing
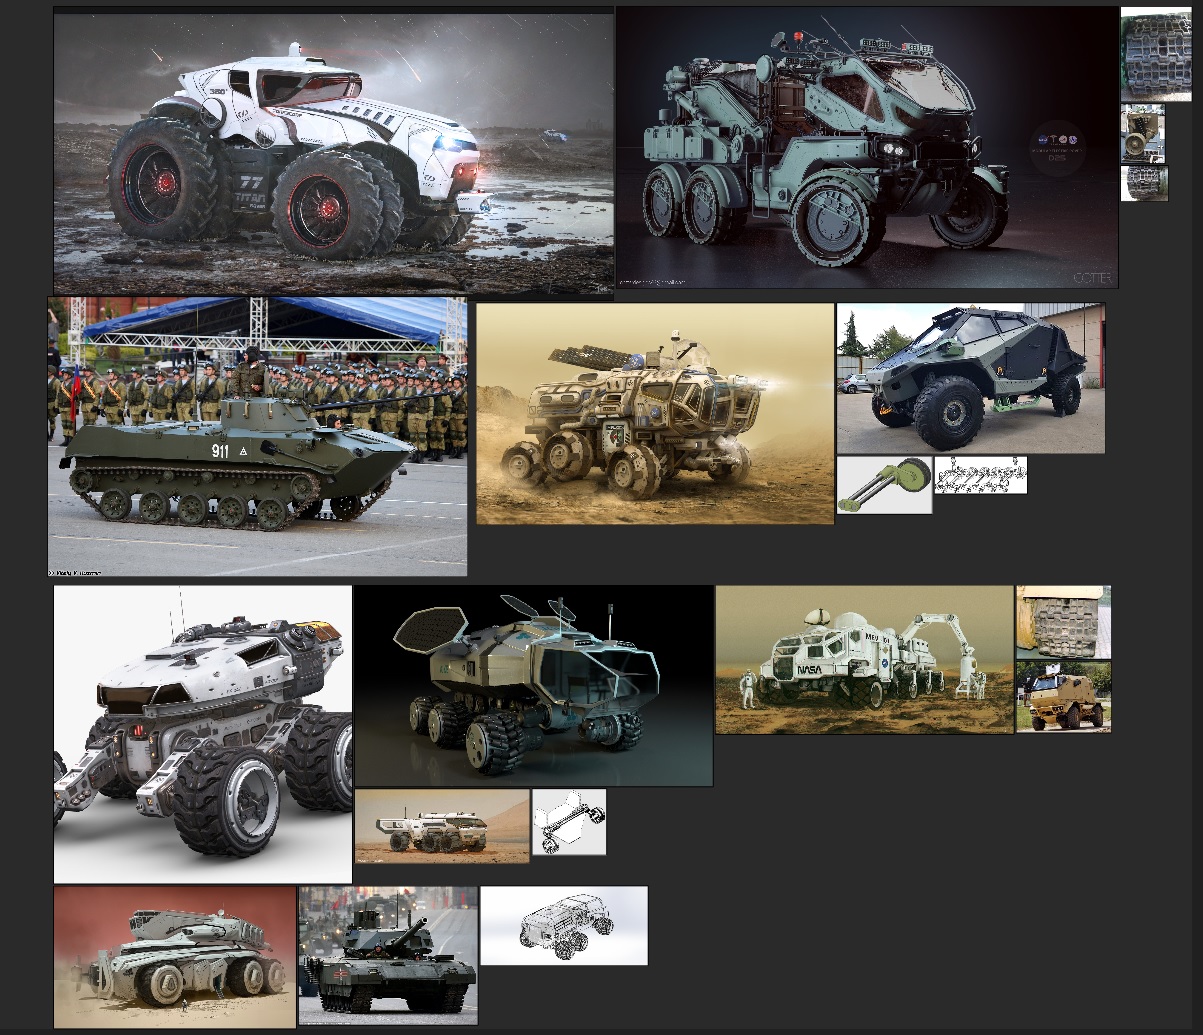
References
I was looking for many reference images and tried to find the most suitable ones.
Modeling
I started to create primary shapes and then I divided them into 4 parts.
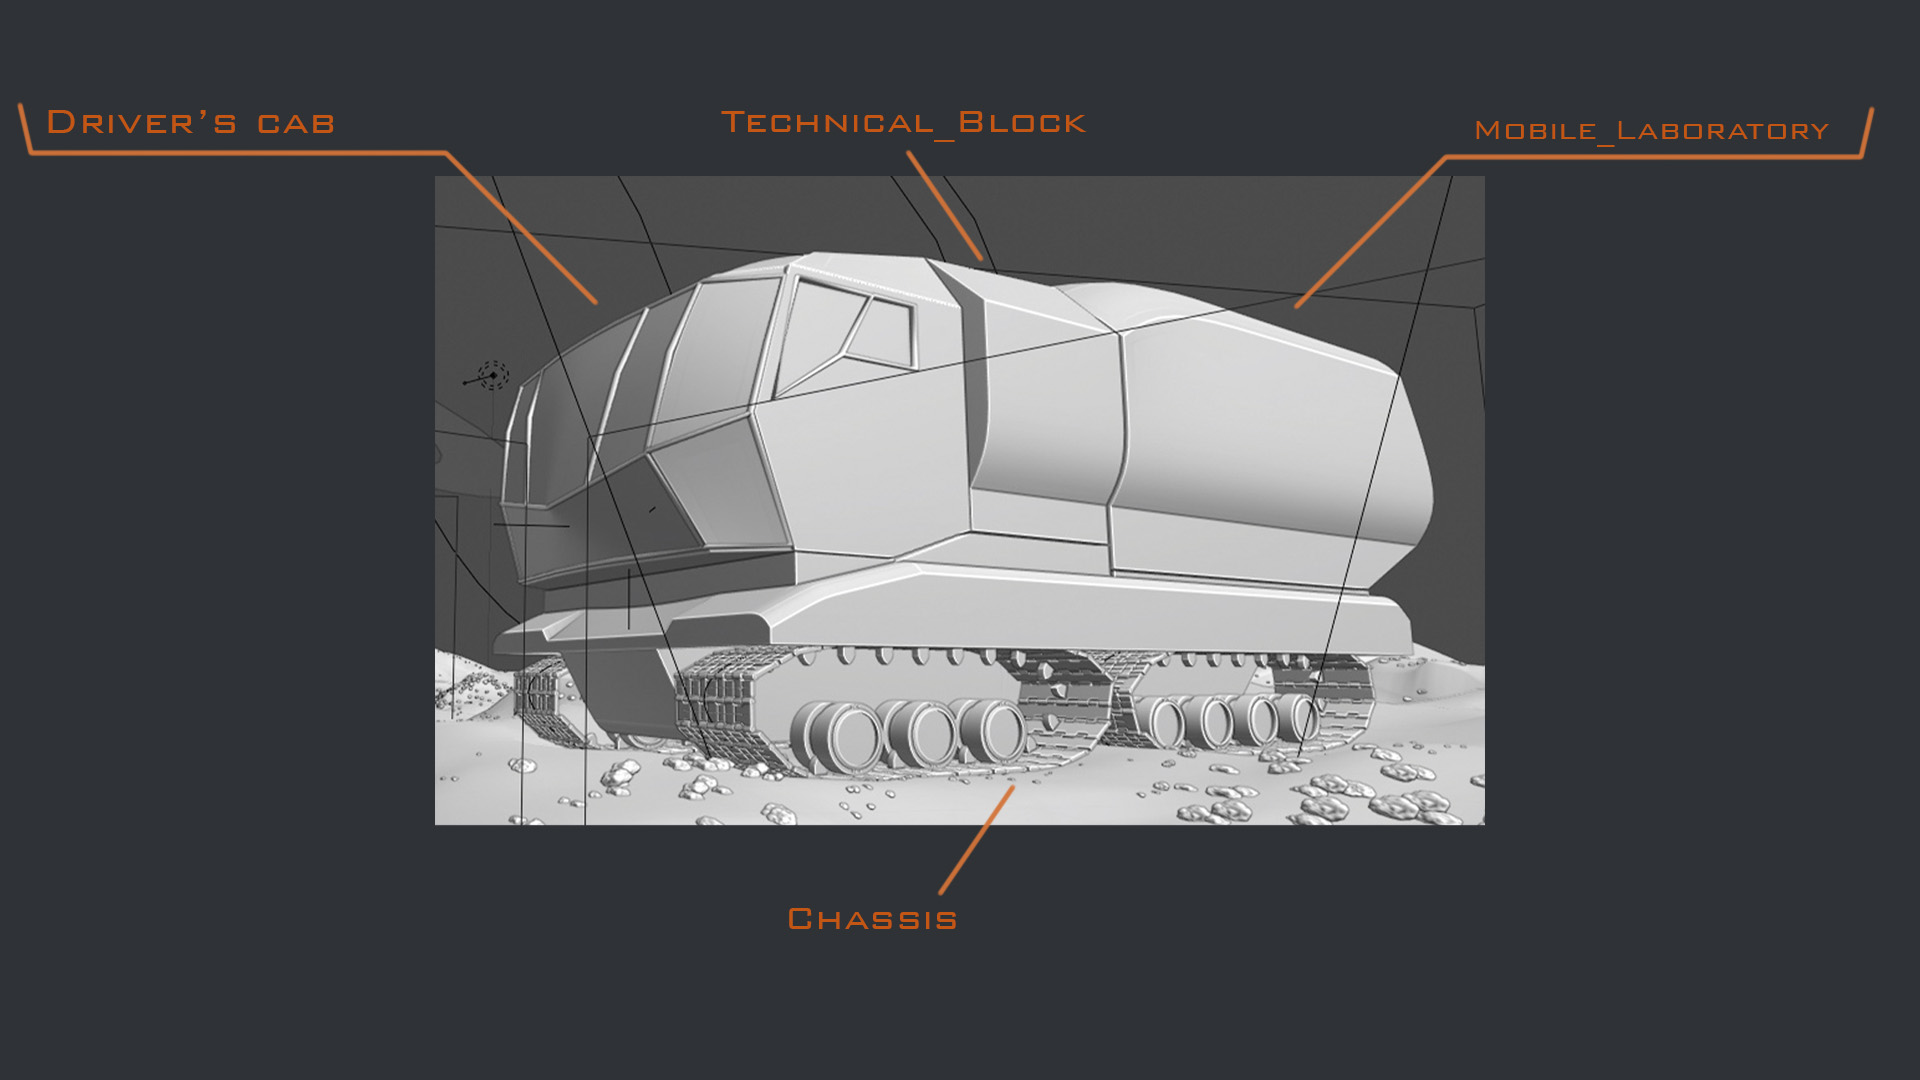
I determined that a chassis that was on tracks with a torsion suspension would be most suitable and effective for this vehicle.


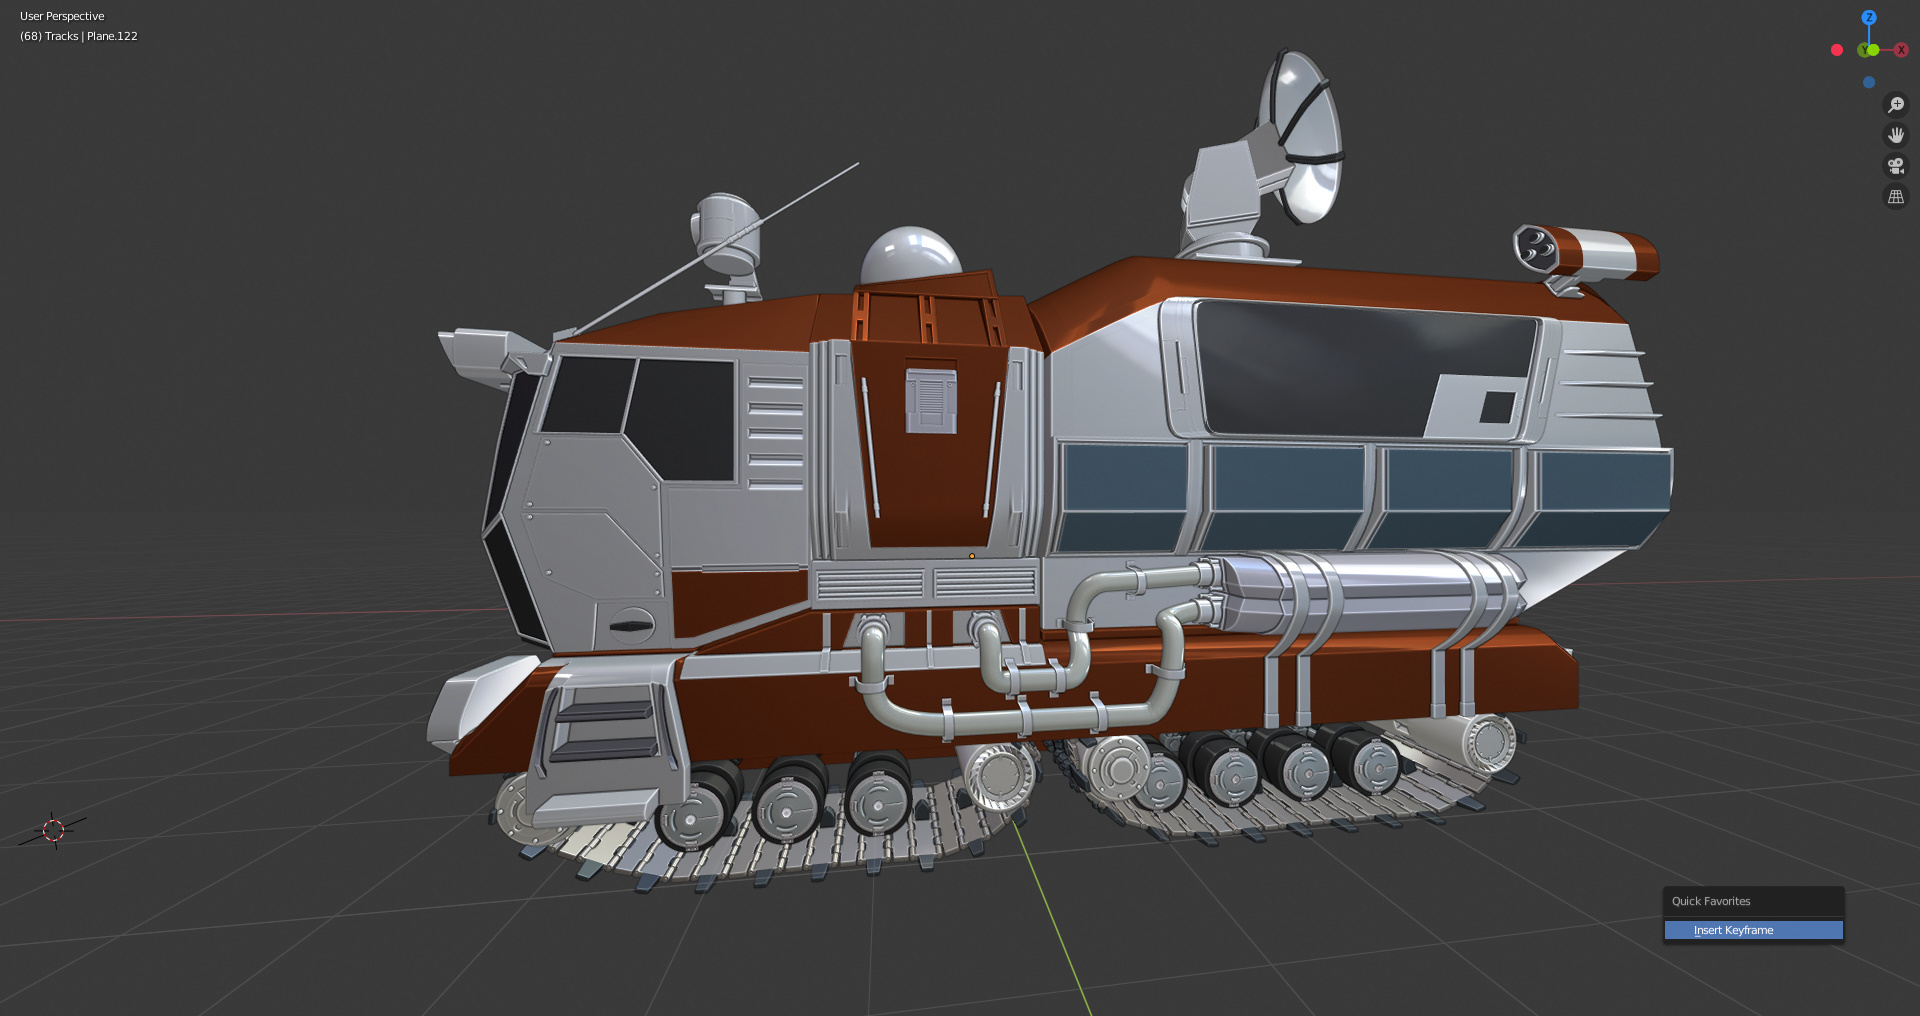
Then I moved on to create secondary shapes. I tried to correctly distribute details so that they fit the model. I also began to add some asymmetrical objects such as terrain and atmosphere scanners.


Final mesh:
UV Mapping
After I had finished modeling, I started to prepare the model for texturing, which was the biggest puzzle. :) The model has many details.
I had to divide the model into separate meshes and after that I unwrapped it.
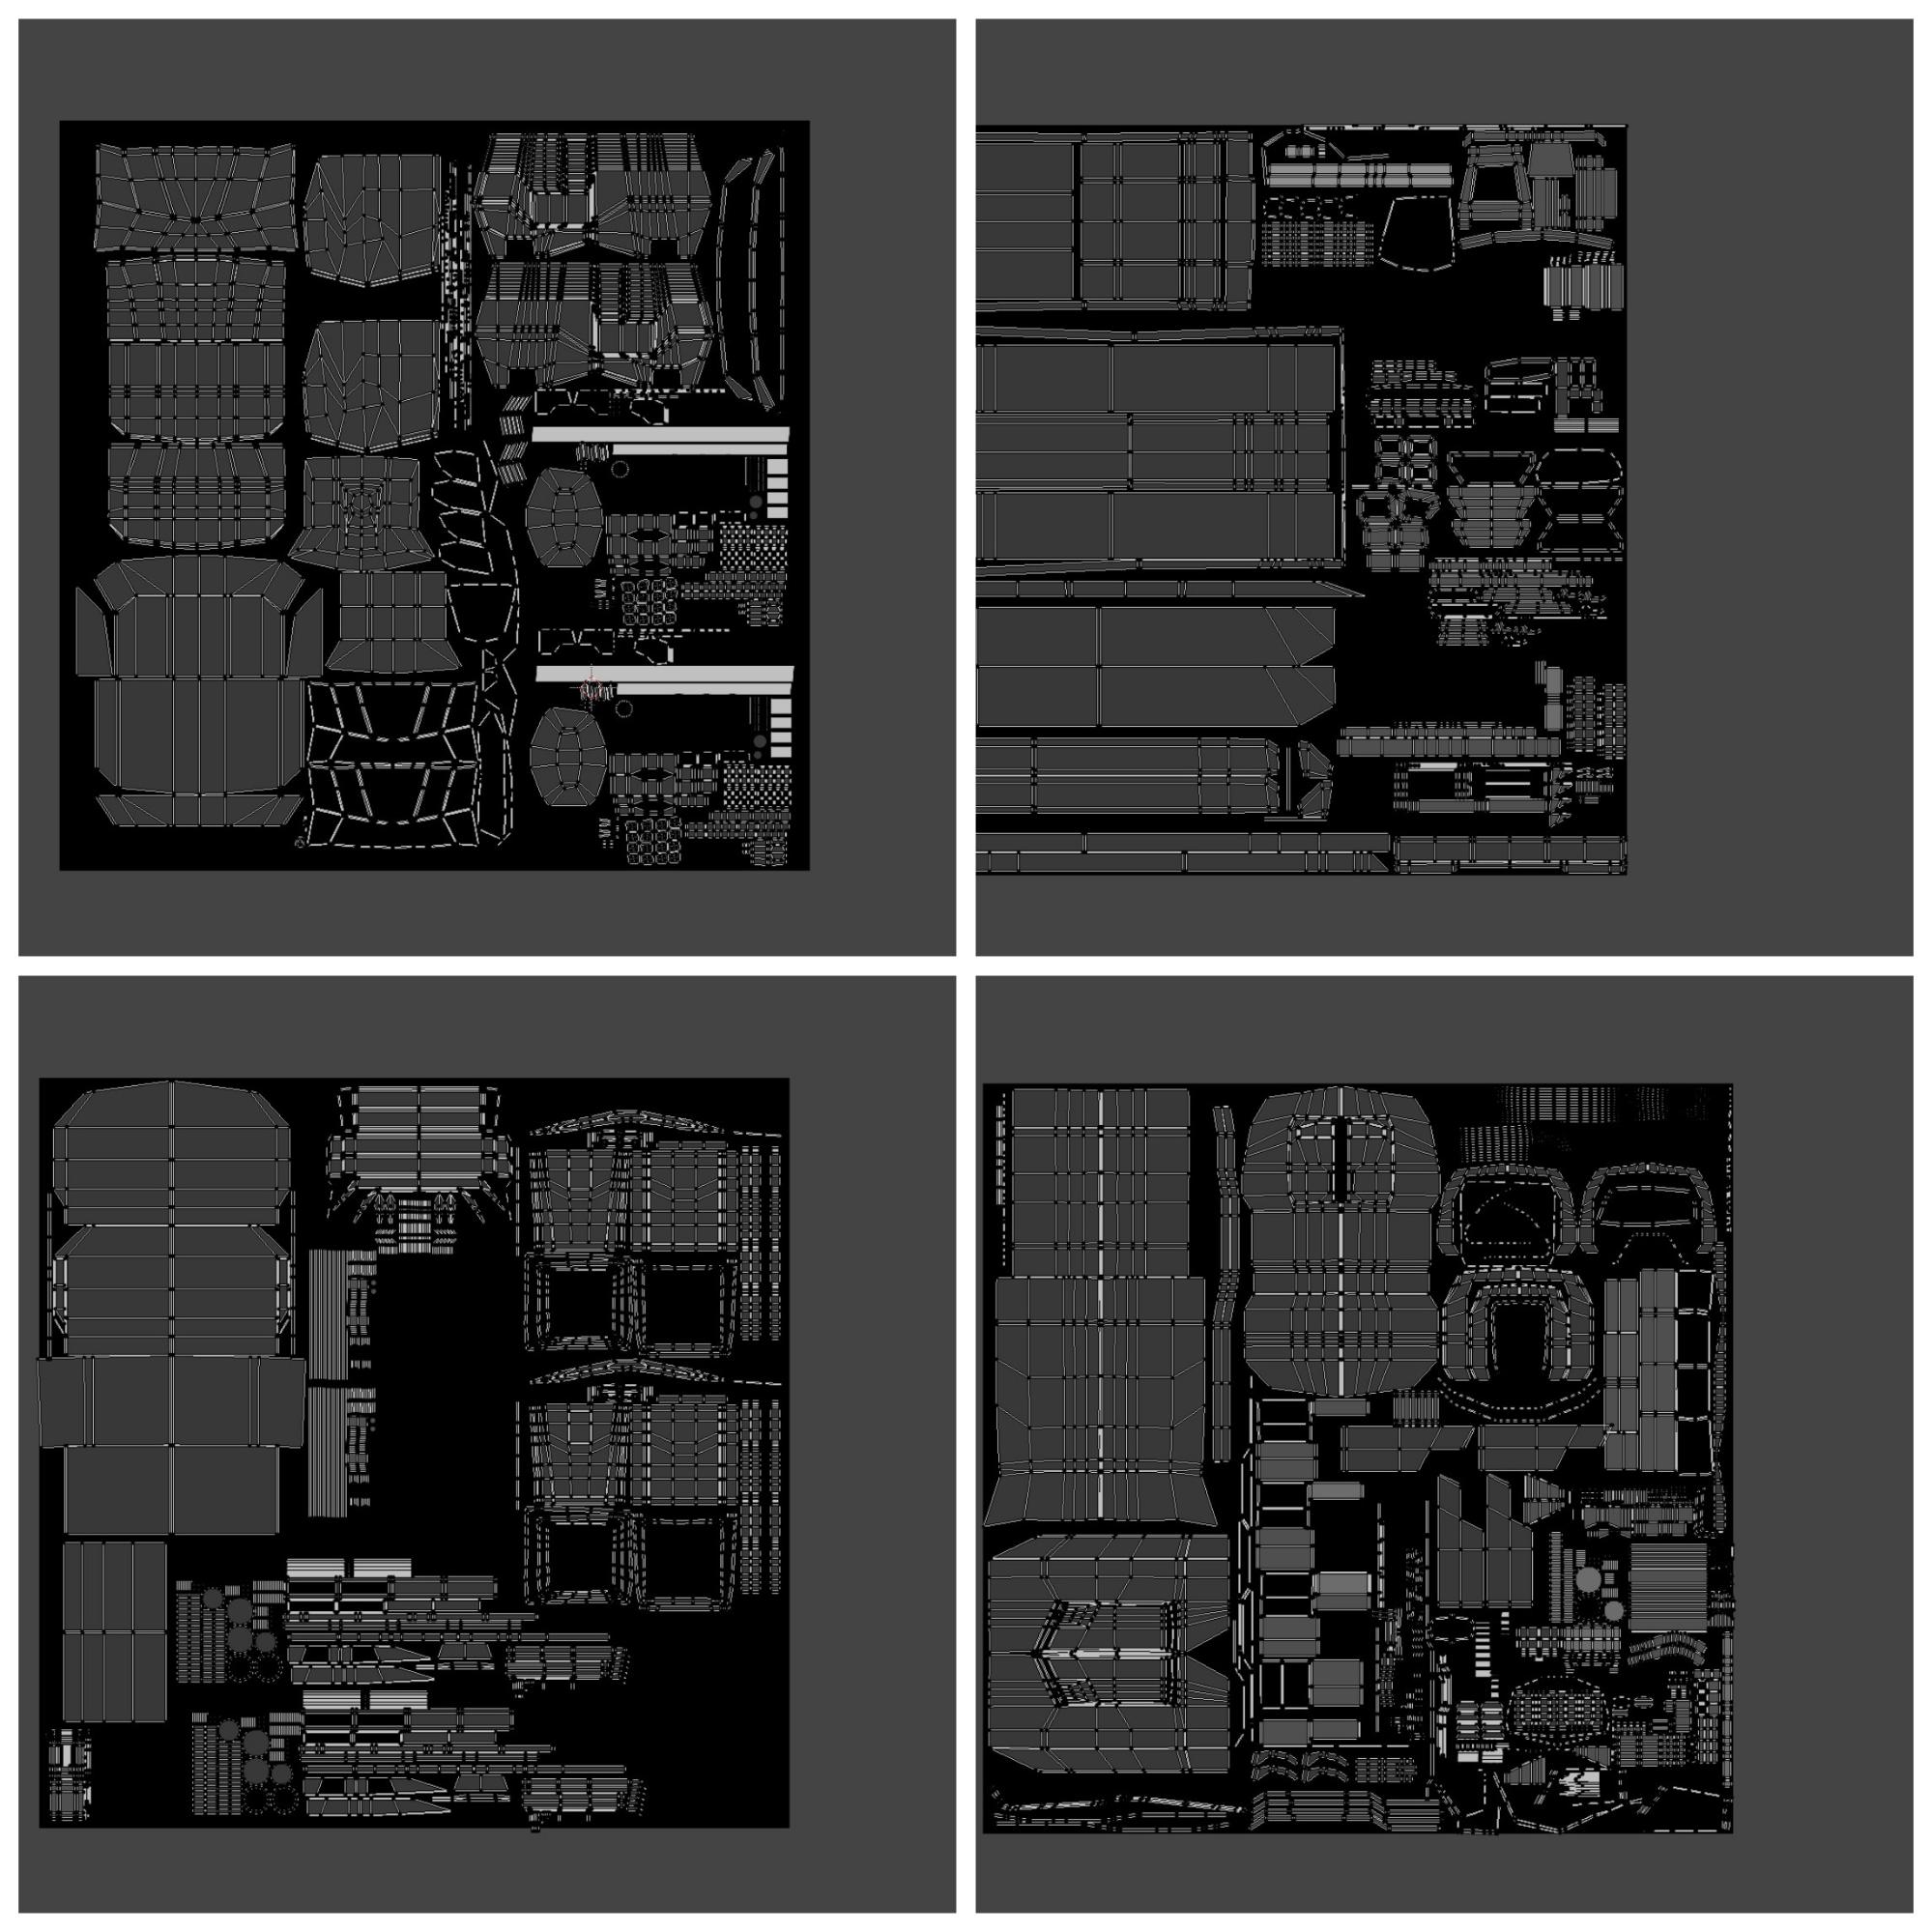
I wanted to make it as correct as possible to avoid creating any artifacts or distortion.


Shading and Texturing
The model was textured in Substance Painter. I also used Photoshop for creating some signs and decals. My mission was to create realistic-looking lightweight, composite materials.


Rendering and Compositing
Below is my raw render; I thought it looked too soft.
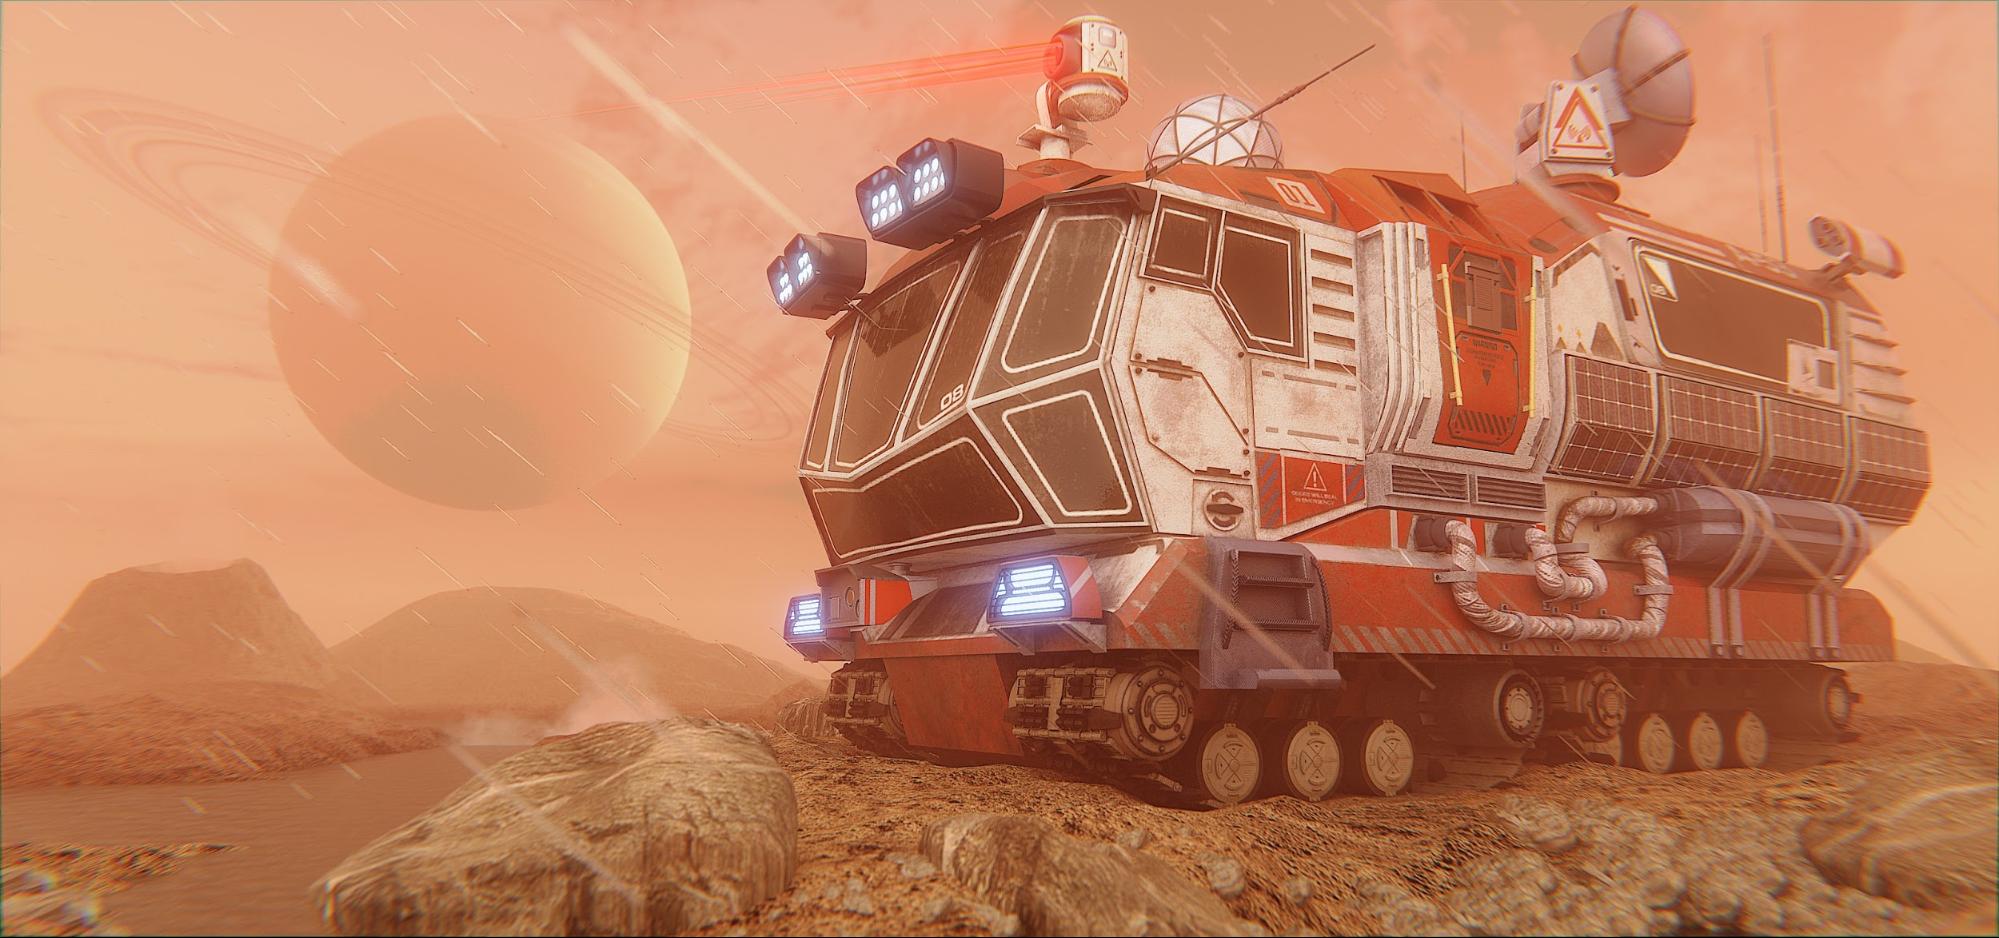
I used the native Blender compositor to add some sharpness and a glare effect.
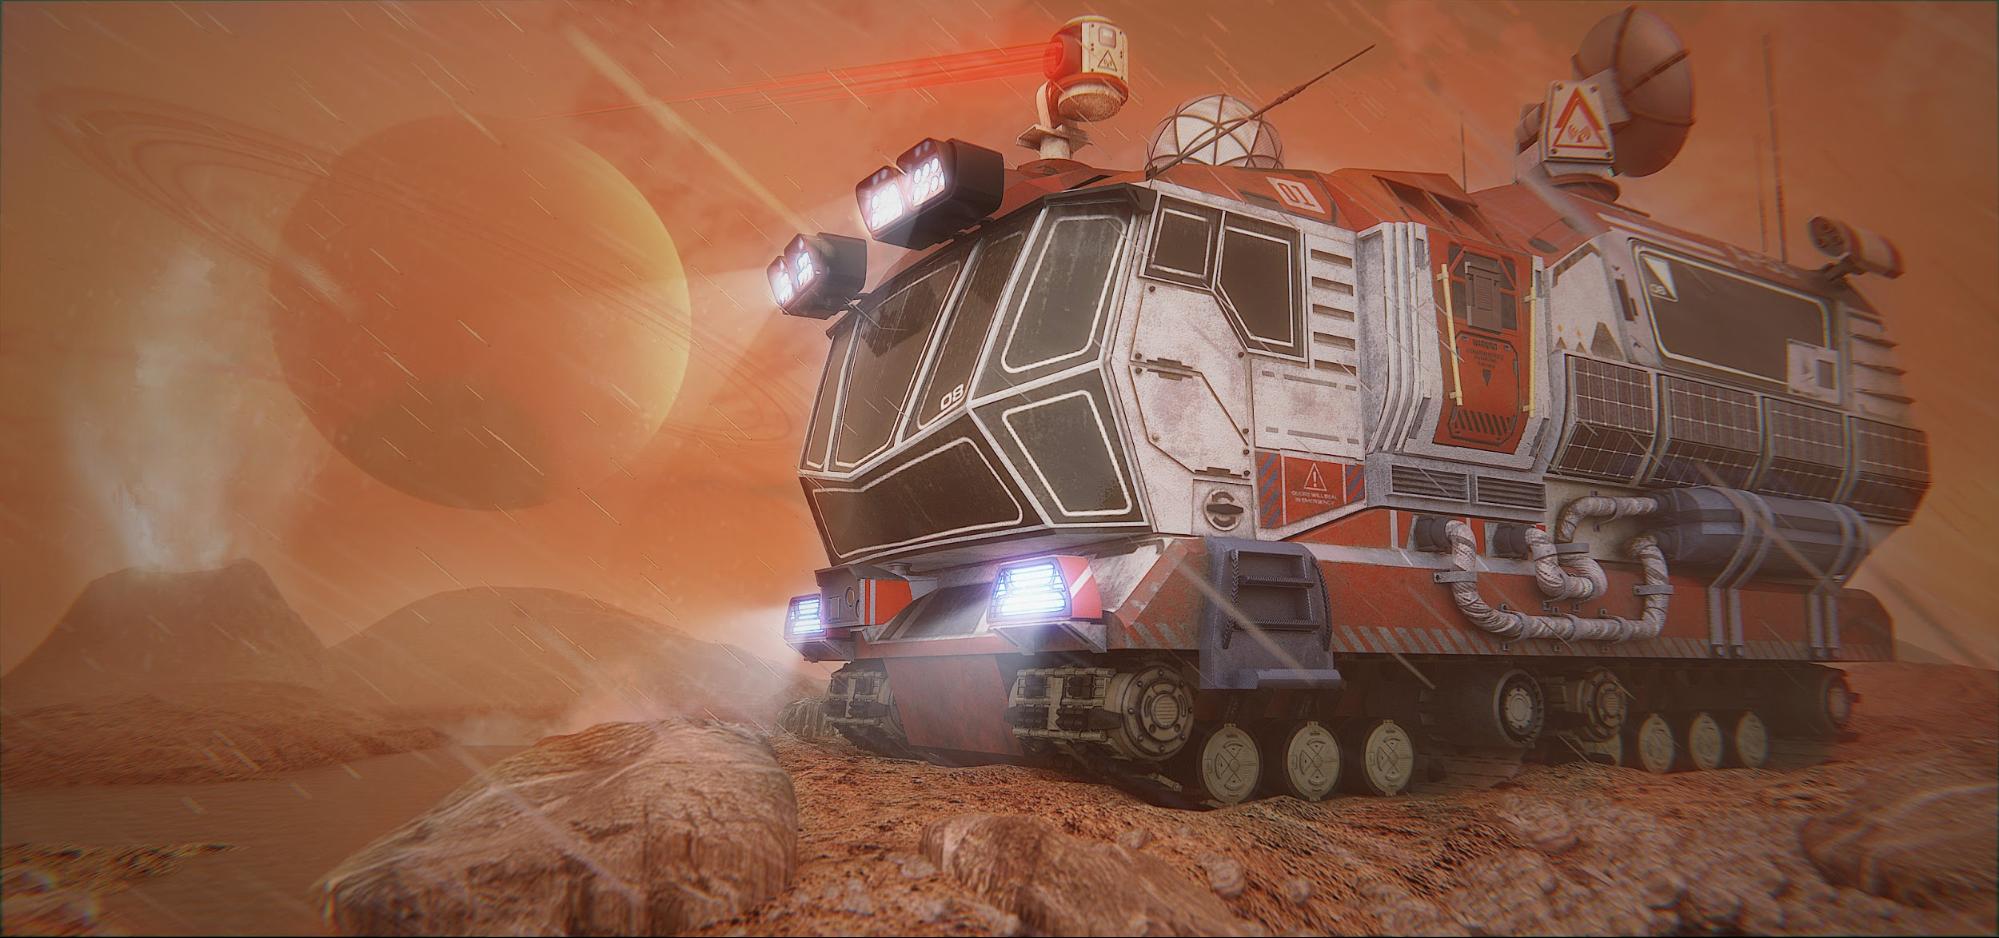
And finally, below is my final image with post-processing done in Photoshop. I used it for color correction and to add some rain and a cryovolcano effect.
Thanks for reading!
Hardware
- CPU-Intel Core i5-3470
- GPU-Nvidia GeForce GTX 650ti
- 8GB RAM
About the Author
 Sergey Panayev, 3D Artist
1 Comment
Wonderful work!