Behind the Scenes: AB Suite
Hi, Heverton Silva here. I’m currently working in an architecture office here in my hometown and freelancing when possible.
I’m a self-taught Blender user that started in the 3D world after learning AutoCAD and Revit in my studies for my Civil Engineering bachelor’s degree back in 2015.
As Revit offered only a very basic rendering, one thing that made me interested in Blender and not 3ds Max at the time was the interactive rendering mode in the viewport with the Cycles render engine. Also, it was not heavy on the machine that I had at the time and it’s free (heh).
Project inspiration and starting point
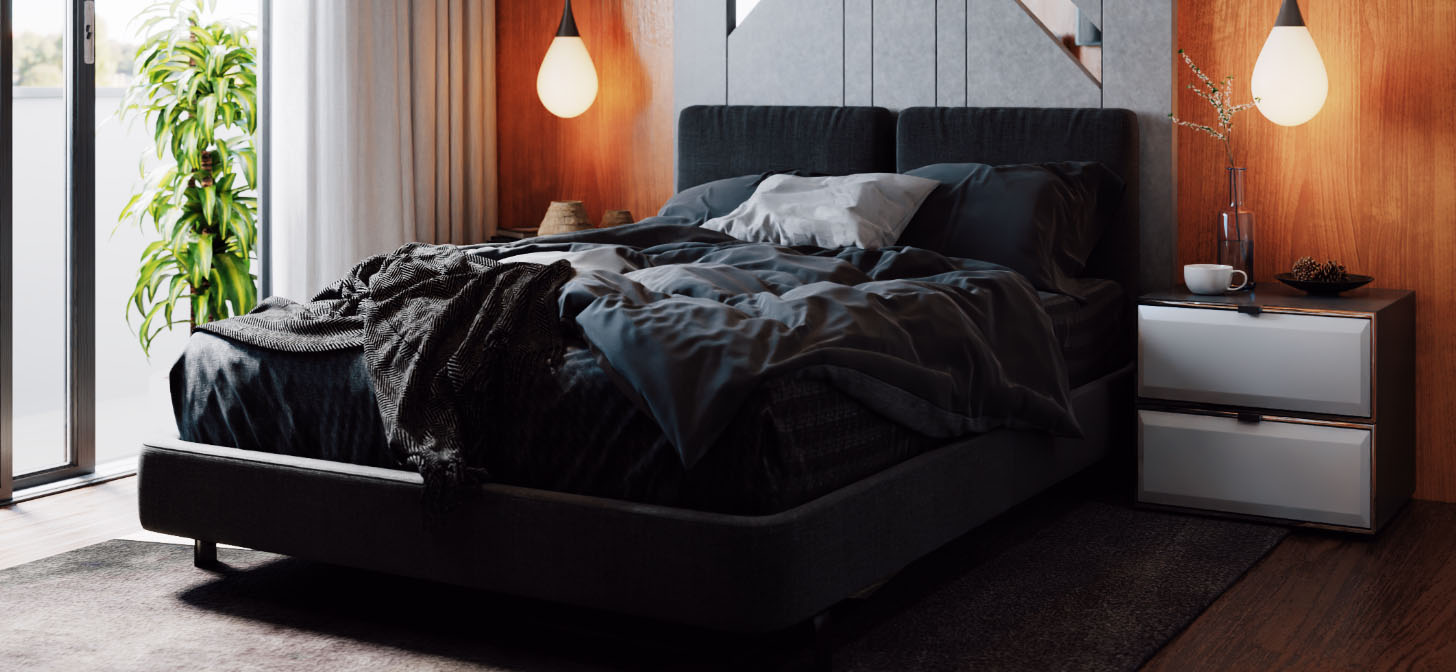
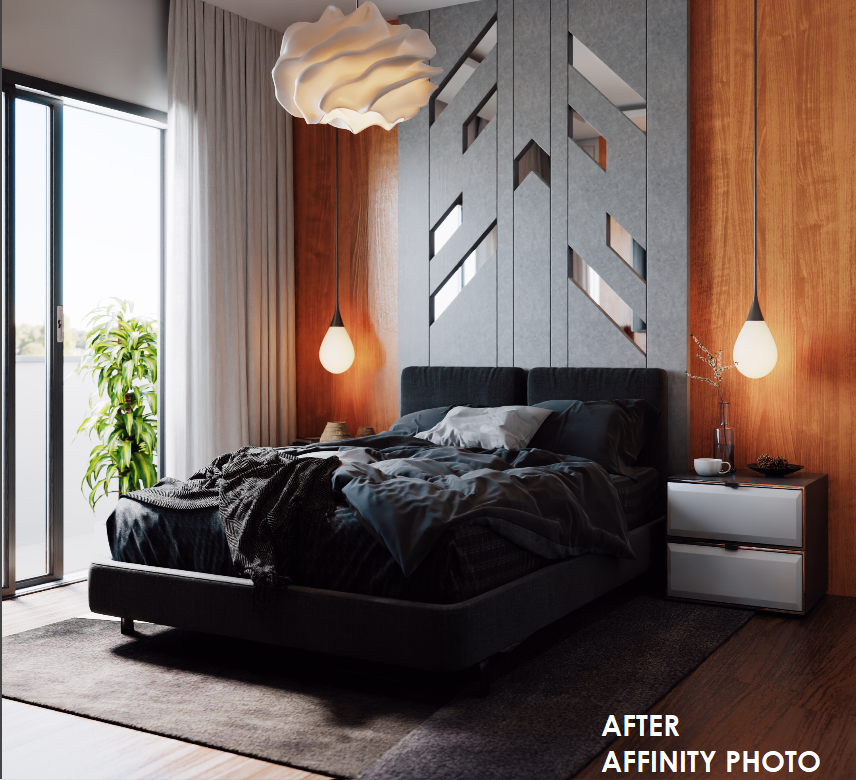
While I was updating my new portfolio, I decided to make a bedroom from scratch based on a few references from Pinterest and Instagram that I carefully selected as inspiration. Then I designed the floor plan in AutoCAD and brought it to Blender and started the 3D process.
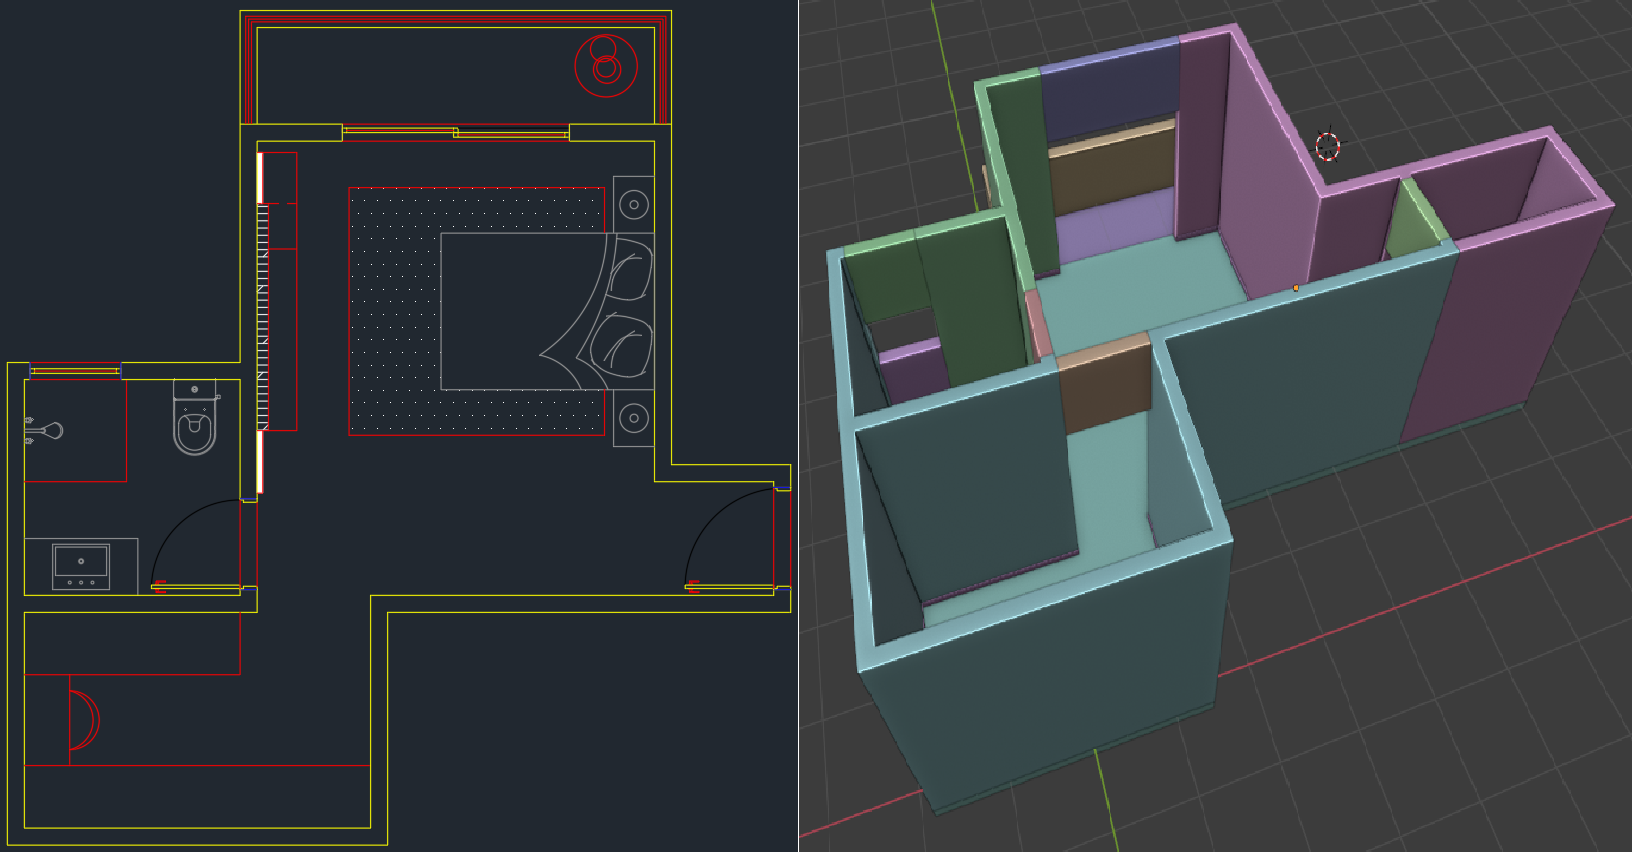
After modeling the walls, I started modeling some basic furniture.
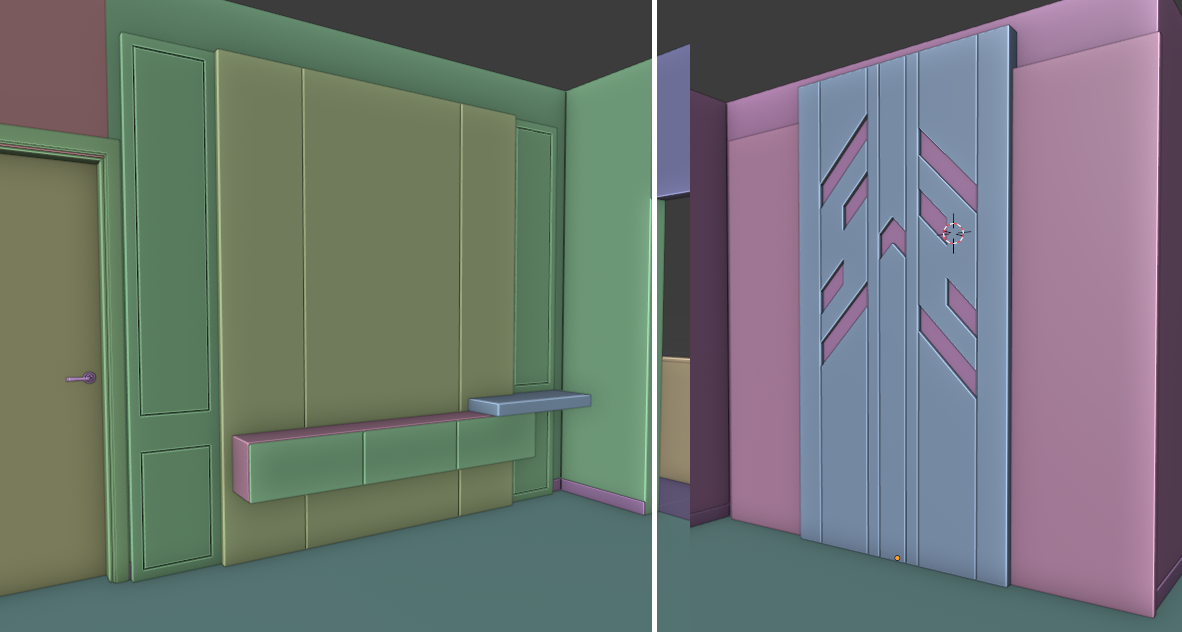
And then I used premade assets from my library and a few other sources. By doing so, I could focus my attention on shading and lighting. I separated all assets used in the project folder so I wouldn’t waste time in doubt of what to use when I was importing the assets.
I made my materials as simple as possible. I used a Principled BSDF for almost all the materials except for glass and a few others in the scene. I used a PBR texture whenever possible, and, when it was not possible, used a “fake” PBR with a color ramp converter for bump and roughness map.
Shading and lighting
For the pendants, I used a thing I discovered by accident to give a subtle fresnel effect: link the incoming socket of the Geometry node to the Translucent normal socket (weird? Yes. But it works like a charm).

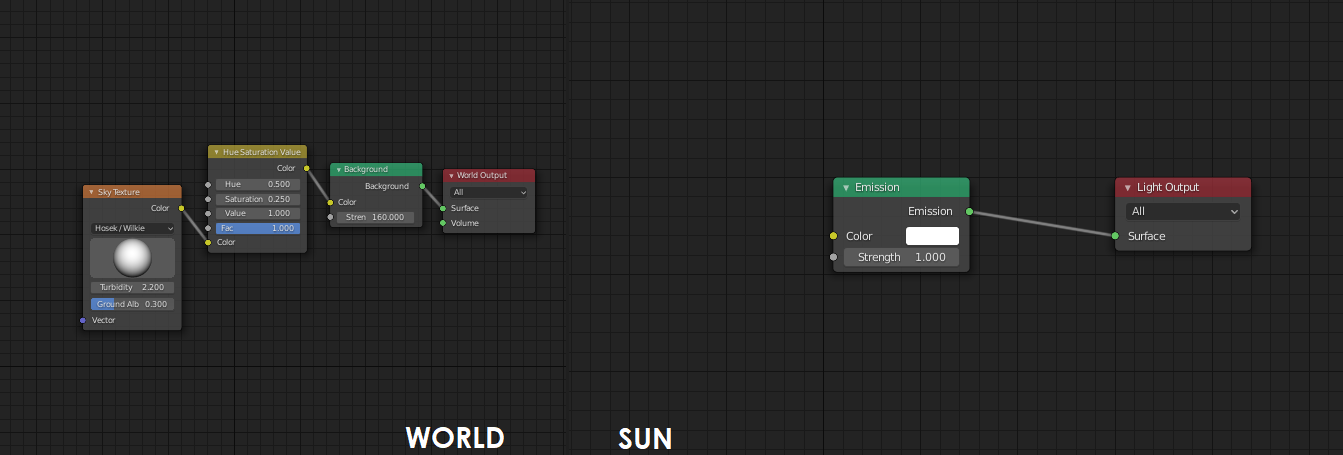
The “world light” is just a Sun+Sky desaturated. I really don’t like the blue-ish light from the default world or the yellow-ish from the sun, so I set them to be ‘black and white’ lighting. For interior lights, starting with the ceiling ones, I added a blackbody node with a value of 4000K; for the other ones I used a value of 3000K.
Compositing and post-process
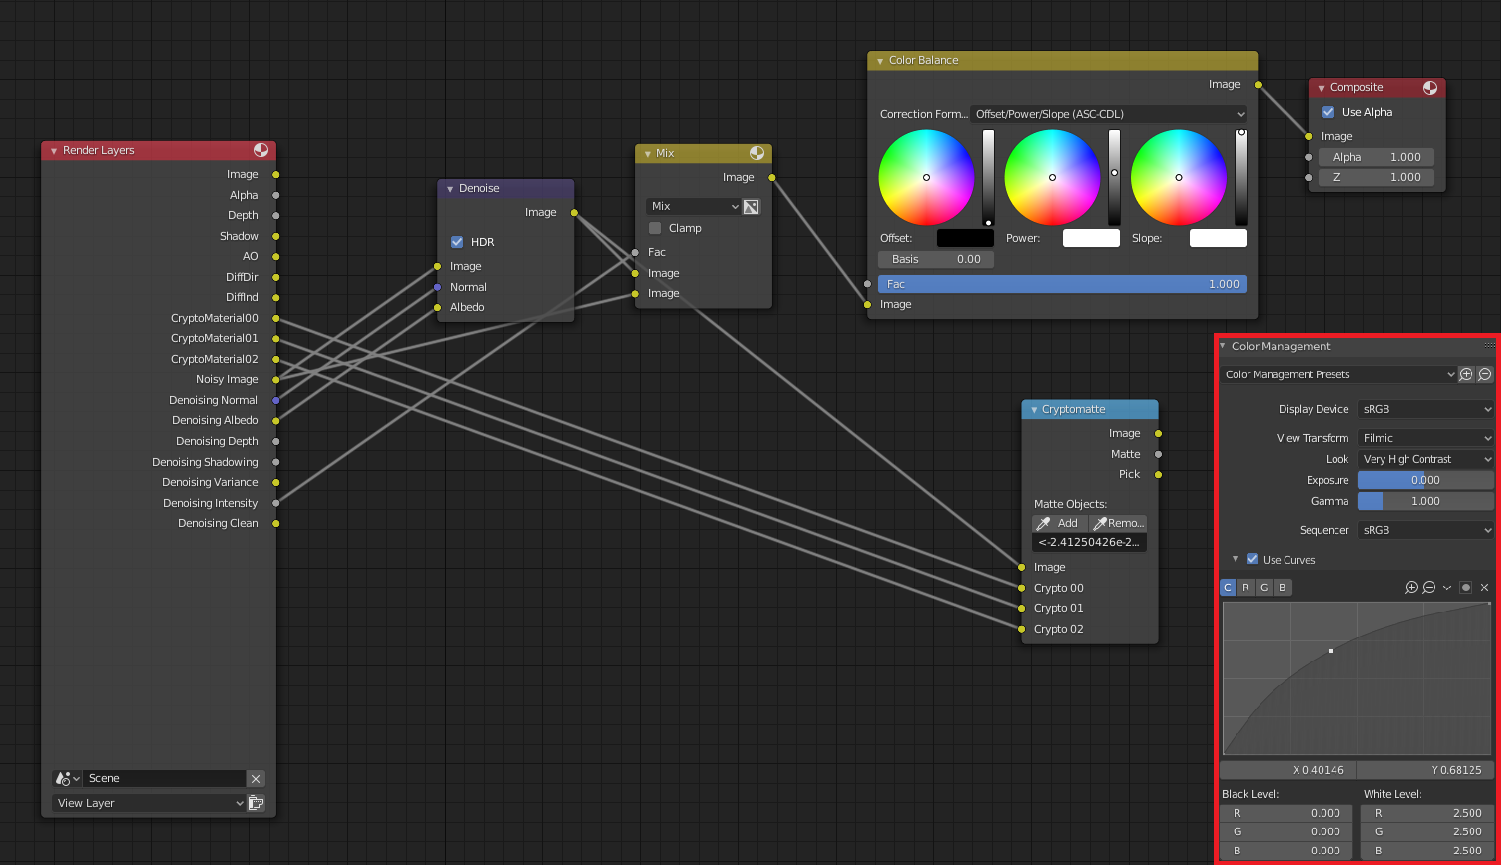
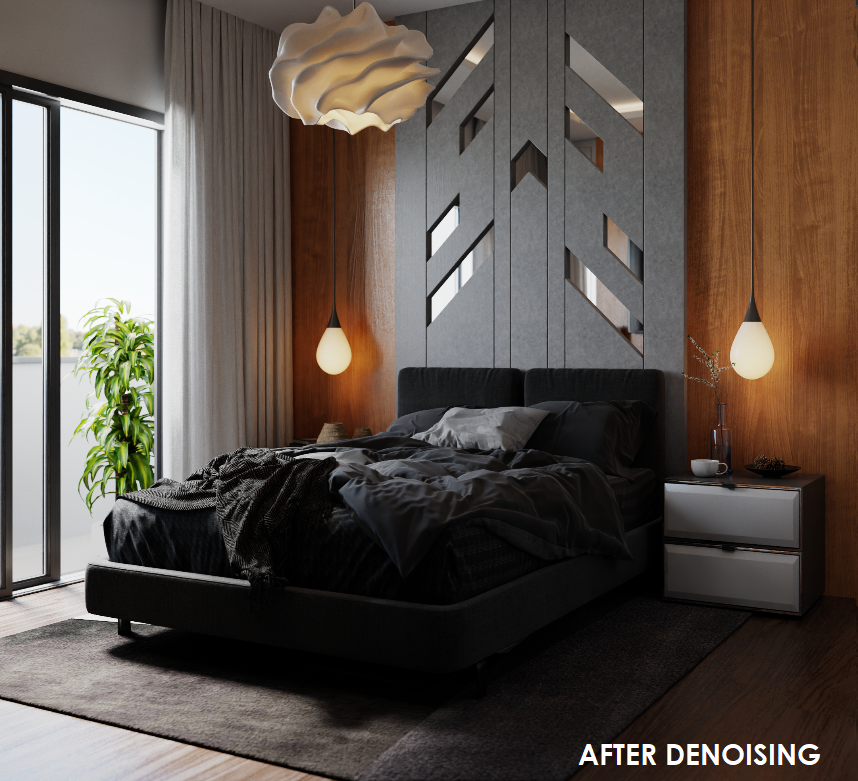
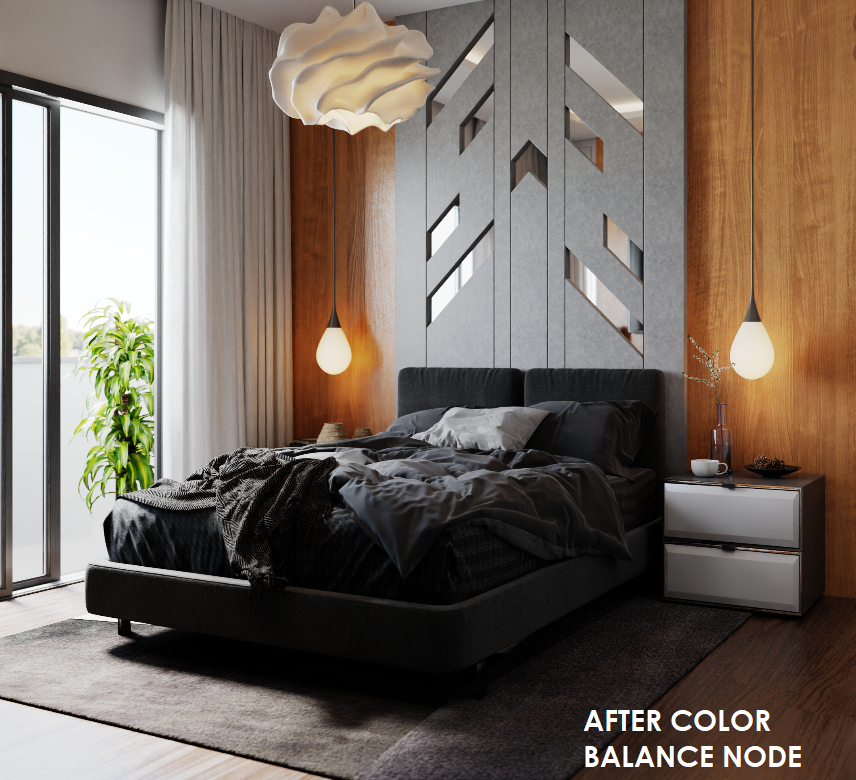
I really tried to keep post-processing simple. I set the Color Management to Filmic: Very High Contrast, and under Use Curves, I raised the white level to get something like Highlight Compress from other Rendering engines. Usually, I use this setup in the Compositor as it seems to get more details to show up after denoising. I always use a Color Balance node to do some sort of color grading after rendering, adjust contrast, and so on.
I like to get white walls to really be white, so I separated the ‘Walls pass’ with Cryptomatte and desaturated them in Affinity Photo and applied a LUT I like.

Tools: Blender/Cycles and Affinity Photo
PC Specs: Ryzen 2600x + GTX 1050Ti + 20GB Ram
Rendertime and resolution: About ~2h each frame, 2160x2160px
See other shots from this scene here or here.
Thanks for reading! :)
About the Author
 Heverton Silva, 3D Archviz Artist


