
About
Hello guys, I'm Natan Ernani. I was born and currently live in São Paulo, Brazil, and I'm 20 years old.
I started learning 3D in August 2018. Before that, I made digital paintings. I'm still very new to 3D art.
When I met 3D, my mind exploded. I was very surprised at what it was possible to achieve with 3D. The first 3D software I learned was Maya.
And so I looked for 3D tutorials.
I found a tutorial from Revolution, a channel in Brazil that publishes many free things for those who want to learn and cannot afford a course, and it was a great help to me.
Since then, I have been looking for tutorials in this area to learn more. I have no formal training in this area.
One day I want to go to college so that I can learn more.
Inspiration
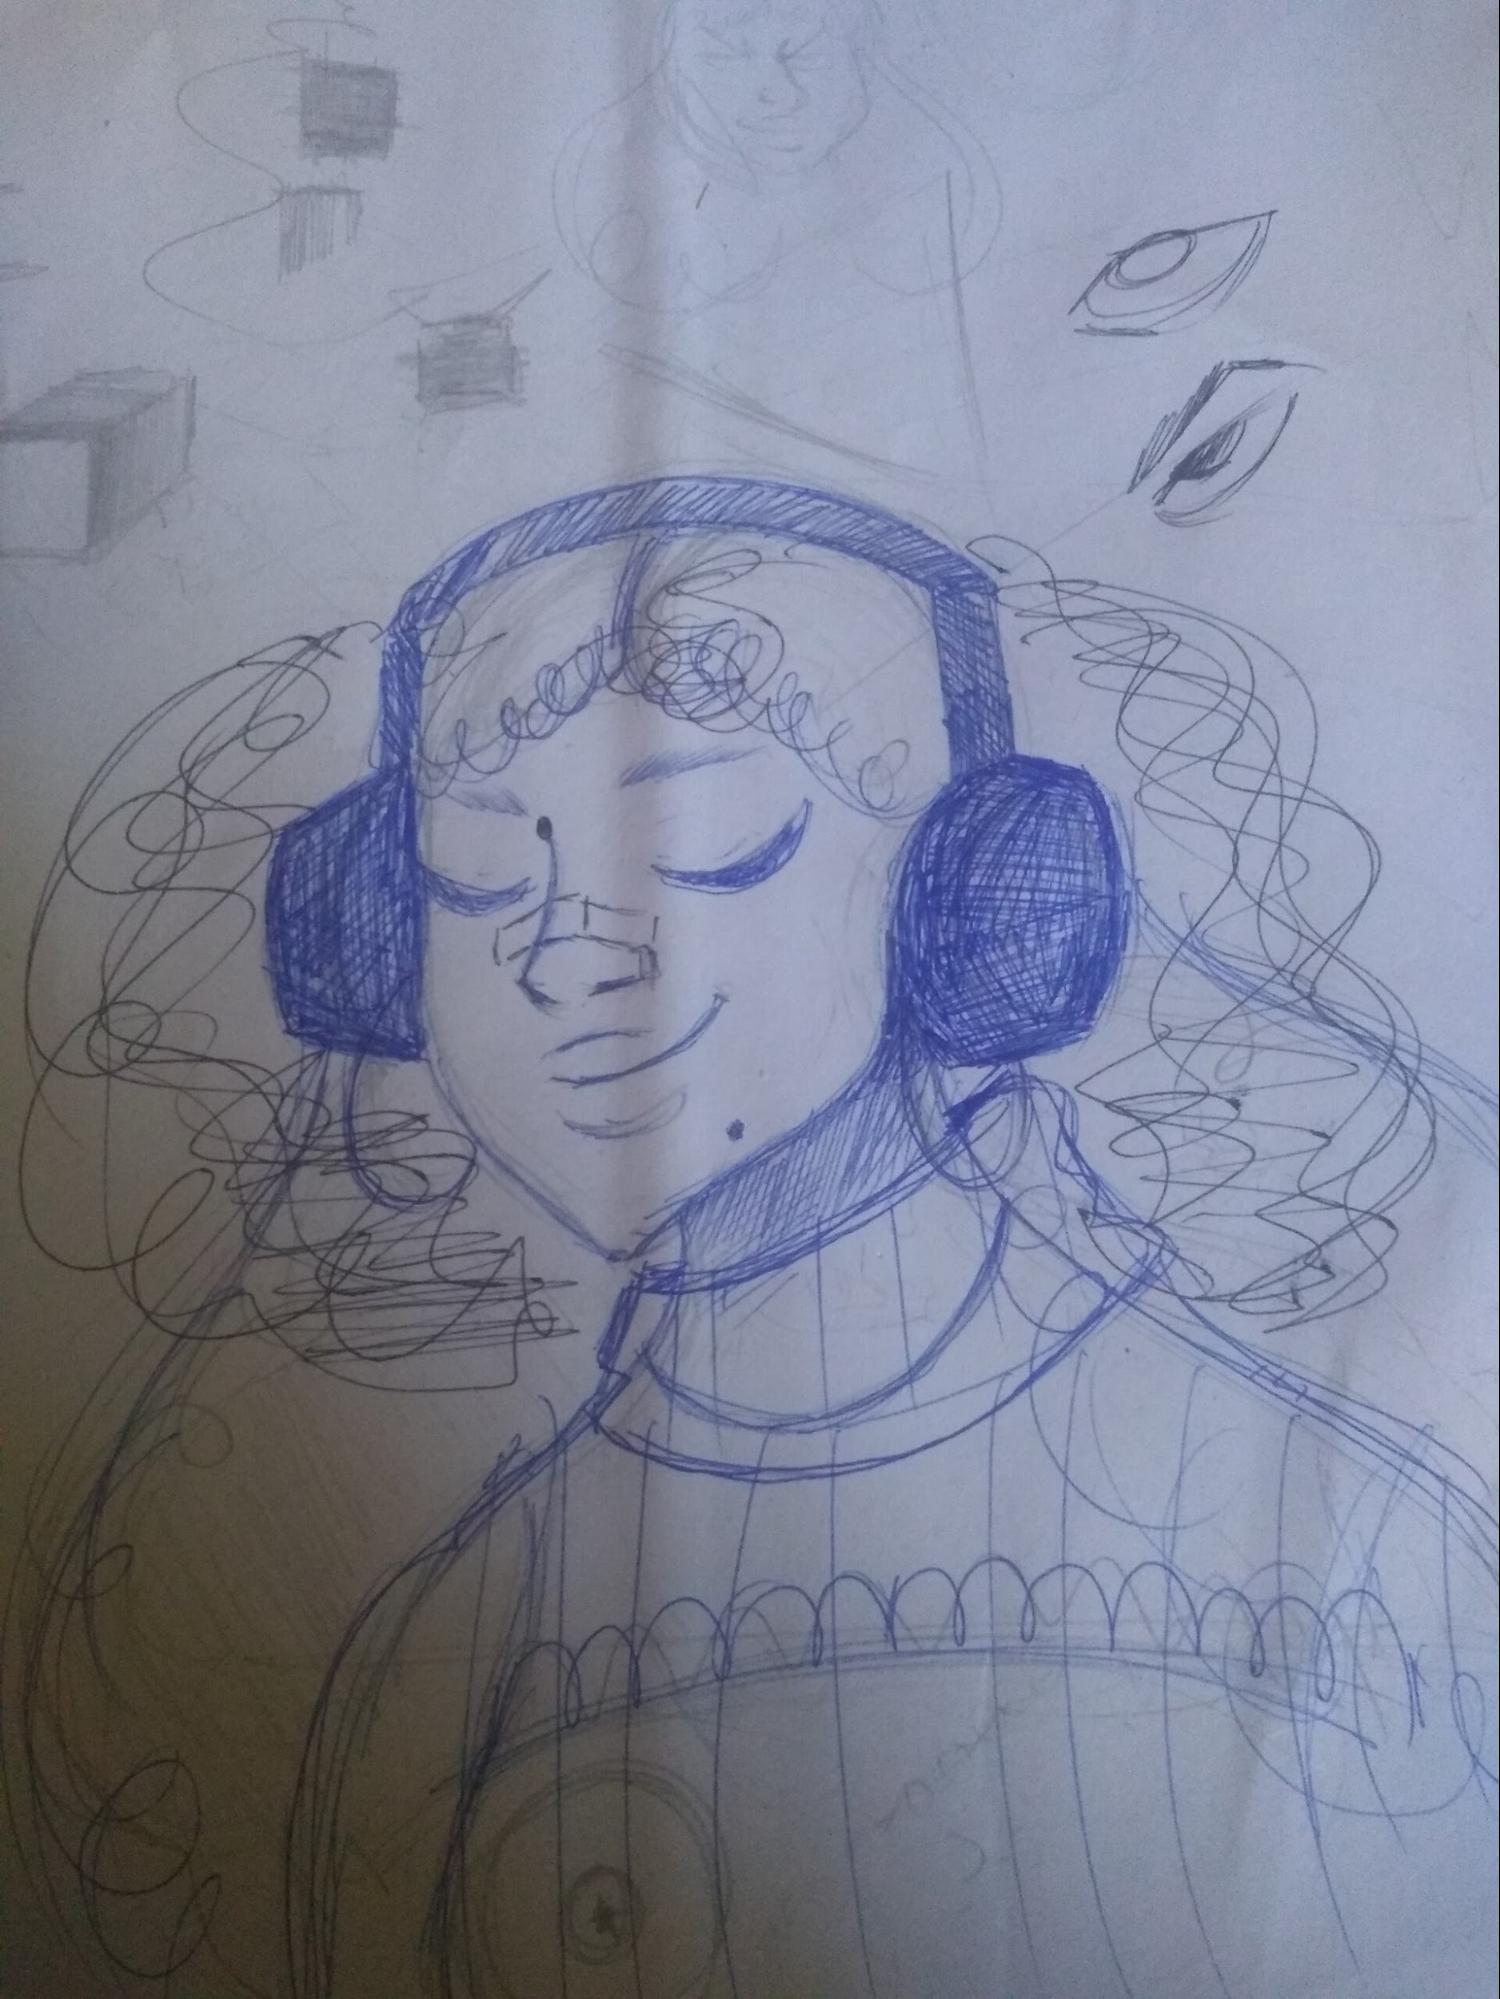
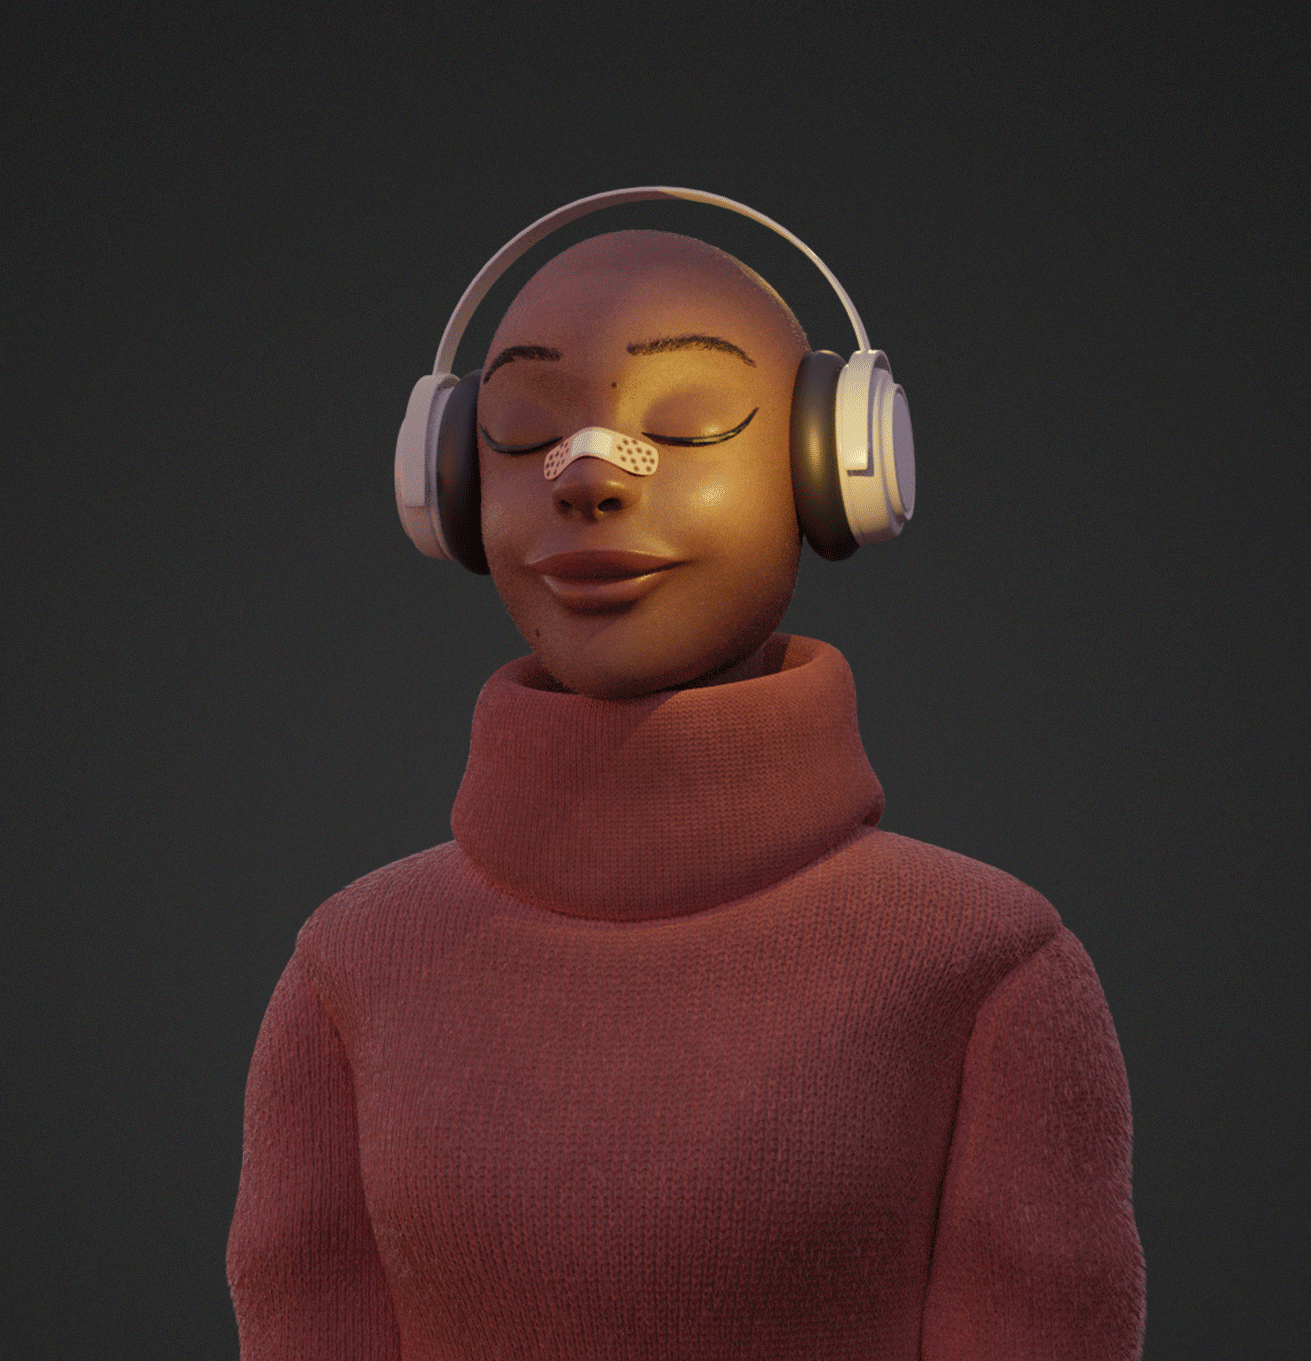
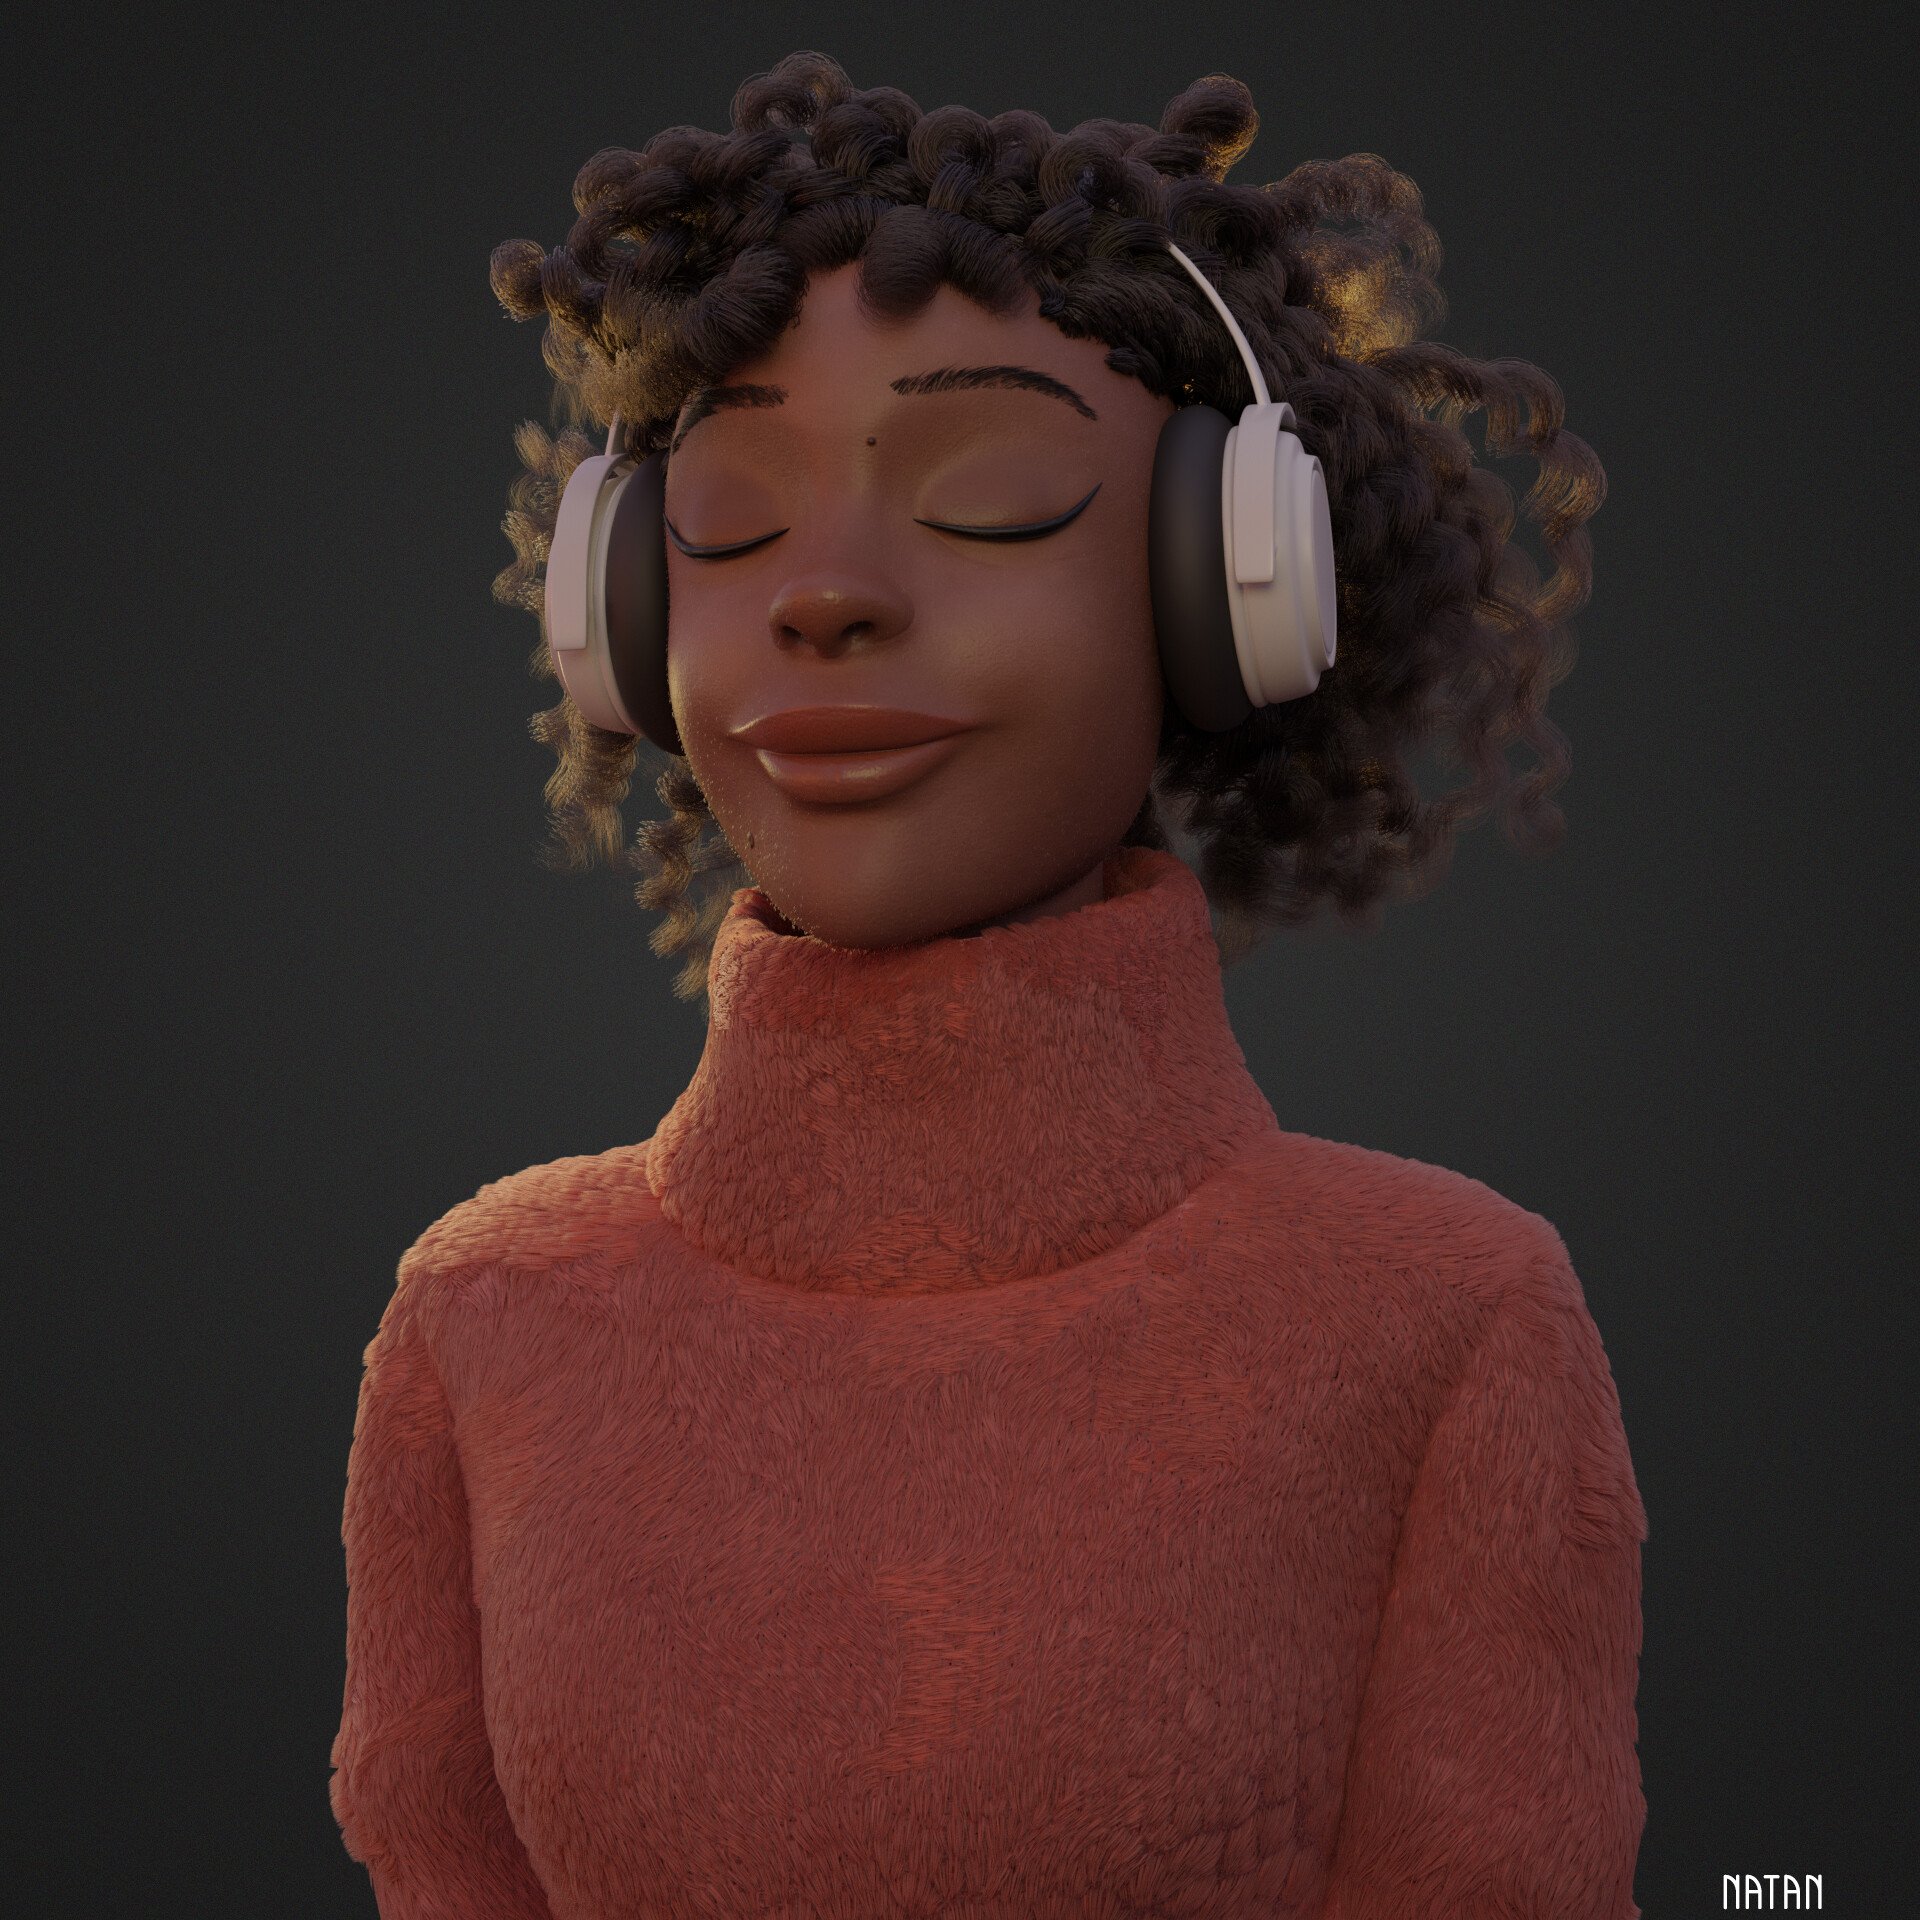
My inspiration for creating Listening was a very old sketch that I found in my house while I was tidying my room lol.
And I really wanted to learn how to do hair.
So I thought I would try to make this character.
References
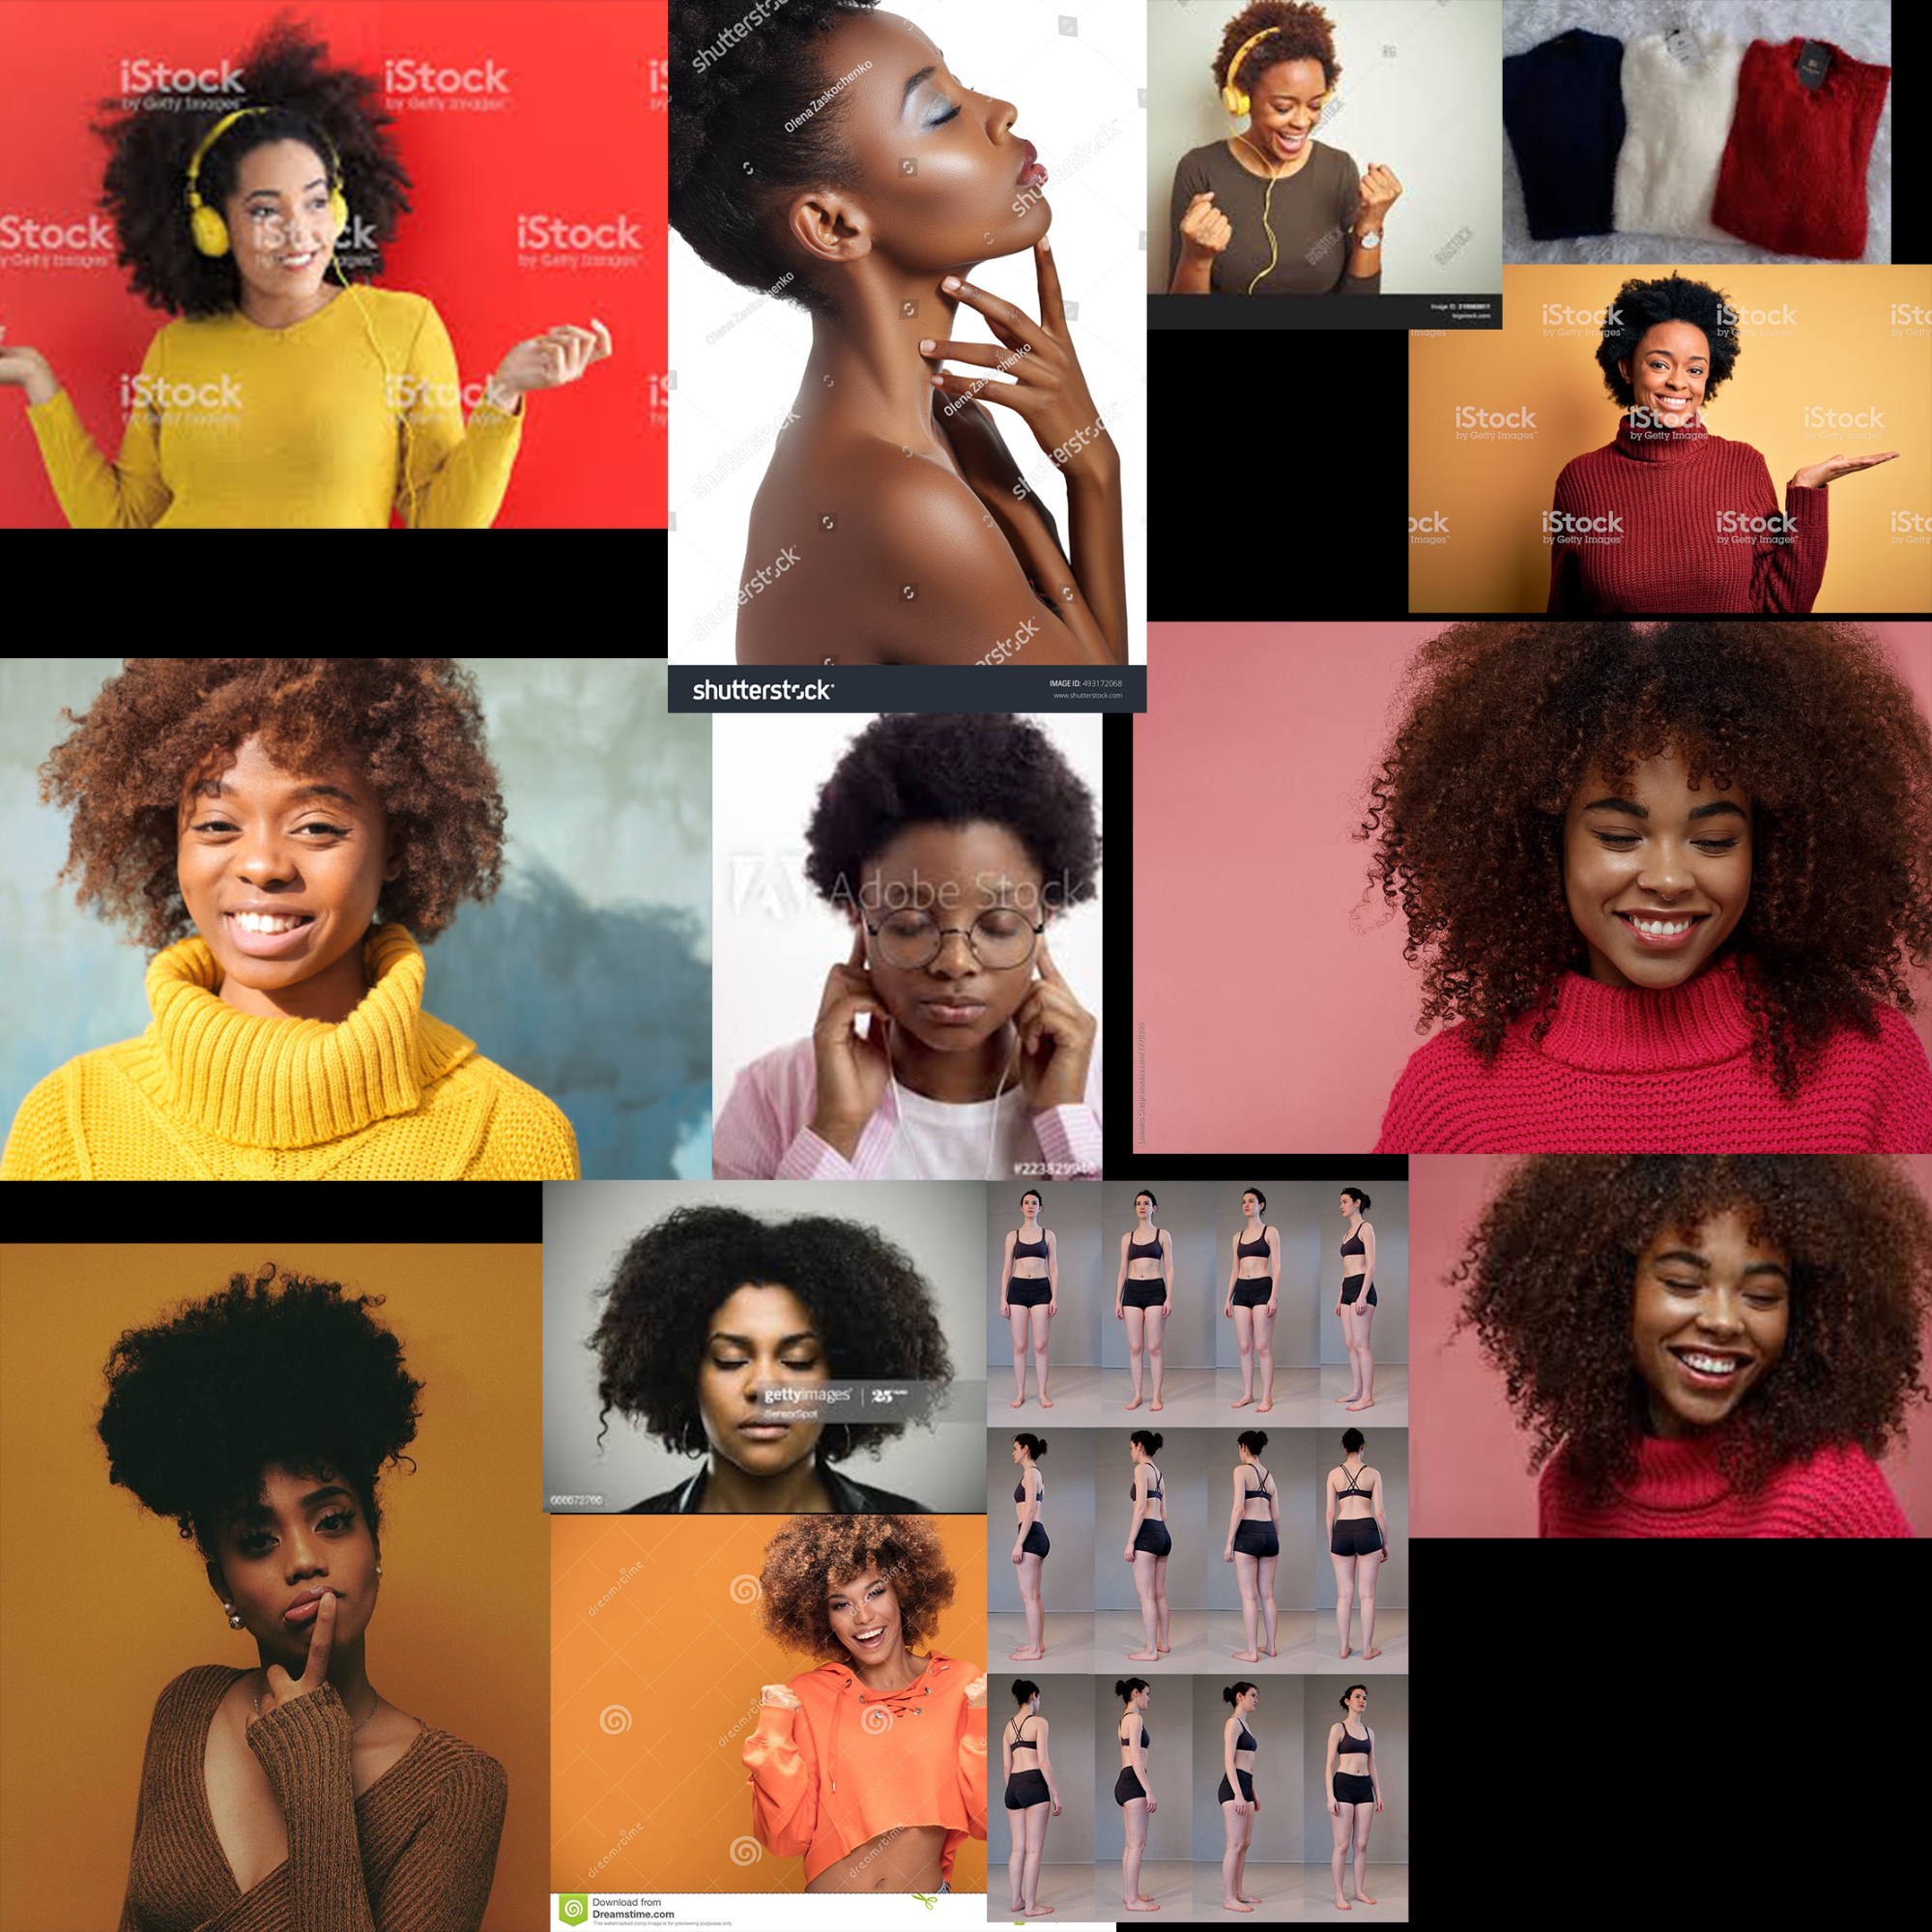
For the first step, I made a mood board to get an idea of what I wanted the girl to look like. I searched for references on Google and joined them in Photoshop.
Modeling and UVs
After separating my references, I went straight to ZBrush and started modeling the character using dynamesh. When I achieved a result that I liked, I decided to use ZRemesher and unwrap the UVs in the ZBrush. This project was not for animation, just for a small study.


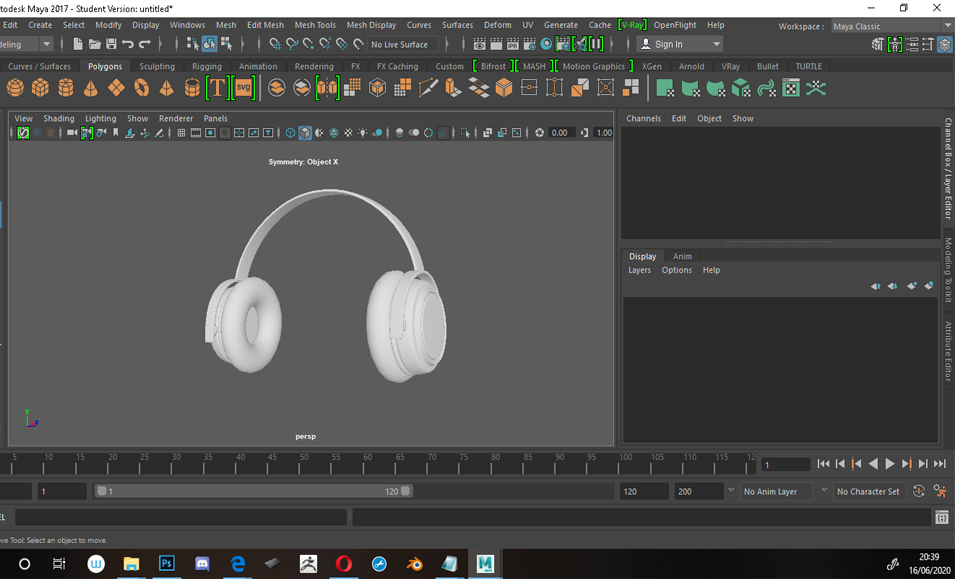
To make the headset, I used Maya. I had been using it for a long time and wanted to warm up to practice a little.
For the headphones, I didn't unwrap the UVs—I used a procedural shader in Blender Cycles.
Textures
After completing these steps and unwrapping the UVS, I went to Substance Painter to texture the clothes and the head.
With the textures ready, I went to Blender and put my texture maps in; I used a procedural shader for the headphones.


I had no idea how to do the hair, so I did some research and found an incredible tutorial that helped me a lot:
So I created a base and adjusted the hair according to my preference.
I separated these pieces of mesh from the head to make the hair and the eyebrows.


I also used the Blender hair editing tools to control the hair on my face and eyebrows.
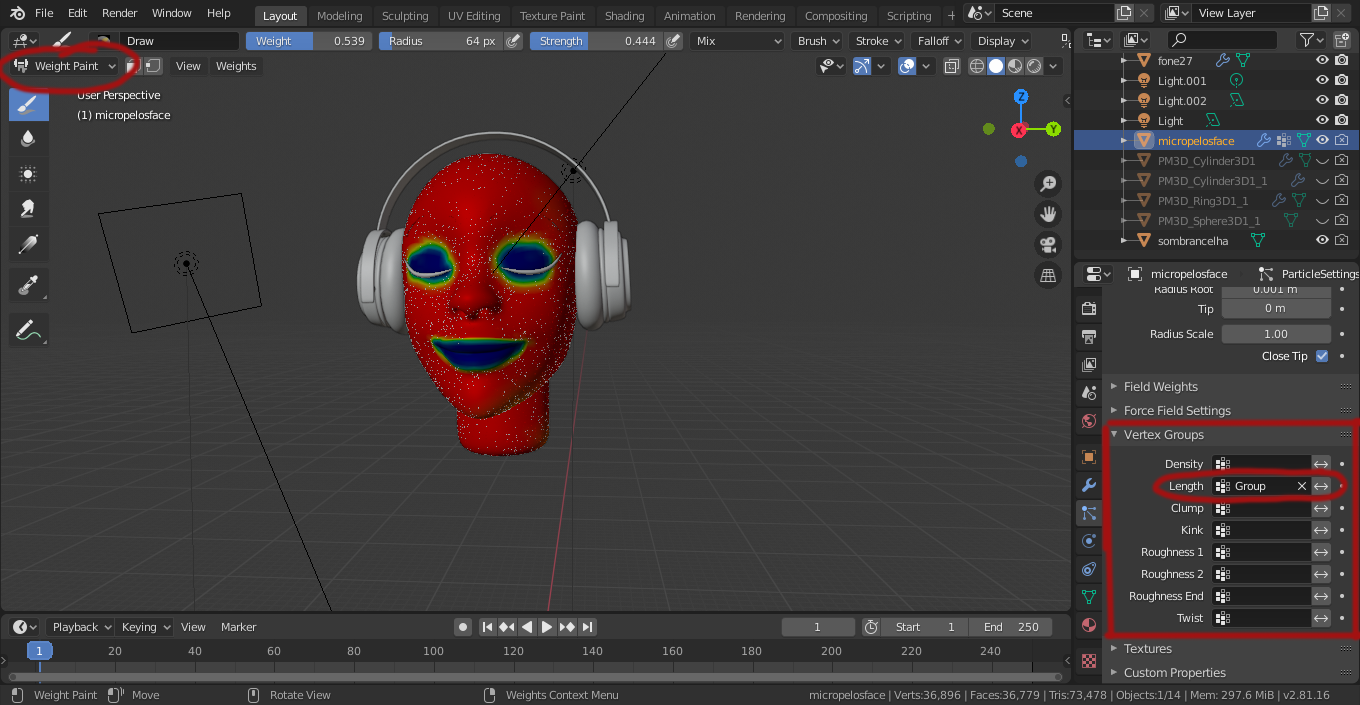
And I used weight paint in the vertex group, which also helped with hair control.
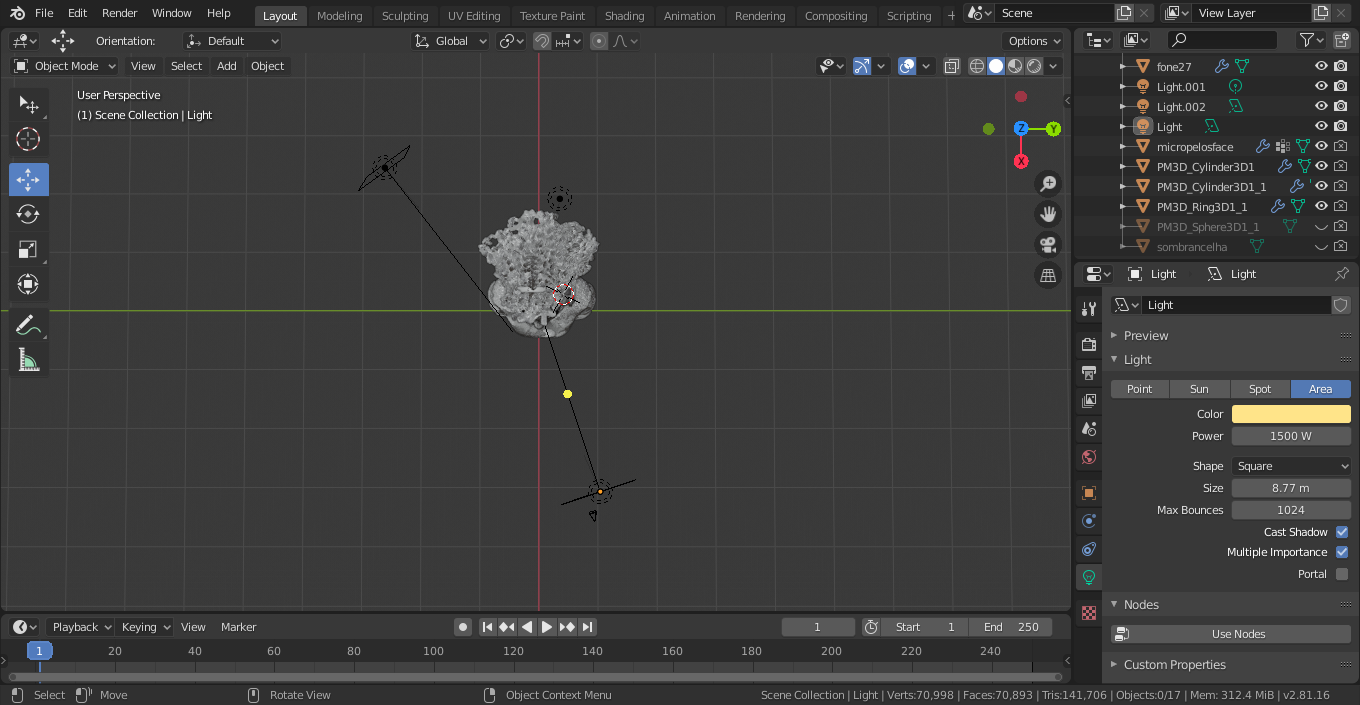
And finally, I went to render it. It was at this point that I went to test the lights and see how the scene looked.
I made several renders until I reached the one that I liked.
I also did many renders to see how the hair looks, because what is in the viewport is not always what will come out in the final render.
As I didn't have a defined concept, I changed many things in the modeling and rendering process. Since it was just a very free sketch, I also created and changed things in the image many times.
Here's a gif of the process.
Thank you so much for reading so far—I hope I have helped in some way. Thank you very much also for this invitation to participate in a Behind the Scenes.
Goodbye :)
About the Author
 Natan Ernani, 3D Artist
2 Comments
Good result! Thanks for sharing the process and showing a great tutorial channel! :)
Great work! Thanks for sharing Natan, great imagery and good detail.