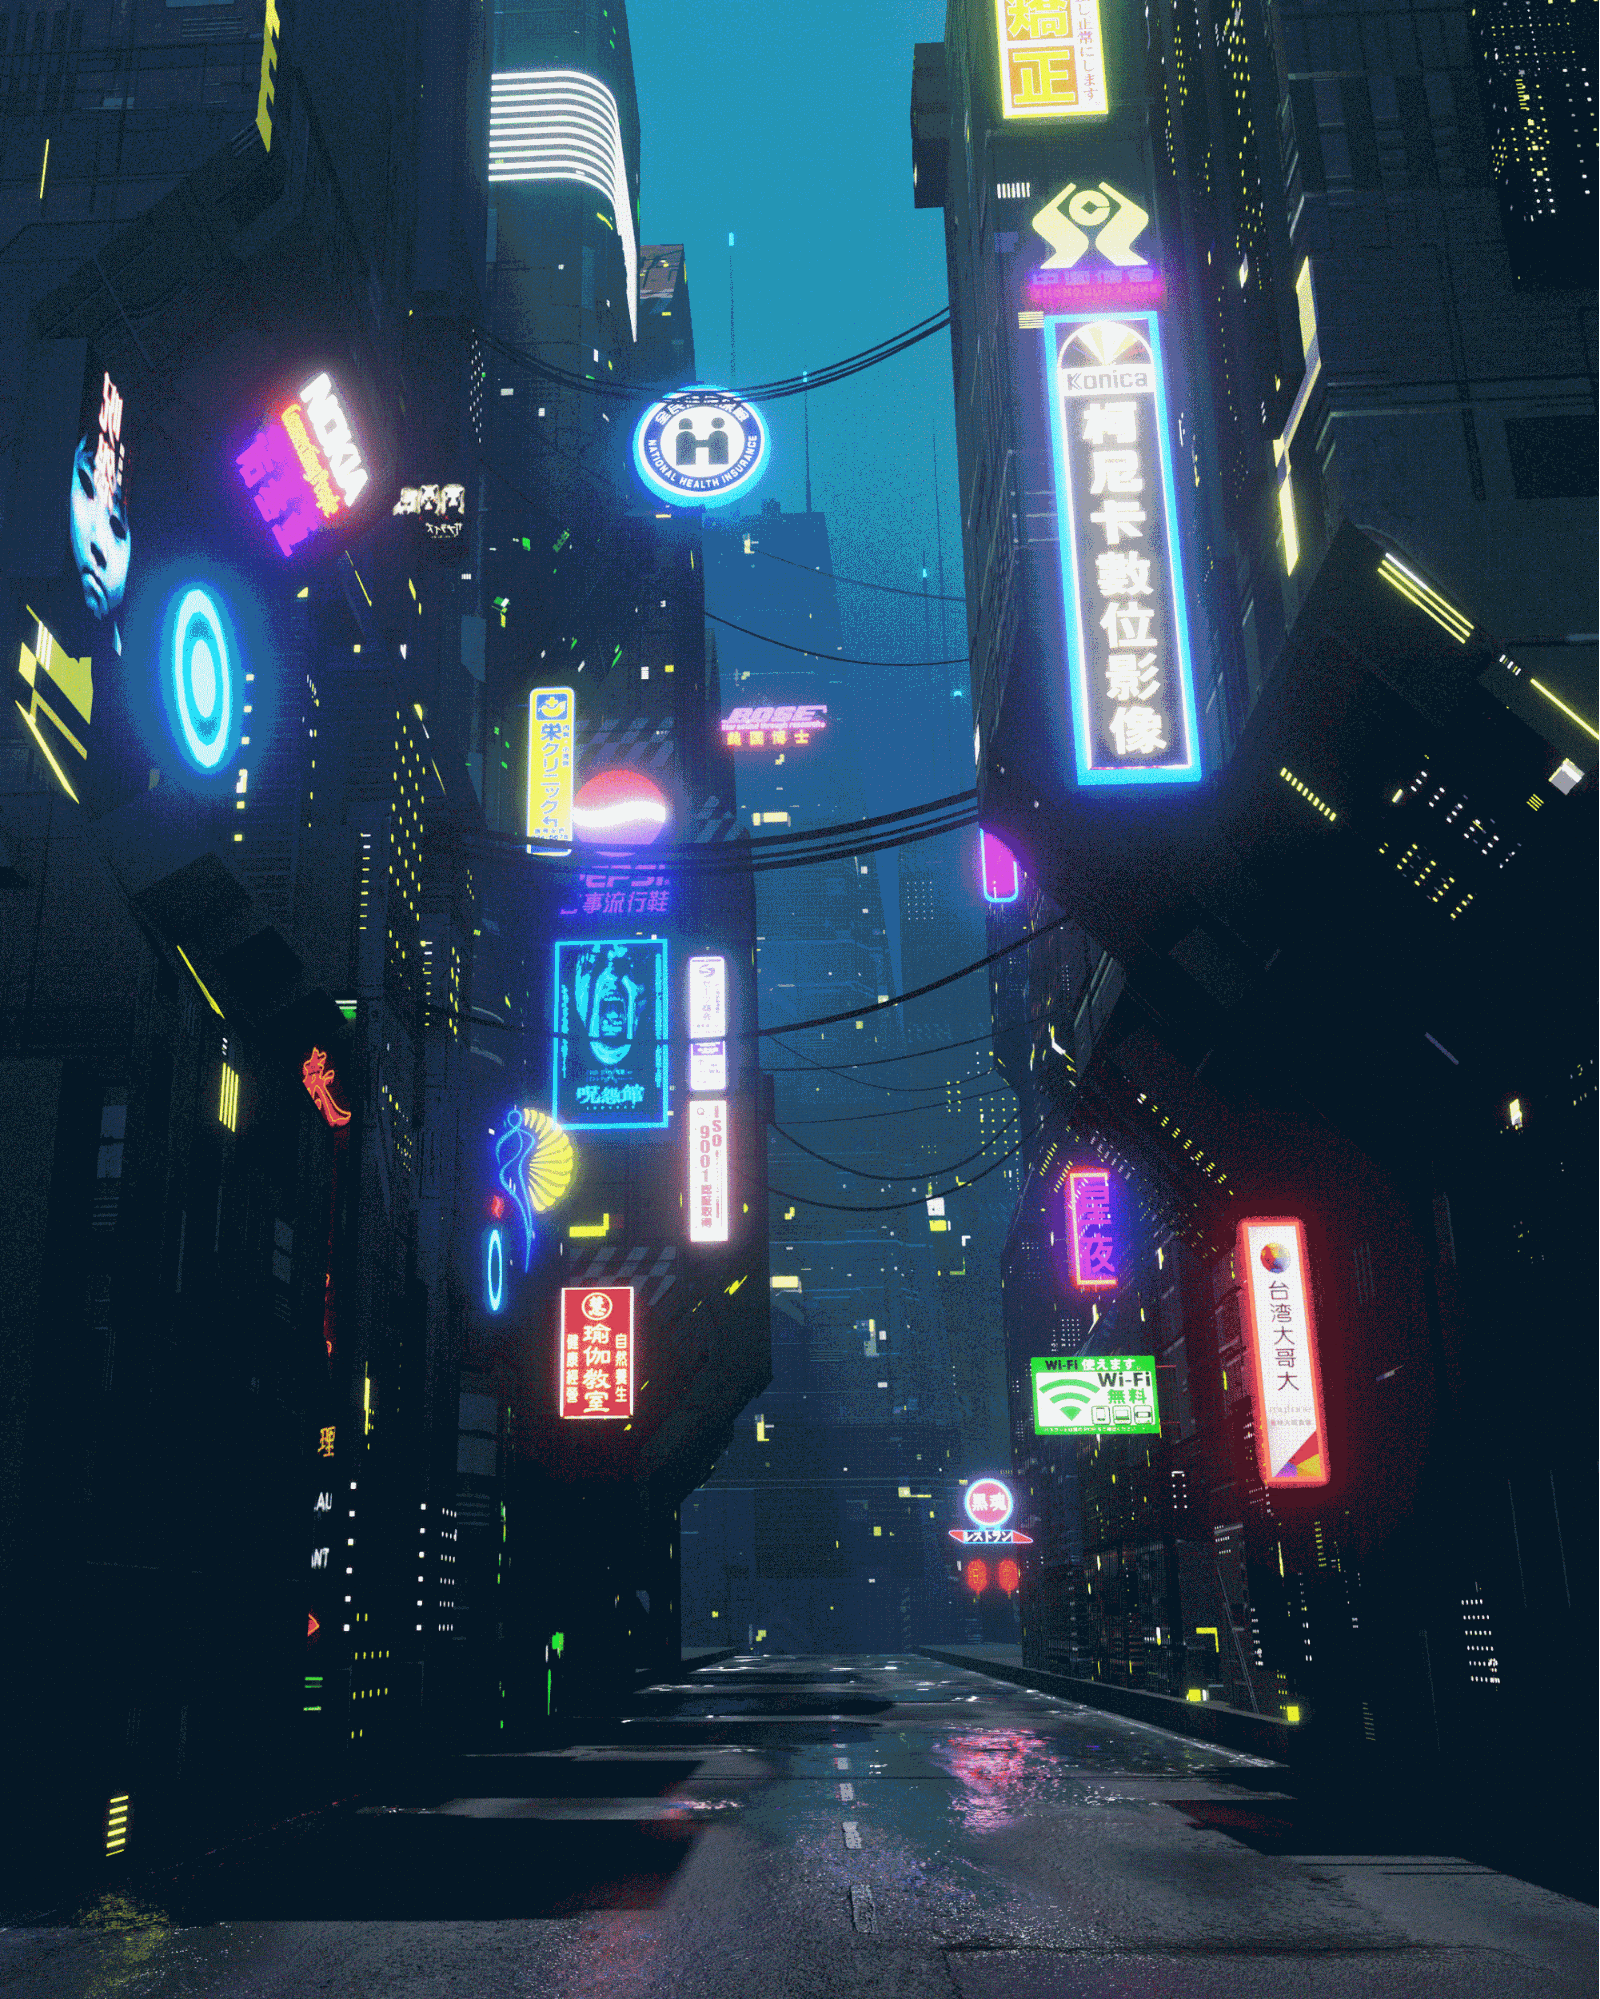
Behind the Scenes: Neon Street
About
My name is Siamak Tavakoli and I live in Iran. I am a 3D Environment Artist and Musician/Sound designer.
I have been working as a 3D artist for almost 8 years. My biggest focus over the years has been learning and designing 3D environments and props for gaming, I have acquired all my skills and knowledge about 3D design from the Internet and online sources. I have worked on many projects as a freelancer, most of which were environmental designs for games.
Also, I’ve been working as a music producer and sound designer for about 15 years! I worked on many different styles of music like cinematic, ambient, electronic, game music, and game UI sound design.
From 2017–2019 I worked for a mobile game company with the 2D UI and 3D Design teams, and I’m doing sound design and game music production too.
Right now I work as a 3D environment/ship and prop designer for a 3D industrial animation company that specializes in 3D marine, ship designs, and gas and oil stations.
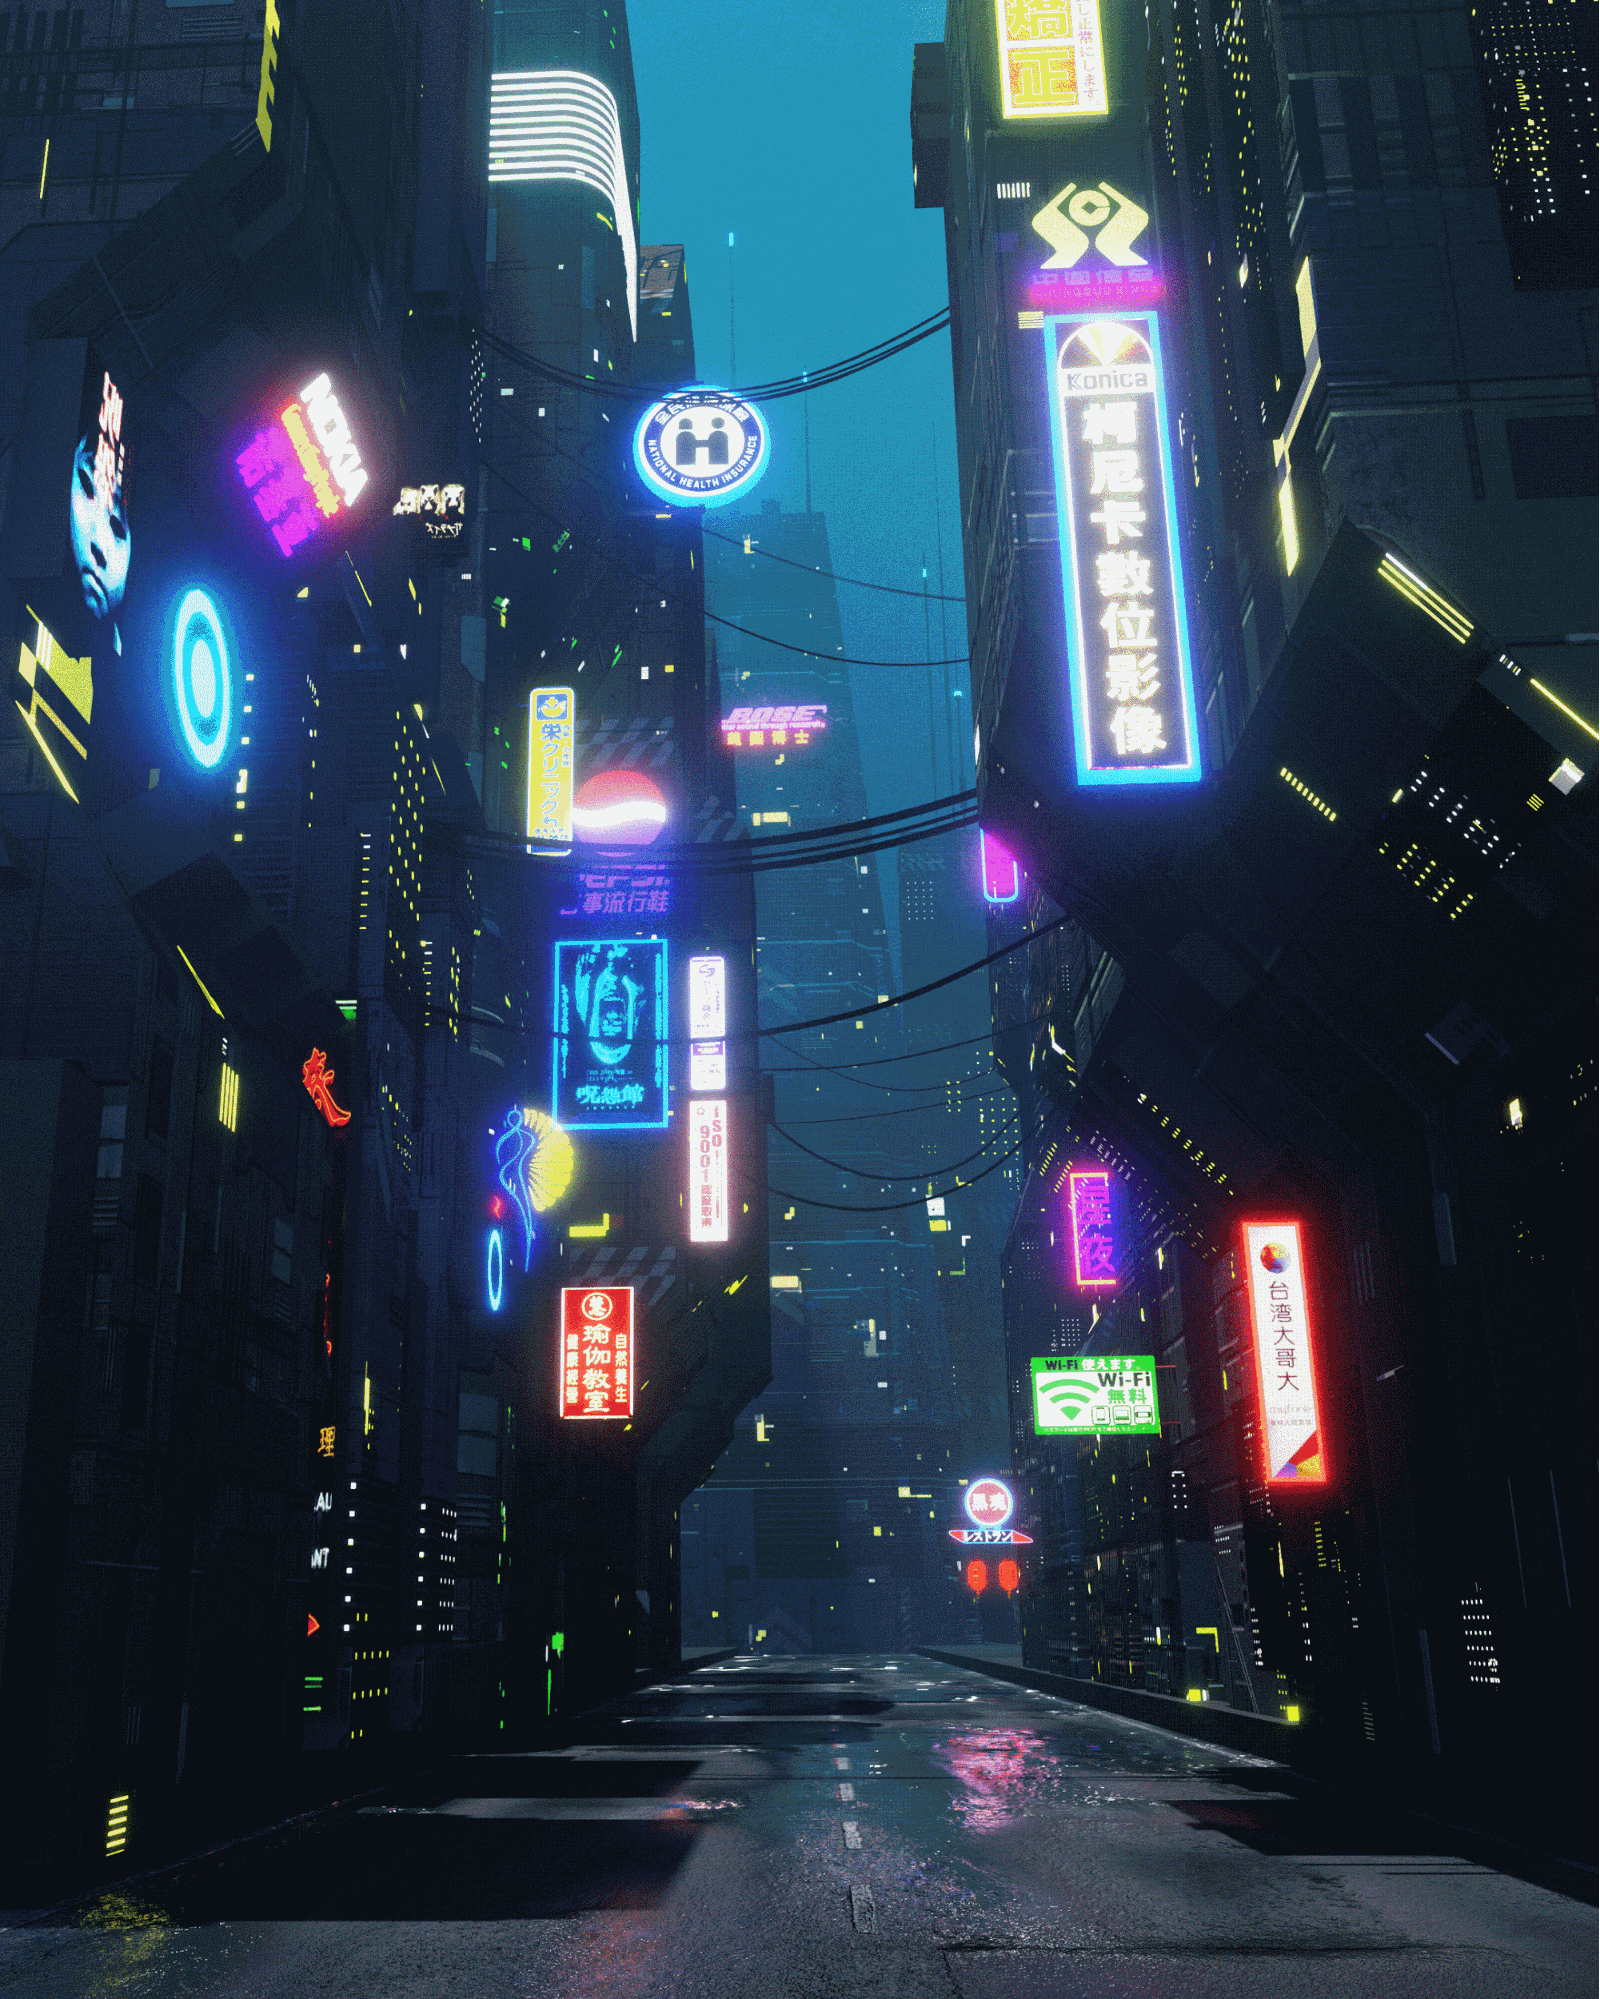
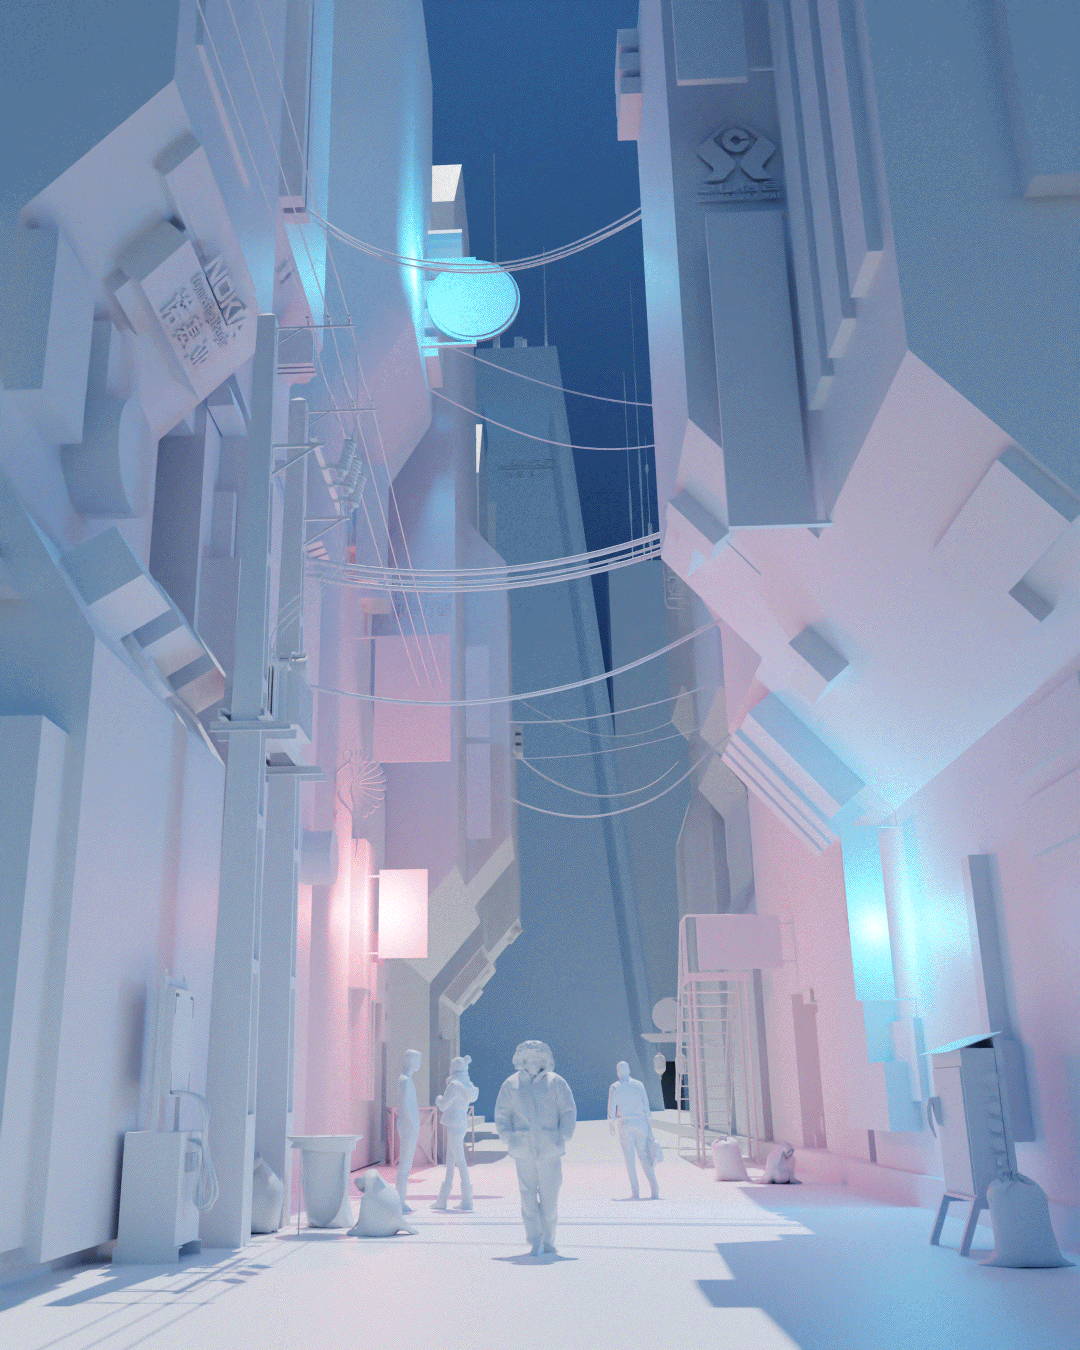
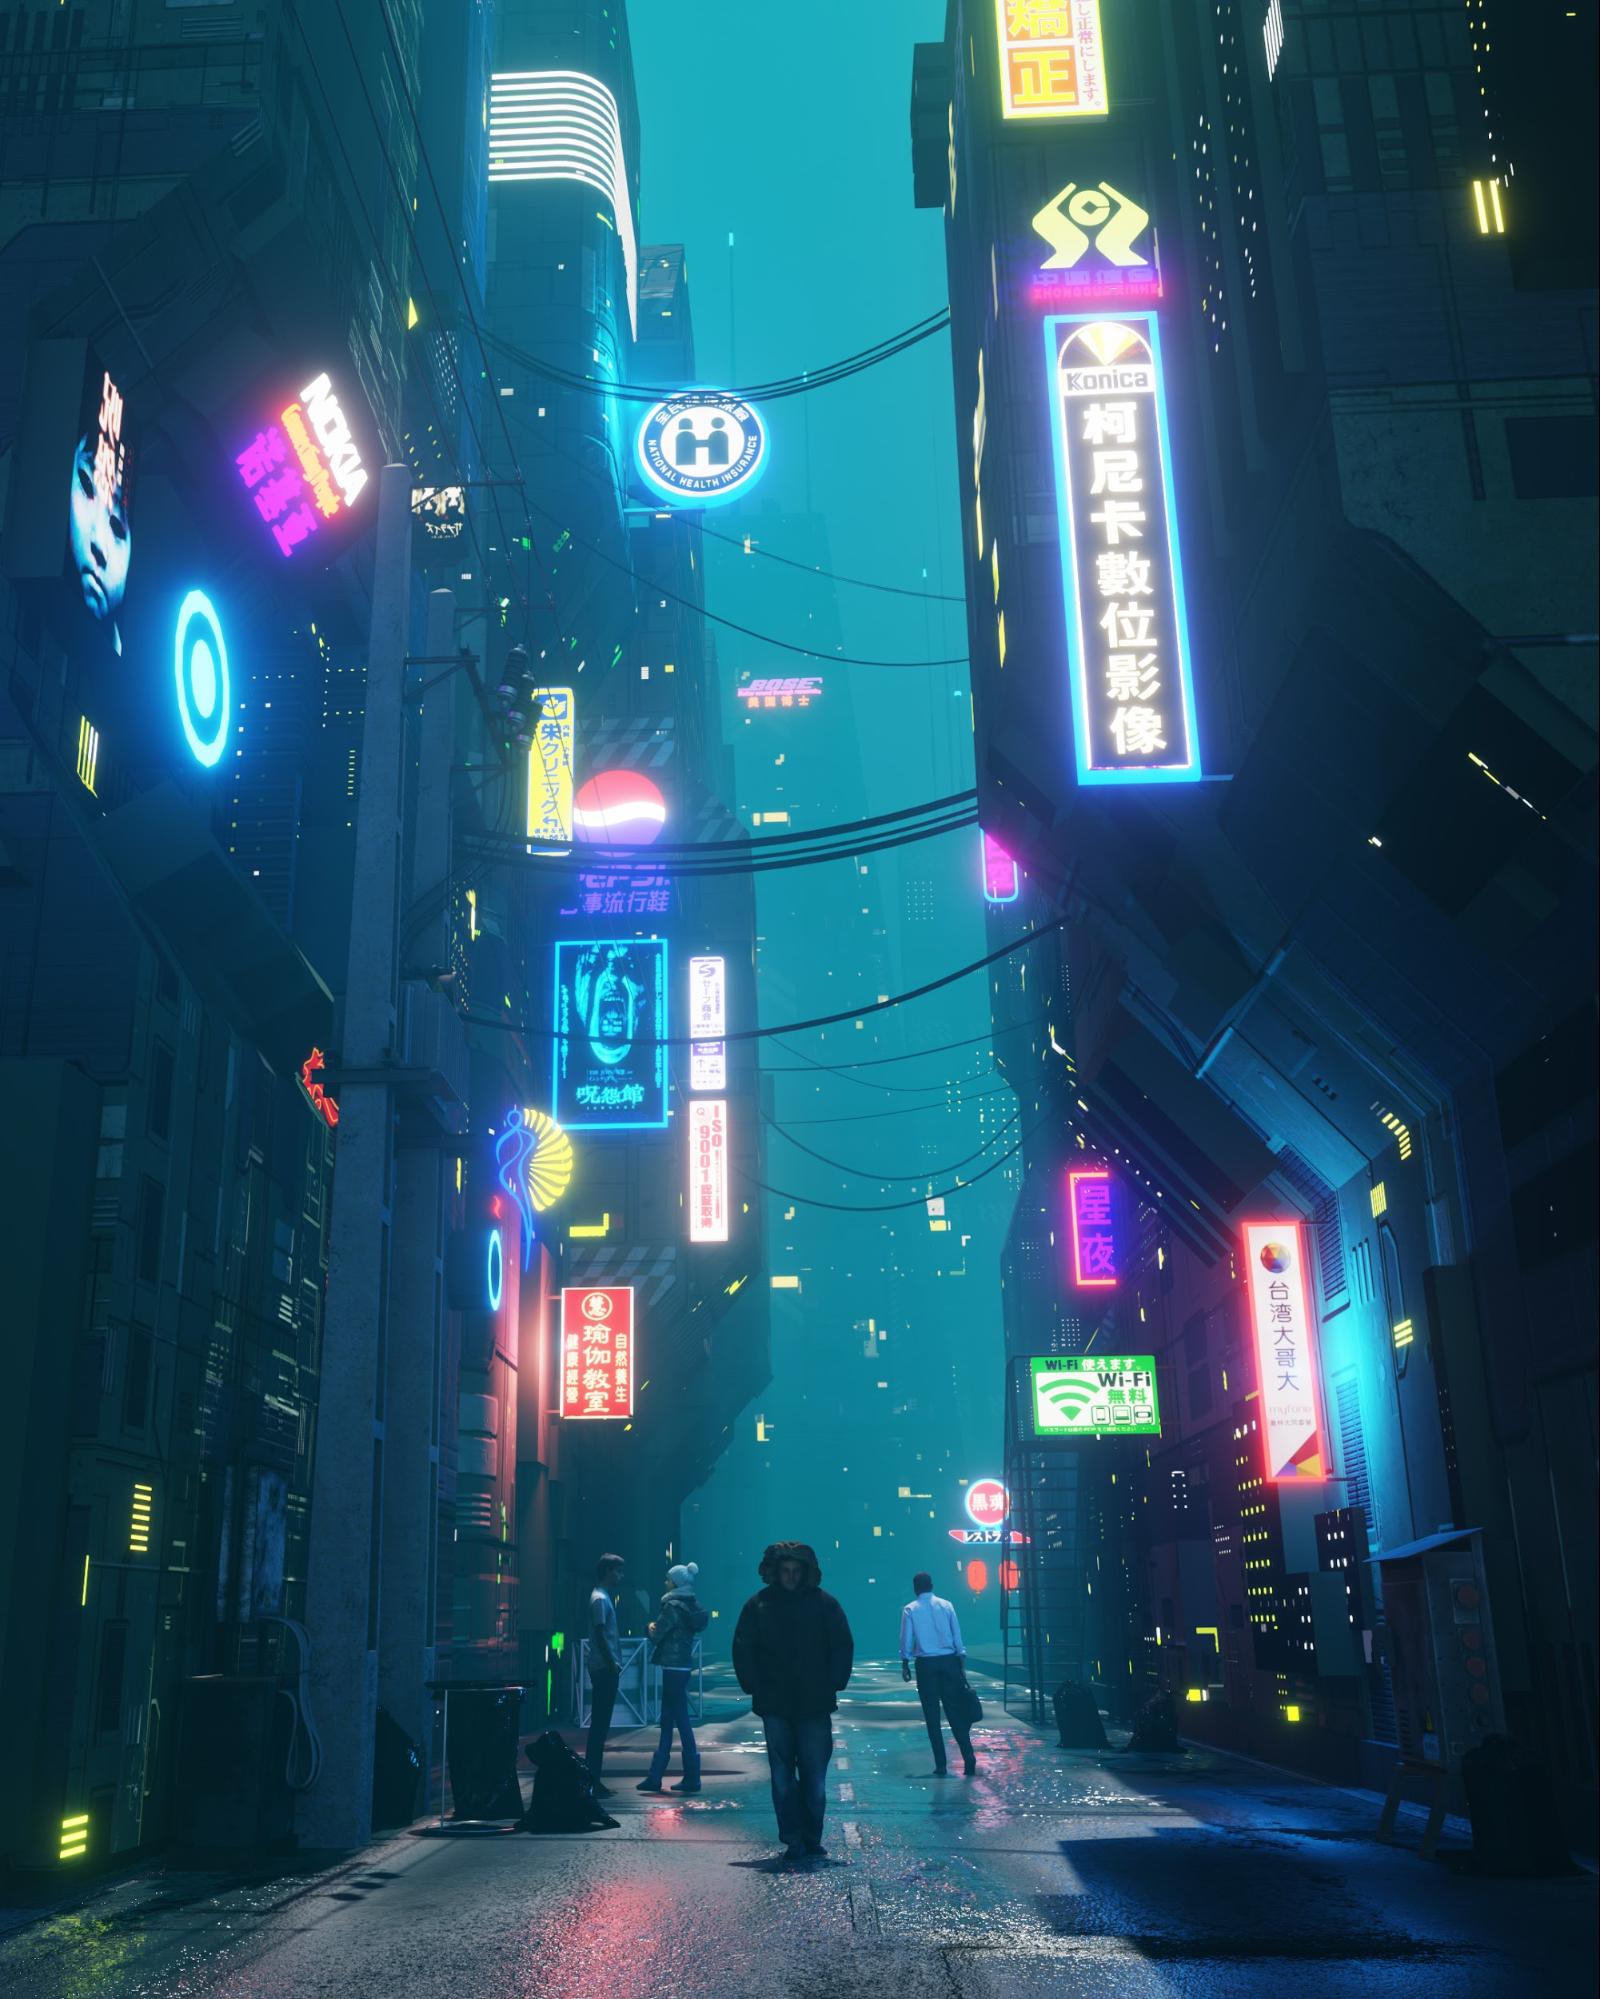
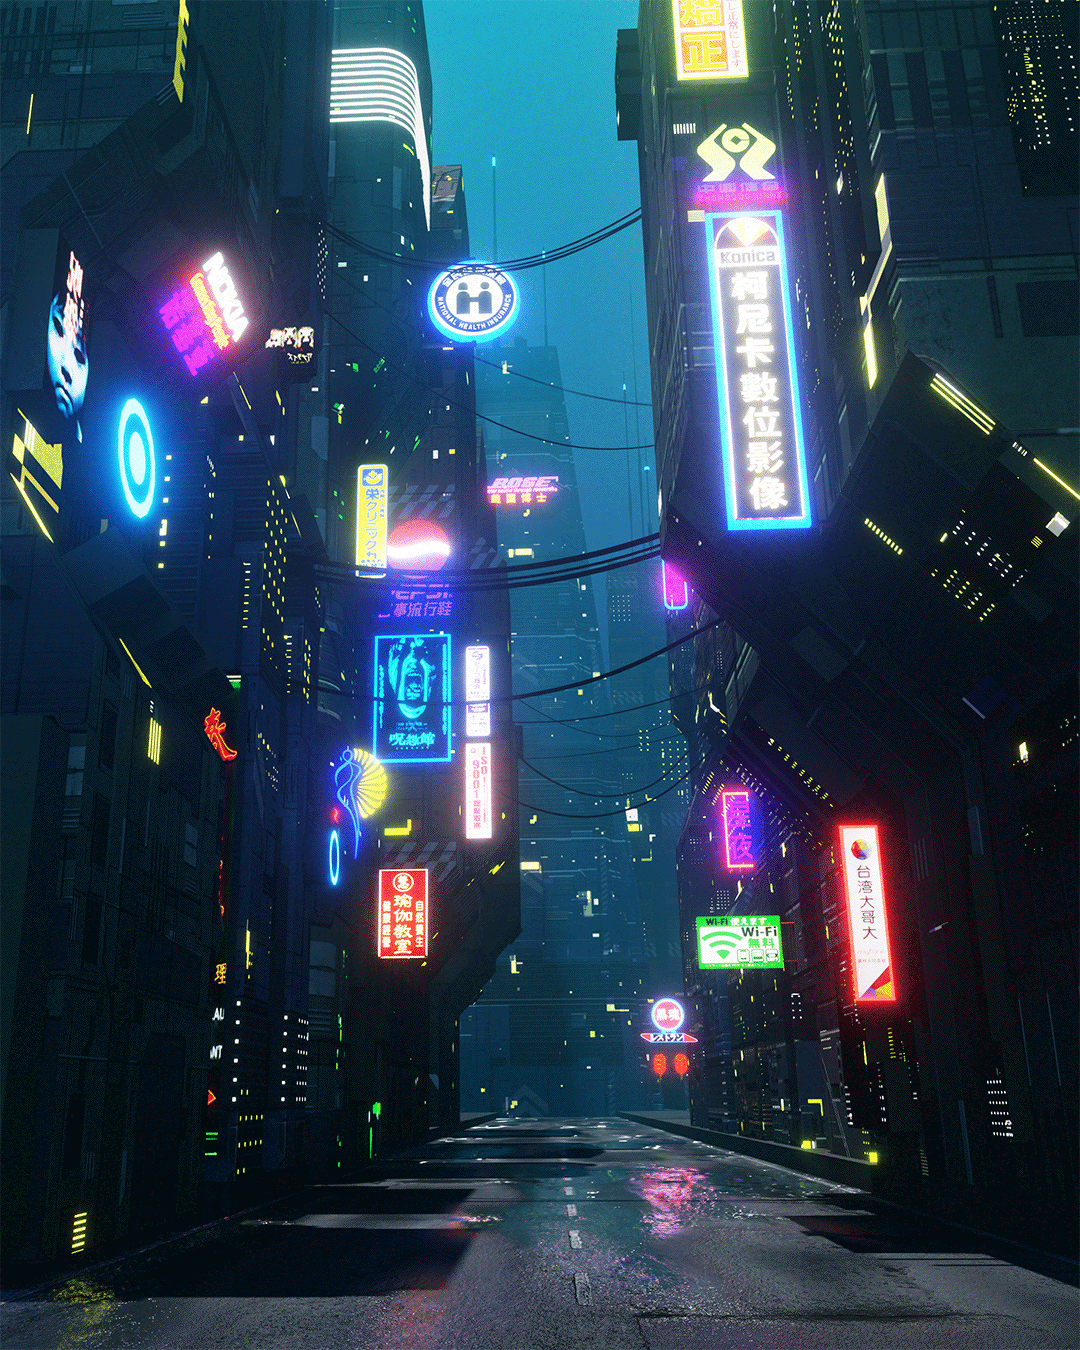
Neon Street
I am a big fan of sci-fi films and games and always looking for a new challenge. My interest in science fiction environments made me decide to build a street in Asia with a lot of neon signs, which is one of the iconic sci-fi and cyberpunk environments.
Inspiration
My inspiration was real photos of Asian environments like China, Hong Kong, and Taiwan streets and also other great artists’ works, mostly from ArtStation.
I did not use references for this work—instead, I made it from my own mental perception by watching the mentioned examples.
Tools
For this piece, I used mainly Blender 2.81 and 3D-Coat for texturing some of the assets.
My PC is Windows 10 / Intel core I 5 / 16GB RAM / GTX 1060.
Modeling
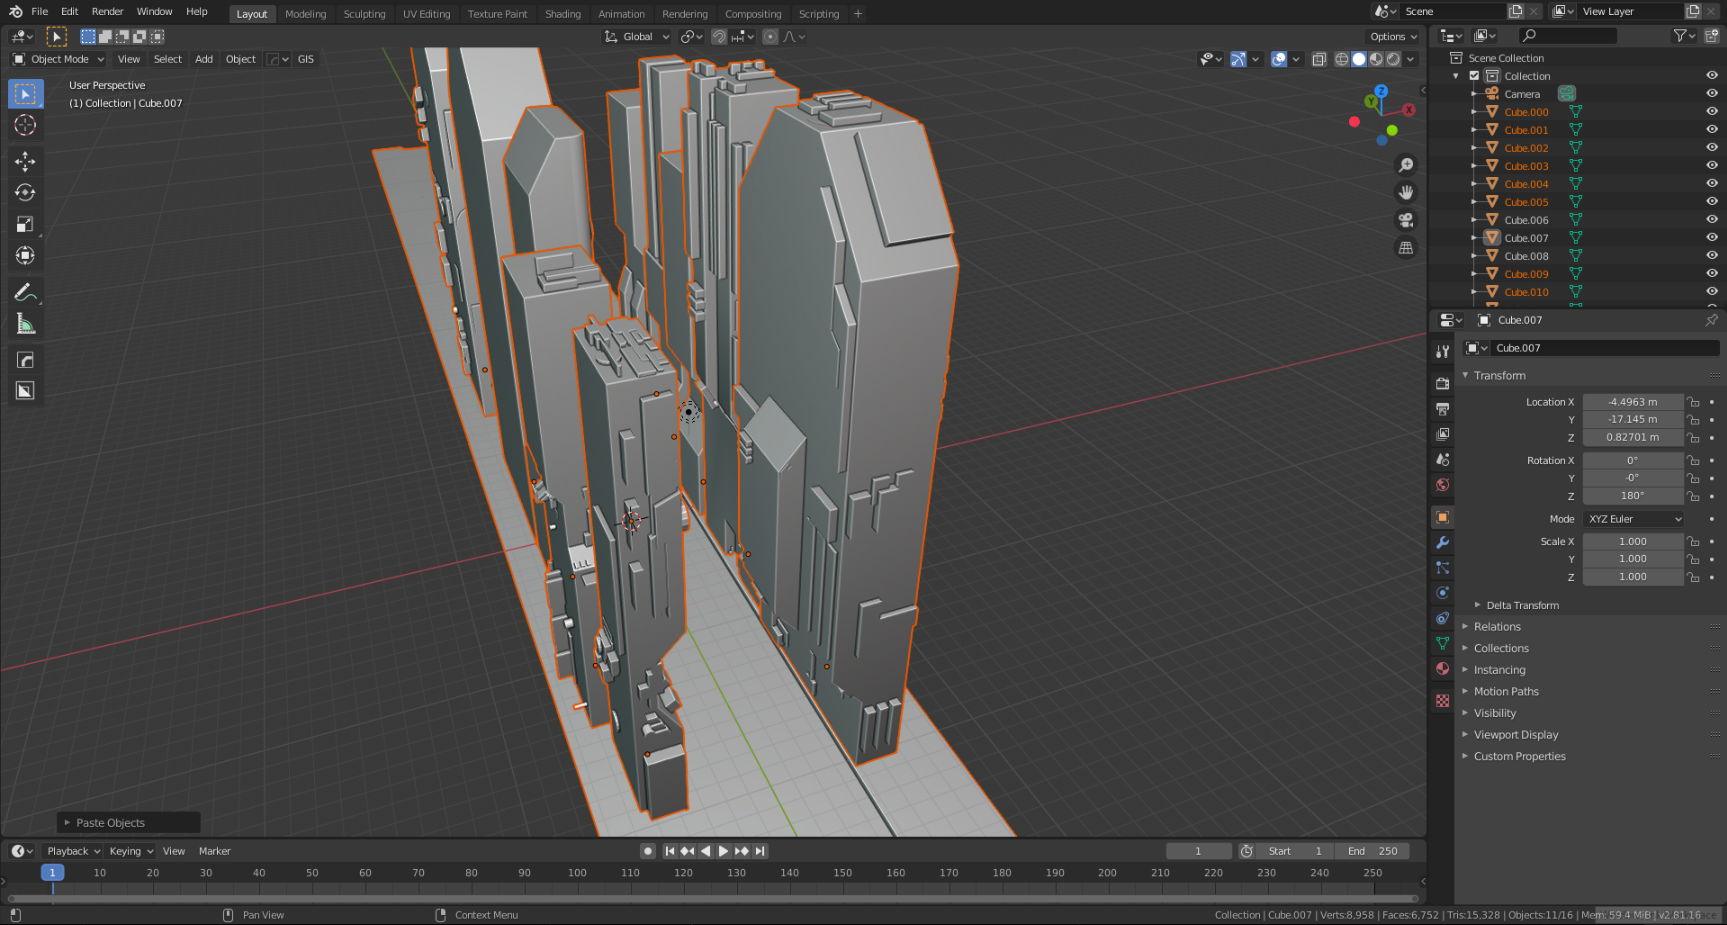
I started with simple sci-fi block shapes for building, My plan was to make simple basic shapes of buildings and decorate them with textures and add details.
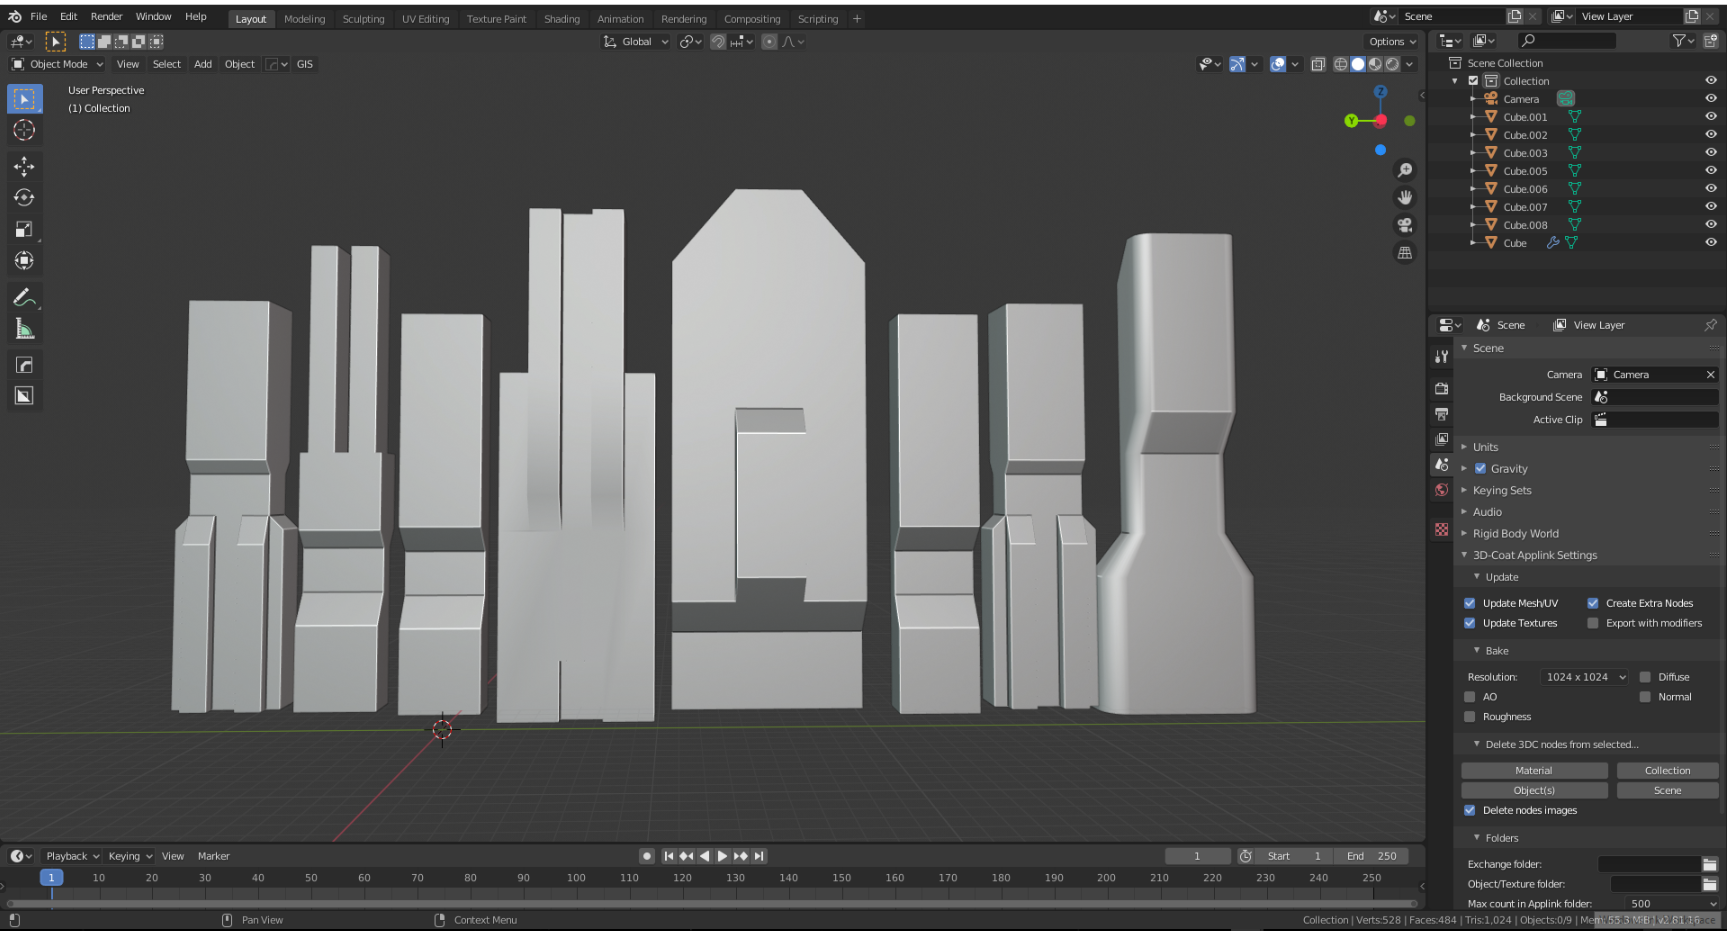
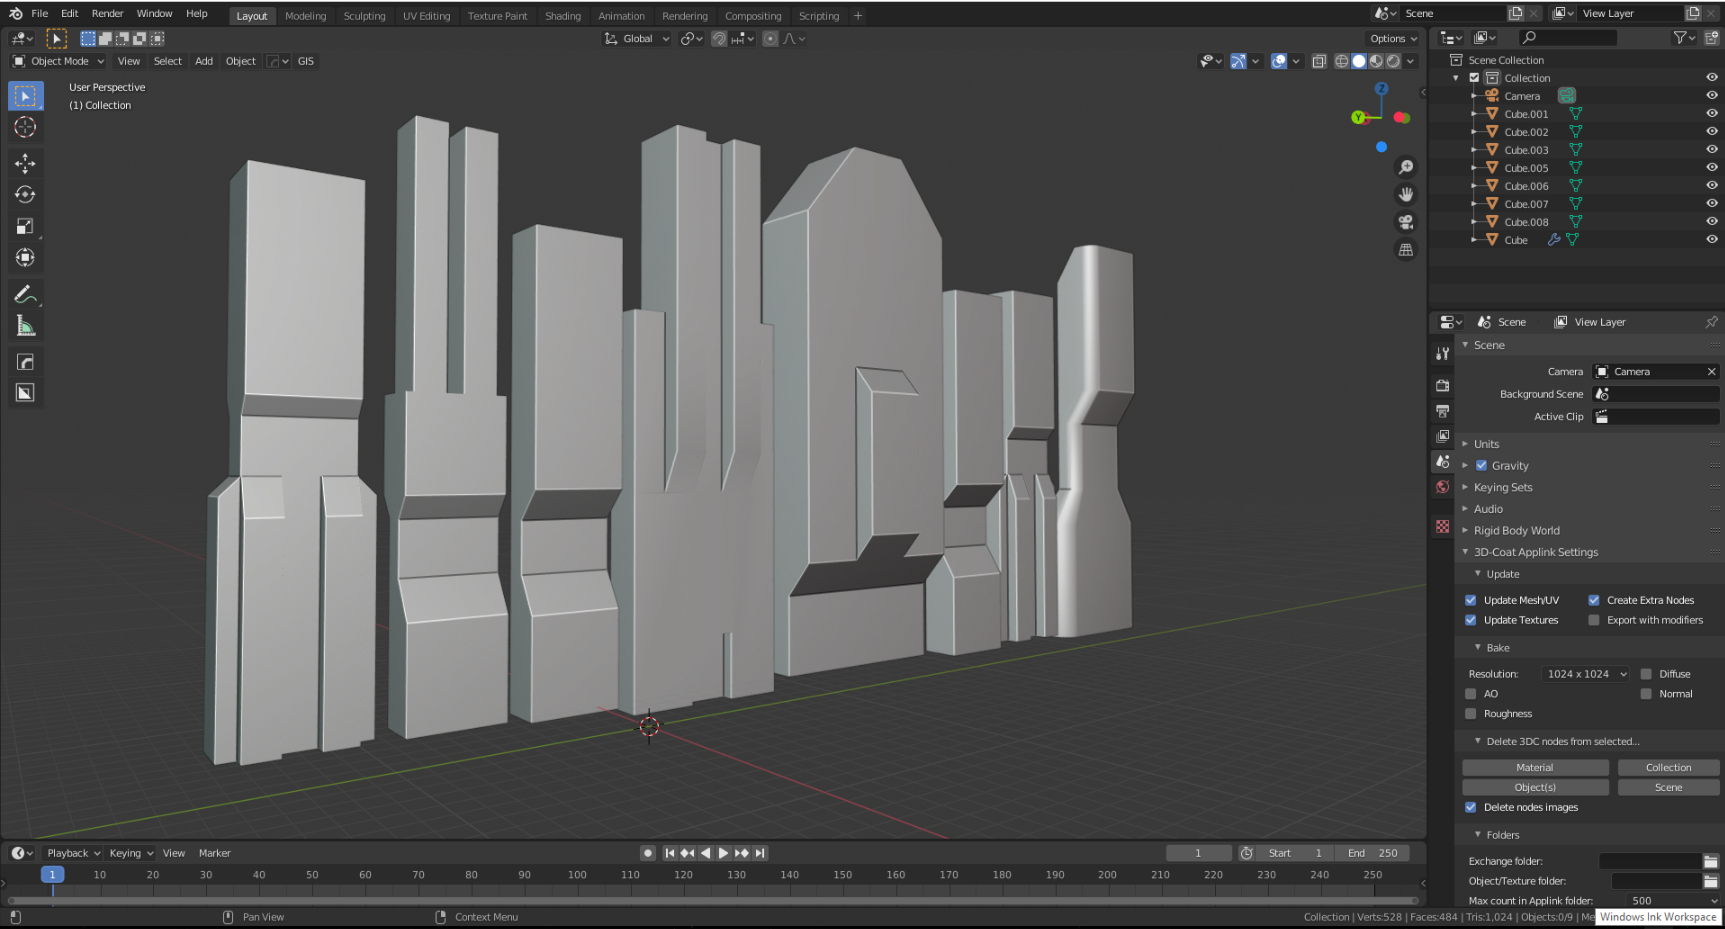
After that, I tried to make the main form of the street by placing the buildings in front of each other. I always use a human model at actual size as a reference for the size of the environment.
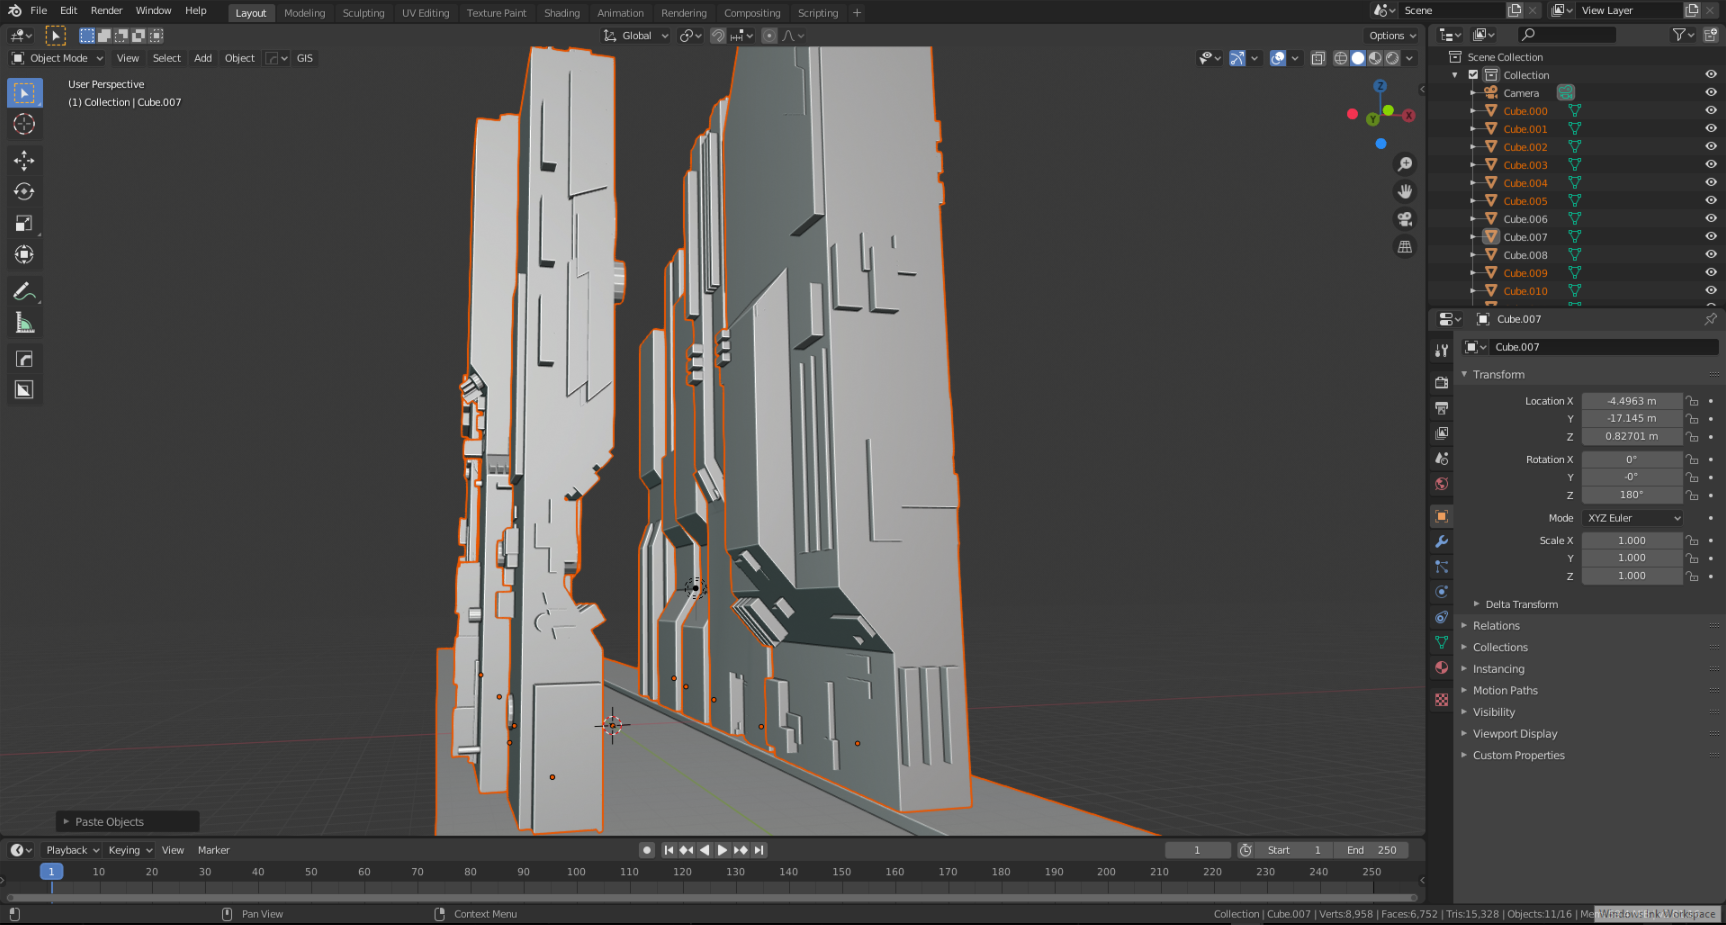
I added some greeble elements to the shapes nearest the camera to add some details. I used the Plating Generator And Greebles addon for this part of the design.
Texturing
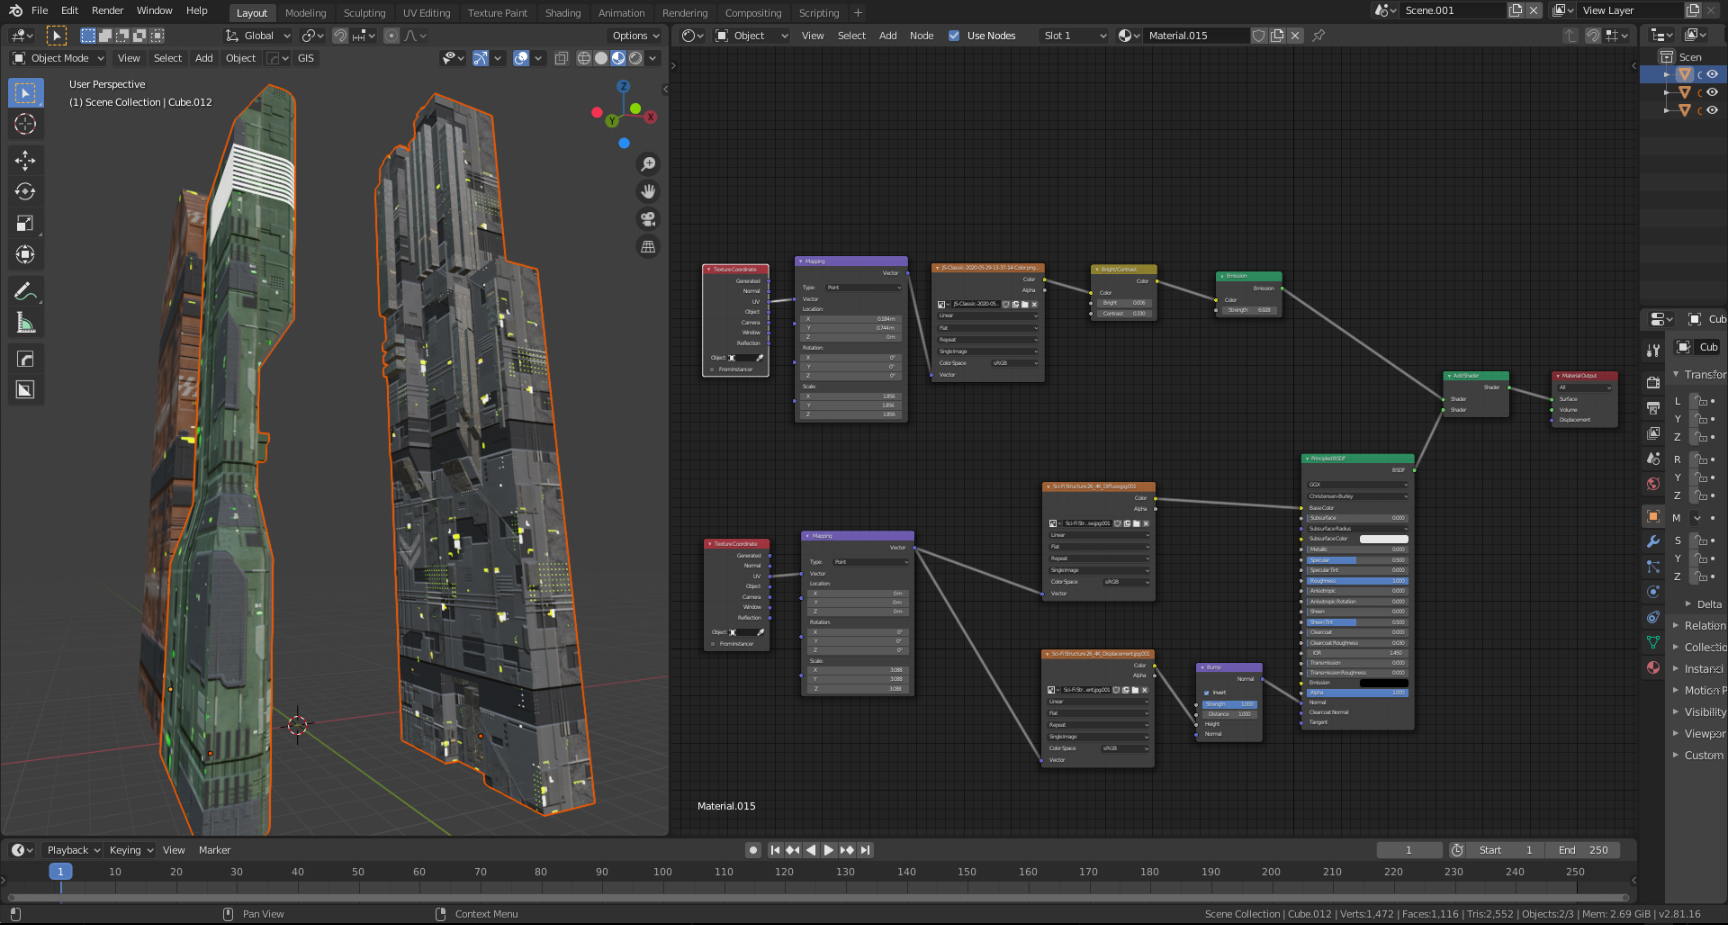
After making my building models, I started texturing the models one by one.
I used Blender itself for texturing the buildings in this project but I also used 3D-Coat to texture other street assets that I created.
I used the Sci Fi Material Pack Vol 1 from the great artist Jonathan Ching.
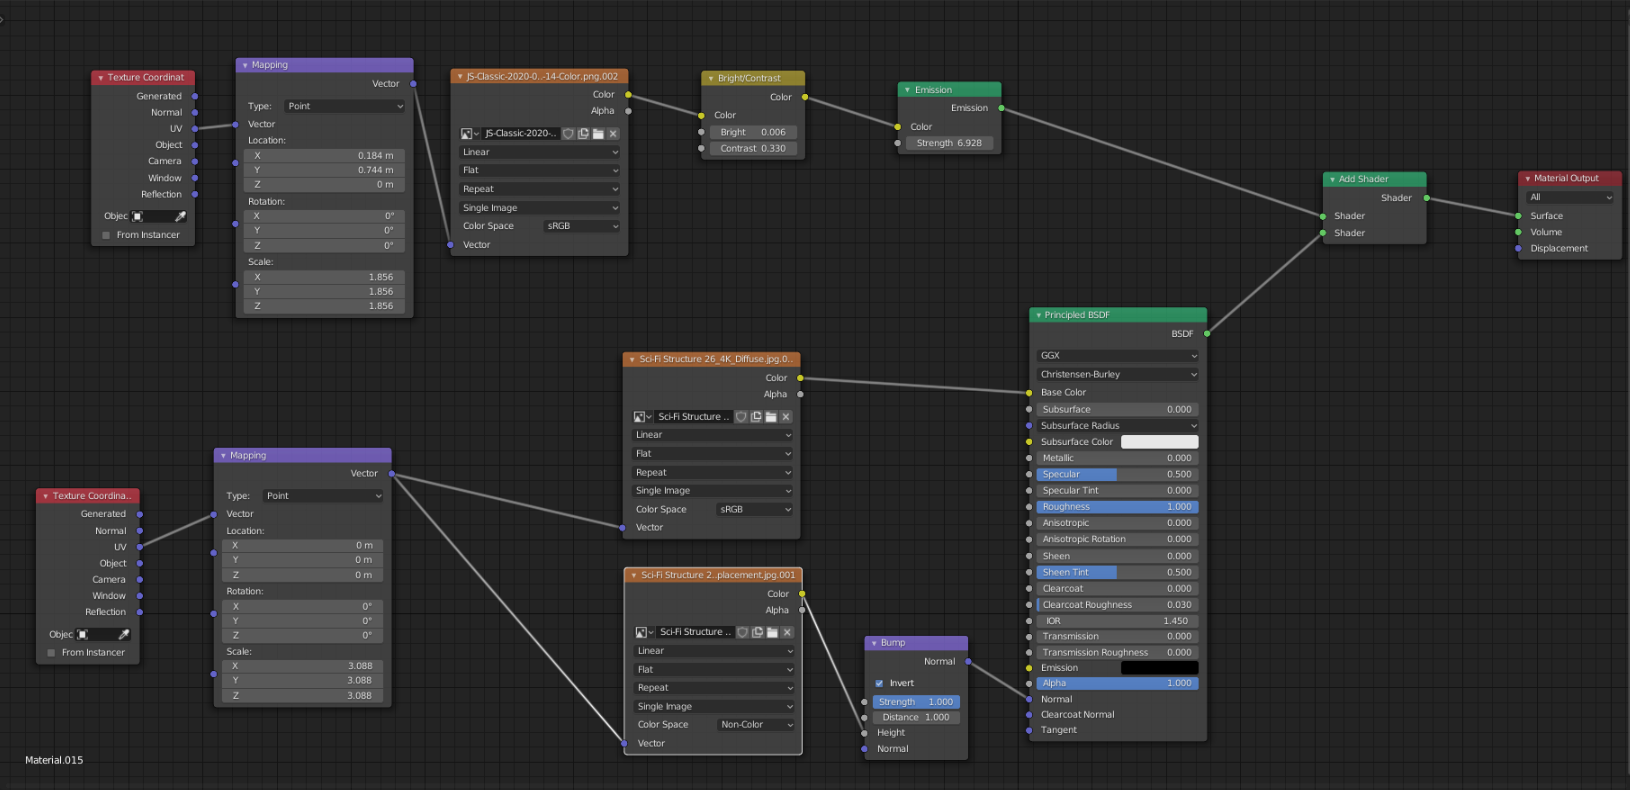
I unwrapped every building model in Blender with cube projection and I used 2 layers of texture for each building, one layer for the sci-fi texture and the other layer for adding emissive texture, such as little window lights for the buildings. Emission textures were generated with a free texture generator called JSplacement.
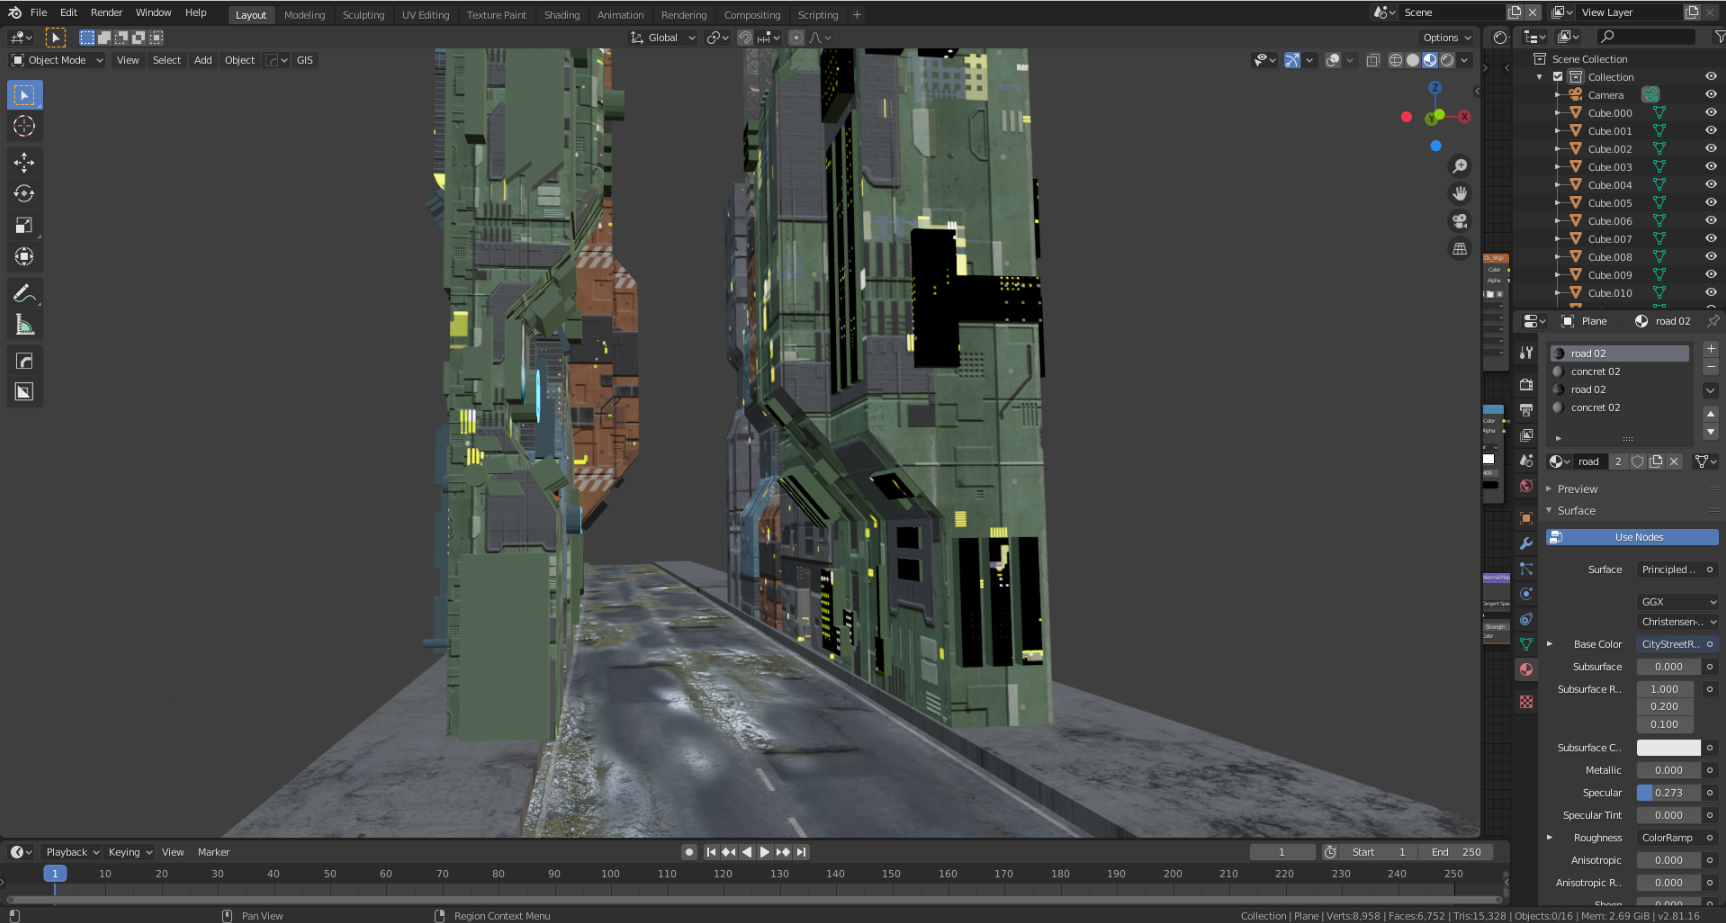
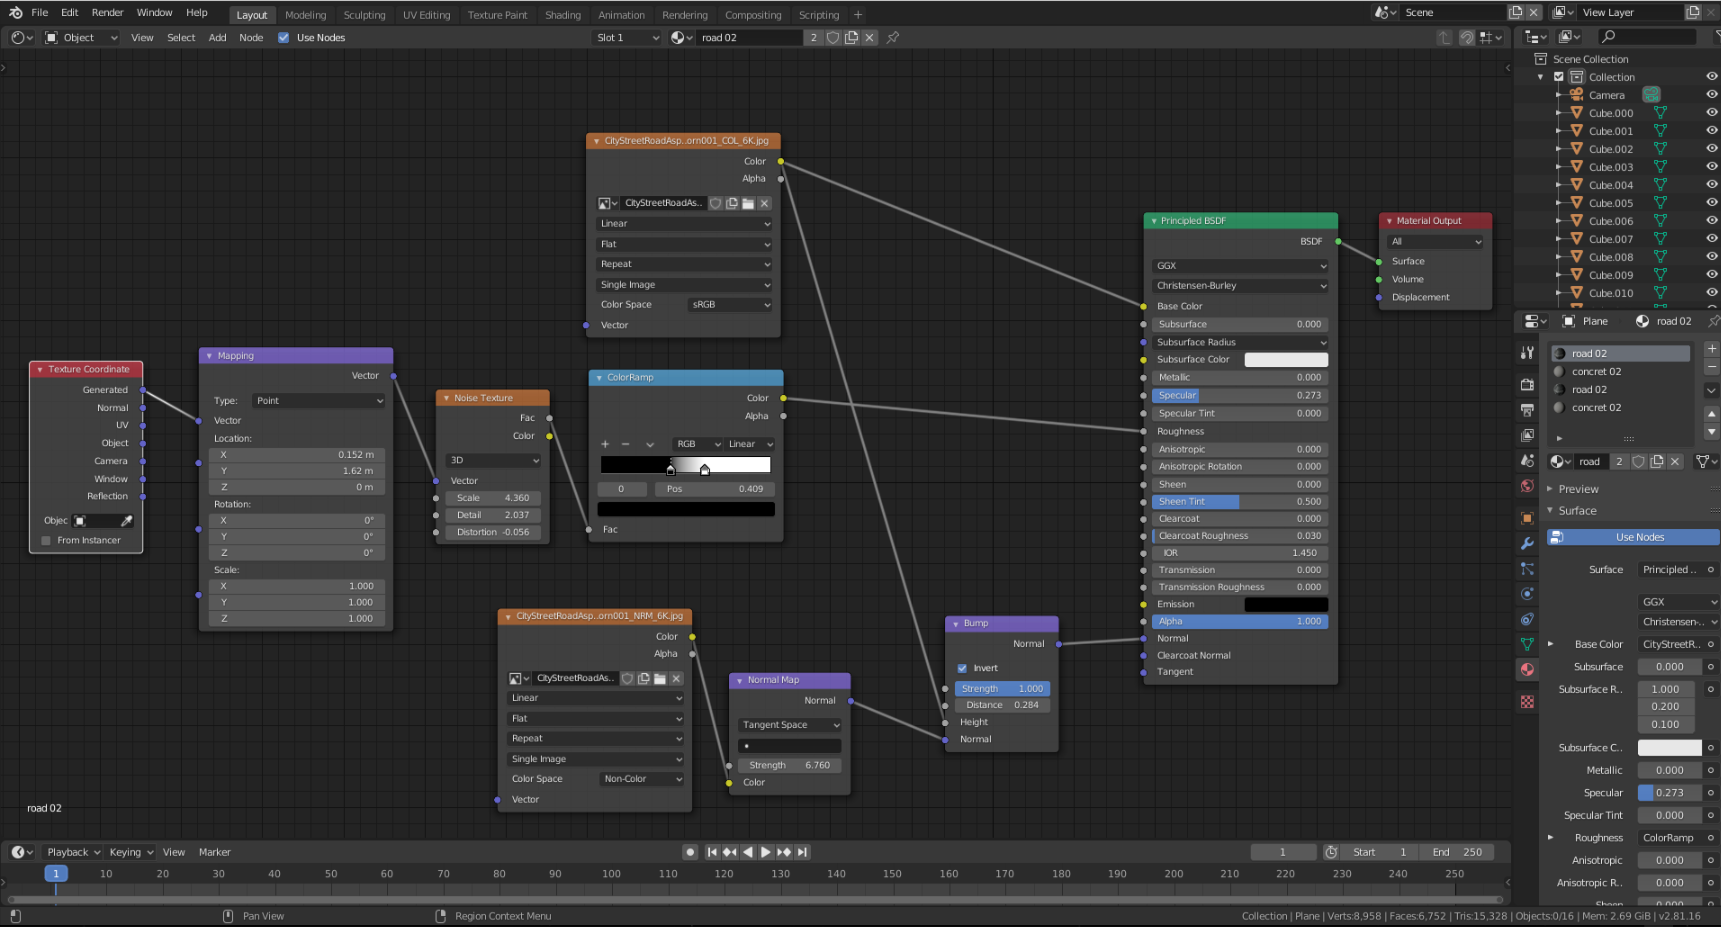
Since I was building a street environment, it was very important to build a realistic street texture.
I used a high-quality street texture from Poliigon.
I added a noise texture to the roughness layer of the street texture and controlled it with Color Ramp node to add the look of a wet street to the ground texture.
Premade Assets
I dedicate several days each week to building environmental components that can be used in a variety of projects.
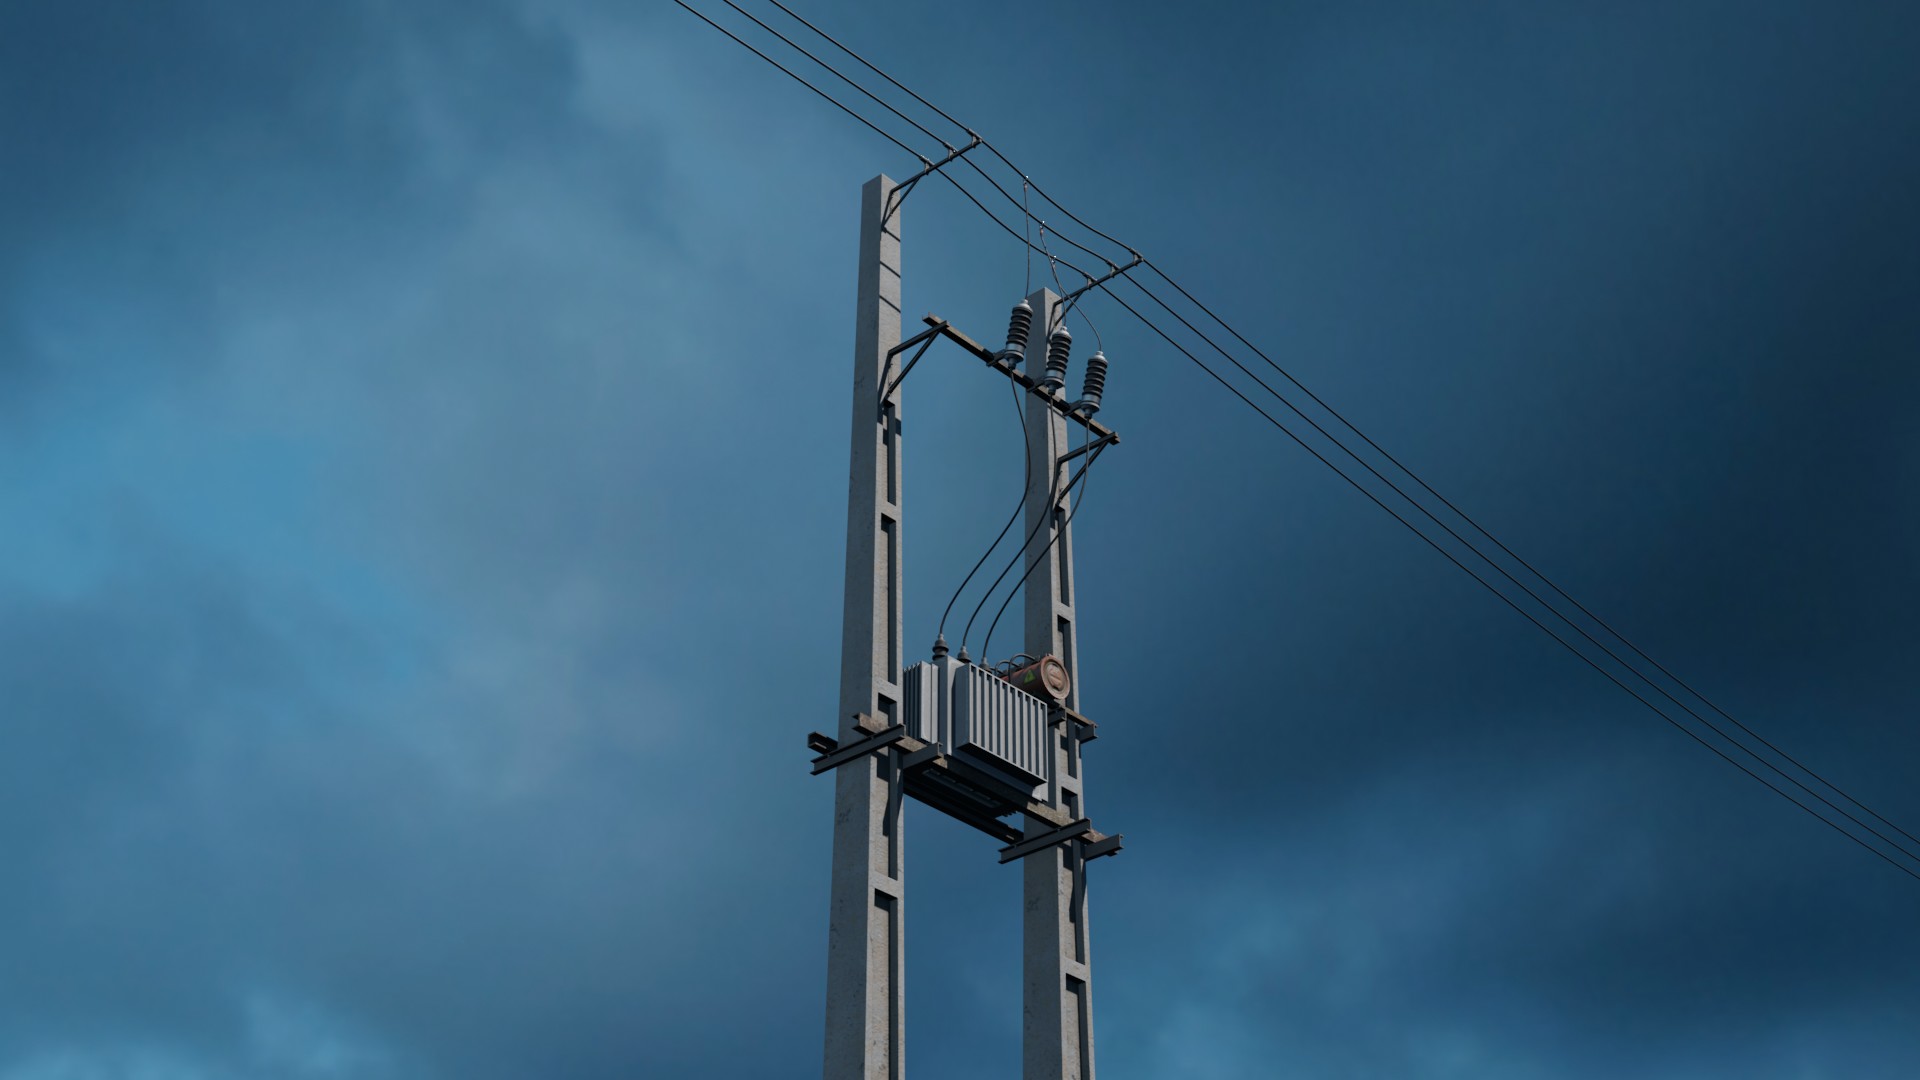
I used premade 3D cables and neon sign assets to add details to this project.
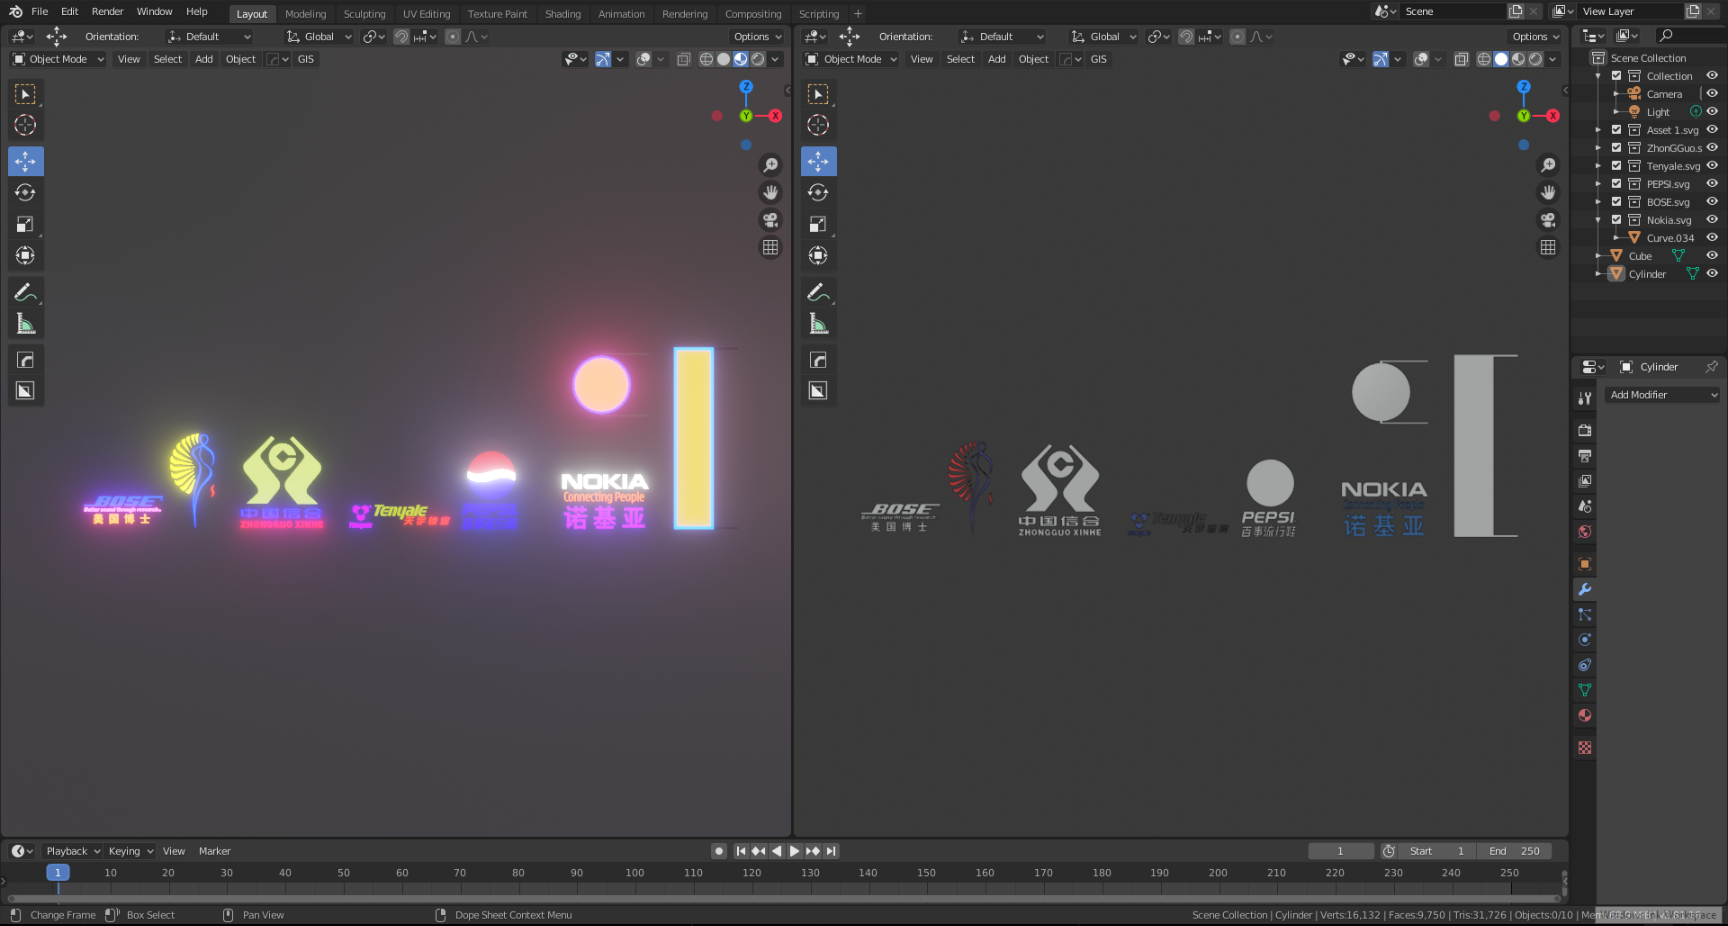
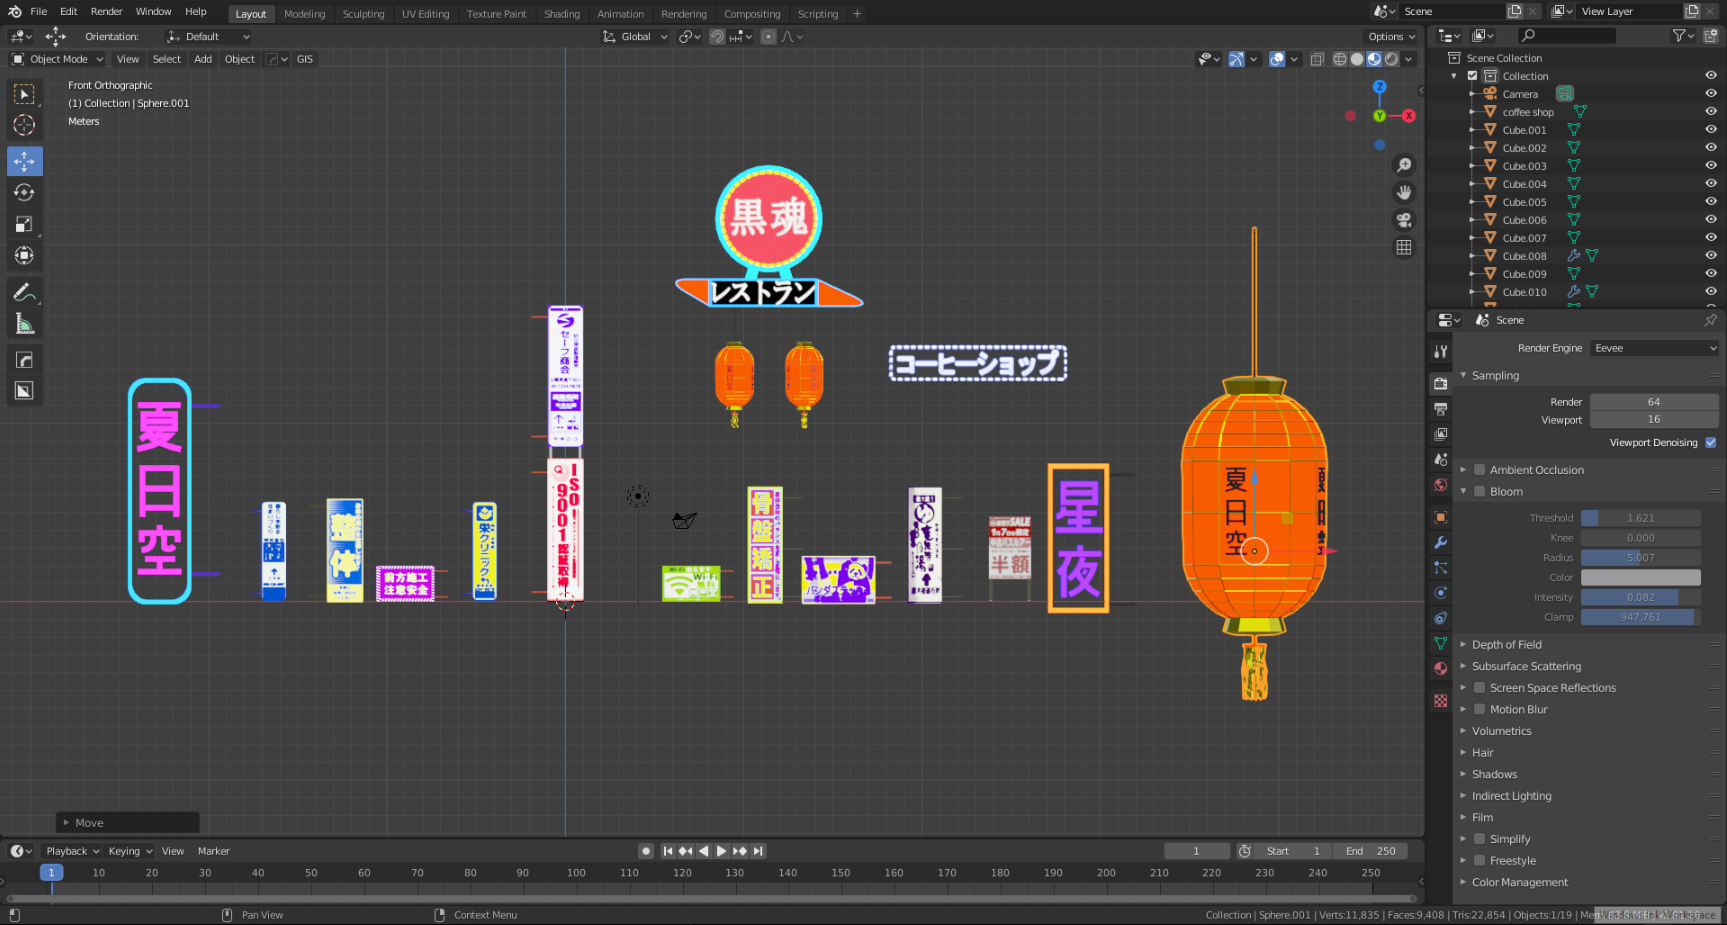
For the street sign textures, I mostly used Taiwan Street signs.
As I saw in the photos of Asian streets, there are a lot of store and company signs on their streets and on the buildings, so I added a couple of street signs and cables on and between the buildings.
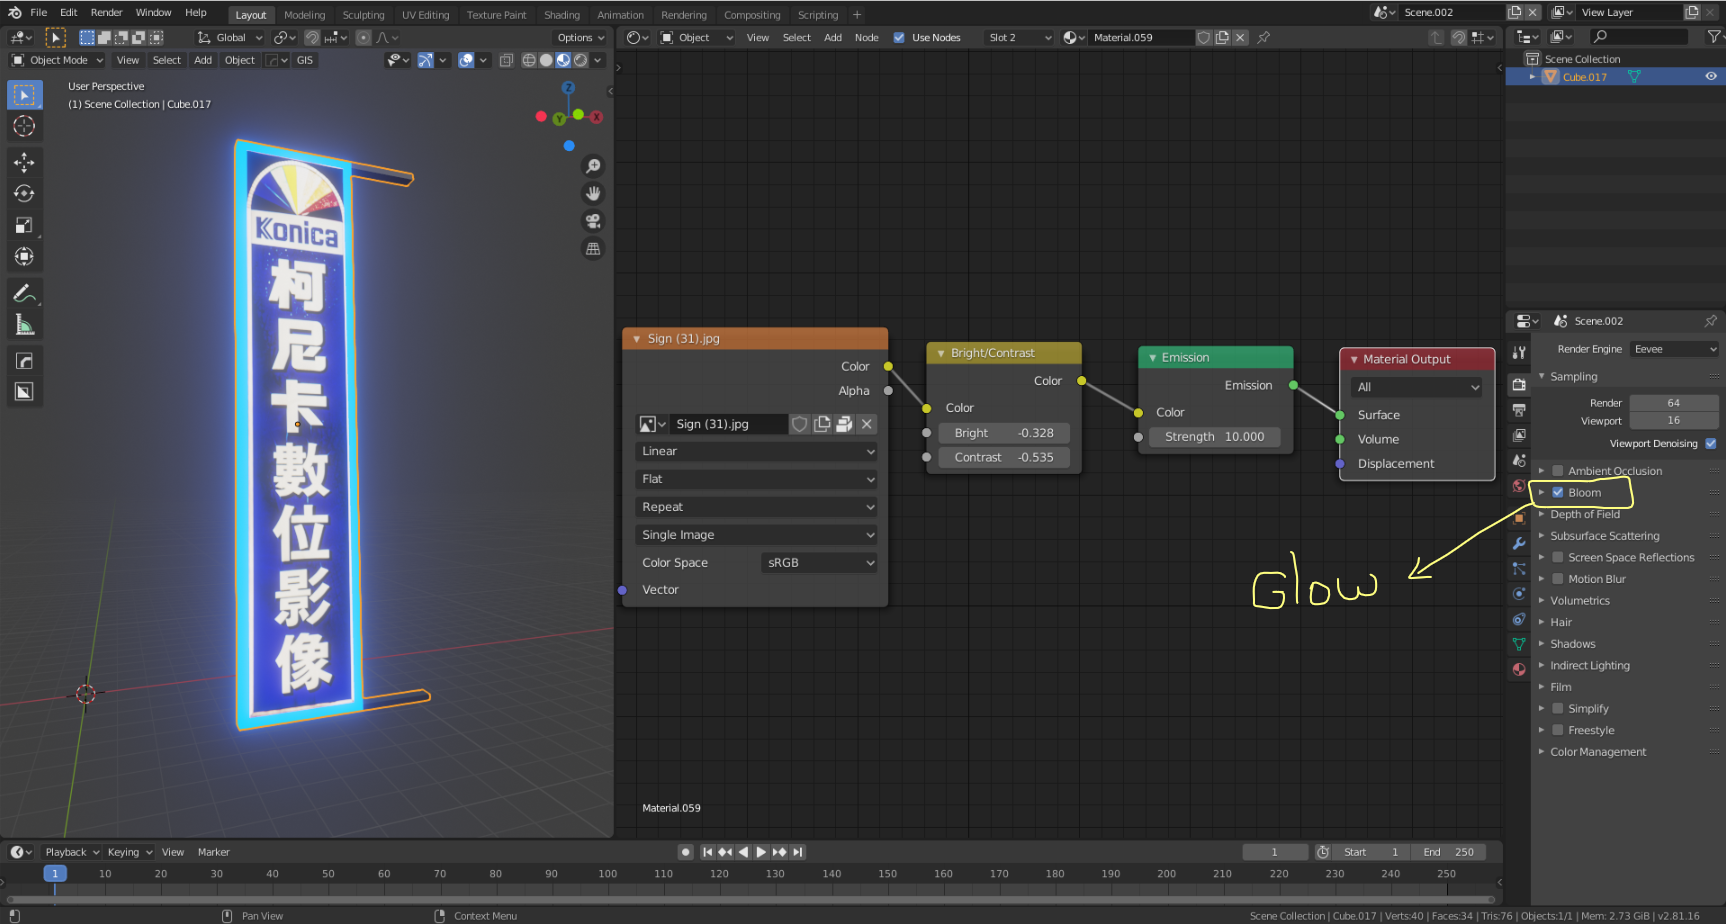
As you can see in the picture below, it’s very simple to create a neon sign using a materials node with the bloom option on in the Render properties tab.
I added two big buildings as a background to the street view.

Street Assets
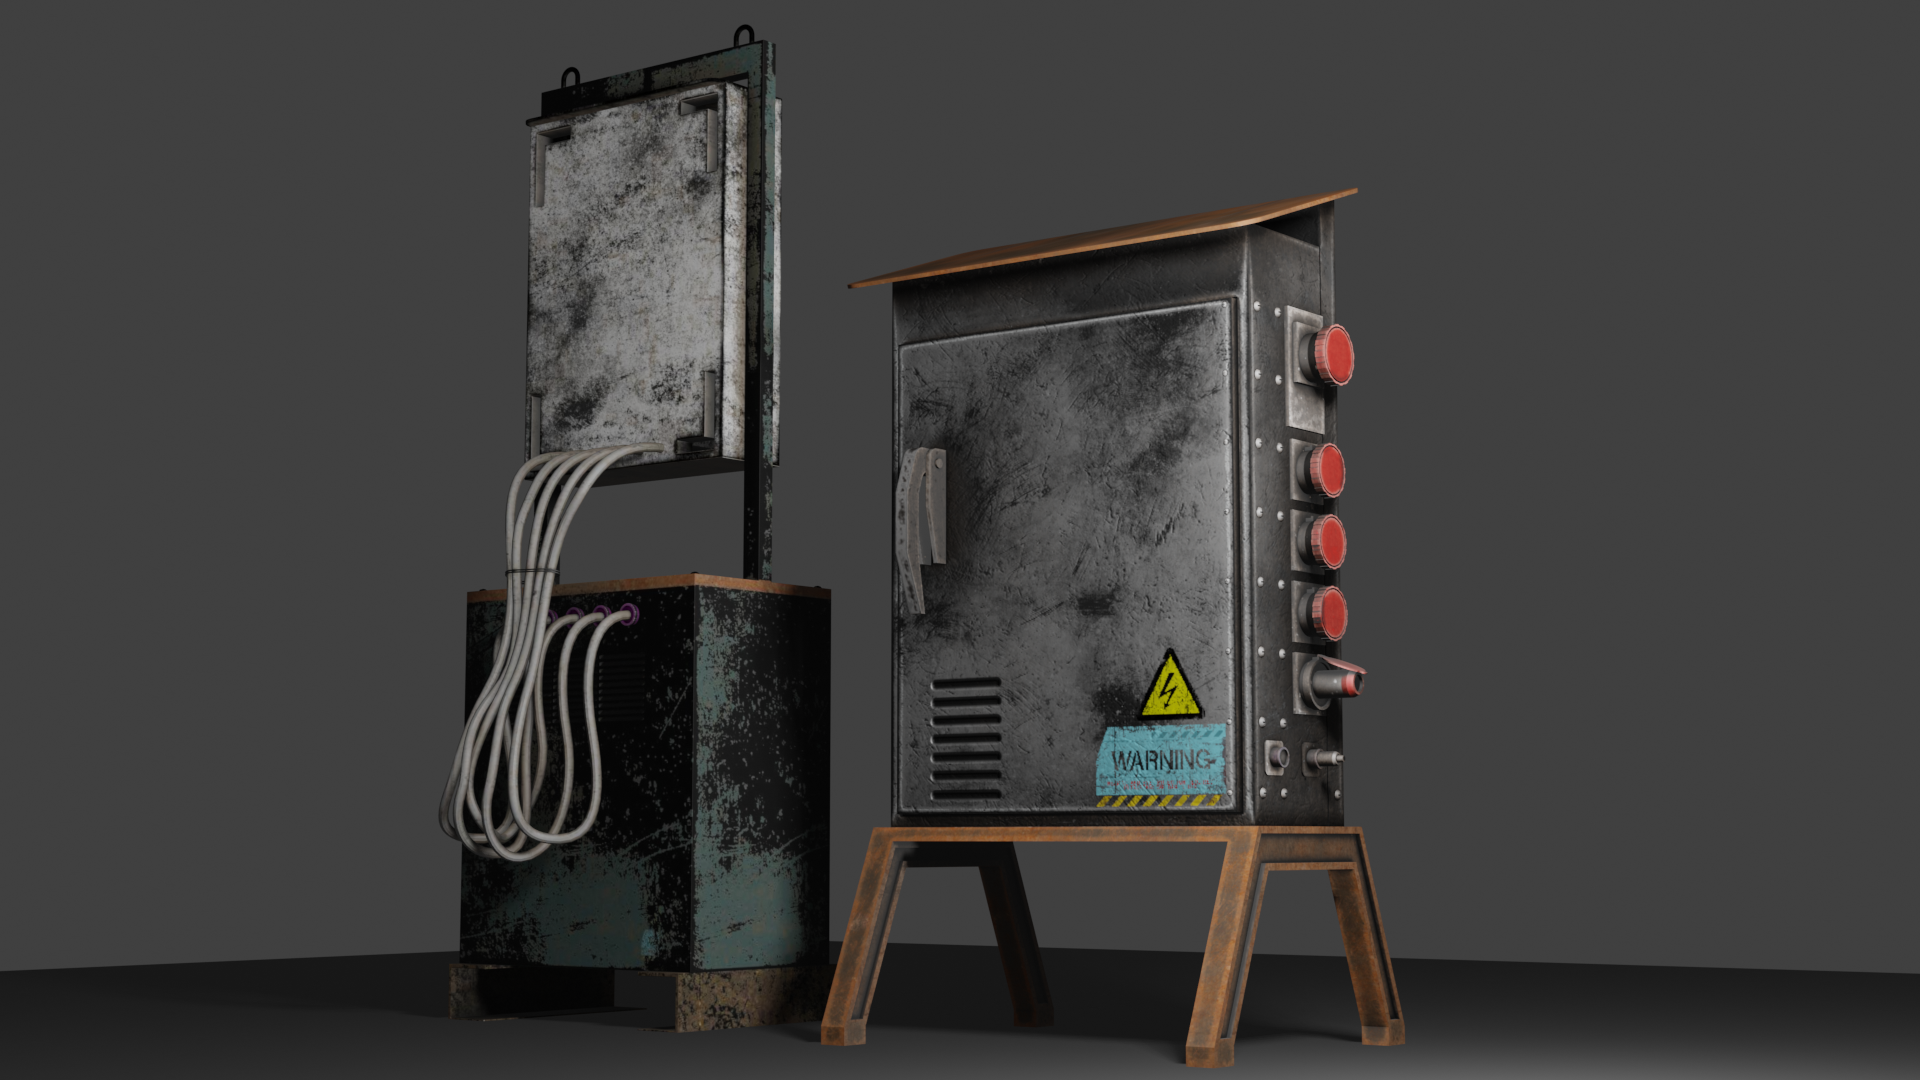
I used some of my old environment assets and some free environment asset models from Sketchfab.
My assets: Store
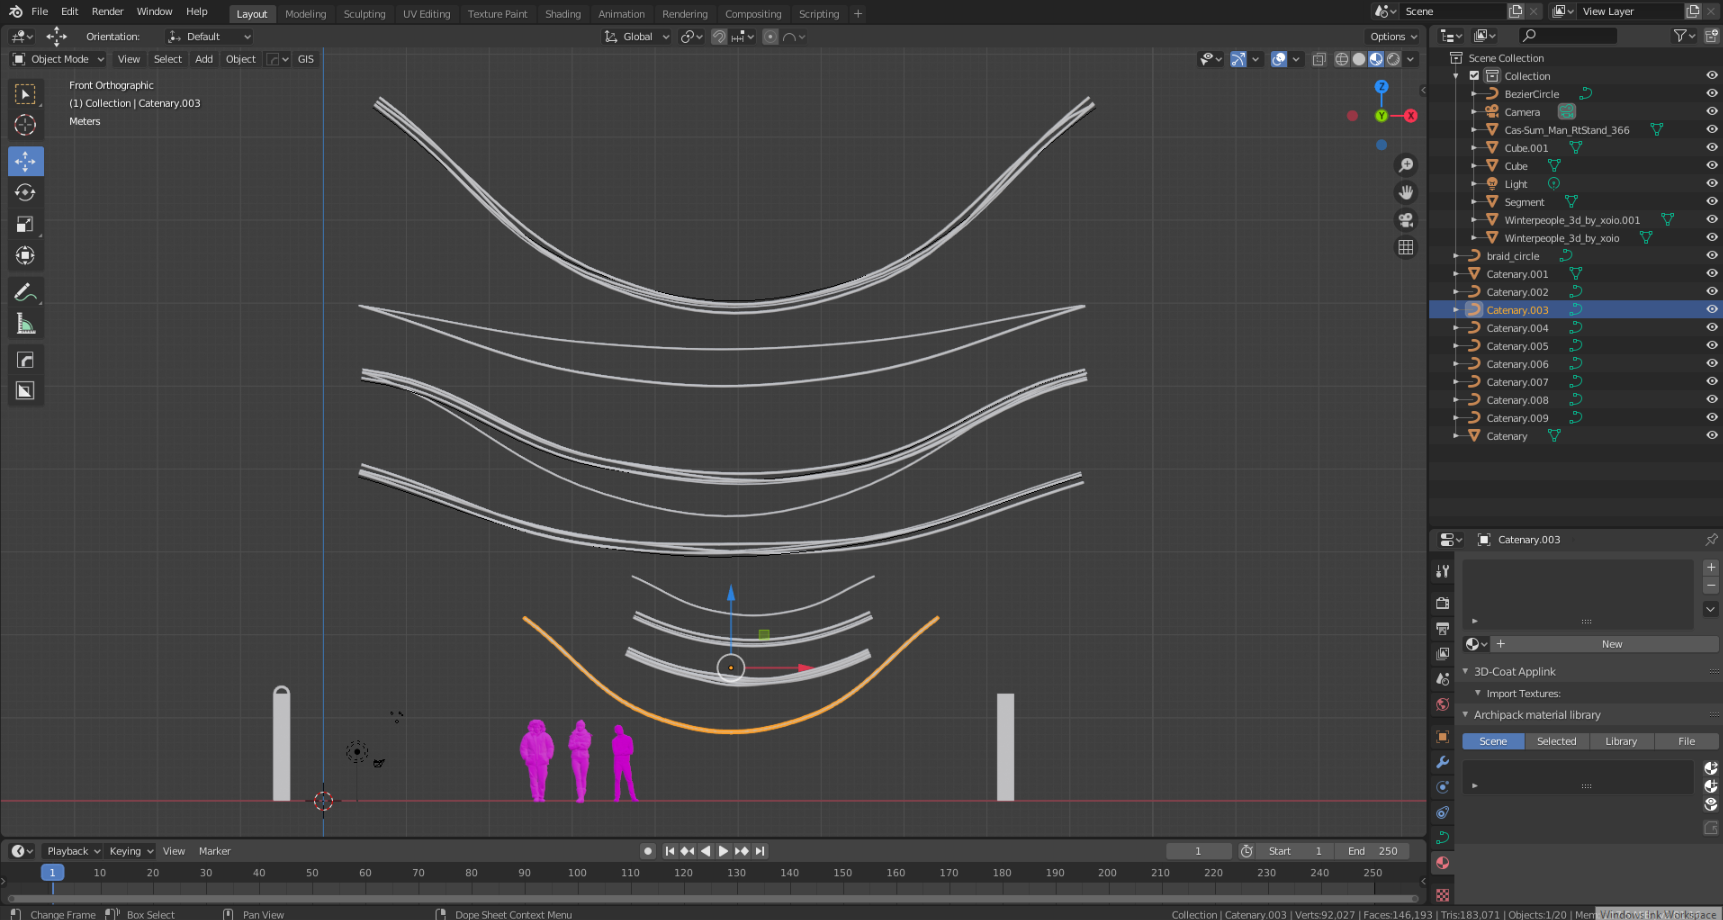
Light and Atmosphere
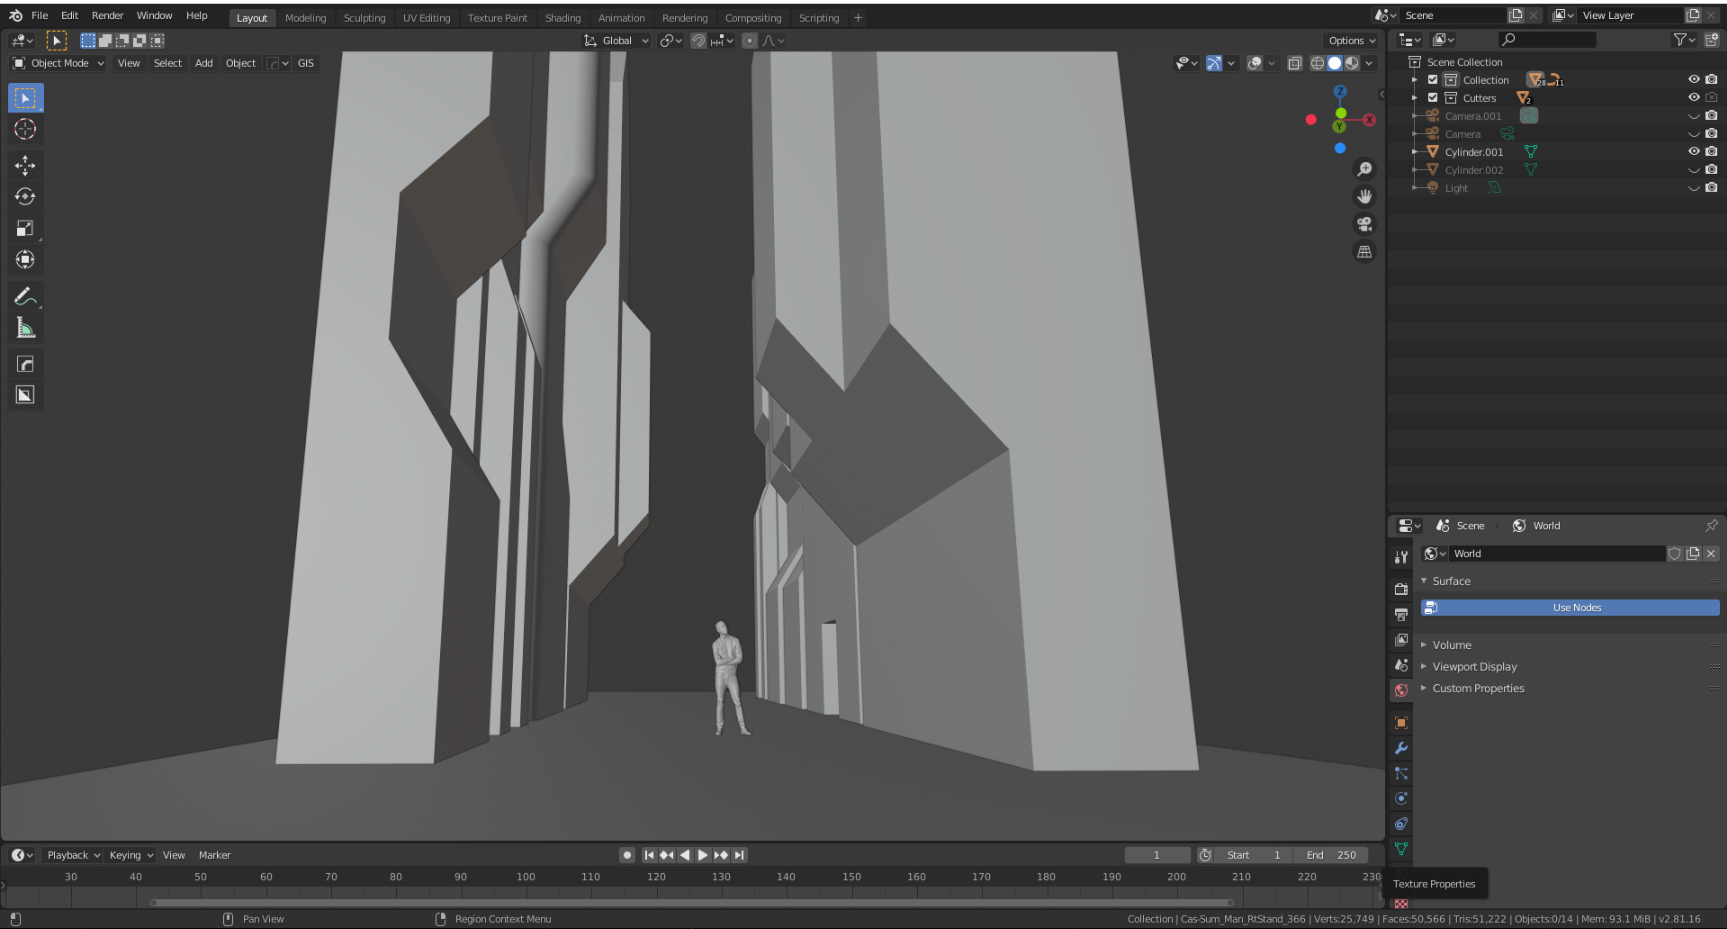
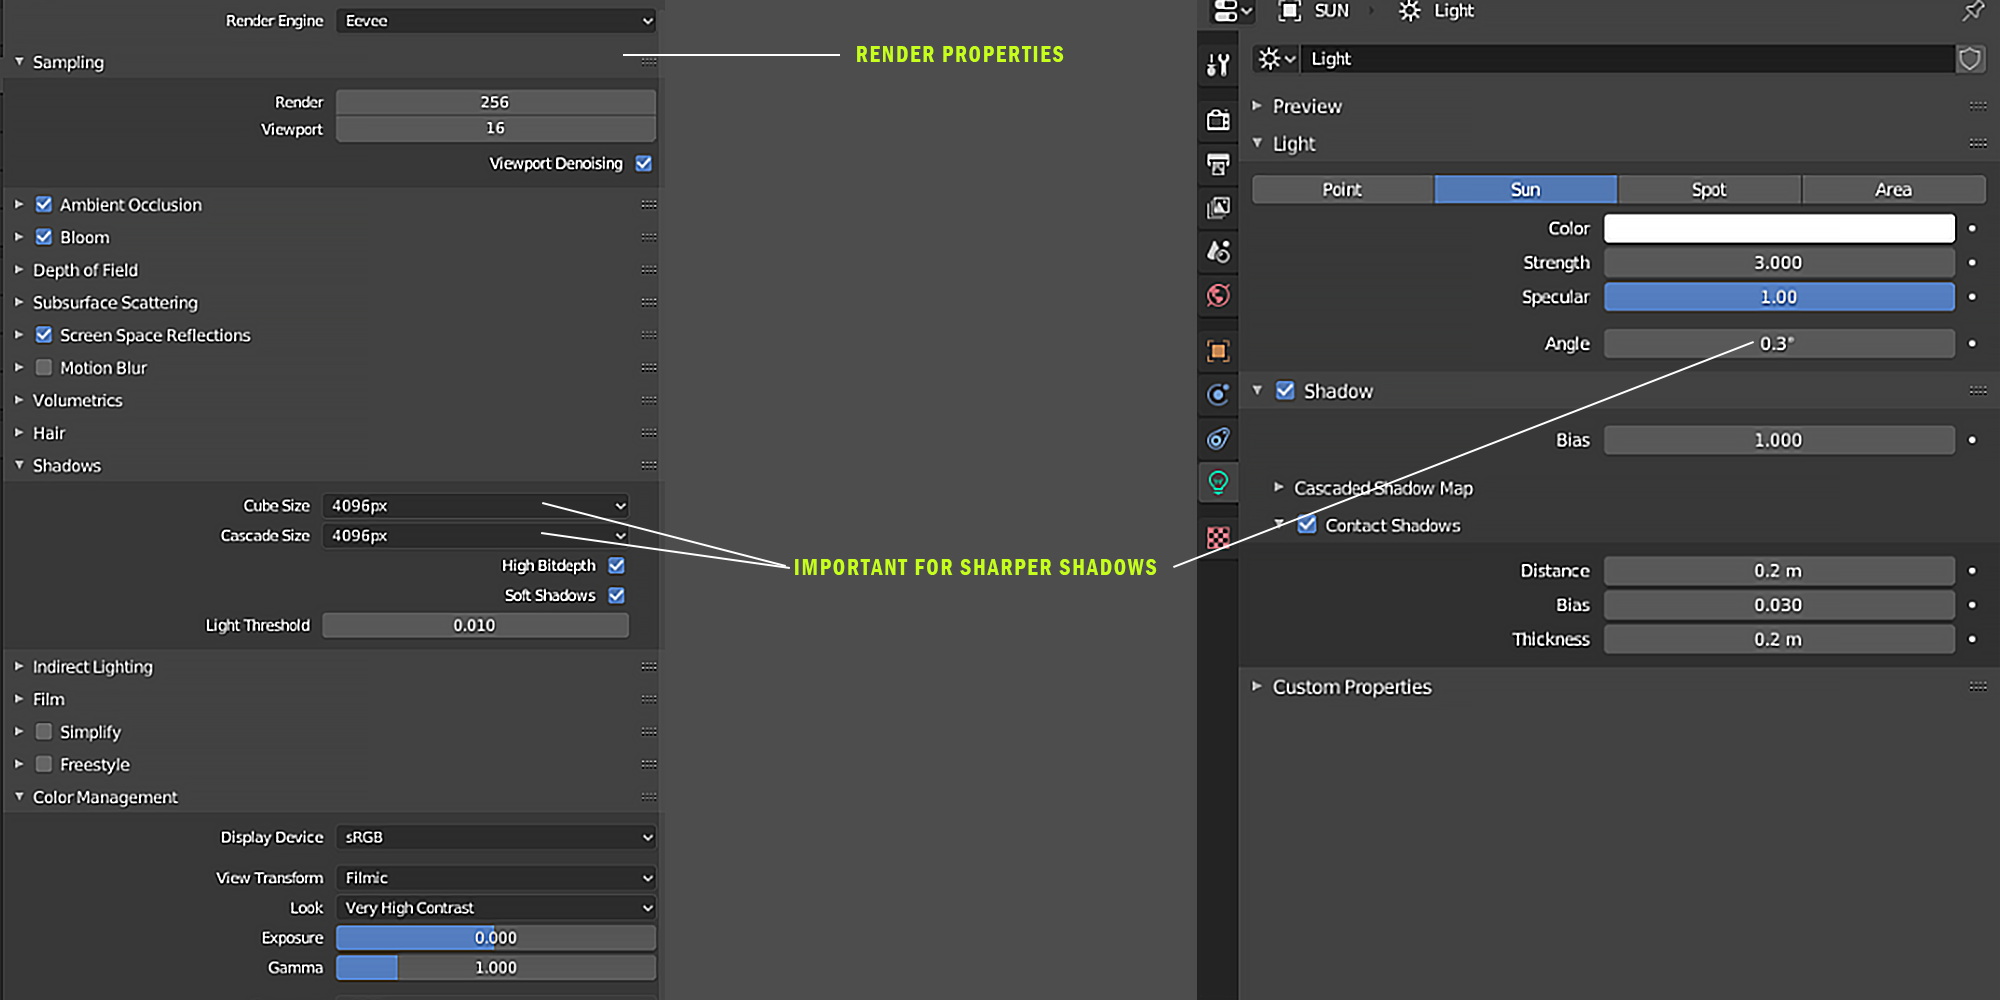
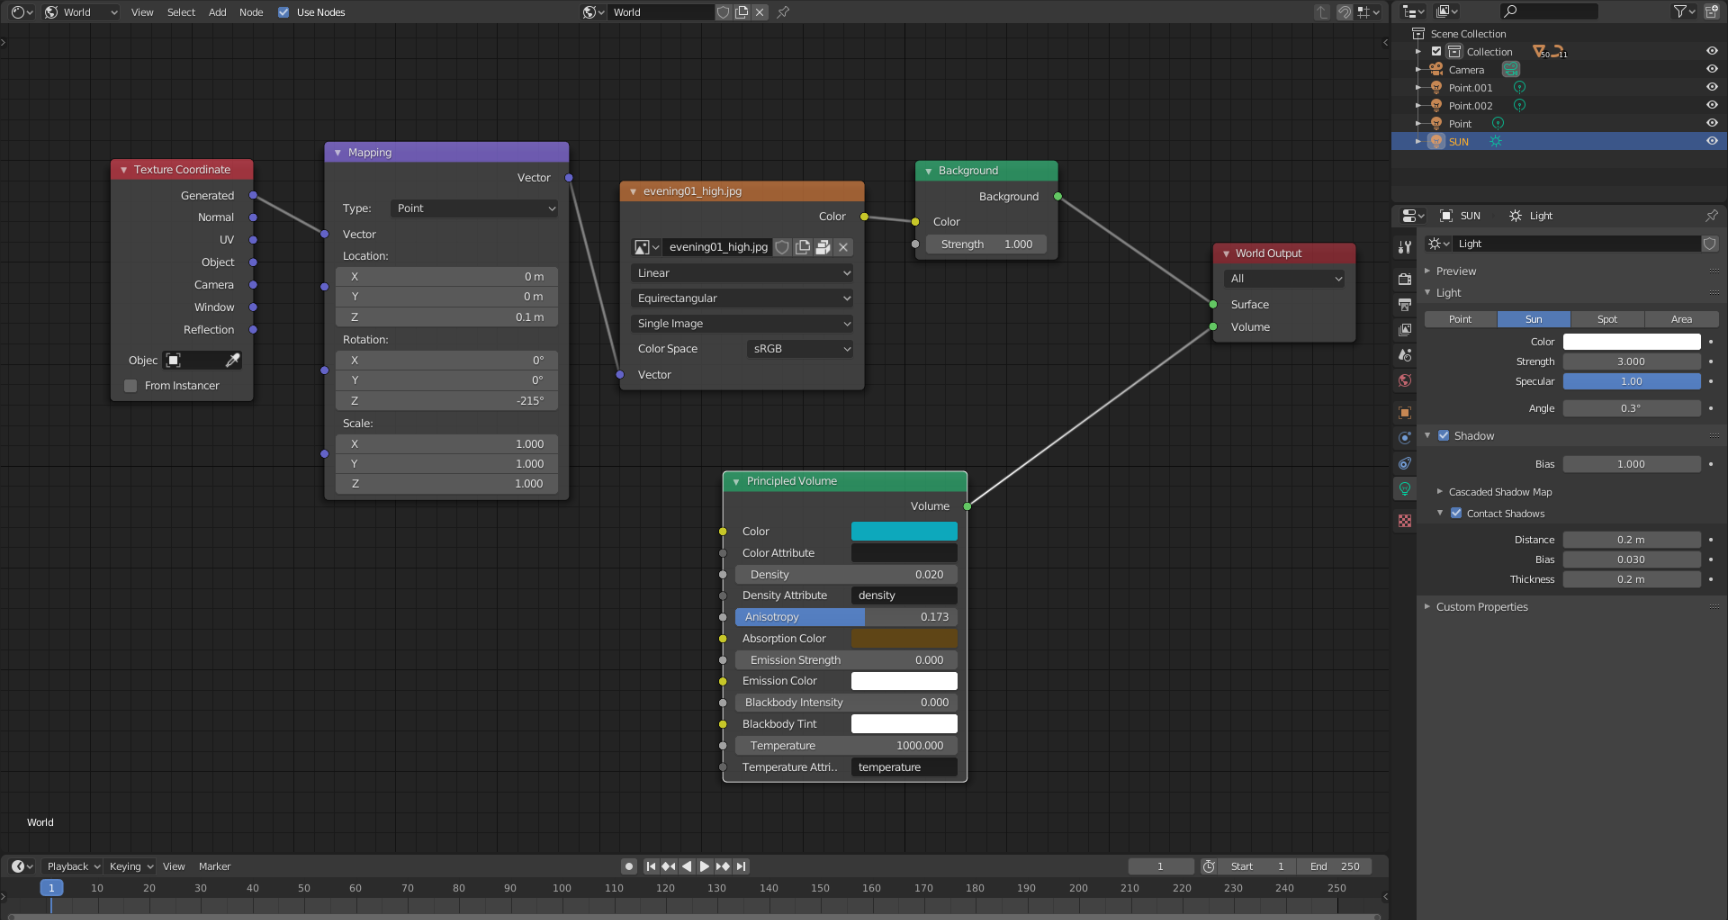
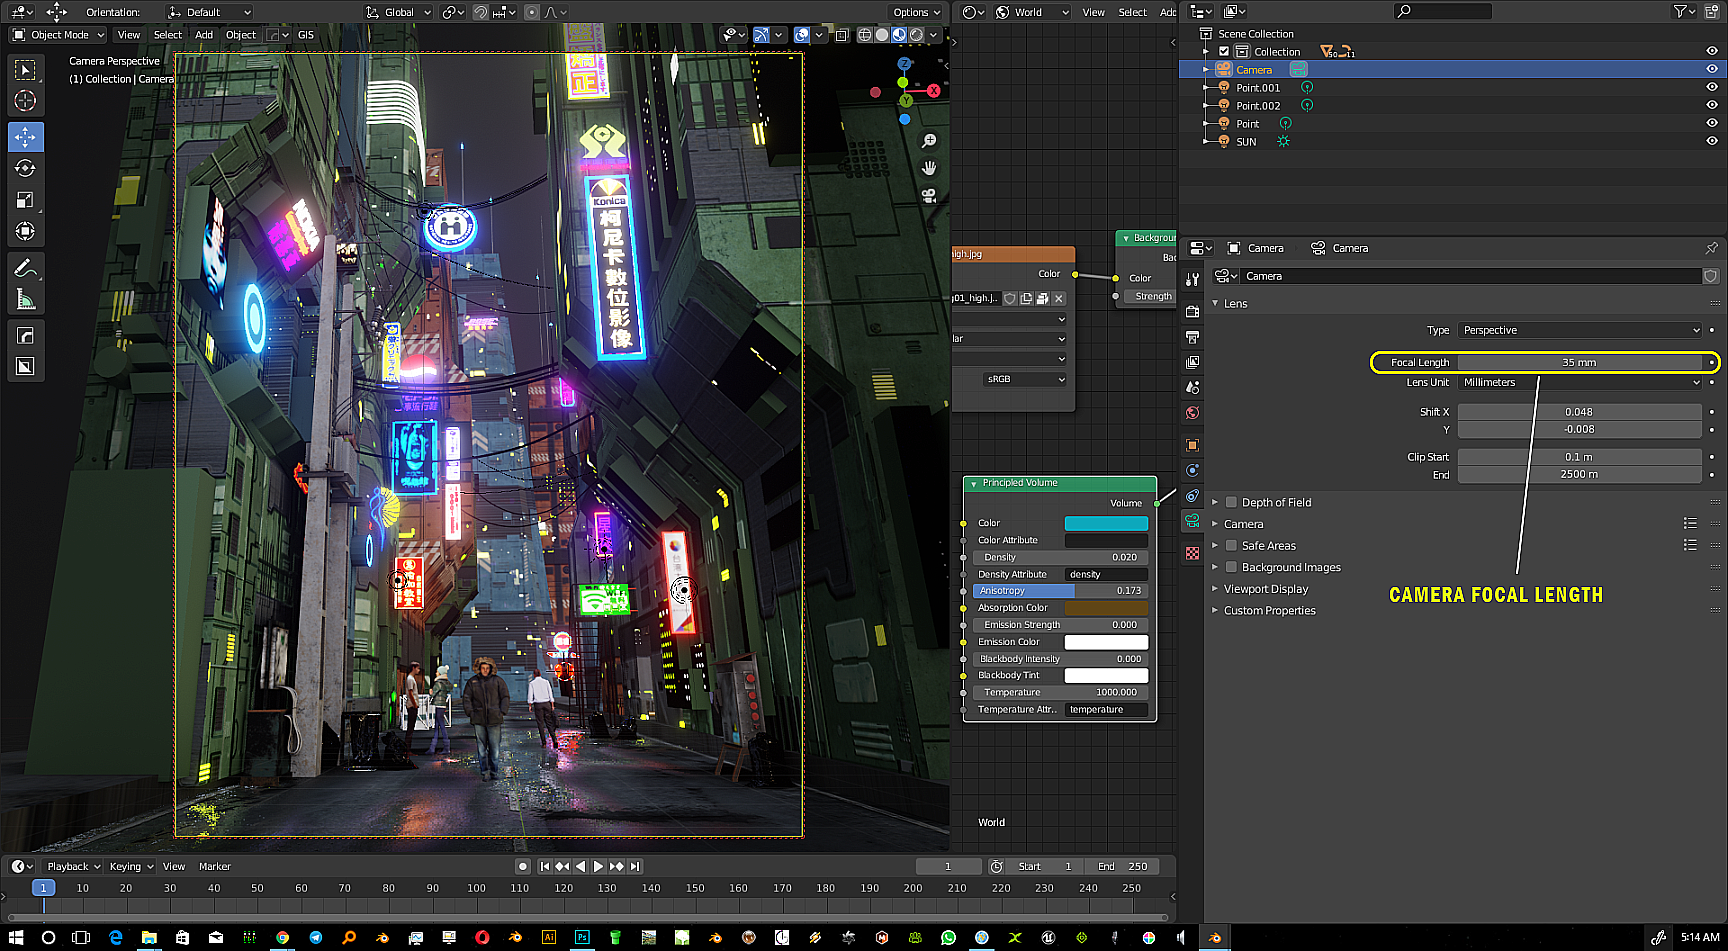
I decided to use EEVEE rendering for this artwork so I had to set up the lights and the atmosphere for the EEVEE rendering engine.
I used one Sun light as the main light of the scene and some Point lights behind the neon sign to illuminate its surroundings, and I changed the color of that lamp based on the color of the billboard.
Main light and shadow setting of the Sun light:
 I think there is no space in the world without dust and airborne particles, so I always use volumetric and fog settings for my atmosphere. As you know, EEVEE renders have a very nice ability to generate volumetric light without very high cost for the rendering time! This is why I chose an EEVEE render for this project.
This is the easy atmosphere setup for volumetric light for this scene:
 The people in the scene are 3D scanned and free from Xoio-Air and Sketchfab.
Rendering
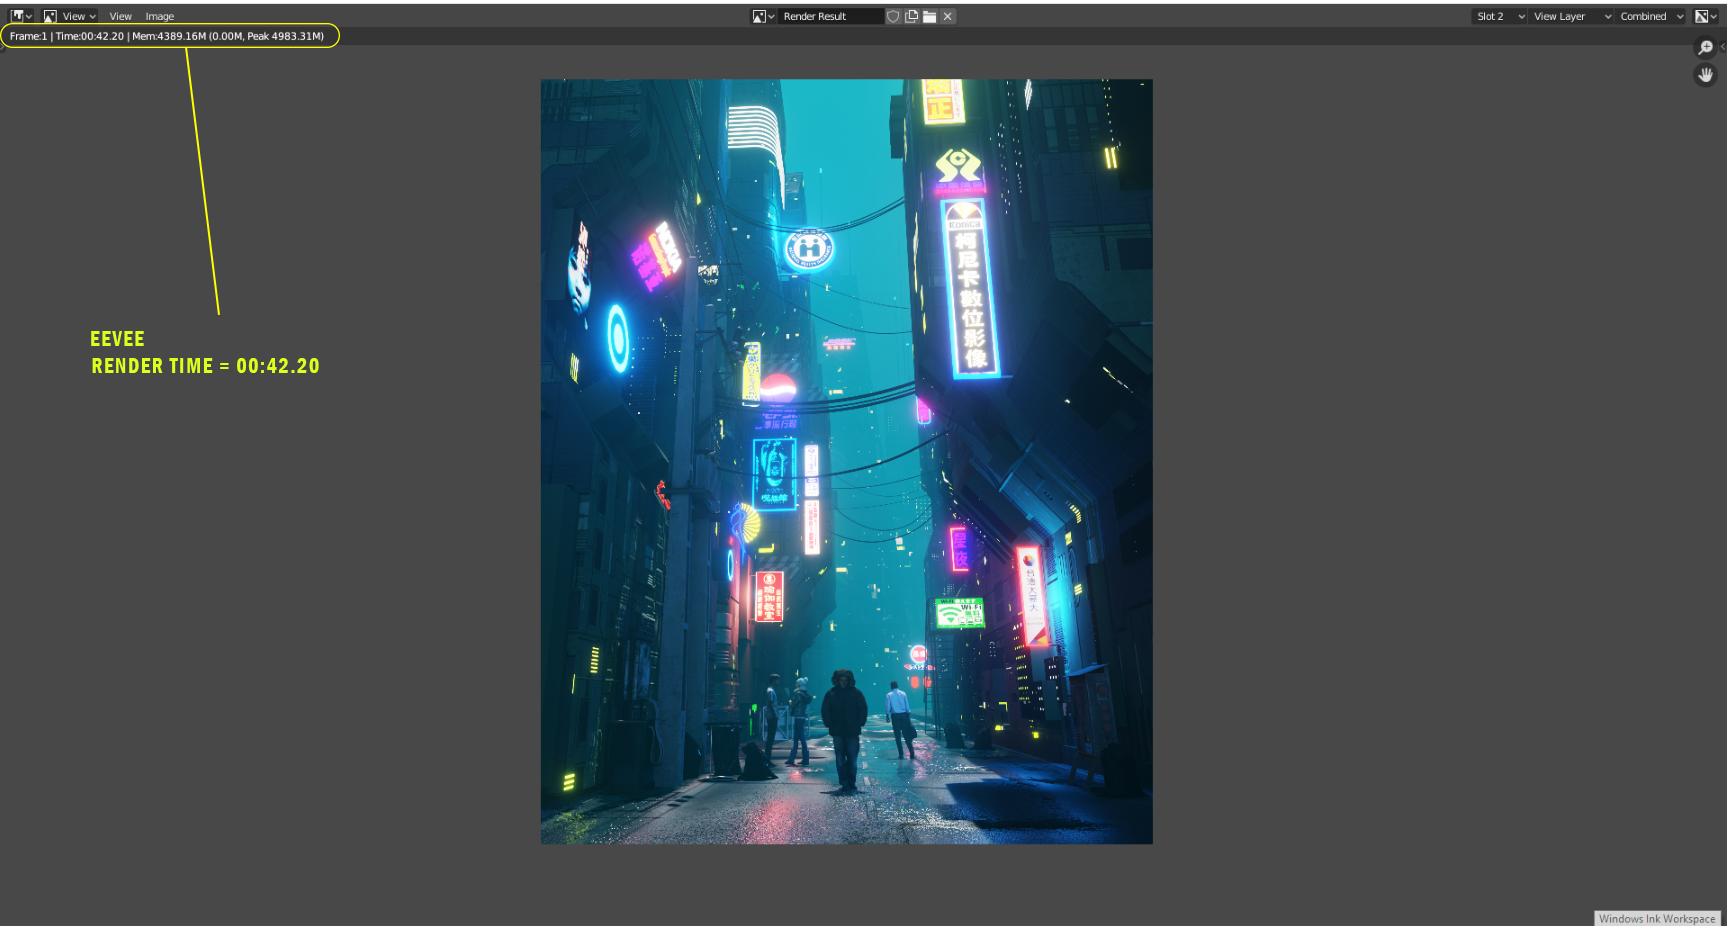
I used 256 of the EEVEE samples for final rendering. I rendered this image for my Instagram page and set a resolution of X = 2160 Y = 2700, which is, I think, the best resolution for Instagram.
This is the render setting:

Camera Focal length = 35mm
 Final Render time = 00:42.20
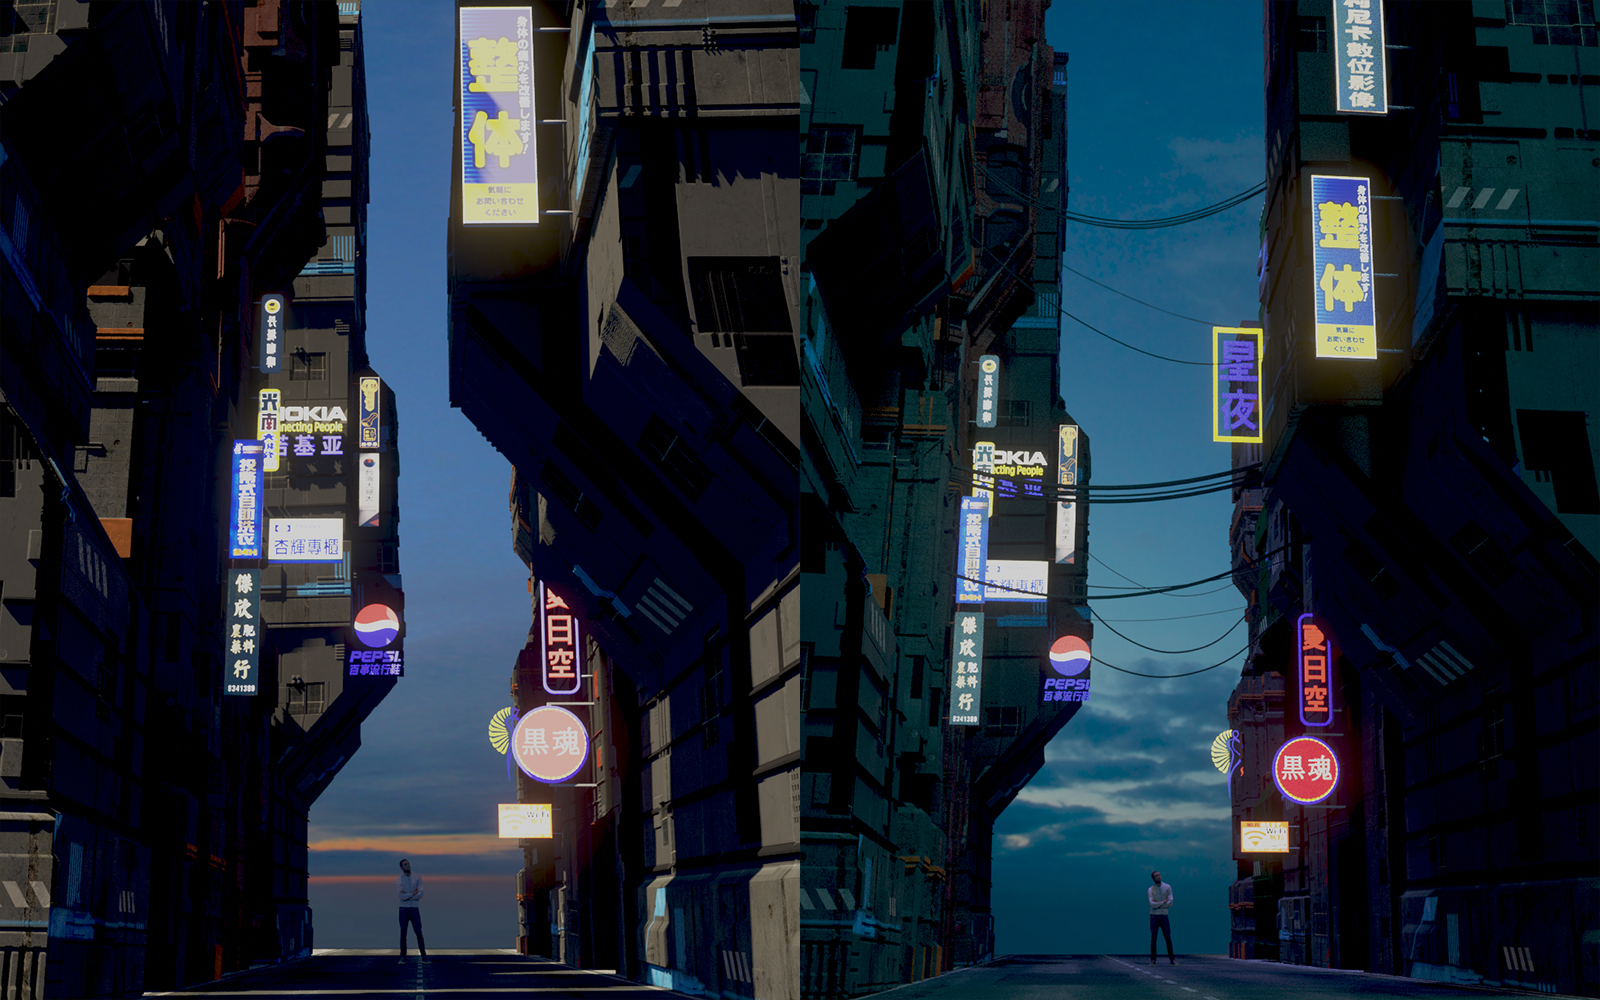
Final Render
Thank you for reading.
About the Author
 Siamak Tavakoli, 3D Environment Artist


Super cool image! Kinda gets me into the Cyberpunk 2077 feeling. One thing caught my eye. Im not sure why there is a road here while and yet so many people walk on it. I dont see a sidewalk?
Thank you for your comment , Yes you are right . This alley doesn’t have sidewalks. I was going to build a narrow alley with tall buildings ..
Cool++ as well. A little too much cartoon style for my personal favor. But otherwise we’ll end-up w/ too much details.
Hi , thank you for your attention
Really, really great!! Nicely done!
Thank you for your kind words , appreciated ..
Great work Siamak. Welldone!
Hi Jorge , Thank you mate .. Grateful!