
About
Kanishk here from Bangalore, India. I got to know about 2D animation through Macromedia Flash (now Adobe Flash) when I was 14. It somehow led me to understand that there existed something called 3D, which you can move and rotate around as well as animate. I managed to get a copy of 3ds Max and started working on it on my own, reading the help file and tutorials that shipped with it. Then, later, I made up my mind to pick this up as my career and I studied animation and got into this industry.
Since most of my education was self-taught, I got to know about Blender through the internet. At that time they had just released Sintel and it was making a lot of noise on the internet. The fact that you could download their production files really drove me towards it. Blender had also ported its interface to 2.5 and it looked really good.
It's been around 9 years that I have been using Blender at home for my personal artworks and I have really enjoyed using it. I think the best part about Blender is the awesome community that it has online. I always follow the #b3d hashtag on Twitter to keep myself updated with the latest. I think Blender has a fabulous developers team and one of the major reasons I want to switch to Blender totally is because of Ton and his awesome team.
About Sadhu
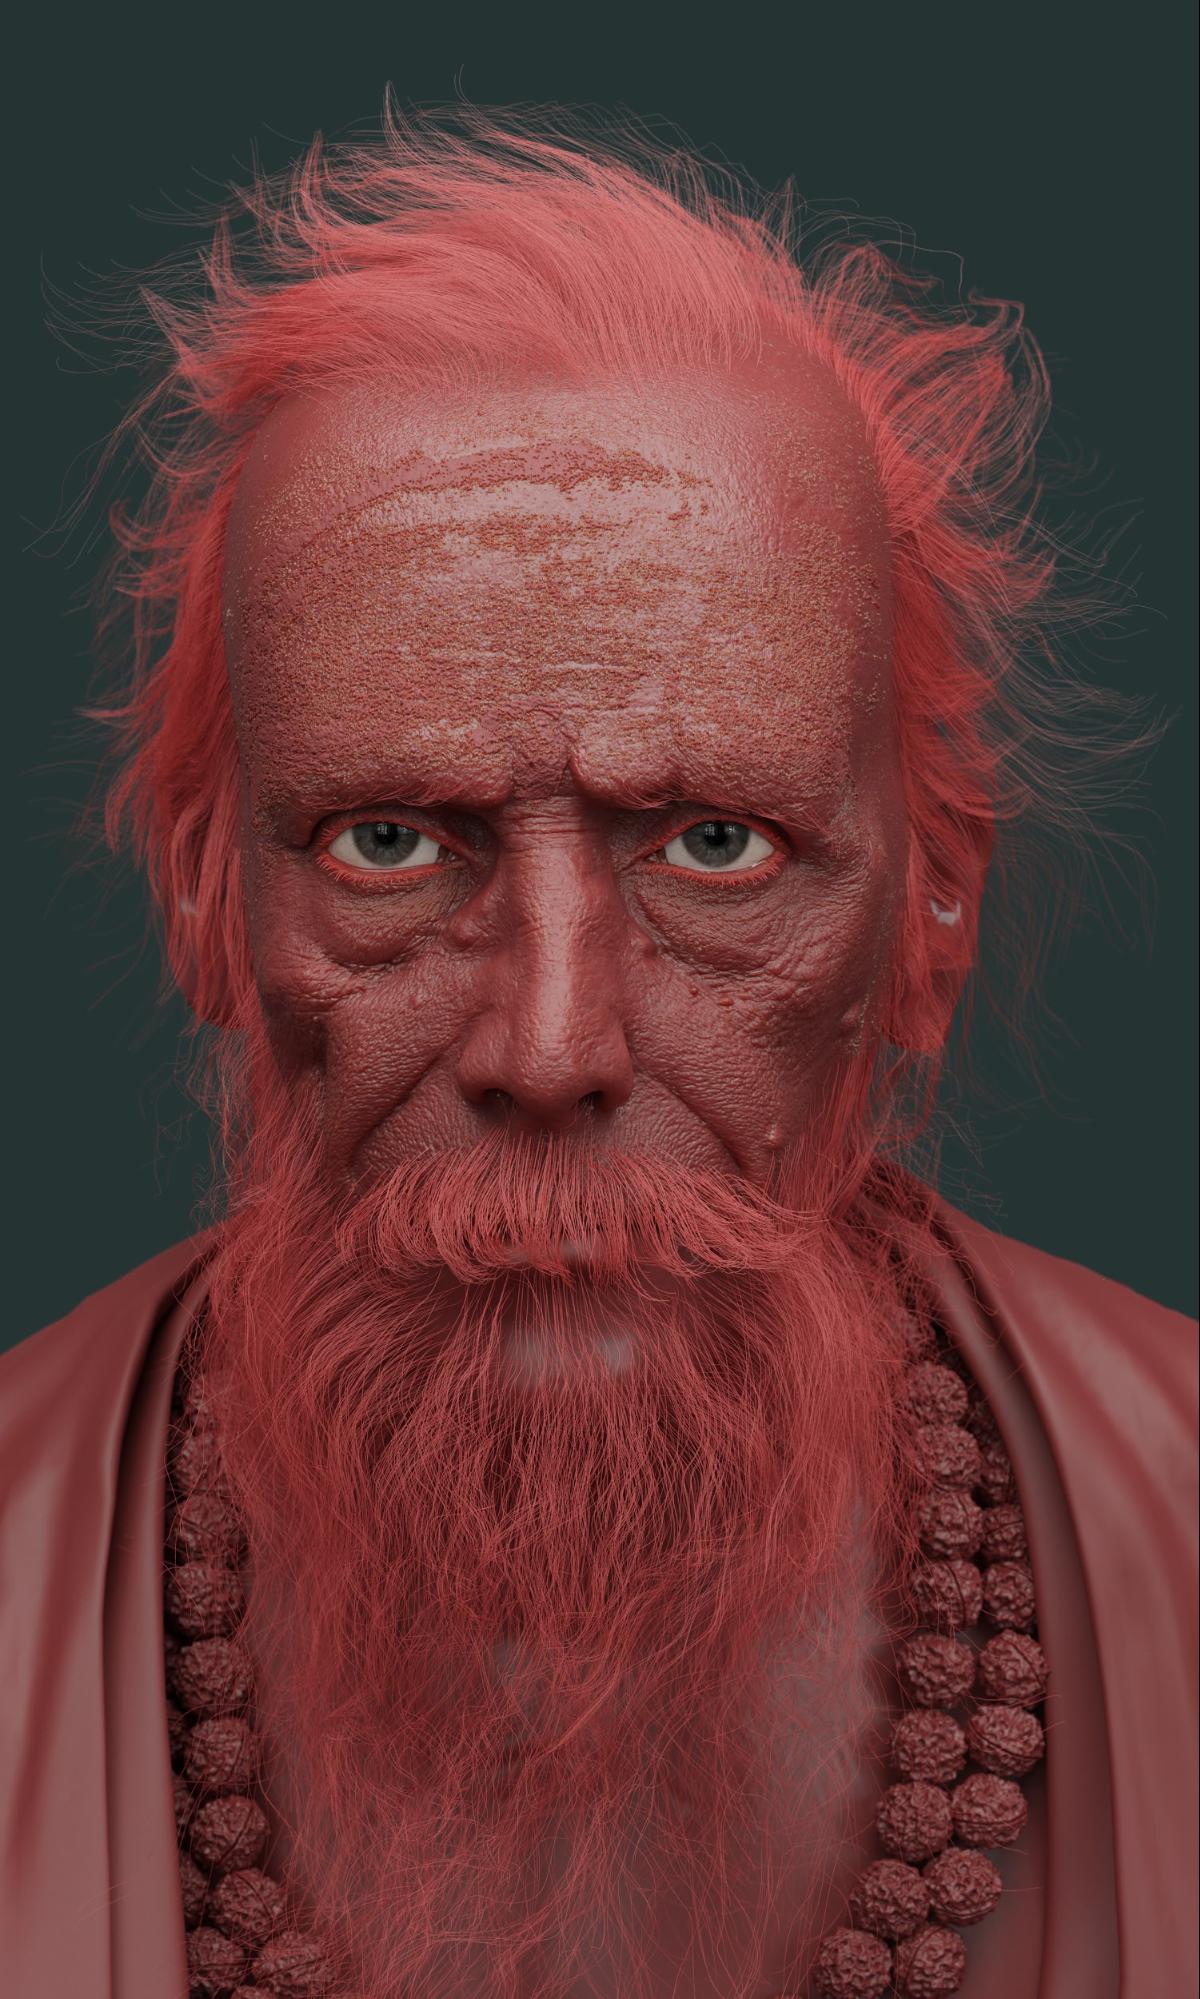
I was very much fascinated by Sadhus and always wanted to make one in 3D. A Sadhu, per Wikipedia, “is a religious ascetic, mendicant or any holy person in Hinduism...who has renounced the worldly life.They are sometimes alternatively referred to as jogi, sannyasi or vairagi.”
I had started this project way back but never managed to finish it. When the countrywide lockdown was announced in India, I decided to restart this project as this was the best time to work on personal stuff.
References
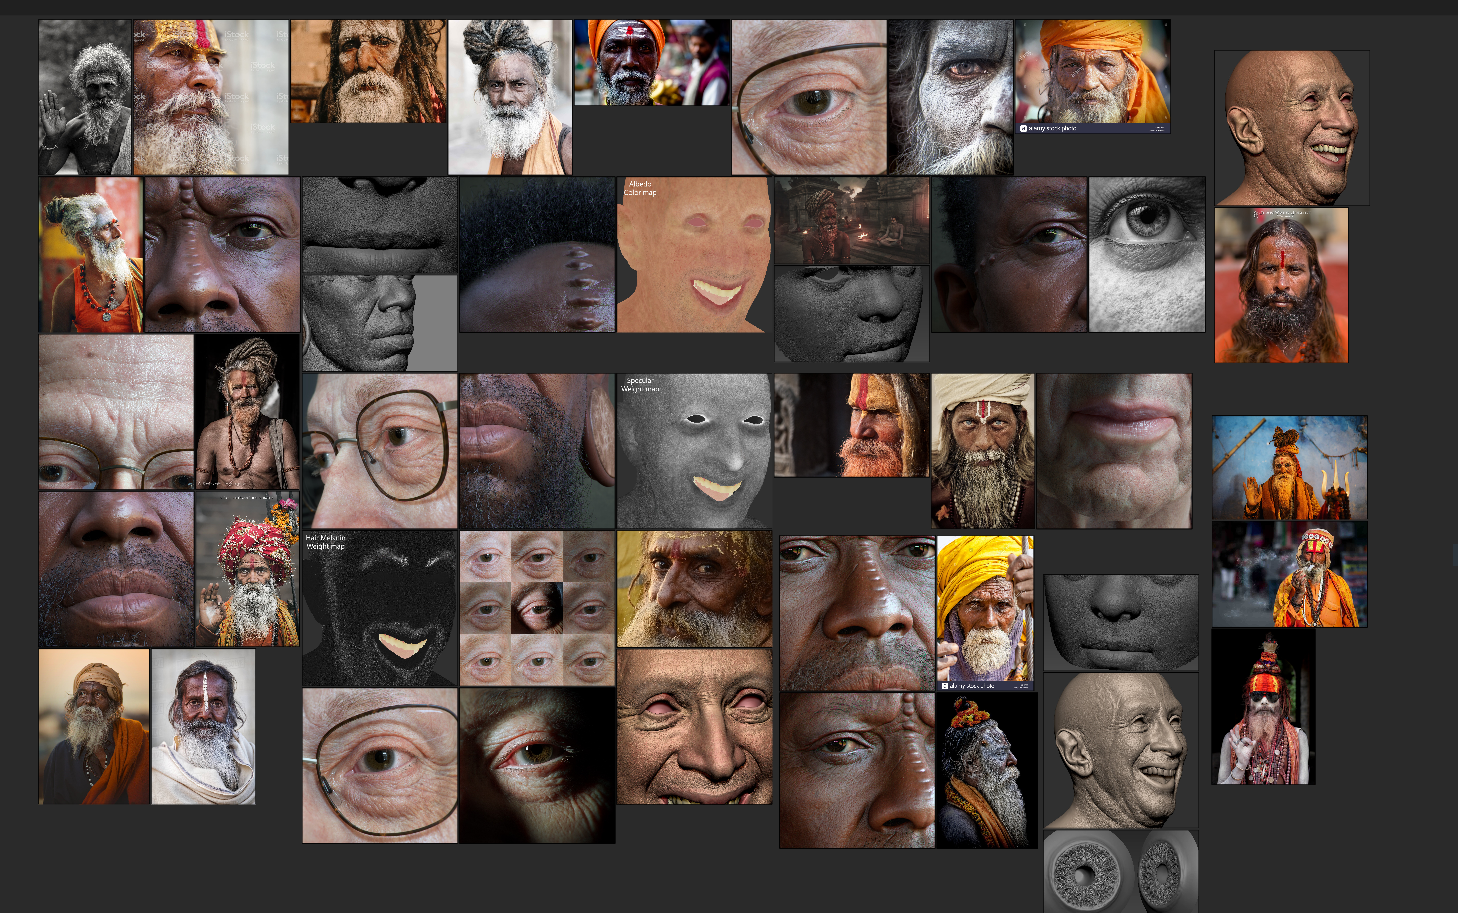
As I have always mentioned, do not start off a project without any references. You need to have references for your model, the kind of texture you want, the lighting you would need, etc.
Basically, everything you need to do in your 3D software package should have a reference.
I have been using PureRef for a long time and can’t stress enough on how good this free software is to collect references. Pinterest has helped me find visually similar images.
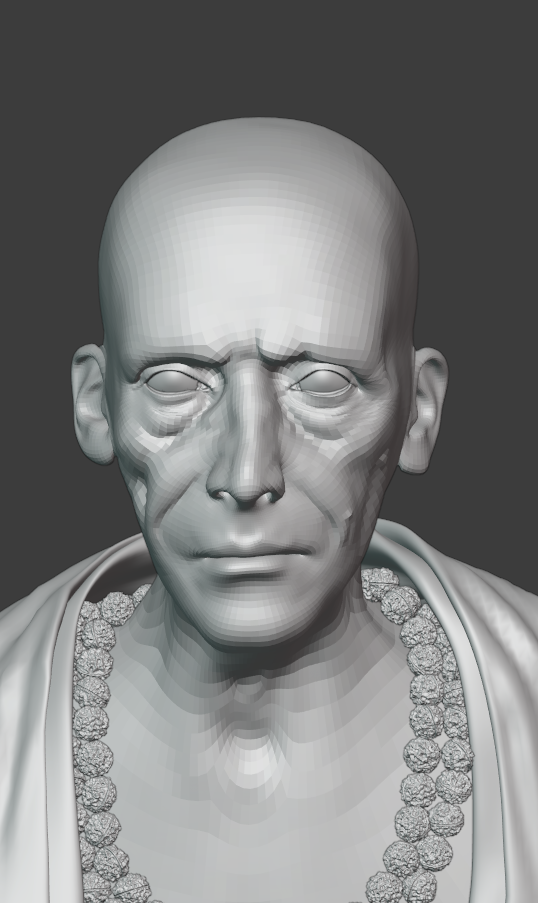
Modeling
There is no harm in starting off a model with a preexisting basemesh. In fact, you might never work on a production model in a studio from scratch. It is always a good idea to reuse old meshes.
Of course, if you are just starting off in the industry, it’s always good to know how things work from scratch. But make sure not to get lost in that process. You should be spending more time on the art side of things.
While sculpting the mesh it is really important to go in the order of Primary > Secondary > Tertiary. Your primary shapes should be good enough to make the model look similar to the reference image. I suggest not moving on to secondary details unless the model matches the reference about 60-70%.
P.S. Always scale your meshes correctly before jumping into sculpting/lookdev. The shaders react differently to different scales of the model. You are definitely going to get incorrect SSS in your shader if your model does not match the real-world scale.
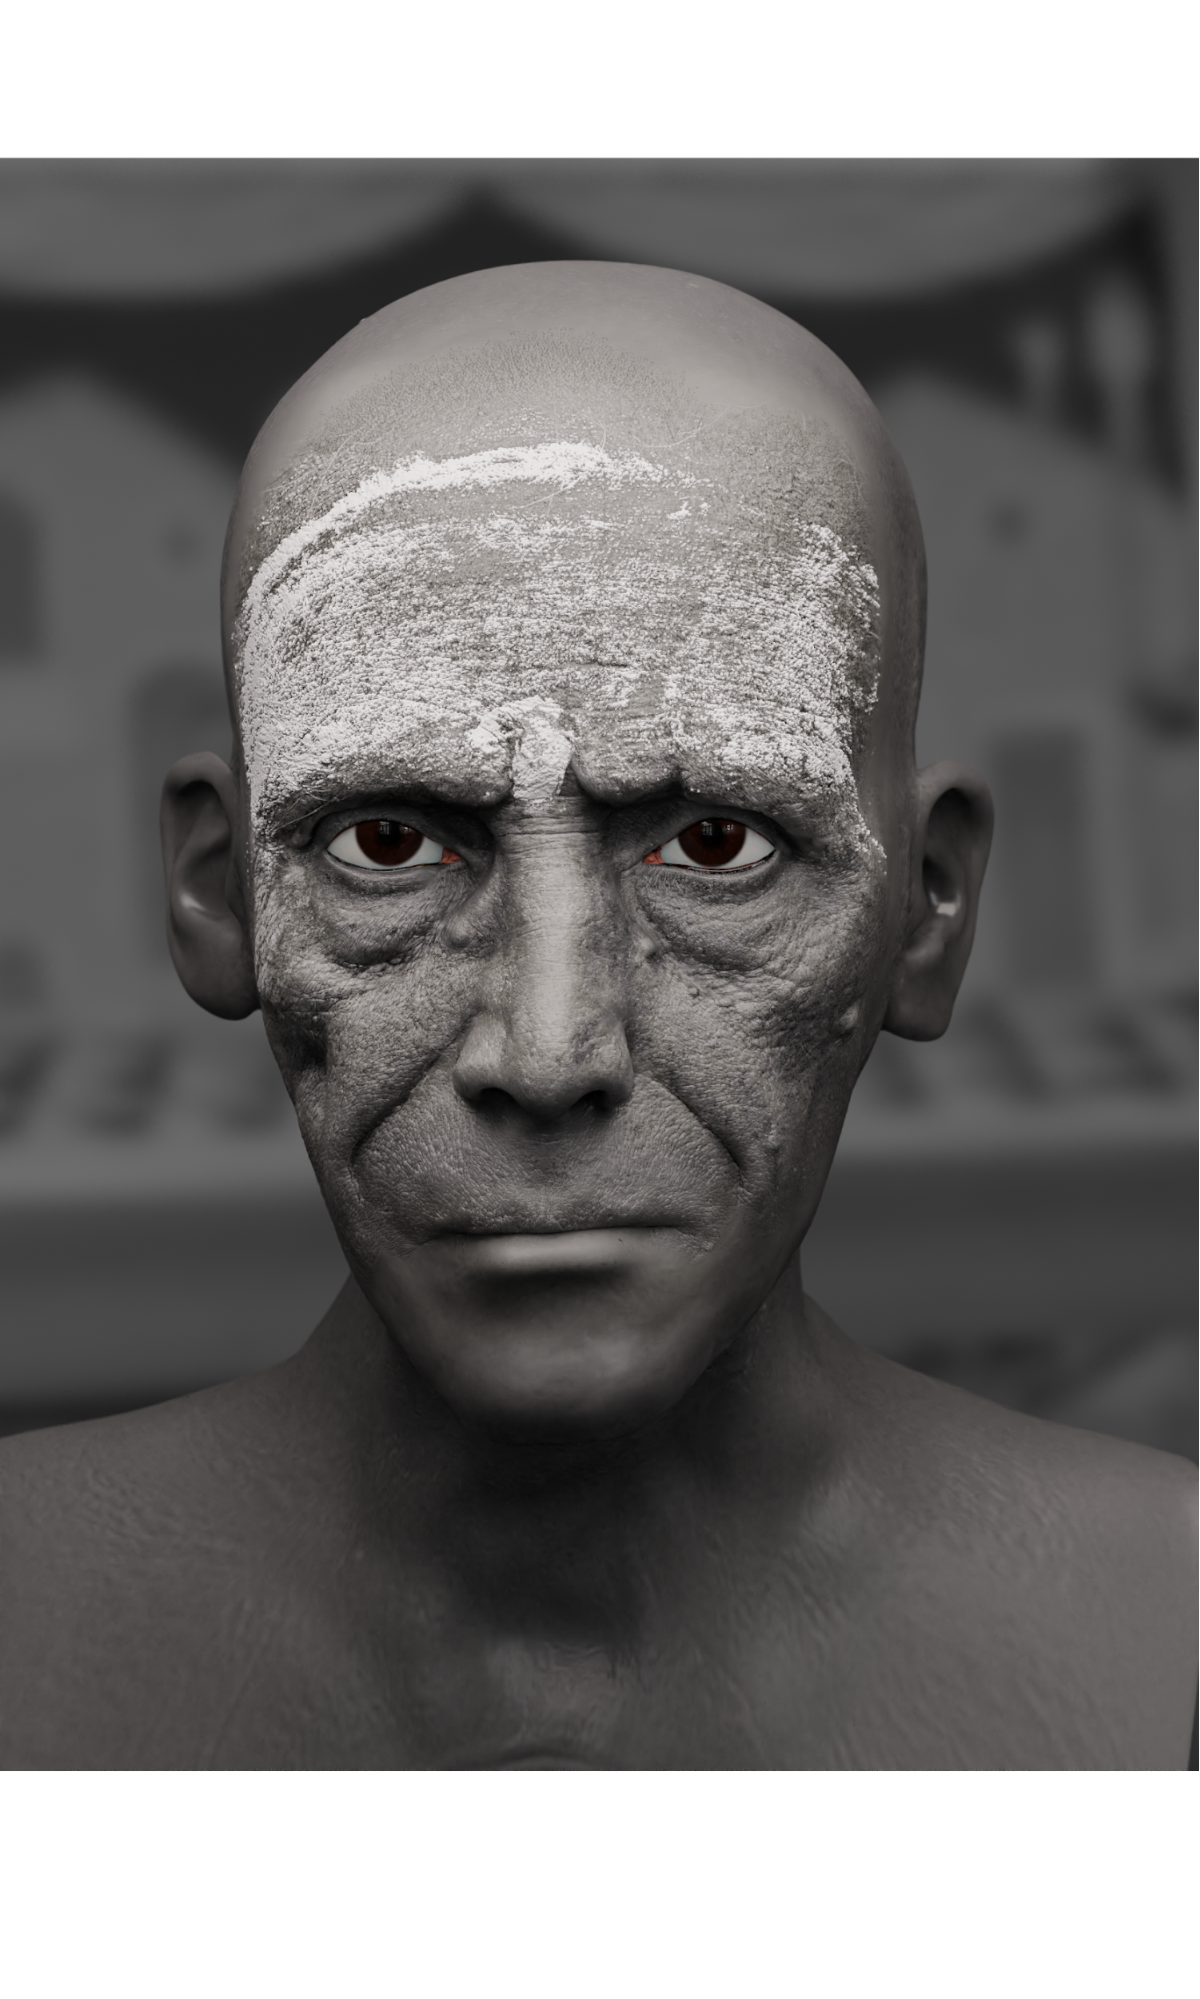
Sculpting/Texturing
Once the model closely resembled the references, texturing and sculpting could begin. A lot of things can be achieved in texturing that cut down on having to sculpt each and every detail. After doing a lot of projects, I realise it’s not important to complete 100% of the modeling, then 100% of the sculpting, and then 100% of the texturing. If you work on them side by side, you will realise that you probably only need 60% of each and will end up saving a lot of time.
Hair
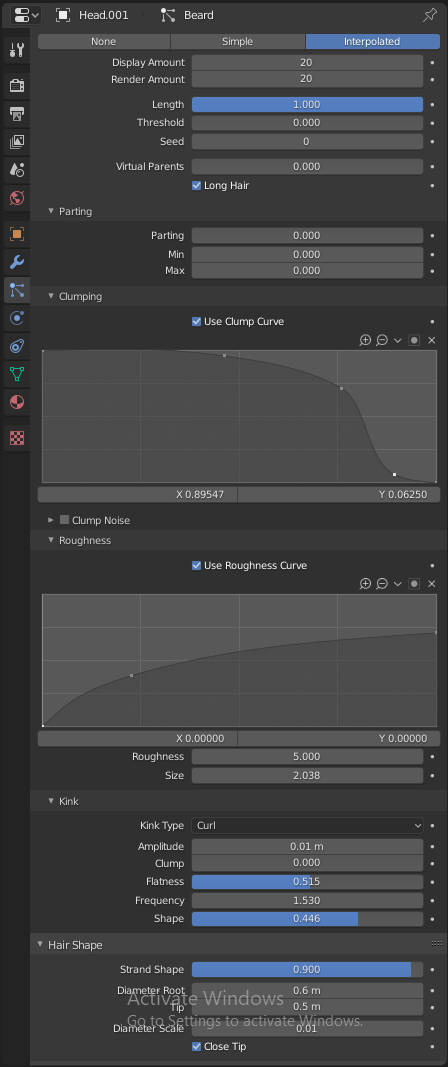
Hair in Blender is straightforward. I think it’s just about having the patience to go to every single guide and make sure the flow is correct. I think in the end it all comes down to your observation skills. You need to split your groom based on the hair types.
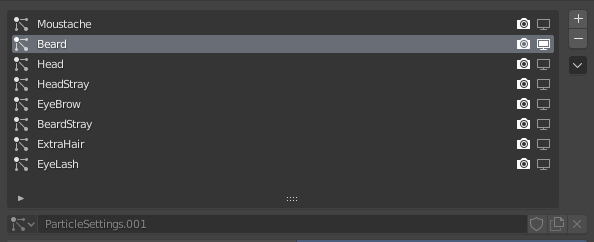
I use the basic settings—nothing special here.
You can see the various hair segments I created for this.
Lighting
The light setup consists of an HDRI from HDRI Haven. I don't think there is any better place to find good calibrated HDRIs out there. I just added a single light source to give the light a direction. The HDRI serves as a fill light from the atmosphere and the Area Light acts as a key light.
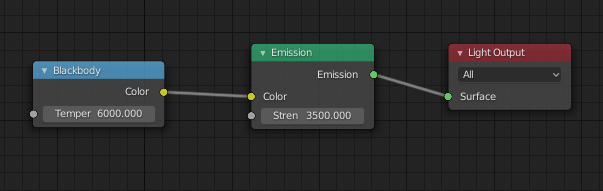
One thing I always do while lighting the scenes is to make sure that I am using the correct colors for the light. I always add a blackbody node to my light to achieve this.
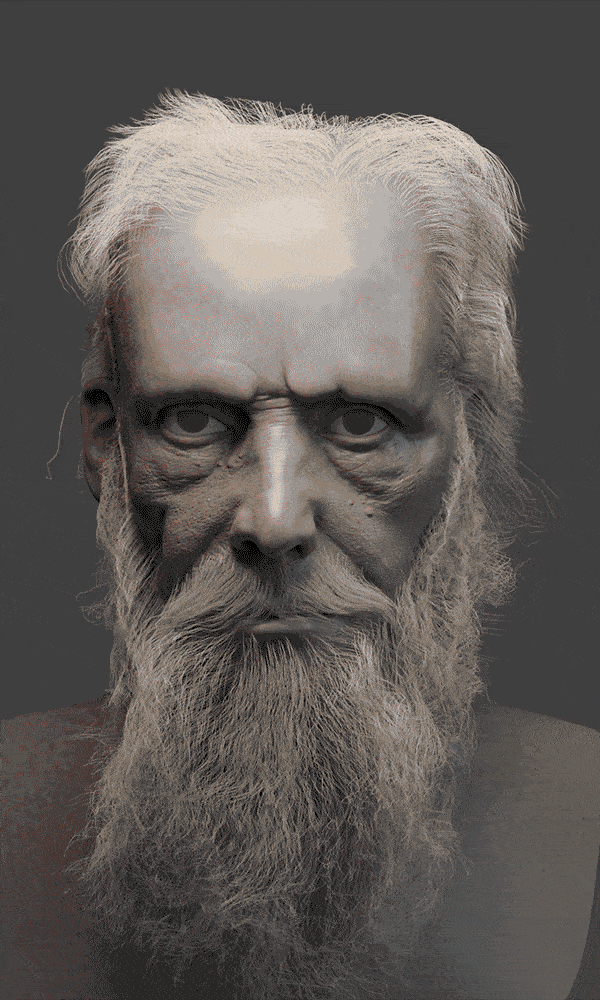
How you want to showcase your model determines how you light it. I suggest rendering and saving images every now and then to make sure you can look back and see how much it has changed.
I always save render versions, which help me understand the corrections better.
Note: If you are doing portraits, make sure you keep your camera focal length high (80mm+).
Render out different versions as well just to get a different vision of the image. Here is a little experiment I did.
Here is a little gif showing my wip renders to the final image.
Conclusion
I had so much fun doing this project and am so happy it received love from the community as well. Feel free to reach out to me by email or hit me up on any social media platforms. I would be more than happy to help.
Thanks
Kanishk
About the Author
 Kanishk Chouhan, 3D Artist
9 Comments
This is extraordinary - so well done. And those eyes couldn't be more perfect.
Thank you so much for great article.
This is the Behind the Scenes that I was waiting for. Thank for being so generous with the background and the details of your workflow. Your work is exceptional and inspiring. I agree with you that the Blender community is what makes it so awesome.
Awesome! Congrats!
Ive never hear dof doing a sculpt for 60% and then go ahead doing textureing work. Sounds kinda weird. Perhaps if this a sulpt render only does this makes sense. Because sometimes the model is needed for something else and the sculpt is to high poly to work with.
But you got stunning results, could really tell what the basemesh looked though.
ANother point about not finishing a sculpt and go ahead doing say work on the hair. Say the model does change quite a bit. Now you need to address all your work done in the hair section. and by doing so you ruin the combing of the hair particles?!?! Kinda weird not?
Or did you mean like instead of sculpting all the skin details you simply use texturing to solve that. That would make sense. Otherwise i really feel its a waste of time progressing and coming back.
PS i guess we didnt see much of the sculpting work because you used Zbrush for that. Still would like to see some of that stuff but perhaps they don't allow it on this site.
you try making the black and white image with more contrast. I think the image will speak even more if you have a much more exaggerated contrast. The details will pop much more. Bu this is ofcourse personal preference. Image is beautiful anyways!