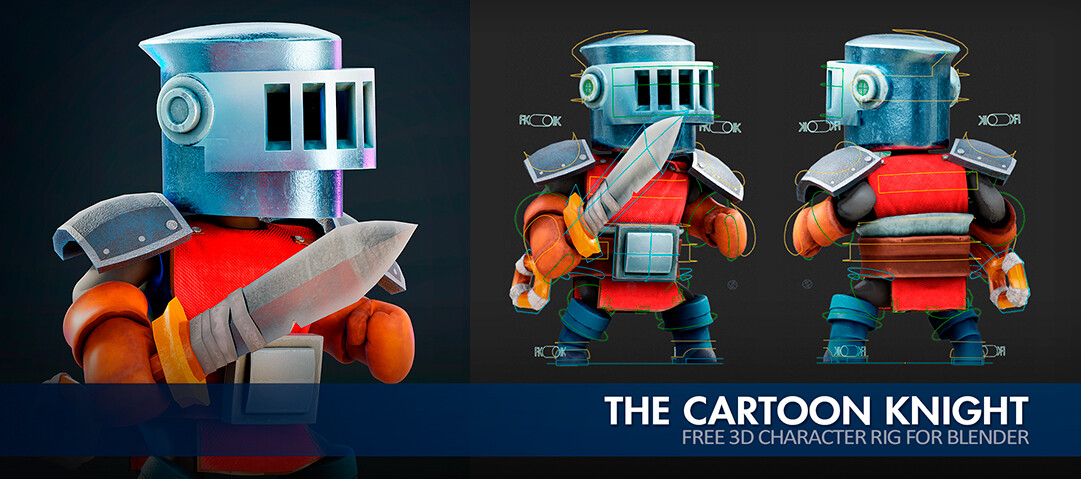
Behind the Scenes: The Cartoon Knight
Introduction
Hi! My name is Lucas and I’m a 3D character artist from Mar del Plata, Argentina. Although I have a 3D generalist background, my main interest is in developing appealing characters for animation and video games.
I first approached Blender a long time ago, in 2007, and haven’t stopped using it ever since. It got me my first full-time job as a 3D artist six years ago and it’s still my software of choice. Nowadays I work in one of the leading mobile video game companies in Argentina, as lead 3D artist.
Concept
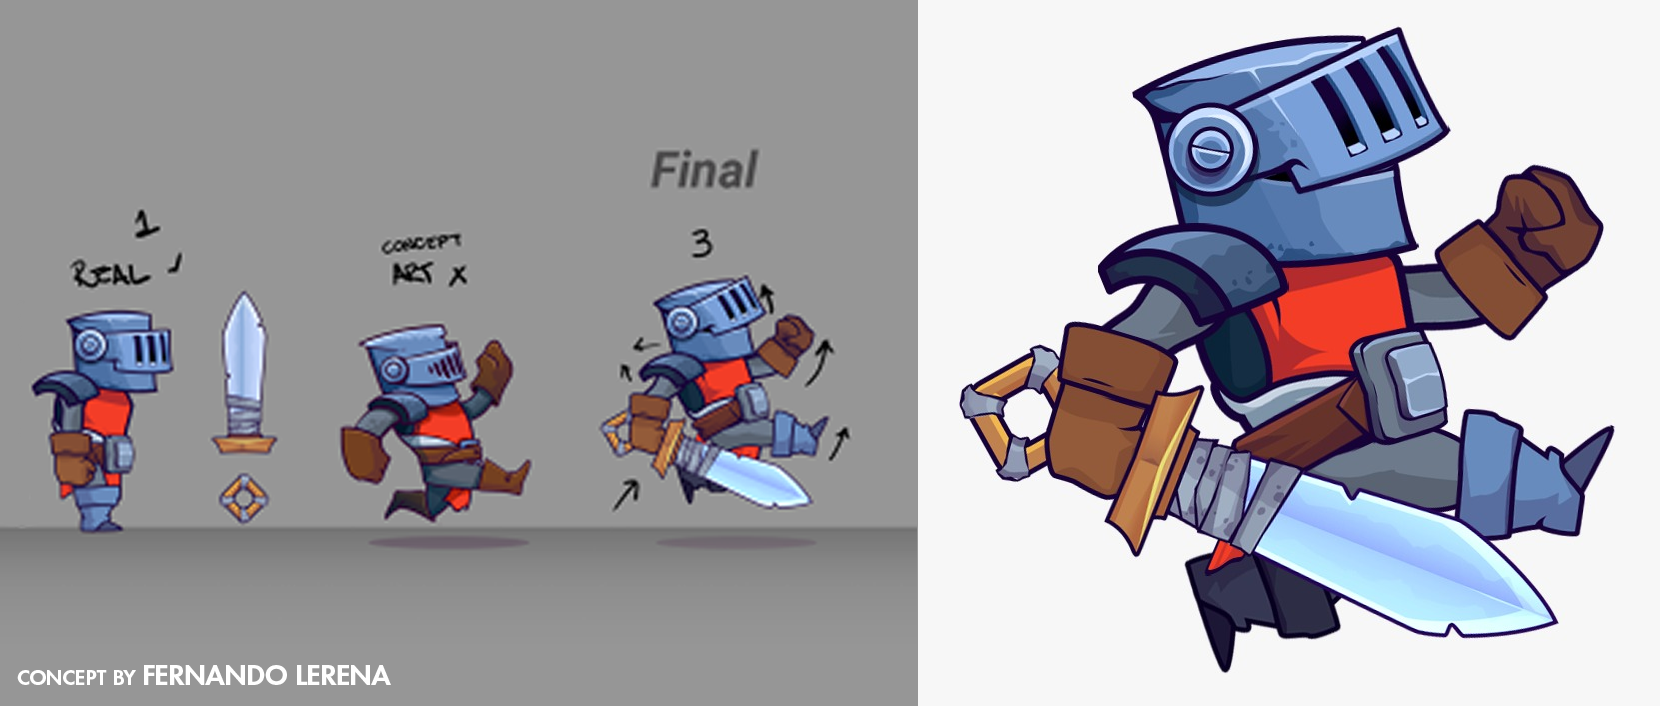
This character was part of a brief online talk I gave, hosted by a local game developers/artists group (@Gamedevmdq). Since I was asked to produce the rigged character, prepare the talk, and document the process in just five days (in my free time), speed was the key.
With that in mind, I decided to work on a concept provided by my friend Fernando Lerena. I chose that one because the shapes were pretty simple and quick to achieve, but the character still had a lot of personality. Avoiding facial details and expressions helped me to greatly reduce my modeling time.
Modeling
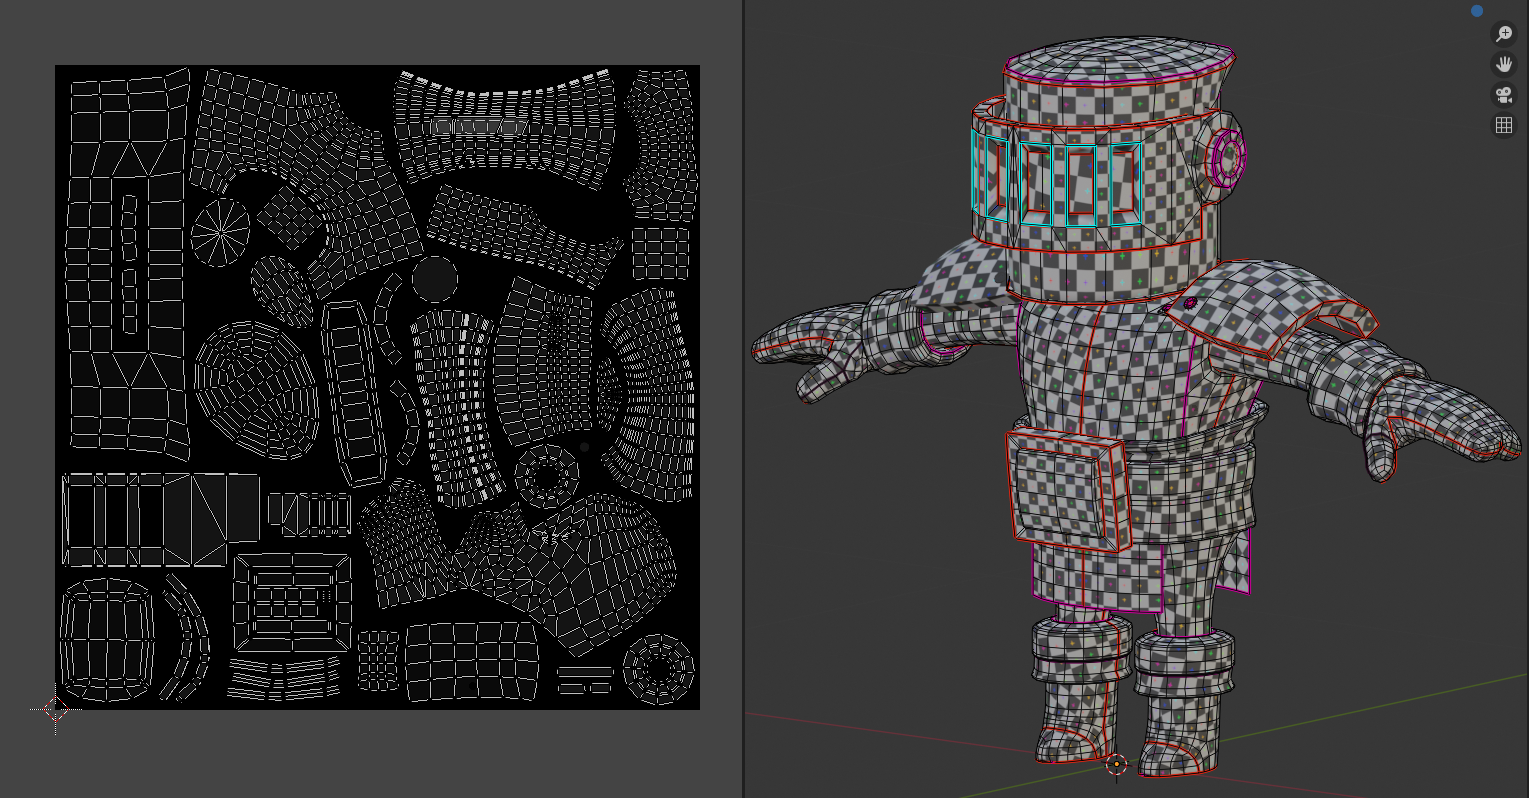
Since there were no complex organic shapes (or time for retopology) and the model had to be rigged, I went straight into old-fashioned poly modeling. This way, I would have complete control over the poly count and topology from the start. I created a low poly version, which I UV unwrapped, then duplicated and detailed using subdivision and sculpting. All of it was done within Blender.
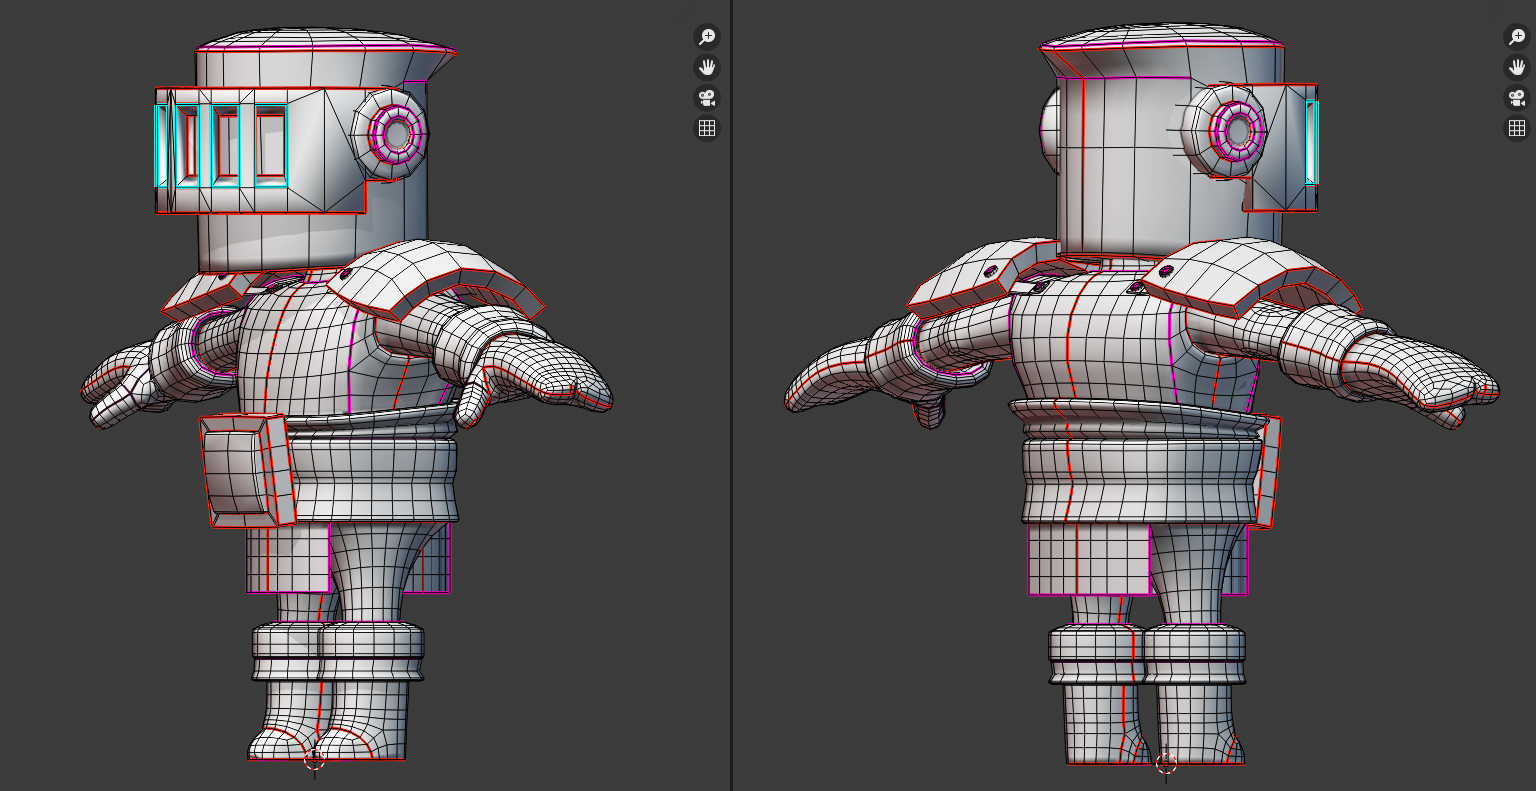
Then I exported both meshes to an FBX file, and loaded them into Marmoset Toolbag for Normal and AO baking. I tried to do it in Blender, but Marmoset gave me more control over the Normal Map artifacts, and allowed me to generate different groups for baking which was essential to avoid overlapping errors and reduce the time spent on this part of the process.

Texturing
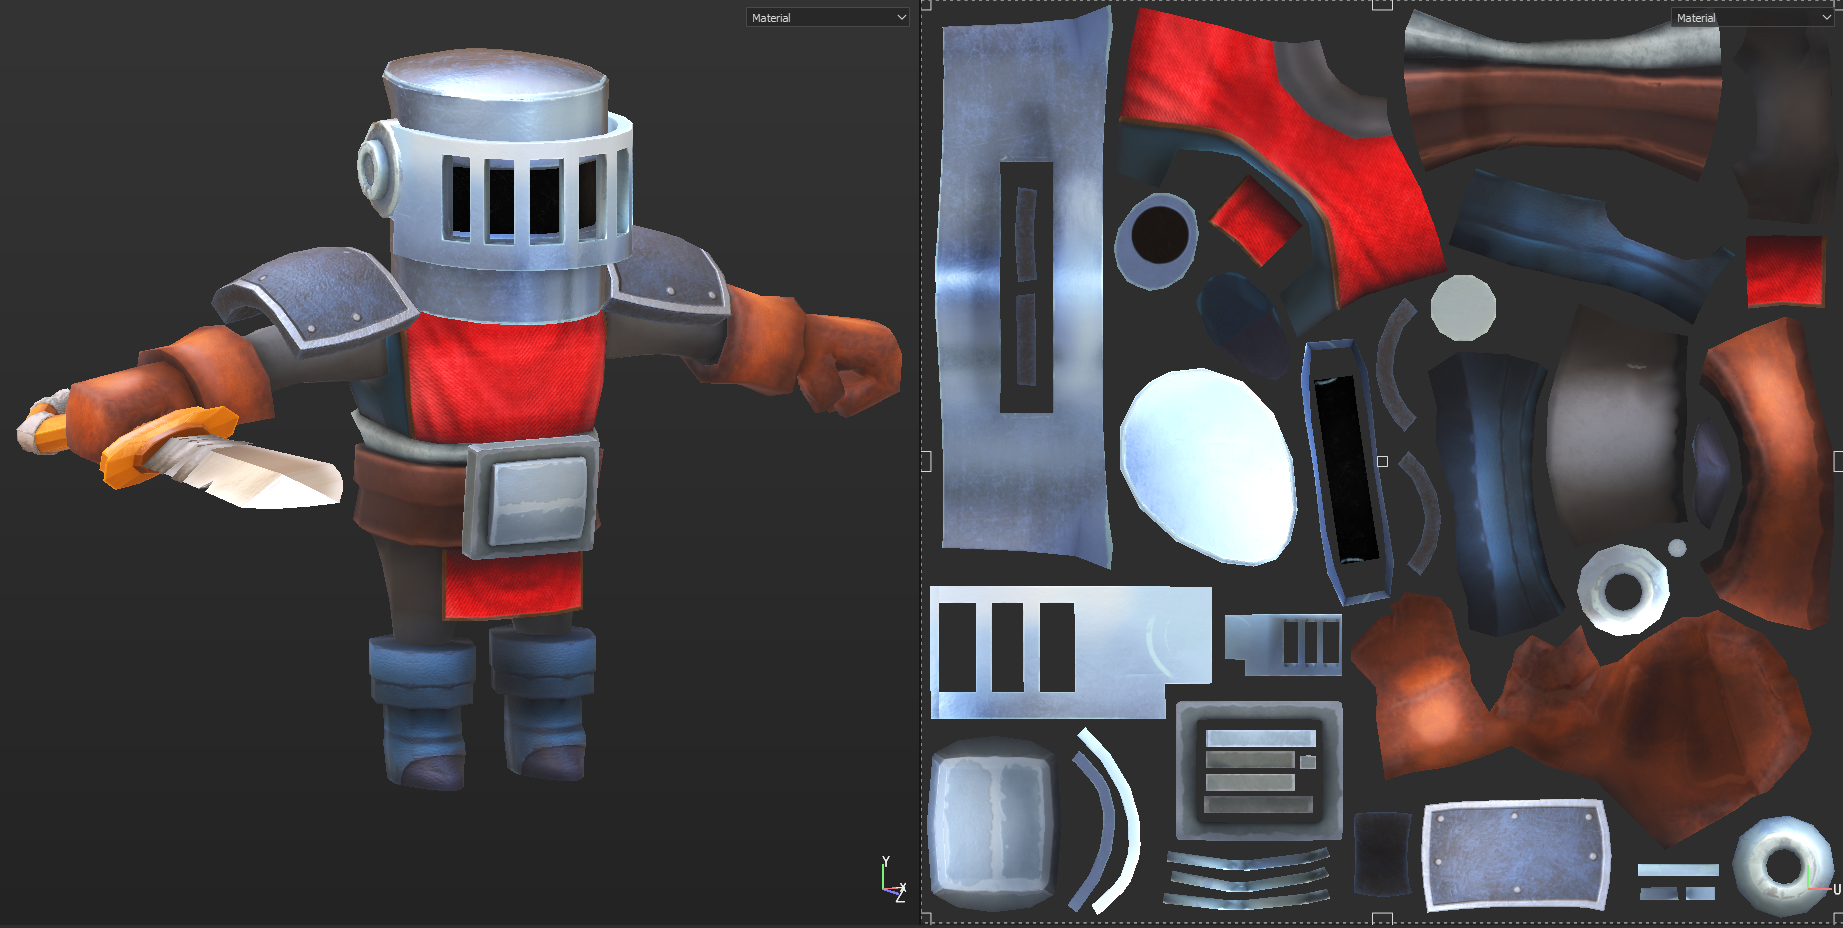
With all the UV’s already prepared in Blender, I decided to start texturing/shading. For this task, I chose Substance Painter, since the smart masks and materials make it easier to achieve really good quality results in a short amount of time. First I imported the Normal and AO maps that I had generated in the previous step, then I proceeded to separate the colors, creating a folder for each material and masking the corresponding UV island.
For most of the pieces, the workflow consisted of using a smart material as a base, then modifying its color, applying color gradients in some areas to reinforce the lights or shadows, adding noise in both the color and roughness channels, and adding some smart or hand-painted masks to enhance the look.
Rigging
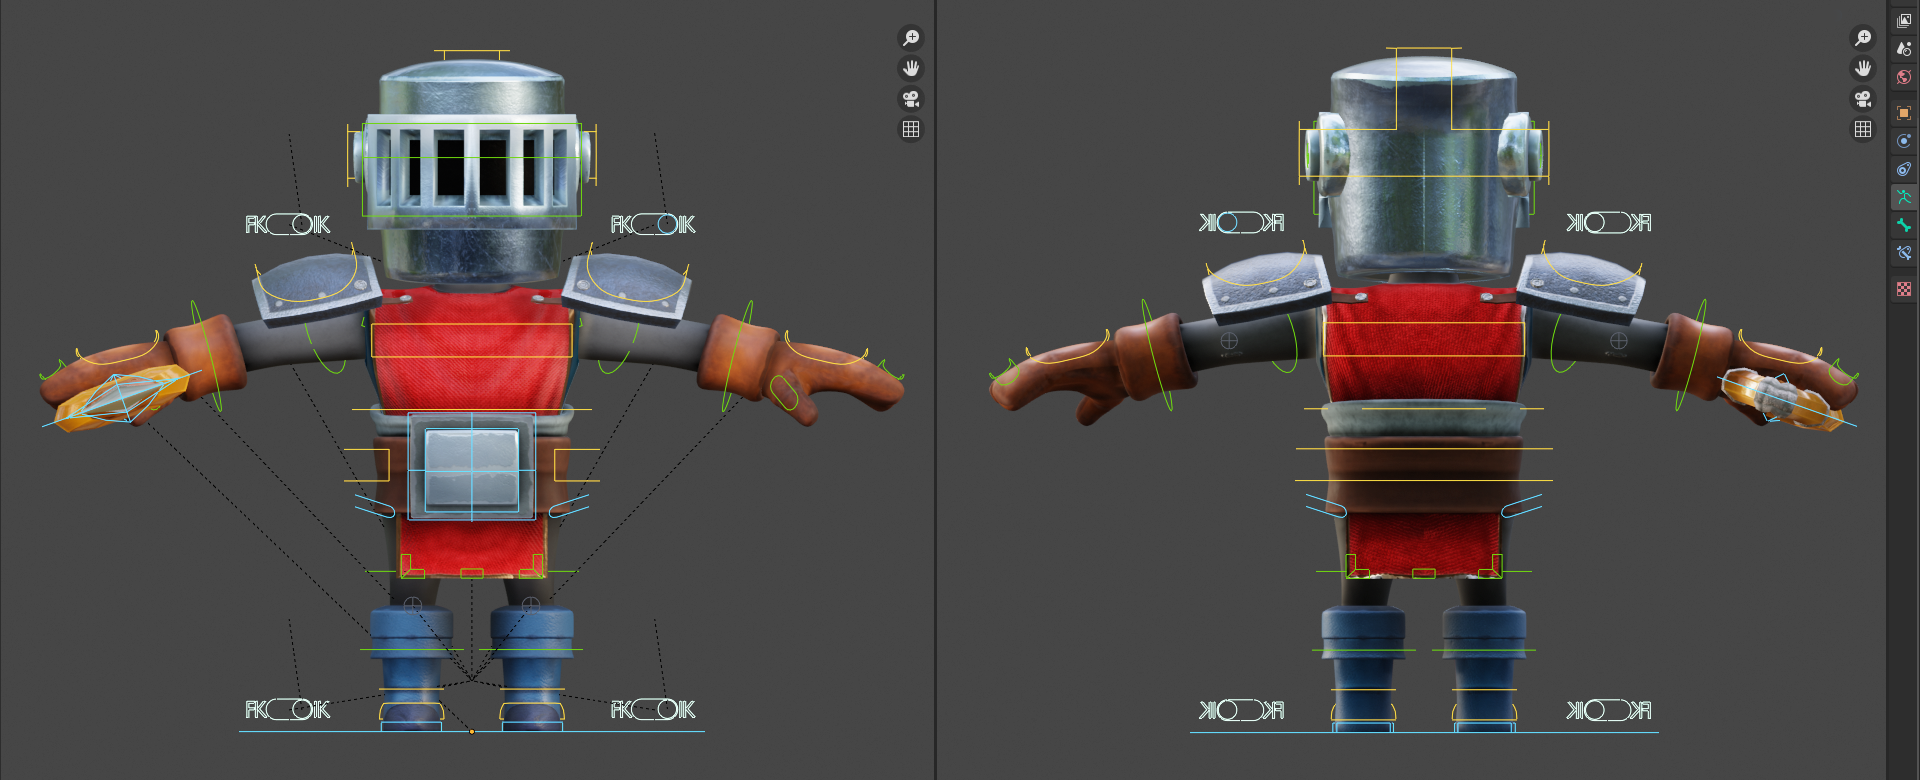
I don’t consider myself a rigger, but I try to learn as much as I can about it. I think it is key for any modeler to understand how a basic humanoid rig works to avoid strange character deformations, especially in the joints.
In most of the cases, I would have used Rigify to make things easier but, considering I had to sample rig a part of the character while streaming live, just using Rigify felt like cheating. To balance things out, I decided to go with a mixed solution. I used Rigify’s base armature to save some time in creating hierarchies and naming bones, and then I created the IKs, the FK/IK switches, and the custom handlers myself.
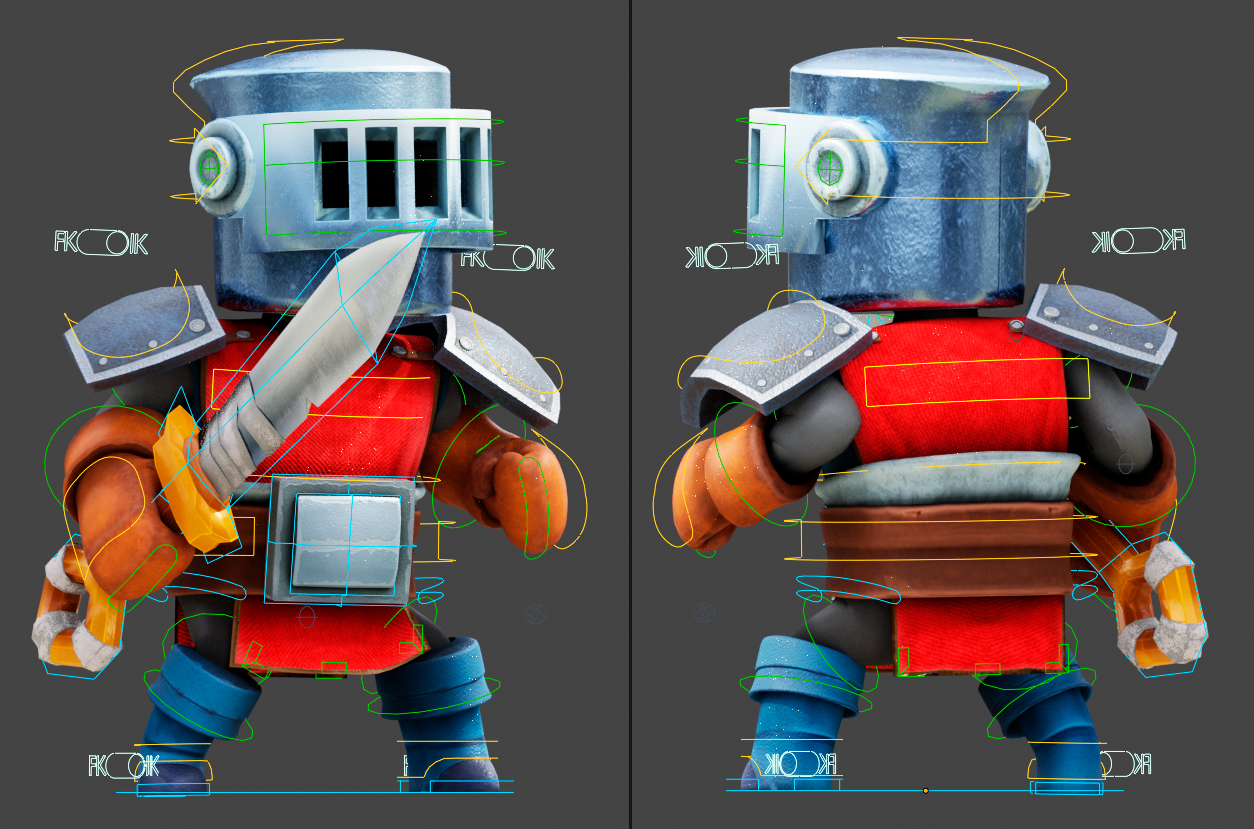
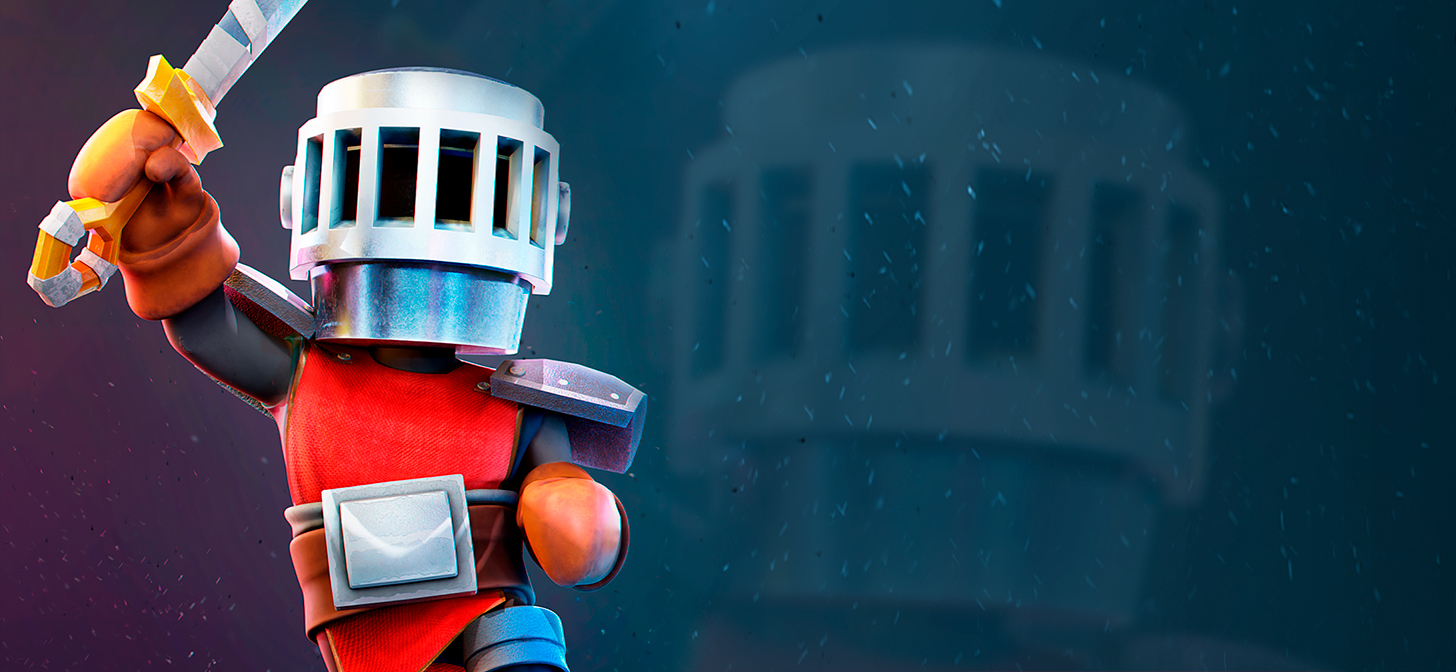
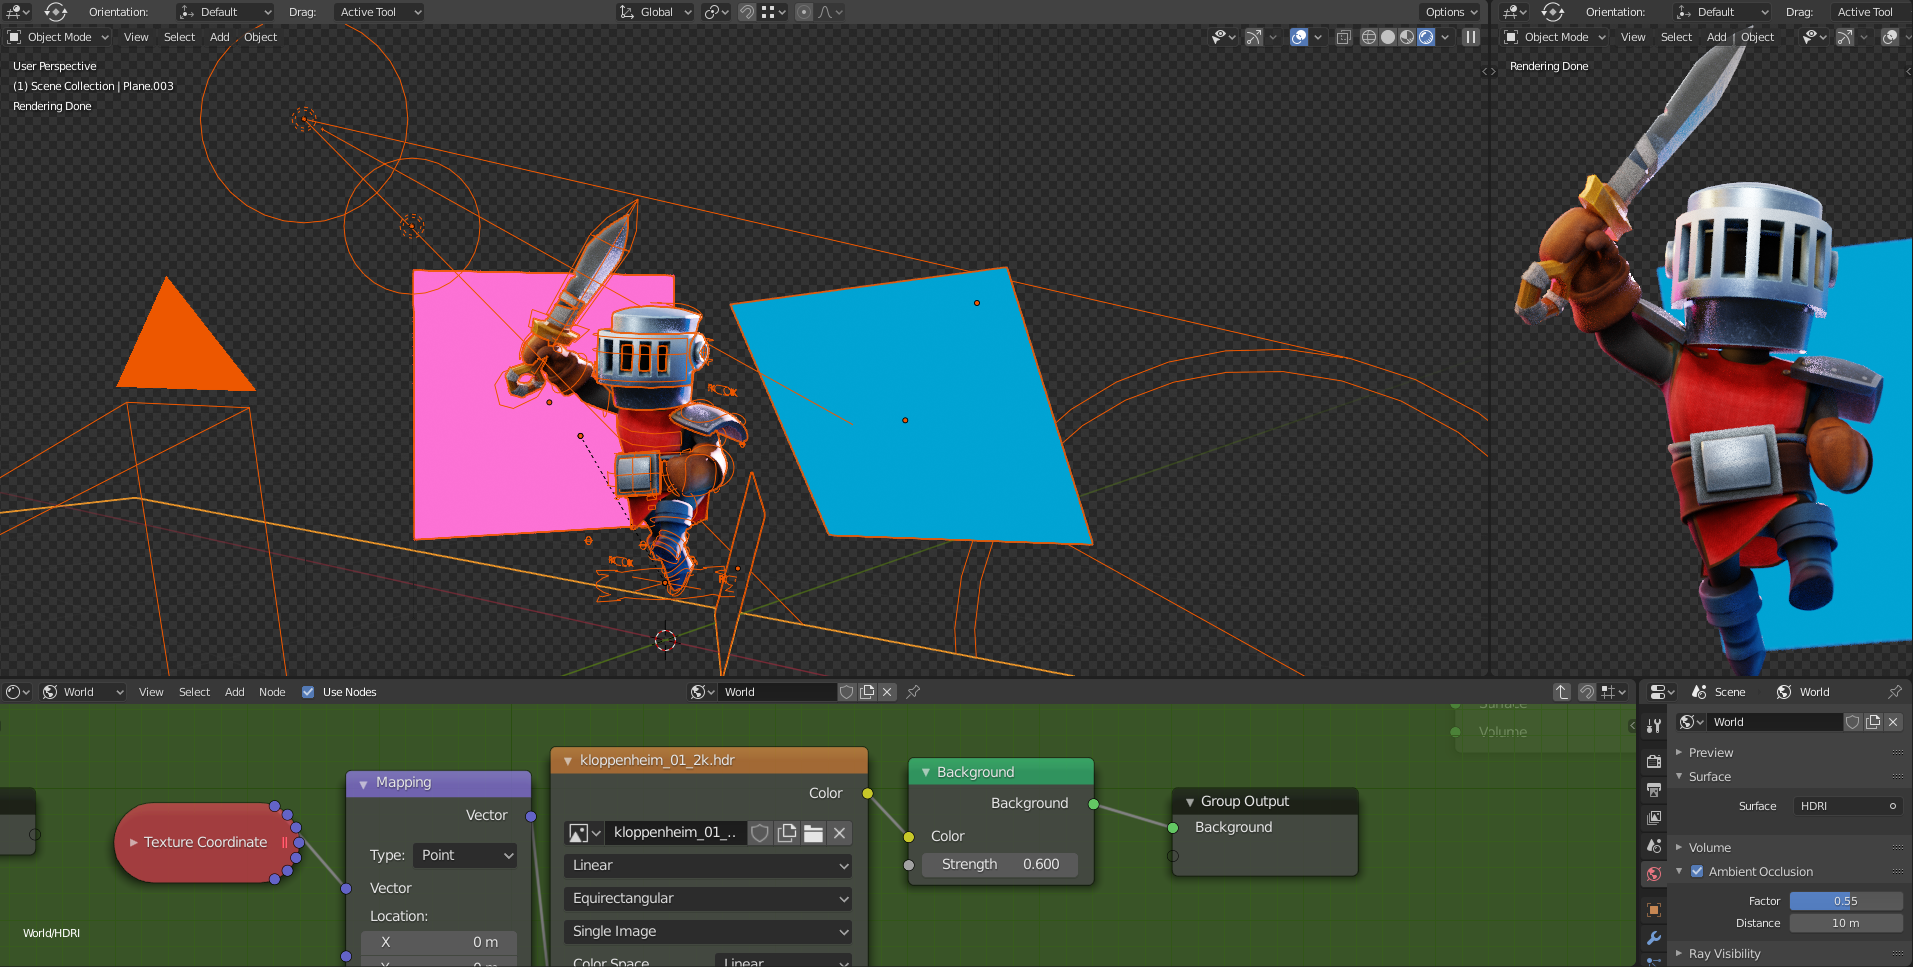
Lighting and Rendering
Lighting was pretty simple. I used an HDRI from HDRI Haven set to a low value, to avoid blank reflections in the metallic parts. That gave me the general look for the whole character, then I chose which parts I wanted to bring to the front by lighting them, and which ones needed less attention. I added two emissive plains from the back, set them to complimentary(ish) colors to make them pop a little, added a white spot on the front-facing the helmet to bring it forward, and added a couple of small point lights to highlight certain details.
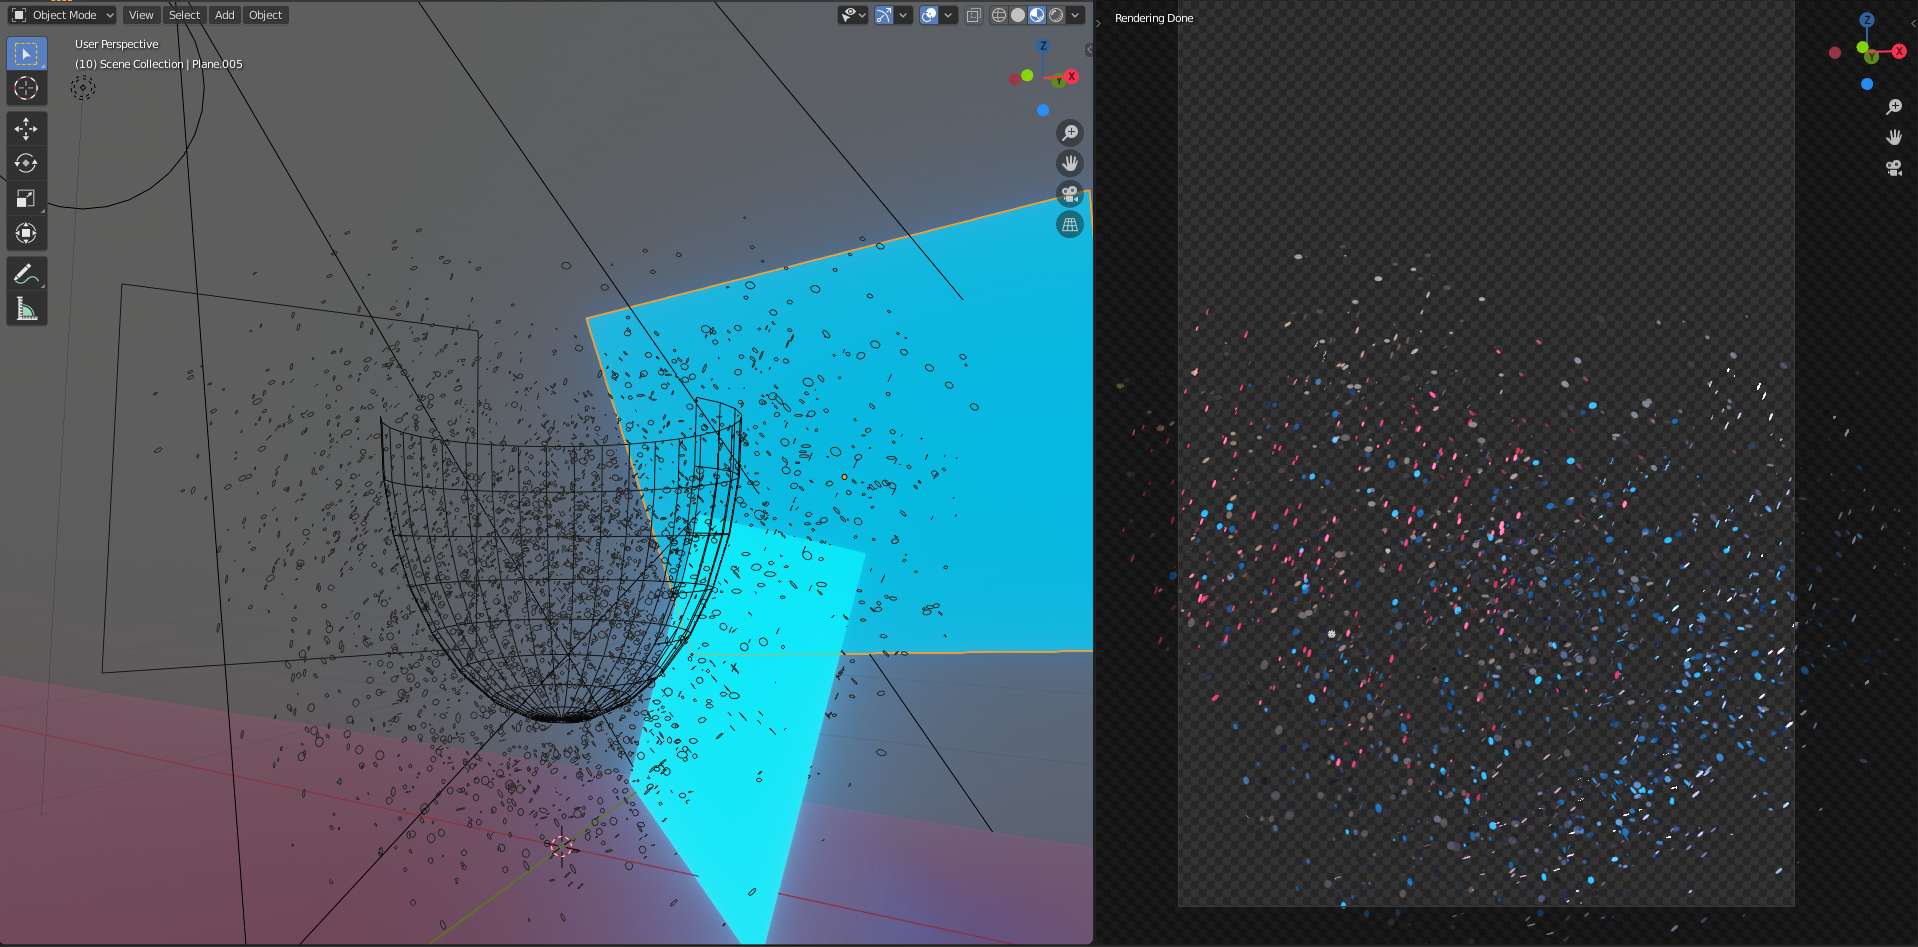
Compositing
Since I didn’t have much time to make a full environment, I just went with a classic dark background. I added a little bit of mist and coloured lights in photoshop and rendered a particle system in Blender with a little DOF and Motion Blur, using the same light setup I made for the character. Then I did a little retouch to fix some minor issues, a general color adjustment, and that’s about it!
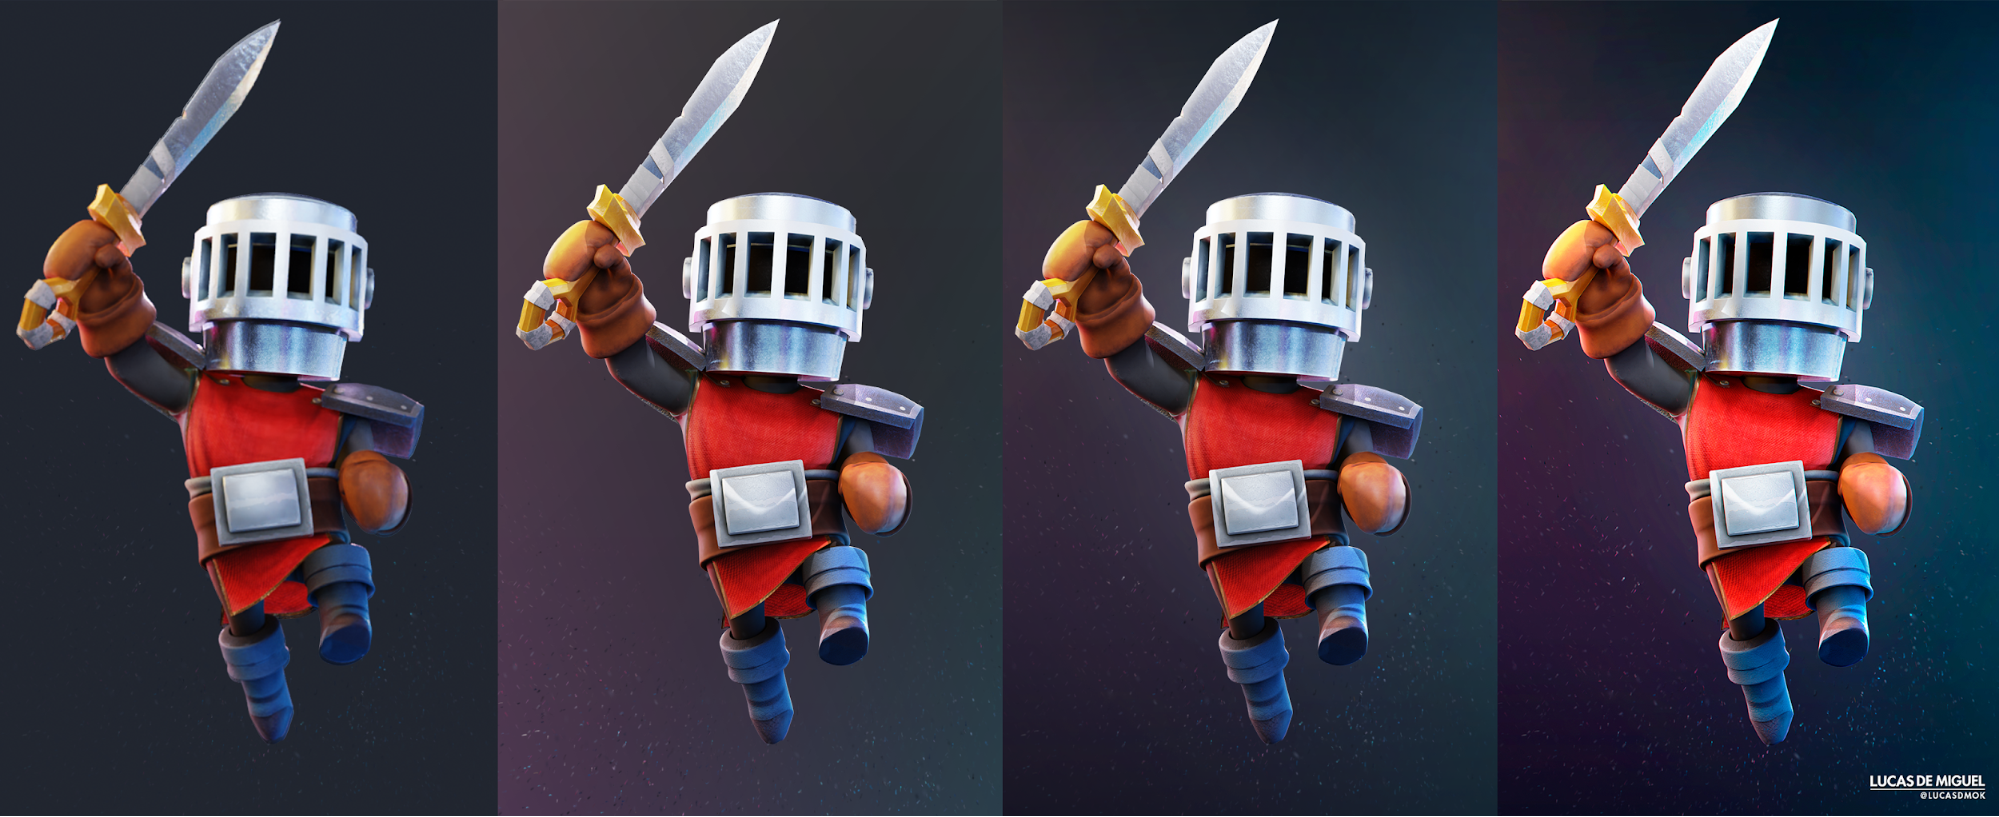
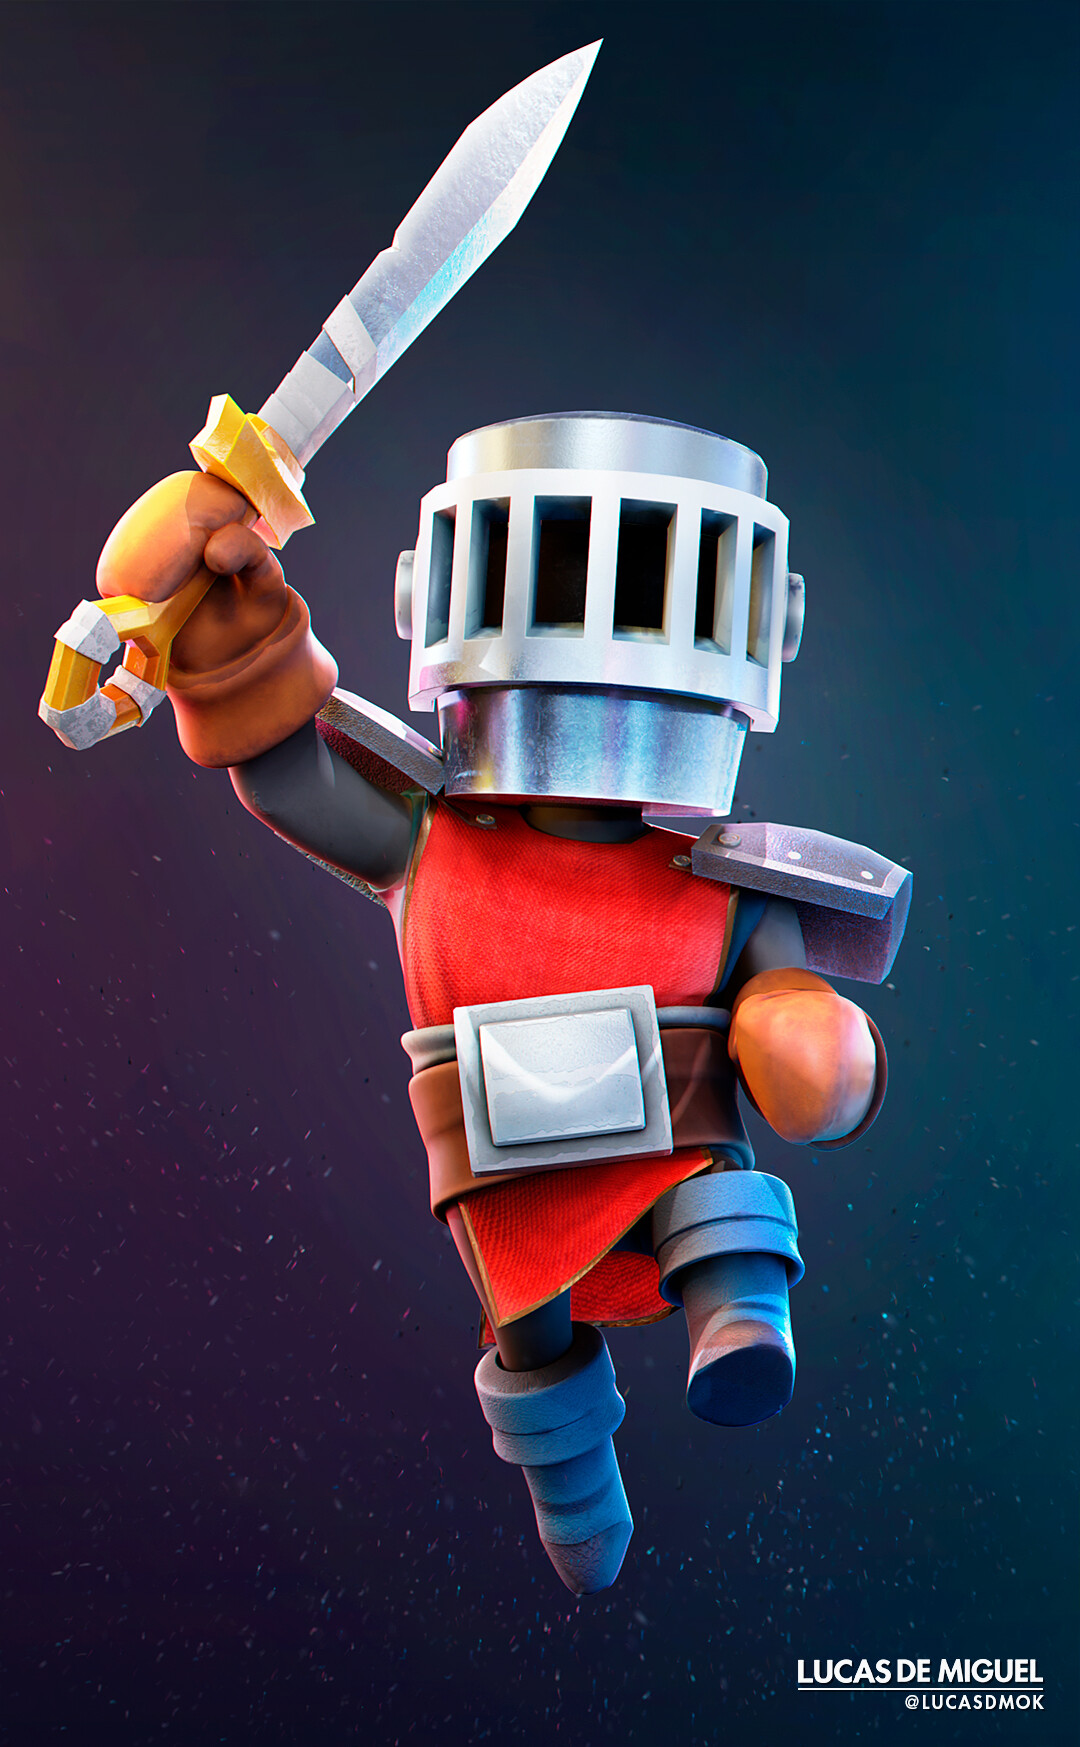
Final images
You can also see the full post on Artstation…and download the rig on Blendswap
Tools
- Blender 2.82
- Substance Painter
- Marmoset Toolbag
- Adobe Photoshop
About the Author
 Lucas De Miguel, 3D Character Artist


