Behind the Scenes: Last Laughs
Background
I’m Adriano D’Elia, a 3D Generalist from Italy focused on modeling, rigging and animation.
After my graduation in Design & Communication, I won some design competitions, helped in developing a video game as a 3D modeler, collaborated as a product and graphic designer with Bhumi Ceramica, and worked as a designer at 3DRap Srl, a 3D printing laboratory.
During university, I got into 3ds Max first and then Blender. I started modeling and rendering many things as a product designer, but it wasn’t enough for me, so I began making some animations. After a few years, I decided to take part in a CG master at BigRock Institute, where I studied Maya, then I stayed in this institute for six more months as R&D. Now, I’m looking for a job opportunity while I’m working on my personal projects.
Inspirations
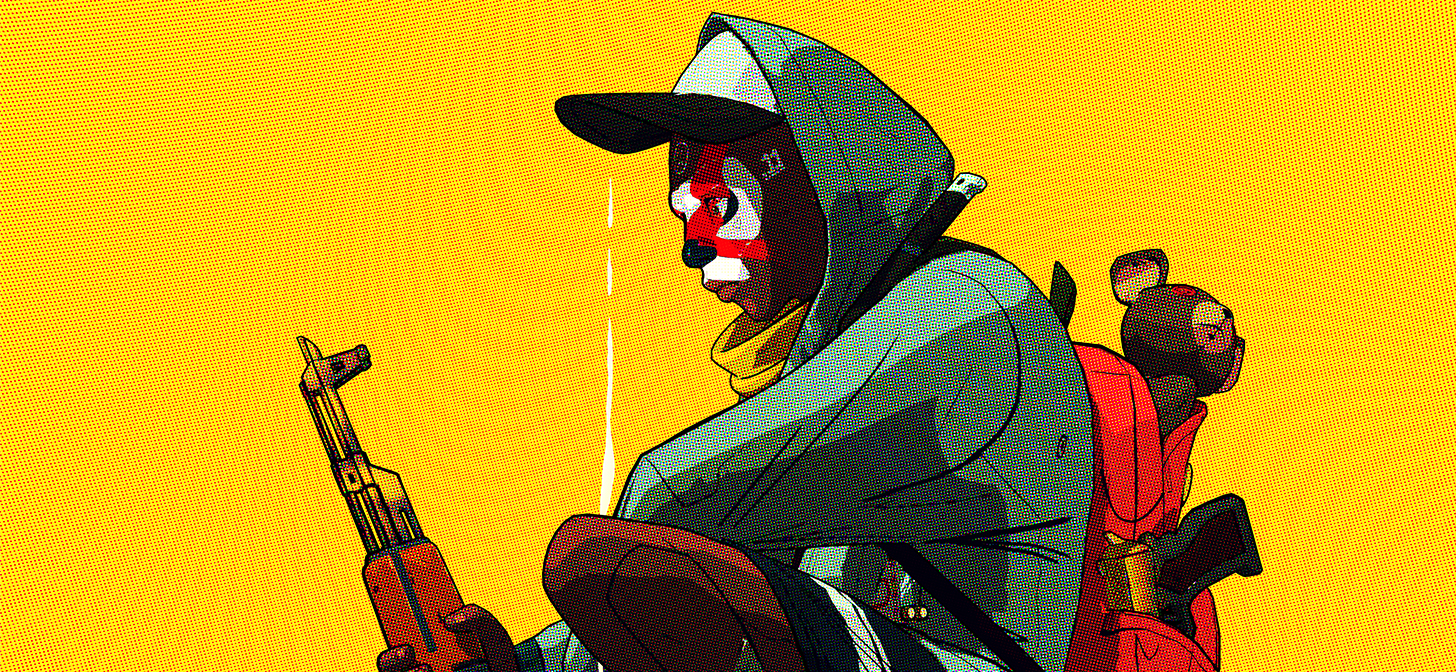
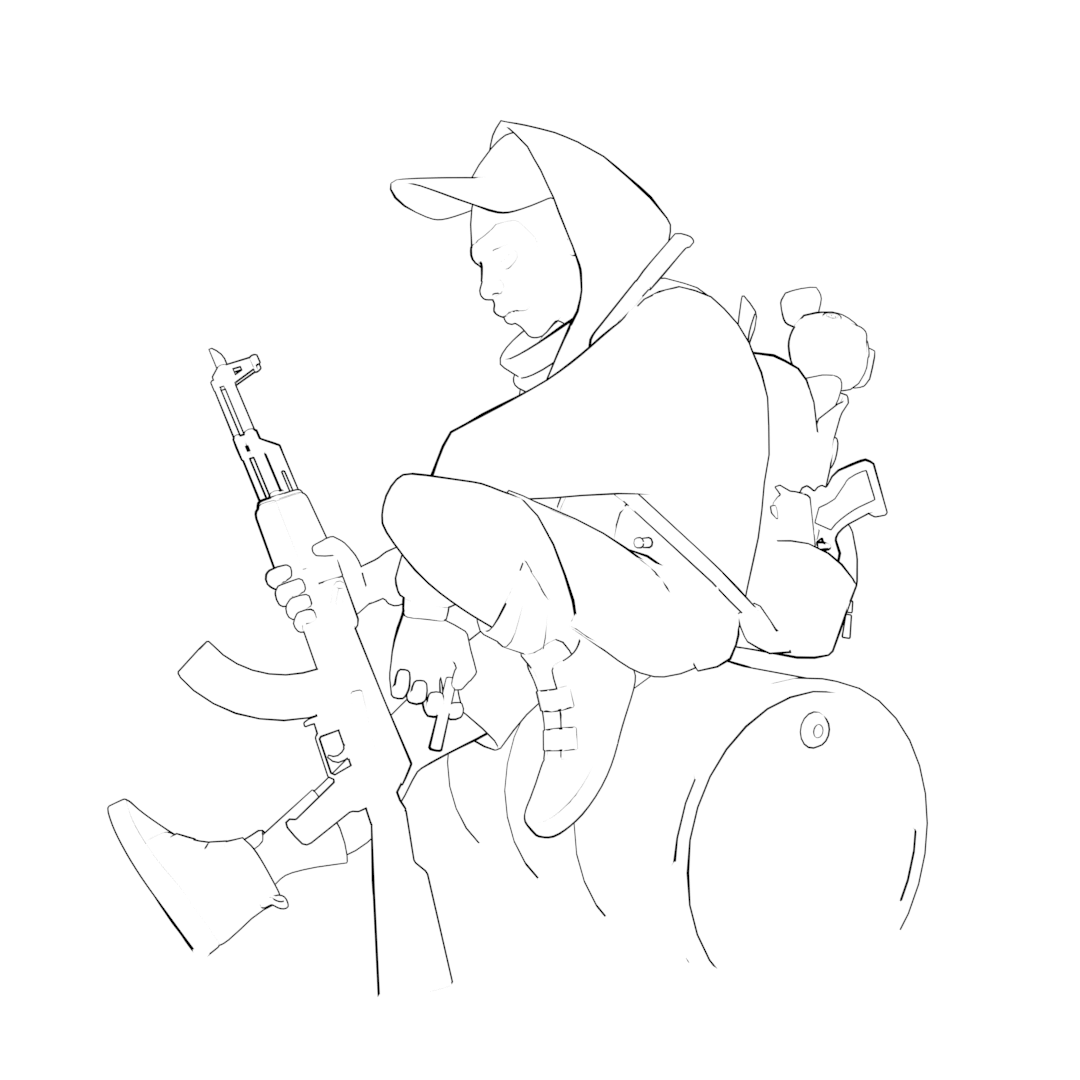
I love stylized 3D models, so I searched for some artworks on ArtStation that inspired me for a new project. I found an amazing concept artist, Benjamin Paulus, whose style looked perfect for what I wanted to do, so I chose one of his concepts. With this kind of artwork, I prefer to maintain the same style for the 3D model, so I tried to recreate the same 2D look with flat and colored shadows.
Process
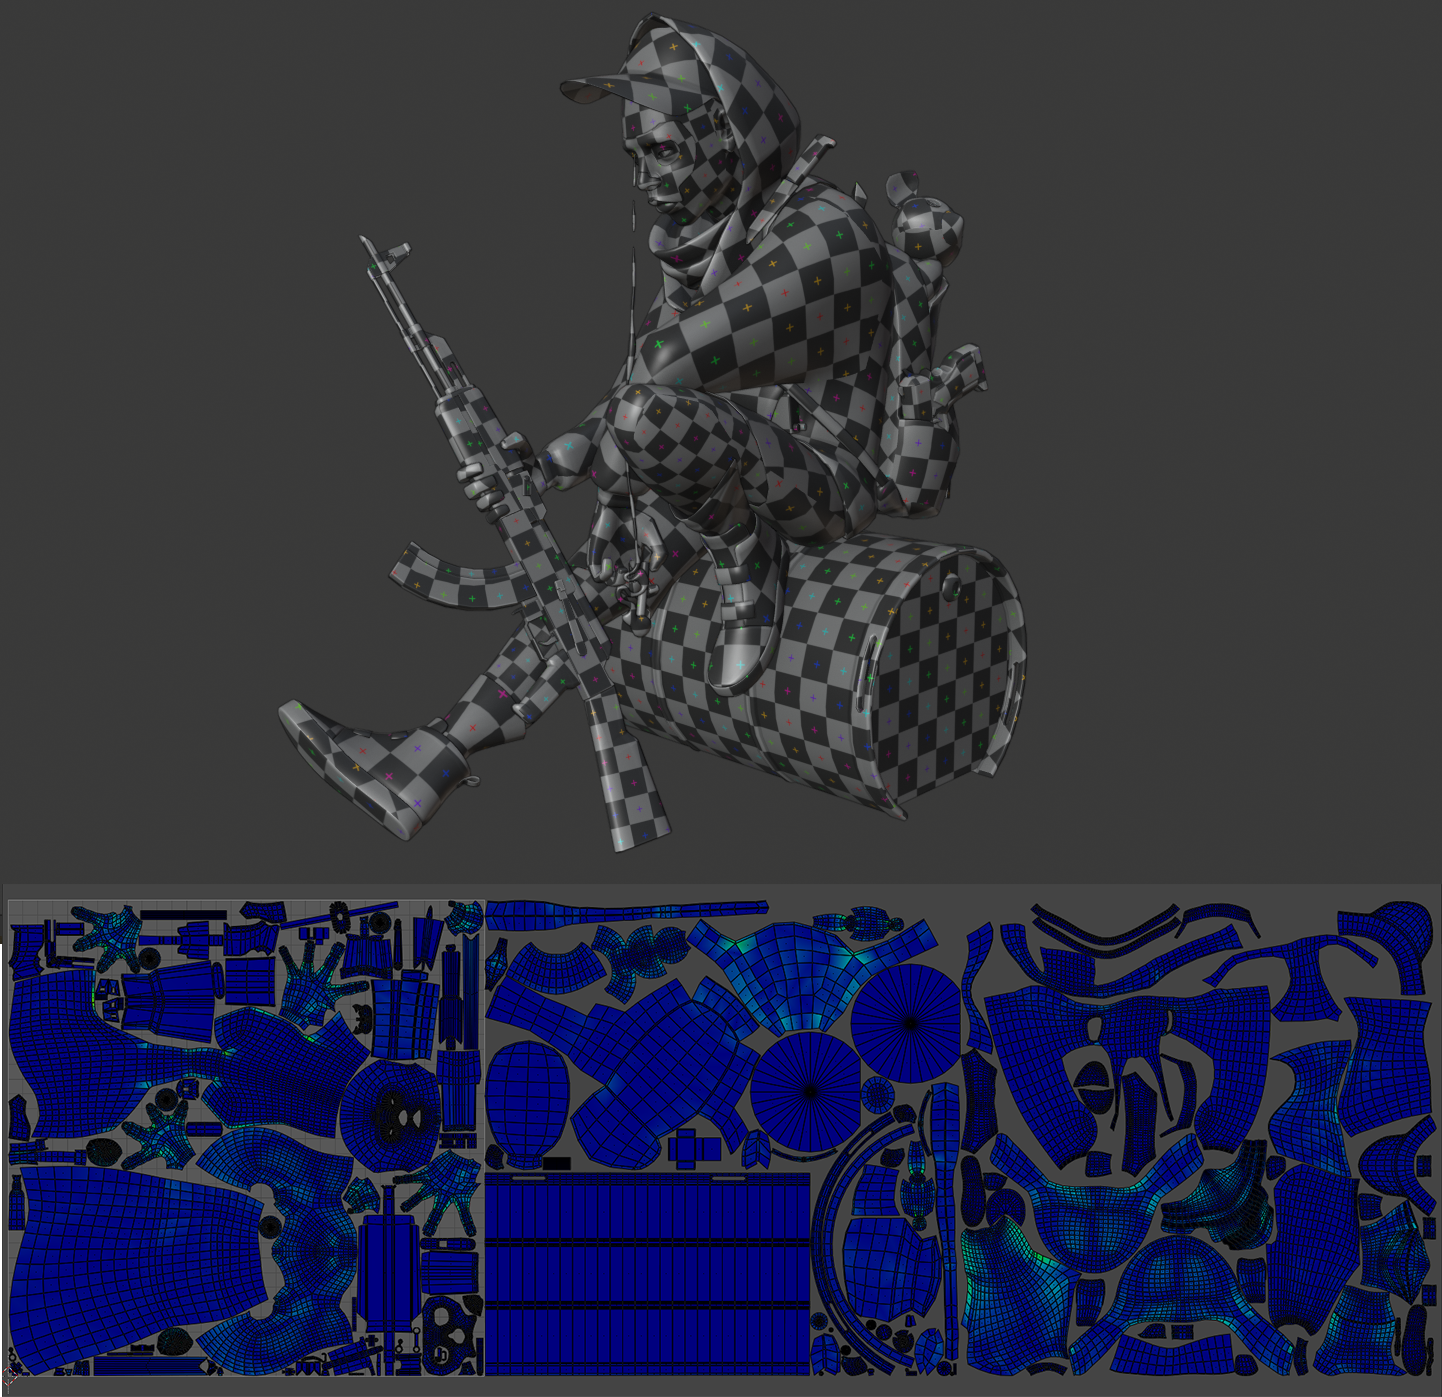
For this project, I used Blender for modeling, sculpting, shading, and Substance for texturing.
I started doing a blockout of the entire scene with a basic shape to reach a correct pose both on camera and in 3D space.
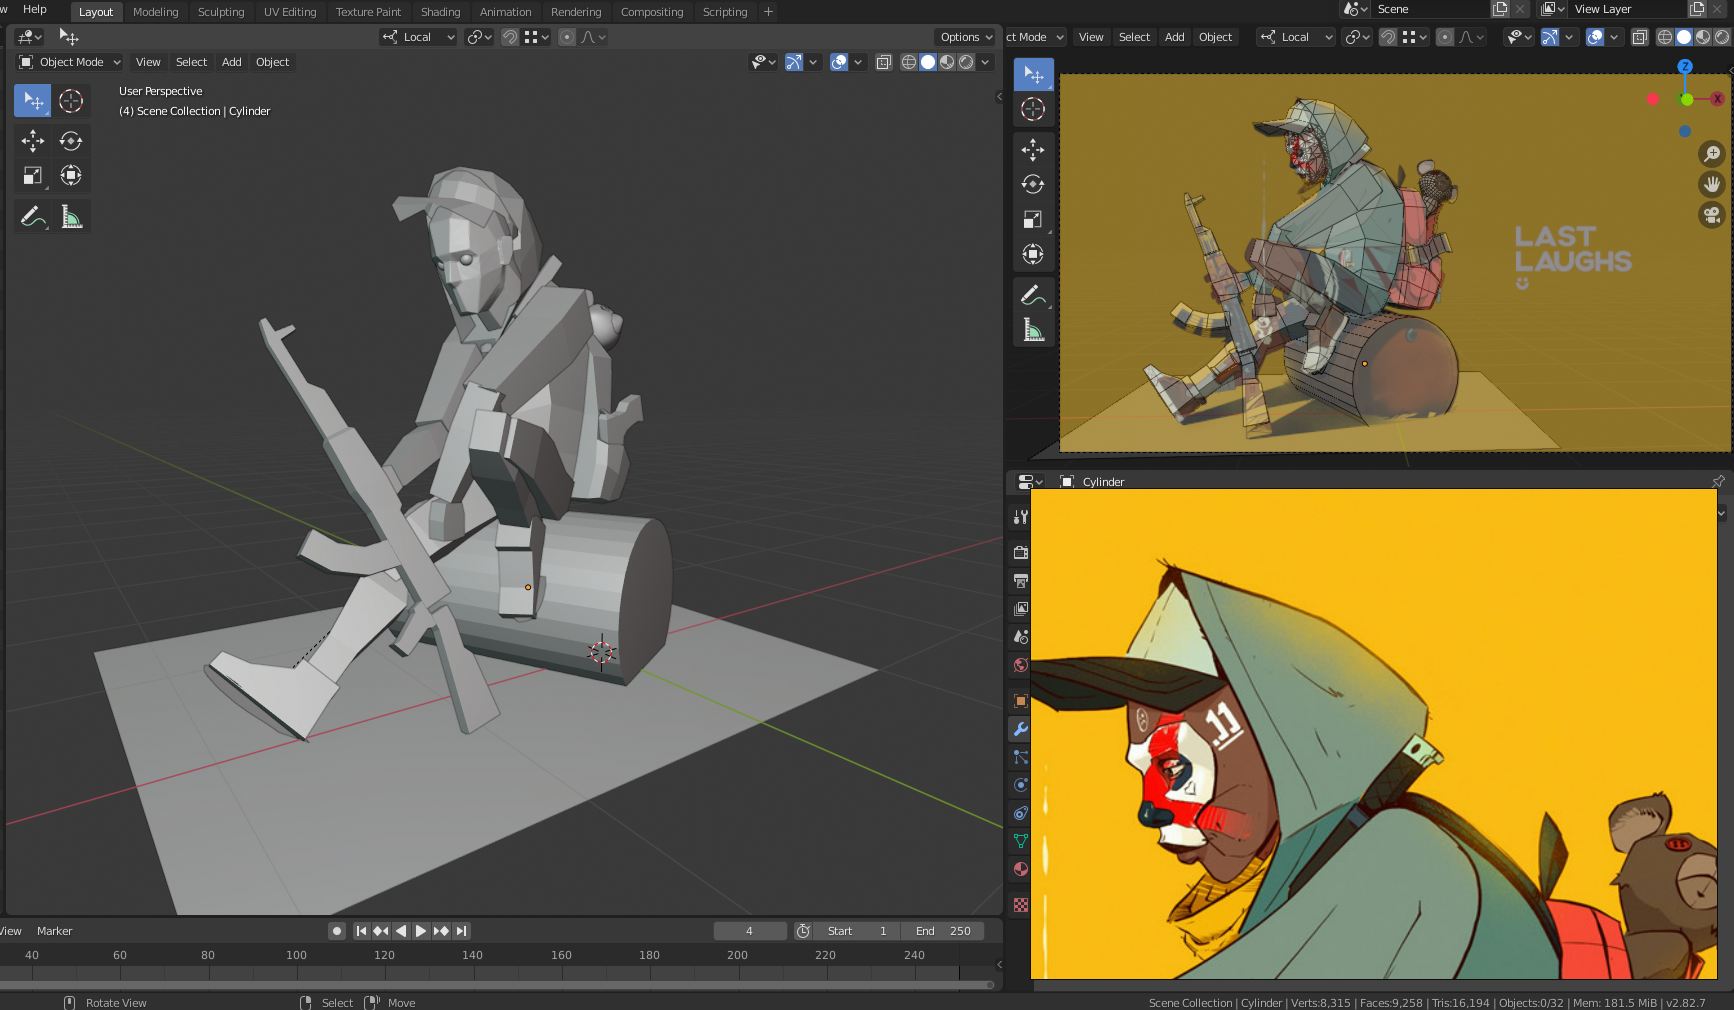
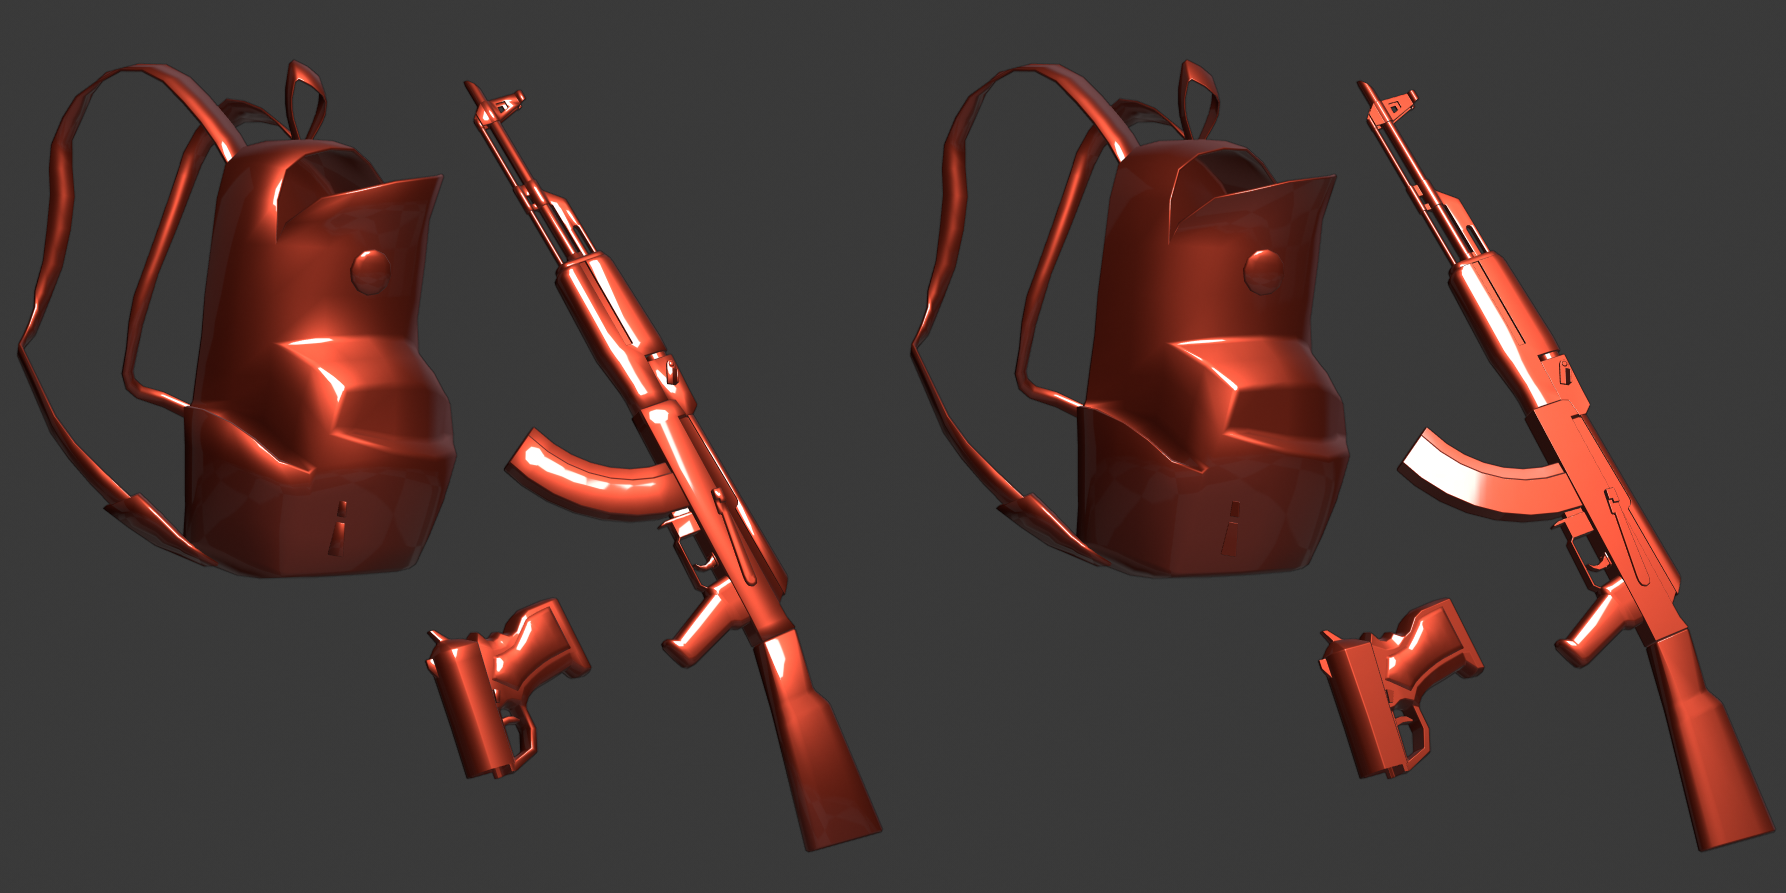
When I finished the blocking, I added details with traditional modeling and kept a low poly count because I wanted to upload the project on Sketchfab. I used sculpting only for the head with the dyntopo option enabled and I frequently used the camera view to match the profile up with the original concept. After sculpting I did a quick retopo for the head and then I modeled the mask using the snap to face option. During this type of modeling, I use addons like F2, LoopTools, and Edit Mesh Tools.
Normals
When you use a low poly count, often you don’t have much control of the surface normals, so I want to talk about some tricks that can be very useful. You can change the vertex normals direction of the selected faces in Mesh > Normals or ALT + N. In this menu there are functions such as “Set From Faces”, “Average > Face Area”, “Smoothen Vectors”, etc. that operate only on the selection. A quick example is a cube with one segment bevel: perfect poly count for a low poly rounded cube but bad normals; if you use Set From Face with the original faces of the cube selected, you get perfect shading on borders, like a bevel with more segments.
In my case, without customizing the normal direction, I had incorrect shading in many places (image below on the left); after changing the normals, I reached a good result without adding vertices or baking any normal map (image below on the right). Note: the reflective matcaps easily show the normals behavior.
To create the outline effect, I used the solidify modifier with inverted normals.
After separating the outline mesh I also added a displace modifier with a low value and a large-scaled noise texture to create an irregular thickness.
UVs and Textures
For the UV mapping I separated everything into 4 materials: one of them for base plane only, one for body parts and little props, another one for large props, and the last for clothes.
For more control during the UV process, I used addons like TexTools and UVPackmaster.
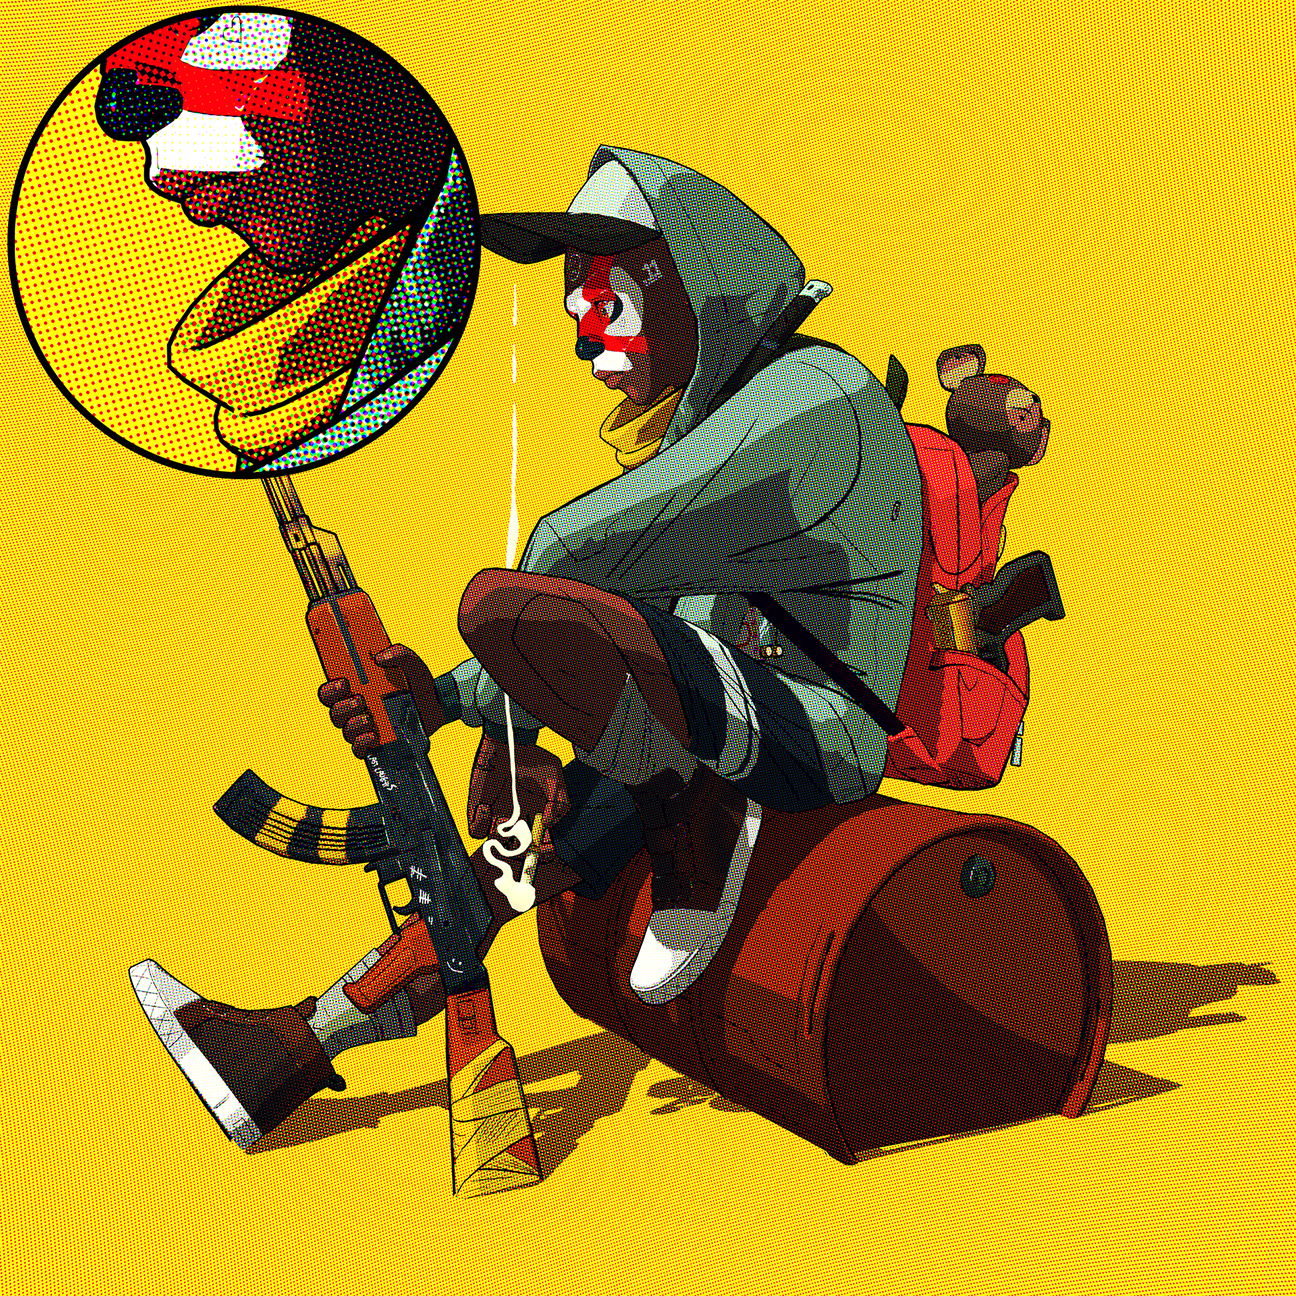
Textures are pretty simple, I painted only the Diffuse map. For each material I created a base layer with uniform colors, then I created other layers for black strokes, shadows, and highlights. I used some alphas to paint some parts like a spray effect and one external pattern for the sole of the shoes. I baked only the ambient occlusion to use it later during the shading.
Shading
In the end, I wanted to challenge myself again with another version of the same project, but with a more comic style, so I created a shading like a comic print using EEVEE that I also released for free online on Gumroad.
Workstation specs
OS Windows 10 x64
CPU I7 – 4790
RAM 16 GB
GPU GTX 1080
About the Author
 Adriano D’Elia, 3D Generalist focused on modeling, rigging, and animation.


This young fellow is my guru. Doing all the stuff I wanted for future projects. Awesome and inspiring.
I’m grateful for this :’)
wow osm stuff bro