
About
Initially, I am a filmmaker and cinematographer. A year ago, I started getting into 3D because I saw in it an open door for new artistic possibilities. To be honest, in the beginning, I underestimated Blender a bit, but now a year into it, I still can’t believe what this open-source software allows you to create. My 3D knowledge consists basically of binge-watching YouTube tutorials, along with a lot of experimentation and discovery through trial and error.
Inspiration
Due to the current situation, I found myself locked at home with a creative tool in my hand and I started messing around in Blender as I always do, without any precise goal in my mind. In the beginning, I was aiming at an abstract still life, as a continuation of this series.


So I started experimenting with the elements that would be in the scene, and everything I tried seemed shallow, like in this test, for example.
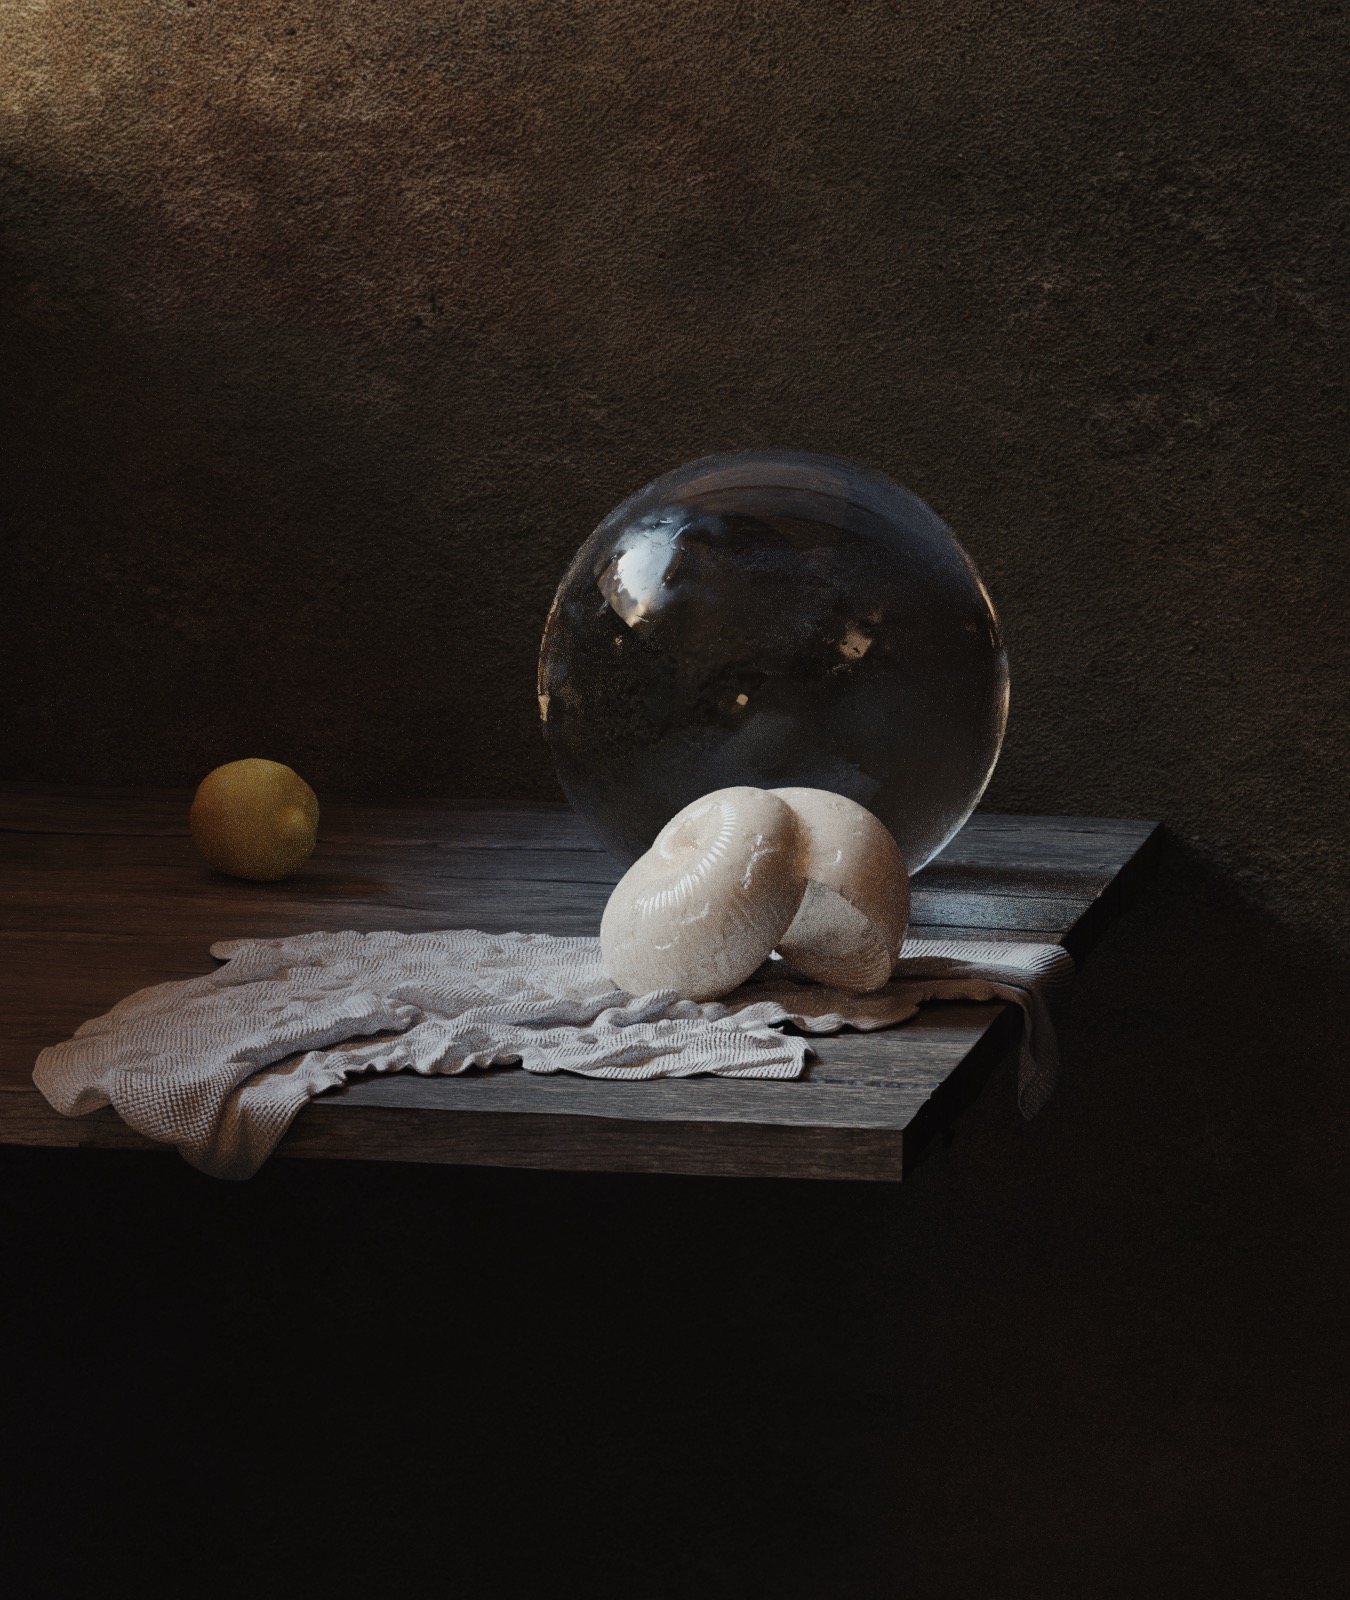
Then I thought why not record a scene from our current situation in the aesthetic of a classical still life, and this is how the idea came to be.
My main inspiration was the still life paintings made by Dutch masters in the 17th century.
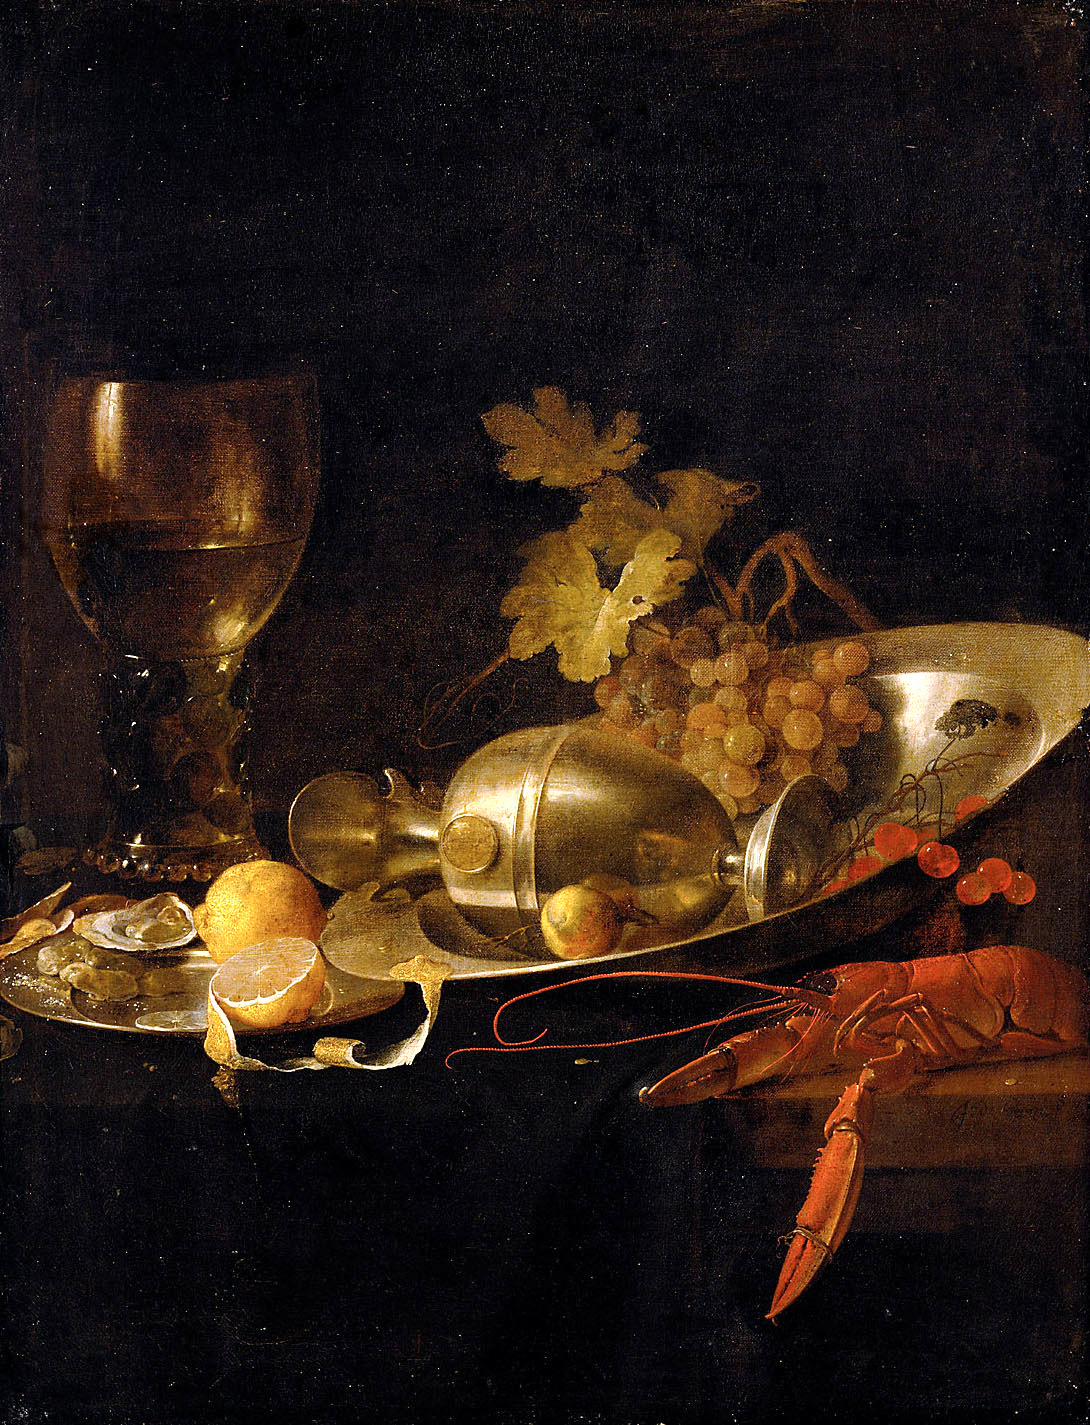
Jan Davidsz de Heem, Frühstücksstillleben (Breakfast Still Life), 1684.
Modeling, Composition, and Lighting
I tried to emulate their composition, lighting, color palette, and choice of elements. Even though I’m really bad at modeling and I tend to use modifiers and procedures to create abstract shapes, I decided to challenge myself and manually model (or simulate) all the assets. The gloves and masks were done using a cloth simulation, while the other elements were modeled.
Finally, modeling was not the most time-consuming part, but rather the object positioning. I wasn’t following any composition rules, but rather kept moving things around until the scene felt right.
For the lighting, I used an HDRi, with a small area light for the back wall, and 5 black planes to block and control the light.


Materials
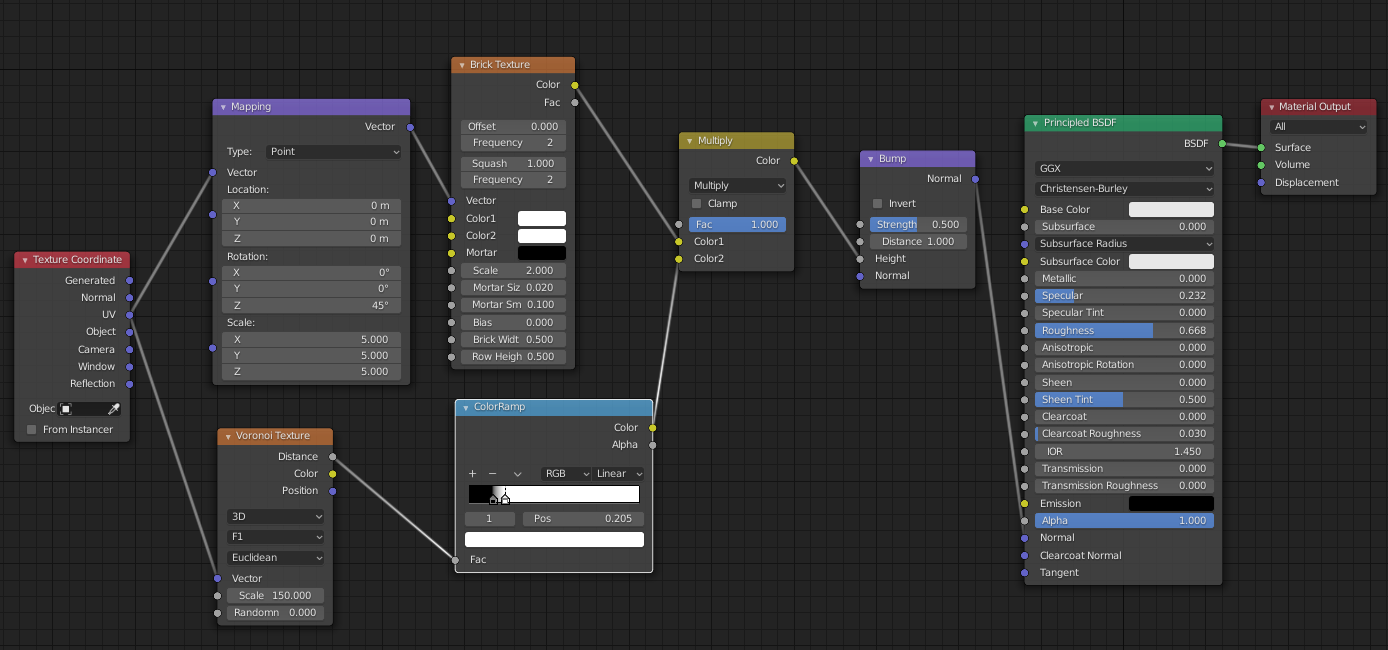
As for the materials, I used one external PBR texture for the table, while the rest of the materials are all procedural. One material I have been asked about repeatedly was the one for the paper towel, which has a fairly basic node setup.
Rendering and Post-Production
In addition to the overall setup and lighting, the denoiser contributes a great deal in selling the “painting” look of the render. I intentionally left a bit of noise in the image, while the small artifacts of the denoiser create the illusion of brushstrokes. Finally, the post-production consisted of a very basic contrast adjustment and color grading.

About the Author
 Mansour Aoun, Lebanese filmmaker and visual artist based in Paris, France.
Links
- Mansour’s website
- Mansour on Instagram: @visualartistatnight (visual artworks) and @mansouraoun (personal, photography and films)
- Sterile Life on Blender Artists
2 Comments
Very nice. I have been trying to do something similar. I like your idea of applying the look of traditional (painted) still-life to a modern context.
My own explorations have been to do with modelling flowers - which I have found quite difficult.
I love it! great work. Thanks for sharing the process. Still life is a genre I would like to do more with, and this has inspired me to try a few things. :)