
Behind the Scenes: Fôlego Running
About
My name is Davi Voss, I am Brazilian and I live in Rio Grande do Sul (South of Brazil). I have a degree in advertising from ESAMC (School of Management and Marketing with Communication). I worked in an advertising agency as Art Director for 10 years, then I became interested in creative retouching when I went to live in Europe. With the evolution of the market, I felt the need to learn 3D to be able to offer that service to my clients. At first, I thought of just doing lettering, but I got interested and went further. I have been working for a very short time as a 3D artist, about 3 years. I started with other software and after one year I met Blender and fell in love.
Where The Idea Came From
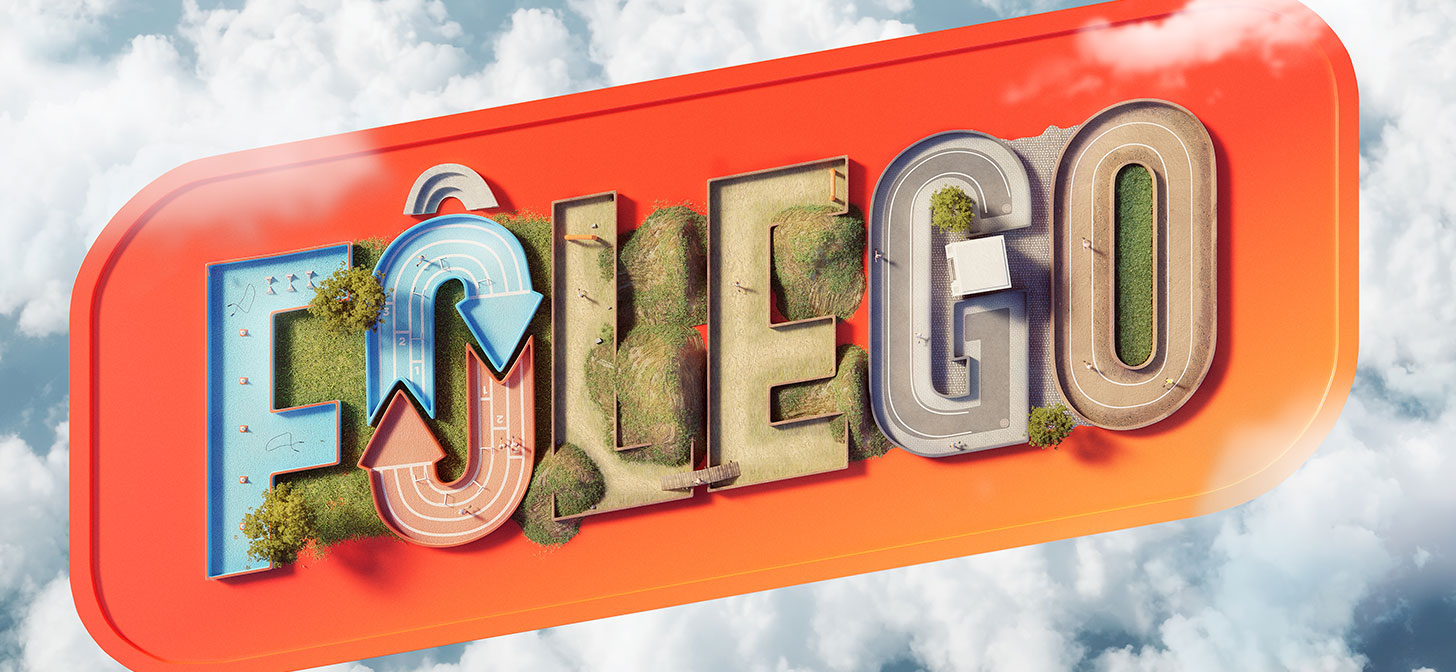
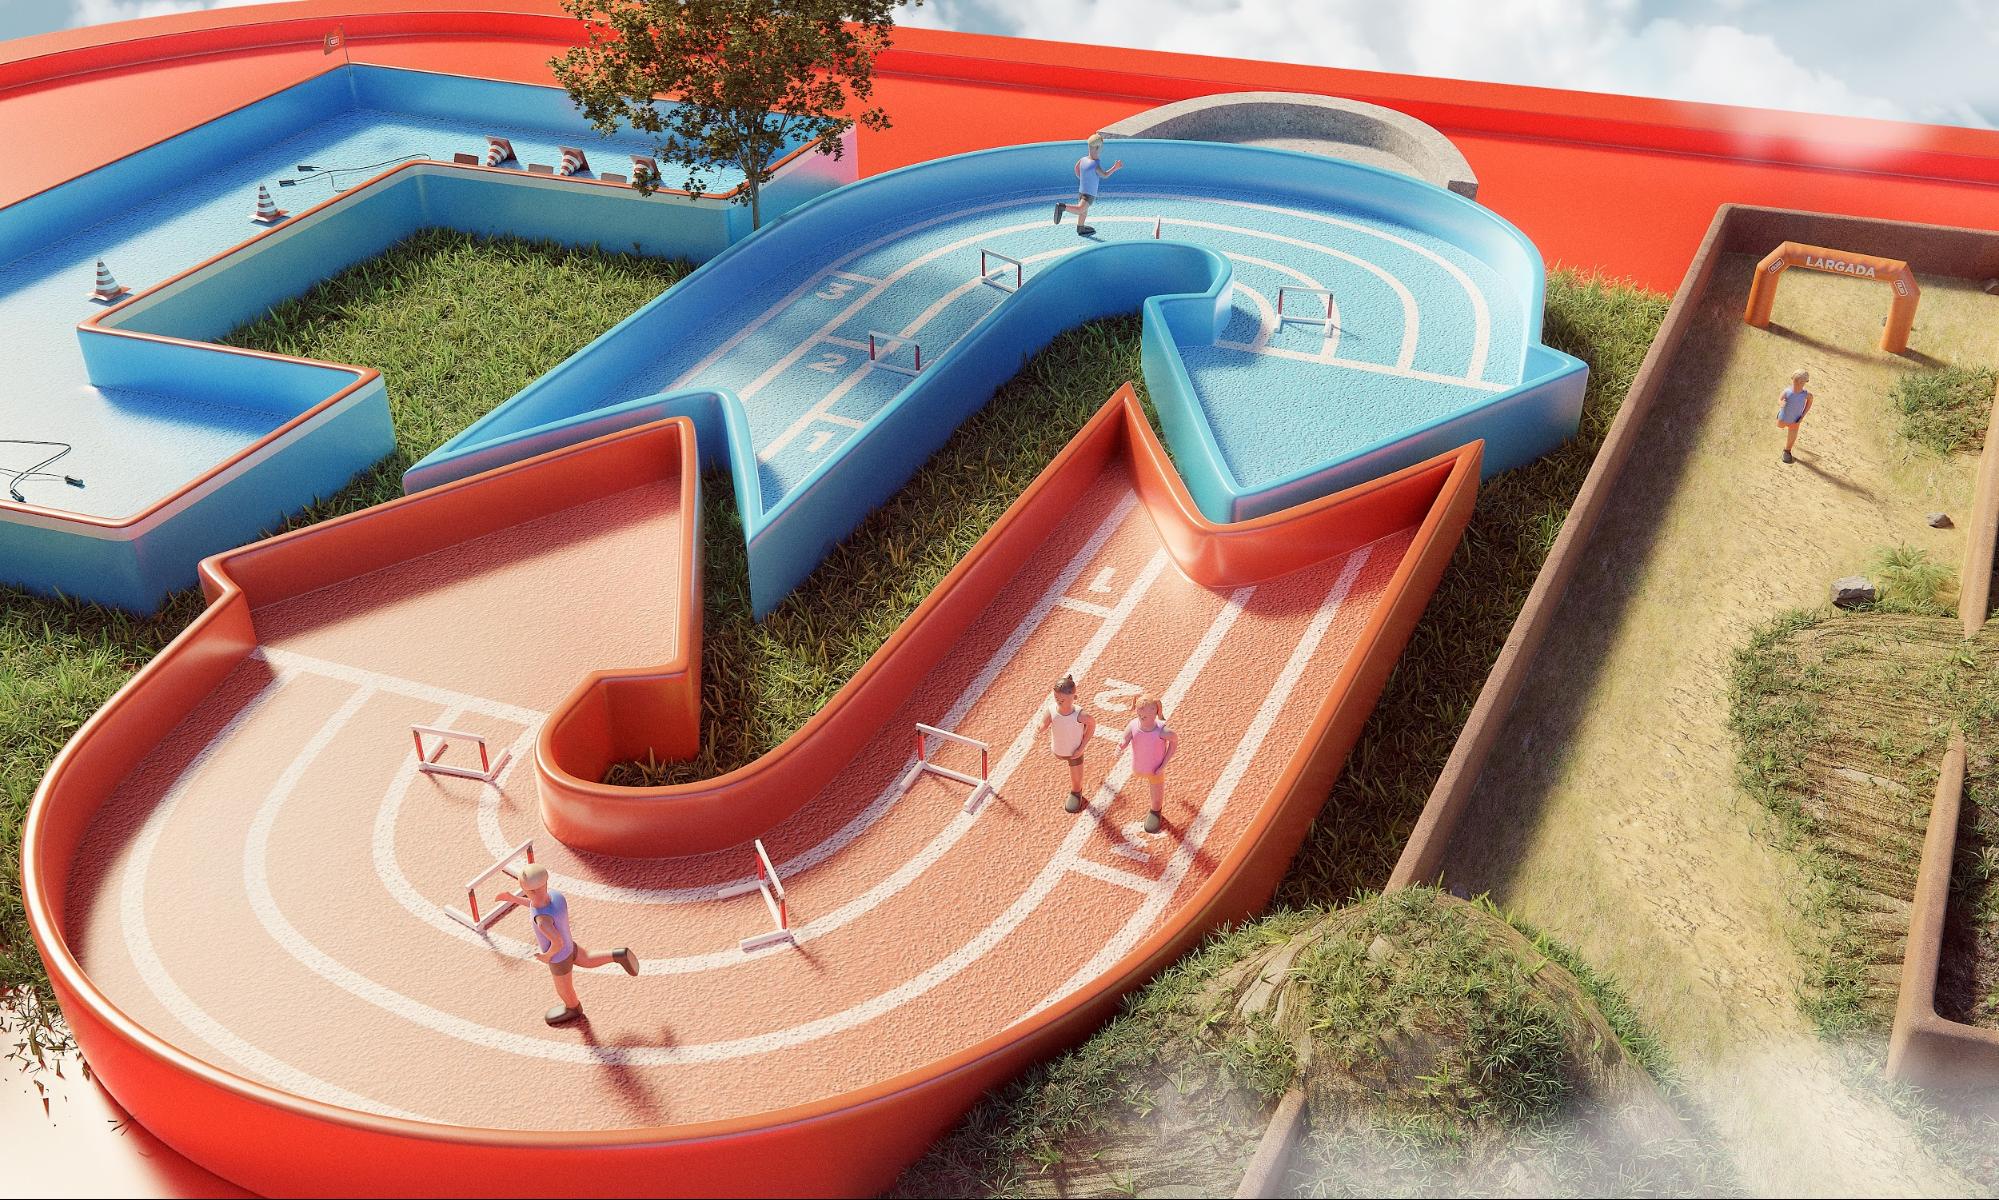
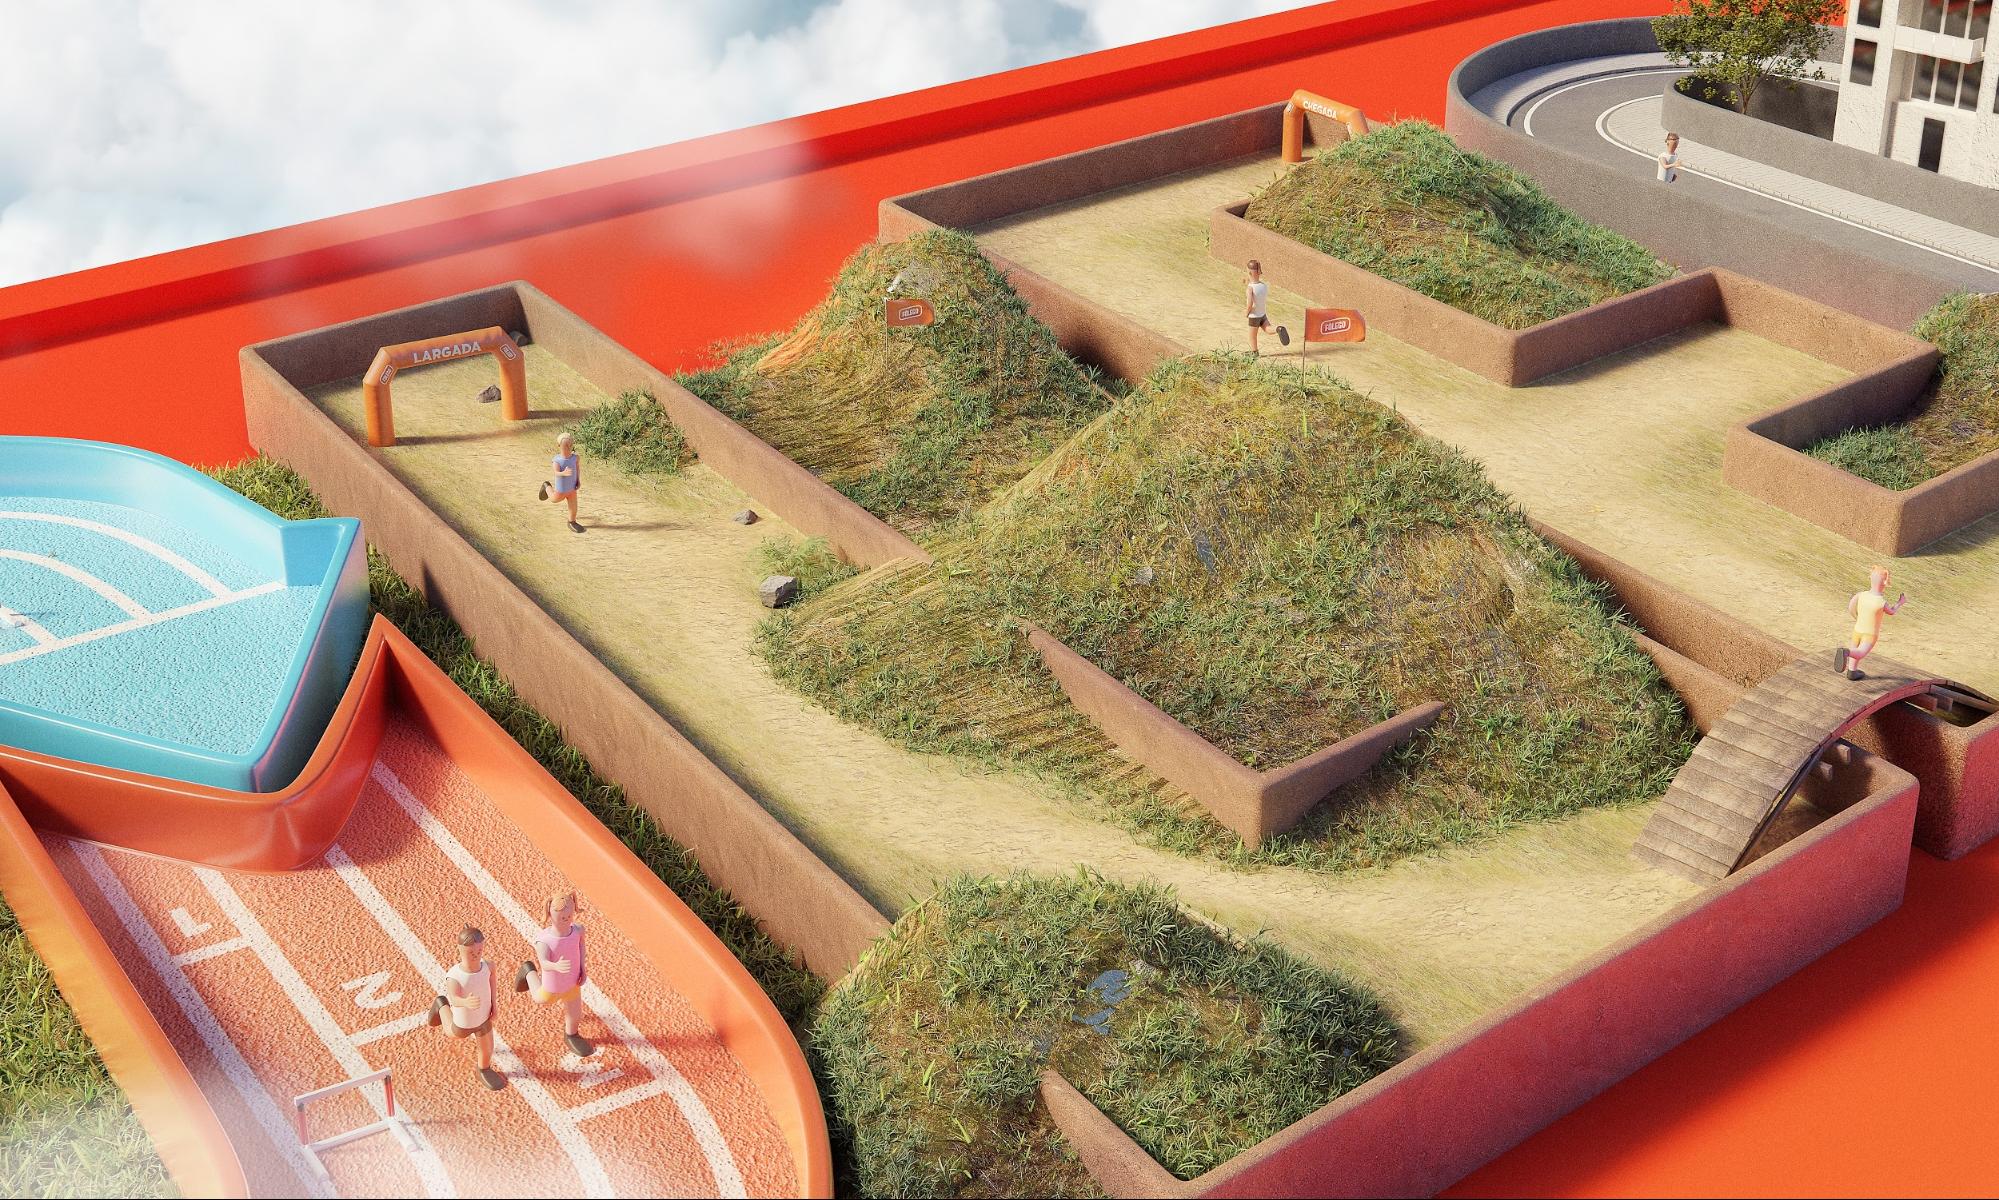
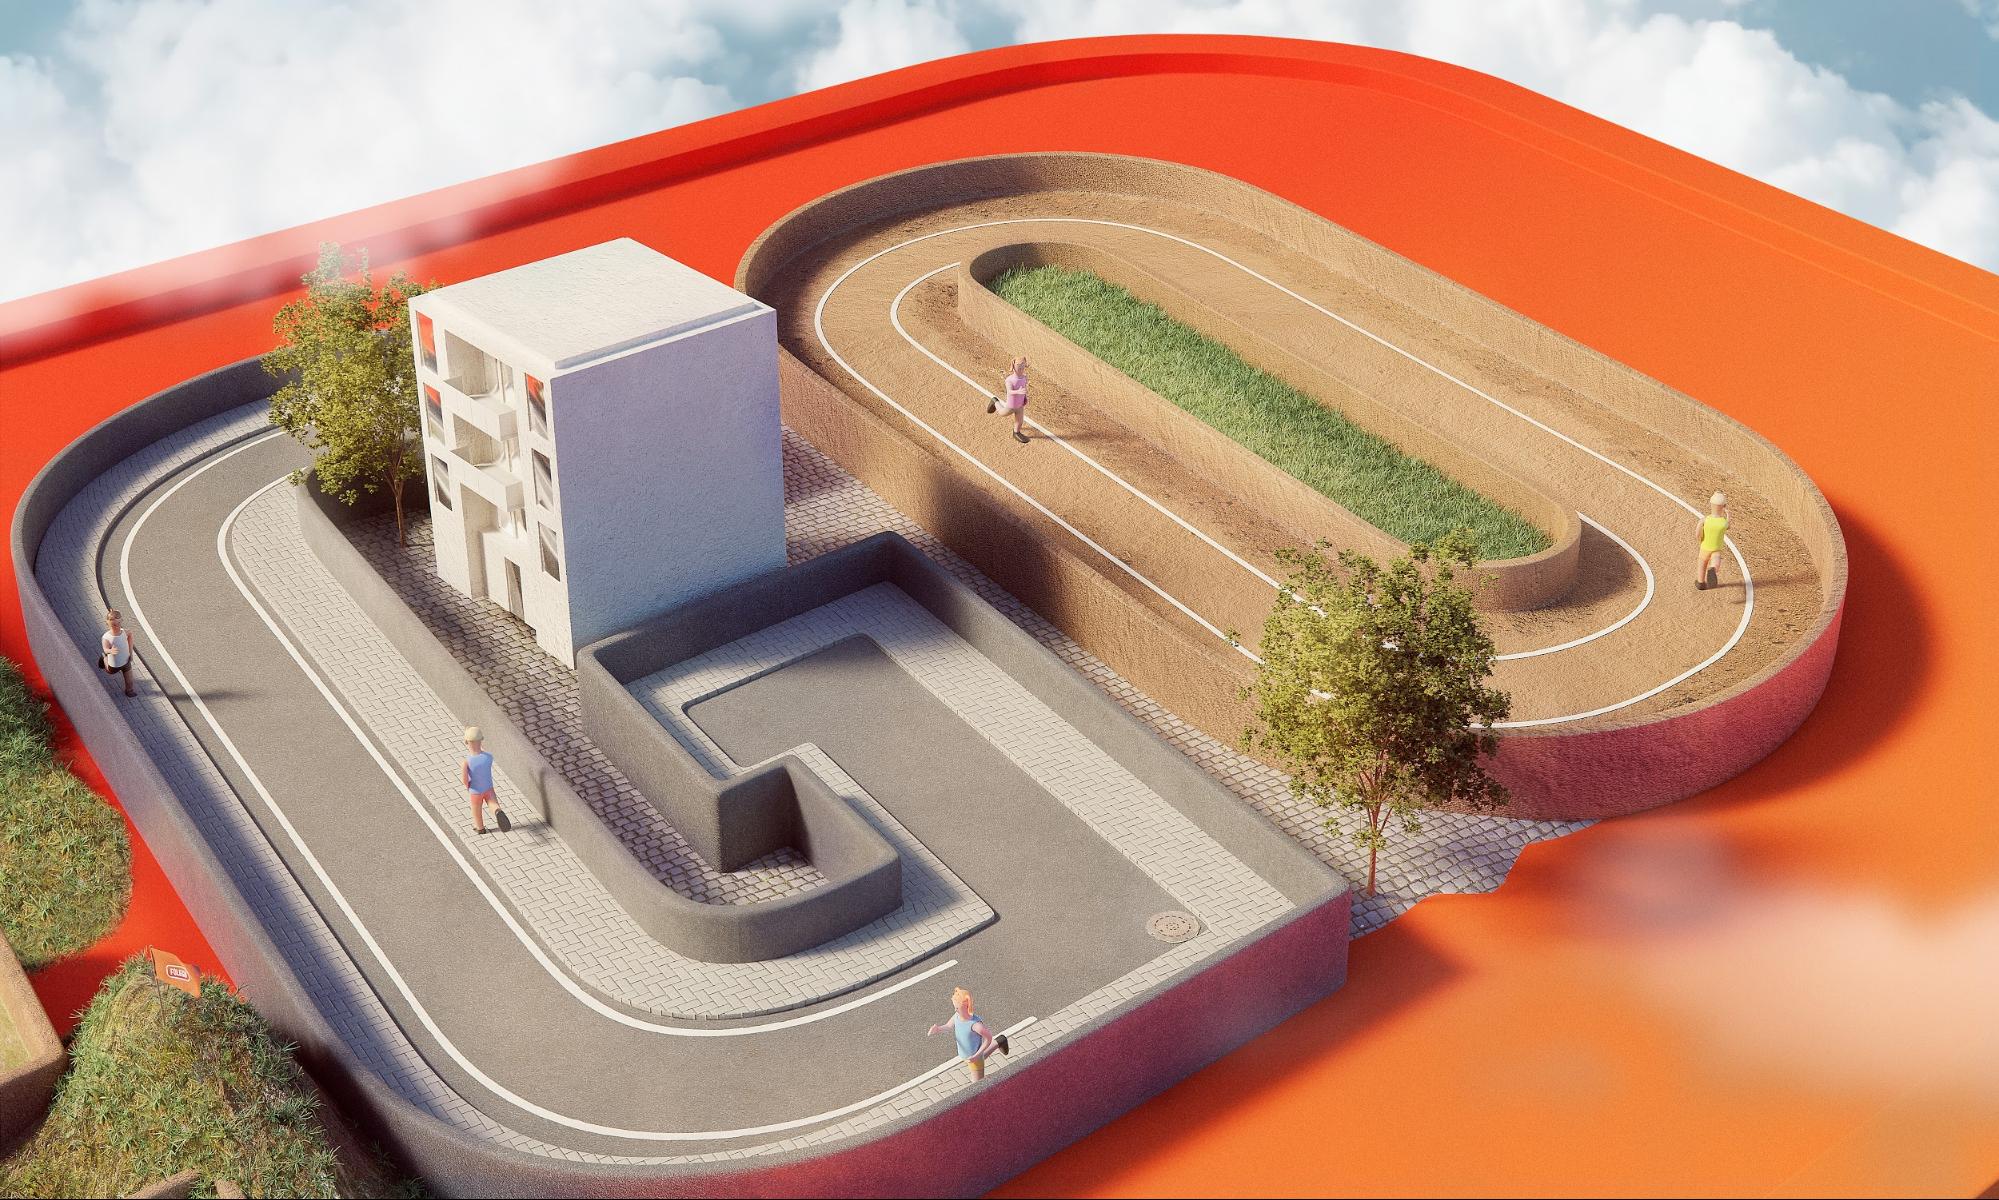
“Fôlego” is a YouTube program for runners (street, track, asphalt, and mountain runners). The word “fôlego” means “breath”, and the idea occurred to me to show some of the program’s brand modalities, creating an interaction of sports in the brand.
Modeling
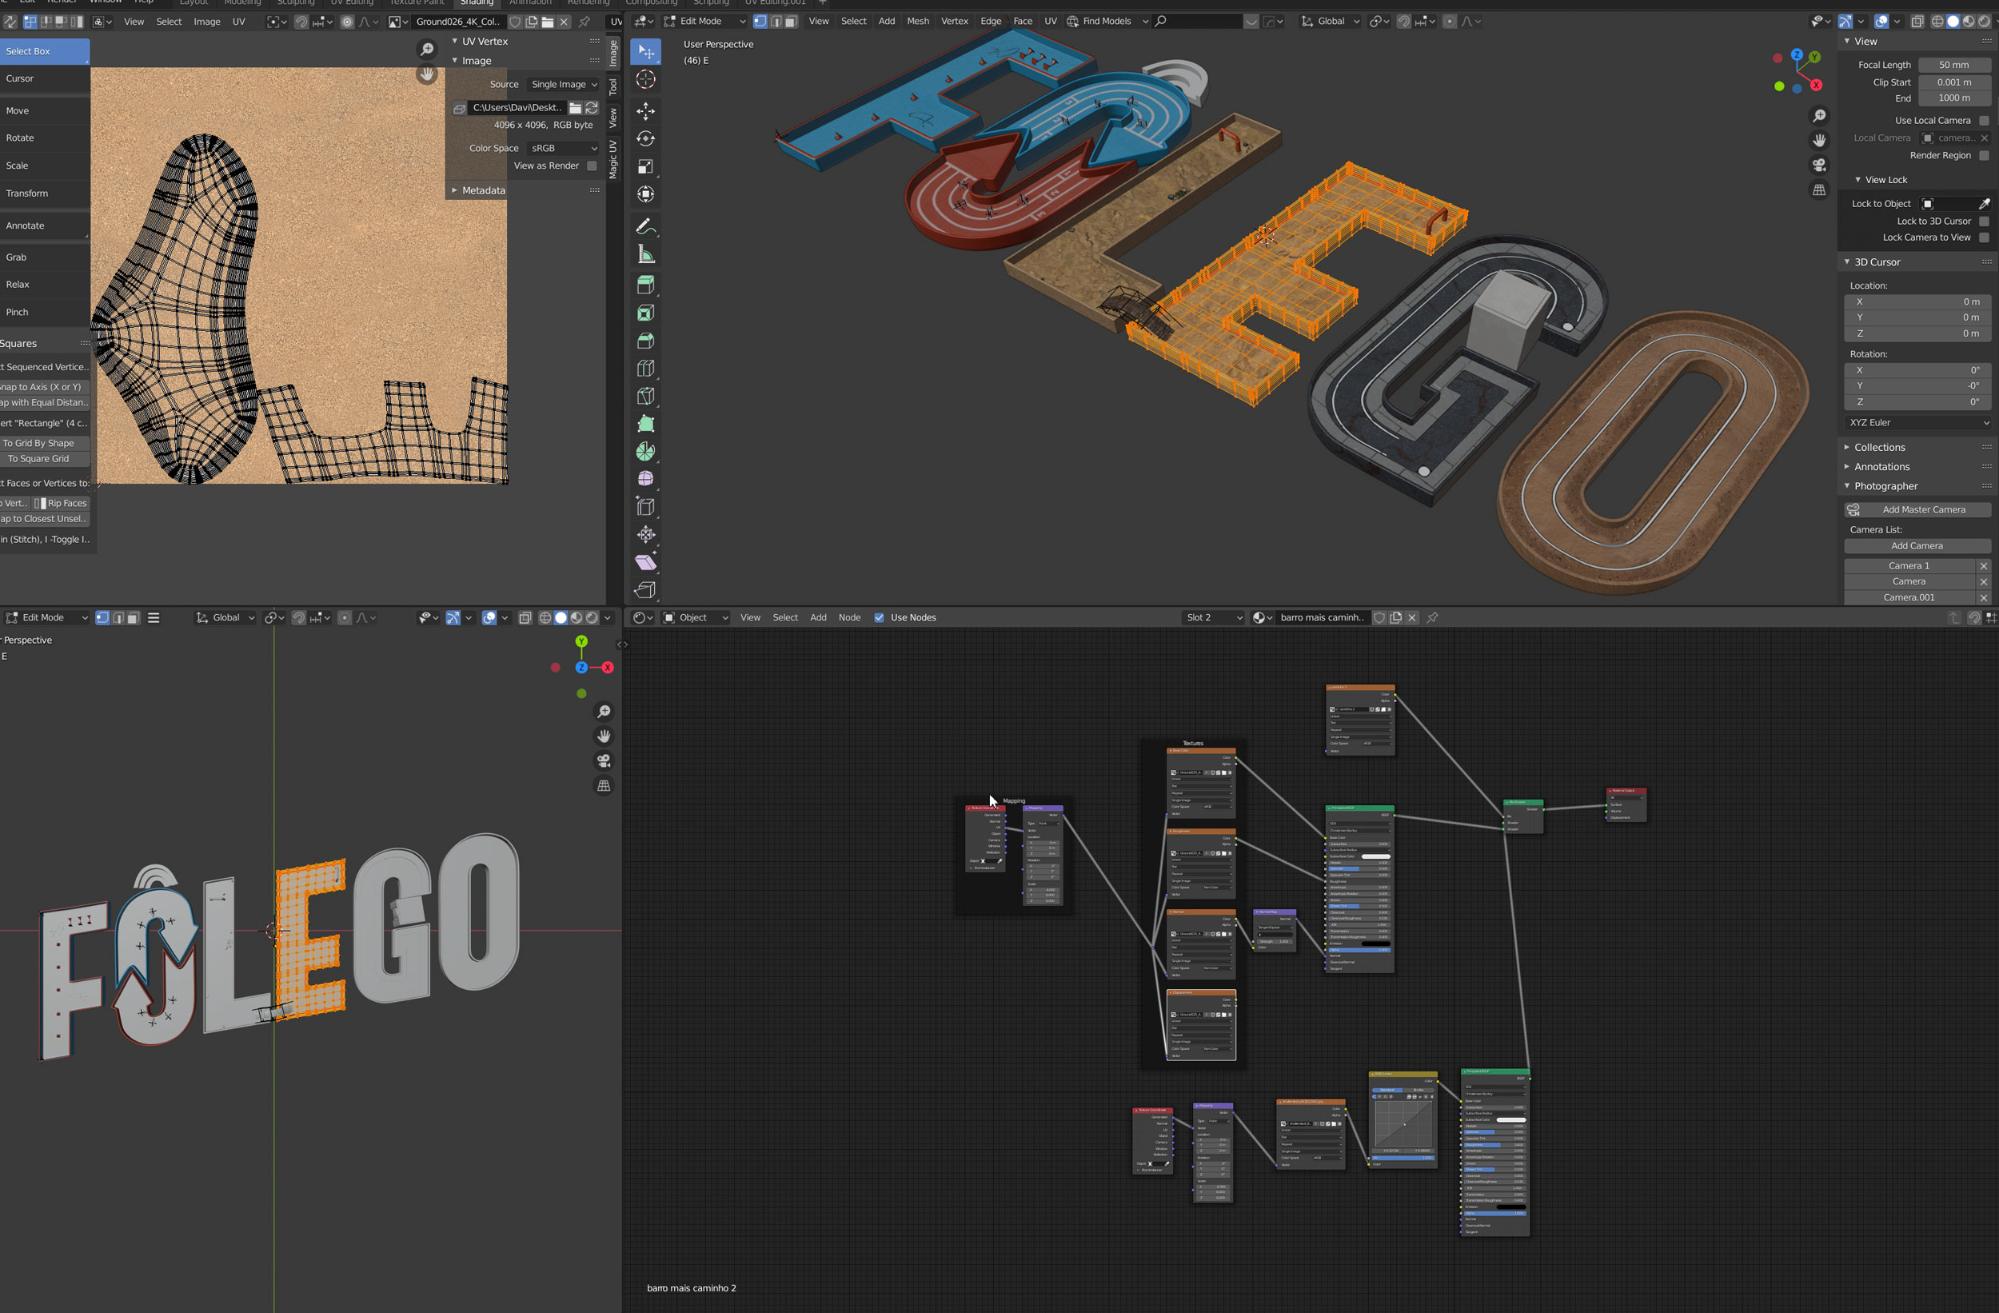
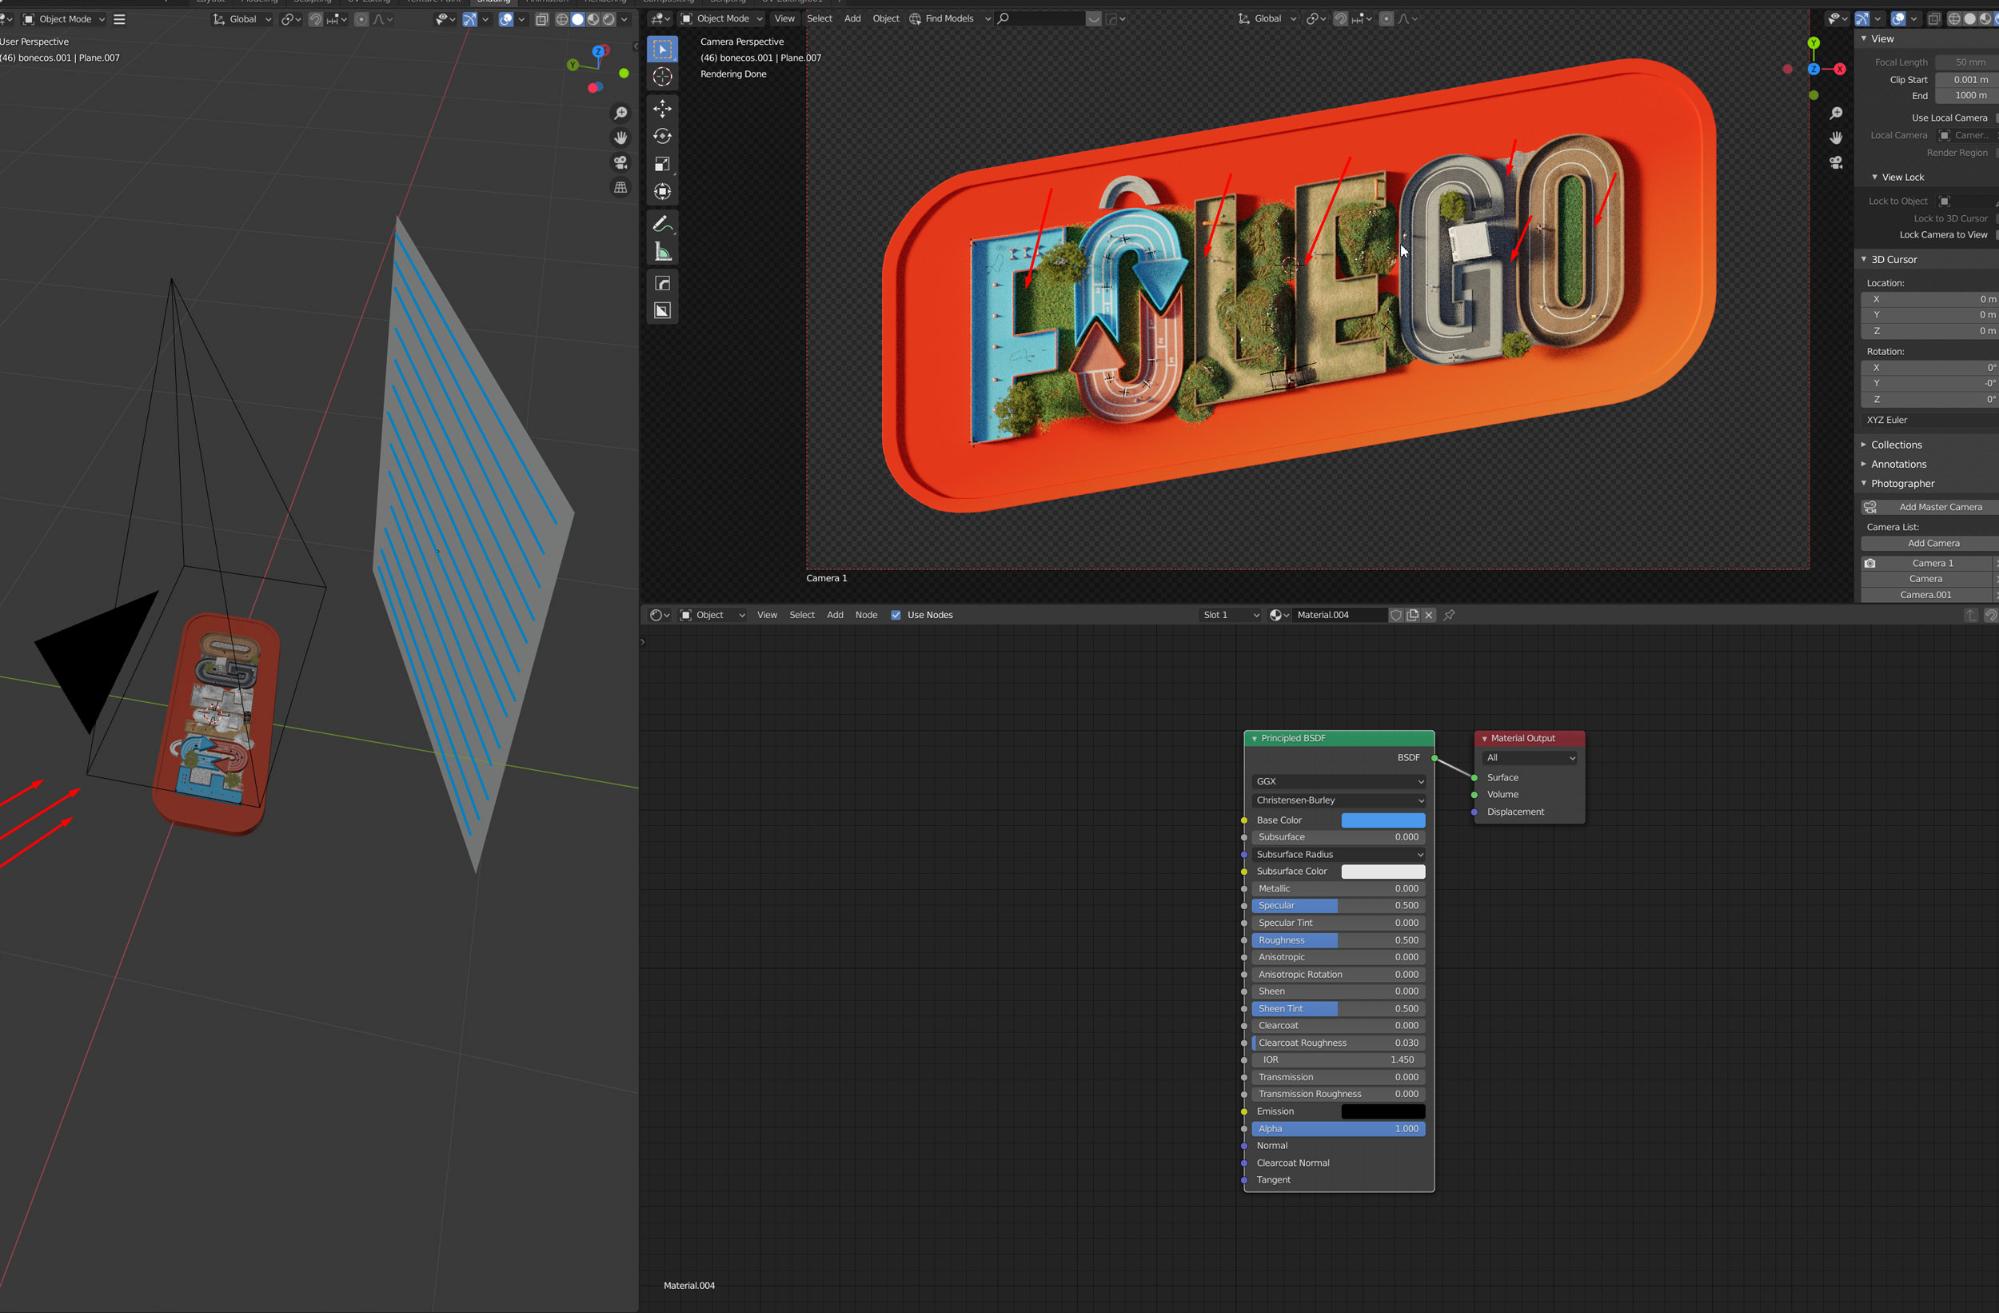
I started with the lettering, poly by poly, then used “inset faces” to make the walls.

Characters
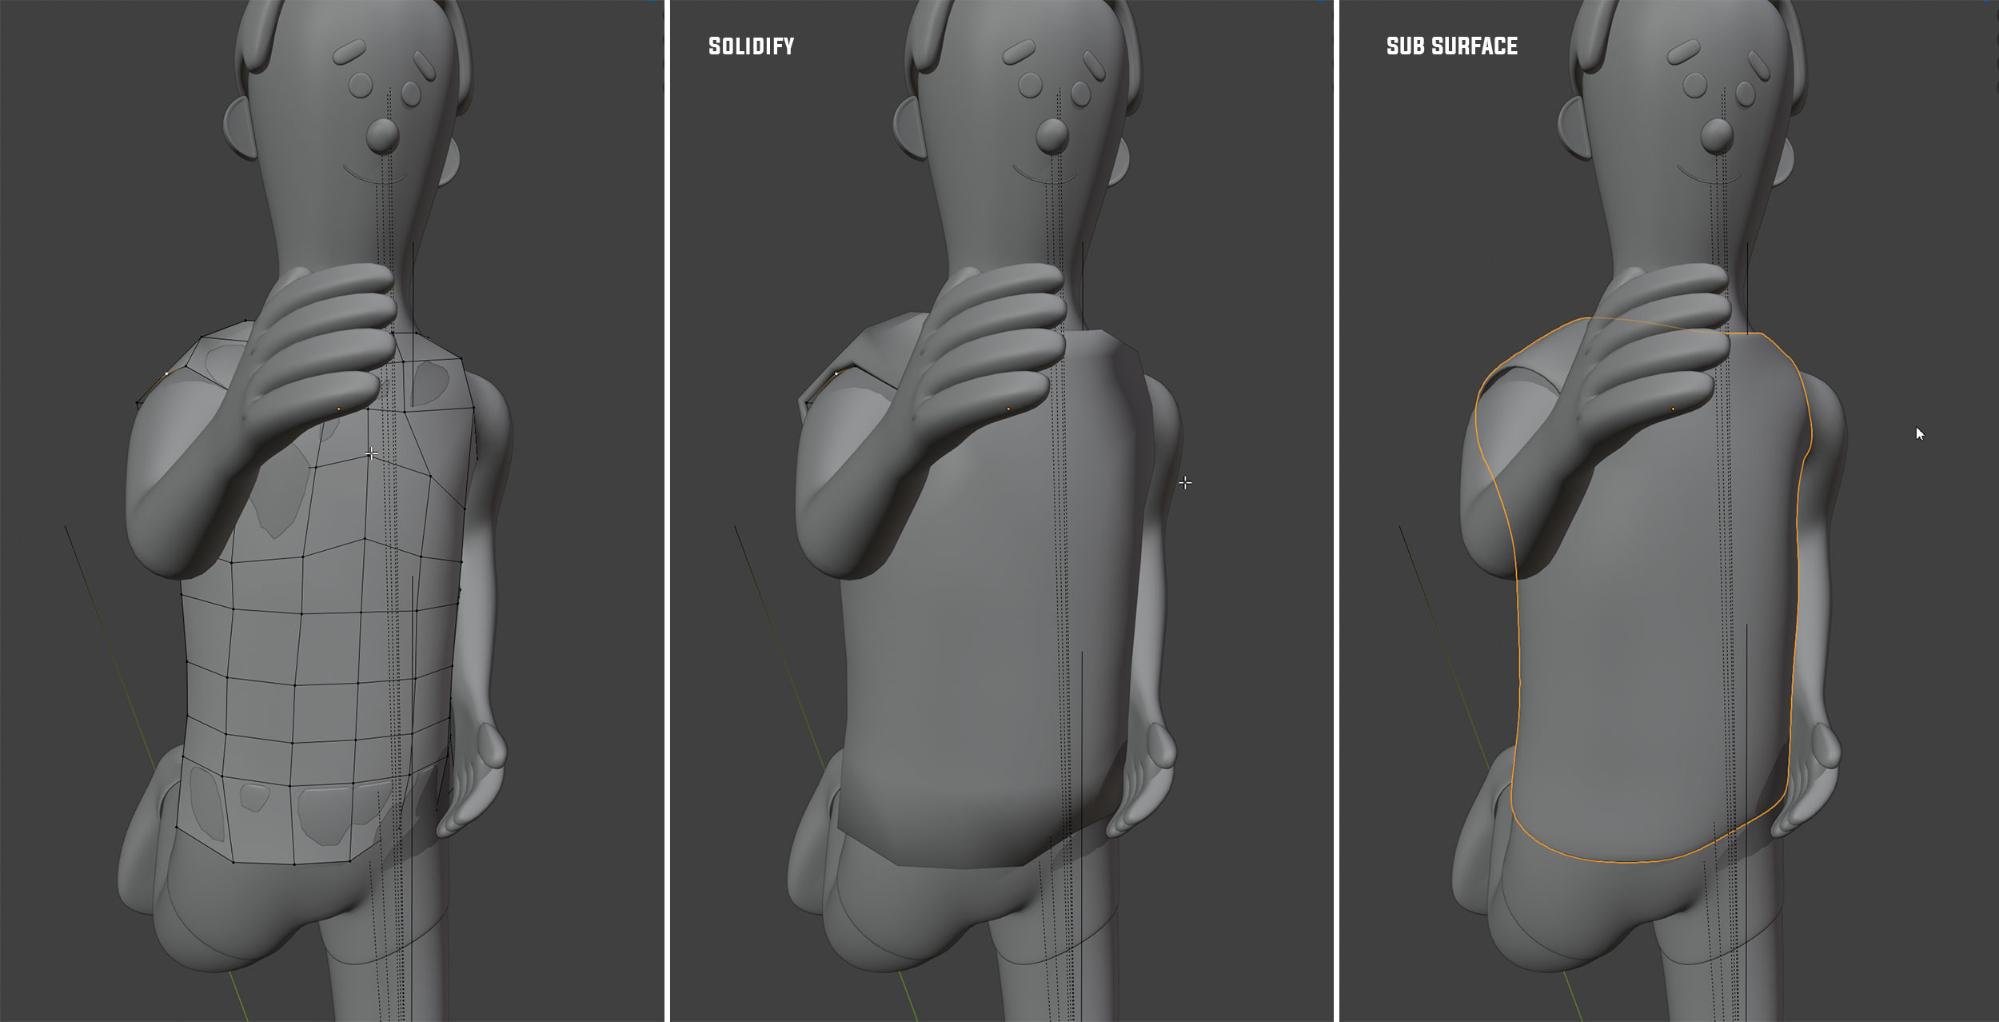
I had never modeled a character, so I asked a friend, Vinicius Maia, to draw a blueprint so I could start. I modeled the body in the T position, used the mirror modifier to optimize my time and, after I finished, I added the shorts and shirt using the body’s own mesh, using solidify and shrink wrap.
Another important tool was “Instancing collection” which made my scene lighter and optimized my working time. I created 3 types of hair, which I altered with “Instancing collection”. Below is a short video of how I did it.

Mountains
I think there is no secret here—to create the landscape, I made some adjustments with one of my favorite Blender tools, which is proportional editing.
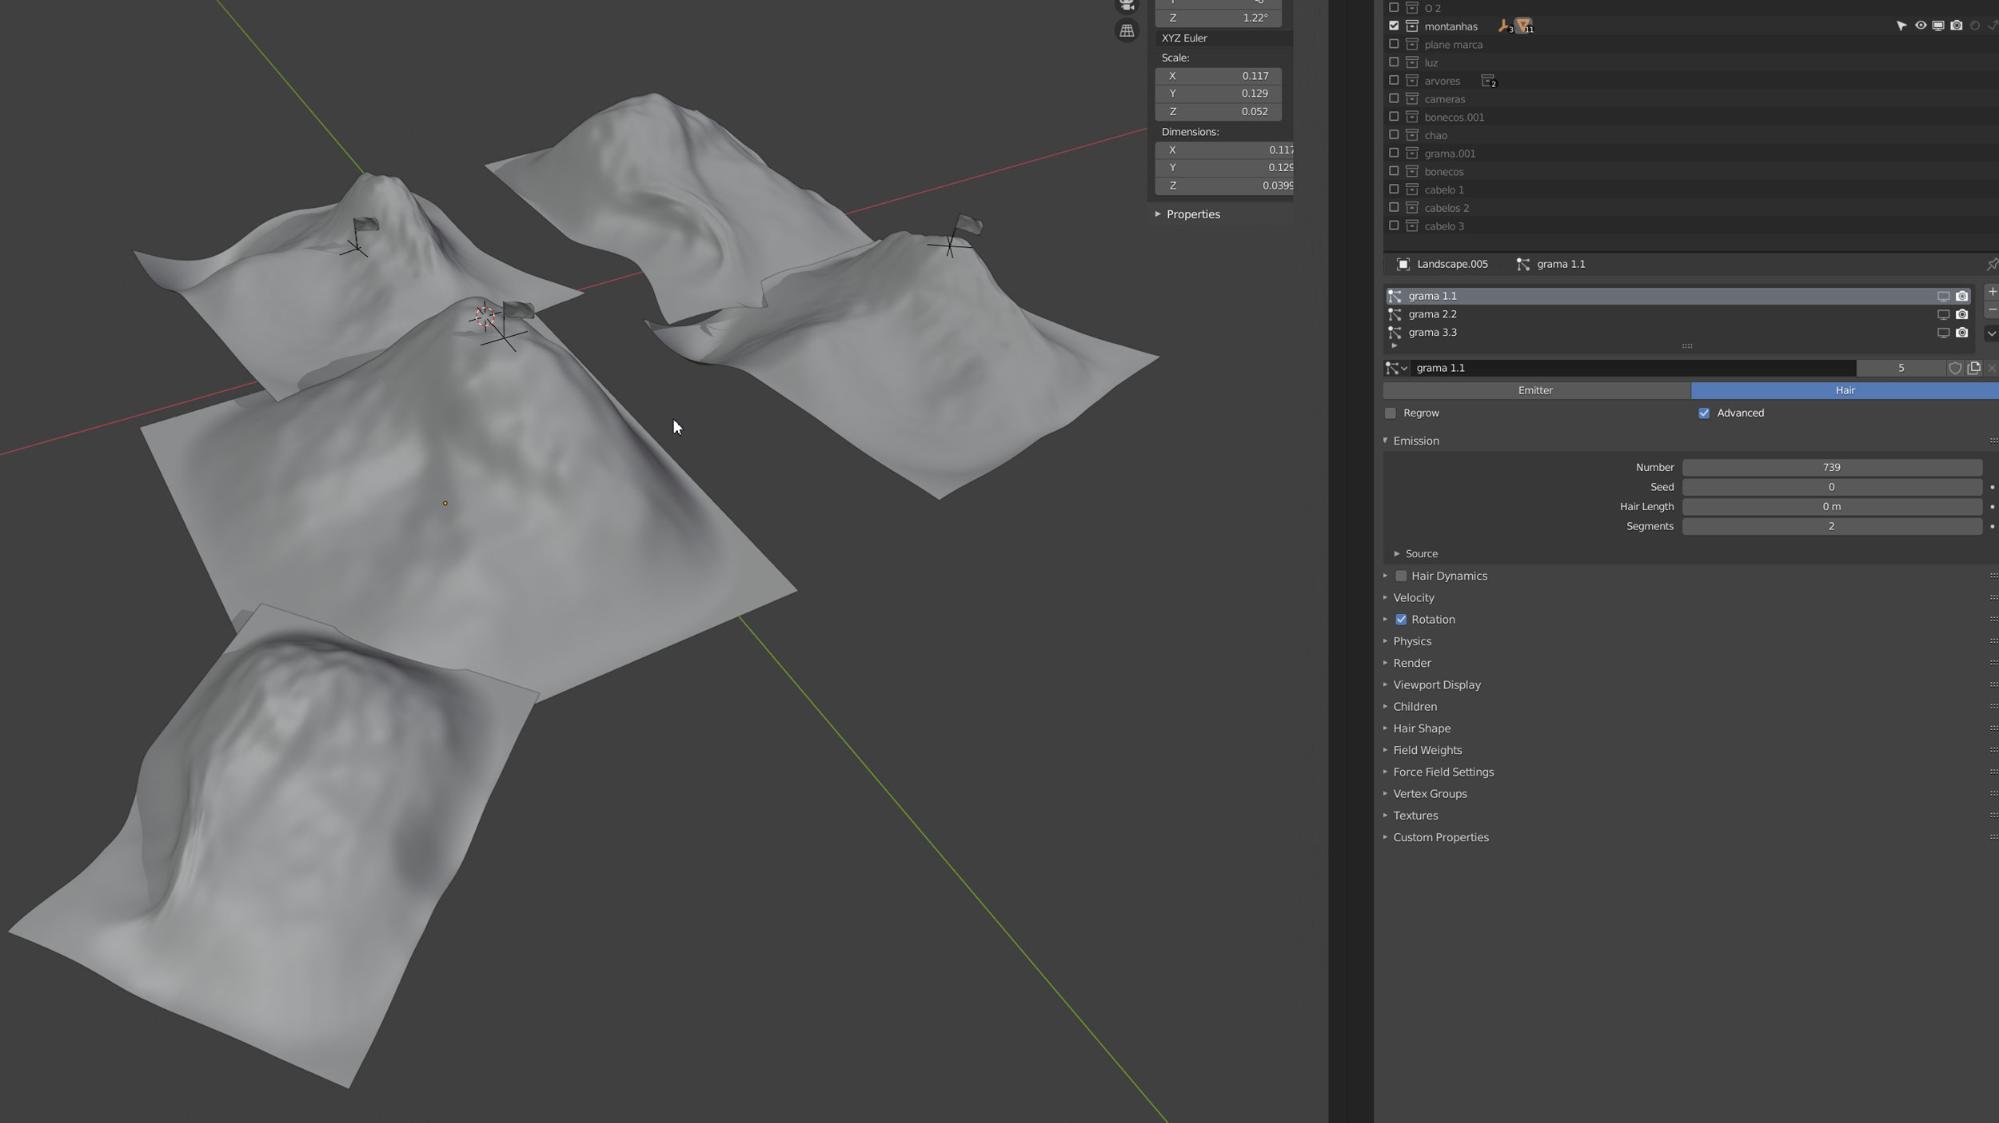
Grass
Using the Realistic Grass Assistant pack, I appended all kinds of grass and distributed it with the particle system, controlling the density and where they would be distributed with weight paint.

Textures
Most textures are PBR, which greatly optimized my working and rendering time. All textures are from CC0 Textures. Procedural textures like skin, hair, plastic, etc. were made with the main BSDF.
Lighting
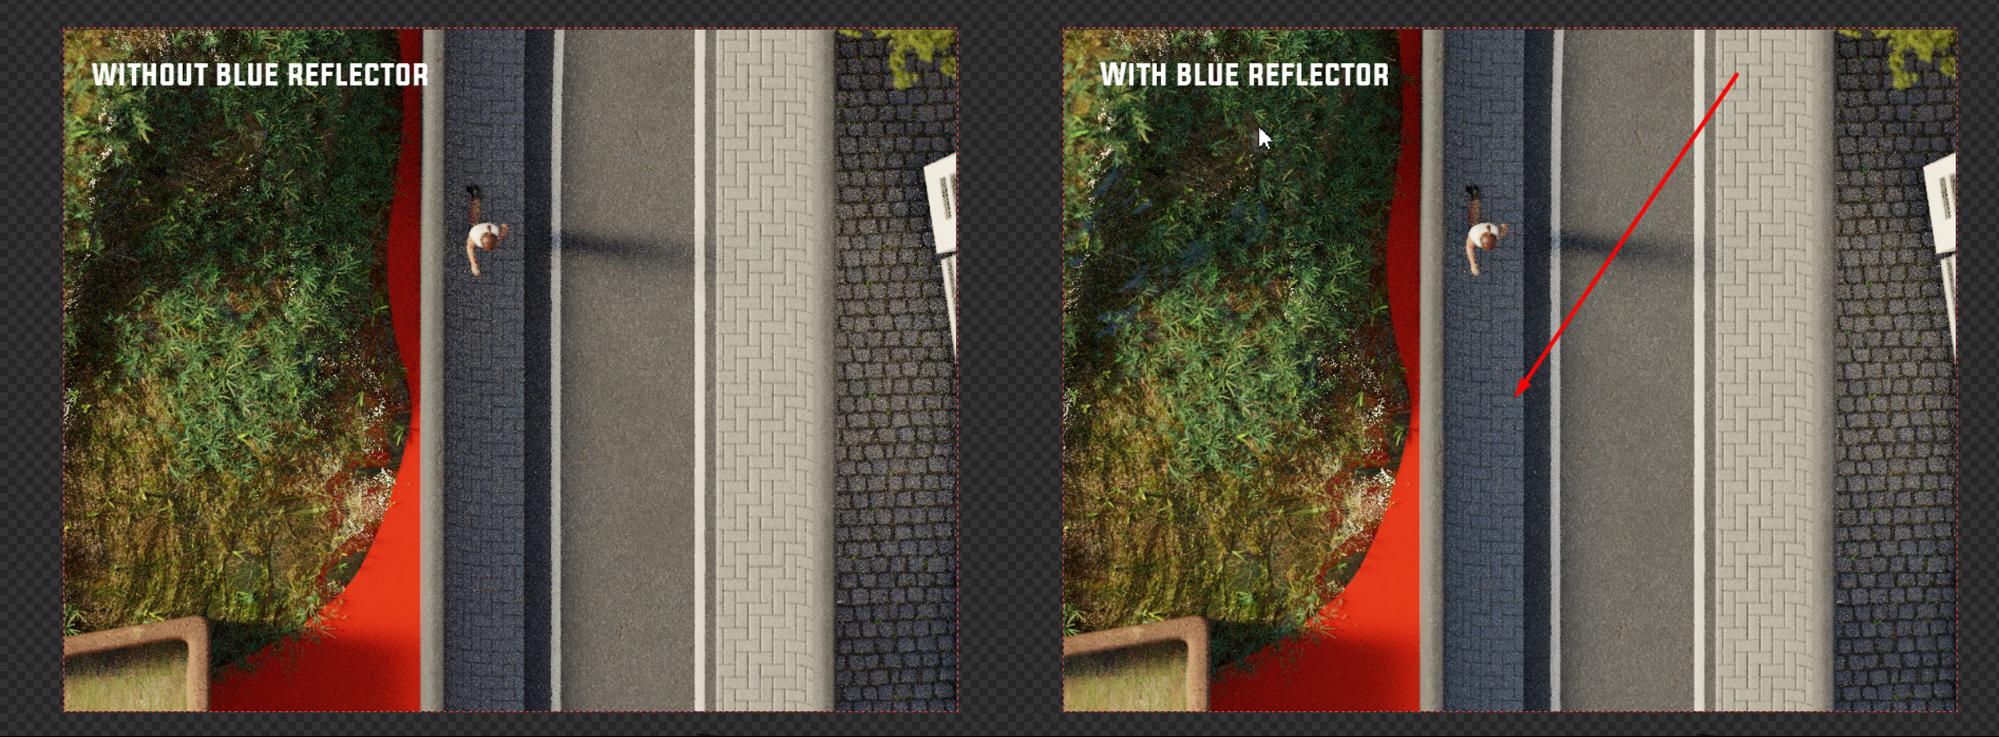
I used an HDRI to simulate a late afternoon light, and a blue reflector to fill the shadows better with color. I worked with complementary colors for this scene—I believe that this little detail makes a big difference in the general look of the image.
Render and Post Production
I rendered with Cycles and all post-production was done in Photoshop. I really like to bring a little bit of my image retoucher skills to my work; normally when I work with 3D images I use chromatic aberration (without exaggeration), vignetting, bloom, sharpness (without excess, respecting what the image can give us ), not so saturated colors, and a little grain. The overall look of the image changes when each detail is modified.
I used Arion FX to work with the chromatic aberration, and Lumenzia to adjust the lights.
Final Images

Tools
- Blender 2.8
- Adobe Photoshop
- Lumenzia (Photoshop Plugin)
- Random Control – Arion FX (Photoshop Plugin)
About the Author
 Davi Voss, Creative Retoucher and CGI


Amazing work! Very inspiring. Thanks for sharing!