

About
Hi, my names is Lucas and I work as a freelance 3D artist, mostly doing characters for animation and sometimes for games too. I live in the south of Brazil in the city of Porto Alegre.
I learned the fundamentals of 3D at design college and since then have always tried to do personal projects, which, in my opinion, is how I have learned the most and developed techniques and skills. And, of course, I learned a lot from others in the studios where I've worked and from watching training from CG Cookie, Blender Guru, Venons Lab 1&2, and many others.
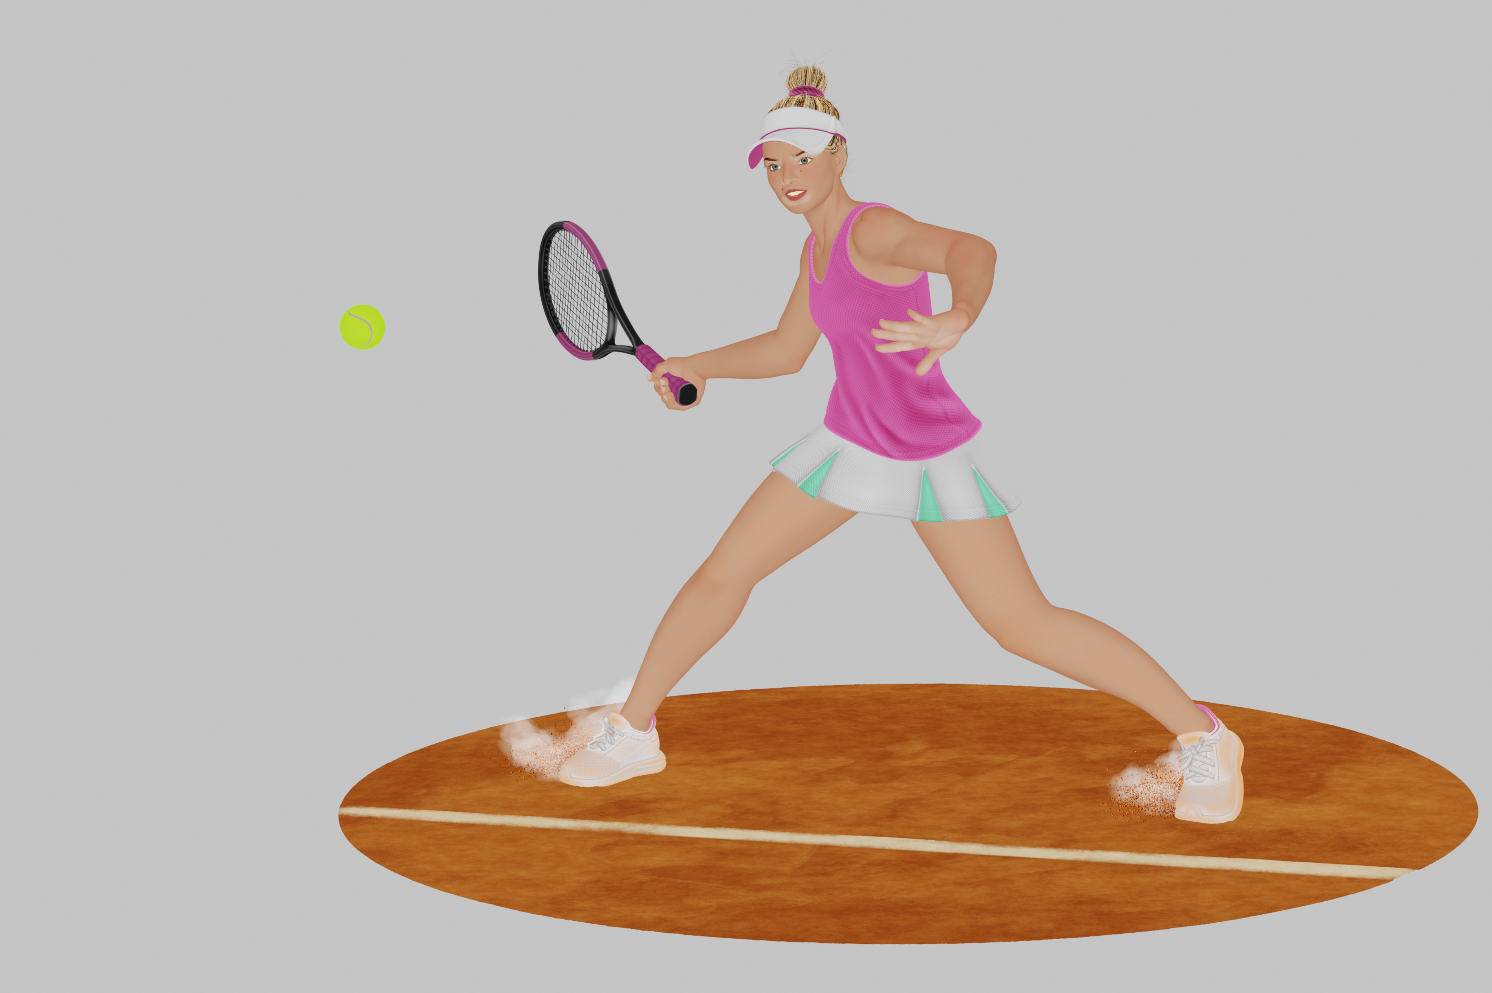
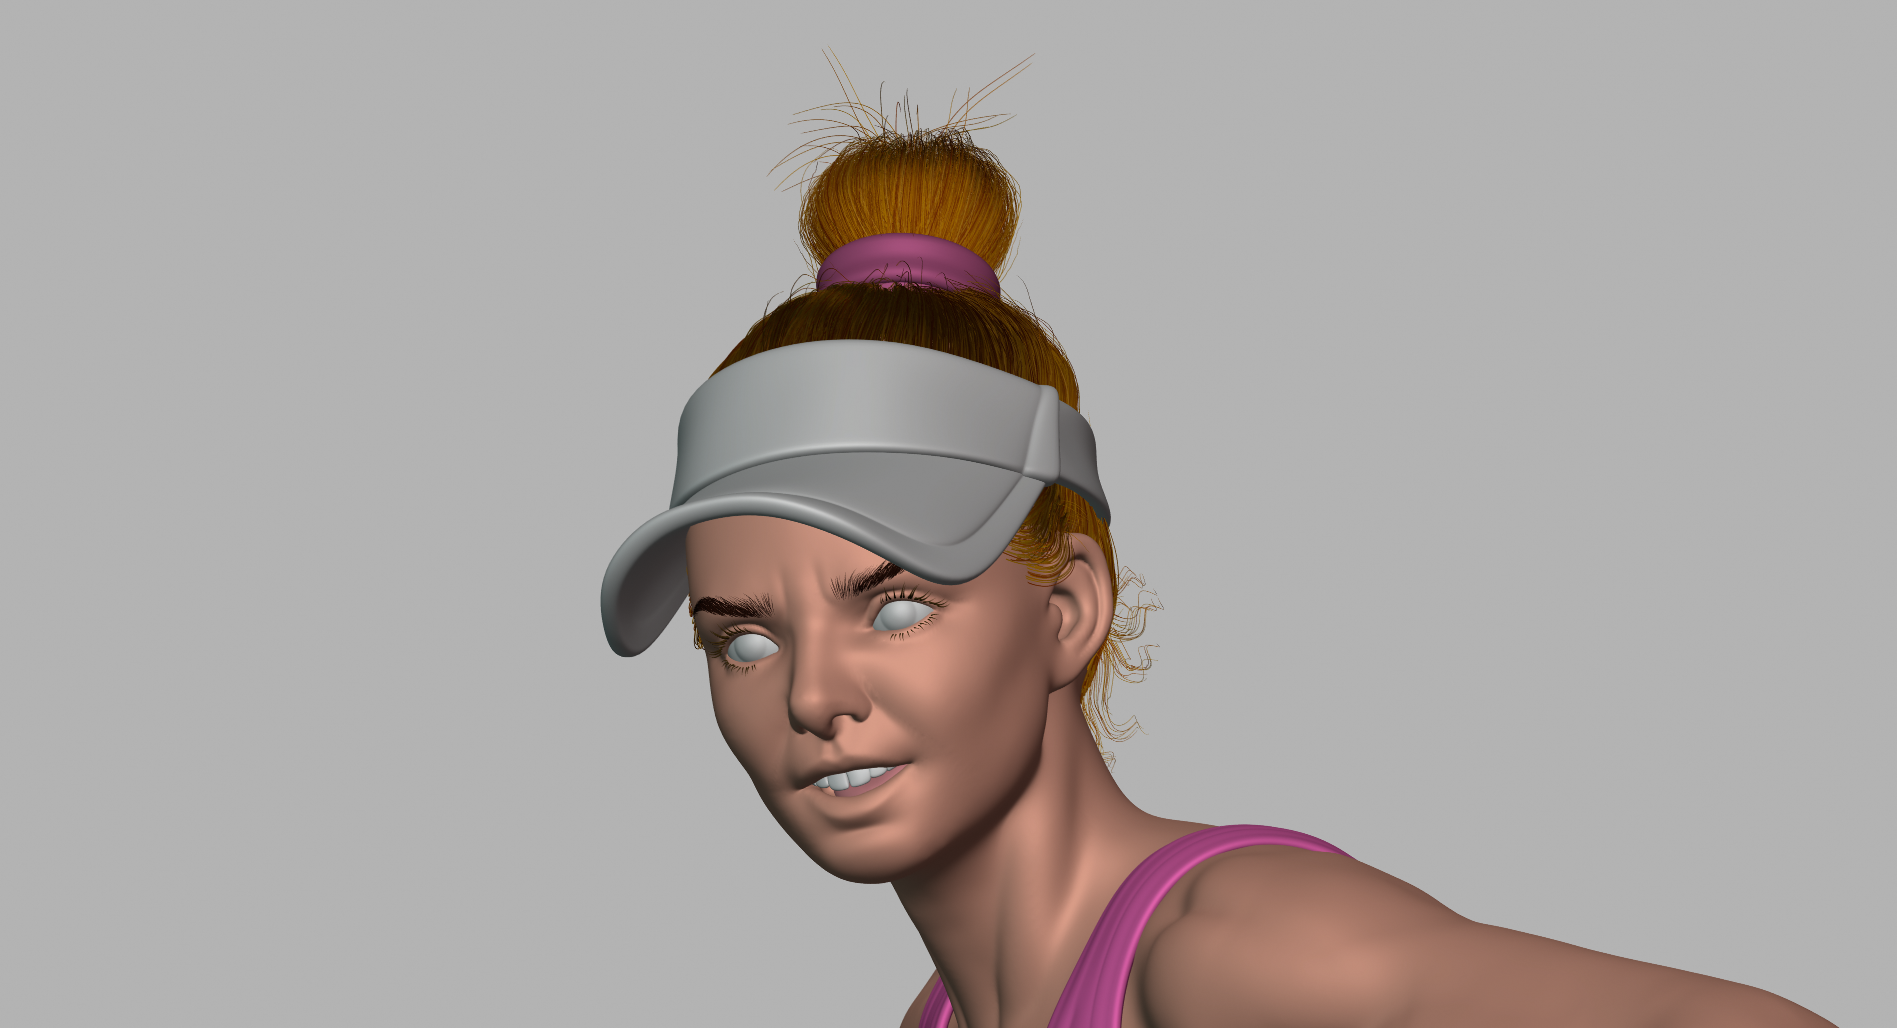
Tennis Player
Most of the inspiration for my personal works comes from life. This piece was a request from my cousin; she is a tennis player and I thought I could do something cool with motion and making her slide on the clay court. I really like sport as a theme—I should do more work around that.
Tools
For the hardware, I have an i7-4790 3.60GHz × 4, with 16GB of RAM and a GeForce GTX 1060 6GB running Linux Mint 19.3 Cinnamon.
For the software, I’ve done mostly everything with Blender, and only used Substance Painter for the skin and clay court textures.
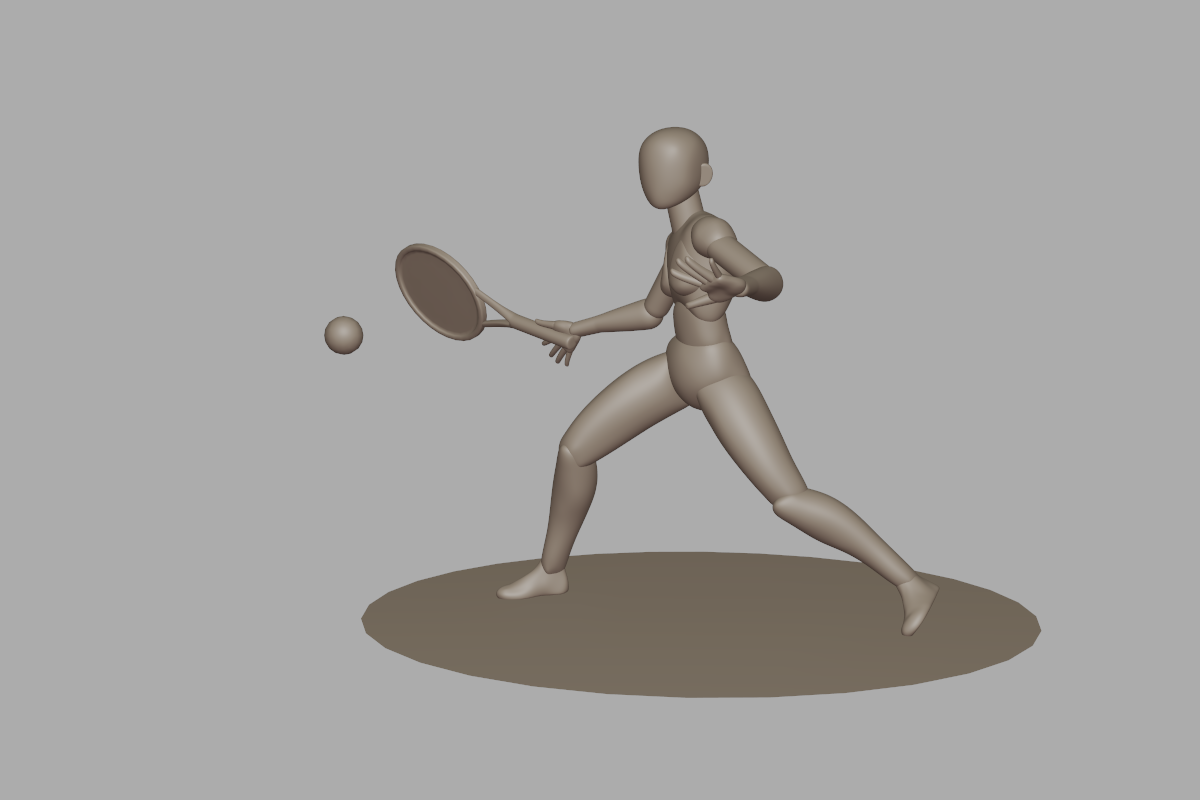
Blocking and Pose
I’m trying to make my workflow faster. I usually do the blocking with poly spheres; with the origin points on the joints, you can parent the meshes hierarchically, so you can have a simple “rig” and can test different poses very quickly.
Sculpt
When I’m satisfied with the pose, I start to join some parts and, using Voxel Remesher, begin to eliminate the intersecting parts so that I can sculpt without any issues. Depending on what the character is wearing, it’s not always necessary to join everything into one mesh, and the arms and legs can be done separately. By preserving the rotation of the head, it’s possible to take advantage of the mirror when sculpting the face on the pose.
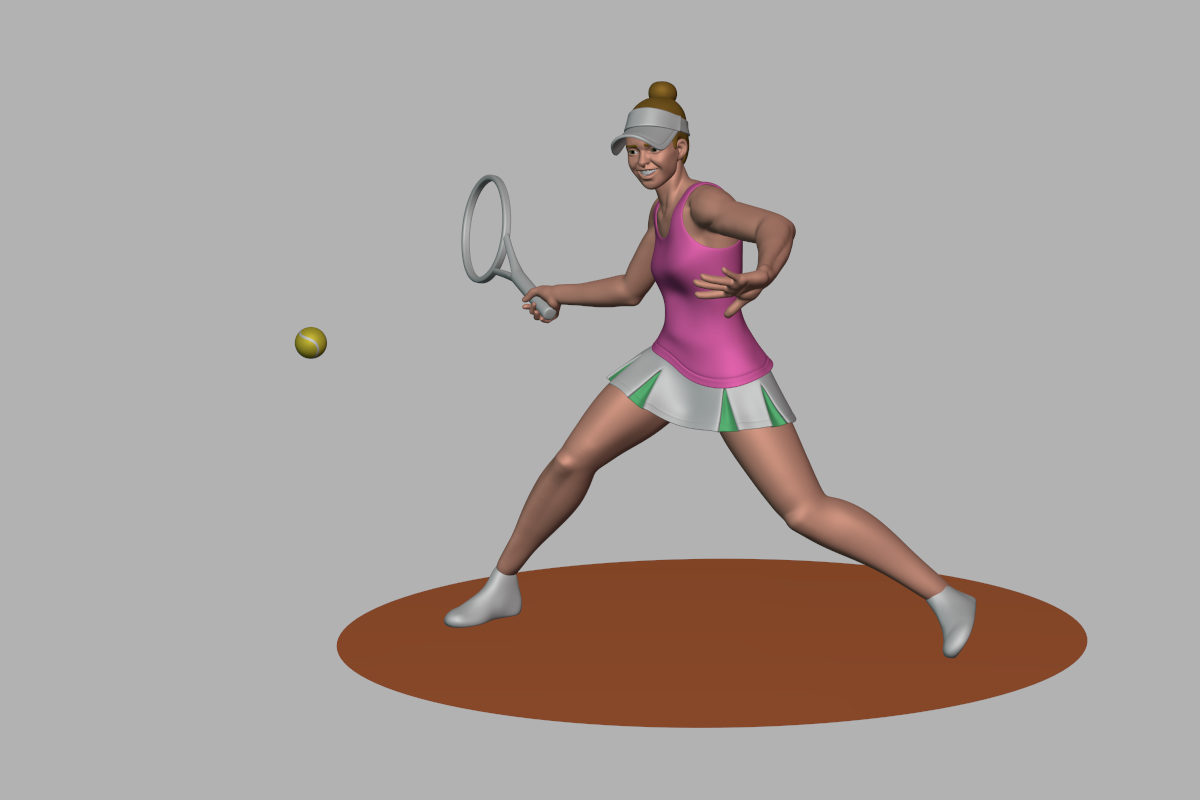
Modeling and Retopology
Some parts, like the racket, shoes, hat, tank top, and skirt, I just model with poly modeling. I sculpt the drapery on the tank top after the poly modeling. So for these parts, I don’t need to do any retopology.
One trick that I always use for modeling shoes is to model them symmetrically and then use a lattice to make the shape for the foot.
Actually, the only part that I end up retopologizing is the legs. They are just extruded cylinders, then subdivided, and with Shrinkwrap it’s possible to project the low res mesh onto the high poly mesh of the legs. The upper part of the body I leave as the Voxel Remesher mesh.


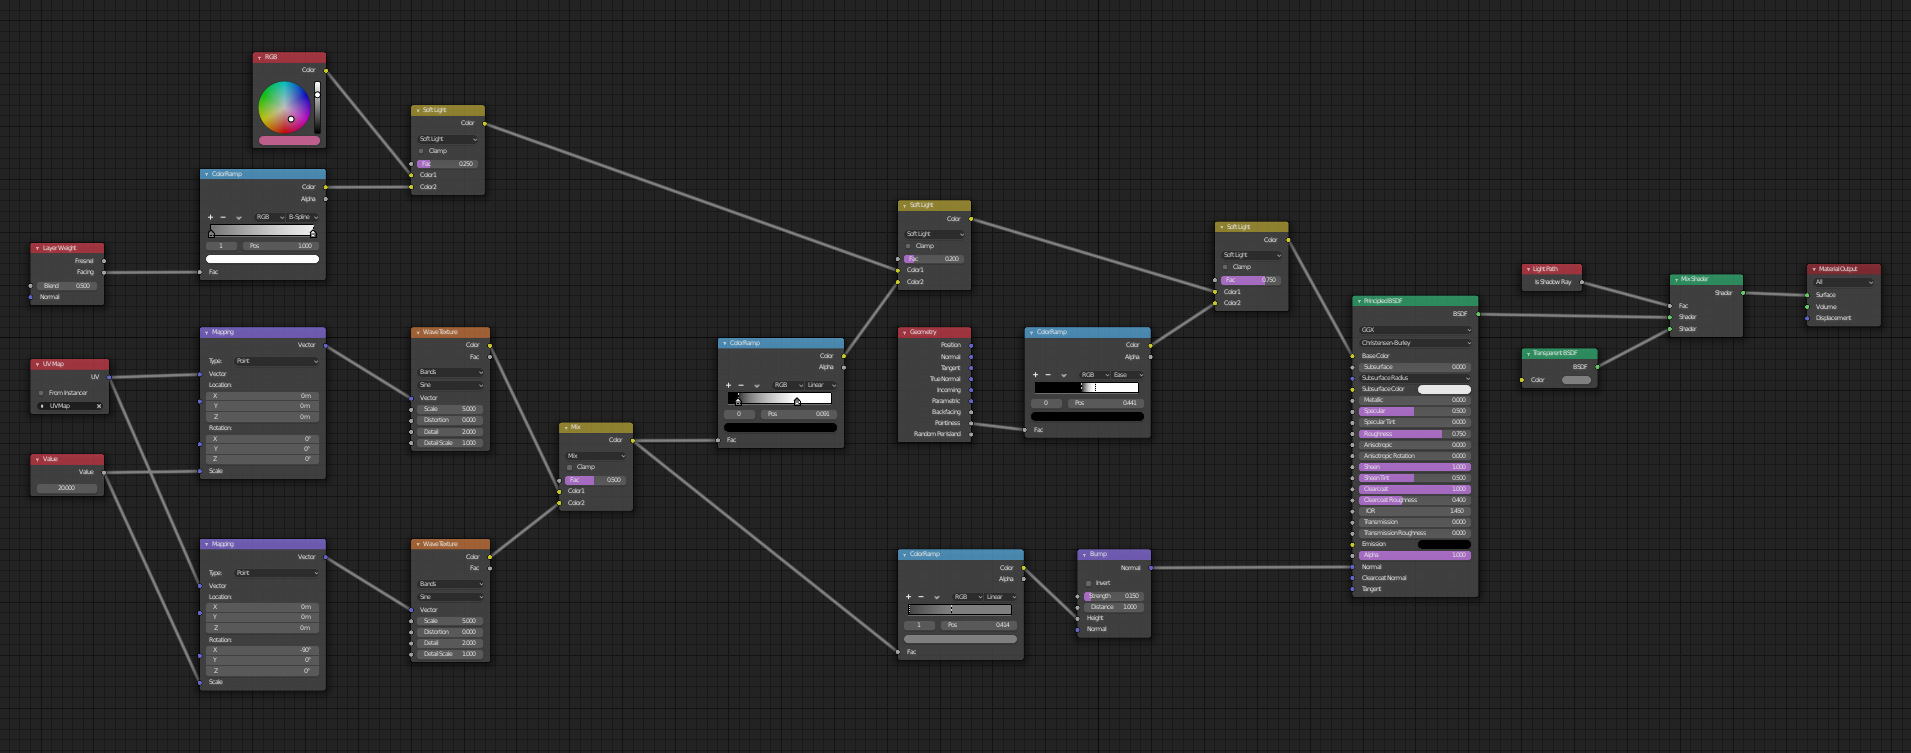
Texturing/Shading
Most of the textures were done with procedural textures inside Blender, except for the skin and the clay court, which were created using Substance Painter.
This is a very common setup on my work; you can see Layer Weight (to add volume to the texture) and Pointiness (to avoid that perfect new look) replicated in almost all the pieces of the model.
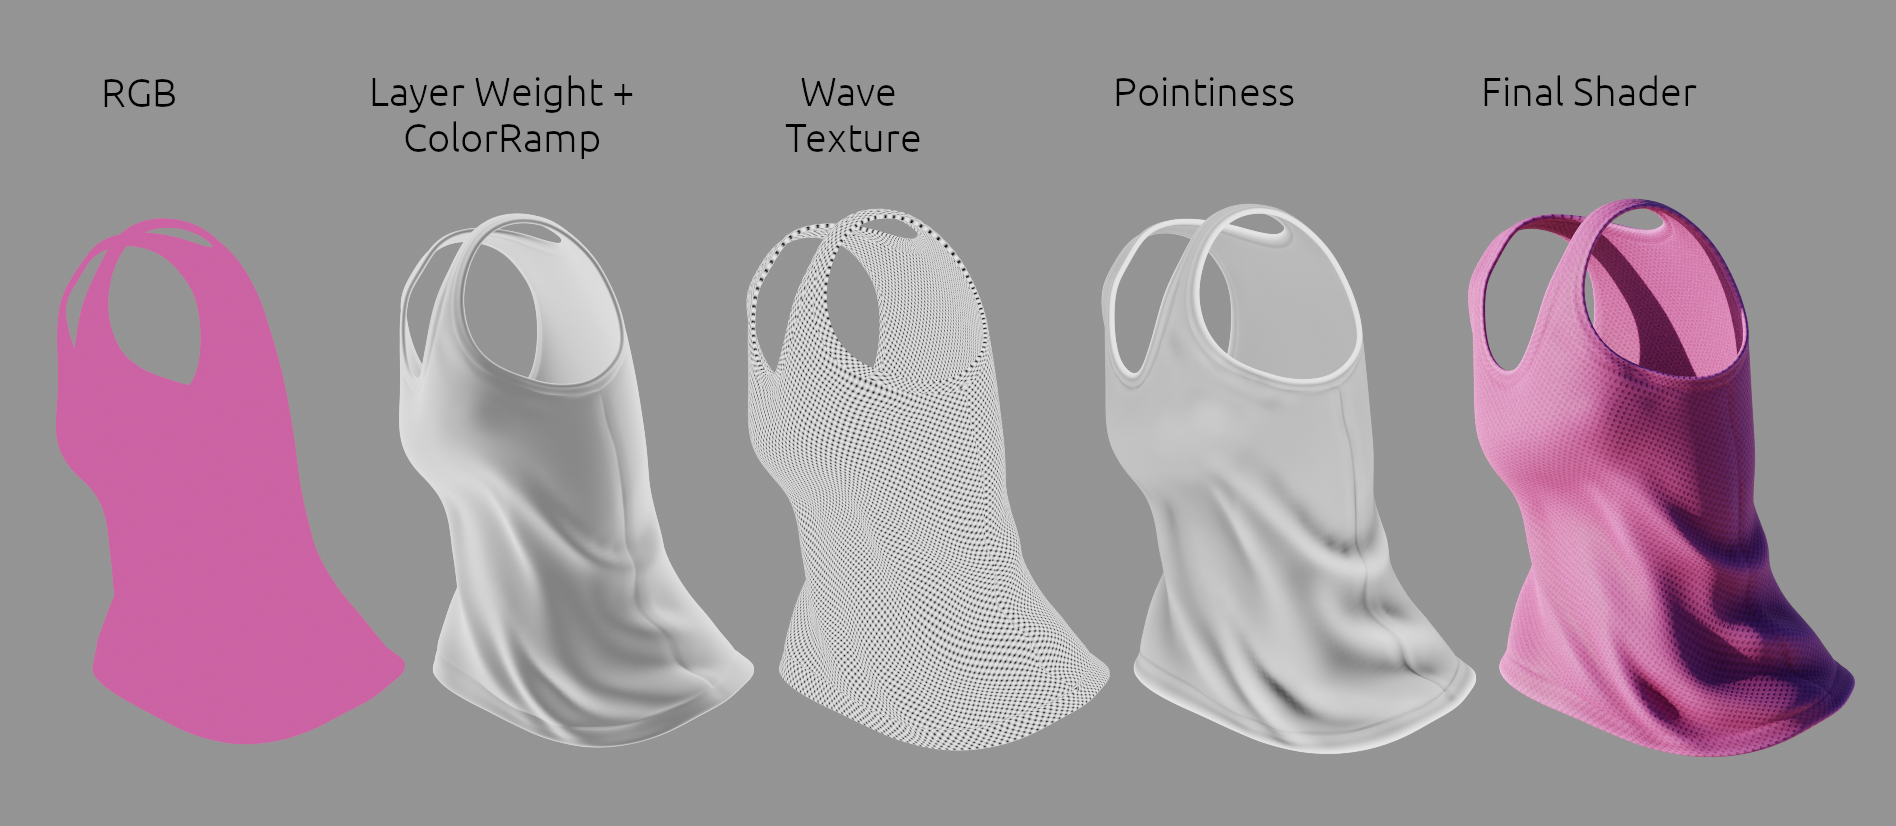
Here is the node setup for the tank top above. In this example, I create a texture using the Wave texture, but the same effect could be applied to image textures, too.
Hair
I use the hair particle system and curve guides to make the bun; here is a tutorial from Danny Mac that explains everything about how to set it up. It’s very boring to set up a multiply curve guide, but doing so allows for a lot of control after it is done. I comb the rest of the hair in the direction of the hair bun. For the final touch I add some loose hair on the edges of the scalp.
For the eyebrows, I use the awesome Eyebrow Pack from Nazar Noschenko.
Tip: For better visualization of hair, inside EEVEE on the Render tab, change the Hair Shape Type to Strip. This way you can visualize the actual thickness of your hair when you set up the tip and root diameter of the Hair Shape, inside particle settings.
Lighting
My intention is to create a sunny hot day with a warm mood and to achieve that I use one HDR from the amazing HDRI Haven and a three-point light setup, especially to fill some of the dark shadows. I like to give the shadows a little bit of tone to prevent them from just being dark, so in my area lights setup I use the setup below to give the shadows a warm color.


Compositing
For the compositing, I separate the scene into four elements.
- Character
- Ground
- Dust
- Volume


There is nothing complicated about the compositing for this image, just simple effects. I use Denoise on the character layer and I like to then mix it with the image that has not been denoised. I do this because usually, the image loses a little bit of detail after the Denoise and so I bring some of it back with a little bit of noise, which I don’t mind having.
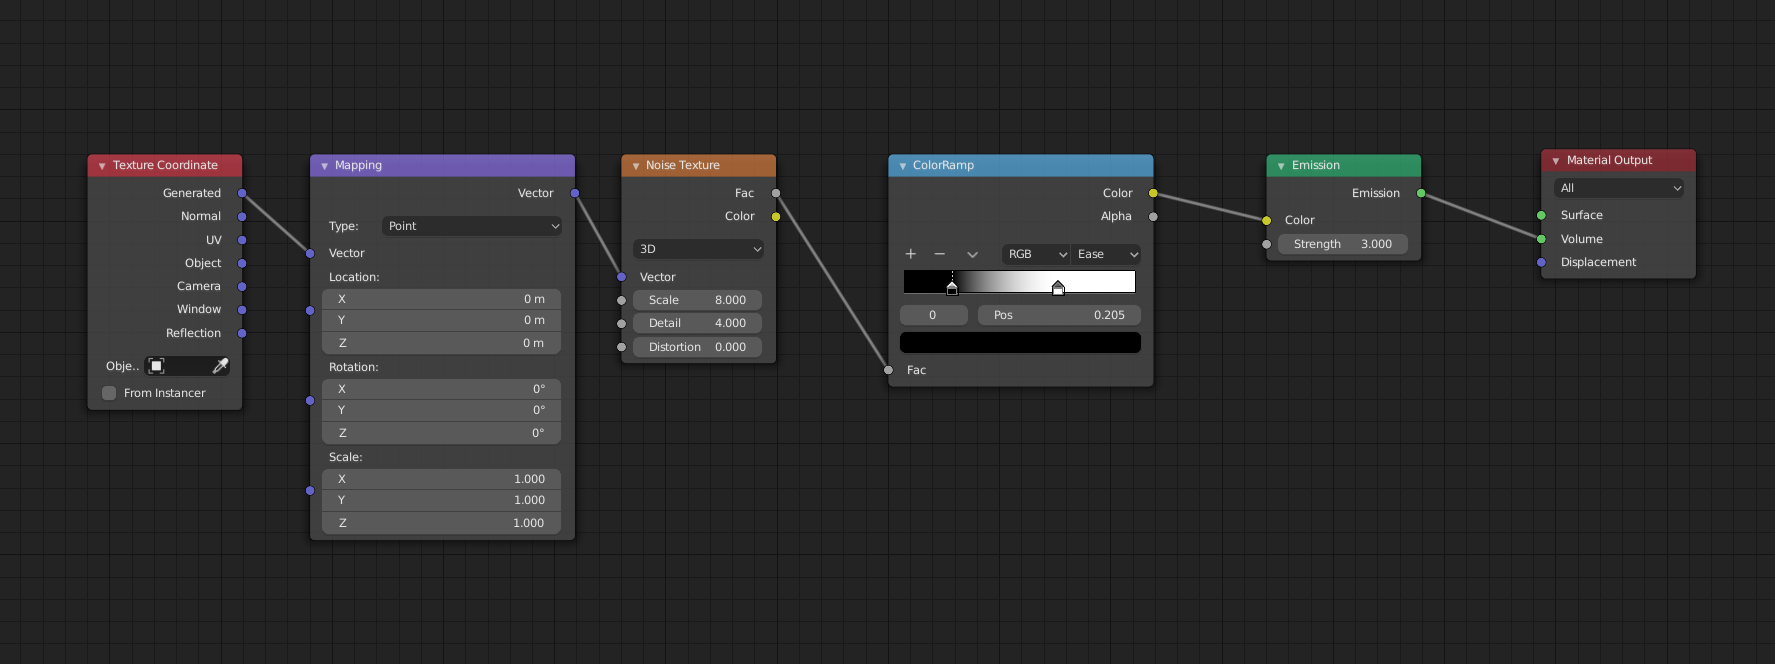
On the Volume layer, which is the little dust clouds close to the feet, I use the emit pass and plug in the Alpha Over factor, which allows me to control the color of the mist. I use the following shader, with an Emission plugged into the Volume Output, just to have a mask I can work with on the Compositing.
Then I join everything with Alpha Over nodes and add a fake motion blur for the ball and the racket using some masking. I add a solid color background and lastly add Glare and Lens Distortion Effects.


About the Author
 Lucas Falcao, 3D Artist
3 Comments
Thank you. Great job!!!
Excellent work
I know your cousin was the inspiration, but the model happens to look like professional tennis player Coco Vandeweghe. Nice work!