

Hi everybody, my name is David, also known in my 3D work as Fhinn. Today I am going to do a workflow overview of a scene I did for a Challenge last month. I won't go deep into technique as there are a lot of good tutorials out there for that purpose. But I hope that this post helps beginners to have a picture of what can be involved in the process of doing a simple render for a challenge, at least my way of doing it. Hope you like it!
A Little About Me
I studied Film Directing and have worked for 15 years on TV series and other programs as Assistant director, Camera operator, and Screenwriter, depending on the project. I decided to study 3D (hard surface modeling and sculpture) and that's where Blender appears, and where I definitely fell in love with the program and what I could do with it. What started as a simple curiosity became my main passion, trying to constantly improve my 3D skills is, at the end of the day, the newest and final objective to achieve.
I've been asked to write a post about an object I worked on a couple of months ago, a "Barometer" (Thx for that Abby!).


But since it's part of a bigger project, I will explain the basics while I go through a quick view of the workflow for the scene that it belongs to: “The Electronaut's Journey”.
The Challenge
The scene is the answer to a private challenge organized by Blendtuts.es, an excellent online school for hard surface modeling led by Oliver Villar. The contest was called "Upcycles", and the only condition was to make an object or a scene using unusual parts of objects. There was a 3-4 week deadline to submit the final render and ".blend" file, so organization was just as important as modeling skills.
How To Start
Every time I face a new project, I take a piece of paper and start drawing ideas, no matter how good you are at drawing, I recommend doing it and incorporating it into your workflow, because even if the result is not the one that will be in your final render, it'll give you a path to walk, and that's all you need to get started ...“a place to go”.
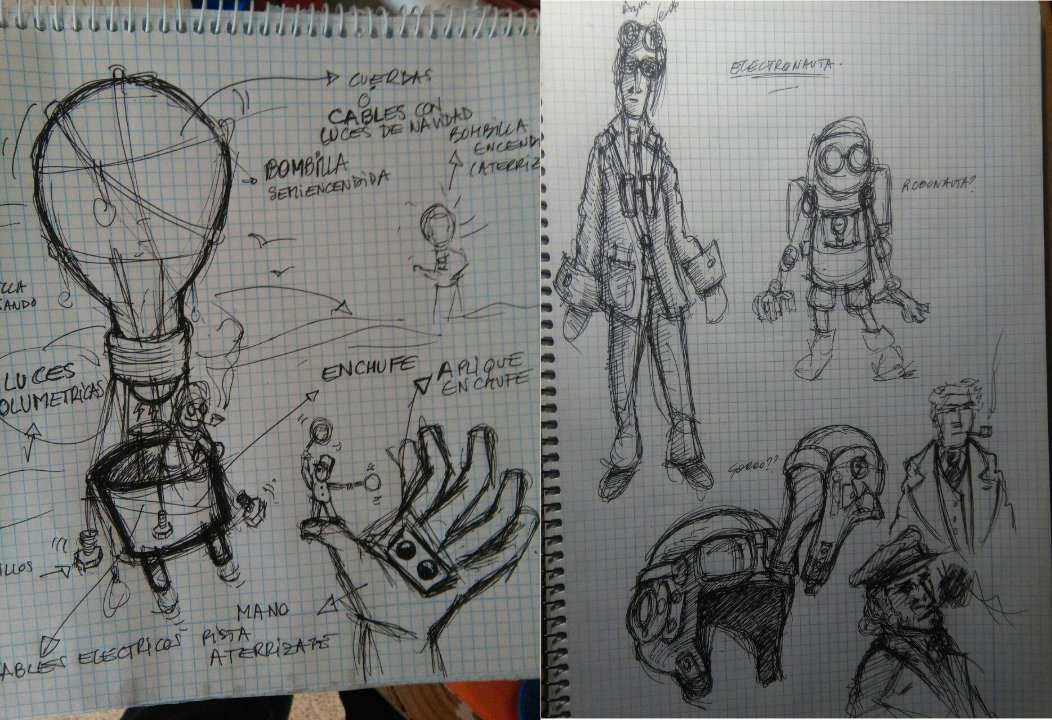
I had the idea to build a balloon with electric elements and an electric bulb, because that would give me the opportunity to play with light and contrast in the scene. At the same time, I knew that the pilot should have an old-fashioned style, and suddenly the title for the piece occurred to me: The Electronauts, “... flying from one storm to another catching lightning and thunder to recharge the light bulb and continue their adventures through the sky.”
Let’s Go! (Modeling)
The only way to achieve goals is by "doing". Keep it in mind, when you feel stuck, just start—movement makes things happen. Once I had the idea, I began to model those electrical objects without worrying about style, simply by making them as realistic as possible. It is always easier to make a stylized object from a realistic one than to do the opposite.


Next was to model the assets that would make these electric objects become an “Electro-balloon”. I took many references from the Internet and watched a couple of movies related to balloons (really… I did it) then I started to mix both worlds.
The ropes were made with bezier curves and the array and curve modifiers, using a cylinder as the base. I took the wood and the rope texture from Poliigon.
The Barometer
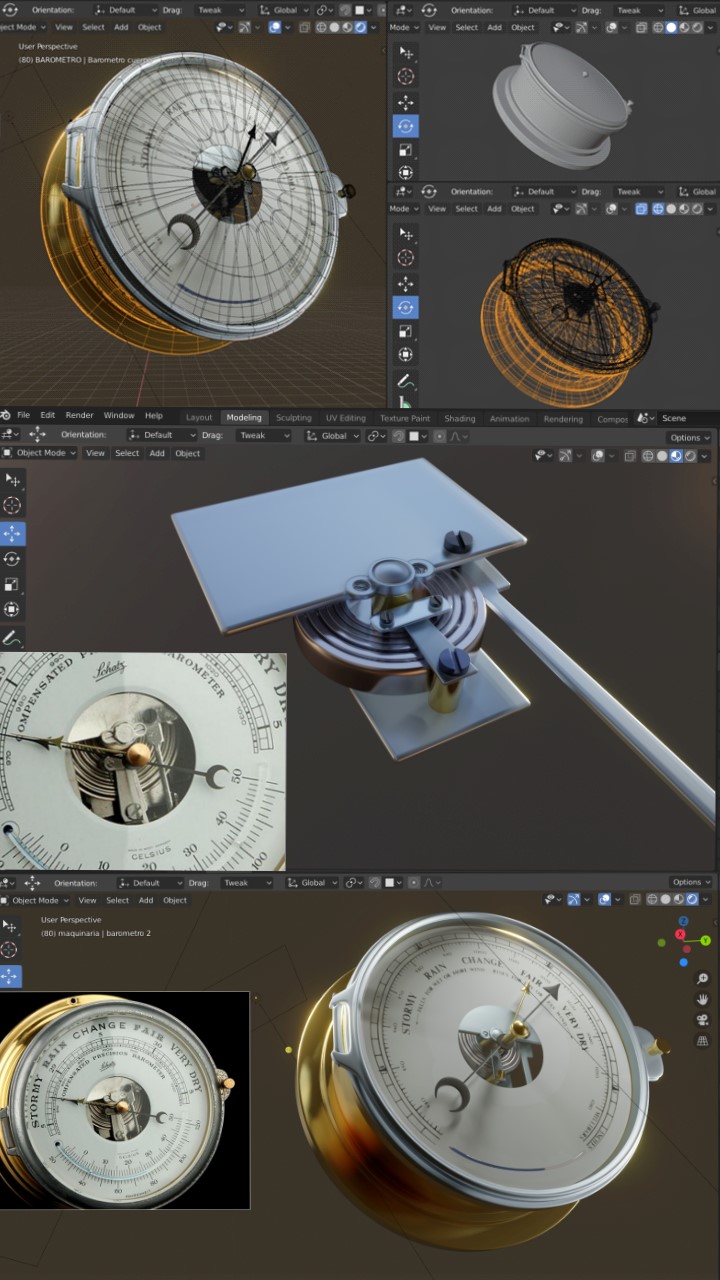
The next step was to build a barometer. I took an internet reference and I replicated it. I started with a circle, filled it up, extruded it, and put each separate part of it in its place. I learned that if an object has different parts, it is better to model them all independently, so I did it—screws, door, etc. I also decided to include the internal machinery, even if you could hardly see it, but it was good practice and I enjoyed the process. A friend from Blendtuts, Luis war, did the letters on the inside (thx for that, mate). For the metal parts, a simple Principled BSDF node may be enough depending on what you are looking for. Just playing around with the roughness, metal, and specular values mixed with the bloom effect can get good results. If you want to age it, that's another story, I suggest Substance Painter. But since it was a challenge, there was no time for that detailing and I had to learn to choose between “what you want…and what you can do”.
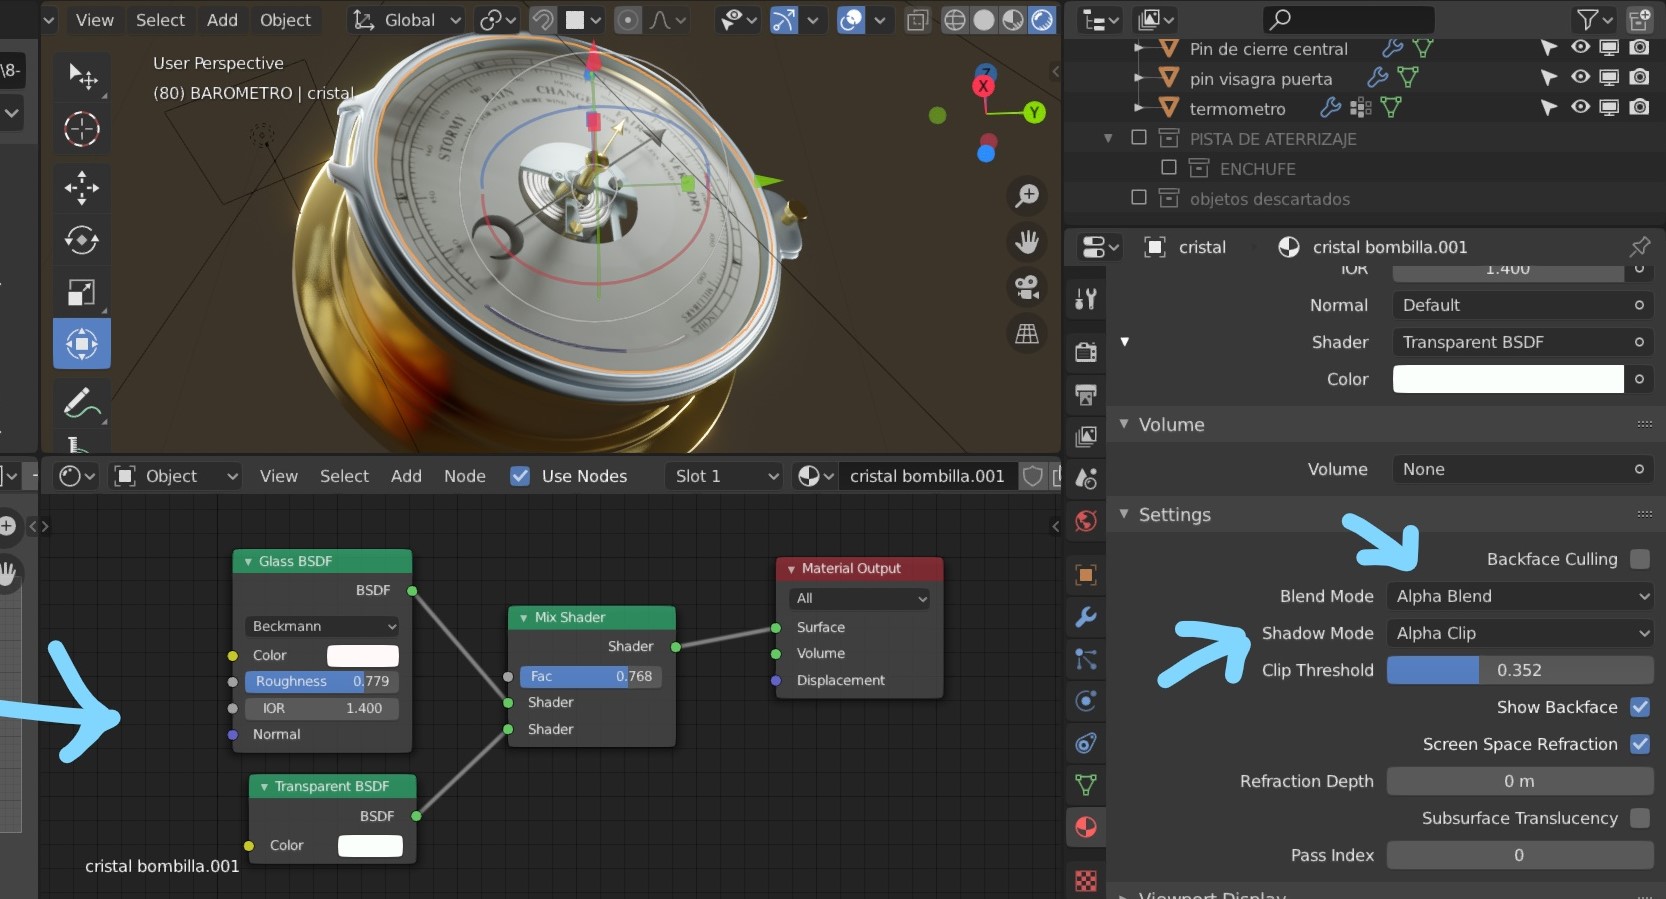
EEVEE glass objects can be tricky—you need to mark in blend mode “Alfa blend”, and if you want it to be transparent you need to check the values in the nodes. Here was my composition.
Finally, I modeled the rest of the objects: telescope, weights, an anchor, etc.


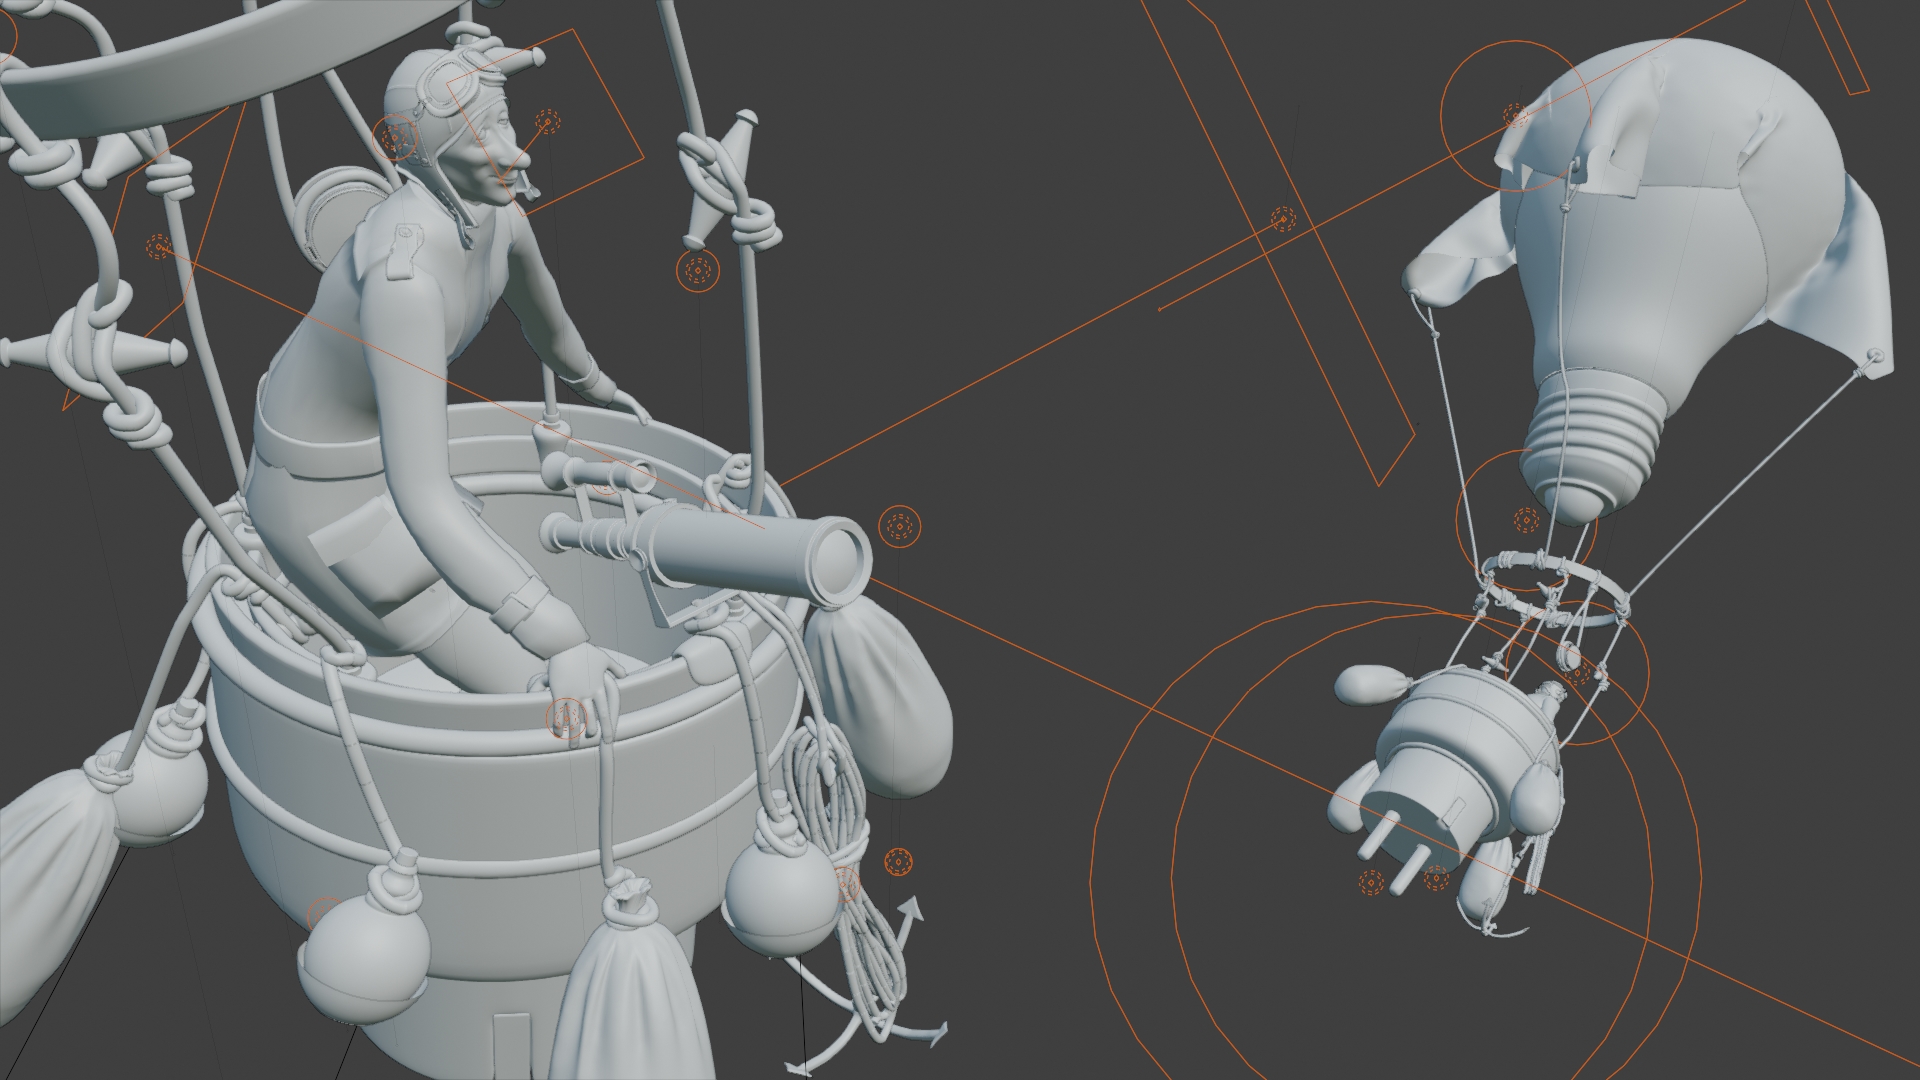
The upper part of the Electroballoon was made by dropping a plane onto the electric bulb, using cloth physical settings, and, once I had the shape I wanted, I just extended the ropes.

Finally, I had something that could fly:
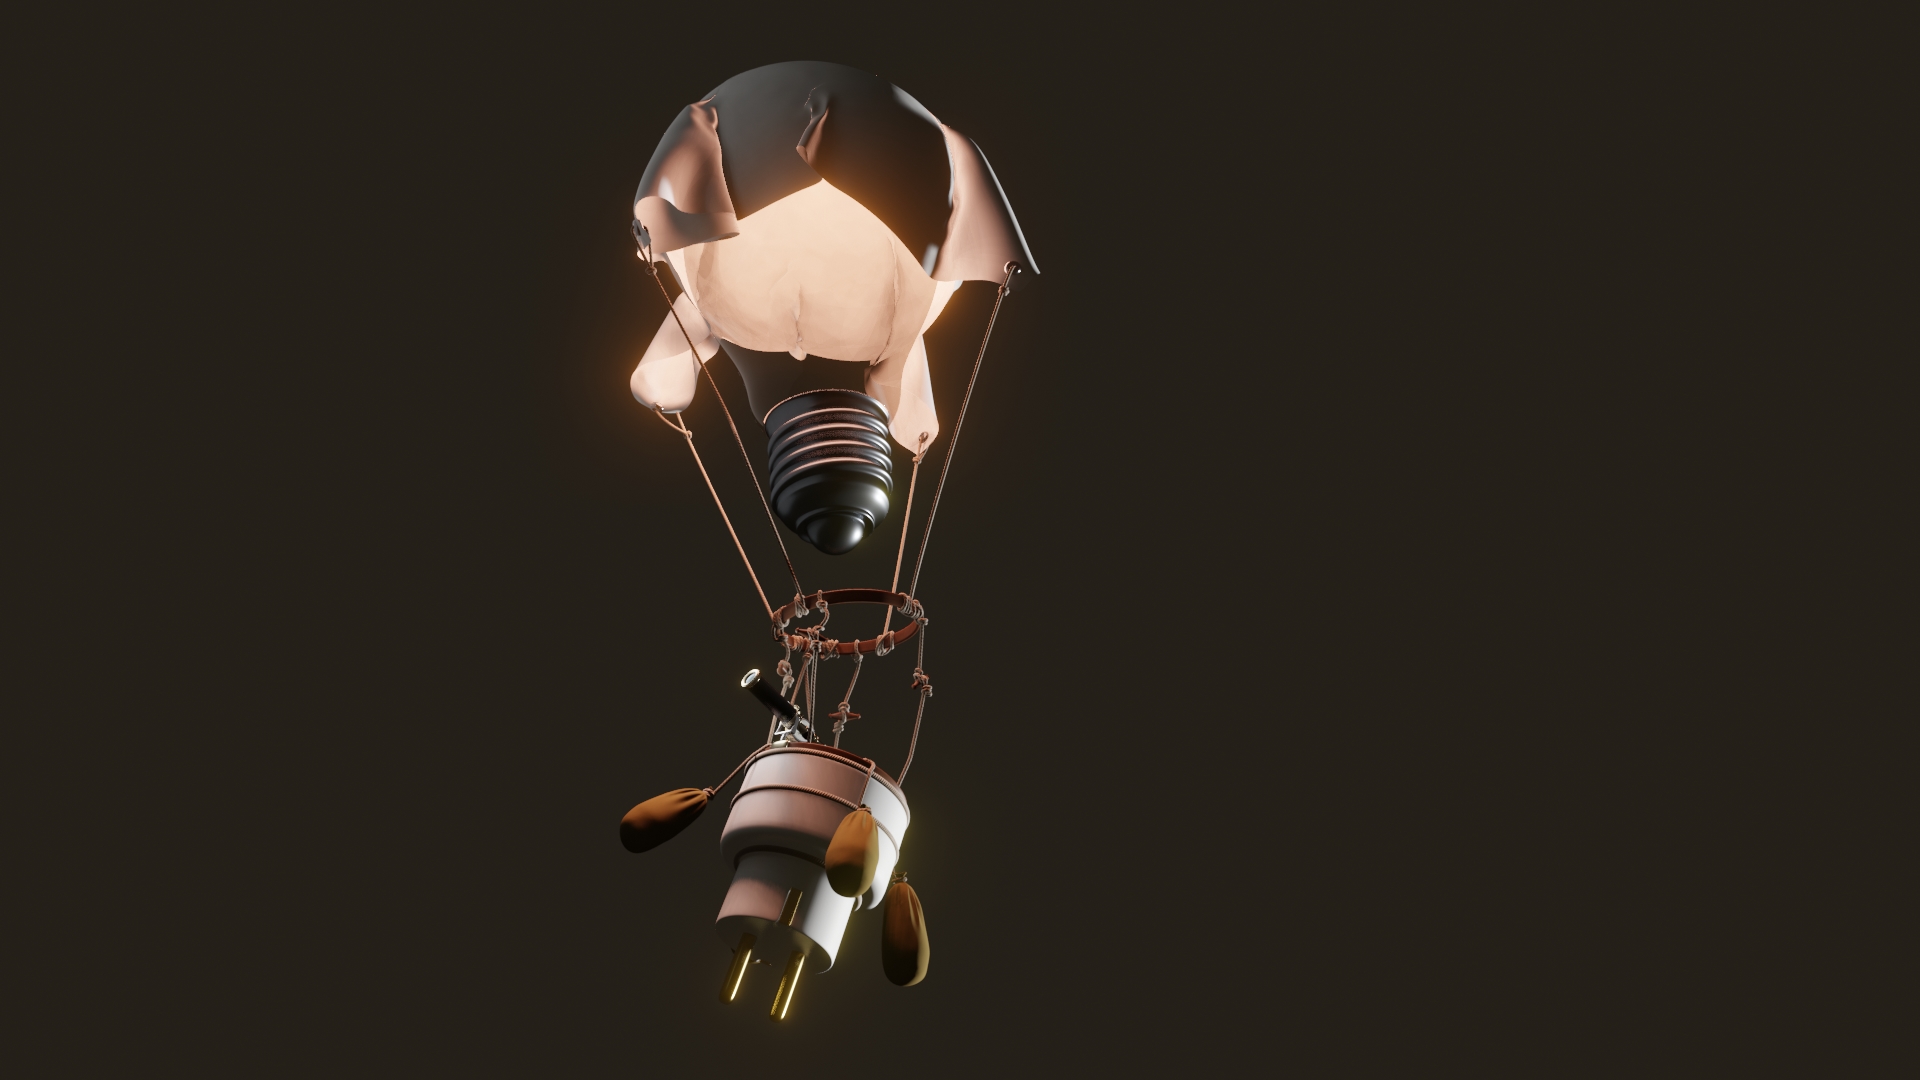
(Everybody knows that if you don't put that cloth on top of the electric bulbs they end up far, far away… ;) ) And It was time to find a brave man to drive it!!
The Pilot
For The pilot, after the drawing lines, I followed the usual workflow for characters: I started sculpting, then retopology, after that I created the uniform cloth, and finally, I used the internal metarig from Blender, the one that has facial expressions, just to pose it; it’s usually more than what you need, and it works.


One of the parts that took me the longest was the helmet since it has many details and I wanted a special one similar to those worn by airplane pilots.


When the job was done, it was time to bring it to life, so again, I started to play with what I had, and the result was this bunch of misfits and air aces. -Gentlemen!... I introduce to you the bravest men you have ever met! ... the Electronauts!-

Up Above, Where? In The Sky…
I used volumetrics to do the clouds, which can be very challenging, but there are a couple of excellent tutorials done by CG Cookie related to that. The problem with volumetrics is that it is hard to control the shape, and many times it is more about how you place them for the composition than how they are made. The good thing about them is that if you place lights on them, you can create a very singular and special ambiance, with the look of old drawings from books, for example, which I tried to replicate. Just take care with the amount of volumetrics in your scene, because the scene is definitely going to be heavier if you use them.

And these are some of the tests I did before the final shot:


Final Step. There Is No Light Without A Shadow, Except In EEVEE...
Yep, when you work light with EEVEE you need to know that it is an engine that does rasterization instead of ray-tracing (Cycles process). You are going to miss a lot of light and shadow detail, and that’s bad, but the good news is that what could be a problem can be your advantage if you know how to use it. Normally, I use lights while working with EEVEE as if they were brushes from an oil painting. That’s not the usual way to work, but it can give very good results if you are building a fantasy scene. As you are not going to have all of those rebounds of light, you can control it and literally paint your scene with those points of light, reinforcing with a new light the place where you understand should be the rebound, or just using different types of lights to place layers of light colors that, mixed with the volumetrics, will fill your scene with magic. Also you have to probe light options and try different tricks and techniques to get more accuracy, if that’s what you are looking for; it was not the case for this project.
And more or less that’s it! There is only one more thing to do:
Last Chapter: You.
If you have reached this ending part, it means that you're really interested in 3D. The Electronauts are flying away into the research of new adventures, but I still have you here, so my last words are for you. It was a long post…I hope that something of that workflow preview helps you to improve and encourages you to make your own creations. If that’s the case, the best way to give in return what you receive is to make it count by doing amazing 3D scenes. It’s easy, just grab your computer, switch it on, run “Blender”, and follow your dream. See you!
About the Author
 Fhinn, 3D artist
10 Comments
Well done Fhinn! It's been a great work and a very interesting post. Keep on blendering! We want to see much more of your dreams ;)
Thx Ozy! :)
This is awesome. Thanks for the insight Fhinn. Great work!
Thanks to you for your time and feedback LISO!
Hermoso trabajo David, la verdad desde que te vi presentar el bosquejo inicial, te animé muchísimo, tienes buenas ideas, la verdad merece esta gran mención, y me hace sentir orgulloso de tu trabajo, pues soy al igual que tu, uno mas de los fieles usuarios de Blender, y formamos parte de una comunidad muy colaboradora en todo aspecto.
Espero prontamente ver otra pieza tuya por acá.
Un abrazo y gracias por compartir tu alegría a esta mención, por parte de Blender Nation.
El que está agradecido por tu ayuda en el proyecto y por tu apoyo soy yo Luis war :) La comunidad de Blender tiene algo especial como dices, y sus usuarios son muy generosos, el siguiente trabajo en ser mencionado debe ser el tuyo! ;)
Always magic Fihnn!
Hey Jbdlink! :) Thx
I don't know a thing about 3D, but your results are simply spectacular! Congratulations for having found a true passion and working hard to achieve your goals. Thanks for transmitting such enthusiasm!
Thanks to you! You're very kind. If you knew nothing about 3D..then is time to start :D Greetings!