
About
My name is Henderson Weffer, I’m 30 years old and I’m from Venezuela. I have been working for 8 years in the 3D industry, starting with 3ds Max, Cinema 4D, and finally, I have found the right place with Blender. Now I have worked with Blender for 4 years and I can say that it’s the best software experience that I have had. I worked for three Animation studios as a 3D animator for kids’ shows, commercials, and music projects (Rabipelao Studio, Sublime Studio, and Colory Animation Studio), and now I’m on my own as a freelancer, doing character design and animation.
Hardware Configuration
CPU Intel i7 8750H, GPU Nvideo Gforce GTX 1060 6GB, 16GB RAM, OS Windows 10.
Inspiration & References
Ava started out as a concept of a character commission for a VR app. Among several proposals, Ava was not selected, but I liked it so much that I decided to take it as a personal project, changing various physical aspects that would help me achieve styles that I had not tried until now.
Once the decision had been made to make it a personal project. I started looking for references to give it a personality and style. I am a lover of metal music, so it was not very difficult to know the direction it would take.
Modeling
I always start my characters with a little blocking to determine their volume. Before, I used to model directly on the concept but since I'm not a great illustrator, this approach resulted in flaws in the proportions. So working directly with the sculpture I have a better experience. For this process, I use ZBrush since it is the program that I am used to for sculpting.
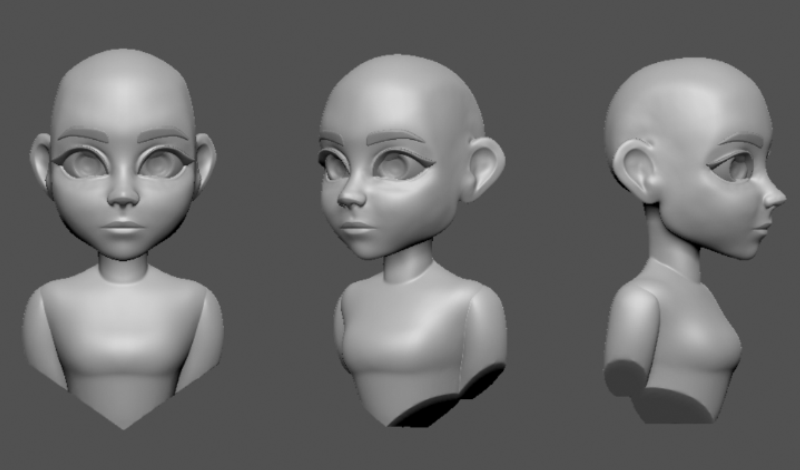
Since the character would not be animated, I made a quick topology using the polygroup function so that I could continue the texturing process in Blender.
Texturing
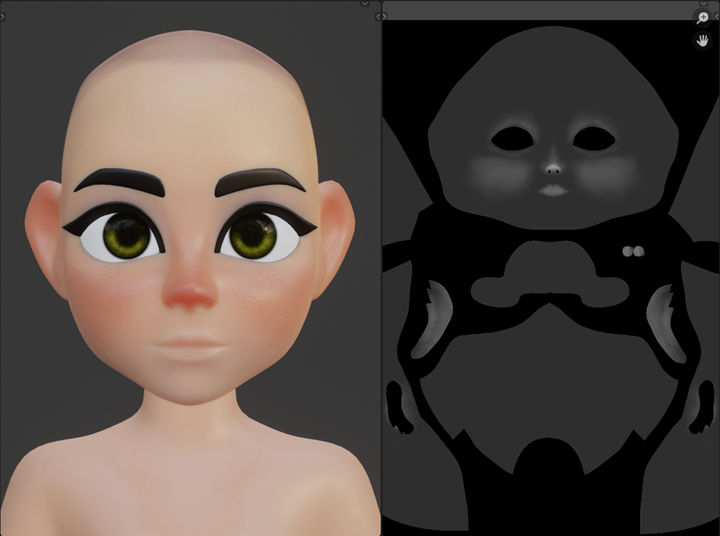
A great tool when it comes to establishing a base skin color is to follow James Gurney's color study, as shown in the following image.
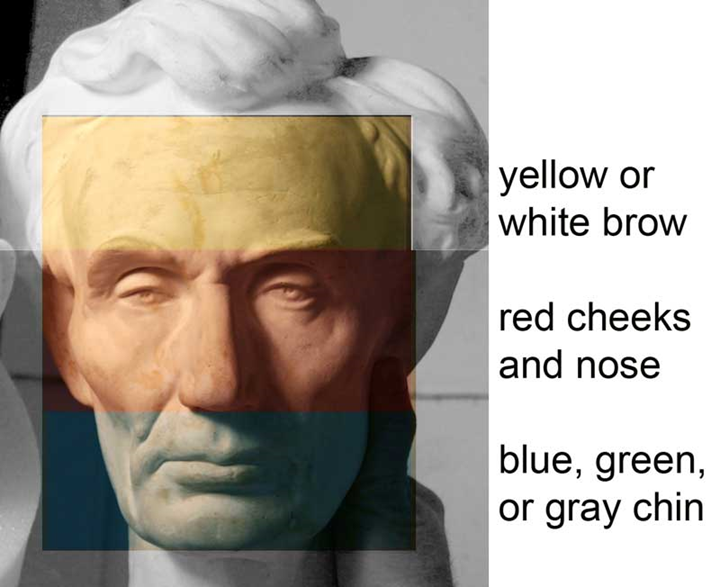
From Color Zones of the Face by James Gurney
Using a brush strength of 0.444 and a pressure-activated brush, I gave it a good base skin finish.
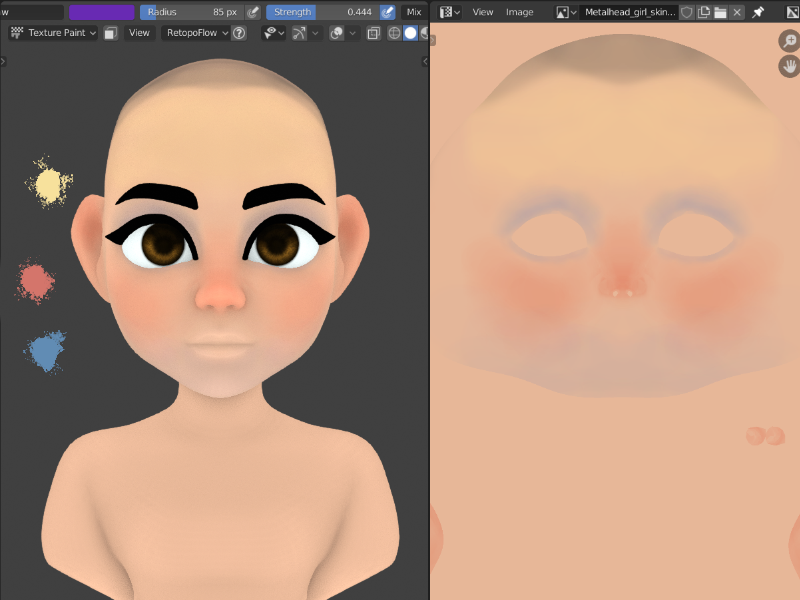
Even with this color study, the skin was still looking flat so I decided to add pores, freckles, and imperfections.
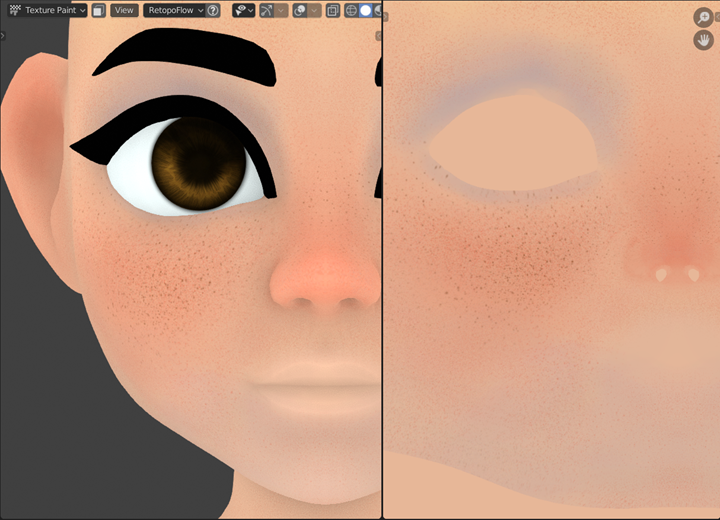
Using the same texture map, with the hue and saturation nodes at 0 and a bump node at normal, I achieved a more realistic porosity.


Very good. I already had the base texture, but it was not yet the end. Next, I added a Subsurface map that would help create a more realistic skin when it was lit. For this map, you have to highlight the areas where light passes through the skin most. But in this case, I exaggerated the nose to help a little more when it came to applying makeup to the character. The ears are also a big point where light passes through the skin.
For makeup, I found some very cool references that seemed to fit her style.


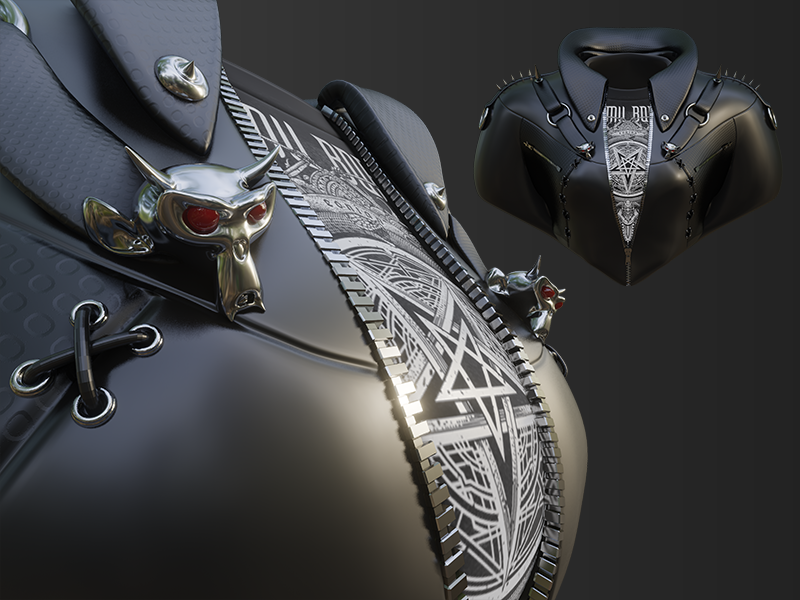
For clothing, I modeled a leather jacket without references—I just improvised until I was convinced of it. Then I added a demonic Suzanne as an easter egg for Blender users.
After testing various illumination settings and adding depth of field with a focus on the eyes, I found this to be the best-looking setting.
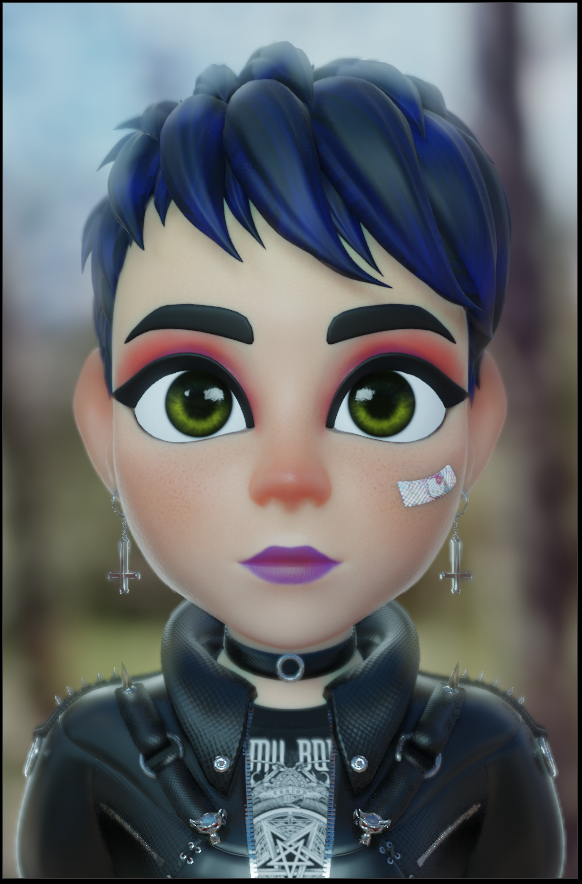
I used Metarig to give it more life and attitude with some poses. And after some adjustments of contrast, levels, and hue-saturation in Photoshop, this is the end result of Ava.


If you want to see the final render in 2279x 3476 resolution, you can find it here.
Also, you can follow my works on Instagram.
Thank you so much for your time. This is my first Behind the Scenes, so I hope my process can be helpful for you. I really enjoyed making this character, as always.
About the Author
 Henderson Weffer, Character designer and animator
3 Comments
Super nice work!!! Just check your IG and you got all kinds of nice characters, also your animation look very well made.
Amigo que trabalho incriável me ajudou muito amigo
thank you for posting usefull article