Behind the Scenes: Lamborghini Terzo Millennio
About the Team
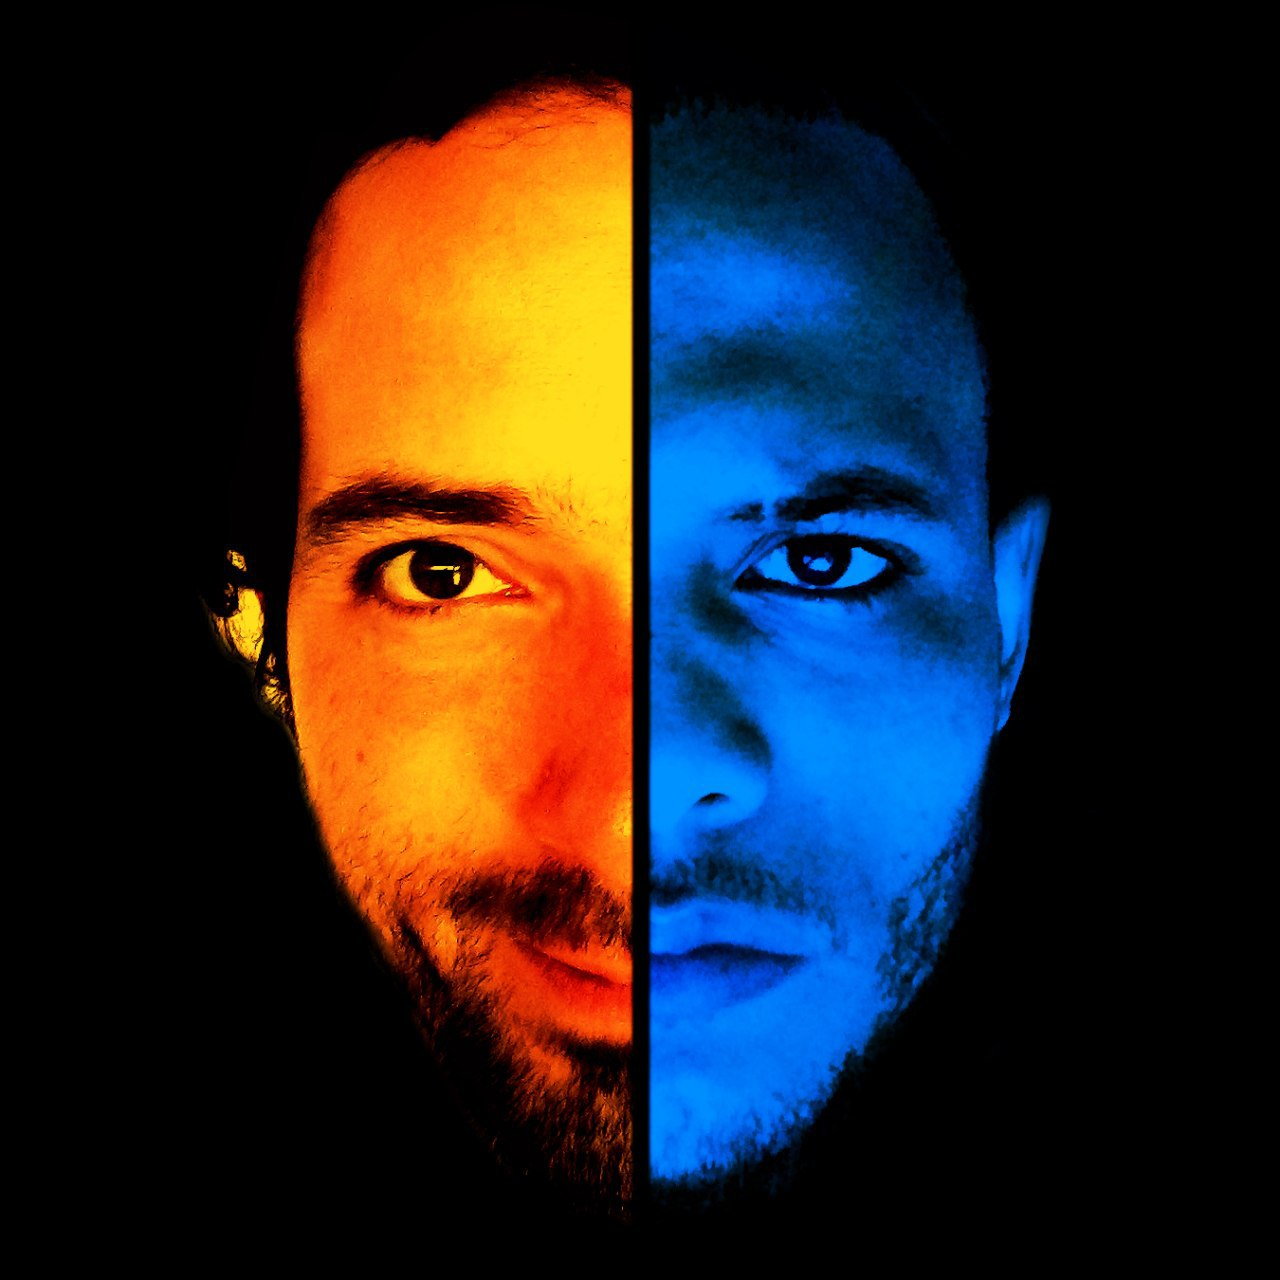 Hi everyone, we are Yorvin Luna and Davide Tirindelli, Blender users from the Dominican Republic and from Italy. We’ve been doing projects for quite a while now, most of which (if not all) you have already seen here on BlenderNation in the past. We are both self-taught artists, and we try to challenge ourselves with different kinds of projects so that we can learn as much as possible, while never allowing things to become boring. We upload our finished projects on Gumroad and Cubebrush so that other users can have access to them, either for free or with a donation of their choice.
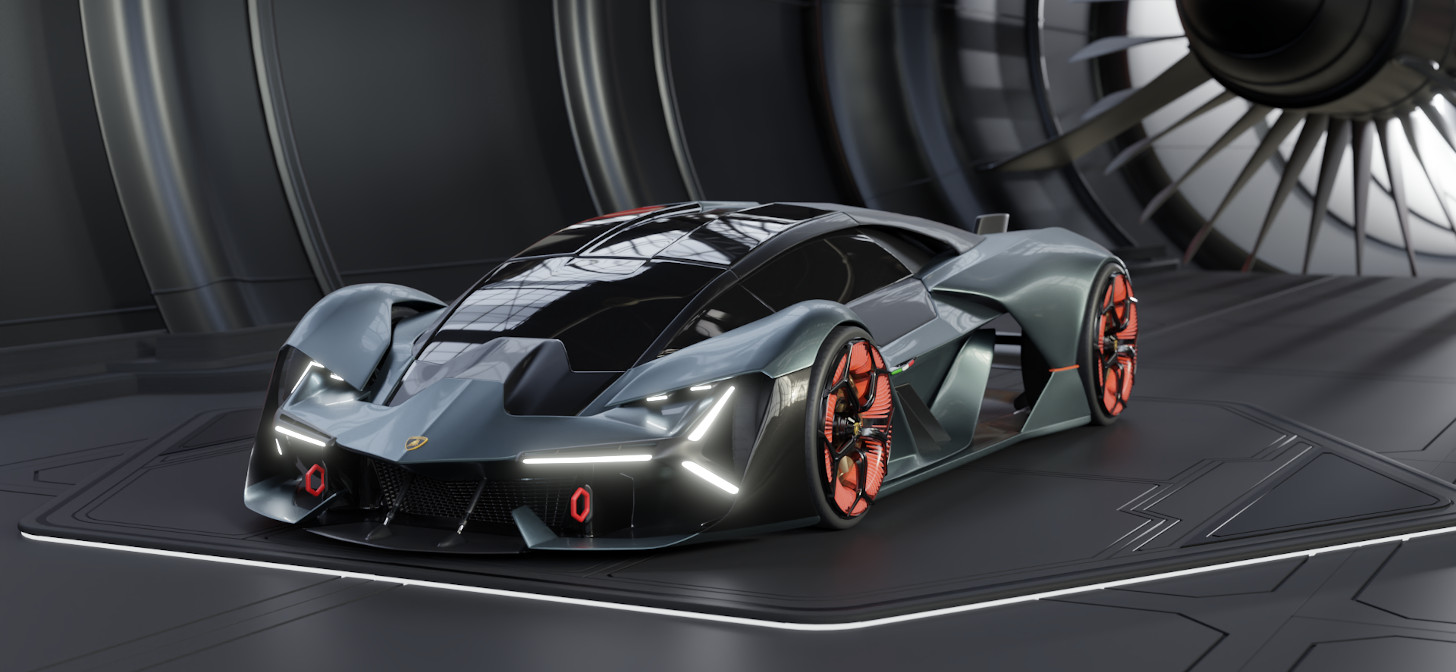
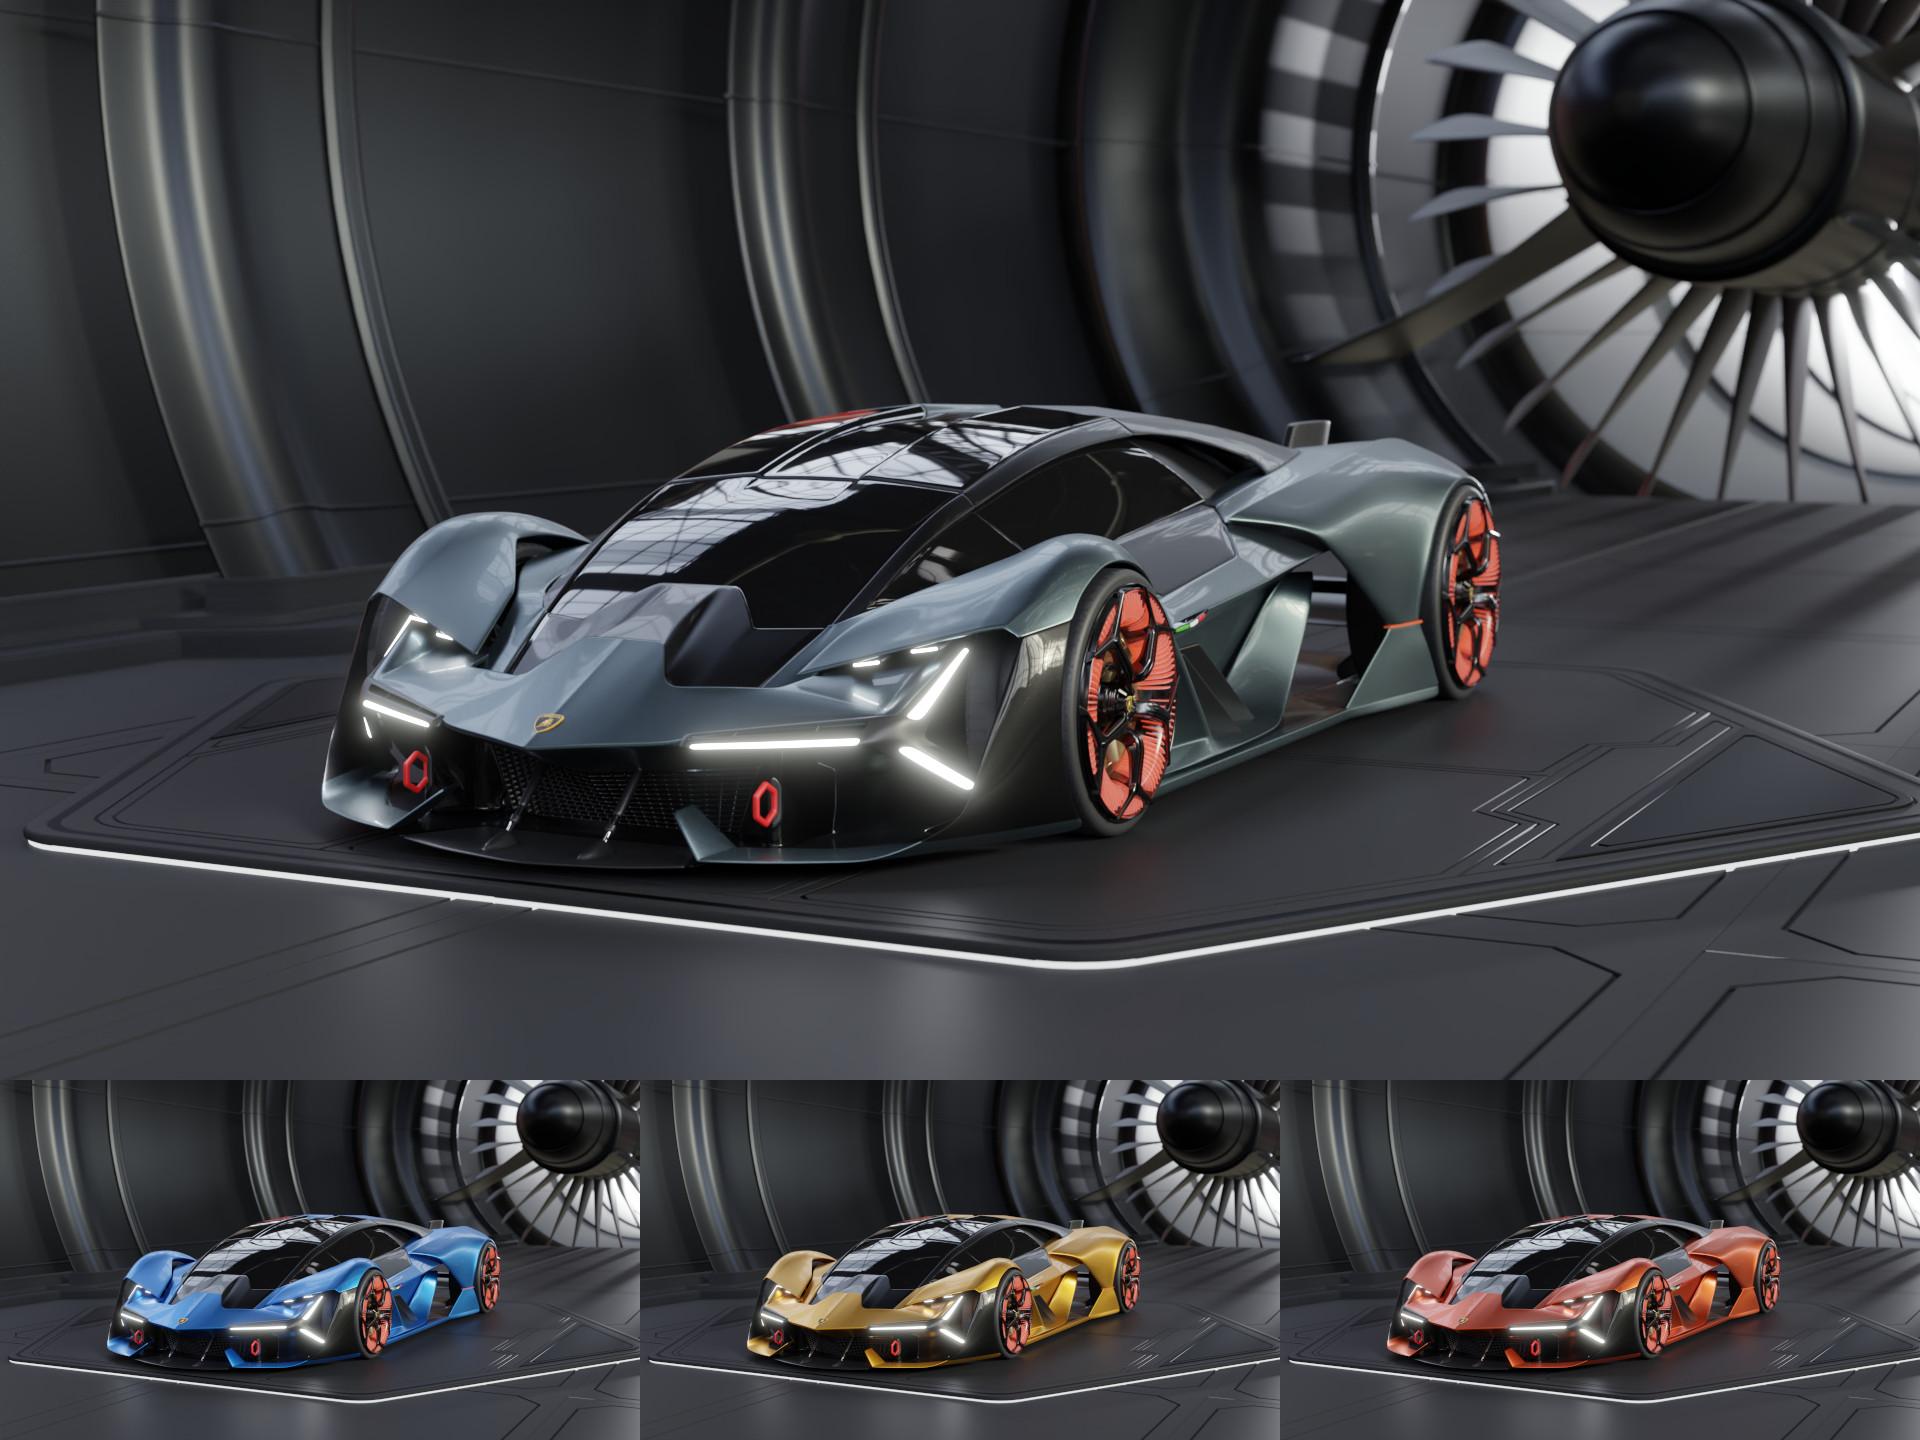
This time we challenged ourselves with one of our favorite sports cars, the Lamborghini Terzo Millennio. The TM was an easy choice—we both like great-looking cars, we knew people would love it, and we knew we would learn a lot modeling it.
Modeling the Car
All of the work for this project was done using Blender. Yorvin is without a doubt the best (and most experienced) of the two of us at modeling cars, so he took the responsibility of creating everything except the tires, which were done by Davide. We both had to download a lot of reference images to try and recreate the details, and also, we watched some free YouTube tutorials by both Blender and non-Blender modelers, to try and understand as much of the workflow as possible before starting.
To model the car, Yorvin used blueprints and the watched some videos of the car itself to get the most accurate shape possible. But blueprints and those videos alone were not enough, so Yorvin also had to use many reference pictures of the real world car, from live demonstrations or events; only by looking at those could he recreate the small fine details and some of the complex parts that were unclear in the blueprint.
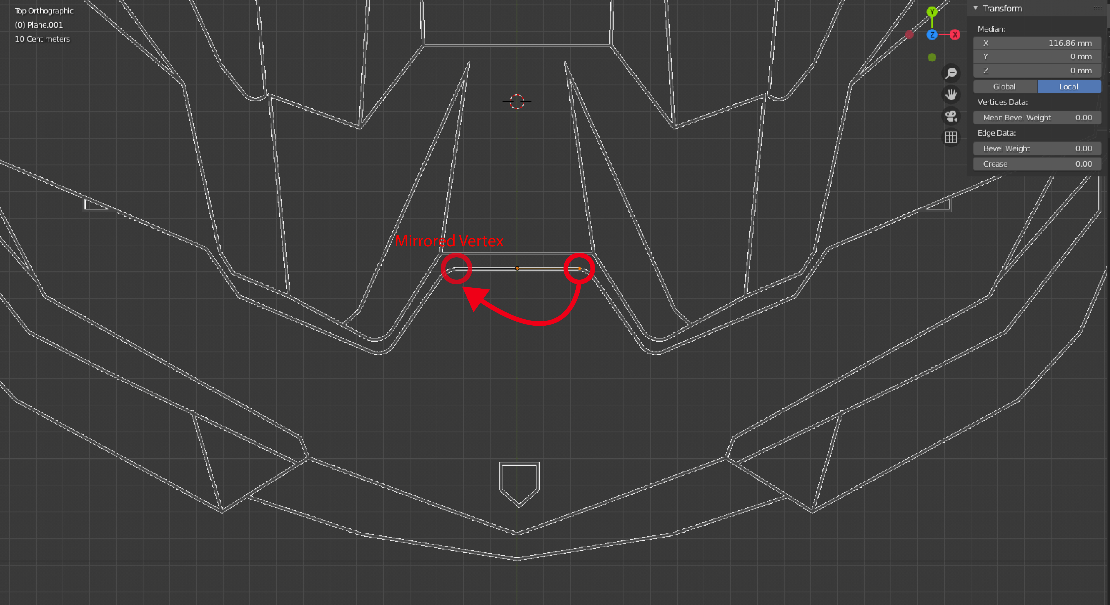
The car modeling process is always begun by adding simple vertices from the top view. Due to the blueprint’s symmetry, to avoid doing double the work, it’s common to use a mirror modifier (using an empty as a mirror object) and then a subdivision surface modifier (see the image below with the red circles). Yorvin usually starts the modeling from the hood, because that part works as a perfect reference to model the rest of the car. Once a piece of the car is finished (in this case the hood), using the reflective red matcap is very useful to see any surface imperfections. Finally, a solidify modifier is added to give the piece thickness.
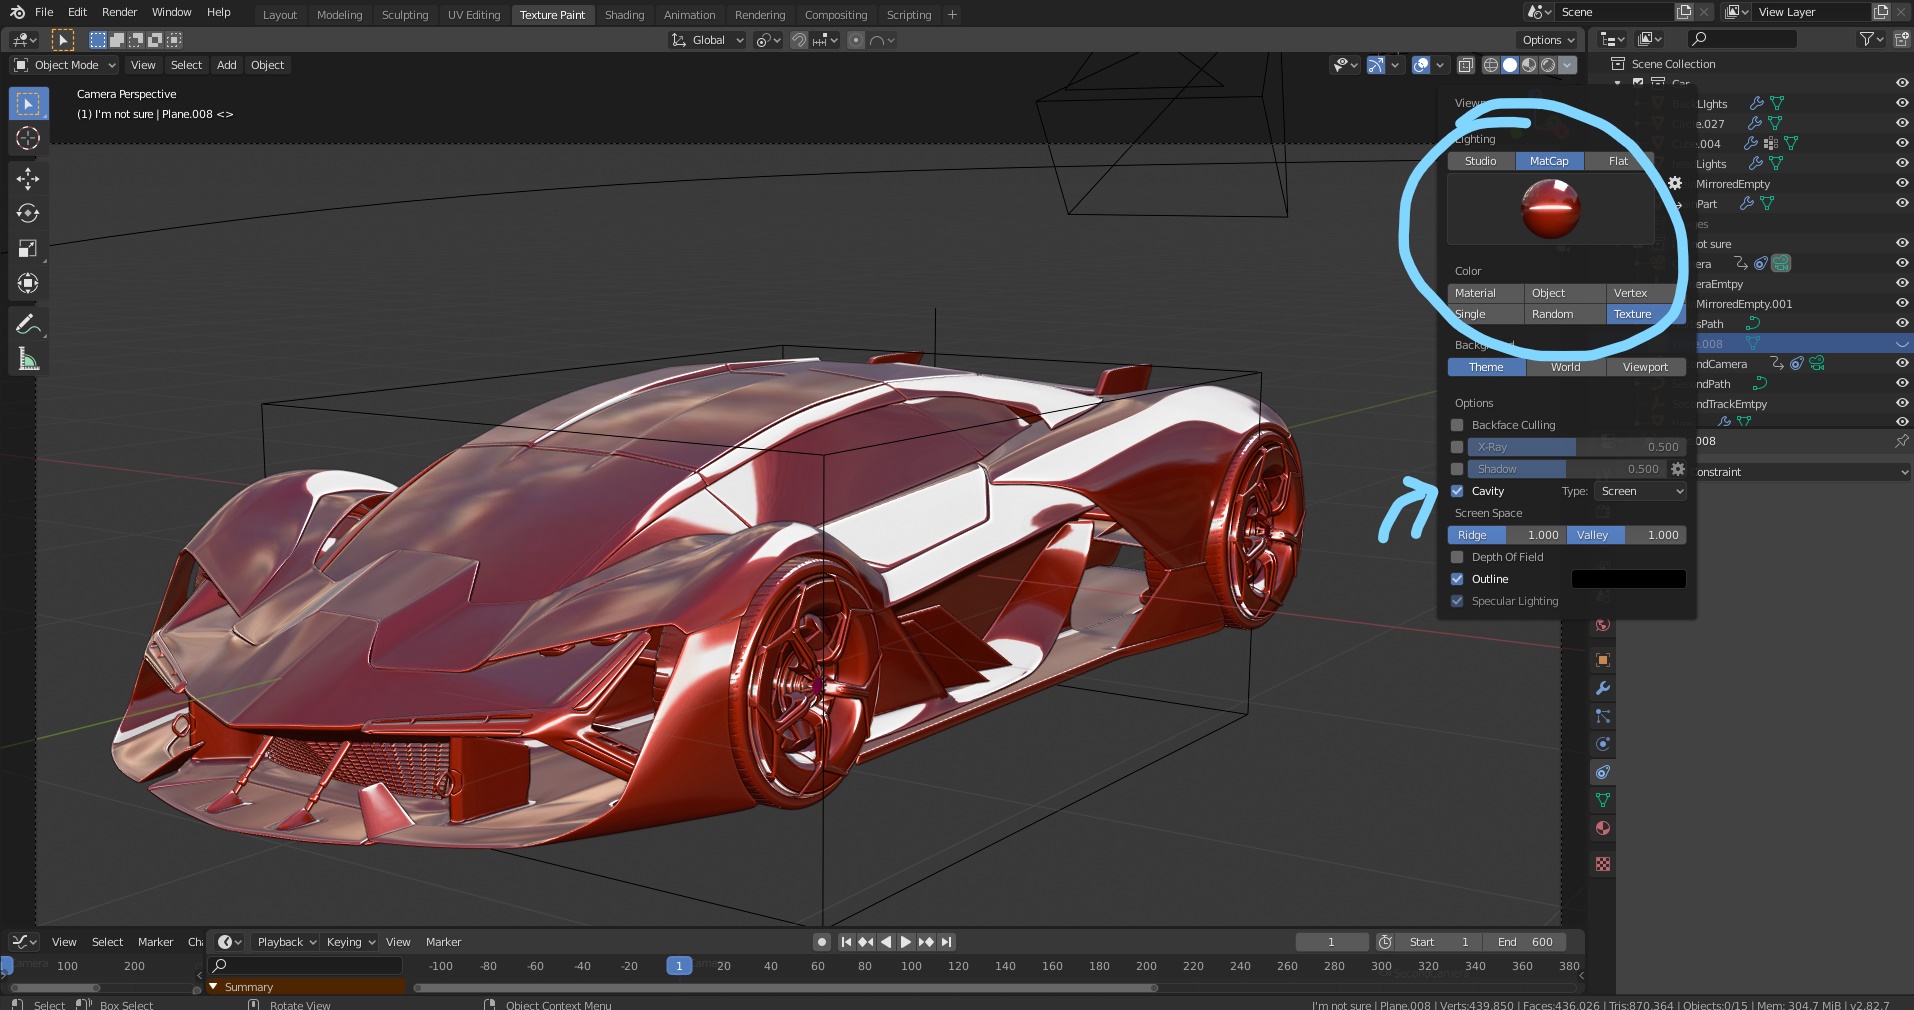
Modeling the whole car usually needs a high number of pieces, and the process requires precision in following the blueprints. Different parts of the car will have different modifiers, and in the end, to clean up the finished model and reduce the number of pieces to a manageable amount, the parts with the same modifiers are joined together. At last, an empty object is used as the main parent for all the parts, to allow easy control when moving or rotating the whole car, and also in case of animations.
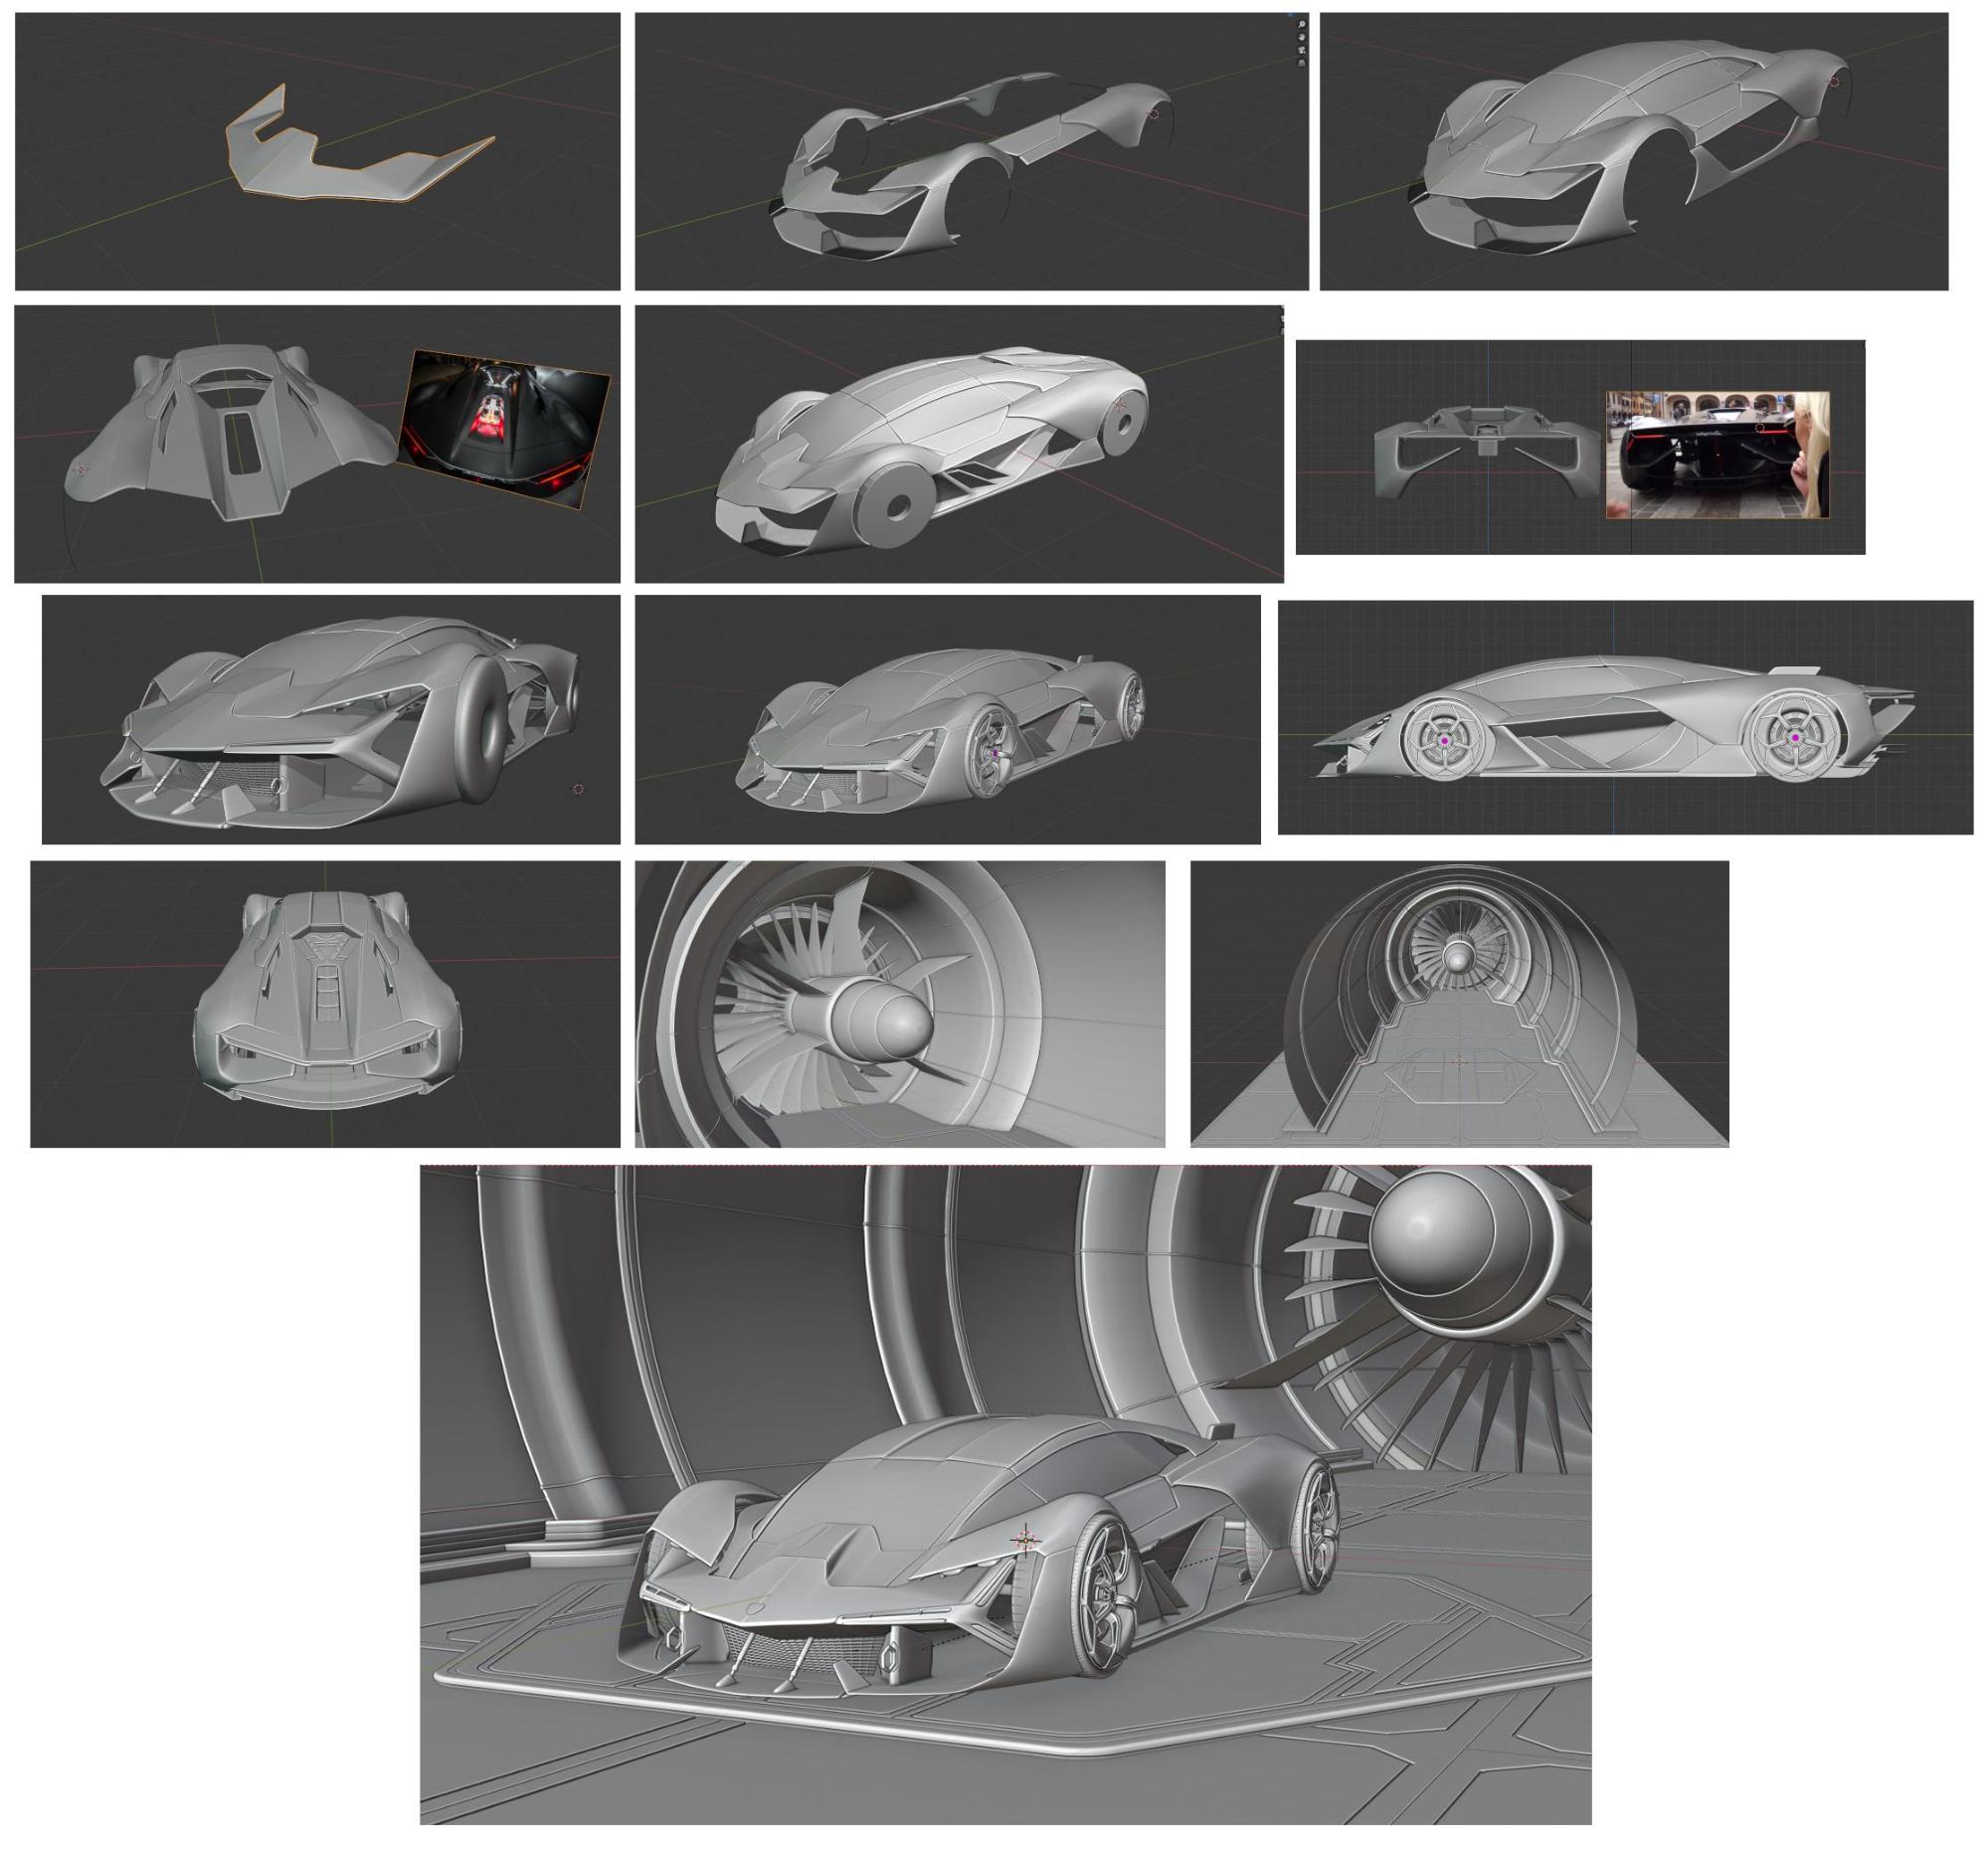
This pic shows the progression in modeling the car:
Lighting + Materials
With the modeling phase complete, Yorvin passed the file to Davide to go on with the materials and lighting phase.
For our other car models, we used a generic circular stage, but we realized this one deserved more than just that. At first, we made only the hexagonal futuristic platform, with the paneling underneath it. For the main lighting, we tried several HDRI images (from HDRI Haven) and combined two of them to achieve a good-looking result, with some interesting reflections visible on the car.
The car paint material was based on a previous one we did for another model: we used that as a starting point and tweaked it mostly just in the graininess effect, and in the amount of reflections. Davide tried the material under different outdoor HDRIs (again from HDRI Haven) to make sure it would work well under other lighting conditions too.
Final Location + Finishing Touches
When we showed the car and the platform to a friend, he suggested trying a wind tunnel as the main location; we modeled that quite quickly and it proved to be a very interesting match with this car. Never underestimate the power of teamwork, a creative person giving an extra idea can really add a lot to the finished result, as happened in this case.
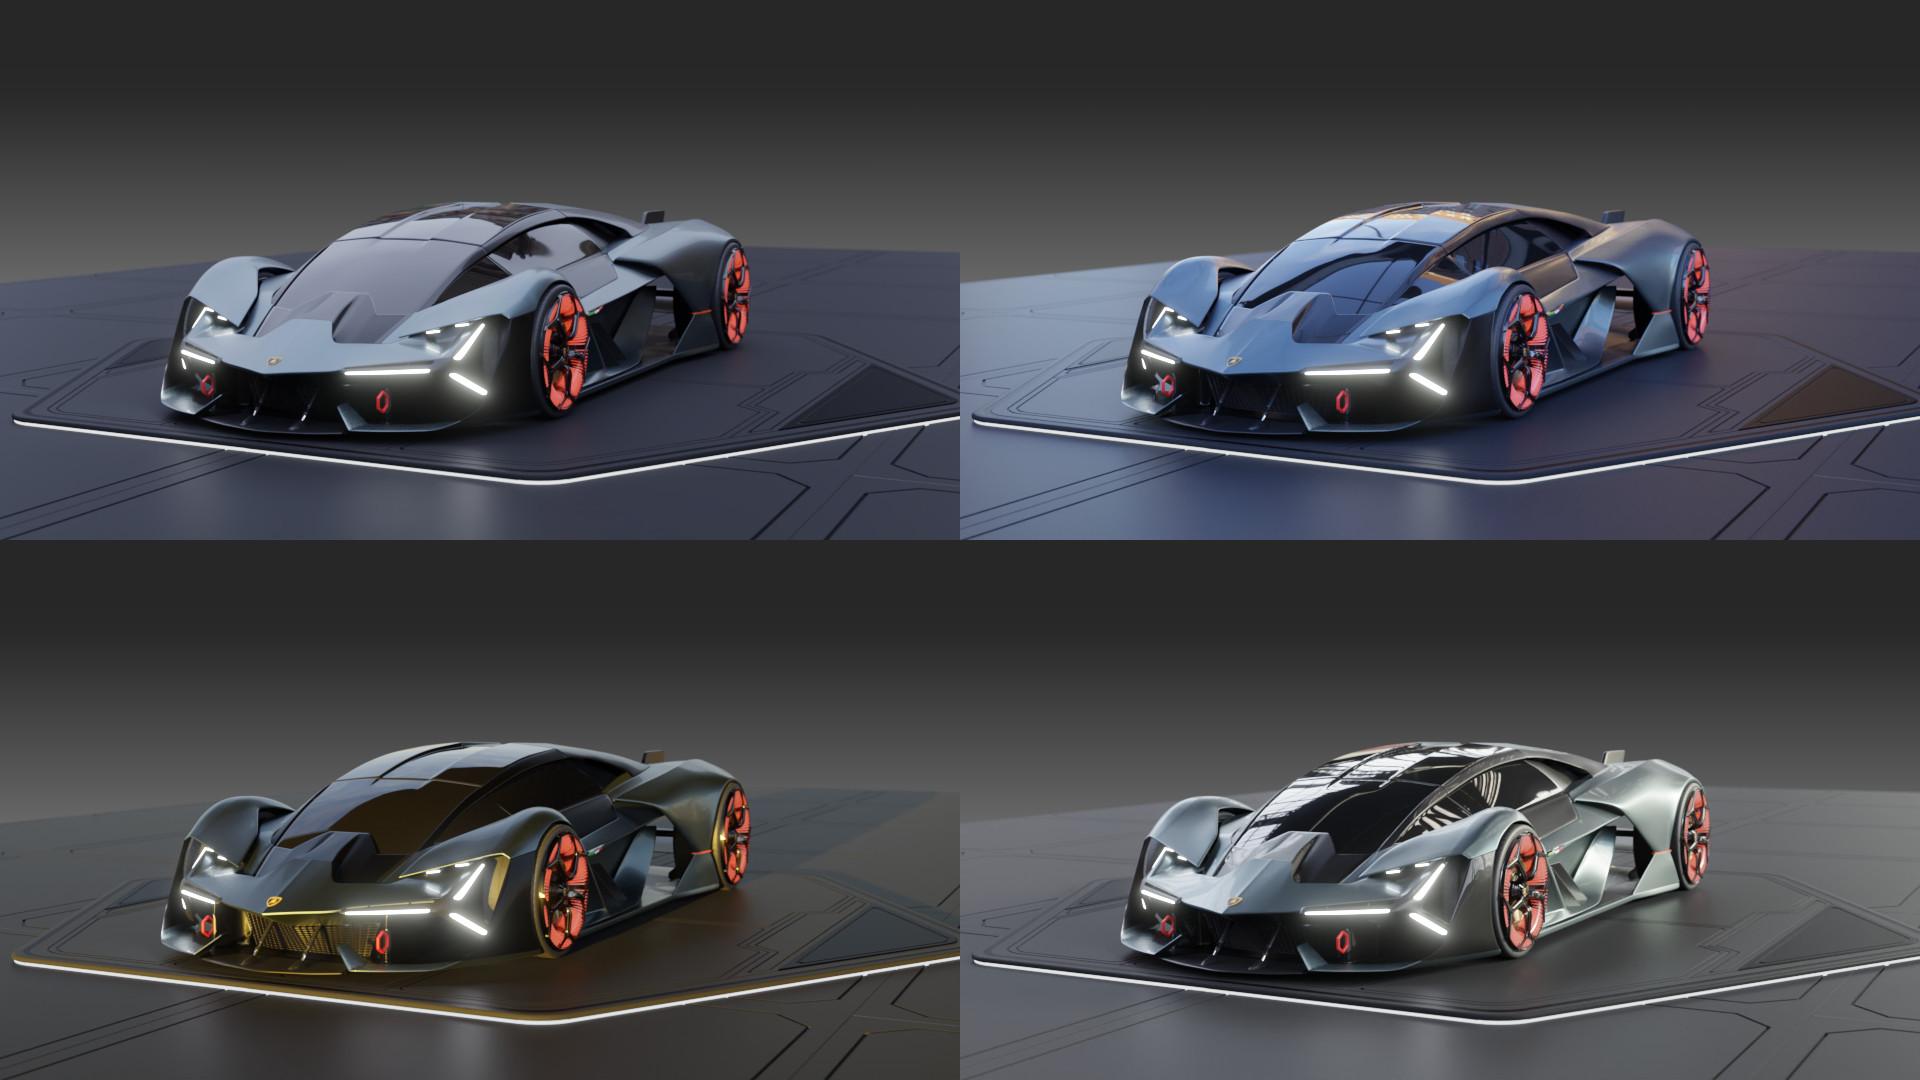
Lastly, we corrected a few details in the car model, tried a few extra color variations for the main paint, and at that point, we called the project done.
The final renders were all done with the 2.83 Alpha as it has adaptive sampling, which gives a very high-quality final image while reducing the render time considerably.
The project files are now available for anyone to download, either for free or with a donation of choice; hundreds of people have downloaded it already, and some have used it to complement their own artwork.
Thank you all for taking the time to read this Behind the Scenes. We tried to make it informative while also keeping it light and quick to read. If you have any further questions or curiosity about any of the steps in the making-of process, feel free to leave a comment. Yorvin and Davide will read it and reply to you.
Thank you again, and see you all in the next projects :-)!
About the Authors
 Yorvin Luna Wisky, Blender modeler since 2018, living in San Cristobal – Dominican Republic
 Davide Tirindelli, Blender modeler since 2014, living in Udine – Italy
Links


You guys rock. Thank you for what you are giving to the community. I wish you all the best.
Thank you very much :-), glad you appreciate what we are doing!
Thats awsome thank you for sharing it i like it very much, but I have a question can you make an Volkswagen I.D. R
thank you, glad you like the model!
about the Volkswagen, Yorvin is currently taking a break from cars as he is focusing on other projects, and also i just checked, i couldn’t find the blueprints – without those it’s hell modeling a car, especially this one
but if you happen to find the blueprints, let us know, if we don’t have too many other projects already we might give it a try!