
Behind the Scenes: New Strings
About Me
My name is Rudi and I live in the south of Germany. I have been working in advertising and software development for about 25 years, mainly designing web pages, web applications, mobile apps and graphical user interfaces for industry software. In the last couple of years, I have also been dealing with the visualization of industrial applications, 3D-modeling, and animation.
I first came into contact with the world of 3D during a one-month crash course in Lightwave 3D as part of a professional training program. Since I did not see any application in it for my further professional career at that time, I didn’t pursue this matter. In my current job at a software development company, however, the desire arose to visualize the applications that we implement for our industry clients. Then I got the chance to learn Blender during my working hours, which was no problem thanks to the great community and the numerous tutorials available. Fascinated by the possibilities that Blender offers, I quickly started to implement my own projects.
The Idea
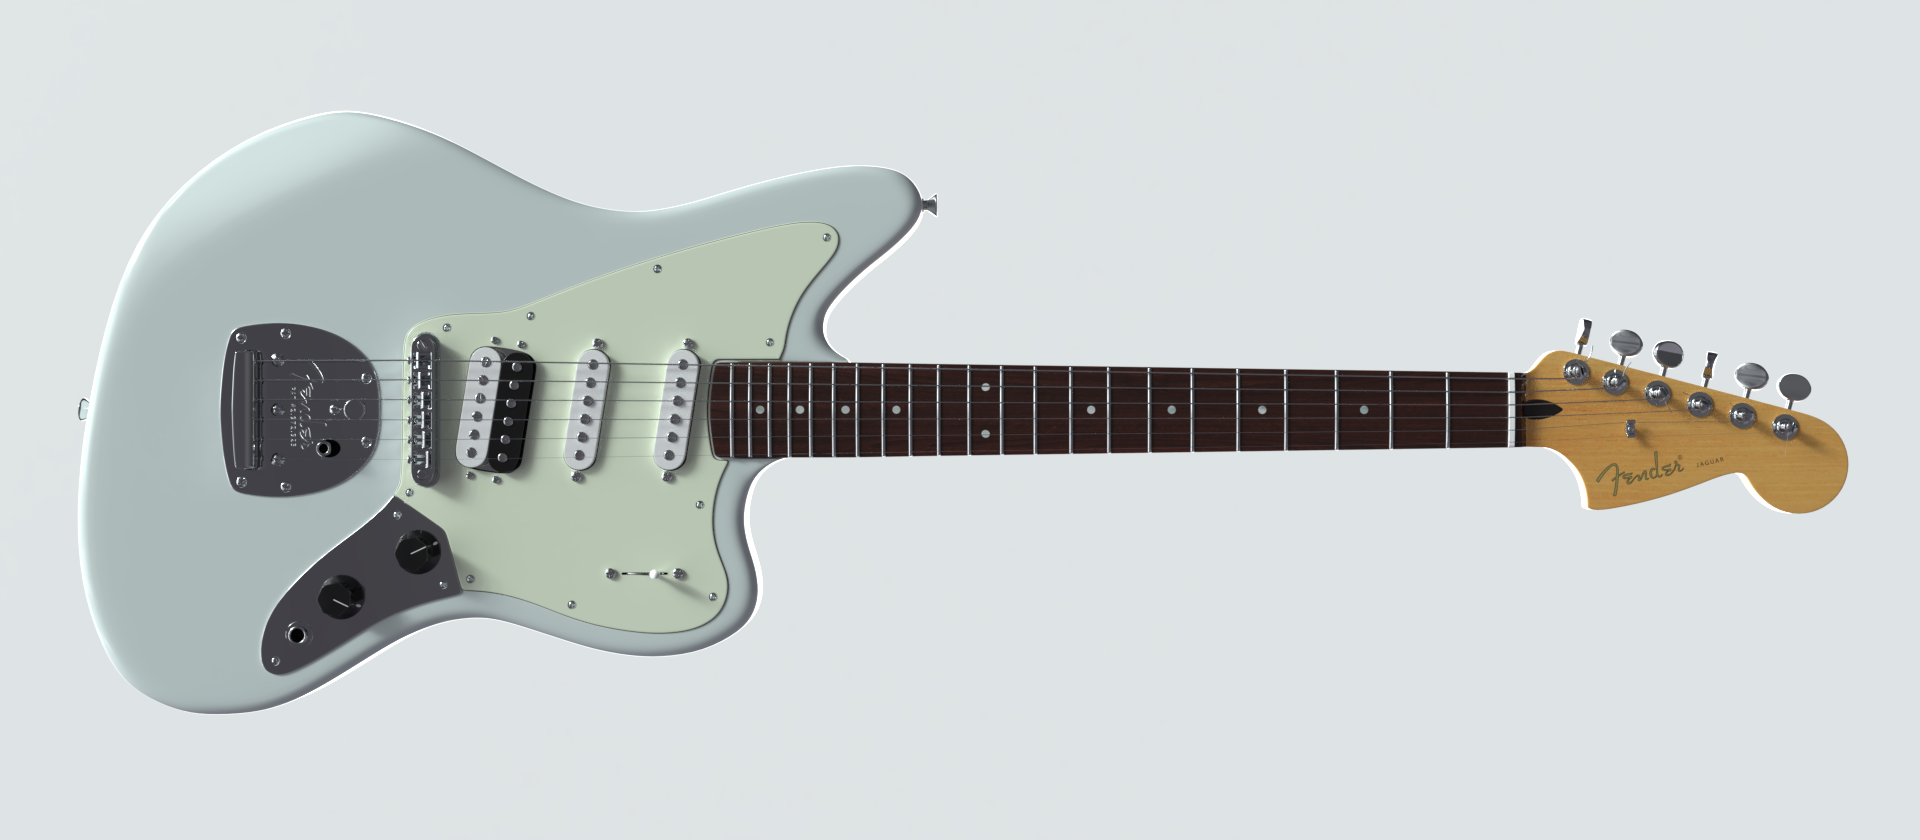
While studying Blender for my company, I often used it to create things from my direct private environment. This served to train my skills and to get to know new aspects in the area of 3D. Among the 3D models I made with Blender were some of my guitars and the Fender shown here.
For me, it made sense to compose a scene from the objects created this way. Because I didn’t just want to make a pure illustration of the objects, I decided on a still life, which should also tell the viewer a little story. Ideally, both guitarists and people who are not familiar with the subject should find the image appealing.
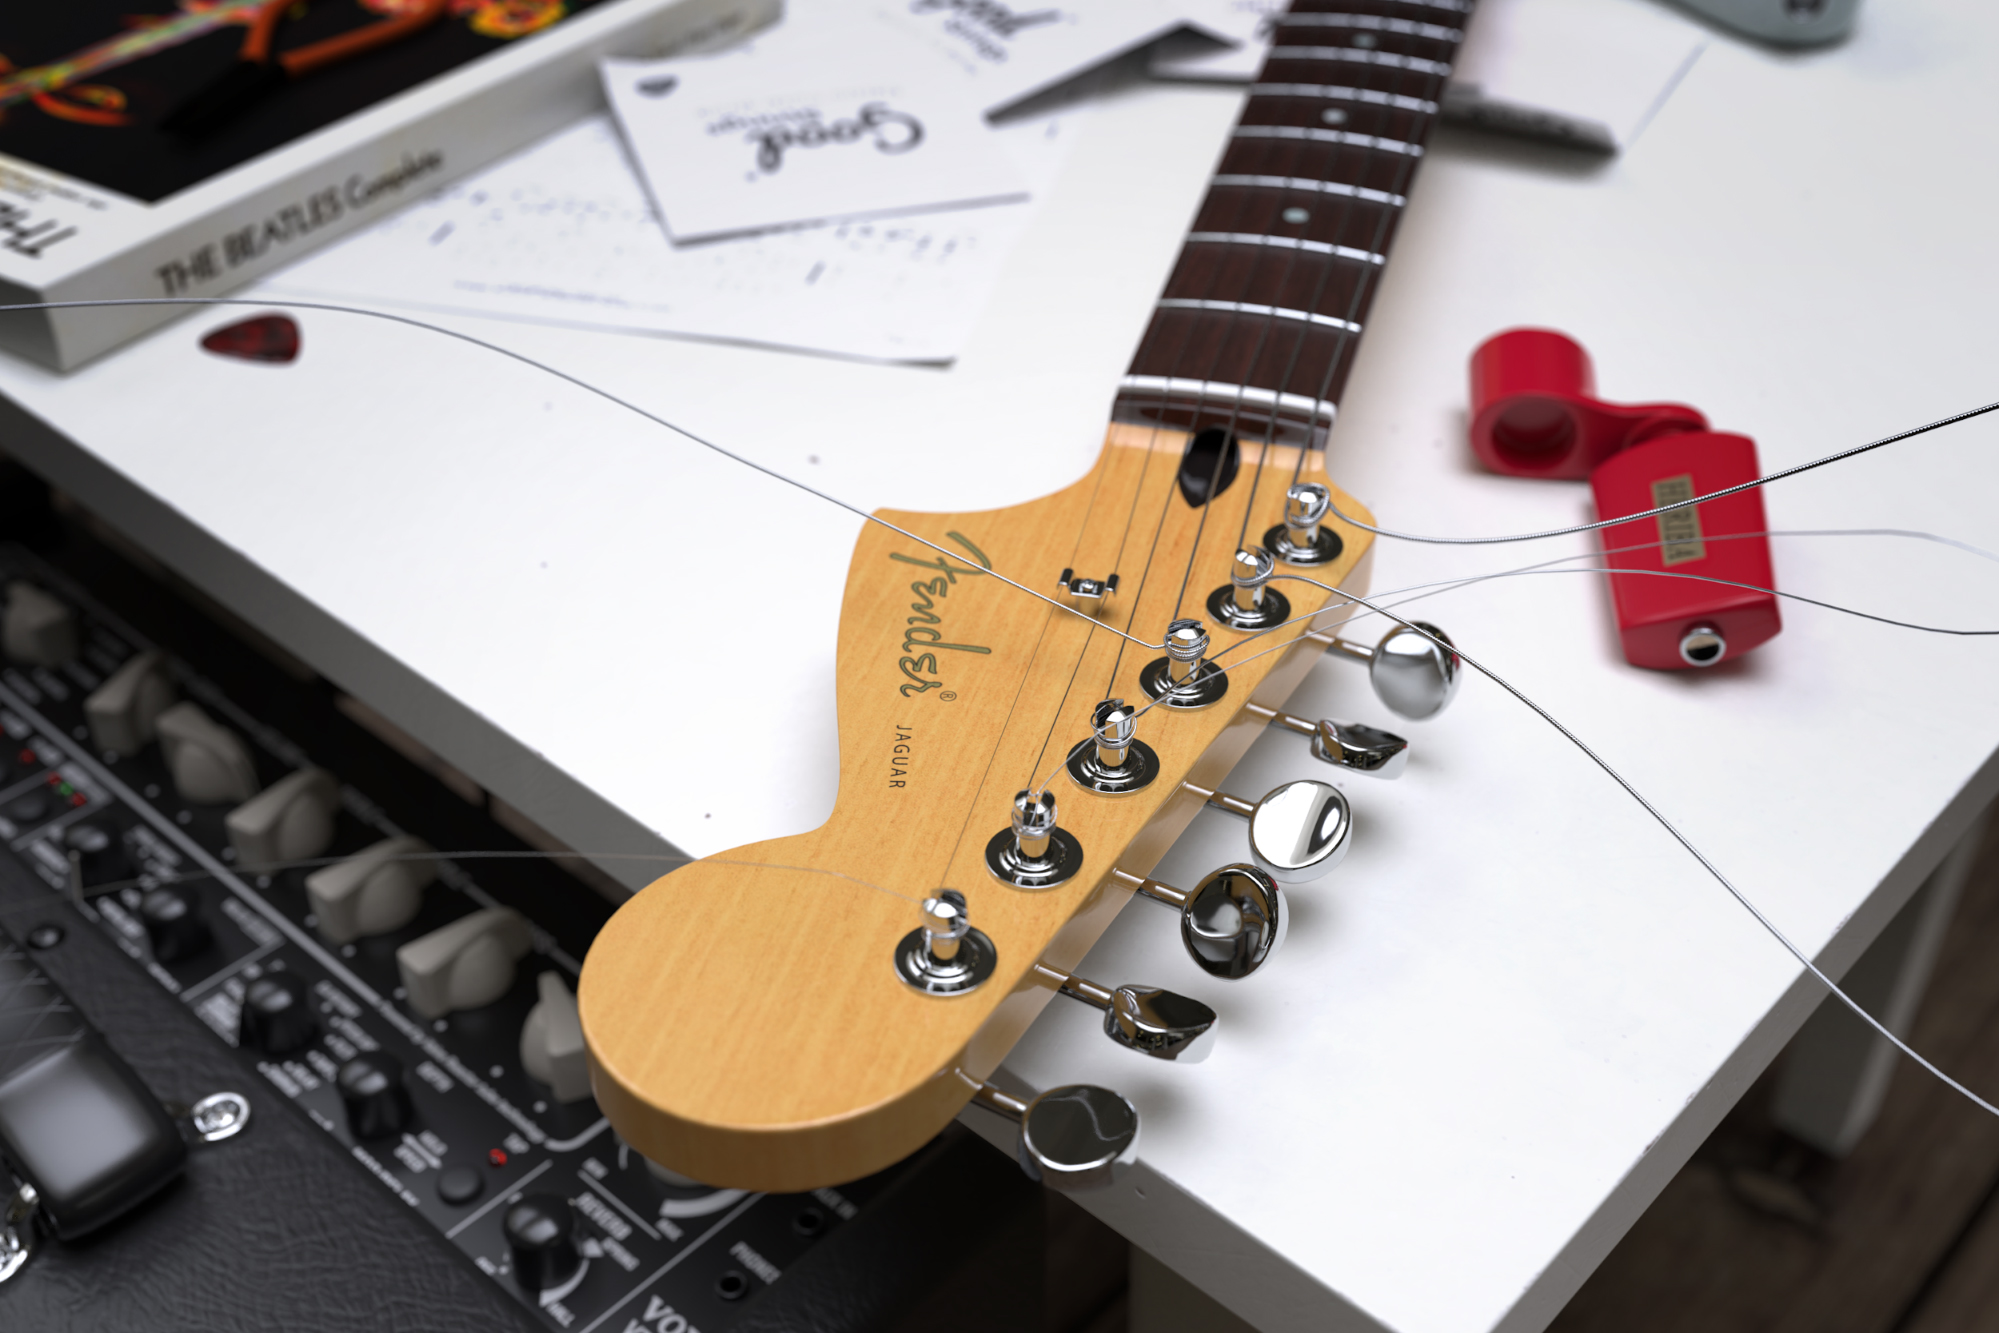
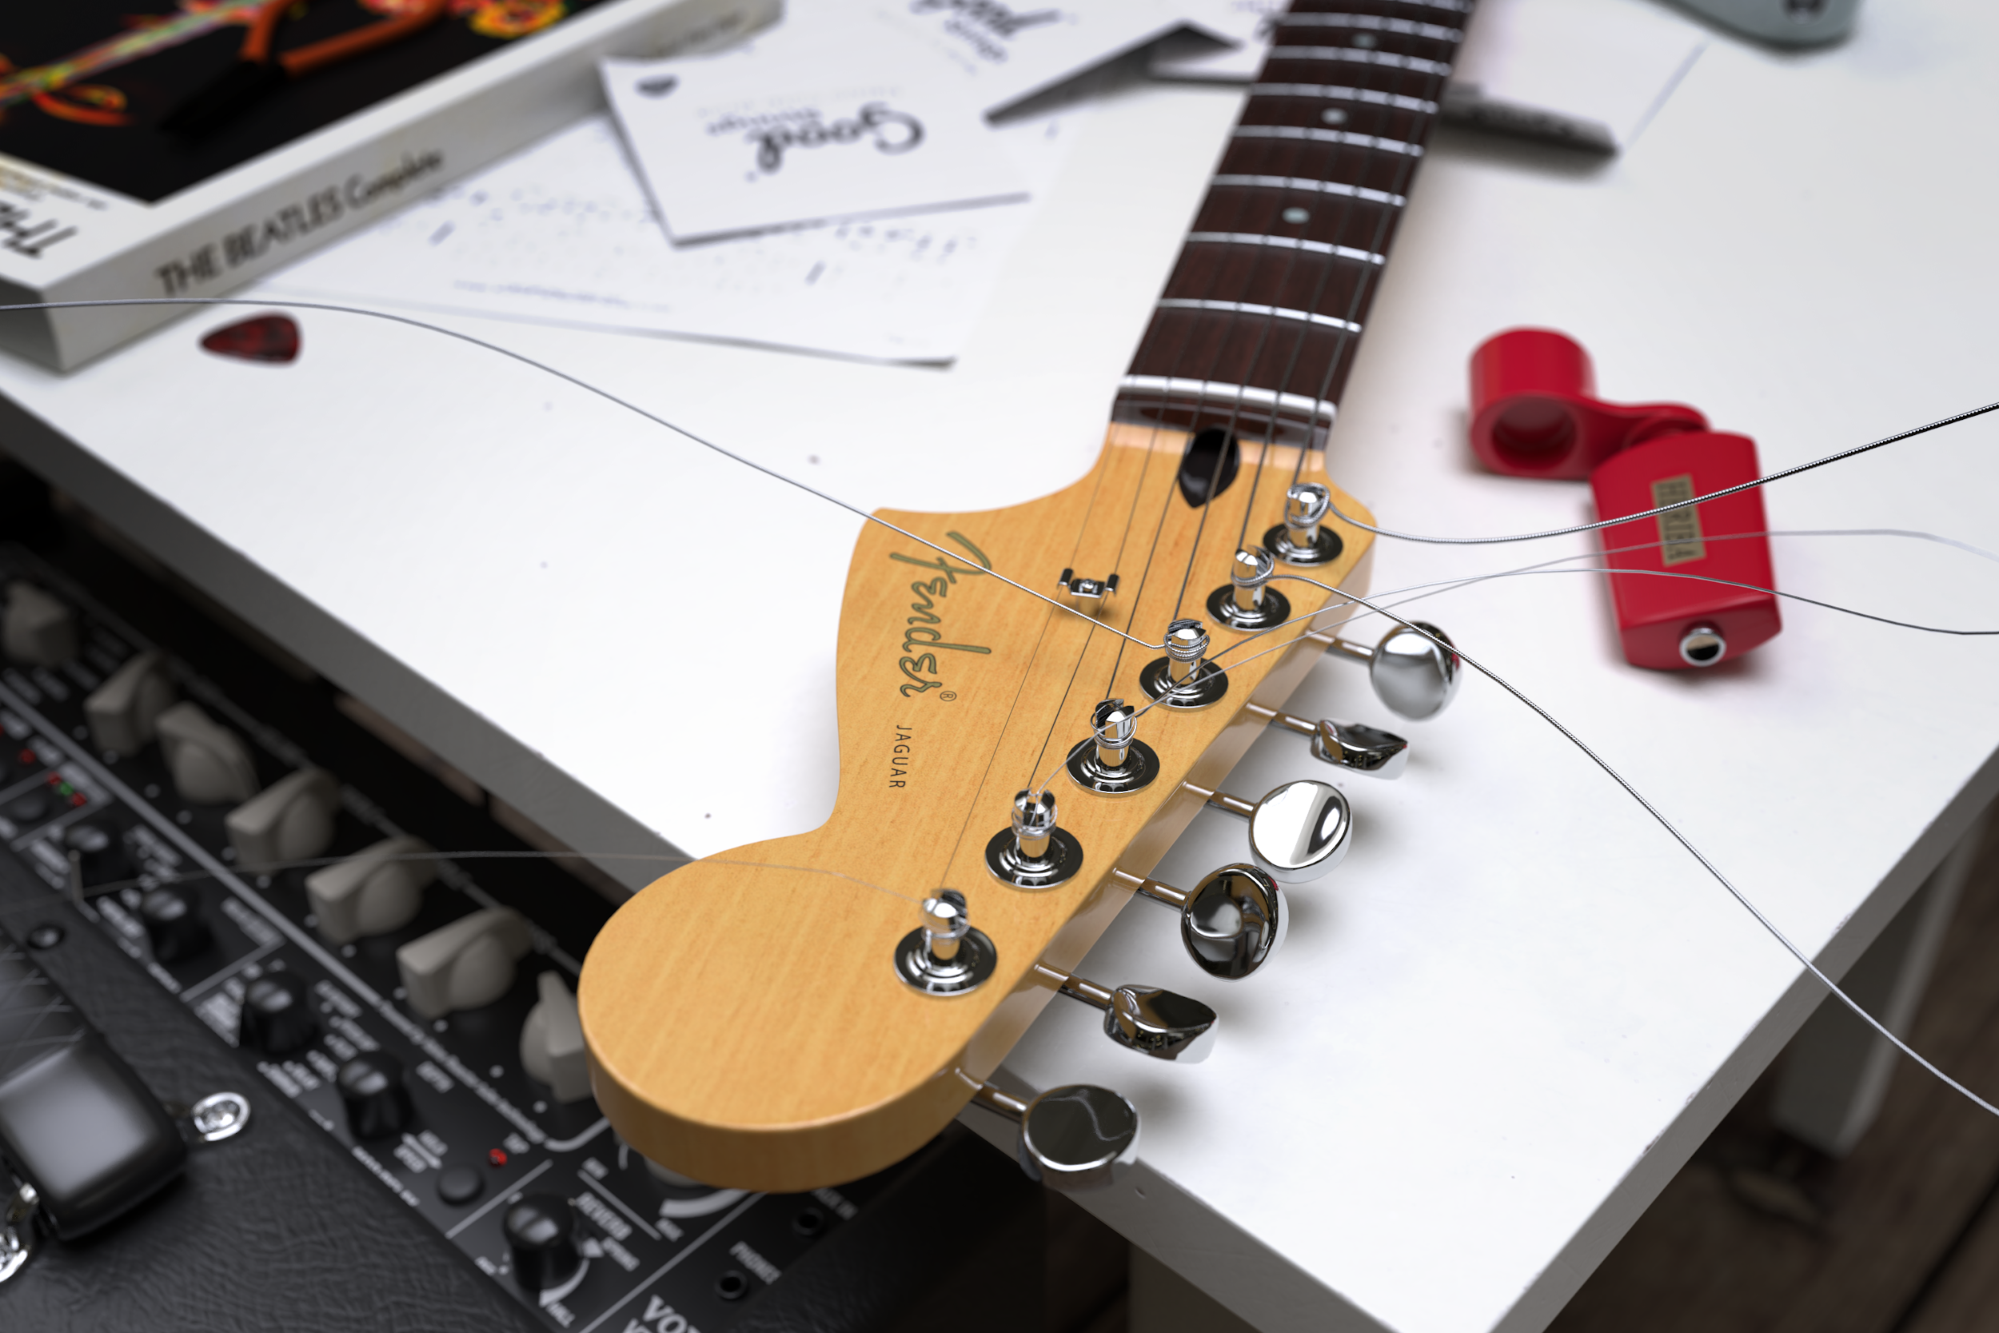
Finally, I got the idea to show the changing of the guitar strings. That also seemed ideal to me for the implementation as a still life. To make it more exciting and to show a process, I wanted the work shown in the picture to be incomplete. The strings should not be cut off yet and maybe even stick out of the picture in the viewer’s direction. This should produce unrest and make the picture look more dynamic.
The Workflow
I used Blender to model and assemble the scene. The objects were created with a very low resolution and optimized for use with the subdiv modifier. Since I have, in real life, the things shown in the Blender scene, I was able to take dimensions and proportions directly from them.
Modeling the Guitar

The electric guitar has a form adapted to the human body and the usual playing styles of guitarists. Therefore, the body does not only consist of a flat board, but has a virtually organic, from all angles curved and asymmetrical shape with different recesses. To bring this out as true to the original as possible was one of the biggest challenges when modelling the objects of the scene.
First, I drew the body in top view based on a reference image in Blender by extruding vertices and finally extruded the result to obtain the three-dimensional basic shape. Afterward I added the geometry for the large slopes at the front/back using the standard methods of Blender’s edit mode (connecting vertices, inset faces, etc.) and modified it according to the original. This was done, for example, by rotating with different rotation points and edge sliding—usually with proportional editing activated (to get nice curves) and selectively hidden geometry (to prevent unwanted parts of the mesh from being affected). Then I added the more general curves using Blender’s bevel tool and corrected the geometry manually. The latter was necessary to rejoin edge loops that had been separated by the modeling process and to turn tris and ngons into quads. This was the only way to achieve satisfactory results with the subdiv modifier afterward. The process required a lot of trial and error, forward and backward steps until I was satisfied with the result.
The procedure for creating the guitar neck was similar, whereby I first modeled the neck and headstock independently of each other and connected the meshes only in a second step. I had to make sure that the respective ends of headstock and neck had the same number of edges so that I could connect them by means of an edge loop. After that, the many details such as mechanics, screws, switches, knobs and pickups were added bit by bit.

Creation of Materials and Textures
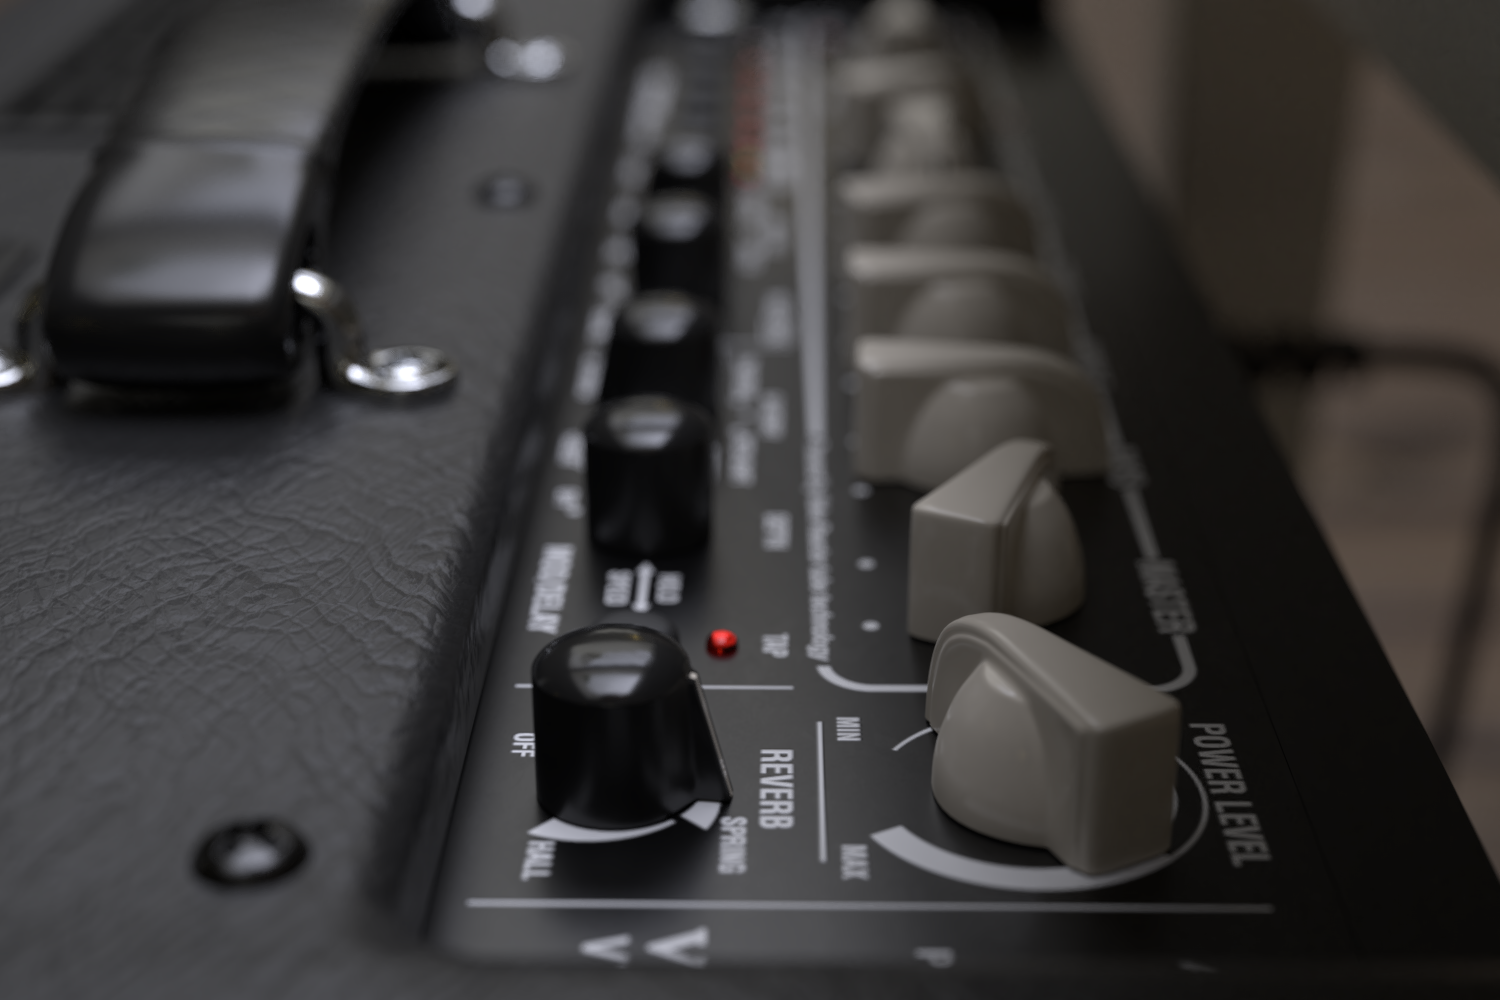
The texture maps were created in GIMP based on the UVs generated in Blender, and the different materials were assembled using image processing. I used the standalone version of the Texture Tools Exporter from Nvidia to create the normal maps and my own grayscale height maps as a basis for this. I partly photographed the lettering on the amplifier, the guitar, and the other objects and partly took them from their respective manuals. Then they were digitally reworked or redrawn and mounted into the texture maps. The creation process was not necessarily about providing each object shown in the scene with high-resolution realistic and detailed textures. In this project, I found it sufficient to simply integrate some stains and scratches and irregularities (e.g. regarding reflections) into some materials.
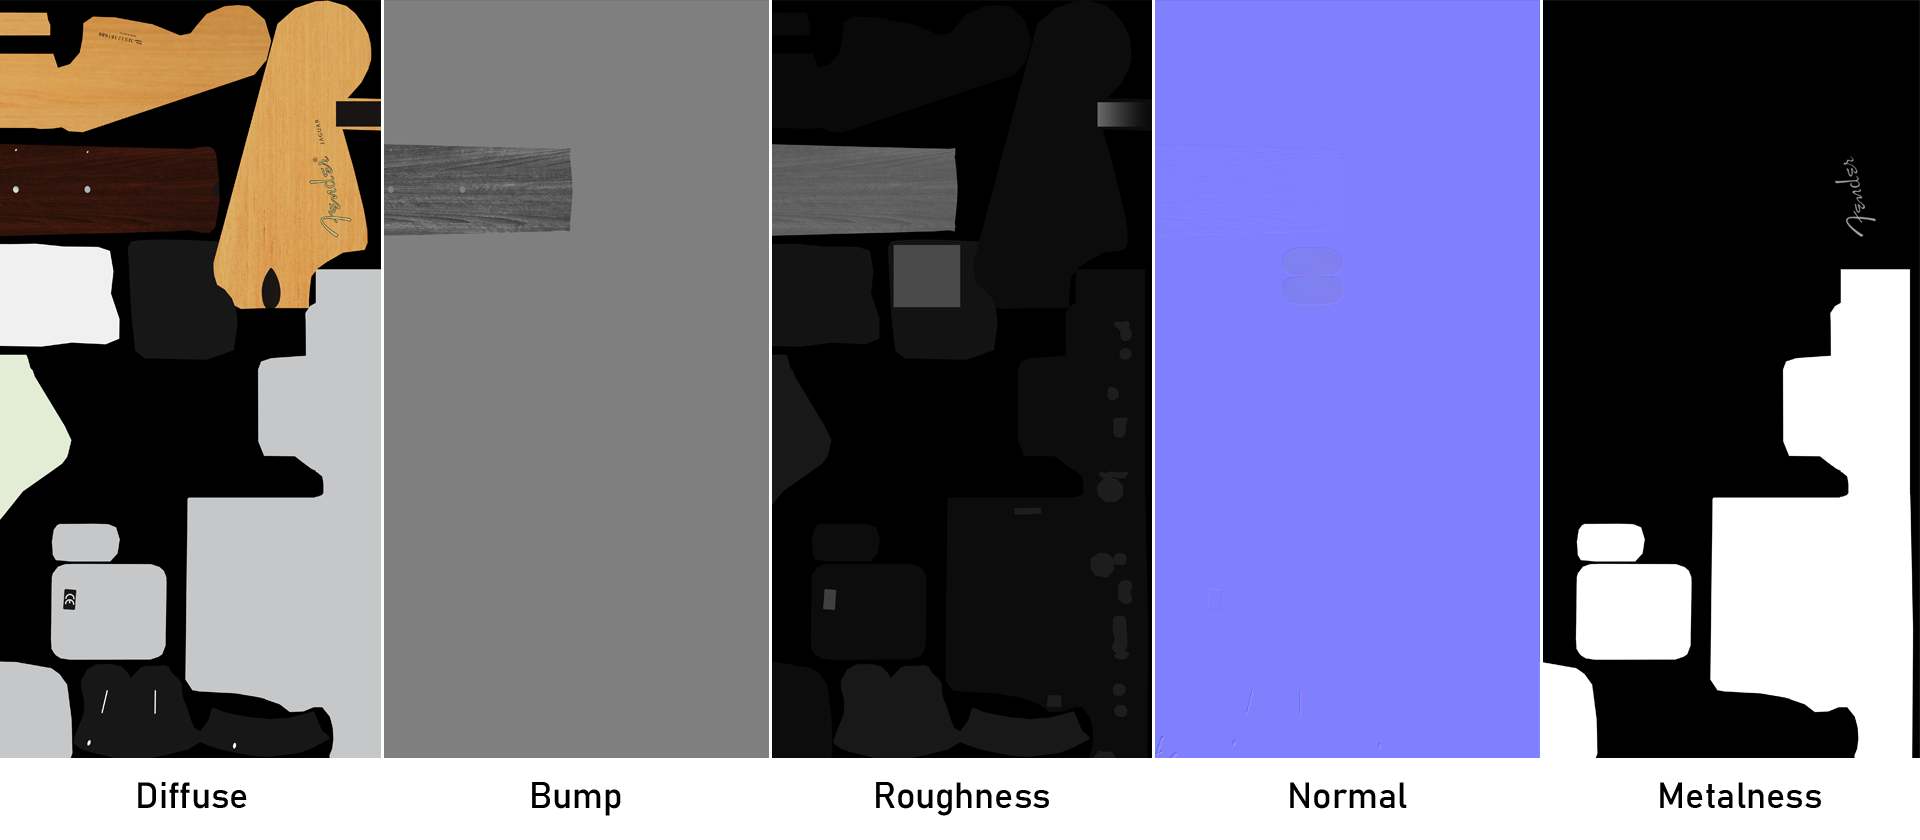
For the three lower strings I created a simple material with a procedural wave texture to represent the winding.

Arranging and Illuminating the Scene
For organizing the scene I worked with a file that contains the lighting and final render settings and to which the still life was also rendered at the end. All objects contained in it were linked from individual asset files organized in a hierarchical folder structure. Since the scene was originally created in Blender 2.79, the now obsolete proxy system still applies here. In my opinion, this approach is the most data-saving and efficient solution to test different setups and at the same time be sure that the objects remain consistent within different versions of a scene. Furthermore, this method allows me to reuse previously created objects quickly and easily.
After I had arranged everything to my satisfaction and chosen camera settings, such as focal length, aperture, focus and decided on a detail of the picture, I moved on to lighting the scene. I tested different lighting setups with different HDRs for the global illumination and spot, or area lights for the details. In the end, I decided (contrary to my usual working method) to use an HDR from Blendercloud as the only light source. This solution came closest to my idea of achieving a bright and clear overall impression. Further light sources did not seem necessary or helpful to me in this case. In order to focus the viewer’s attention more on the main motif, I later integrated a slight vignetting in the final rendering using image processing. The finished scene was rendered with Cycles at 400 samples with Cycles-Denoiser activated.
Postprocessing of the Result
For my taste, not much post-processing was needed after rendering. So I just selectively and very carefully reworked image areas slightly in terms of brightness/contrast with GIMP and (as already mentioned above) added a slight vignetting to emphasize the main motif a bit more.
Final Render
About the Author
 Rudi Wohland, Media/UX-Designer Germany


Right here is the right site for anybody who hopes to find out about this topic.
You understand so much its almost hard to argue with you (not that I actually
would want to…HaHa). You definitely put a new spin on a topic that’s been written about for a long time.
Wonderful stuff, just excellent!
Thanks a lot!
Rudi, cool work. It looks astonishingly realistic, especially if I compare to the guitar and “Beatles complete” lying around here in my room :) My real-life guitar (unfortunately) features more dust. Your amplifier surface also is done really nicely.
Thanks a lot! Yeah, the guitar really looks so new and clean. Sometimes I even remove the dust ;-)
A blender fender! Having two fenders myself I appreciate this. I see the founder of blender to be a bit like Leo Fender. A really well done project. One critique you suck at winding strings. ha joking! Interestingly it’s actually harder to model how you modeled it than if the strings were wound up properly. Did you do that on purpose?. It did give it more realism.
Thank you very much! It always causes me pain myself when I see guitarists who don’t cut off their strings. So I actually found it more interesting to depict it that way. As a remedy I have hidden a small pair of pliers in the picture ;-)