
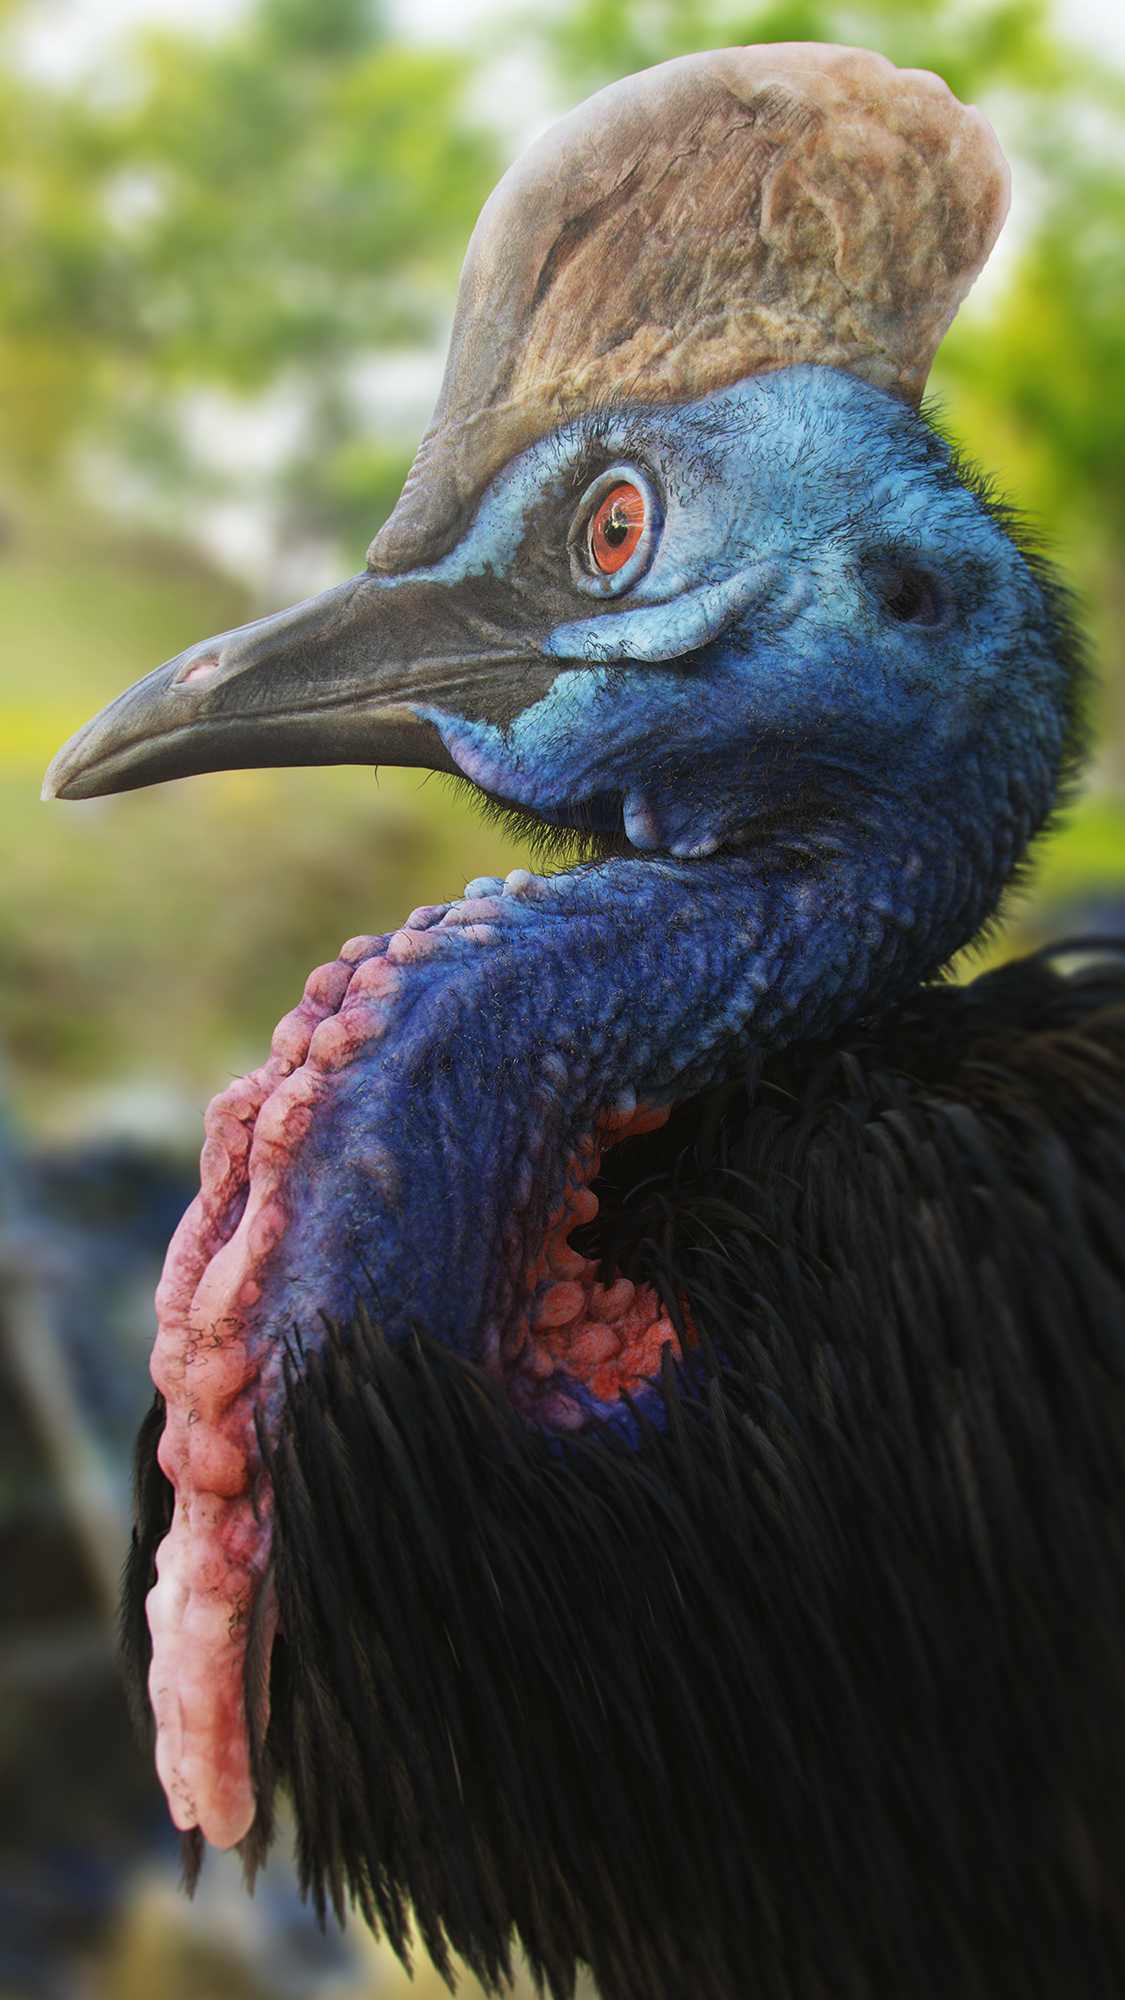
Behind the Scenes: Southern Cassowary
Inspiration
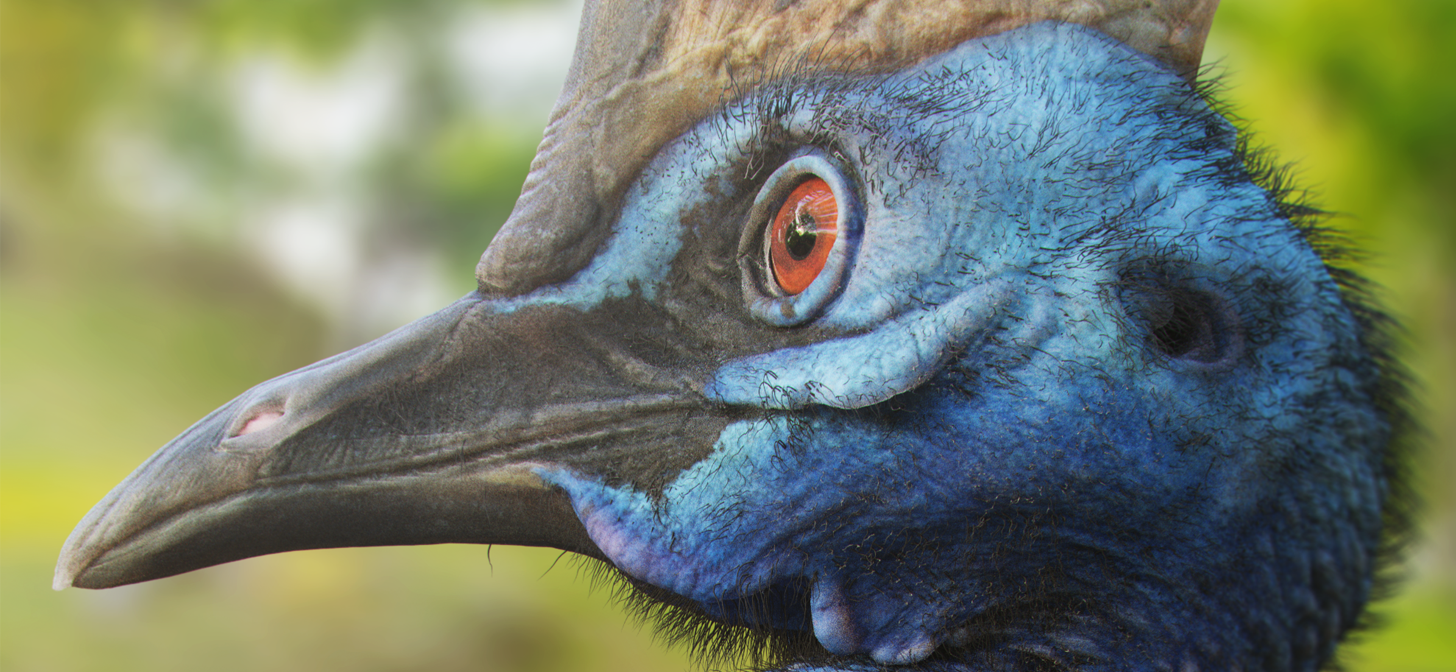
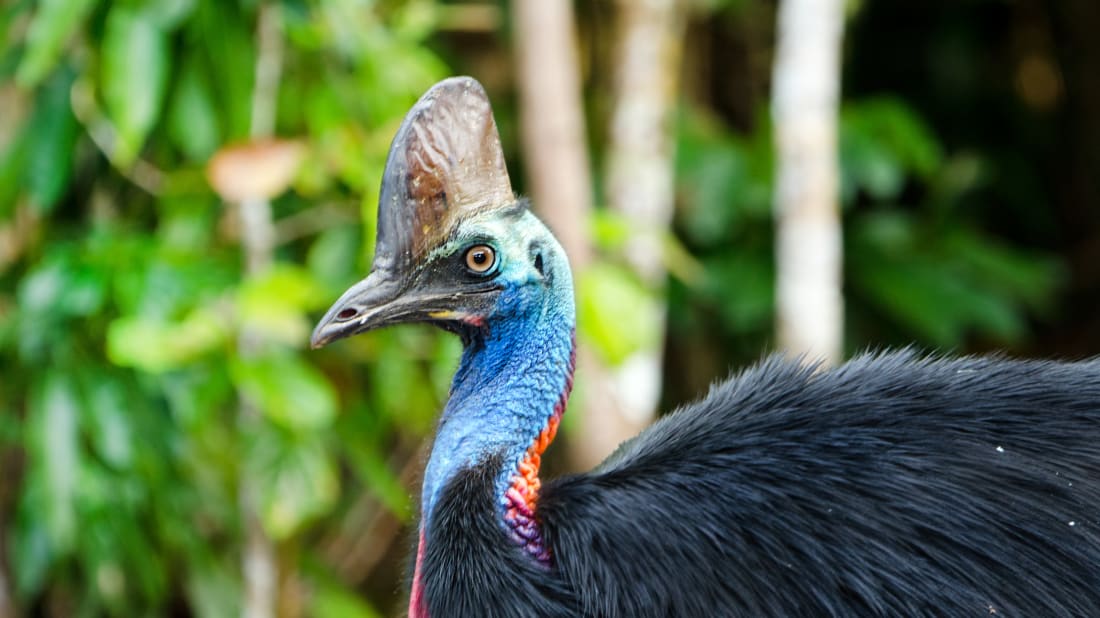
Cassowaries are a popular subject to showcase texturing skills. They exhibit textures of different qualities in a small area and have a very particular color scheme. This and their primal look of something ancient yet familiar are great sources of inspiration in not only this project.
Software
I used ZBrush for sculpting, Substance Painter for texturing. Then I rendered everything in Blender. Post-processing was done in Photoshop.
Sculpting and Retopology
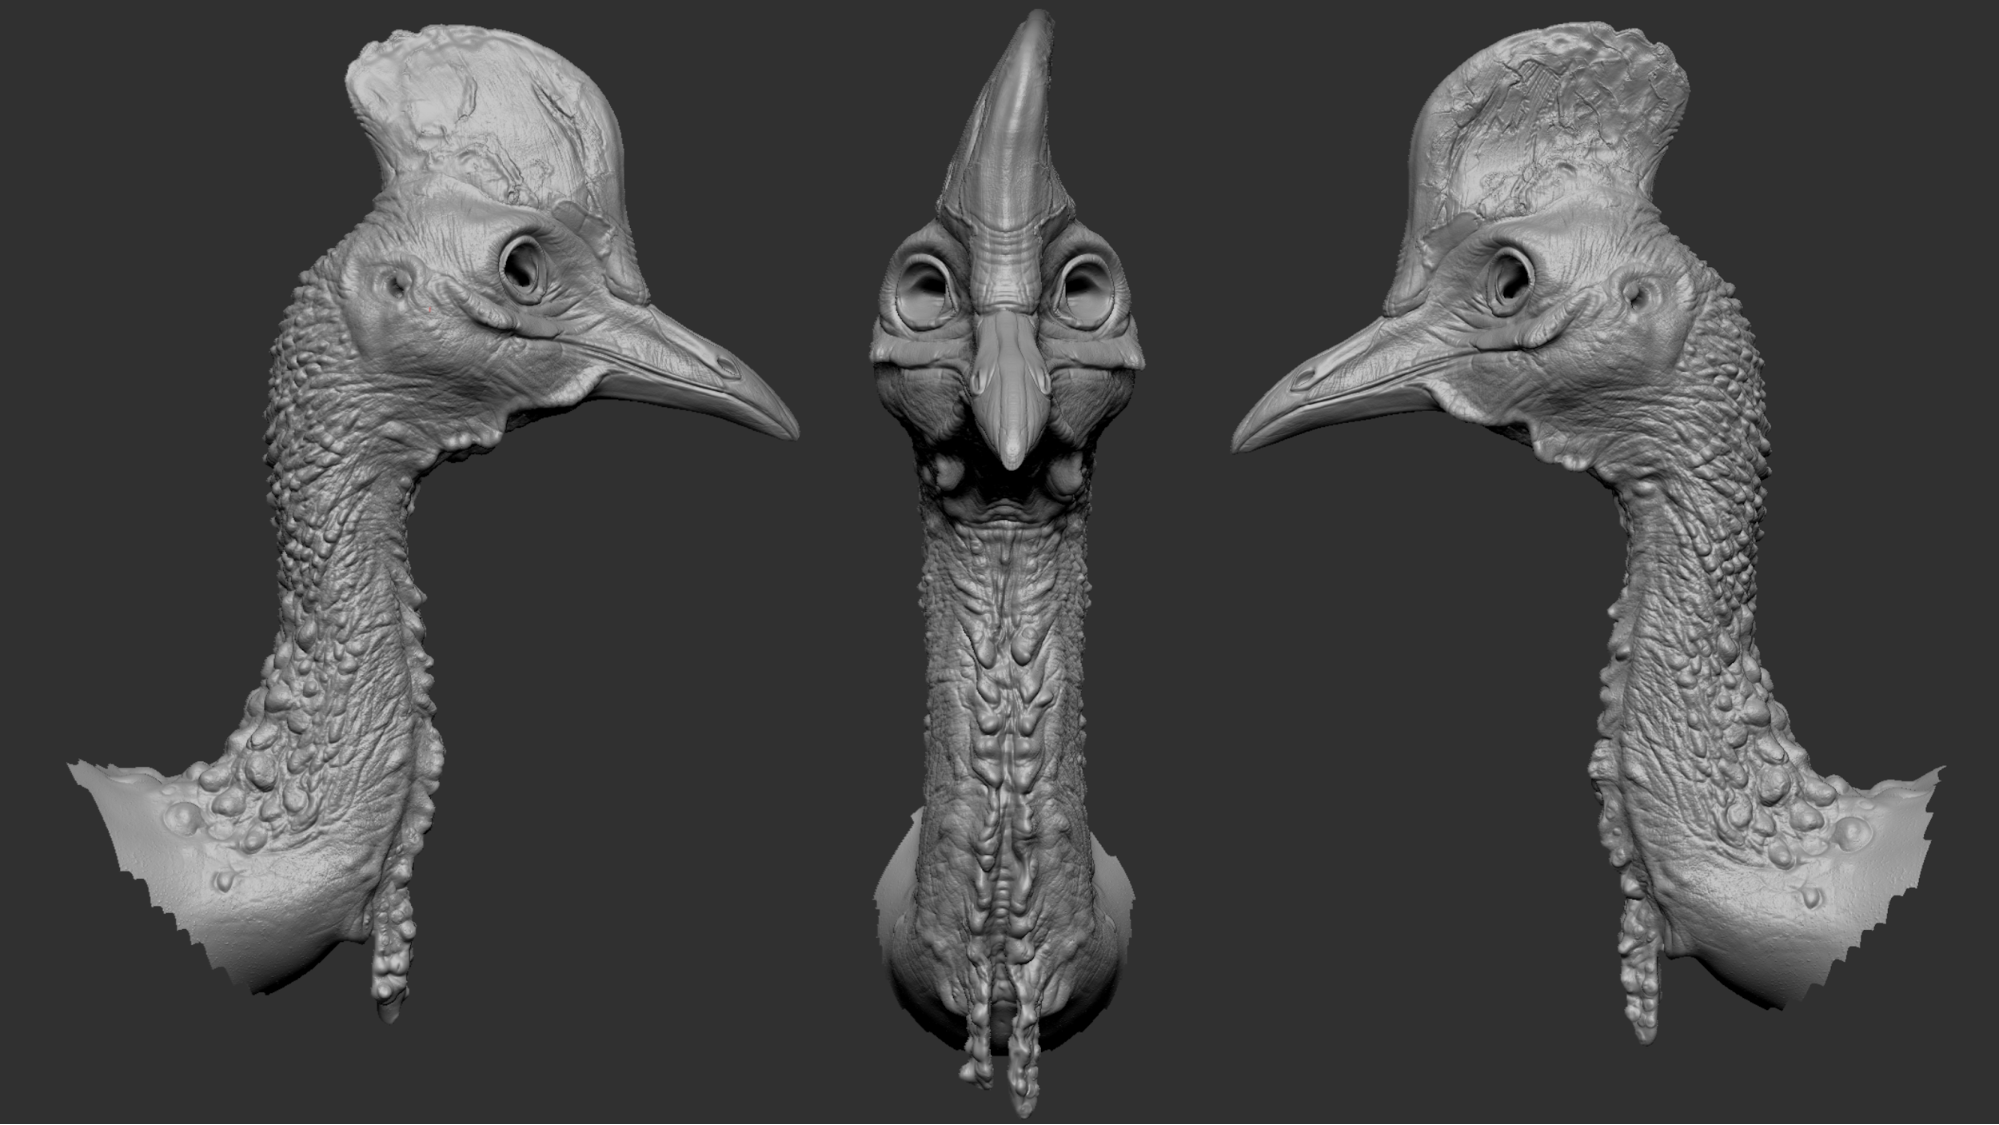
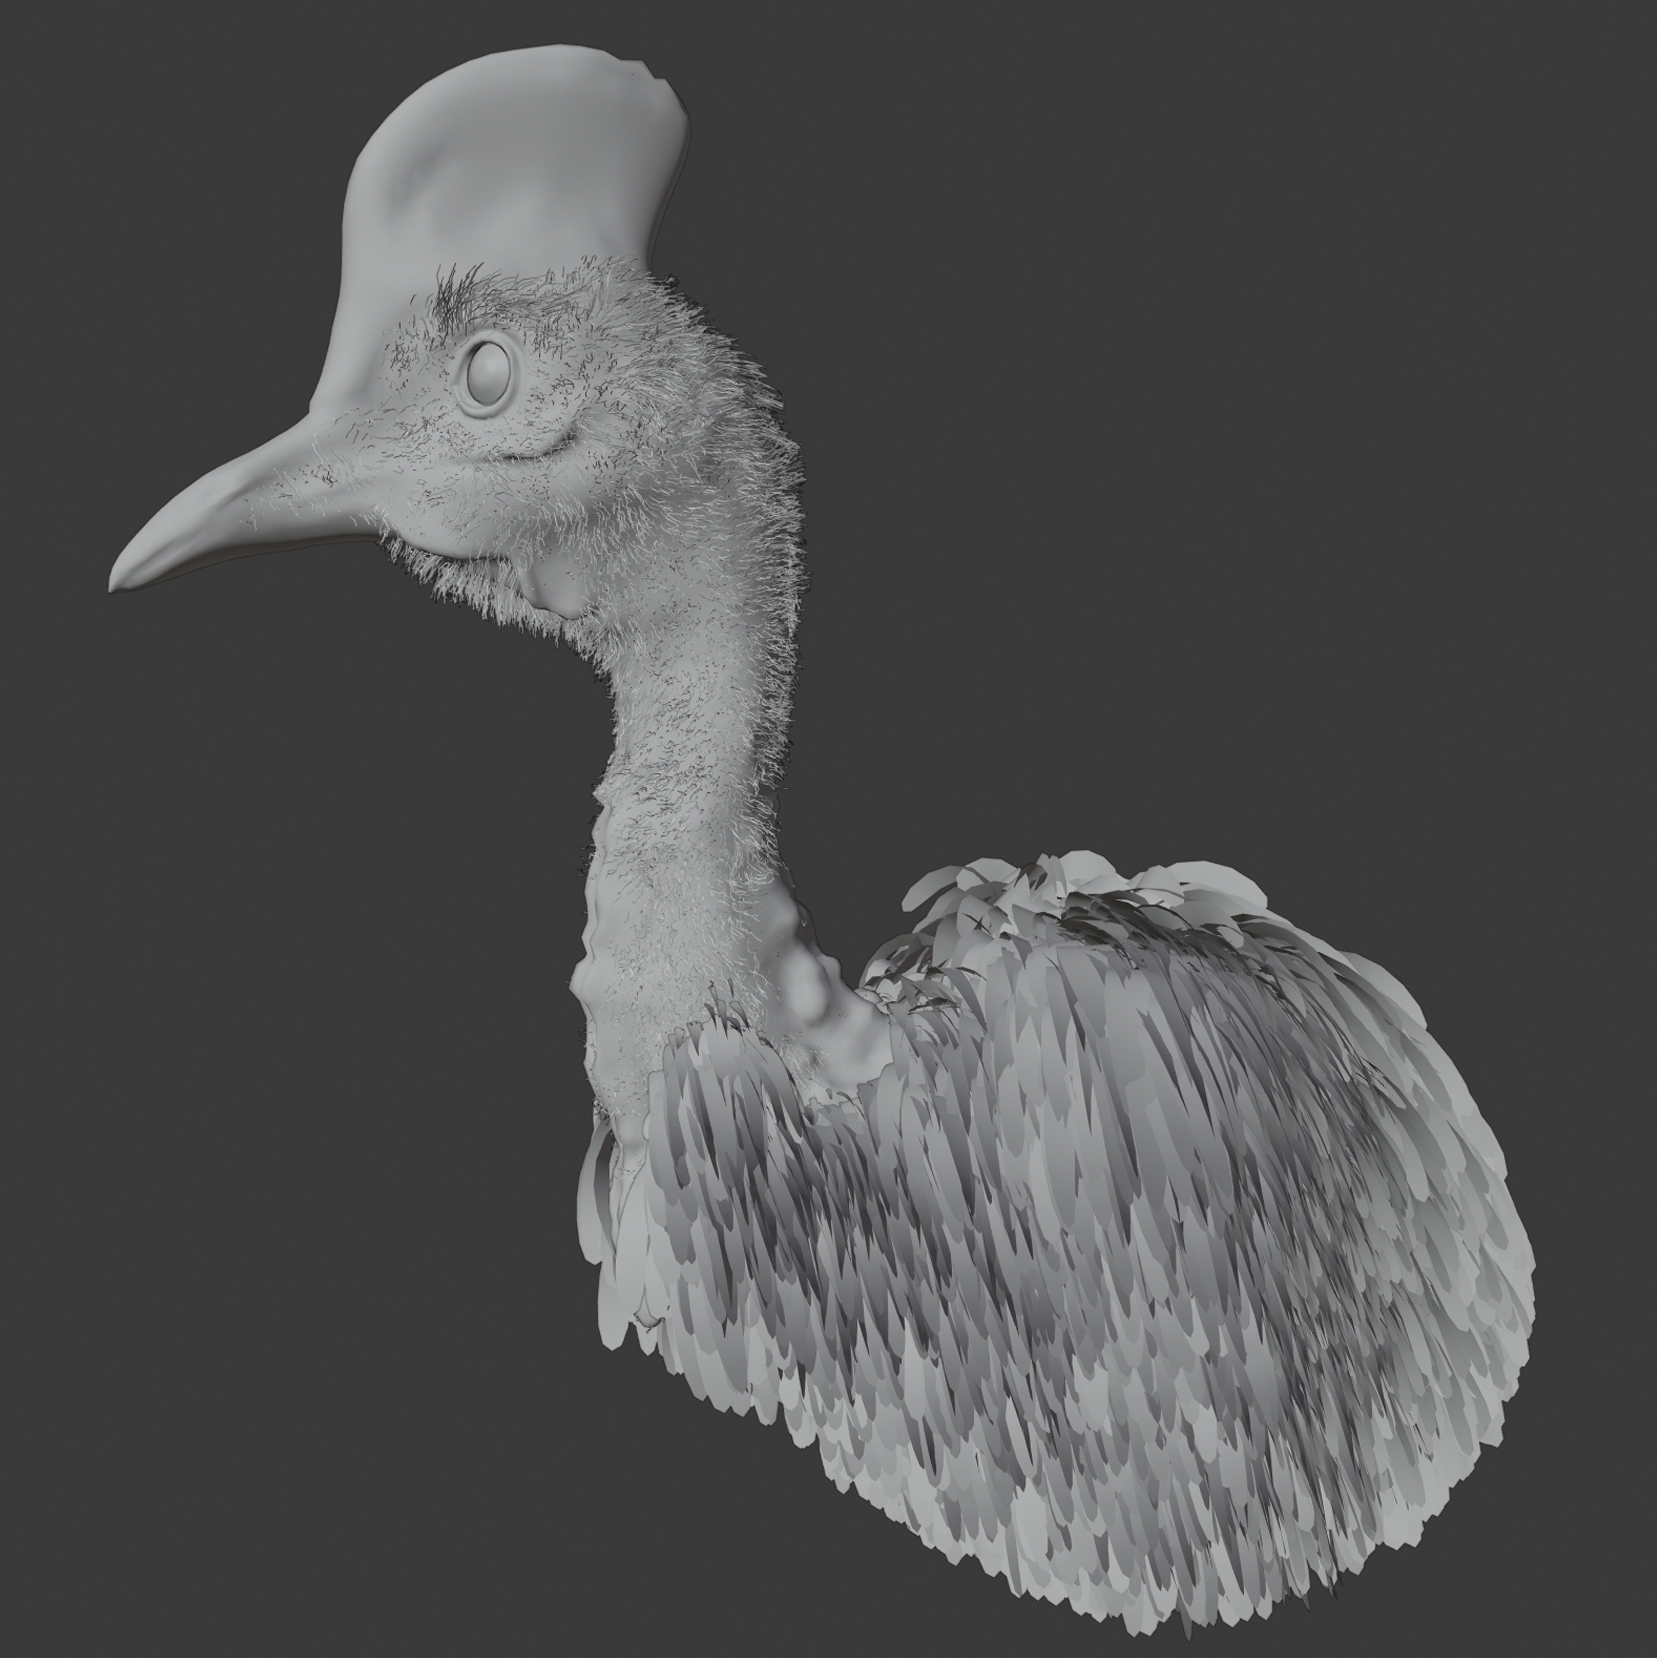
I started this project browsing my old ZBrush sculpts. This one was two years old and was nearly begging for a fitting presentation. It was good but it needed its proportions and some anatomical inaccuracies corrected. It was also too symmetrical, so I broke the pattern with some additional details and moved topology around.
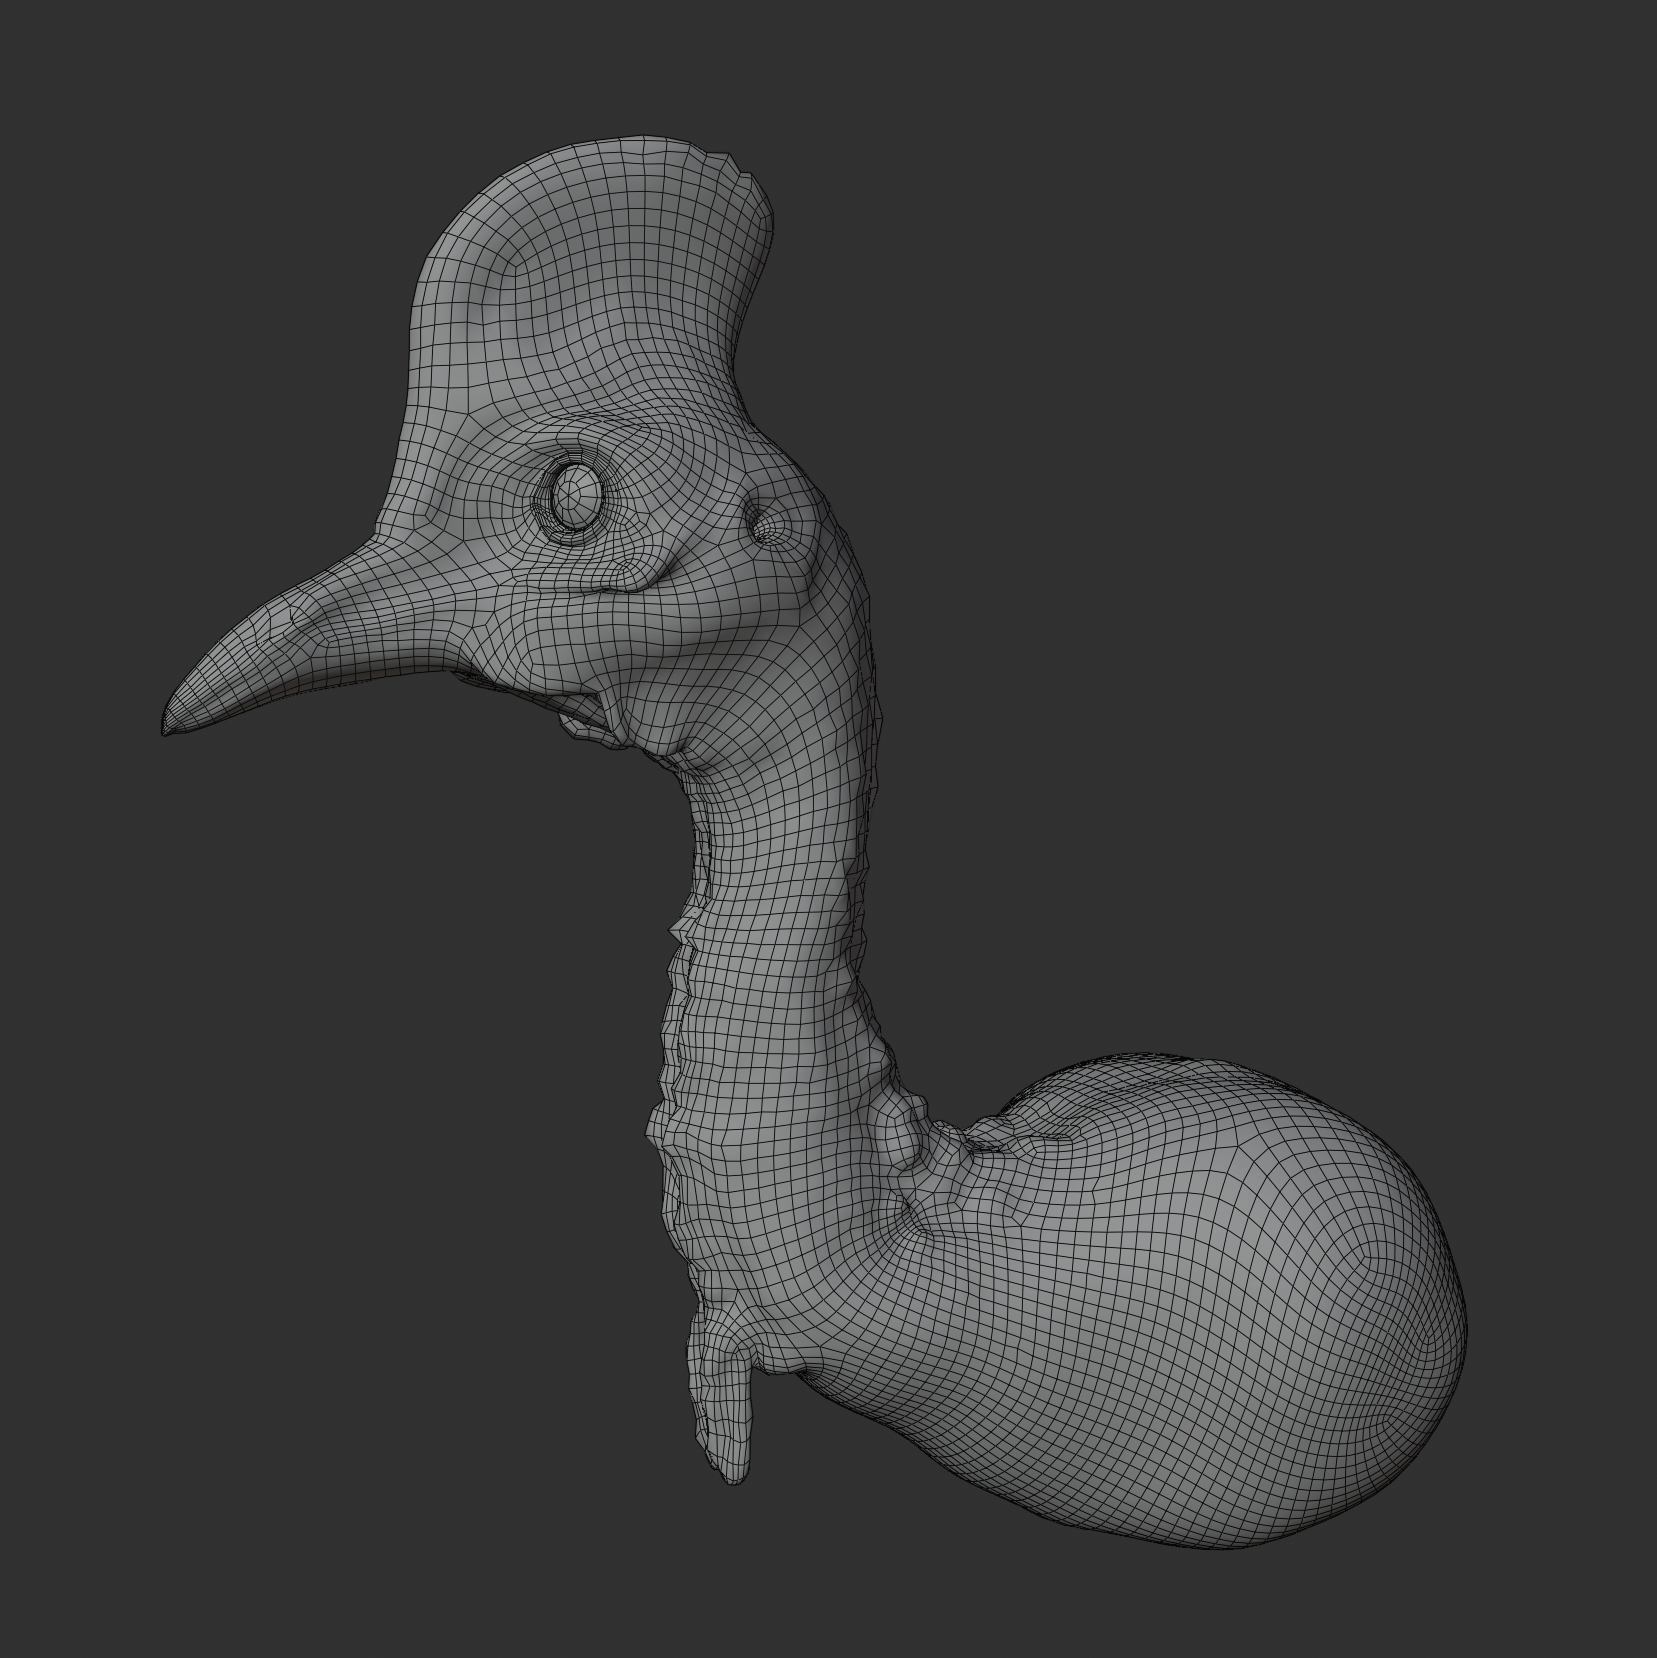
Because I didn’t plan to animate or deform this model much, I used the auto retopo tool. It gave me a serviceable low-poly mesh, which I then UV mapped in Blender.
Texturing
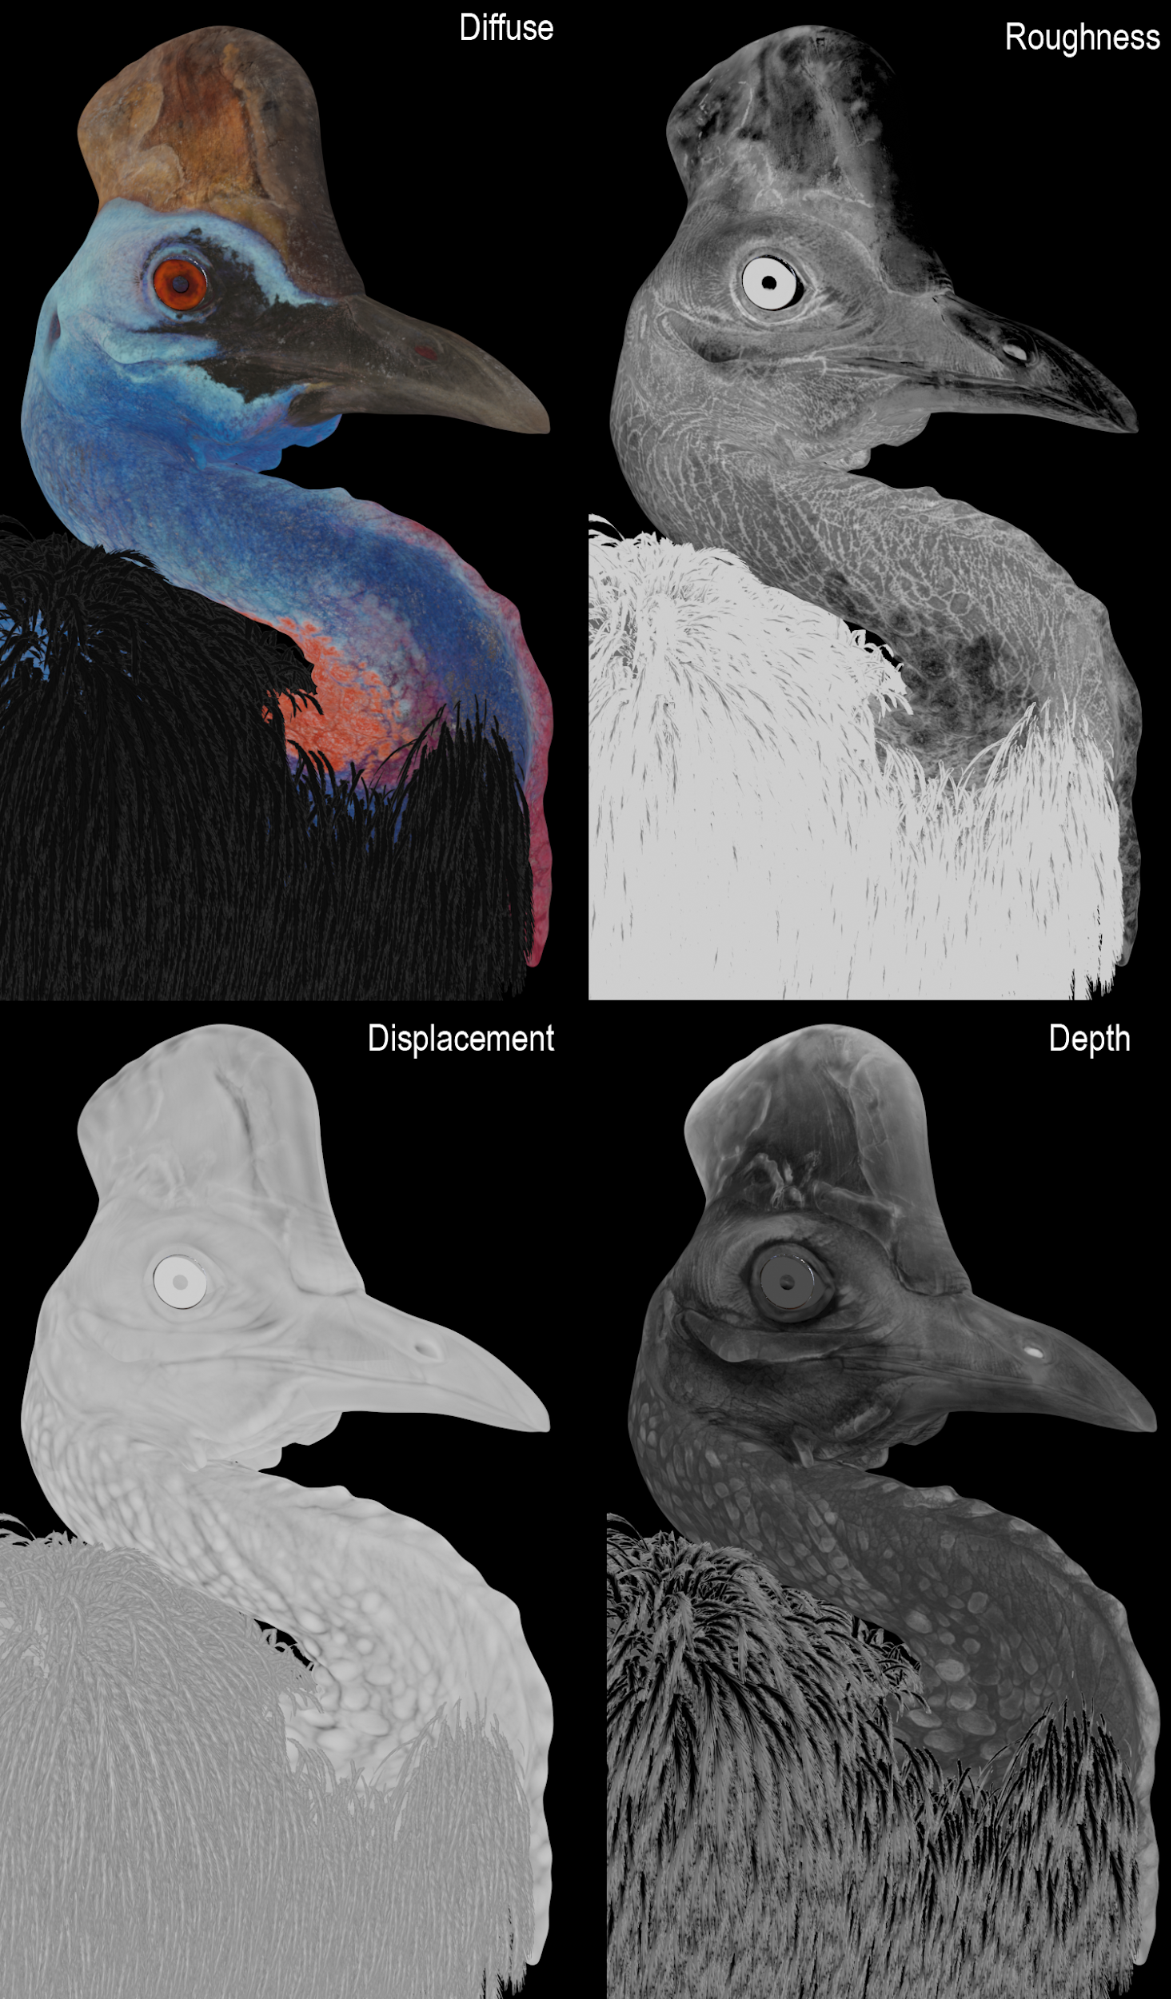
I had already made a texture with ZBrush’s Polypaint tools, but it wasn’t of satisfying quality.
I used it as a base. Thanks to a baked cavity map and many different grunge masks I could texture the rest nearly procedurally. The keratinous casque on the head proved to be the biggest challenge. To stimulate the detail I projected a flaking wood texture on top of it.
A very important element of realistic texturing is a dirt pass. I added dead skin, dust, and other imperfections using a blend of cavity, ambient occlusion, and various grunge masks.
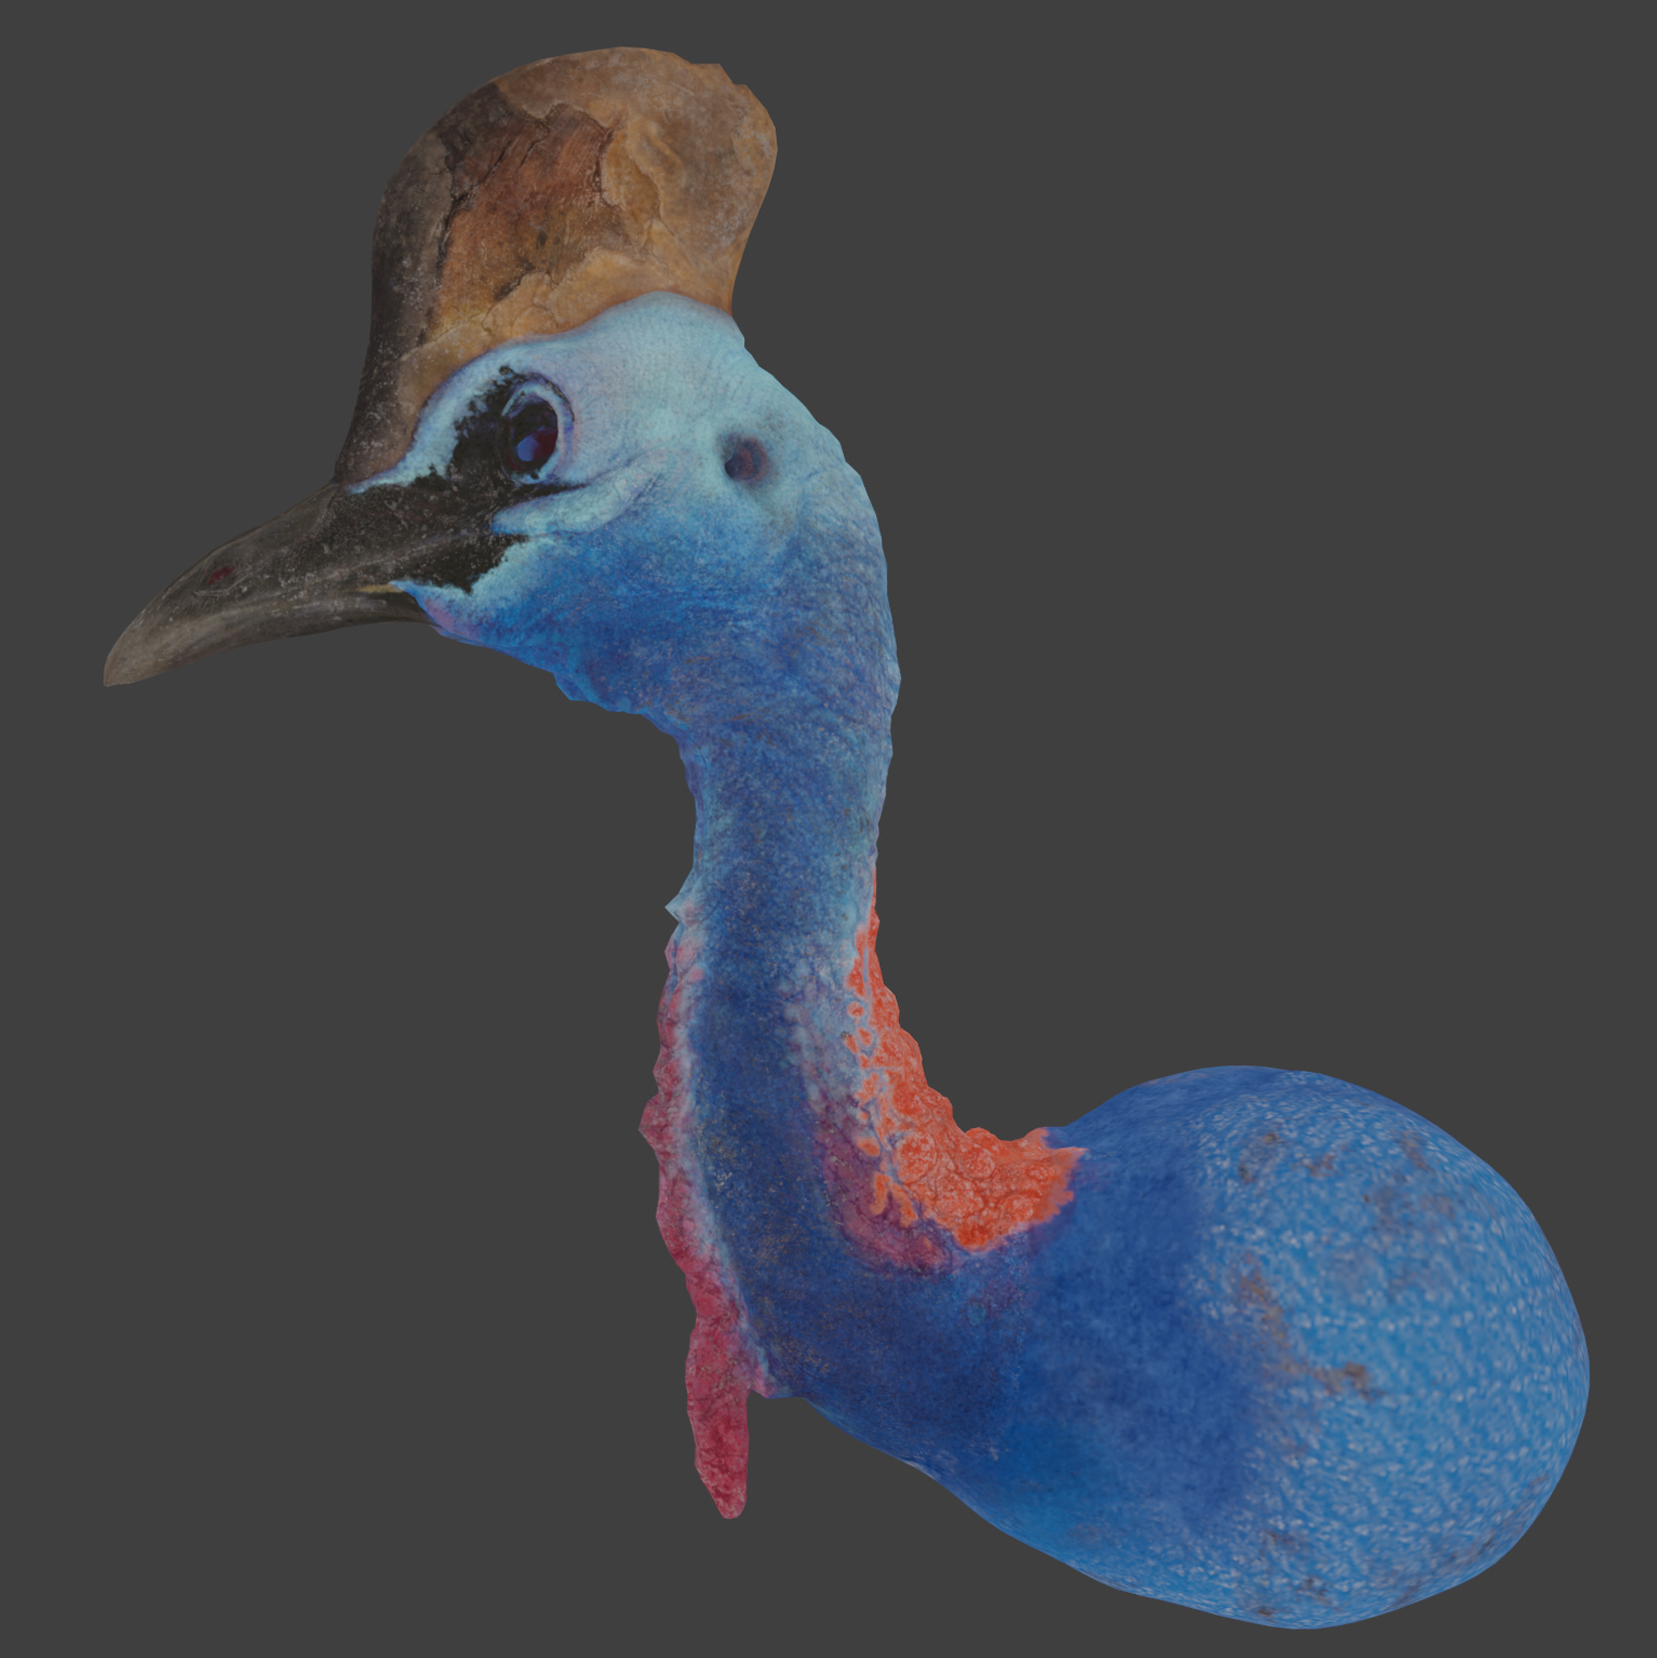
Materials
After exporting textures from Substance Painter I started plugging them into Blender. I used the usual principled BSDF, with subsurface scattering on. To control its color better, I blurred and added red tint into the diffuse texture. The SSS map itself was a composite of the Substance Painter depth map and roughness. I also used Awesome Bump to convert the normal map into a displacement map to get extra geometry deformation for more realistic results.
The cassowary’s head is covered with sparse fur-like feathers. To simulate them I made two particle systems: one to control longer hair on the brow, and the second for the finer hair on the neck.

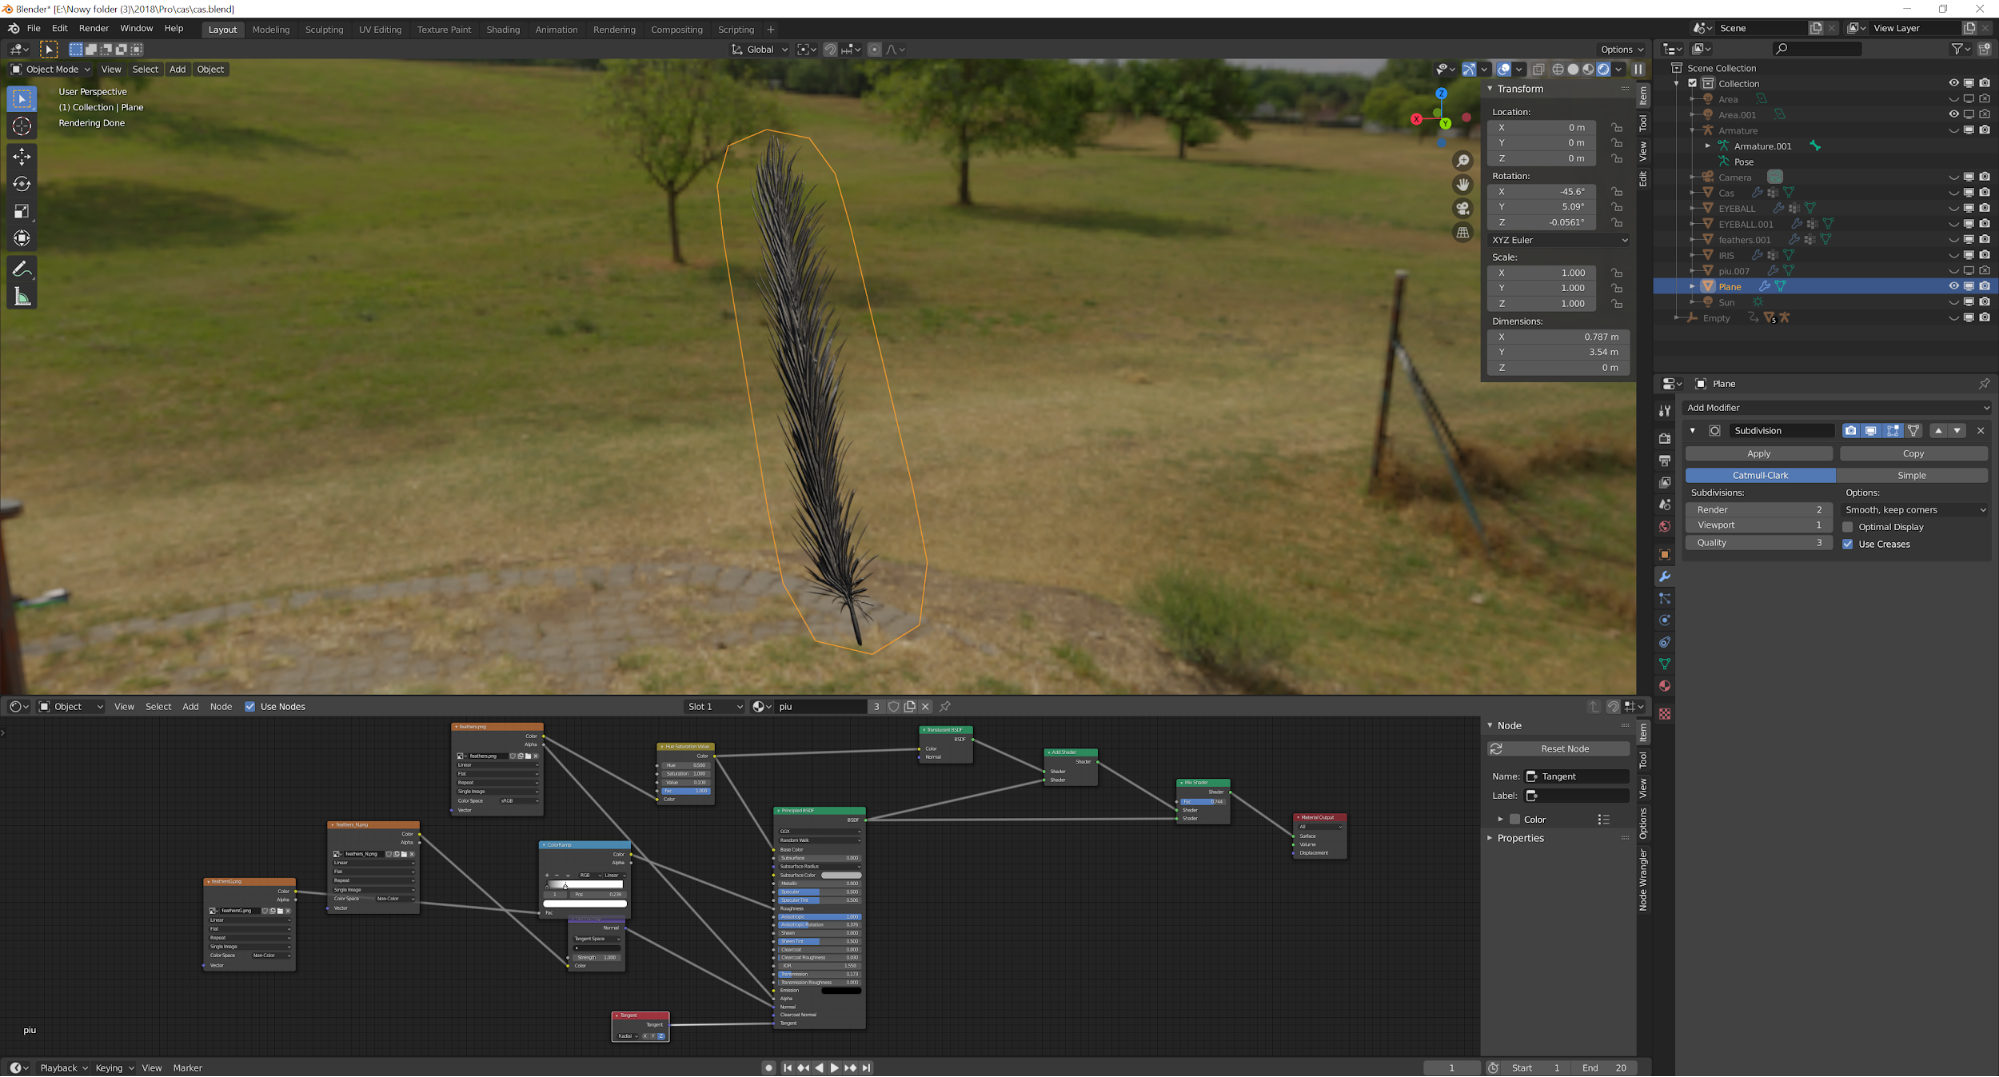
Feathers on the body were created as planes with ZBrush’s FiberMesh system and then exported as an .obj file.
I painted alpha texture and converted it to normal and roughness maps. I mixed the BSDF setup with a translucency node to get the half-transparent look of feathers. I also appended a tangent vector and turned up the anisotropy.
For the eyes, I used an eye shader and mesh that I had made for a different project, all according to the wonderful tutorial by César Salcedo.
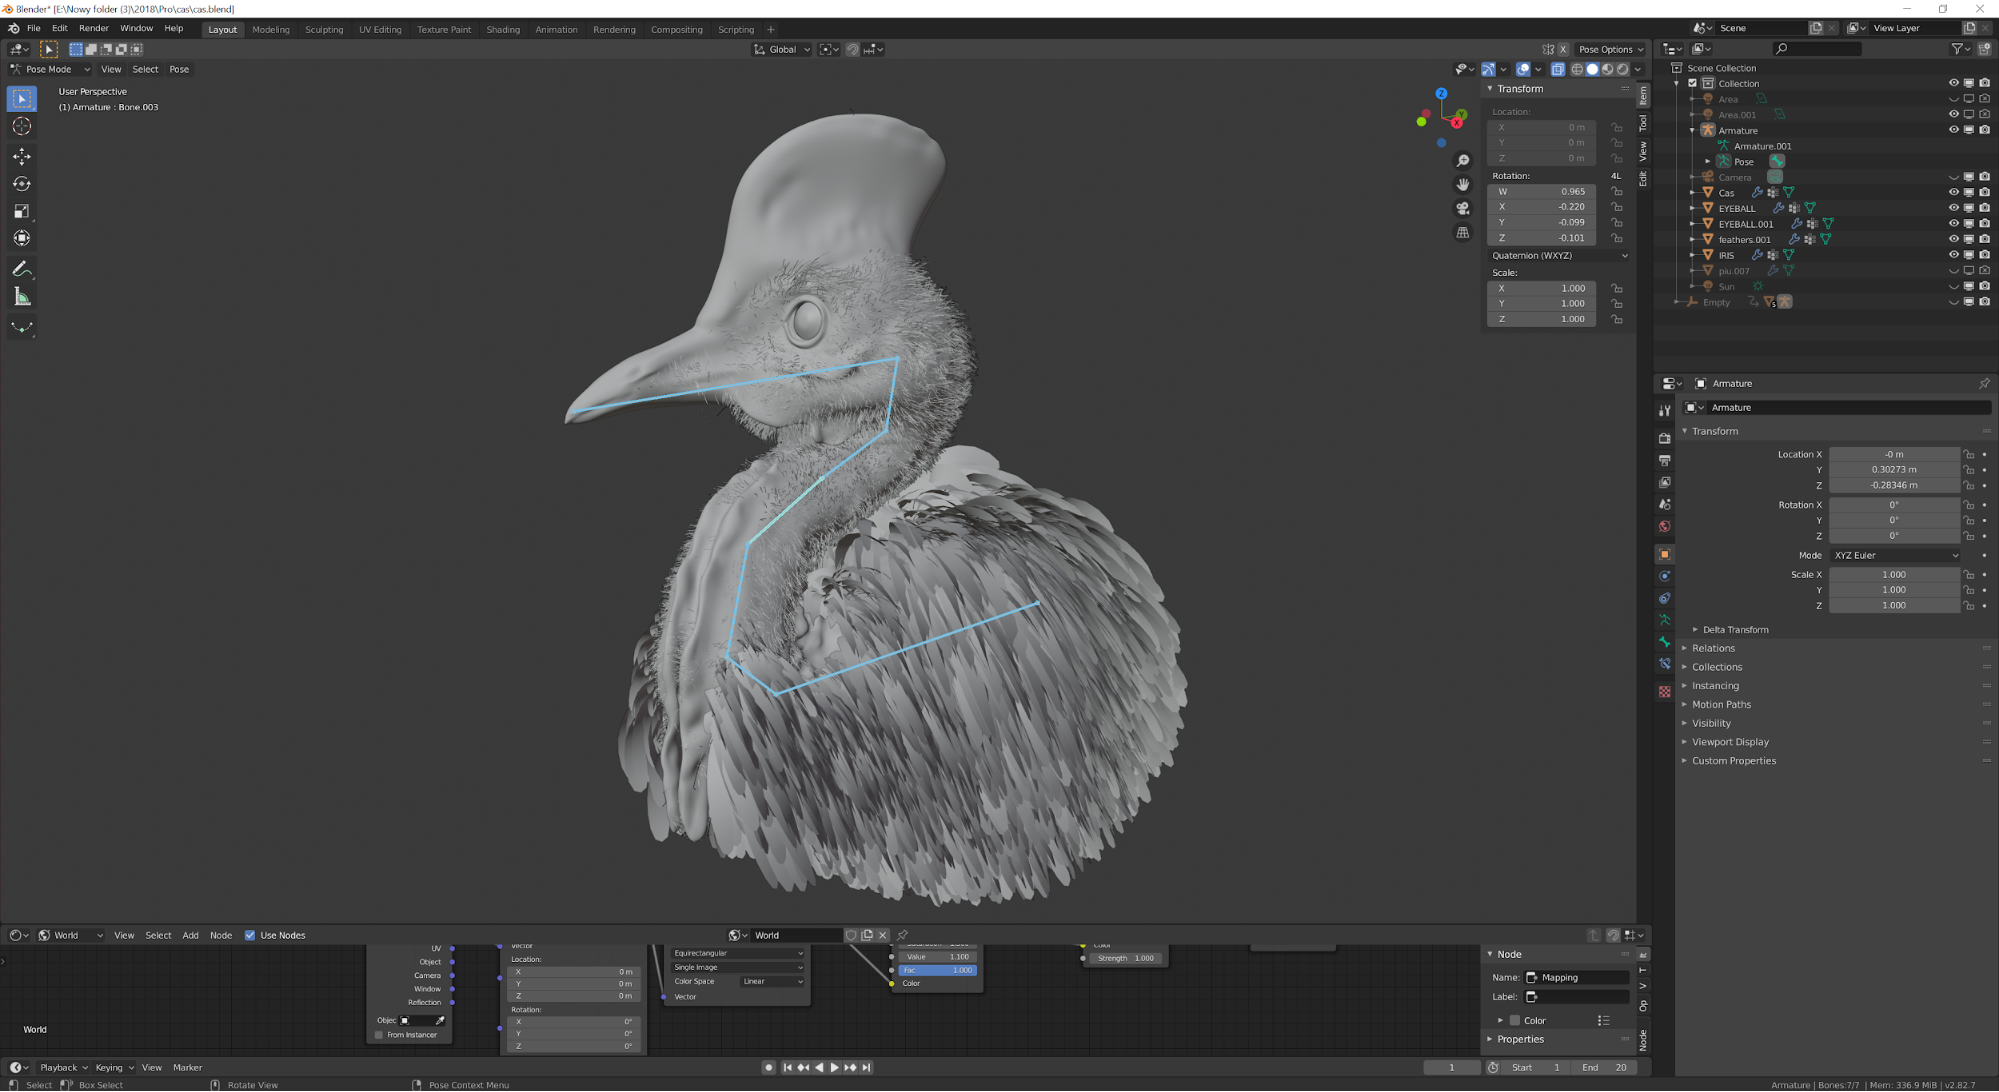
Posing
To add more character to the model, I posed it using a simple armature setup. I arranged it in a resting position to make bird seem more relaxed and at ease.
Lighting
For lighting, I used wonderful HDRIs from HDRI Haven. They are perfect for photorealistic rendering without requiring a complicated setup.
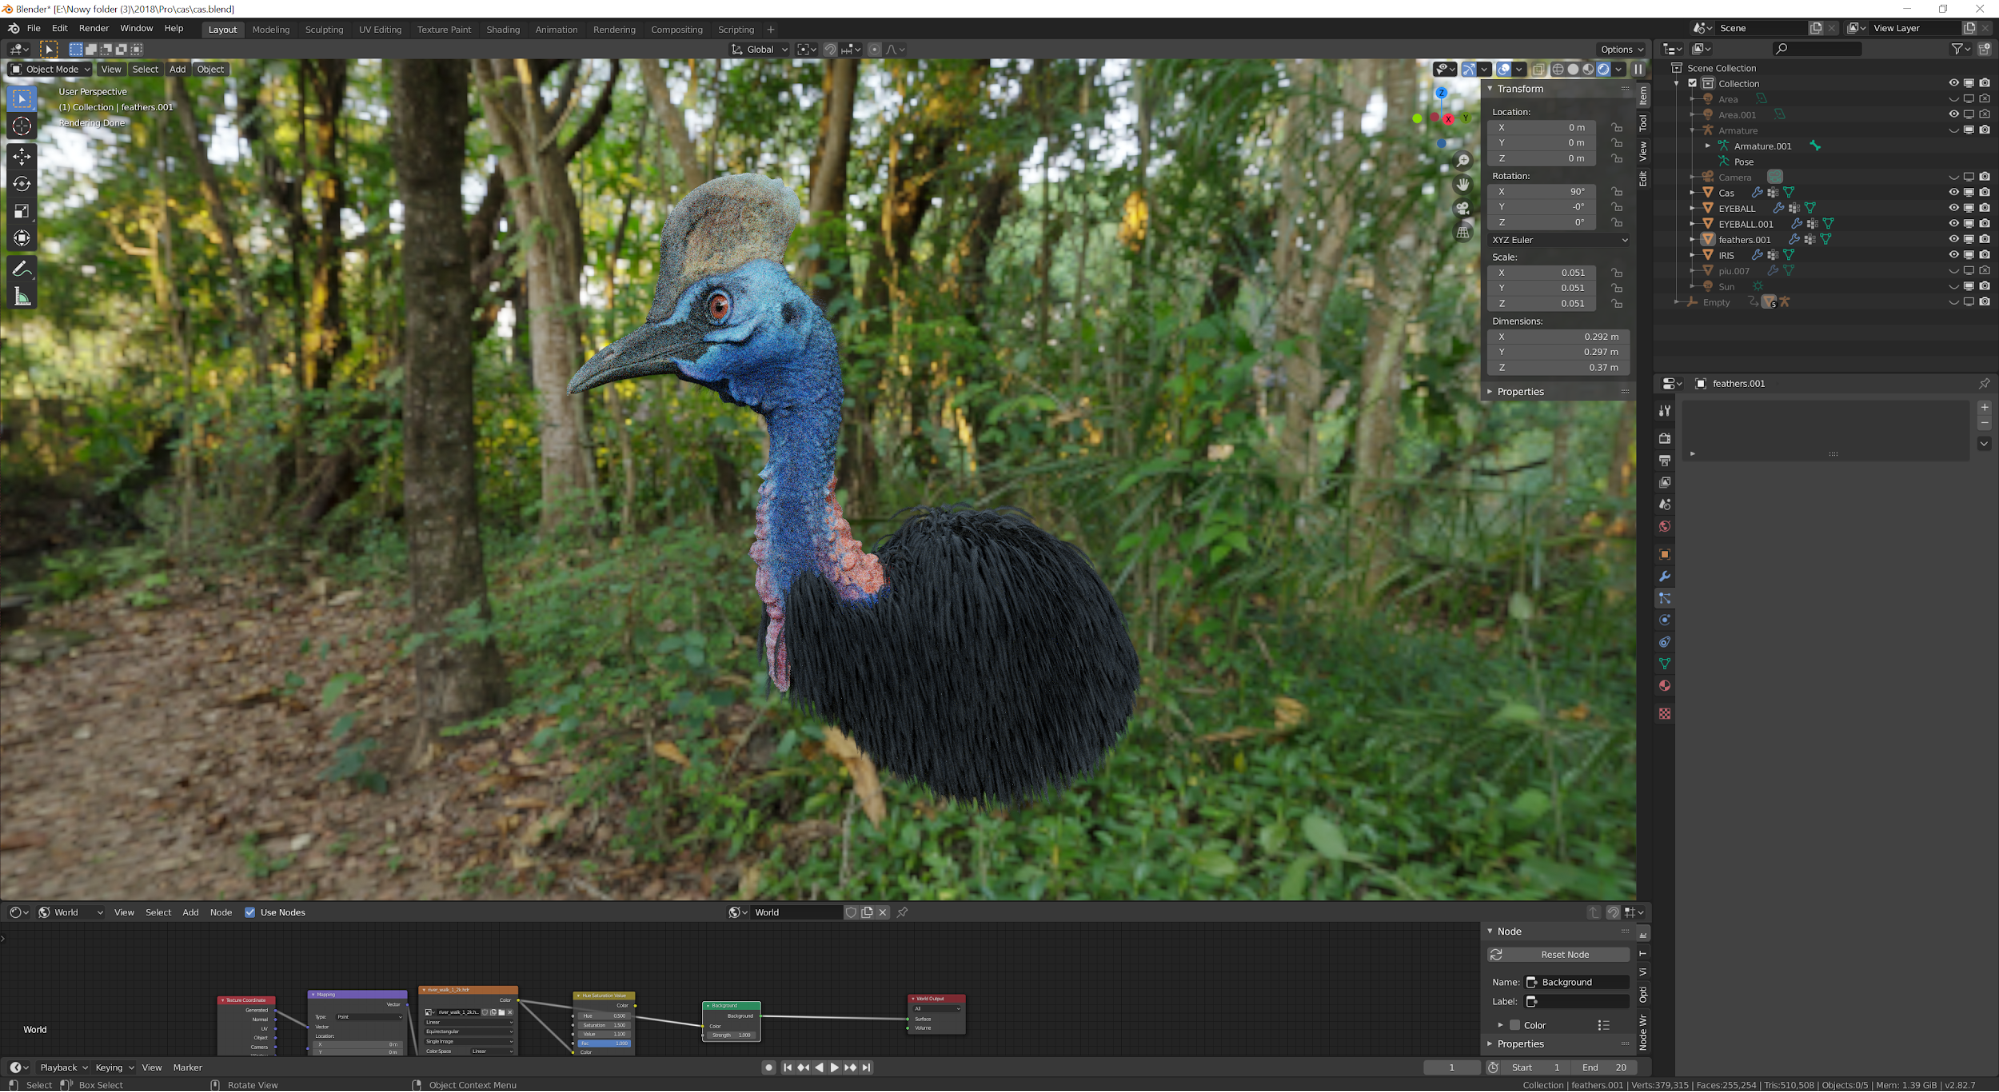
I made a couple of test renders to decide the camera position and HDRI. I already knew I wanted to simulate the cassowary’s natural forest habitat, but wanted to see how it would look in different lighting conditions.

Post-process
When I decided on HDRI, I gave it a proper render. Then I imported the object and environment layers to Photoshop, blurred the background, corrected the colors, added chromatic aberration and some grain for a filmic look.
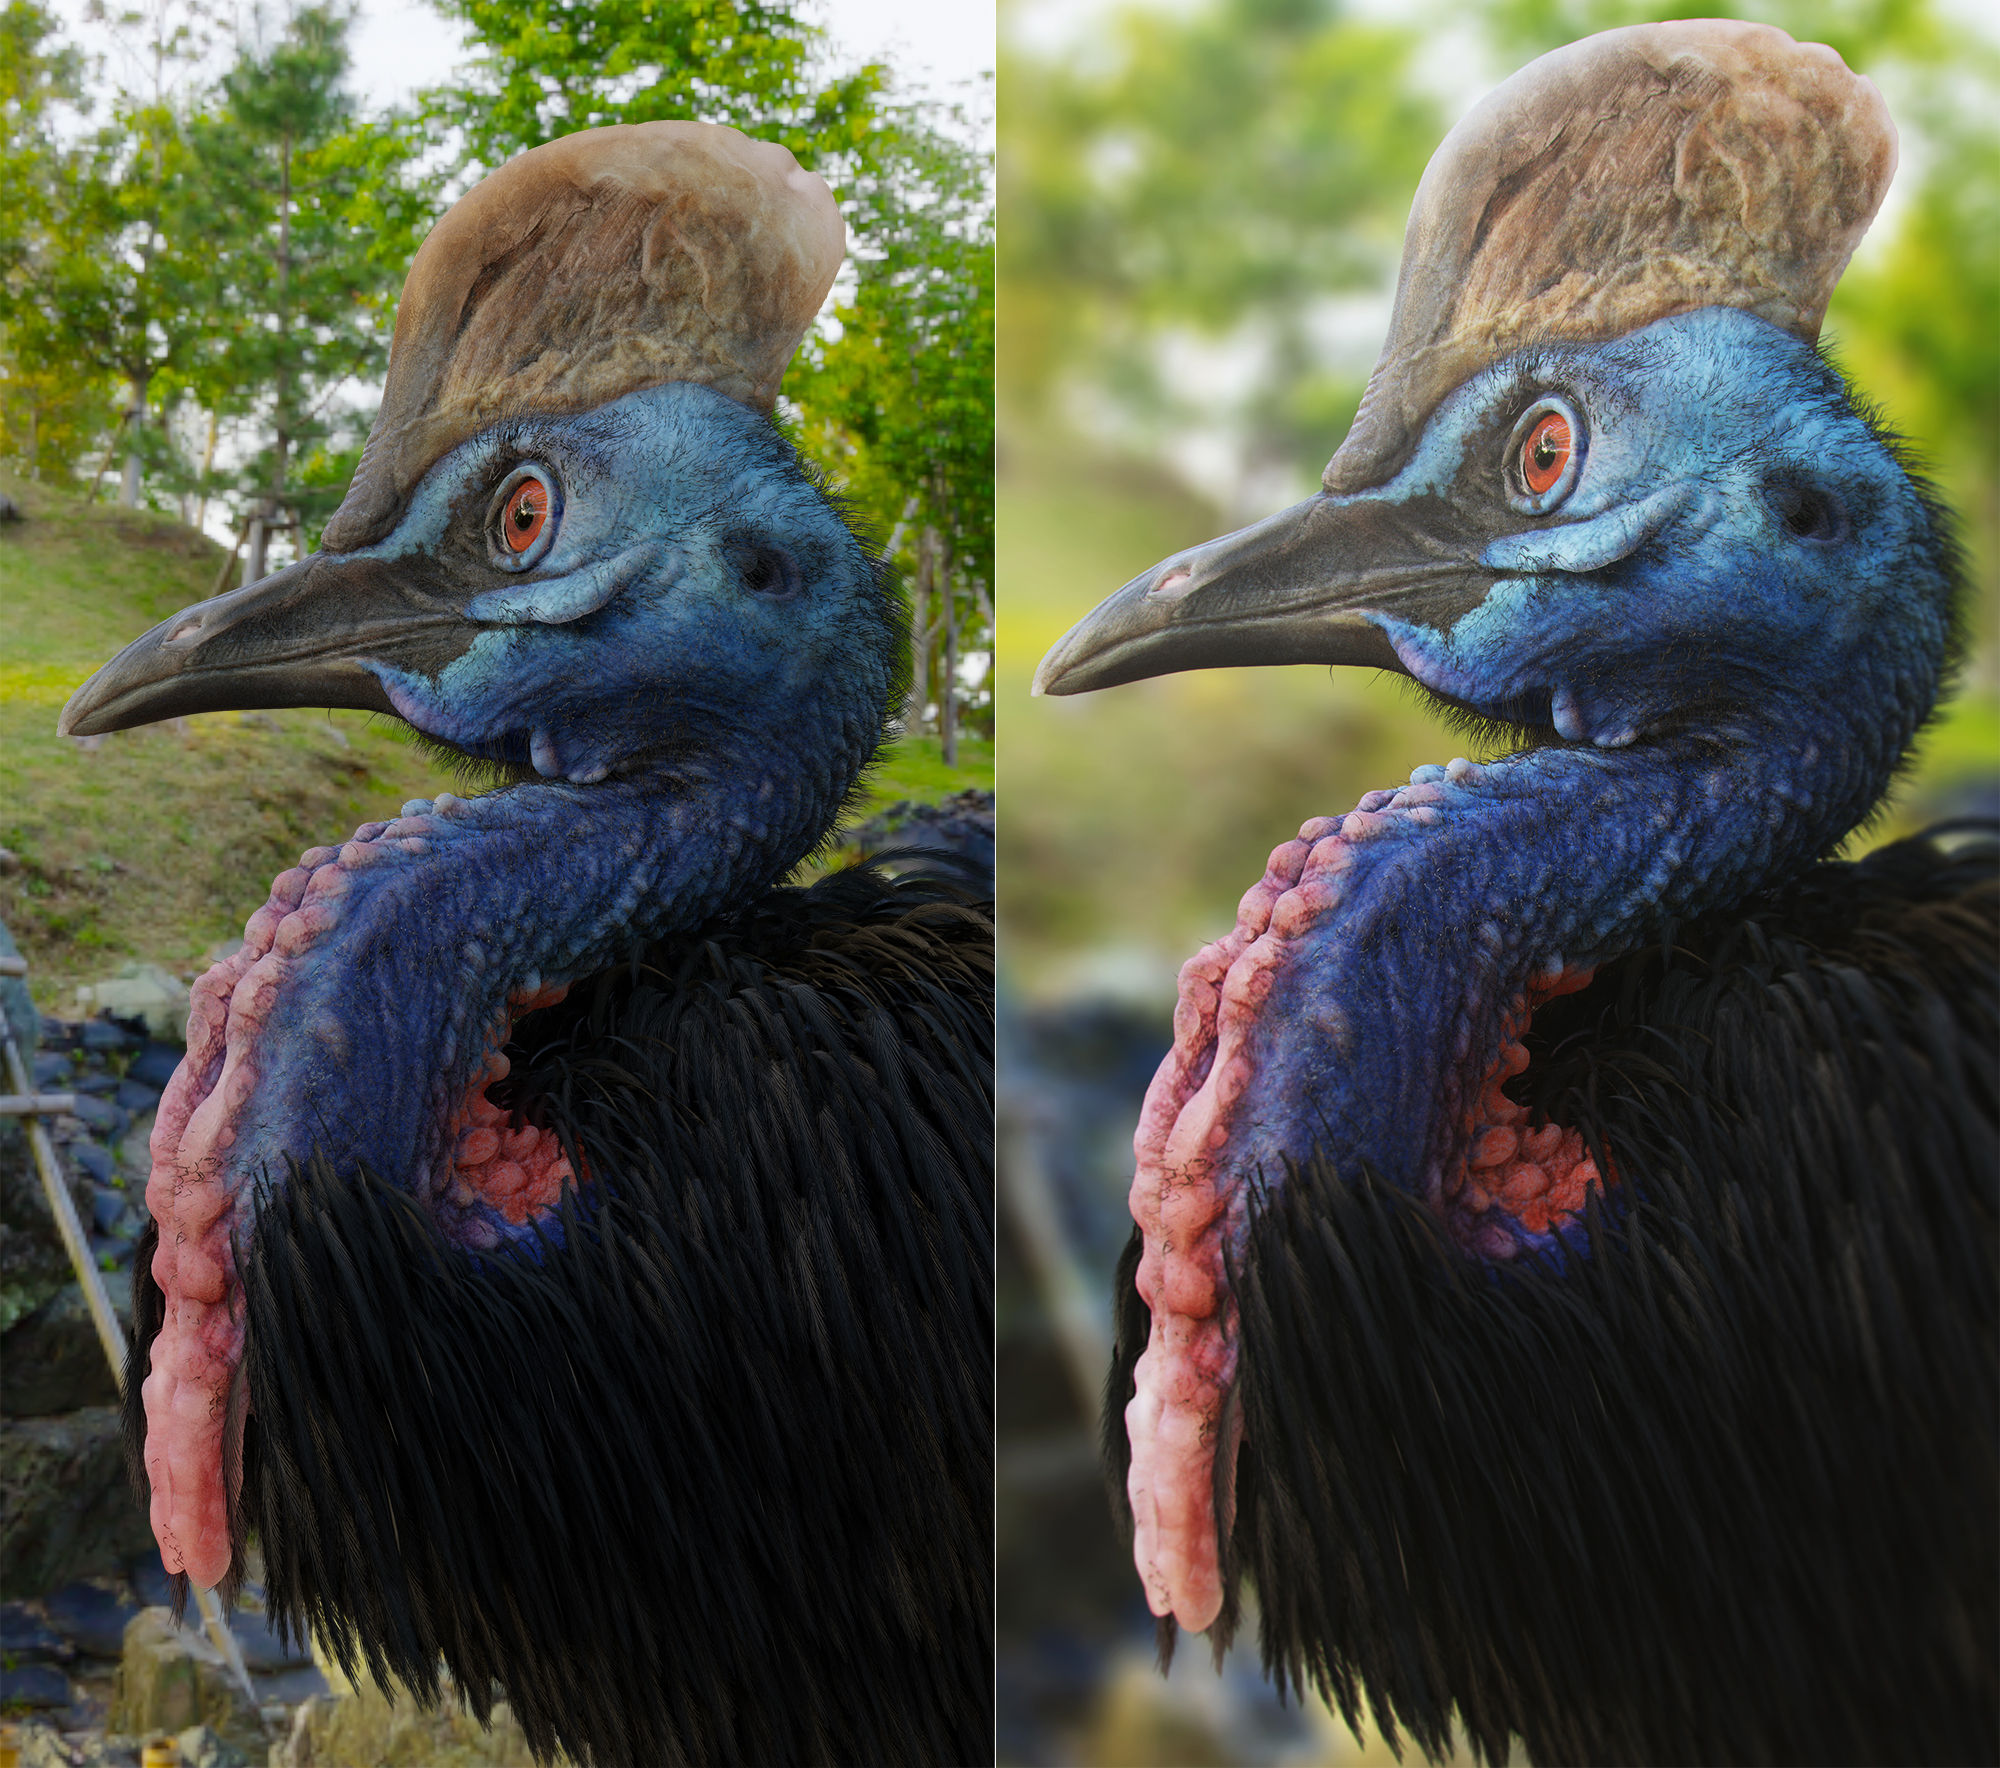
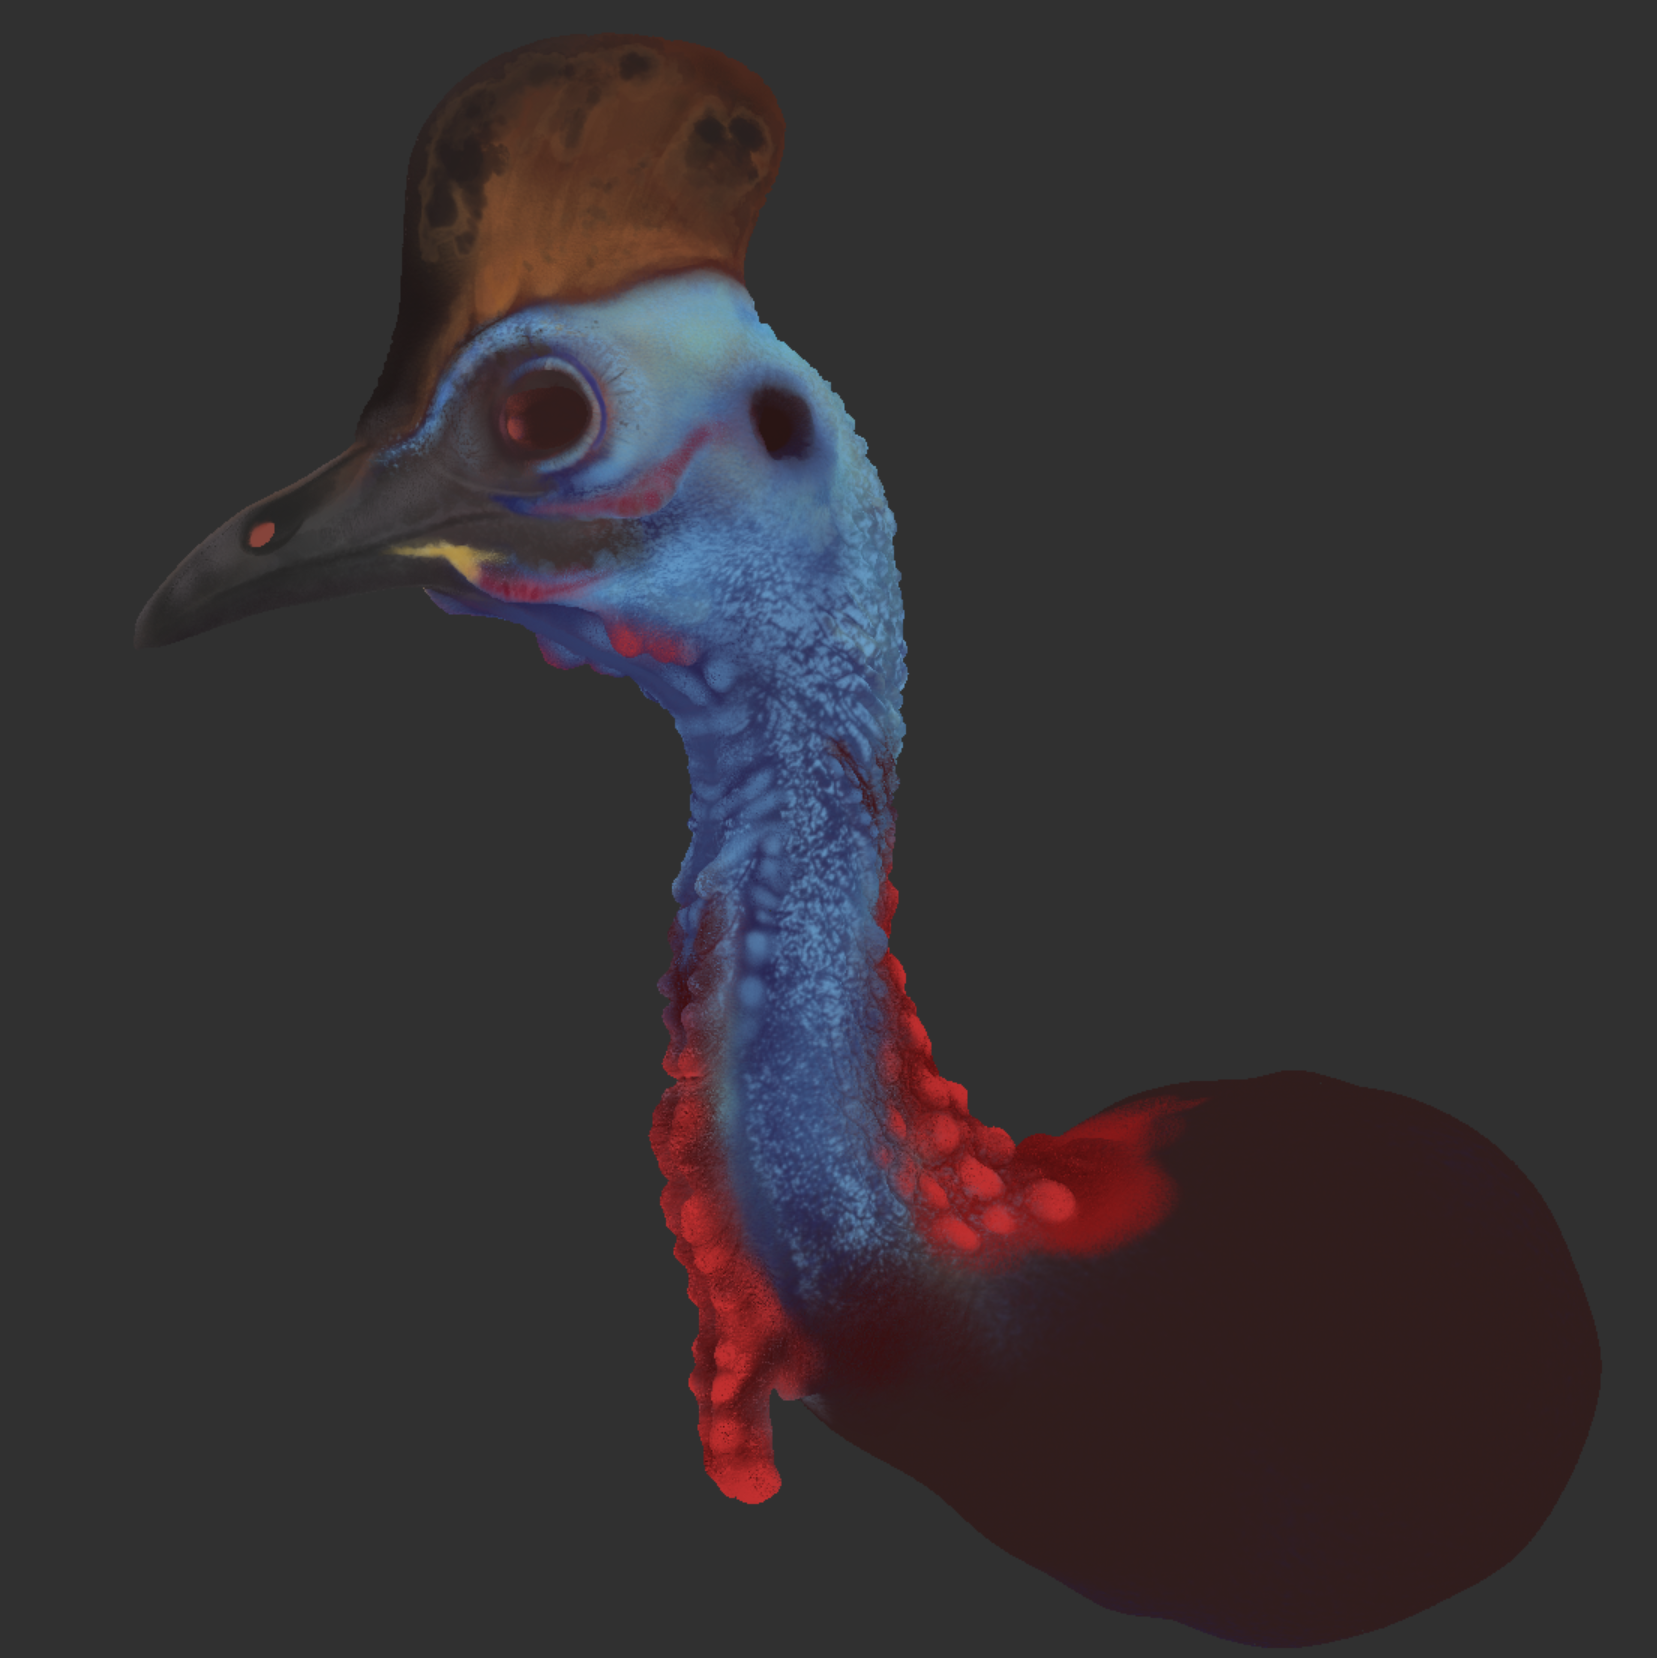
Final Render
About the Author
 Joanna Kobierska, game design student at the University of Silesia. A long-time Blender enthusiast, I’m most interested in realistic sculpting and texturing of different creatures from real animals to fantastical beasts. I’m also quite adept in shader development and animation.


Absolutely stunning piece Abby! Love it. Very inspiring.
Thanks, Michael! But the true credit belongs to Joanna—I just edit and format. ;-)
Wow, Joanna! That’s a beautiful piece of work! And thanks for showing your break down/process, very interesting.
Excellent work Joanna! It takes a particular discipline and sensitivity to detail to create such exquisite work.