Behind the Scenes: SculptJanuary 2 Machine
About Me
Hello everyone, I’m Manuel D’Onofrio and I come from Pescara (Italy). I’m 24 years old and for about a year I’ve been a freelance 3D generalist.
I started using Blender 3 years ago, thanks to the help of Emiliano Colantoni, who made me fall in love with this profession and gave me the opportunity to reach quality levels with dedication and passion.
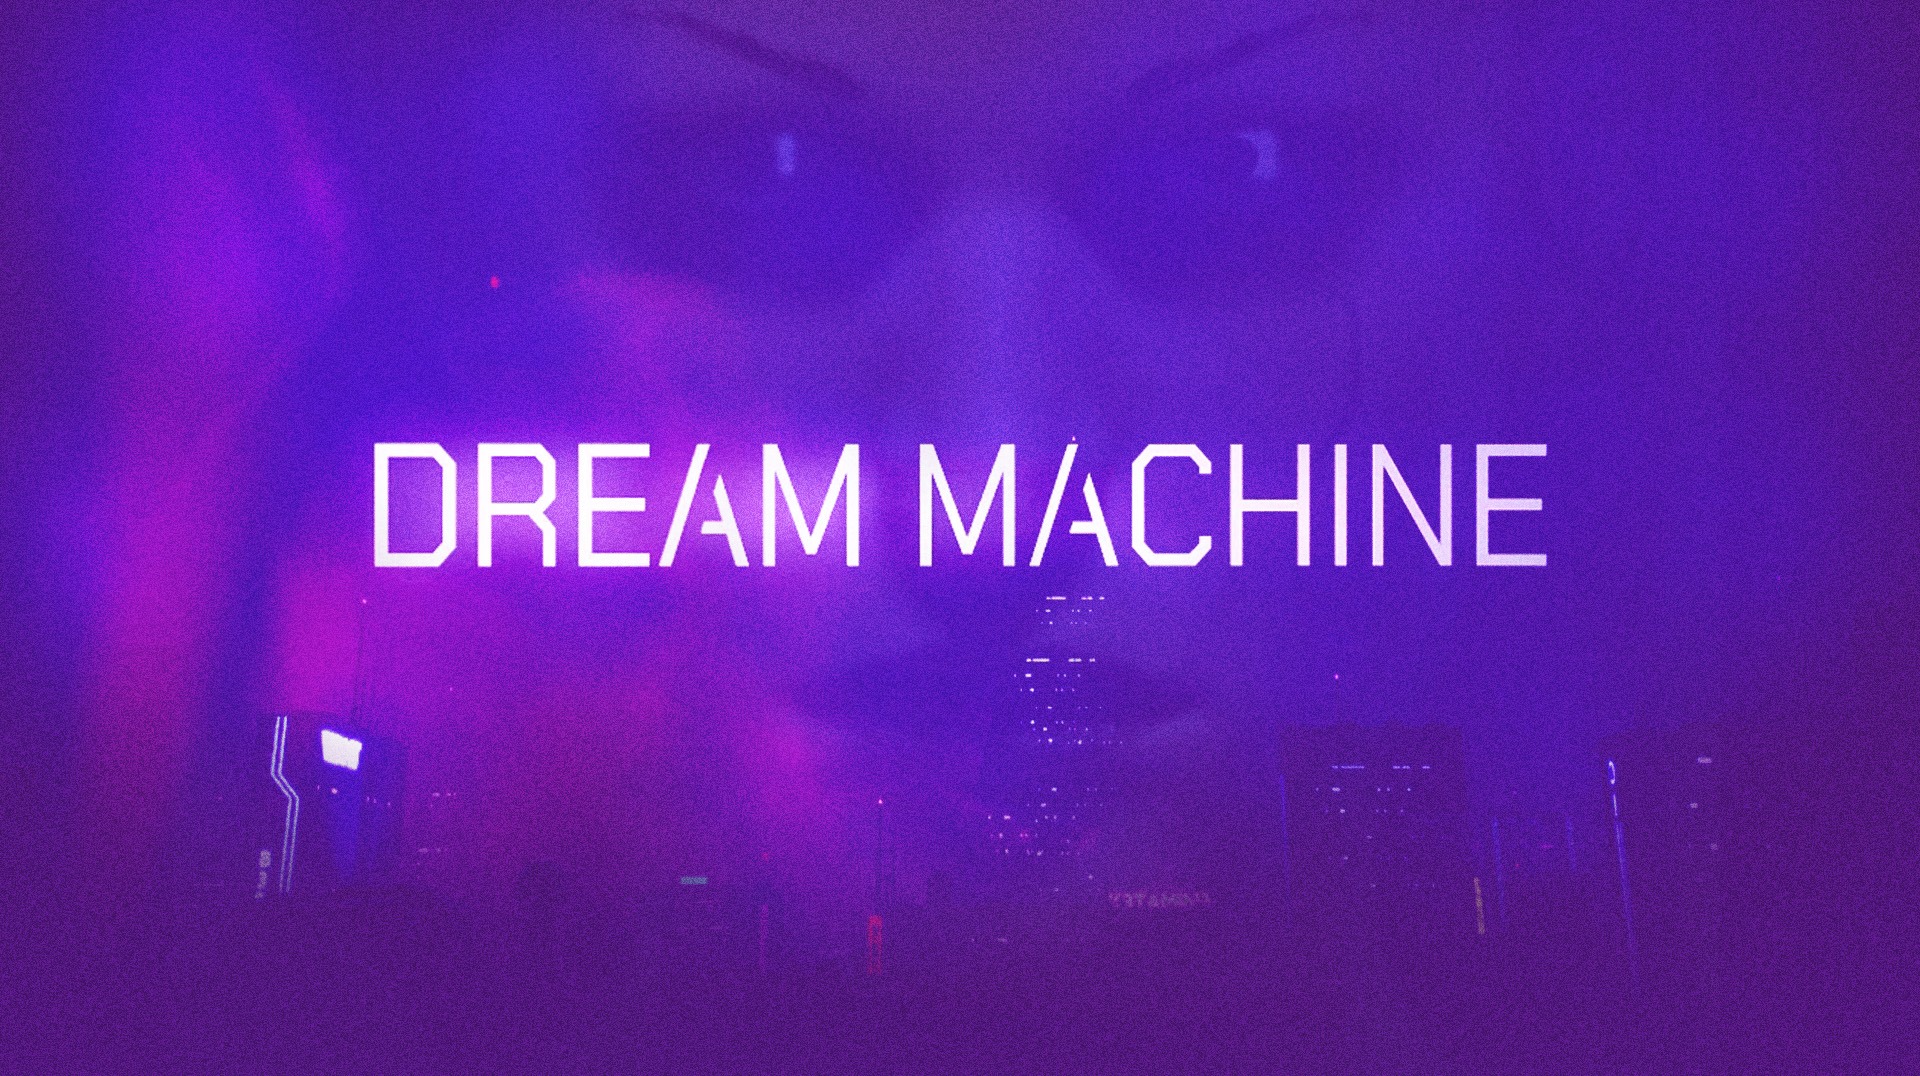
Just recently, we developed an animated short film called “Dream Machine“. This is a story born 15 years ago from an original idea by Adriano De Vincentiis and subsequently adapted by Emiliano to make it an animated short film with the power of the EEVEE engine.
SculptJanuary
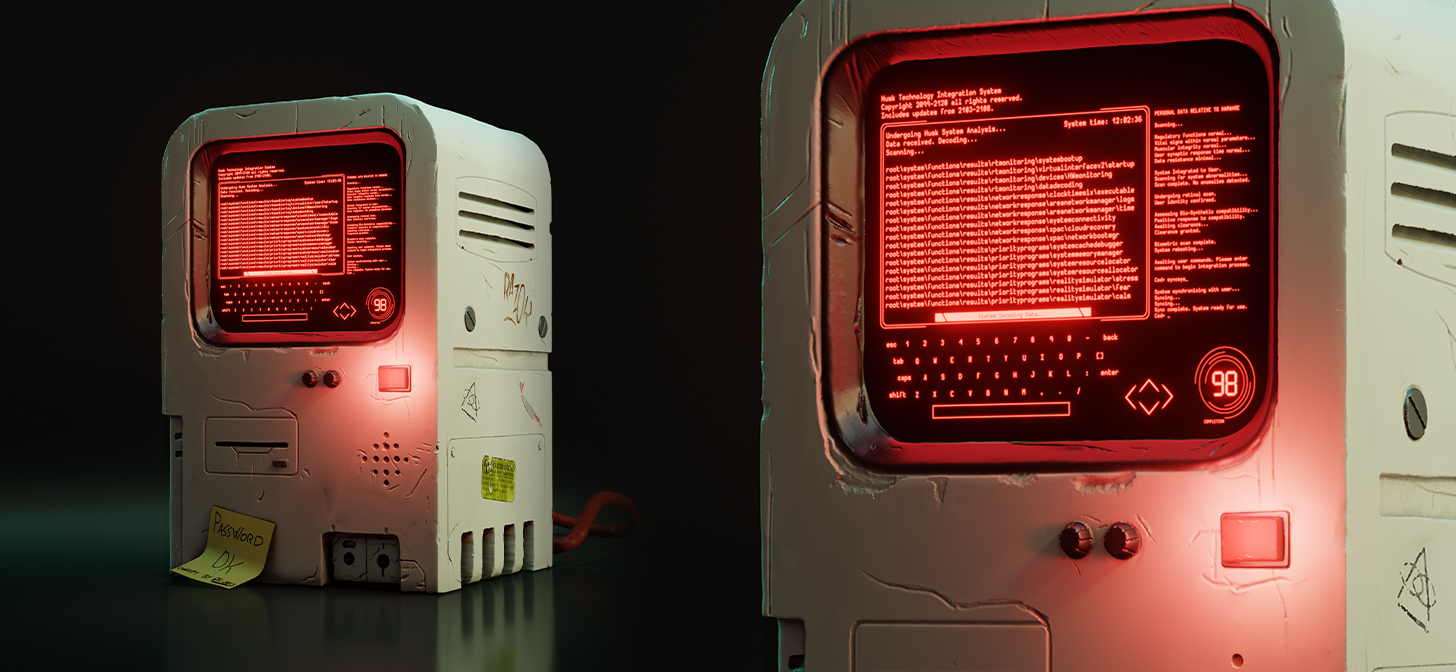
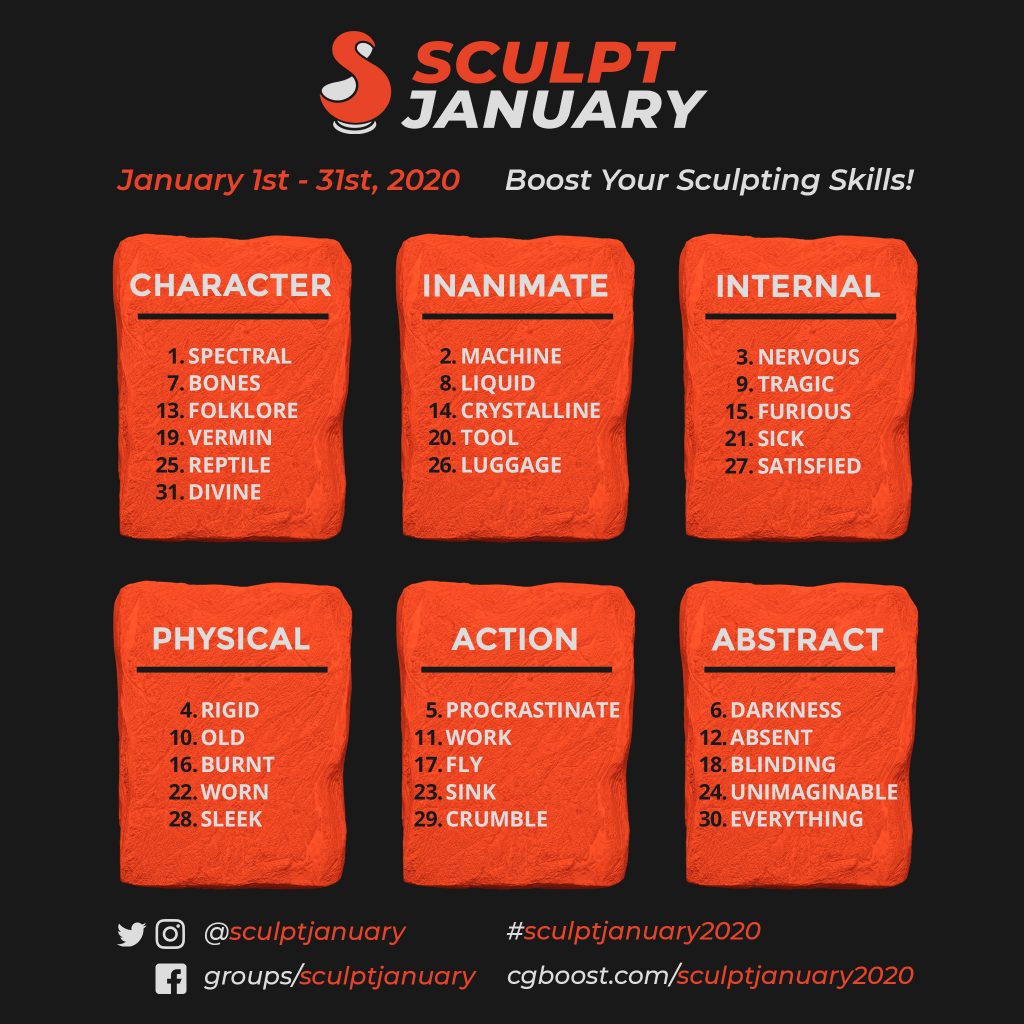
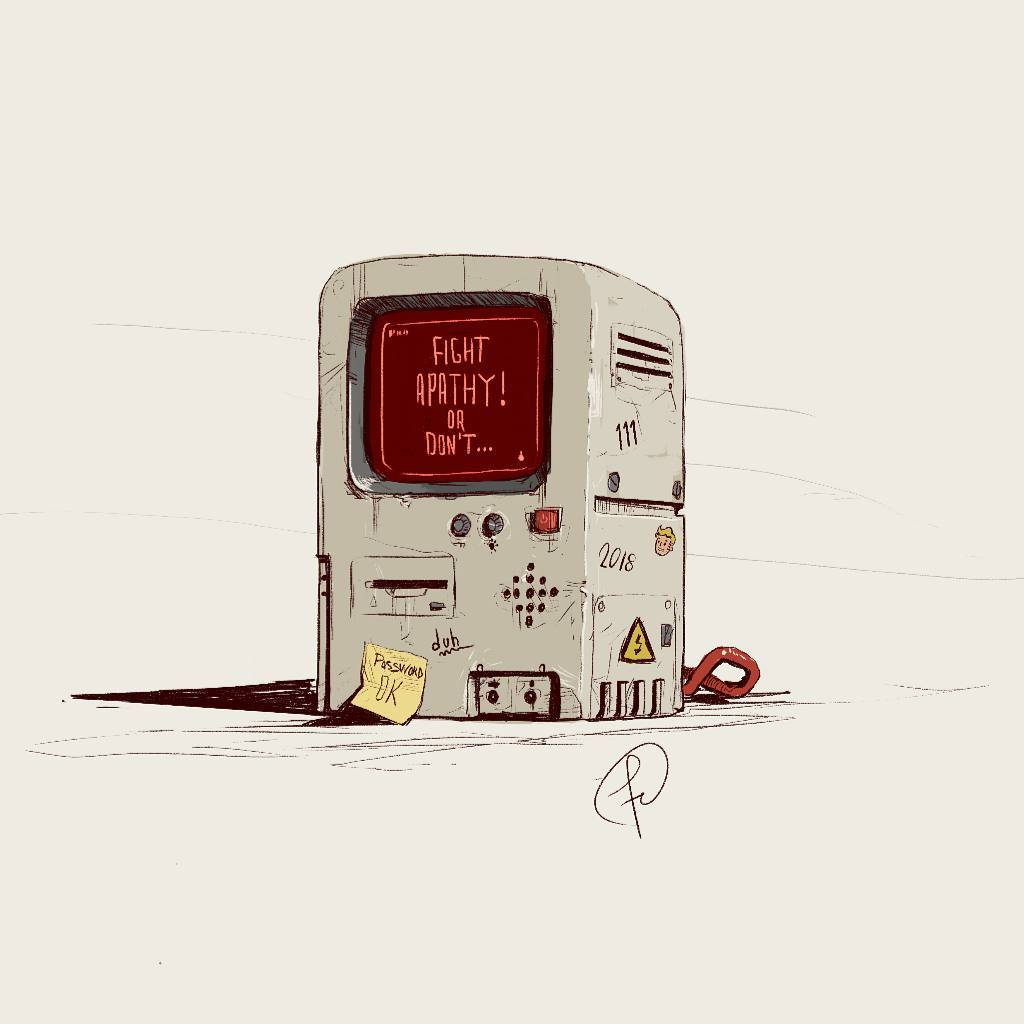
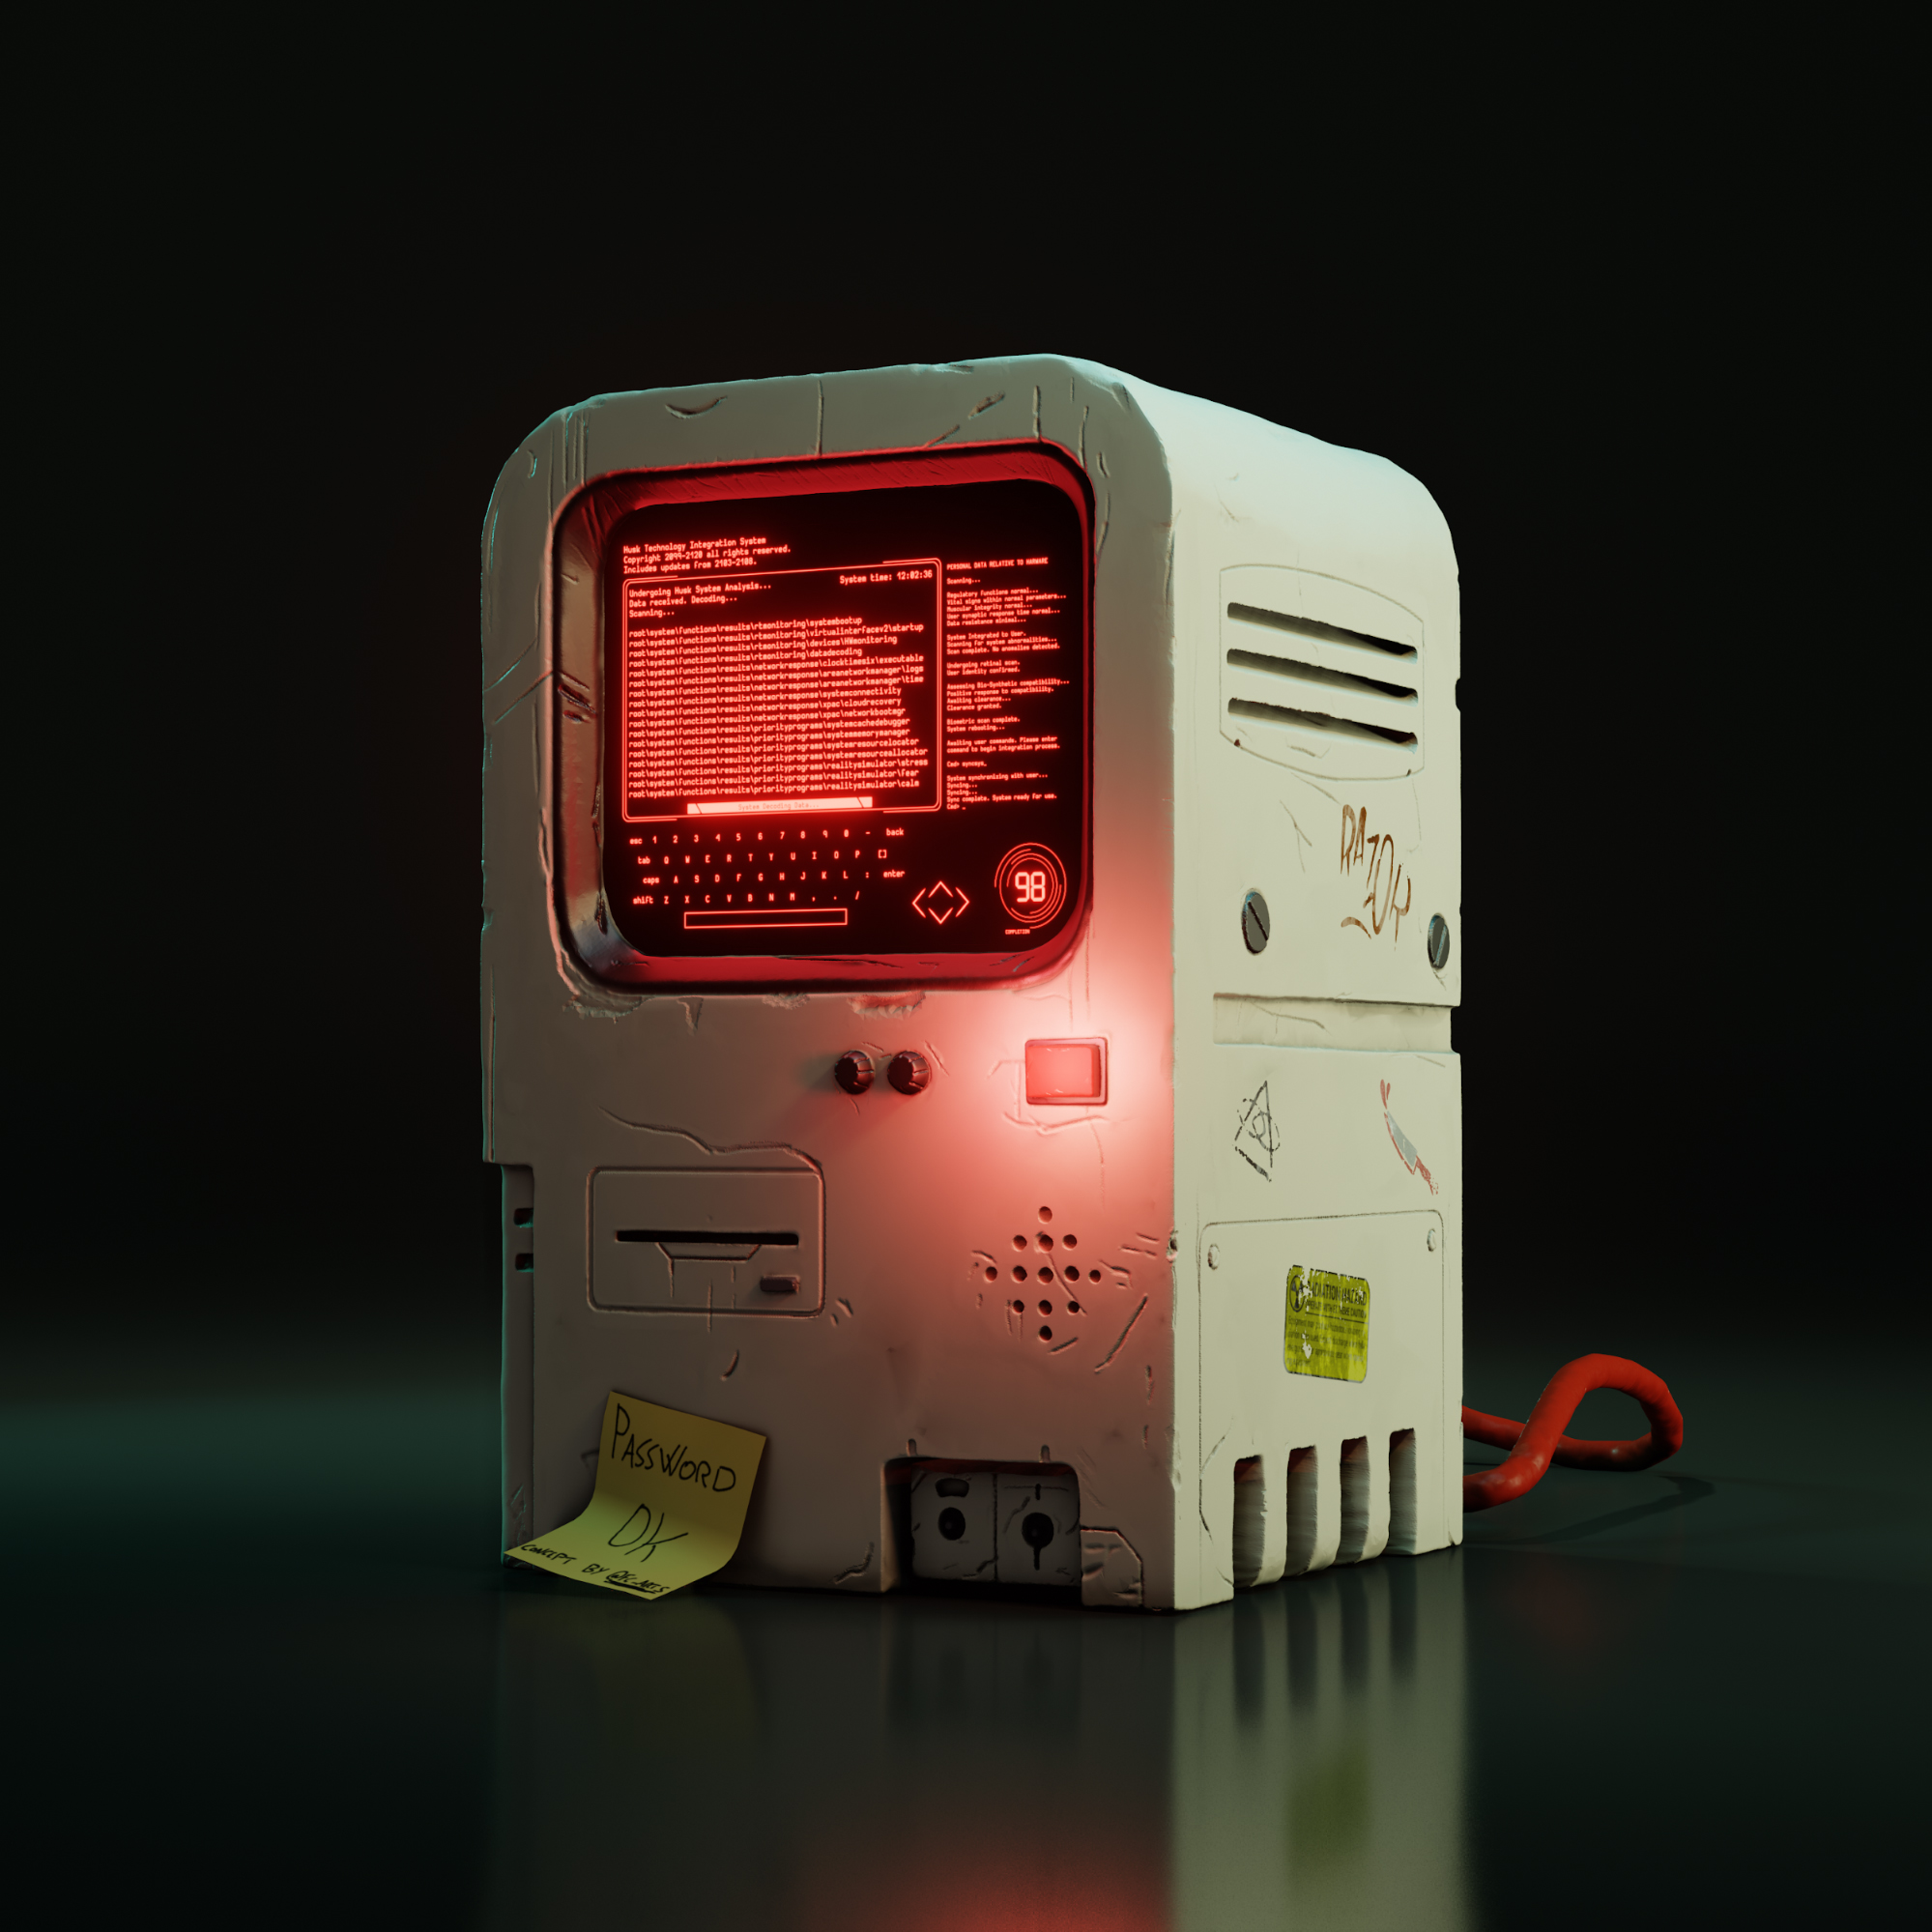
SculptJanuary is the reason why I made this model. The challenge was to create a sculpture every day with a different topic during the 31 days of January.
Unfortunately, for work reasons, perfectionism and especially, laziness, I barely made it to the ninth topic. A real defeat.
Idea
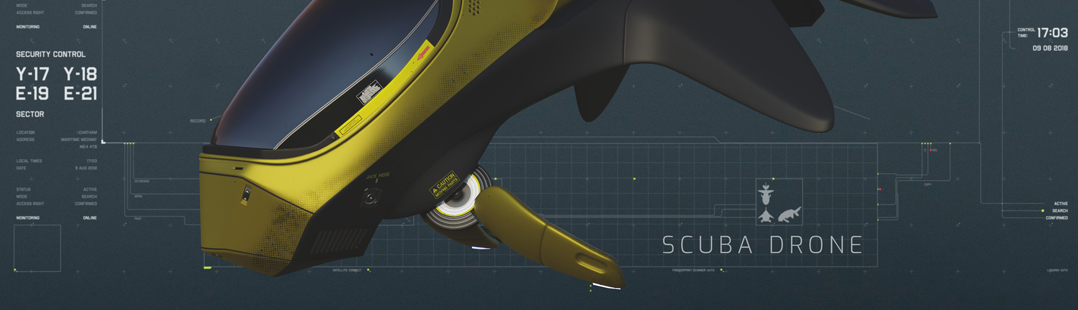
As a big fan of Fernando Correa‘s works, I wanted to take one of his concepts as a reference for the second topic of January, namely Machine.
Modeling
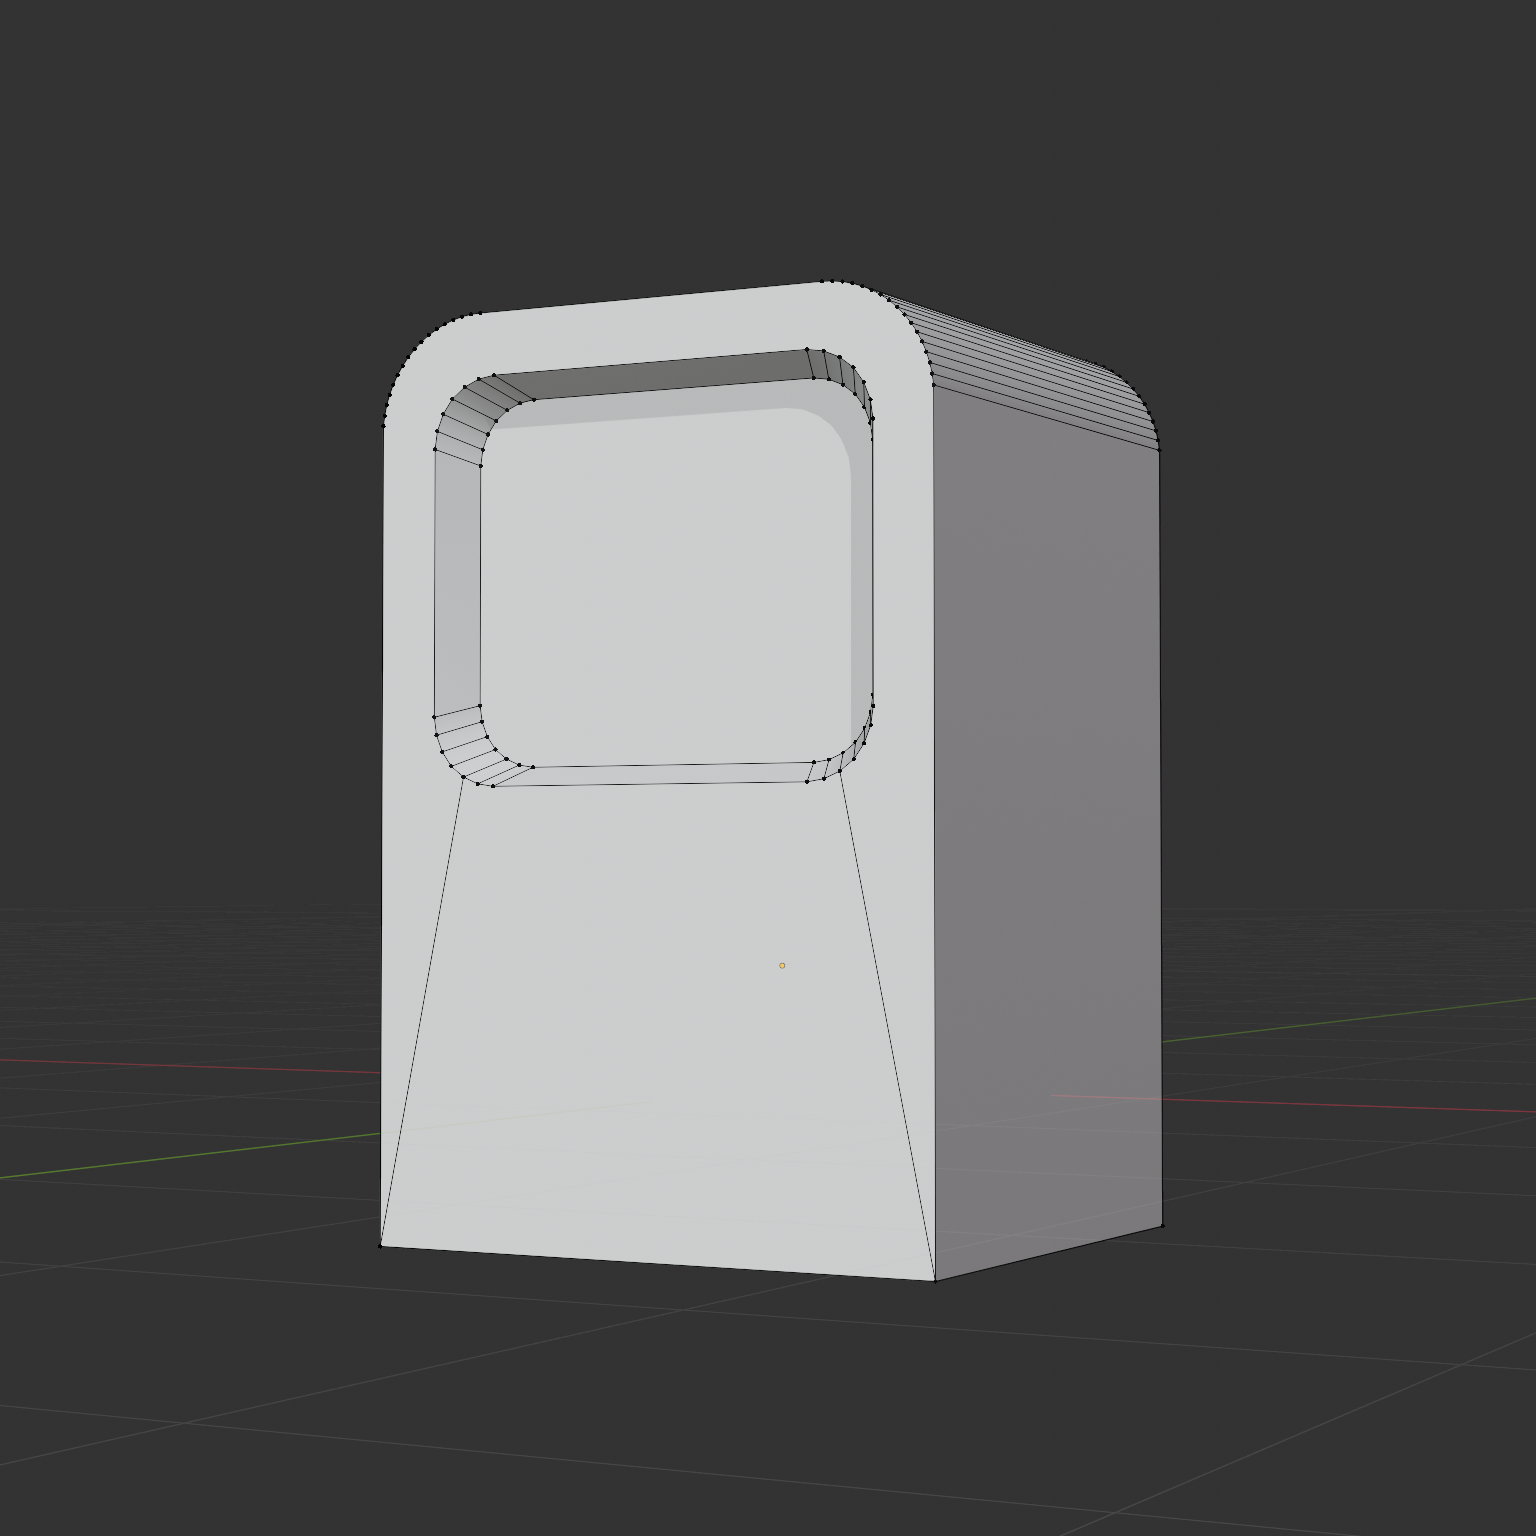
Being a sculpture exercise, I didn’t want to go overboard with modeling so I set up a very simple low poly computer.
Sculpting
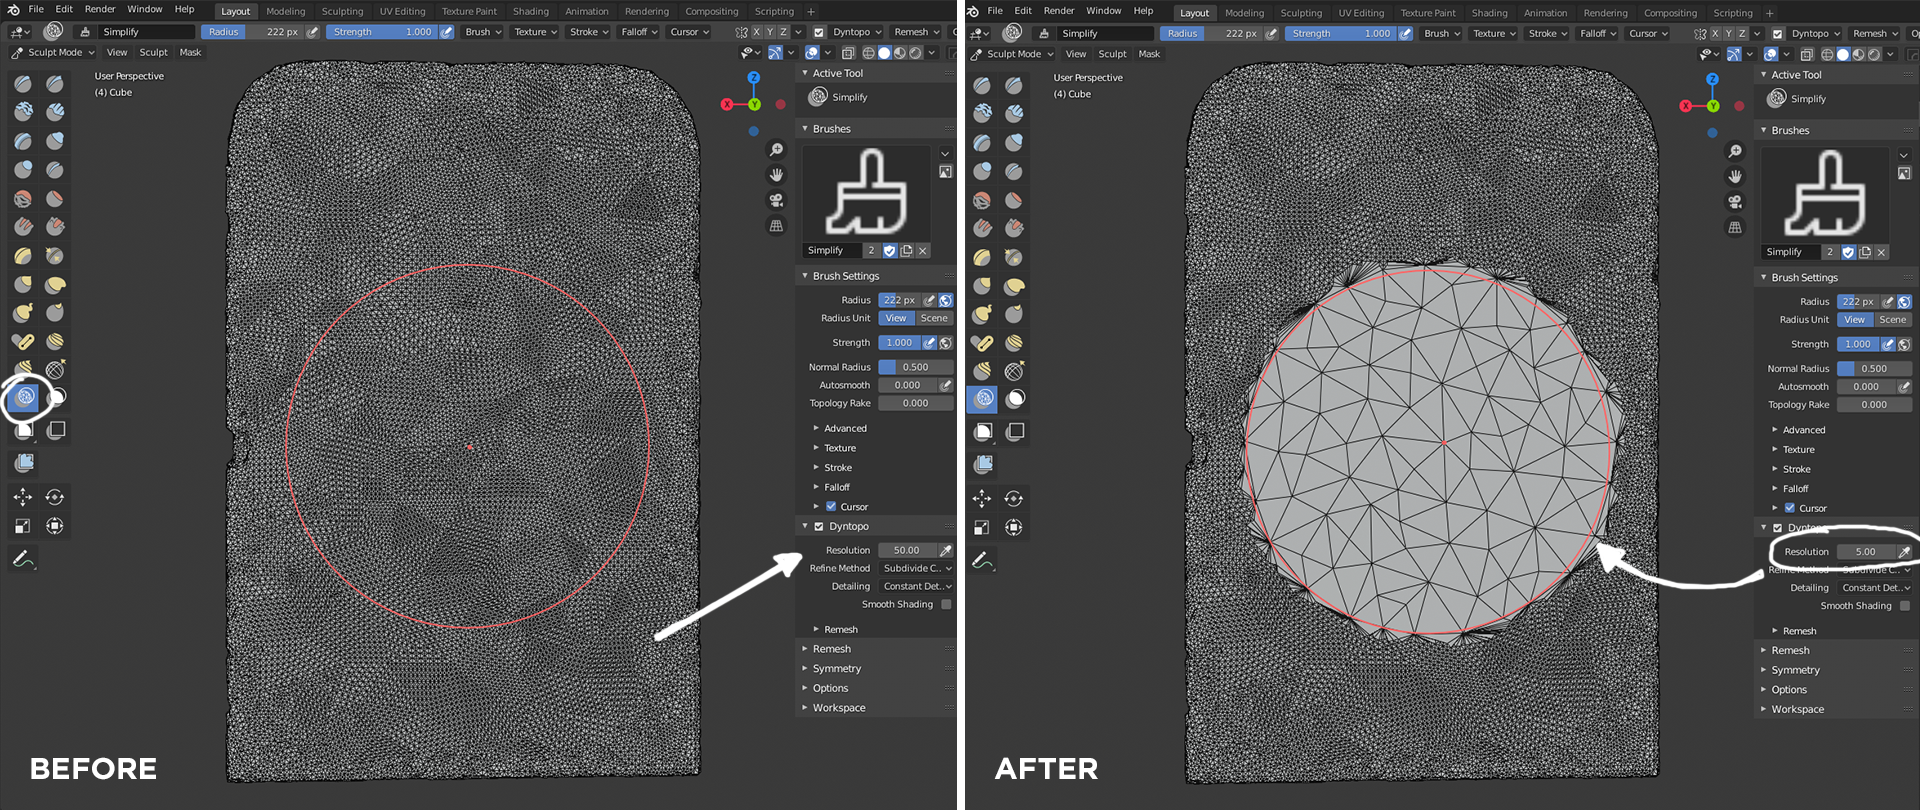
Once in sculpt mode, I immediately made a remesh with a high density of geometry. In this way, I had the opportunity to move all those shapes that I hadn’t created in modeling.
To do this I used a repeated workflow: mask, move, and remesh.
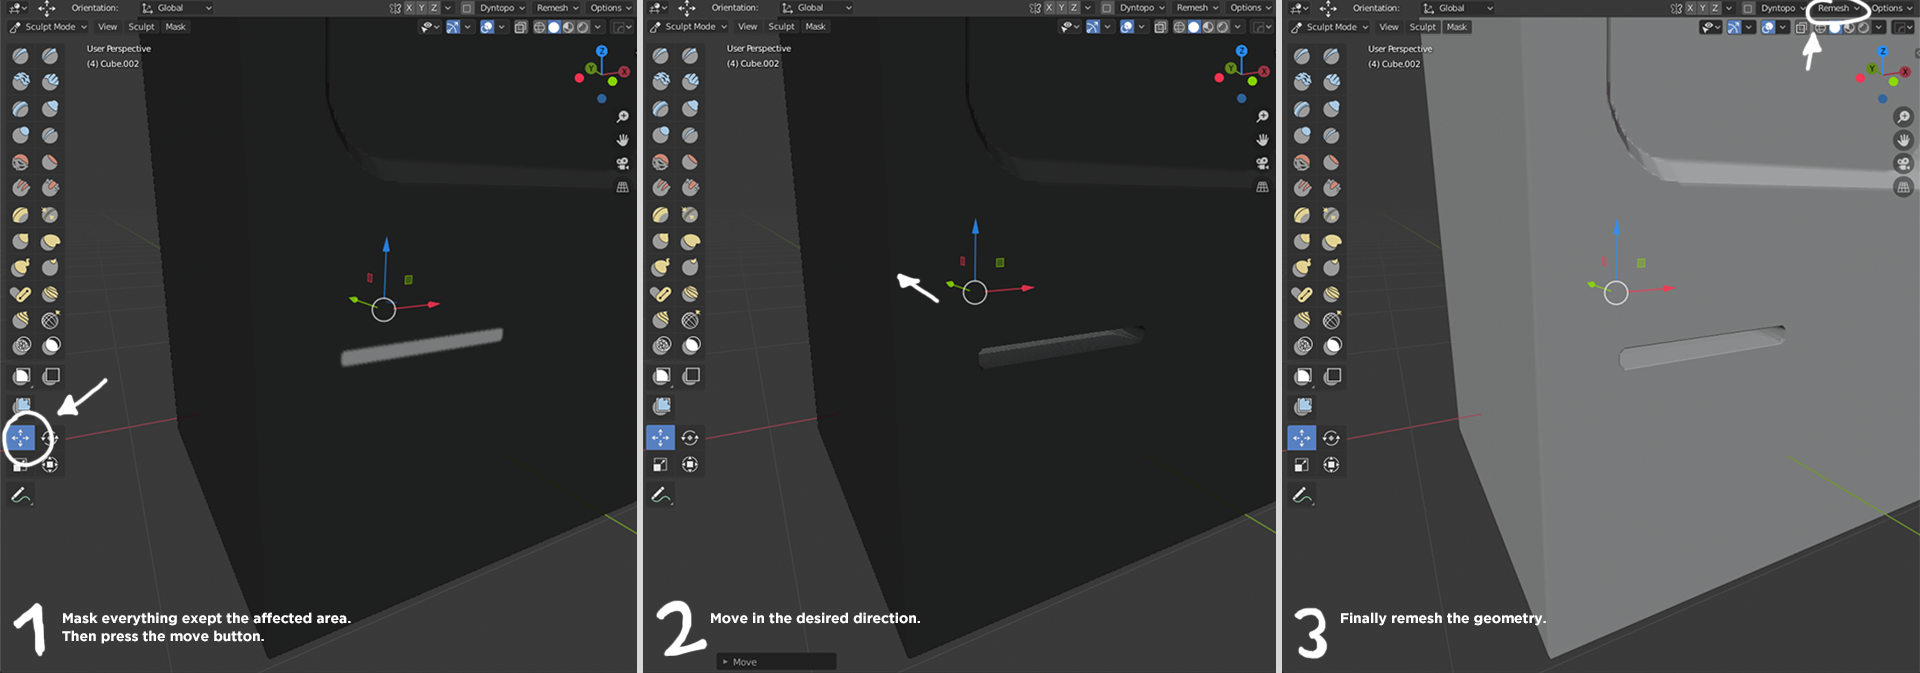
At the end of this part, I switched from remesh to Dyntopo to get a lot of detail only on the areas that I wanted.
I didn’t give importance to the precision of the strokes because I wanted to achieve an old and ruined look for the model.
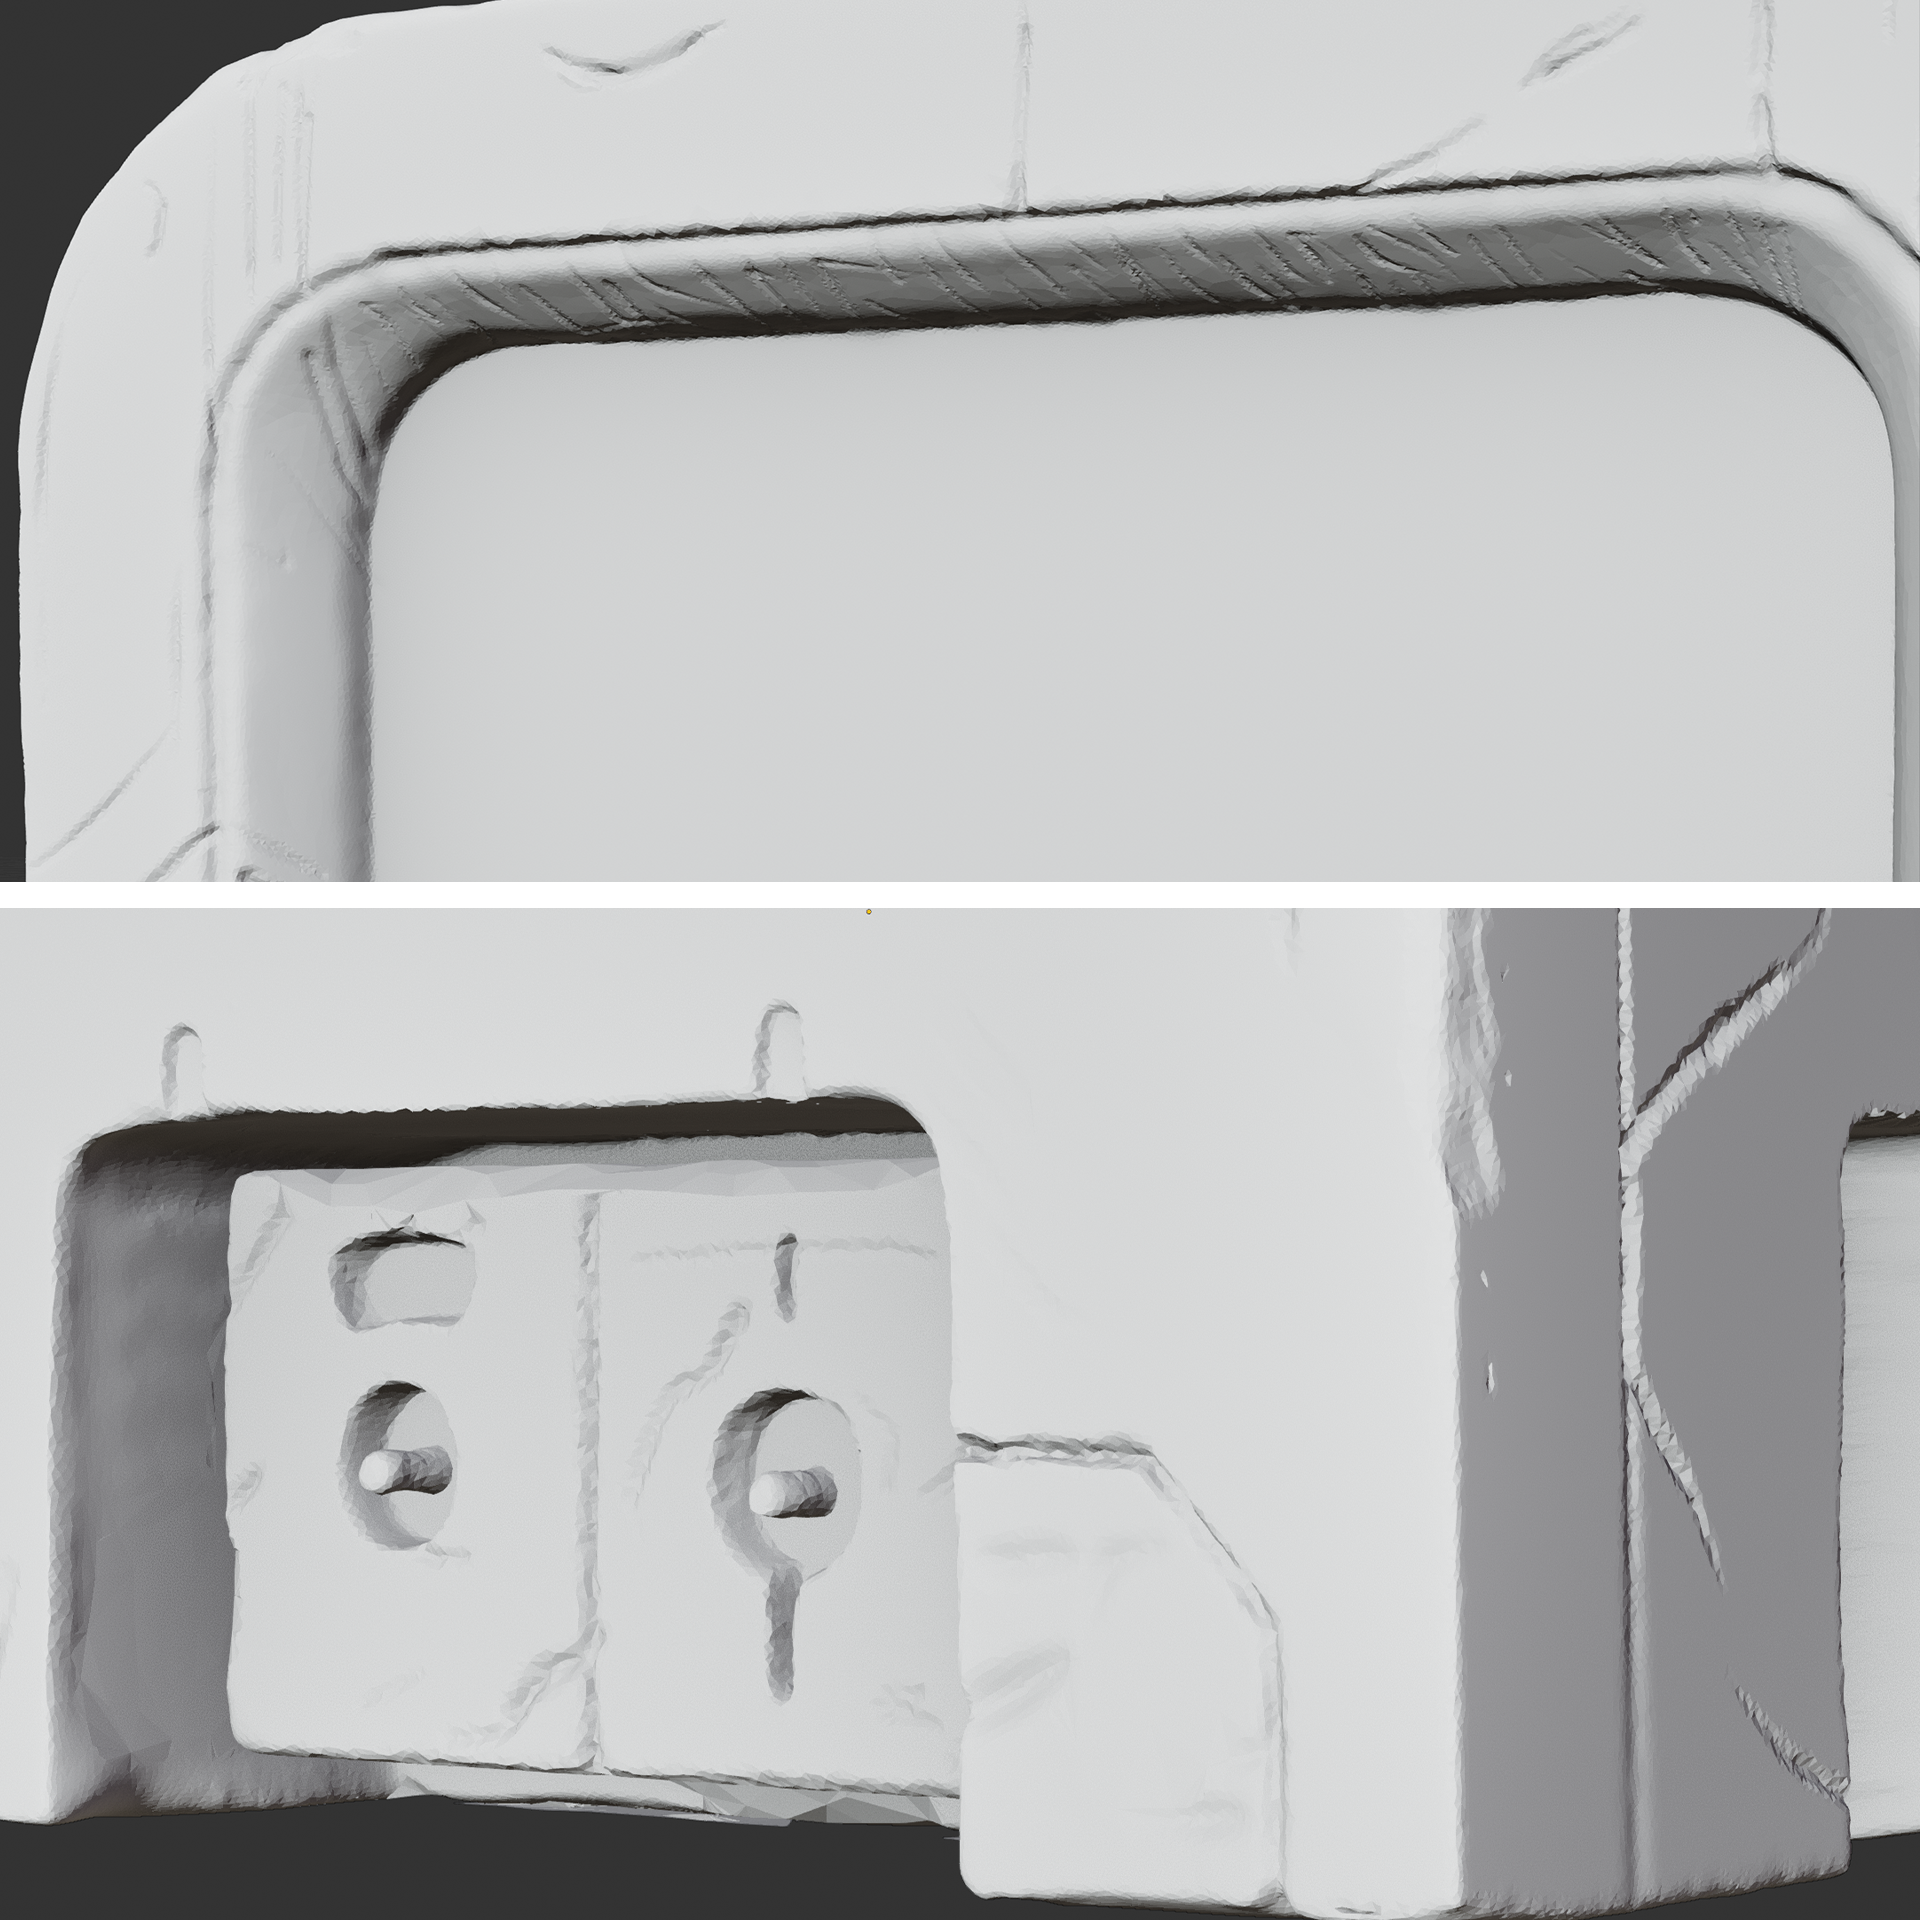

Also, to improve the performance, I used the Simplify brush to reduce the excess geometry on flat areas.
Texturing
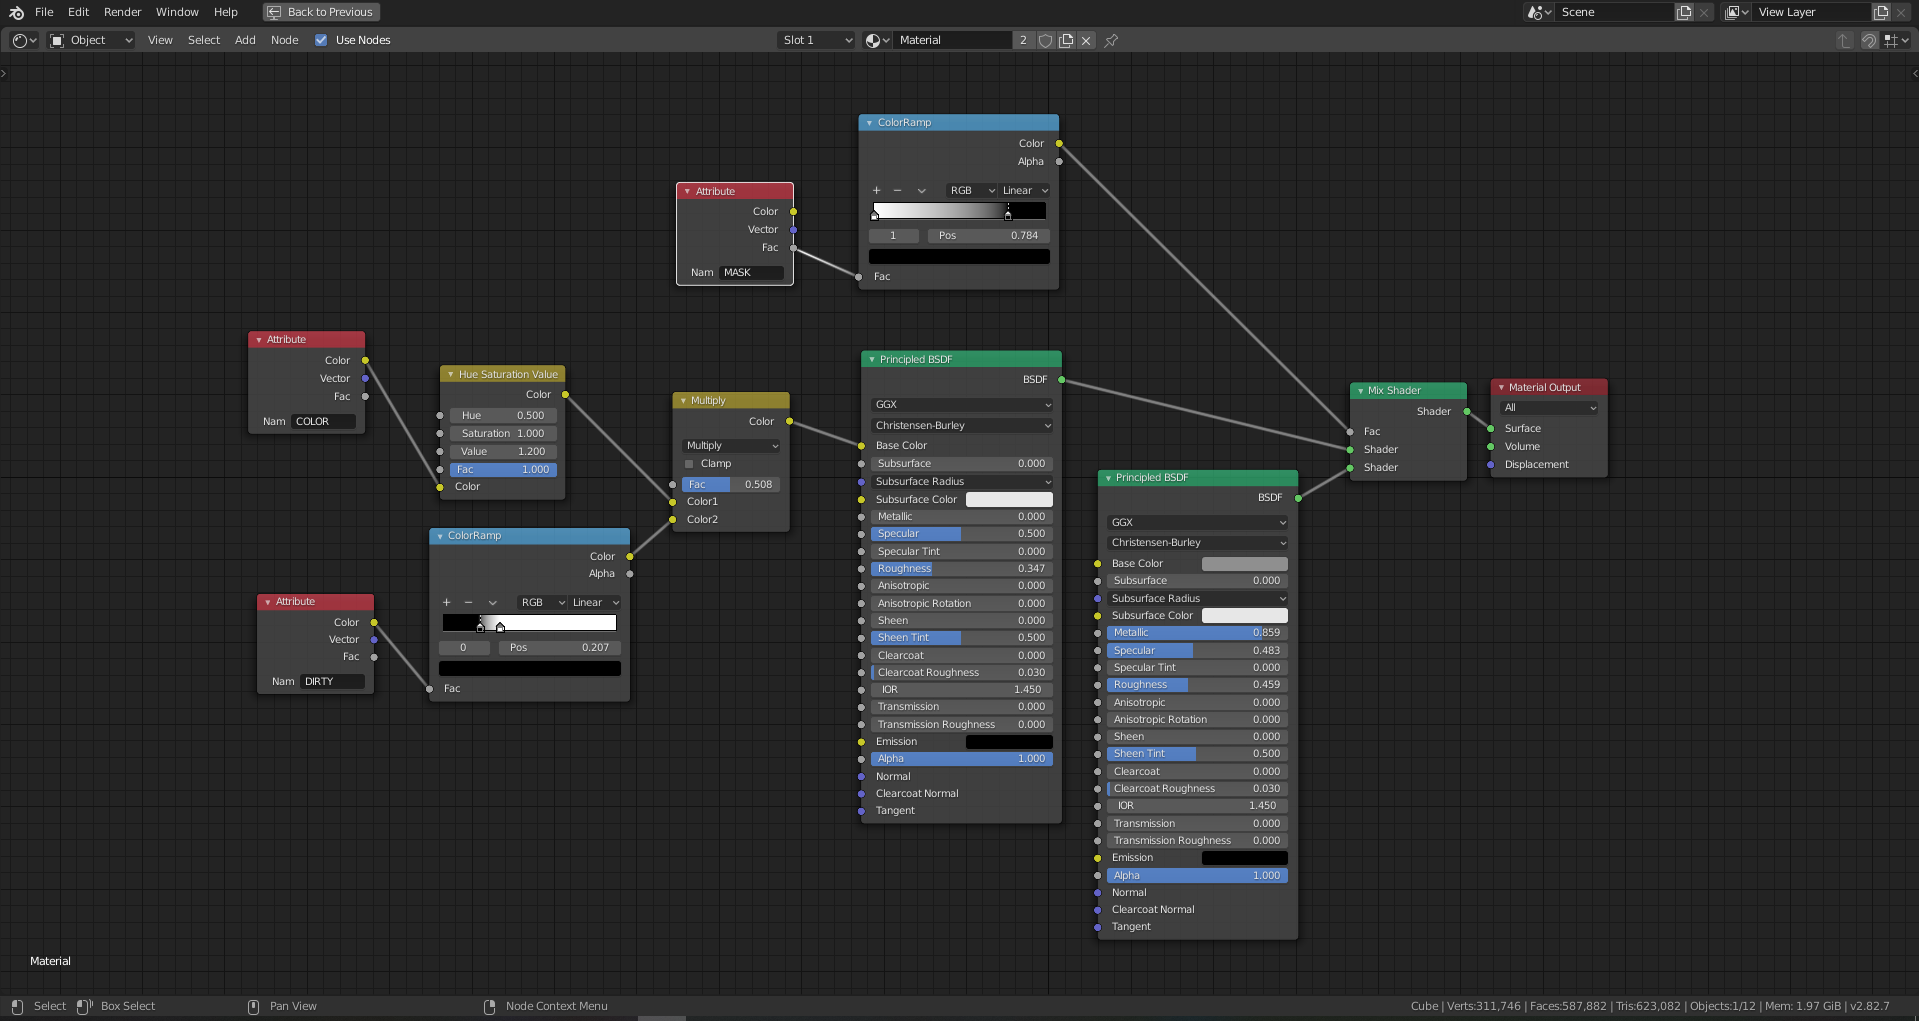
In my texturing workflow, I always rely on maps created in vertex color. In this case, I created a color map, a dirt map, and a metallic mask.
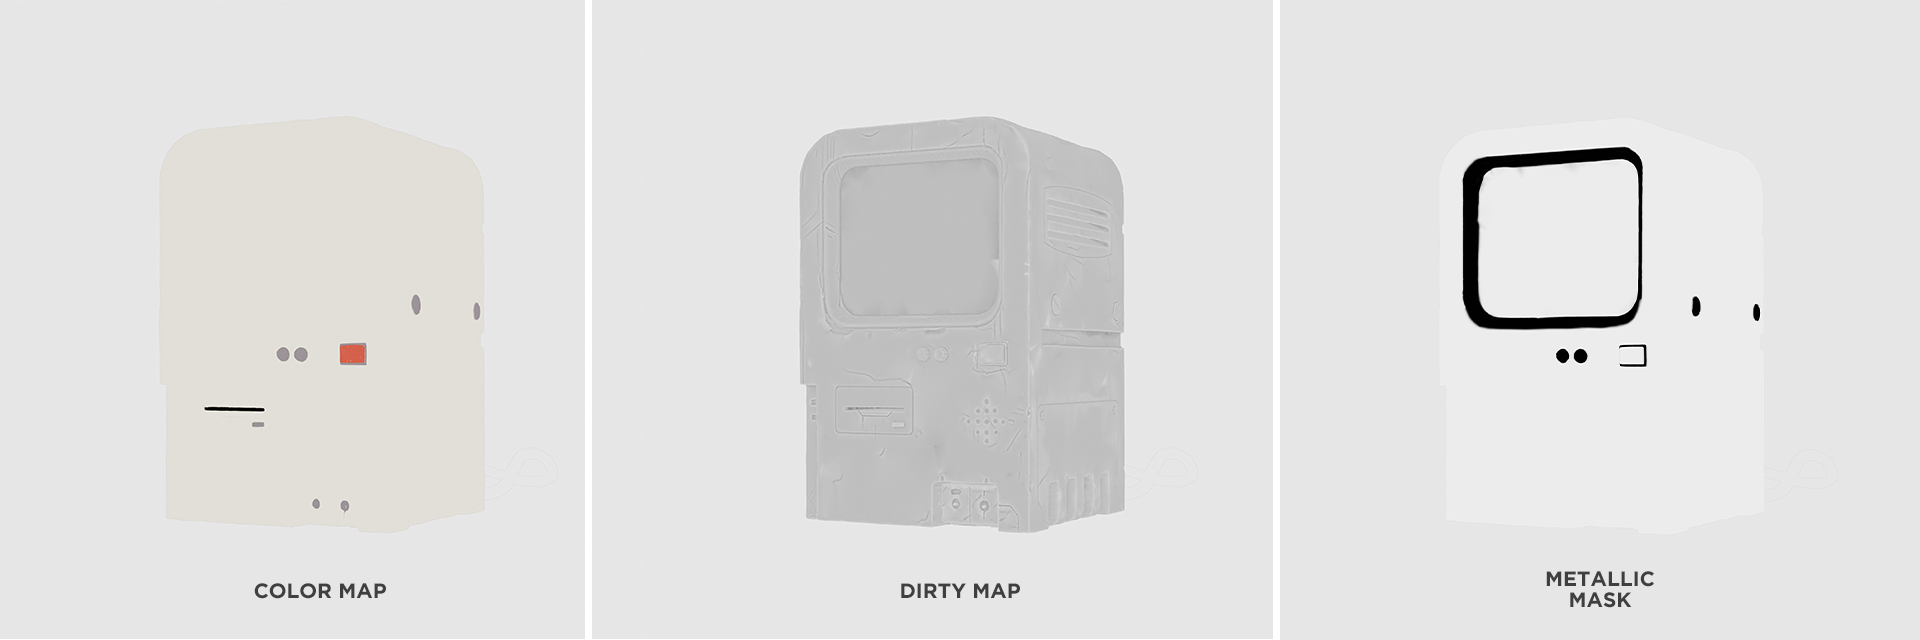
I used a plane with a Poliigon texture for the monitor, and created a texture in Blender for the post-it note.
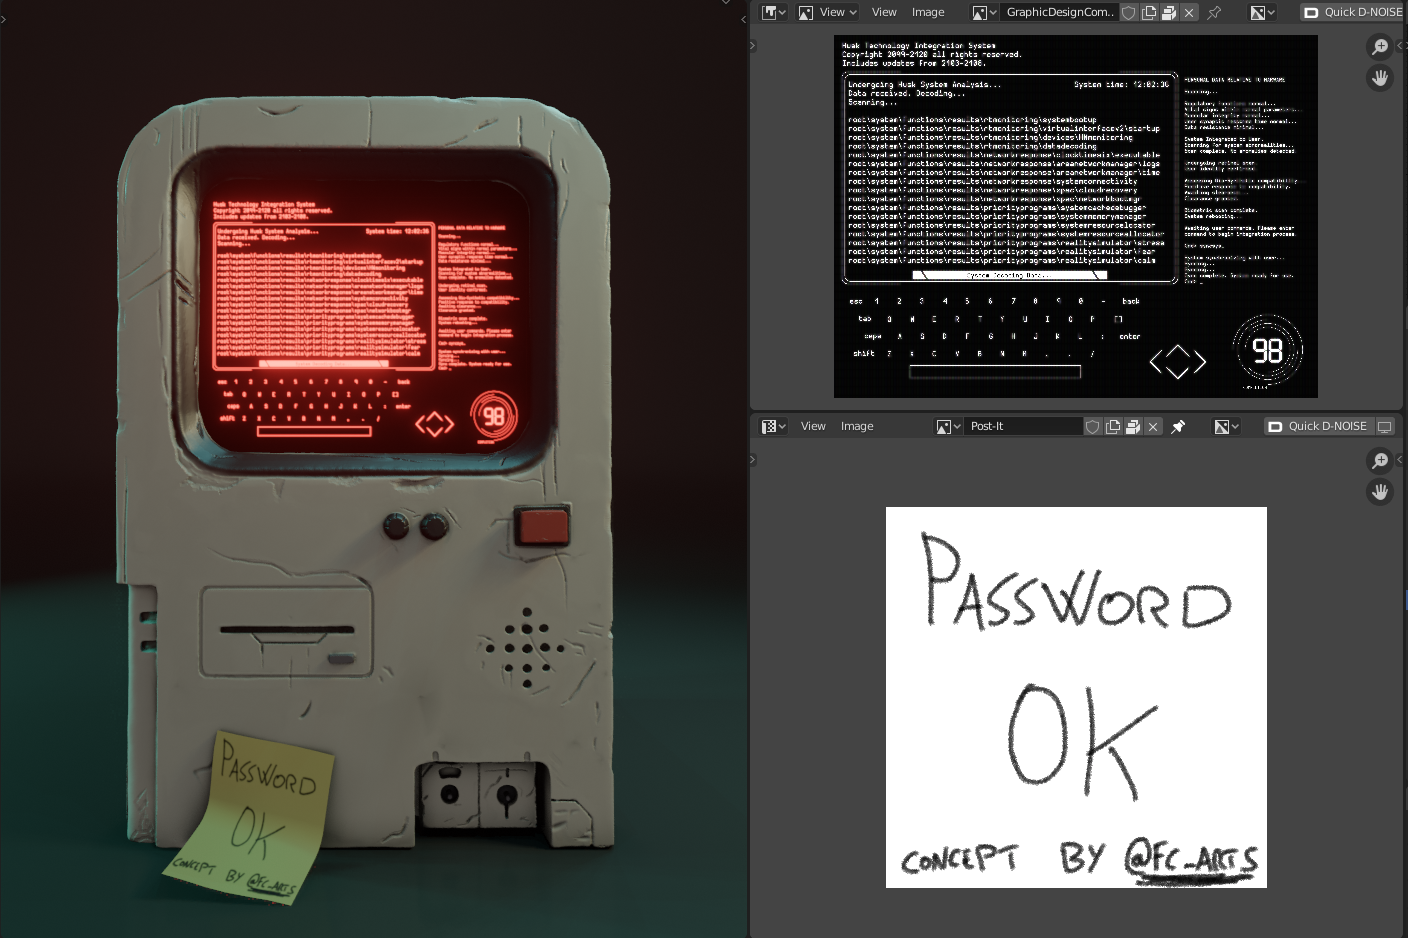
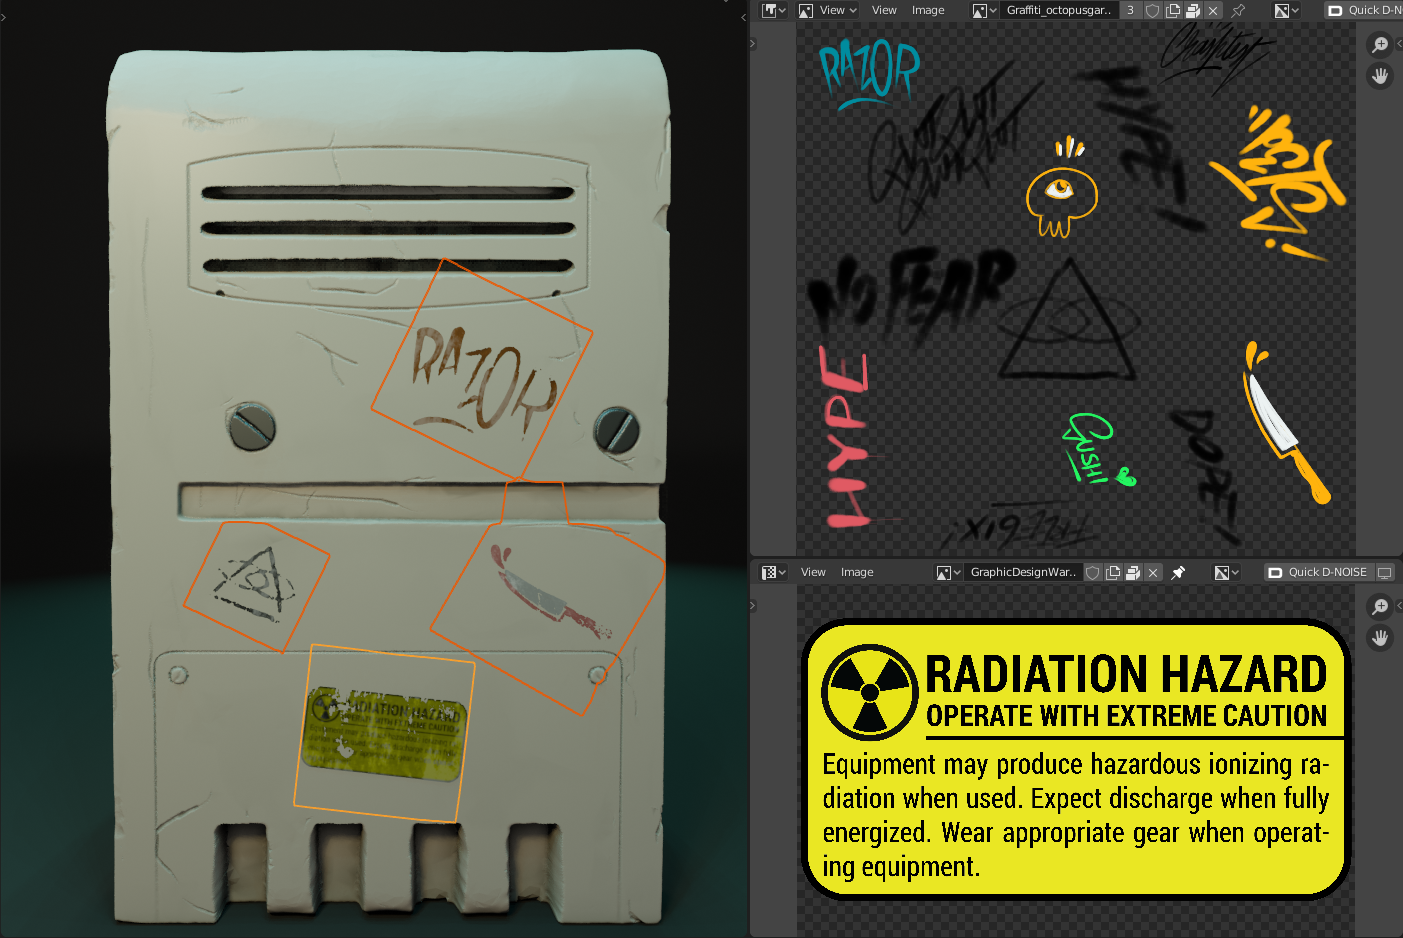
As for the decals, they were imported as plans, and then divided and applied to the model with the shrinkwrap modifier. The graphics were created by Octopusgarden.
Lighting
To illuminate the scene, I always start with three-point lighting. After that, thanks to the help of EEVEE, I can quickly understand where one particular lighting mood works better than another.
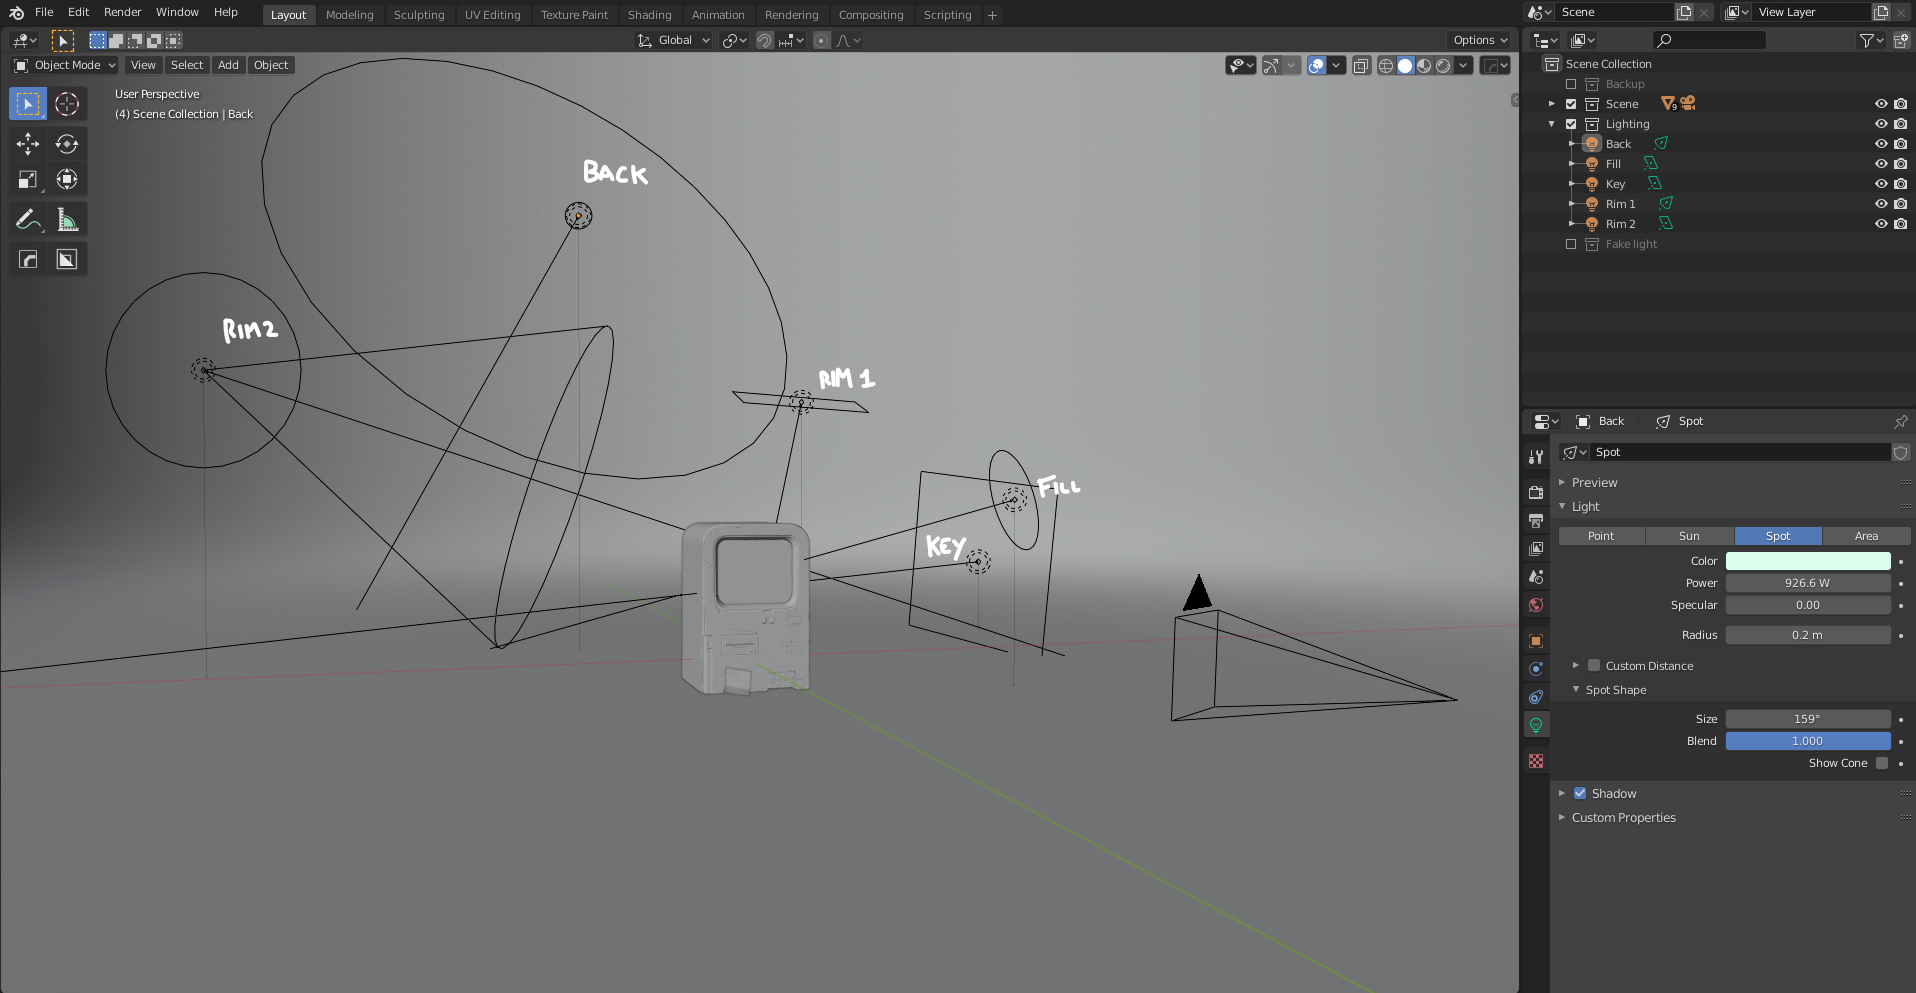
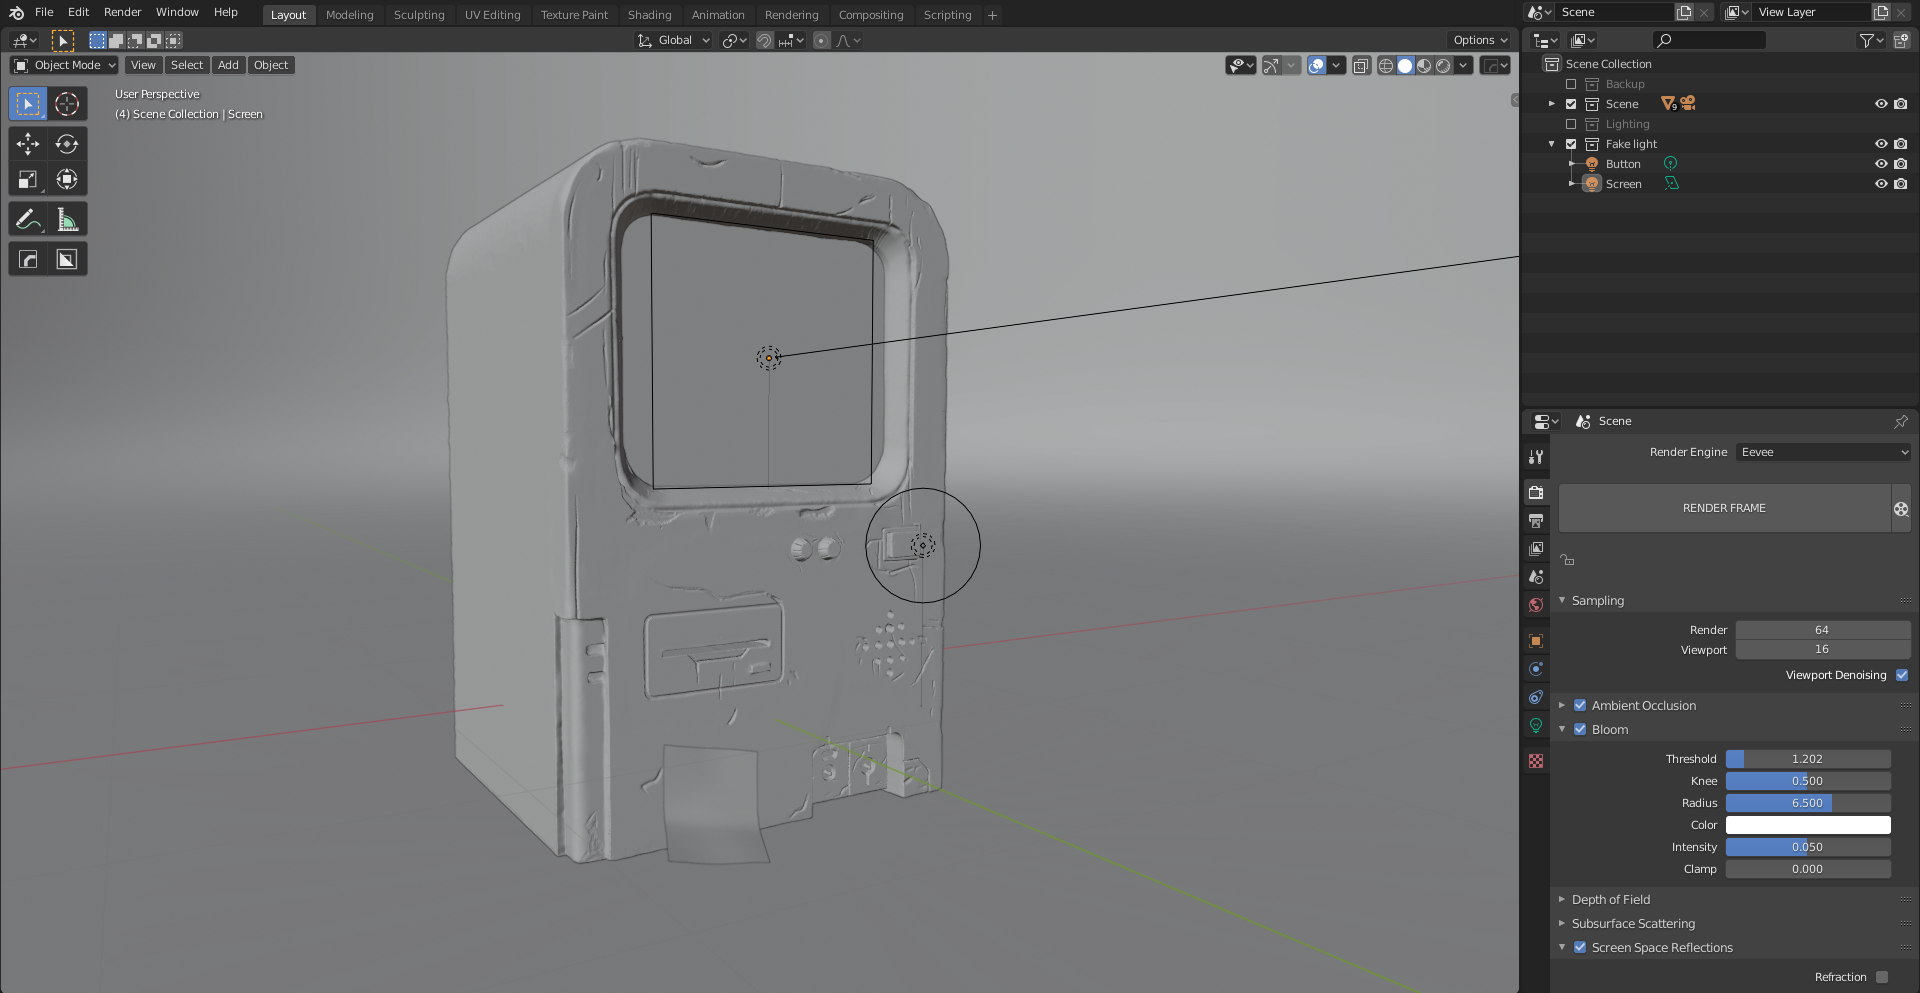
Also, it was essential to use two light planes, one on the button and one on the screen, to recreate the contribution of light that is not created in EEVEE.
Final Tweak
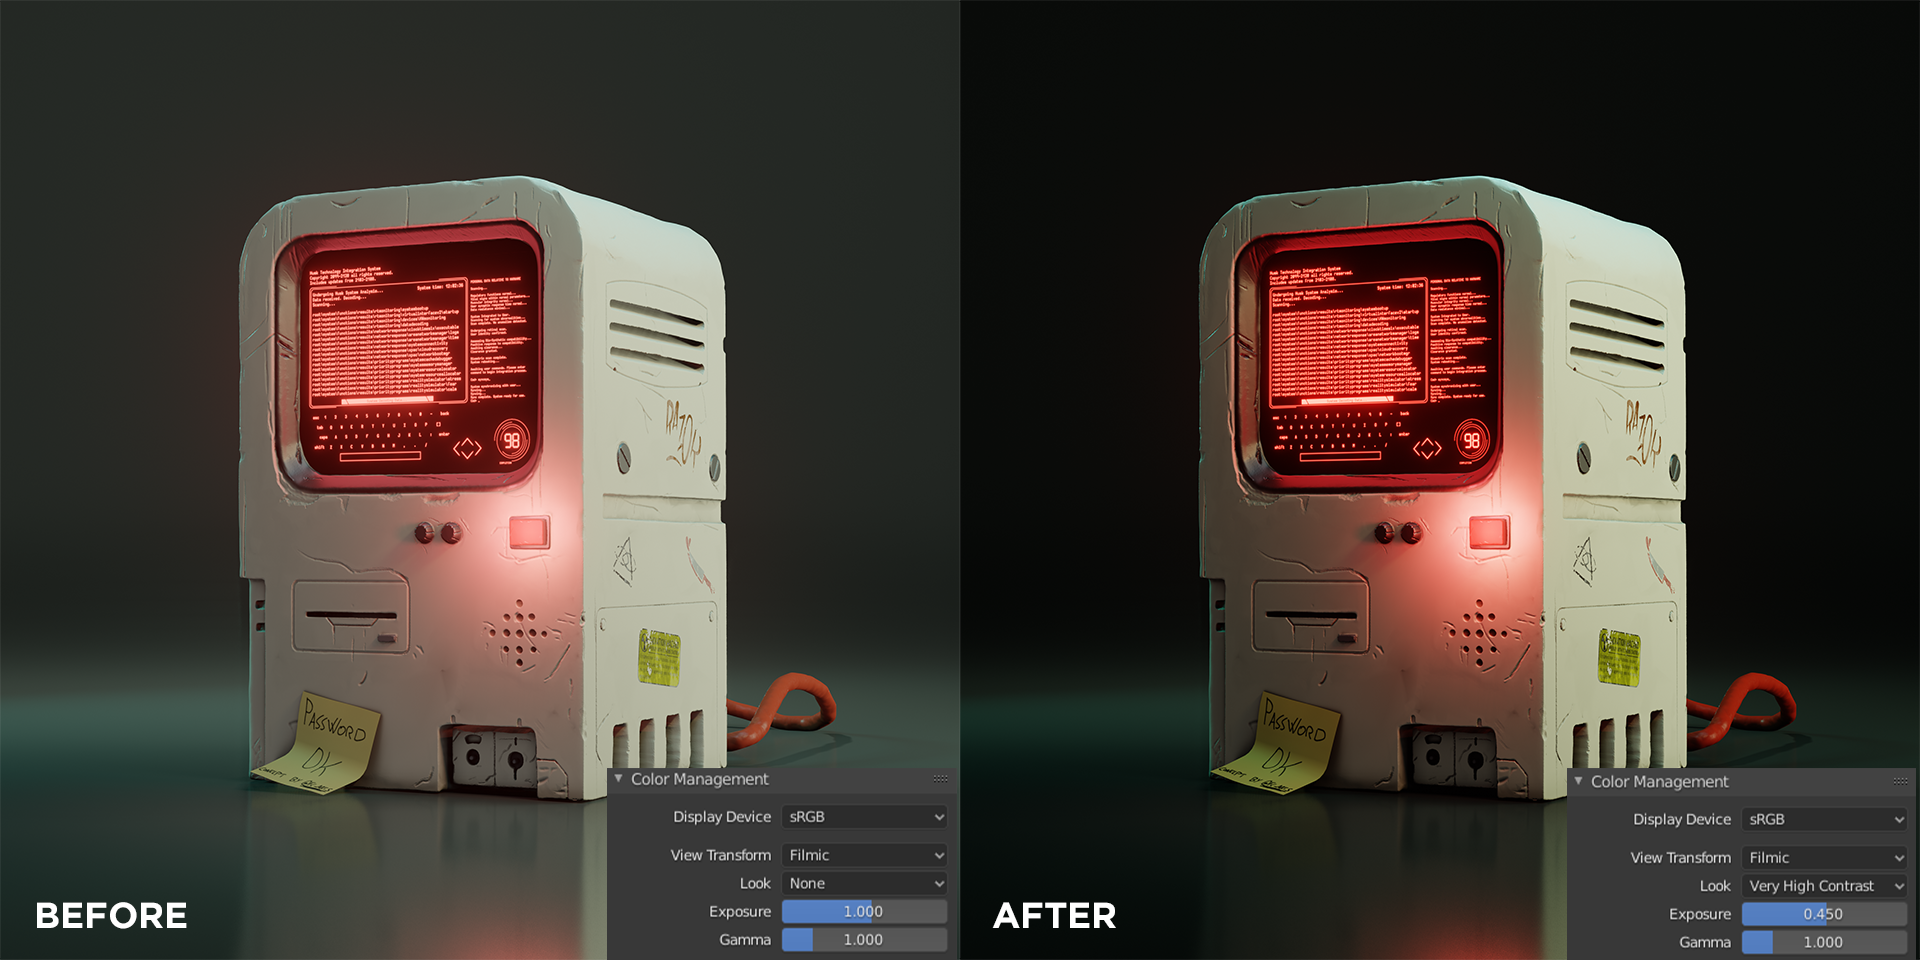
As a final touch, I try to improve the look with a balance of exposure and contrast in the color management panel.
Render
Thank you for your attention!
About the Author
 Manuel D’Onofrio, I’m a self-taught freelance 3D Generalist in love with Blender.


awesome model. and great writeup! Thanks for going in depth on your sculpting process!
Thanks Master! Next time I will definitely use Hard Ops. No more masochism.
Thank you for the breakdown of your process! The outcome is really good! Did this in how many hours? Valuable!
Thank you! Maybe 4-5 hours.
Amazing work! Keep going
Thanks dude!
Amazing work man!!