Behind the Scenes: Sculpt January 2020 Day 24

Intro
Hello BlenderNation! My name is Felipe Goh. I’m a hobbyist/beginner artist and have been studying Blender for a little while. One of the disciplines that always fascinated me and I always wanted to explore was 3D sculpting.
I knew that CGBoost was hosting the art challenge SculptJanuary, and thought this would be the perfect opportunity to finally dive right into it. The idea behind the challenge was to make one sculpture based on a pre-established theme, every single day throughout the month of January.
Today I’m going to explain a little bit about one of the pieces I did for the challenge.
Instead of having a clear concept of what I wanted to sculpt initially, I improvised my way to the final image and sculpted many of the elements on-the-go.
The prompt for this day was Unimaginable. I had quite a bit of trouble coming up with ideas at first, but after brainstorming for a while I figured I wanted to sculpt a human bust and add some clouds or mysterious abstract objects surrounding the top of the head, hiding the brain area, thus making it “unimaginable”. Very creative, huh? Although in the end I changed my mind and decided to add cats instead.
I aimed for the stylized look that is commonly seen on feature-length animated films so I grabbed a bunch of reference images from well-known titles as Spider-Man: Into the Spider-Verse and Frozen. I was also inspired by the works of other insanely great artists in the Blender community, Julien Kaspar and Yansculpts.
Sculpting the Head
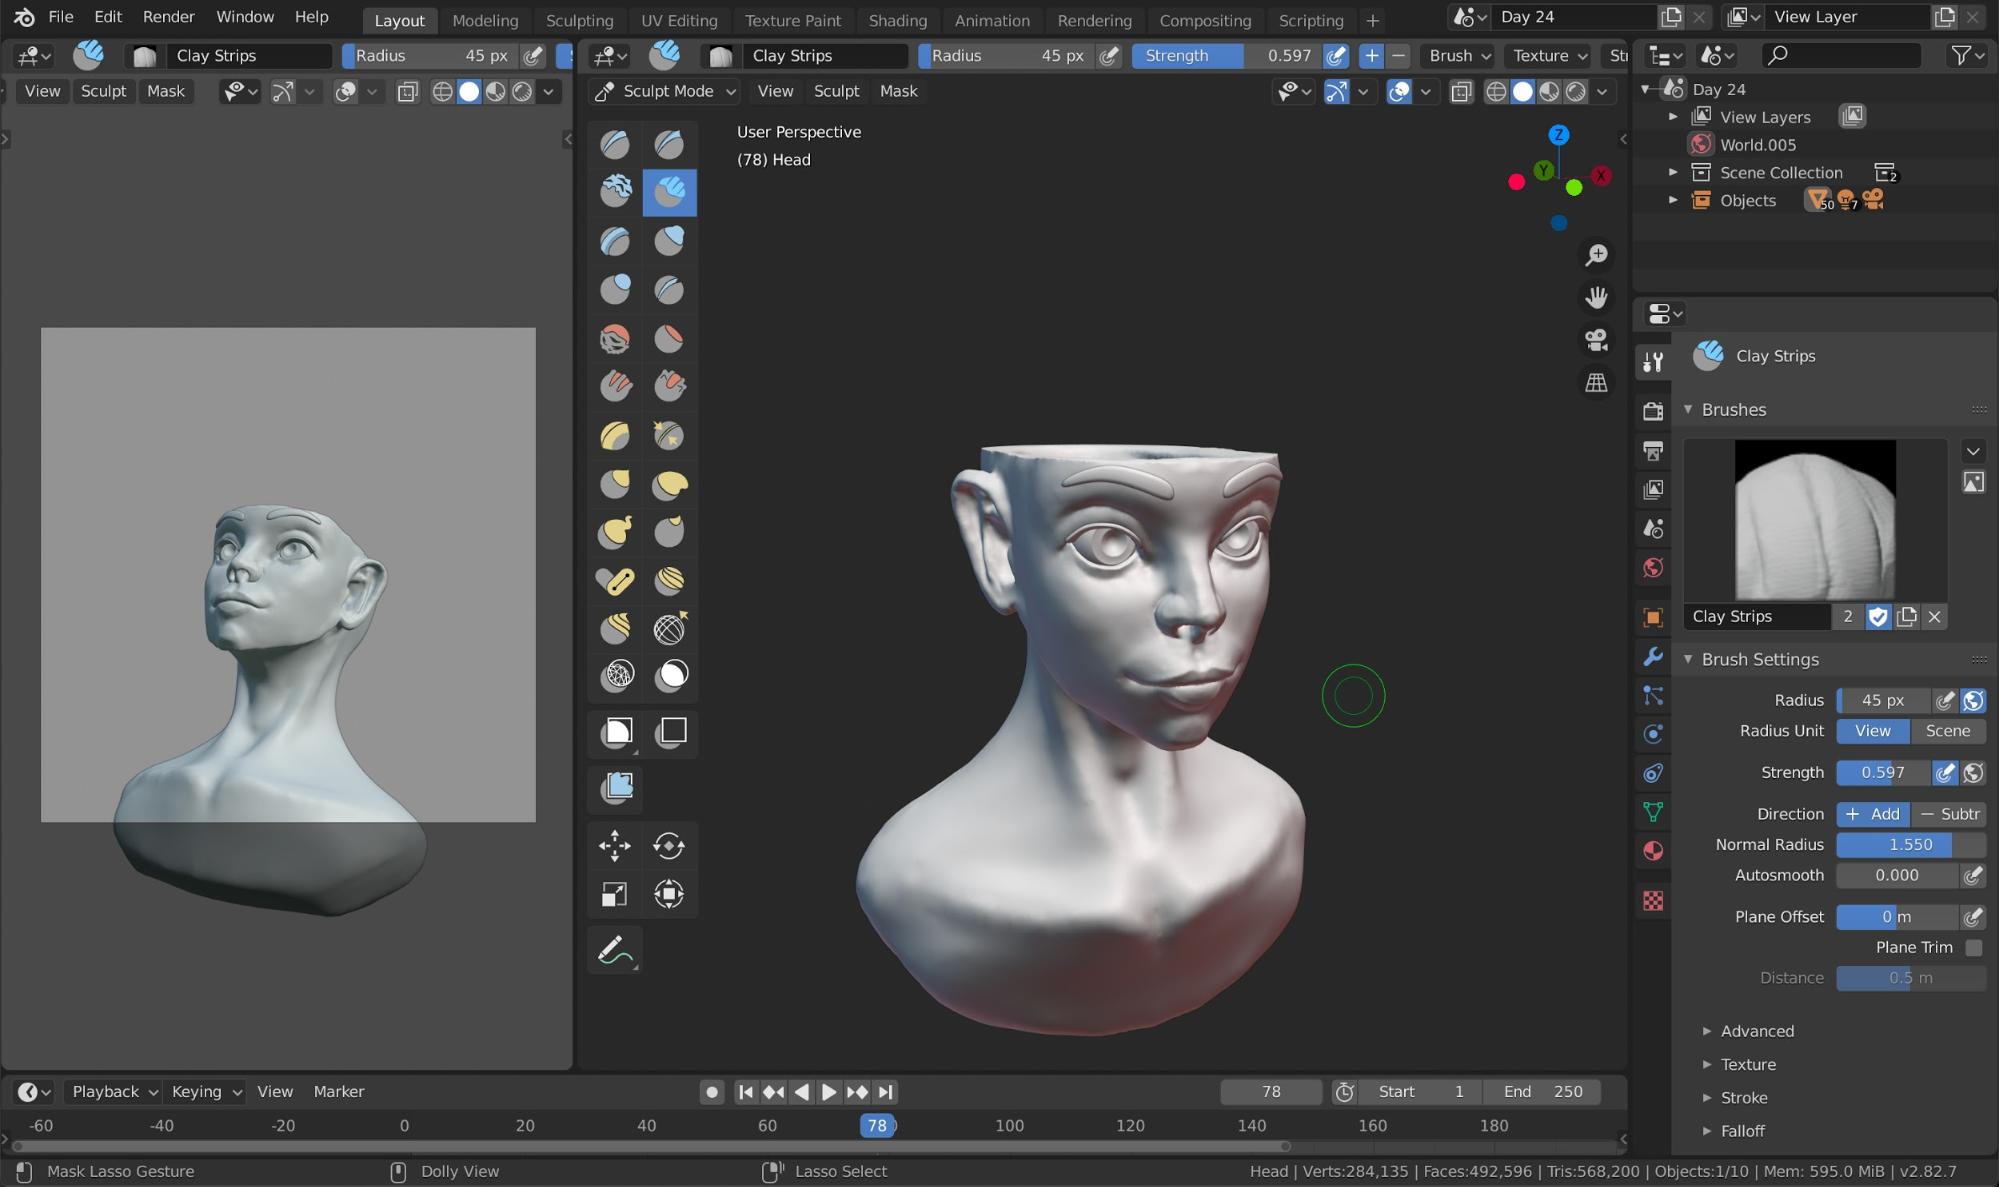
I began the scene by sculpting the head, for which I used Dyntopo (dynamic topology) set with constant detailing. As a rule of thumb, I start sculpting with very low resolution and as I add more details, I increase the resolution on the settings panel accordingly. Here’s a breakdown of the process:
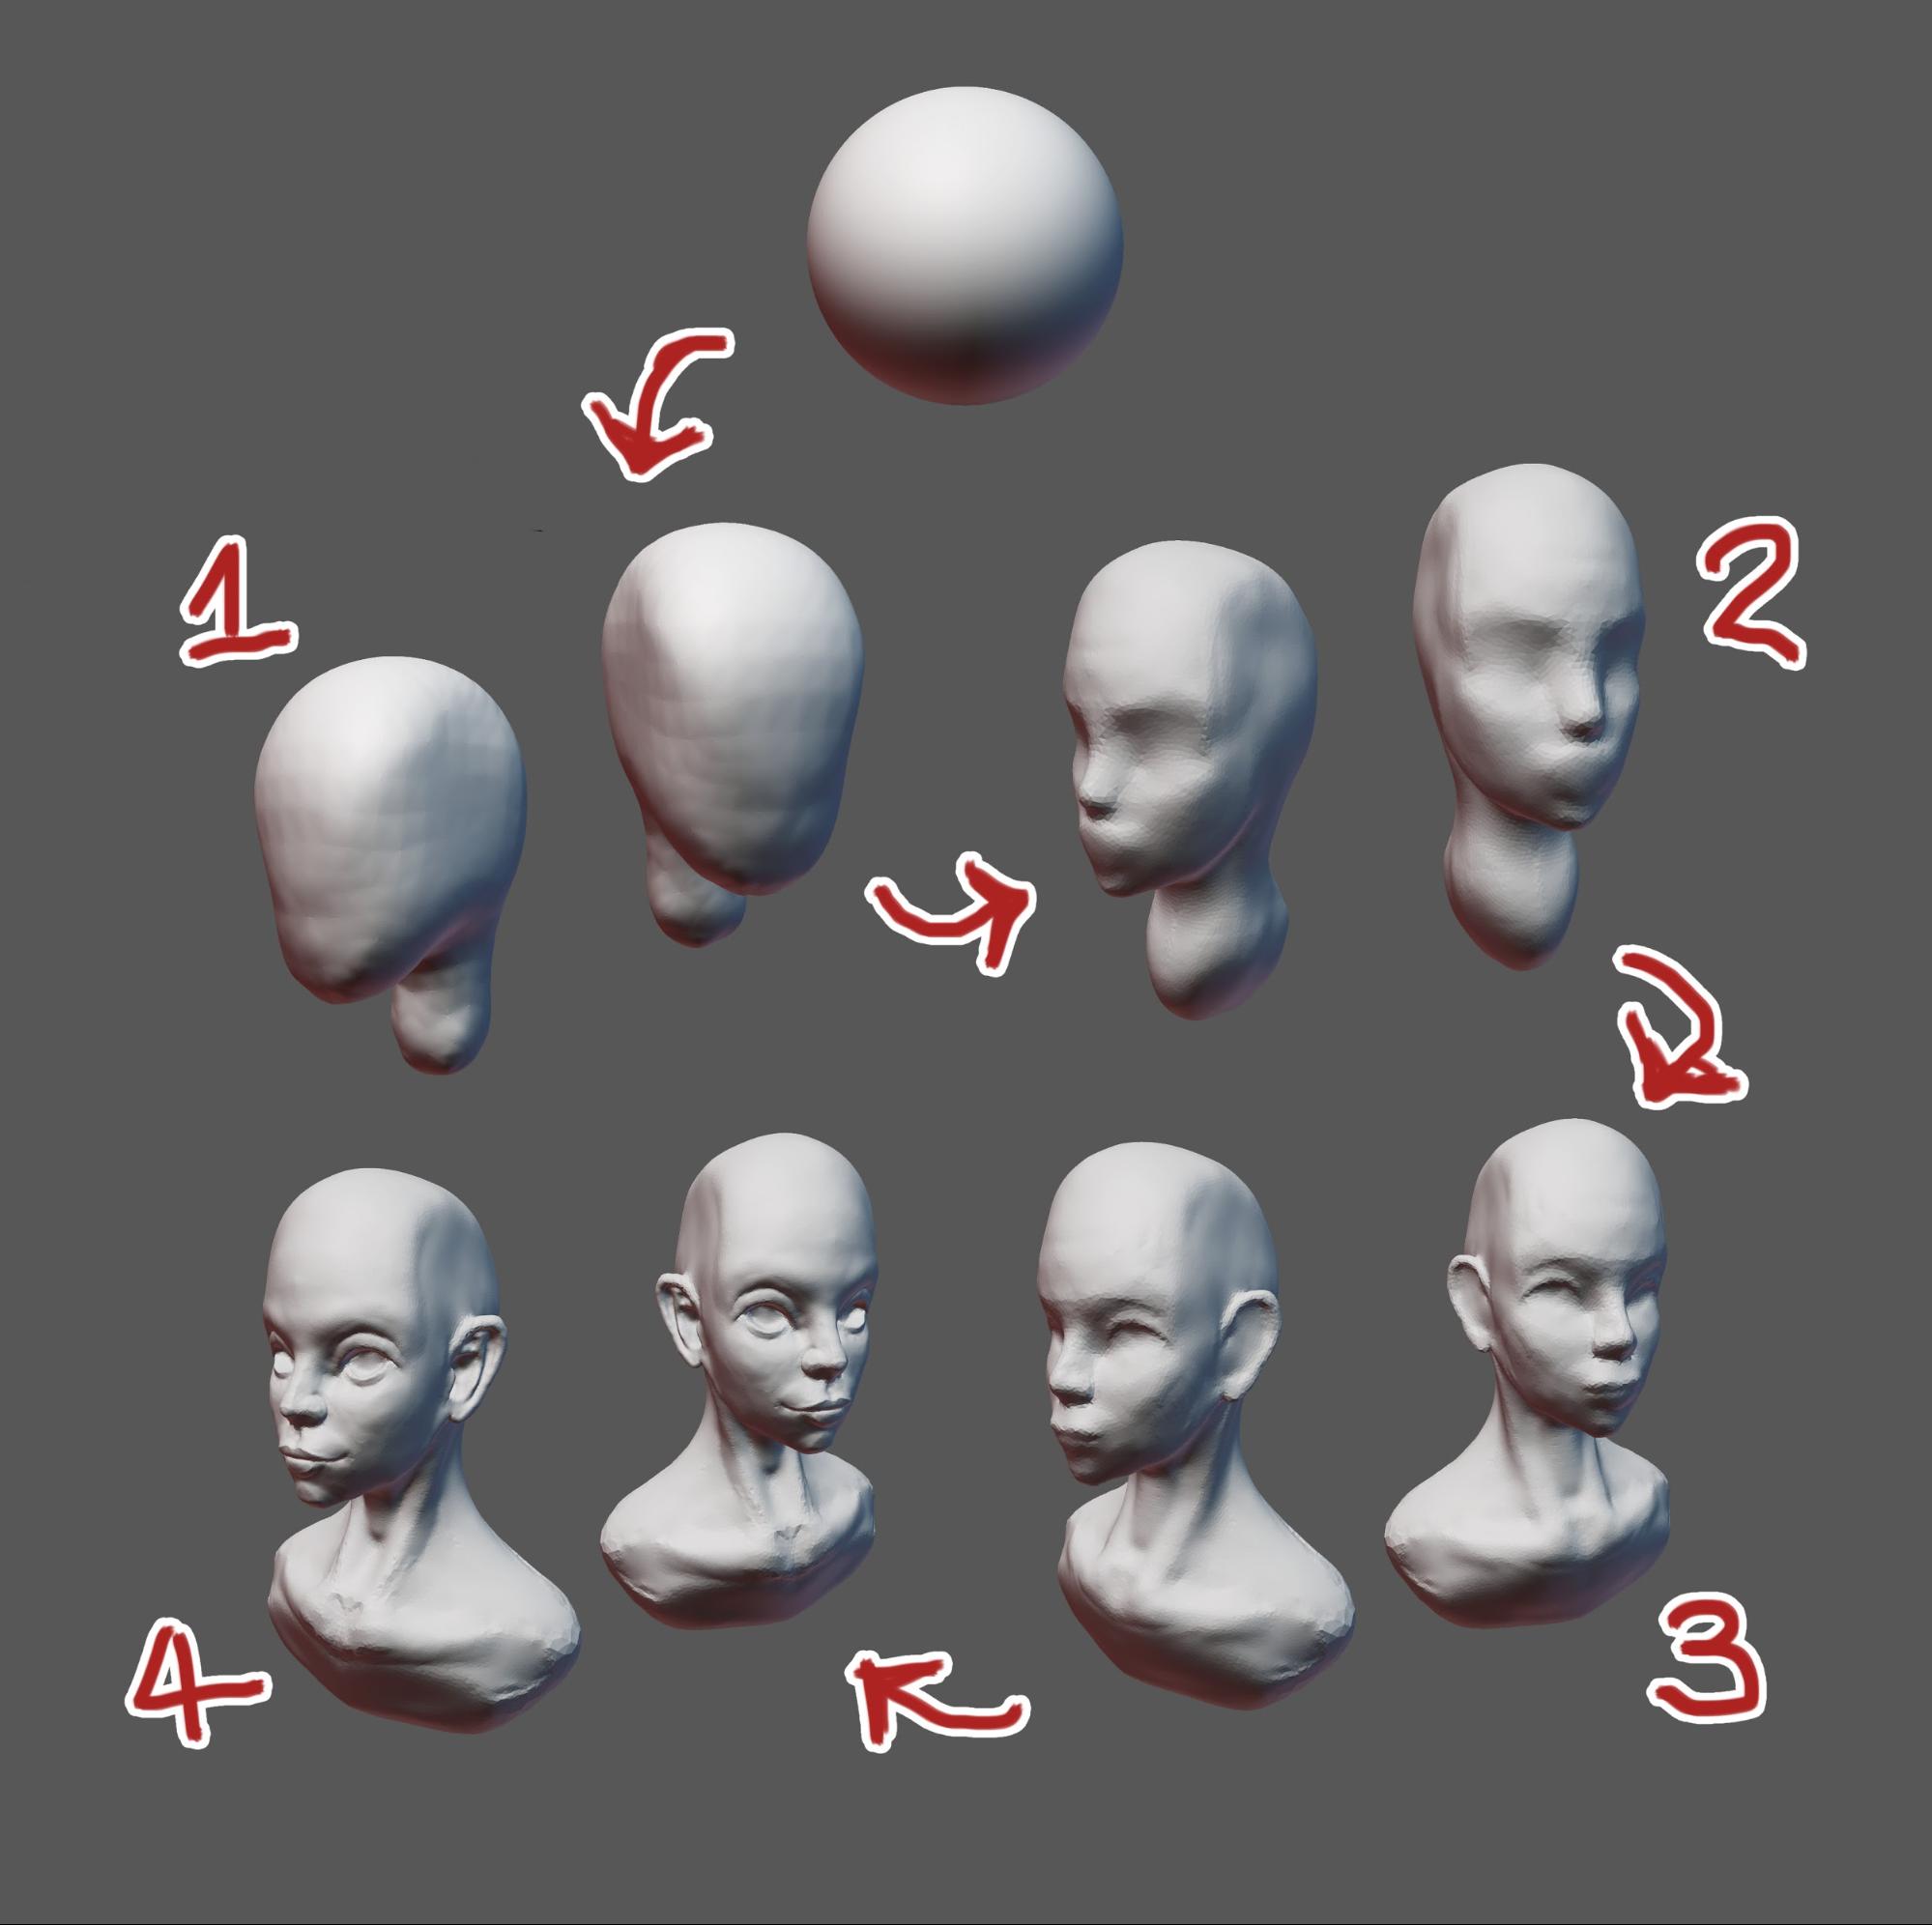
- Starting the sculpt from a basic UV Sphere. Using mainly the Grab Brush to move around the mesh, defining the jaw area and overall shape of the head. The neck was pulled with the Snake Hook Brush.
- Using the Clay Strip Brush and Smoothing Brush, here I’m blocking in the main facial features such as the nose bridge, eye cavities, and mouth protrusion. The idea here is using the least amount of detail possible while laying the foundational shapes and most importantly, getting the proportions right.
- After nailing the main facial features, it’s time to increase the detail level on Dyntopo and start sculpting the smaller parts, eyelids, lips, and nostrils. Here I’m starting to incorporate the Crease Brush into the workflow to sculpt the lips and eyelids.
- Keep increasing the detail level little by little and refining the shapes until I’m satisfied.
Eyes, Eyebrows, and Eyelashes
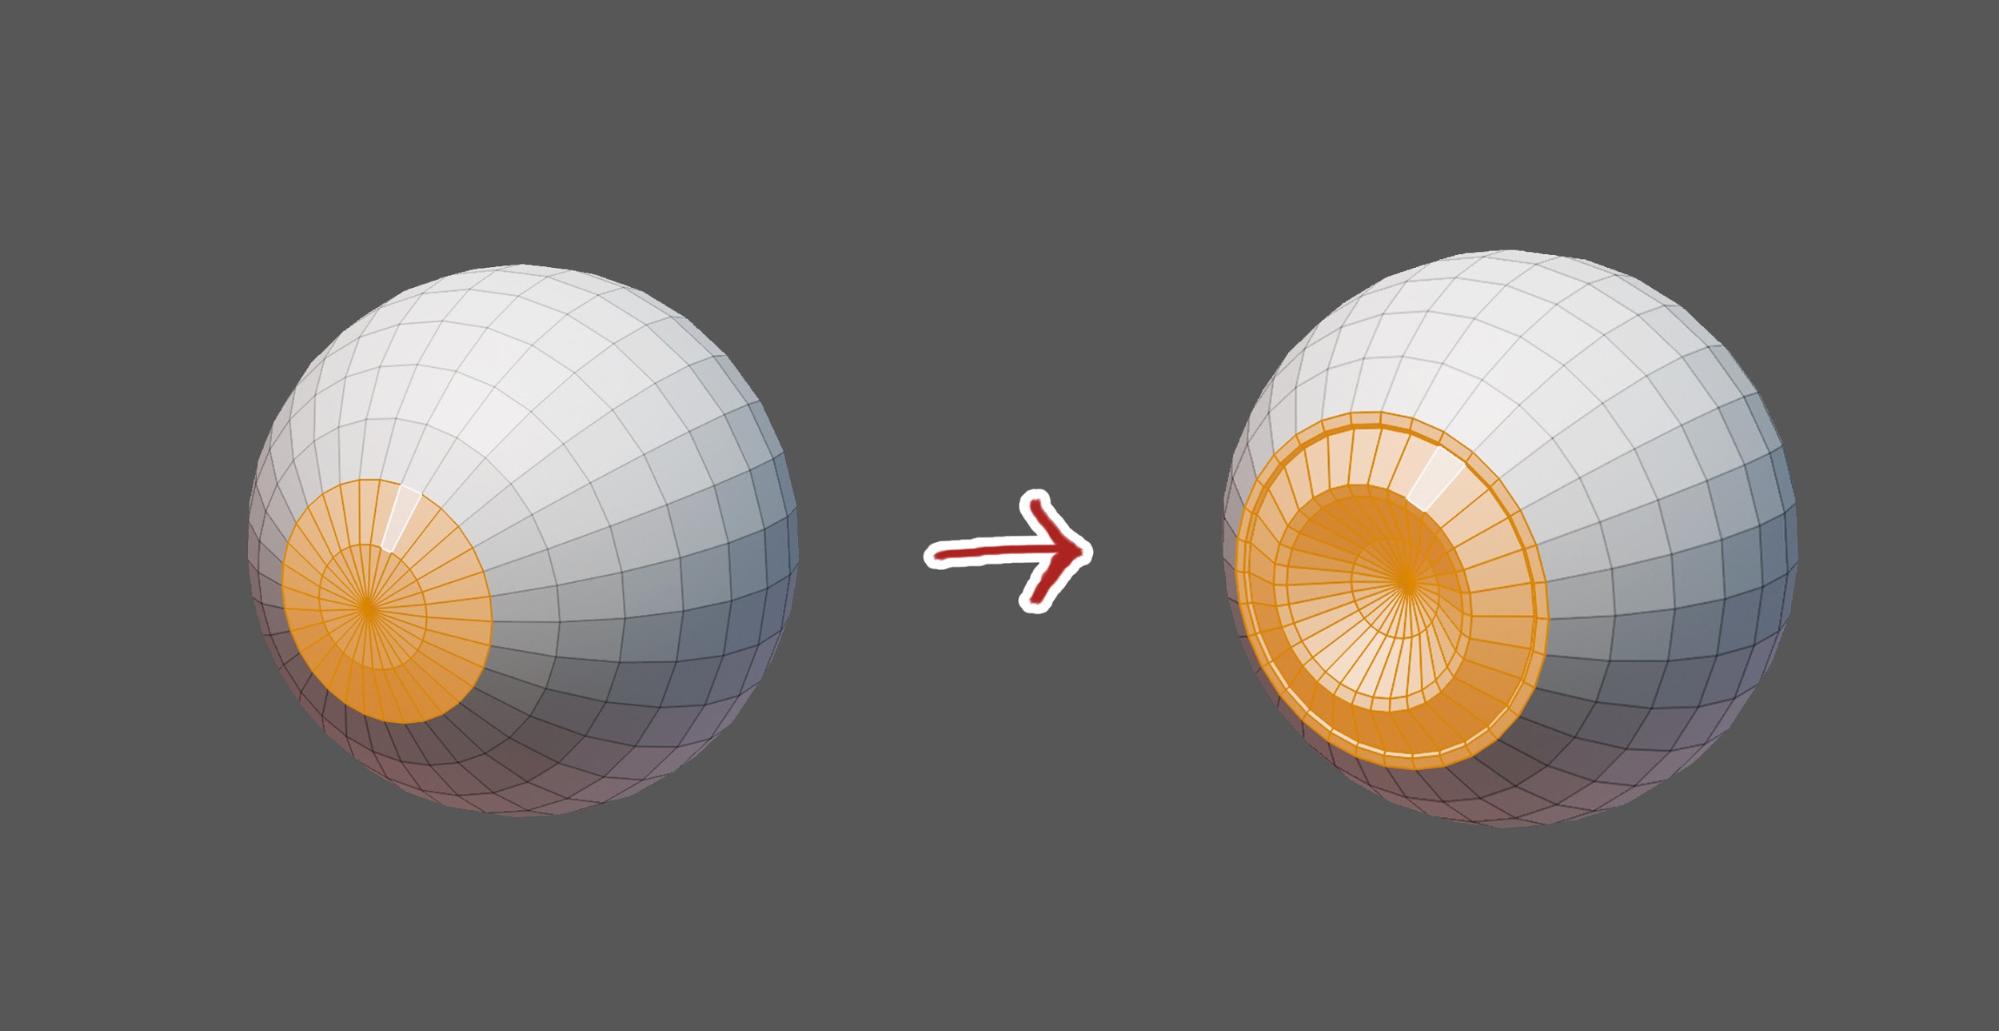
The eyeballs were first modeled by adding edge loops, extruding and moving edges on a UV Sphere, like so:
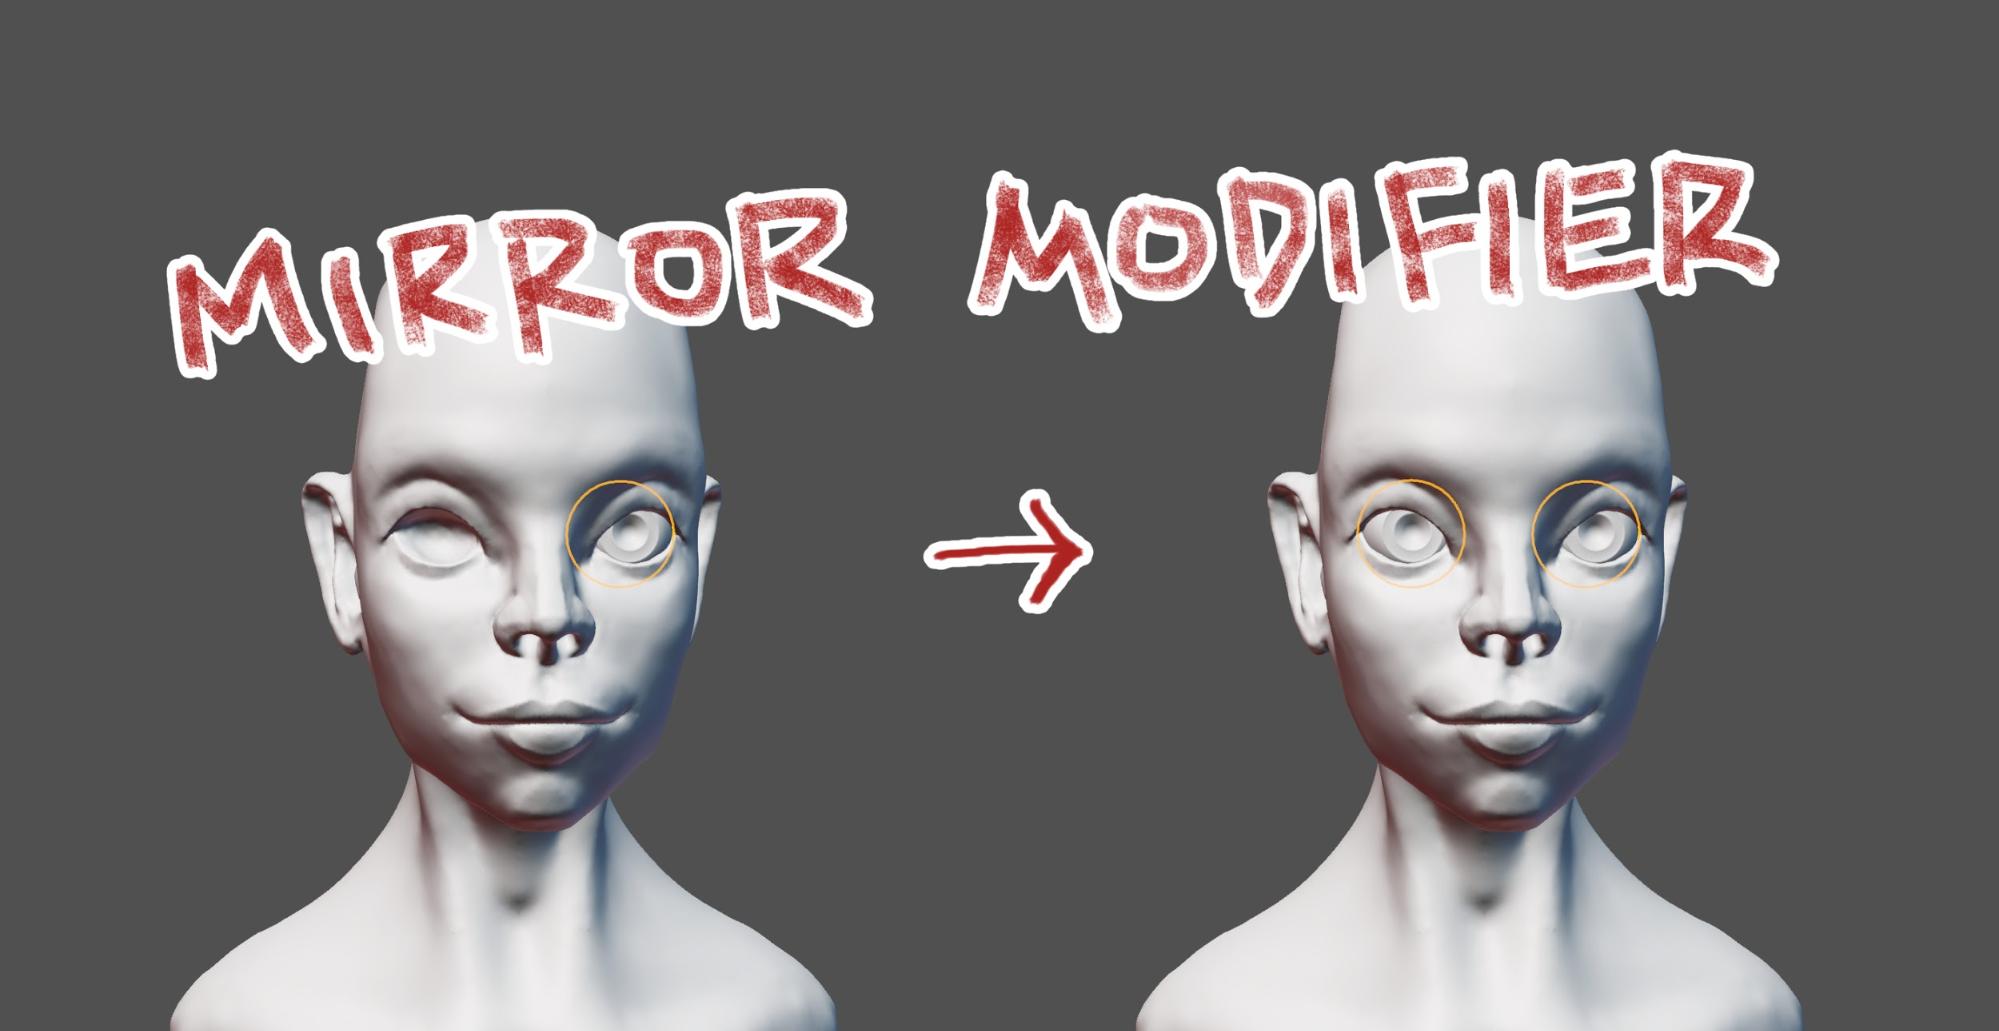
After placing the eyeballs on the eye sockets and adjusting the shape of the eyelids, I duplicated it across the face using the Mirror Modifier:
The eyebrows started from a simple plane mesh, extruded to roughly match the shape I wanted it to have, then snapped it to the head’s surface, followed by a couple of modifiers:
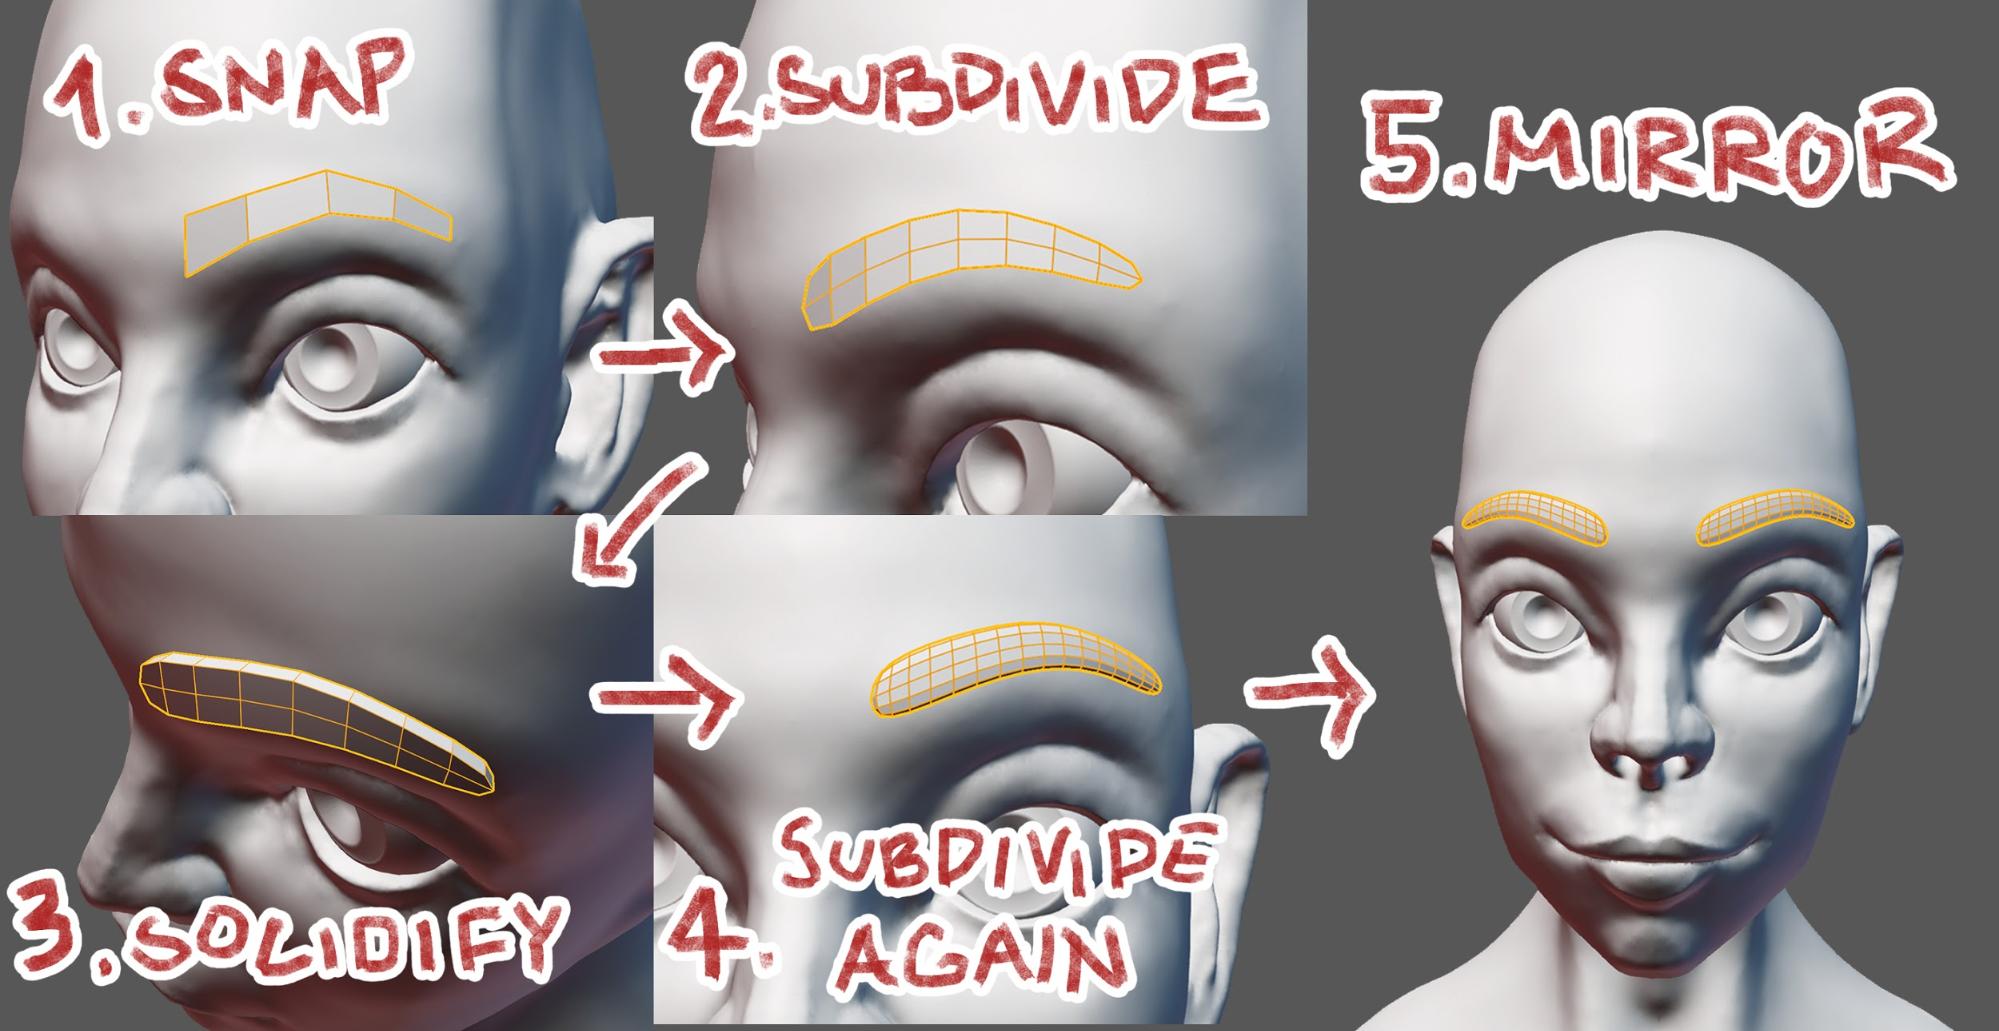
I found this method gives more control than sculpting does over the shape subject. It’s perfect for creating certain clothing and other accessories that are directly attached to a mesh’s surface.
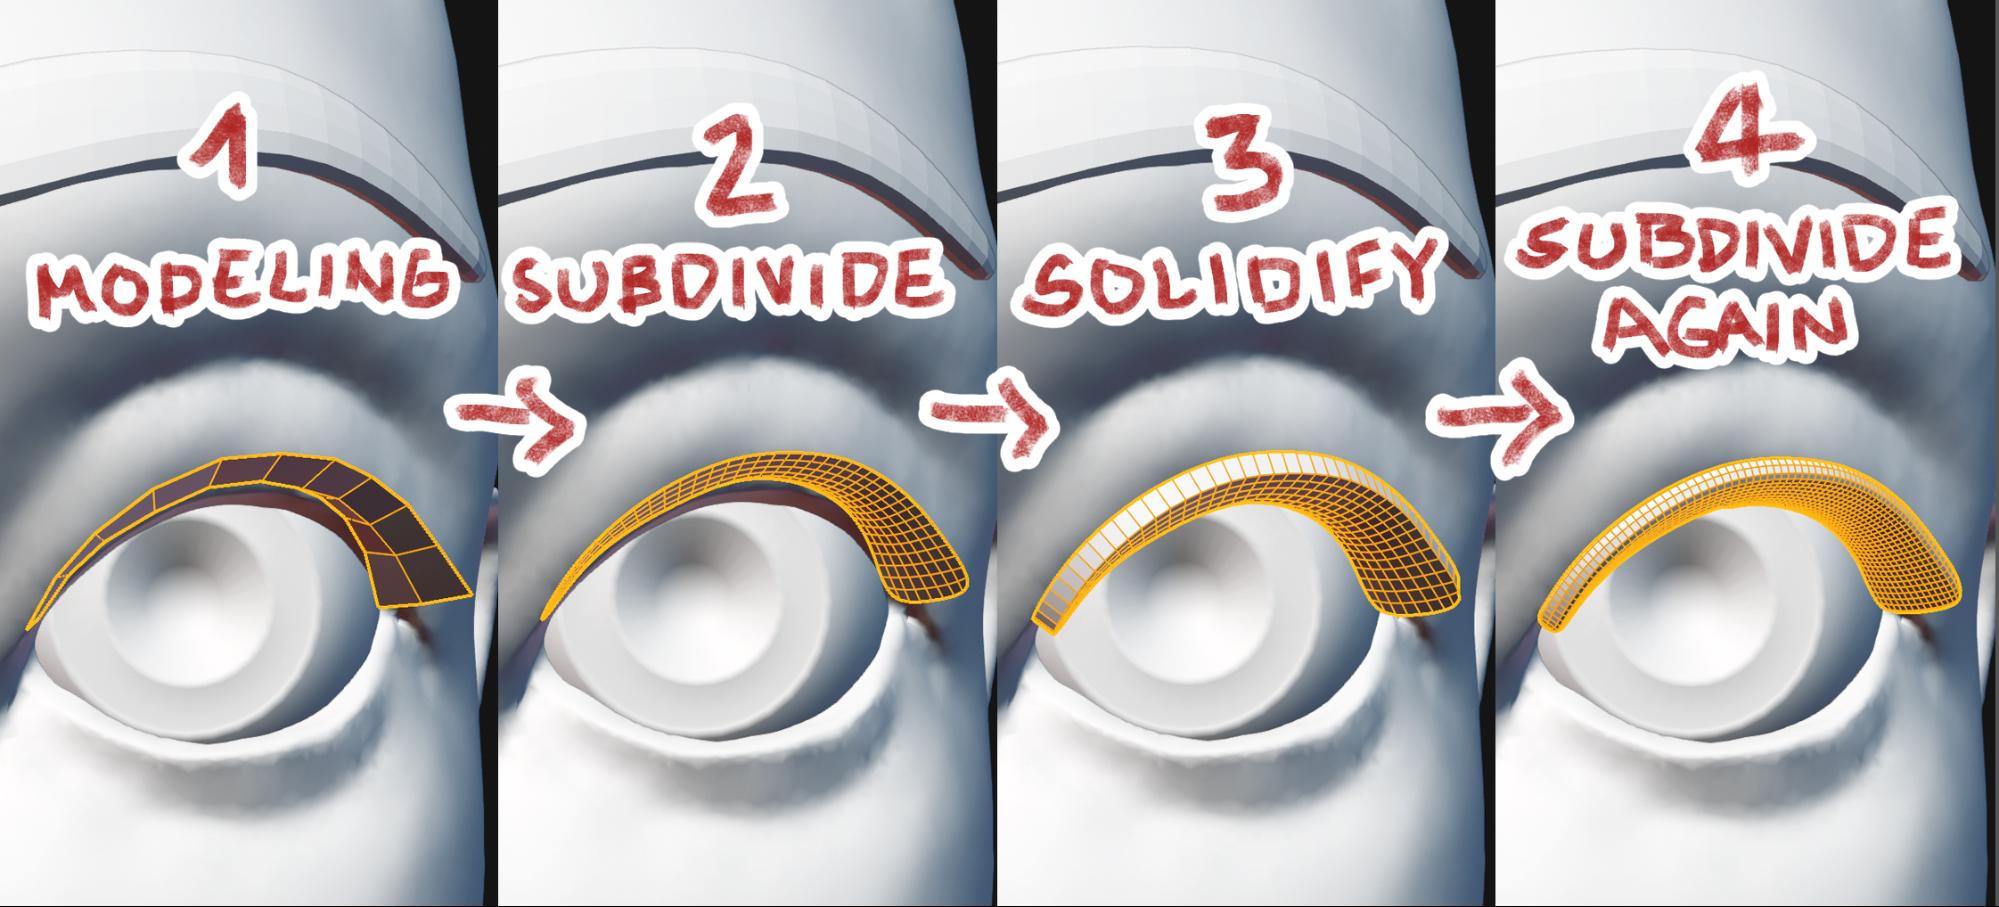
Now that the eyebrows are neatly placed, I proceeded to make the eyelashes in a similar fashion:
Chopping Off the Forehead
It is from here that I decided to deviate from the initial idea I had planned. Instead of sculpting whatever abstract form I had in mind, I decided to add cats instead. I did this mainly because it was a one-day project and time was running out. Sculpting cats would be simpler, and also more fun. :D
I first used the add-on Bool Tools to cut off the upper part of the head. Here you can see me:
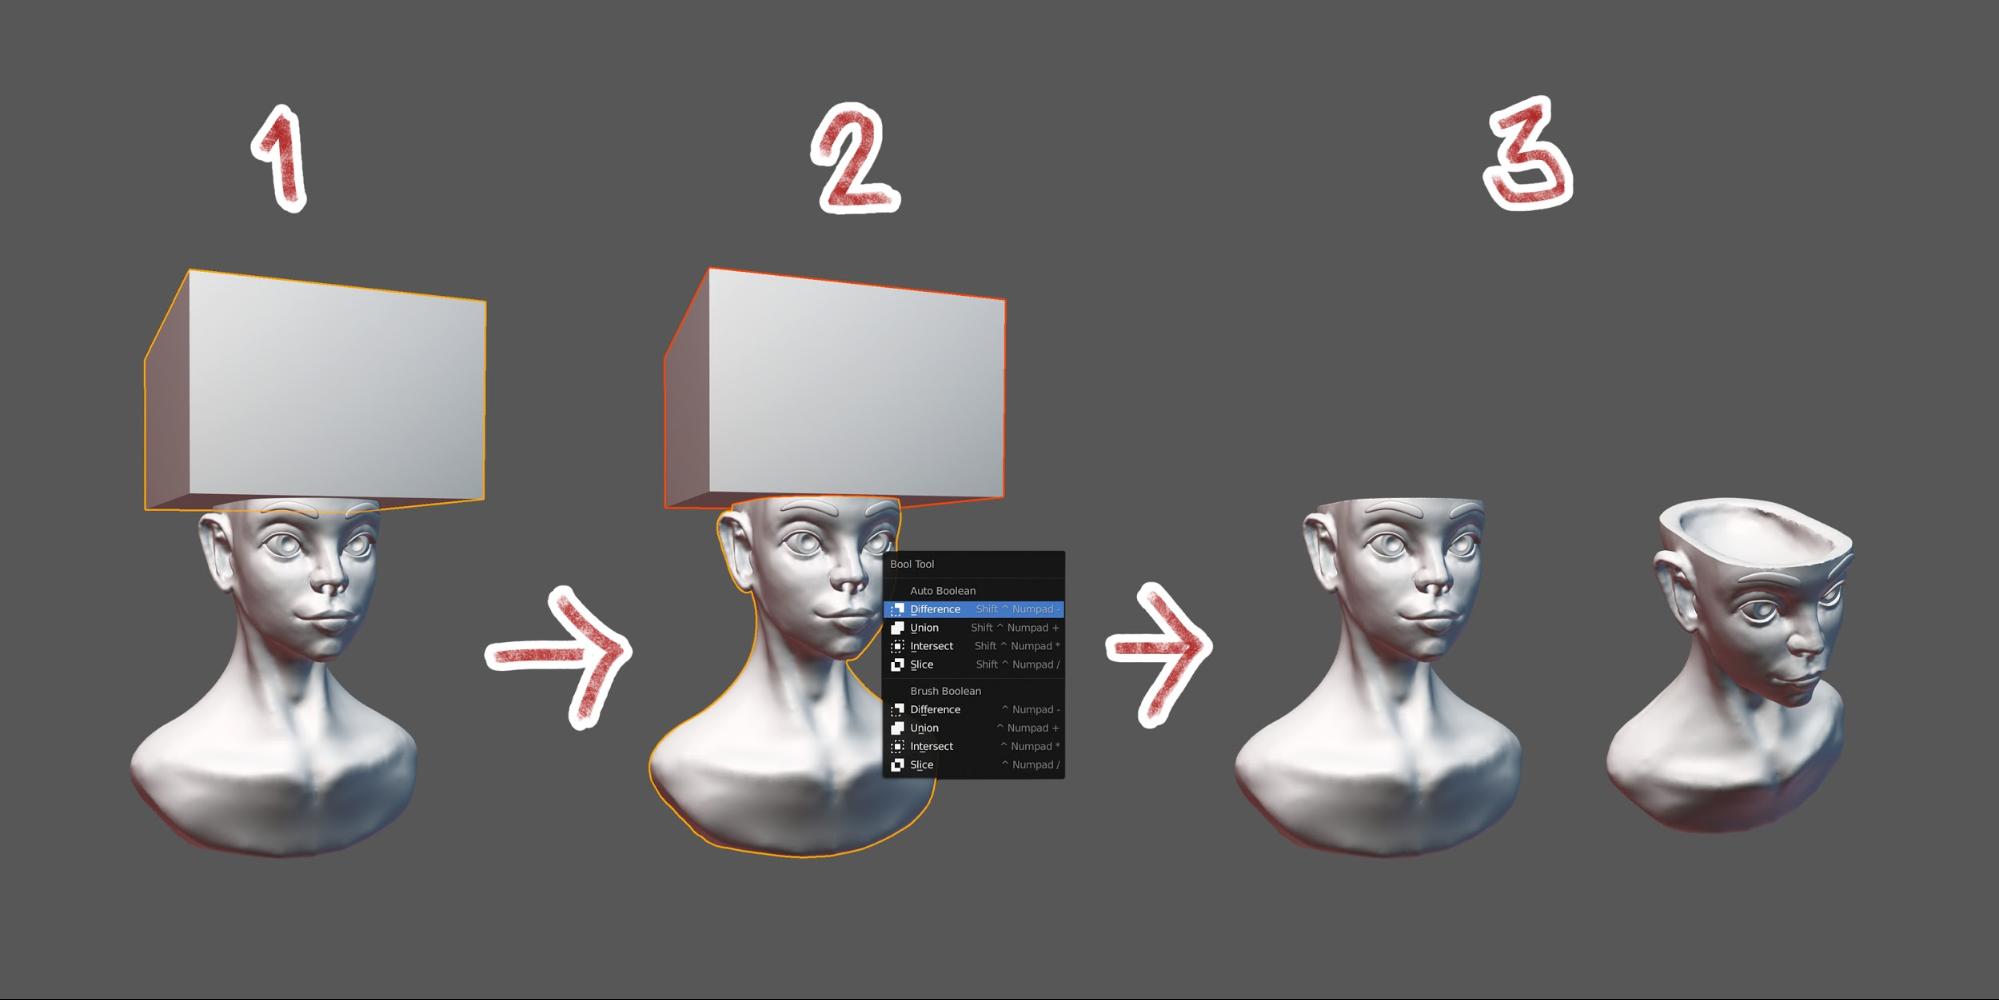
- Positioning a cube object over the head, covering the area I want to clear.
- Selecting the cube and then the head, respectively, and pressing Ctrl + Shift + B to open the Bool Tools menu and selecting Difference.
- If performed correctly the overlapping area should be cut off. I also went into sculpt mode again and dug the cavity where the cats would be lodged.
Camera
Now that I have my subject somewhat defined, I started to move the camera around, trying to find an interesting angle for the final rendered image. I tend to spend too much time in this step, which is not necessarily a good thing to do. Because I was uploading the daily sculpts on Instagram, I chose a square frame. From this moment on I’ll have my screen split in two with the camera frame on the left side and my main workspace on the right side throughout my workflow. This way I can see the final image while I add and modify new elements, and make changes to the composition as necessary.
Cats!
Now I’m adding the cats’ heads one-by-one, followed by their bodies and the other objects. Each of the cats represents one of the many unimaginable emotions/thoughts/personality traits that a person has inside their head. Each of them has a different expression and is wearing different accessories.
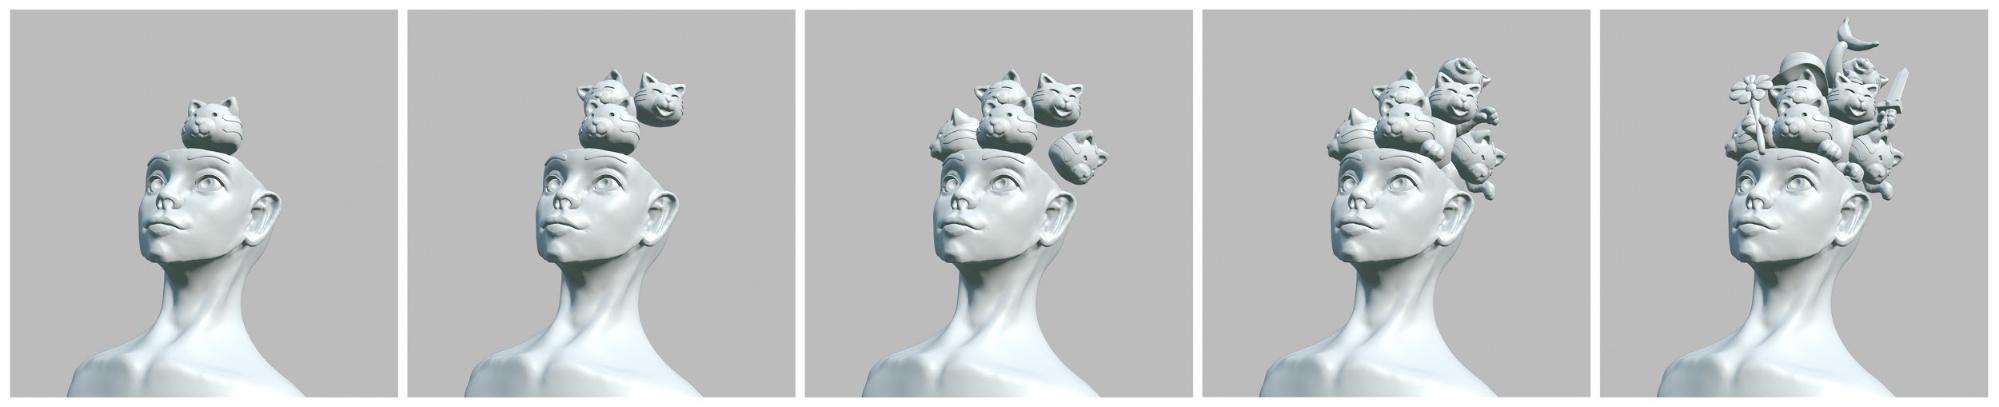
Since the scene was only going to be used for the final rendered image, I only added and edited the parts visible to the camera angle, so if viewed from other angles everything looks messy. In addition, the body, the head and the pawn are all separate objects. Keeping all body parts split this way makes it easier to make adjustments later on.
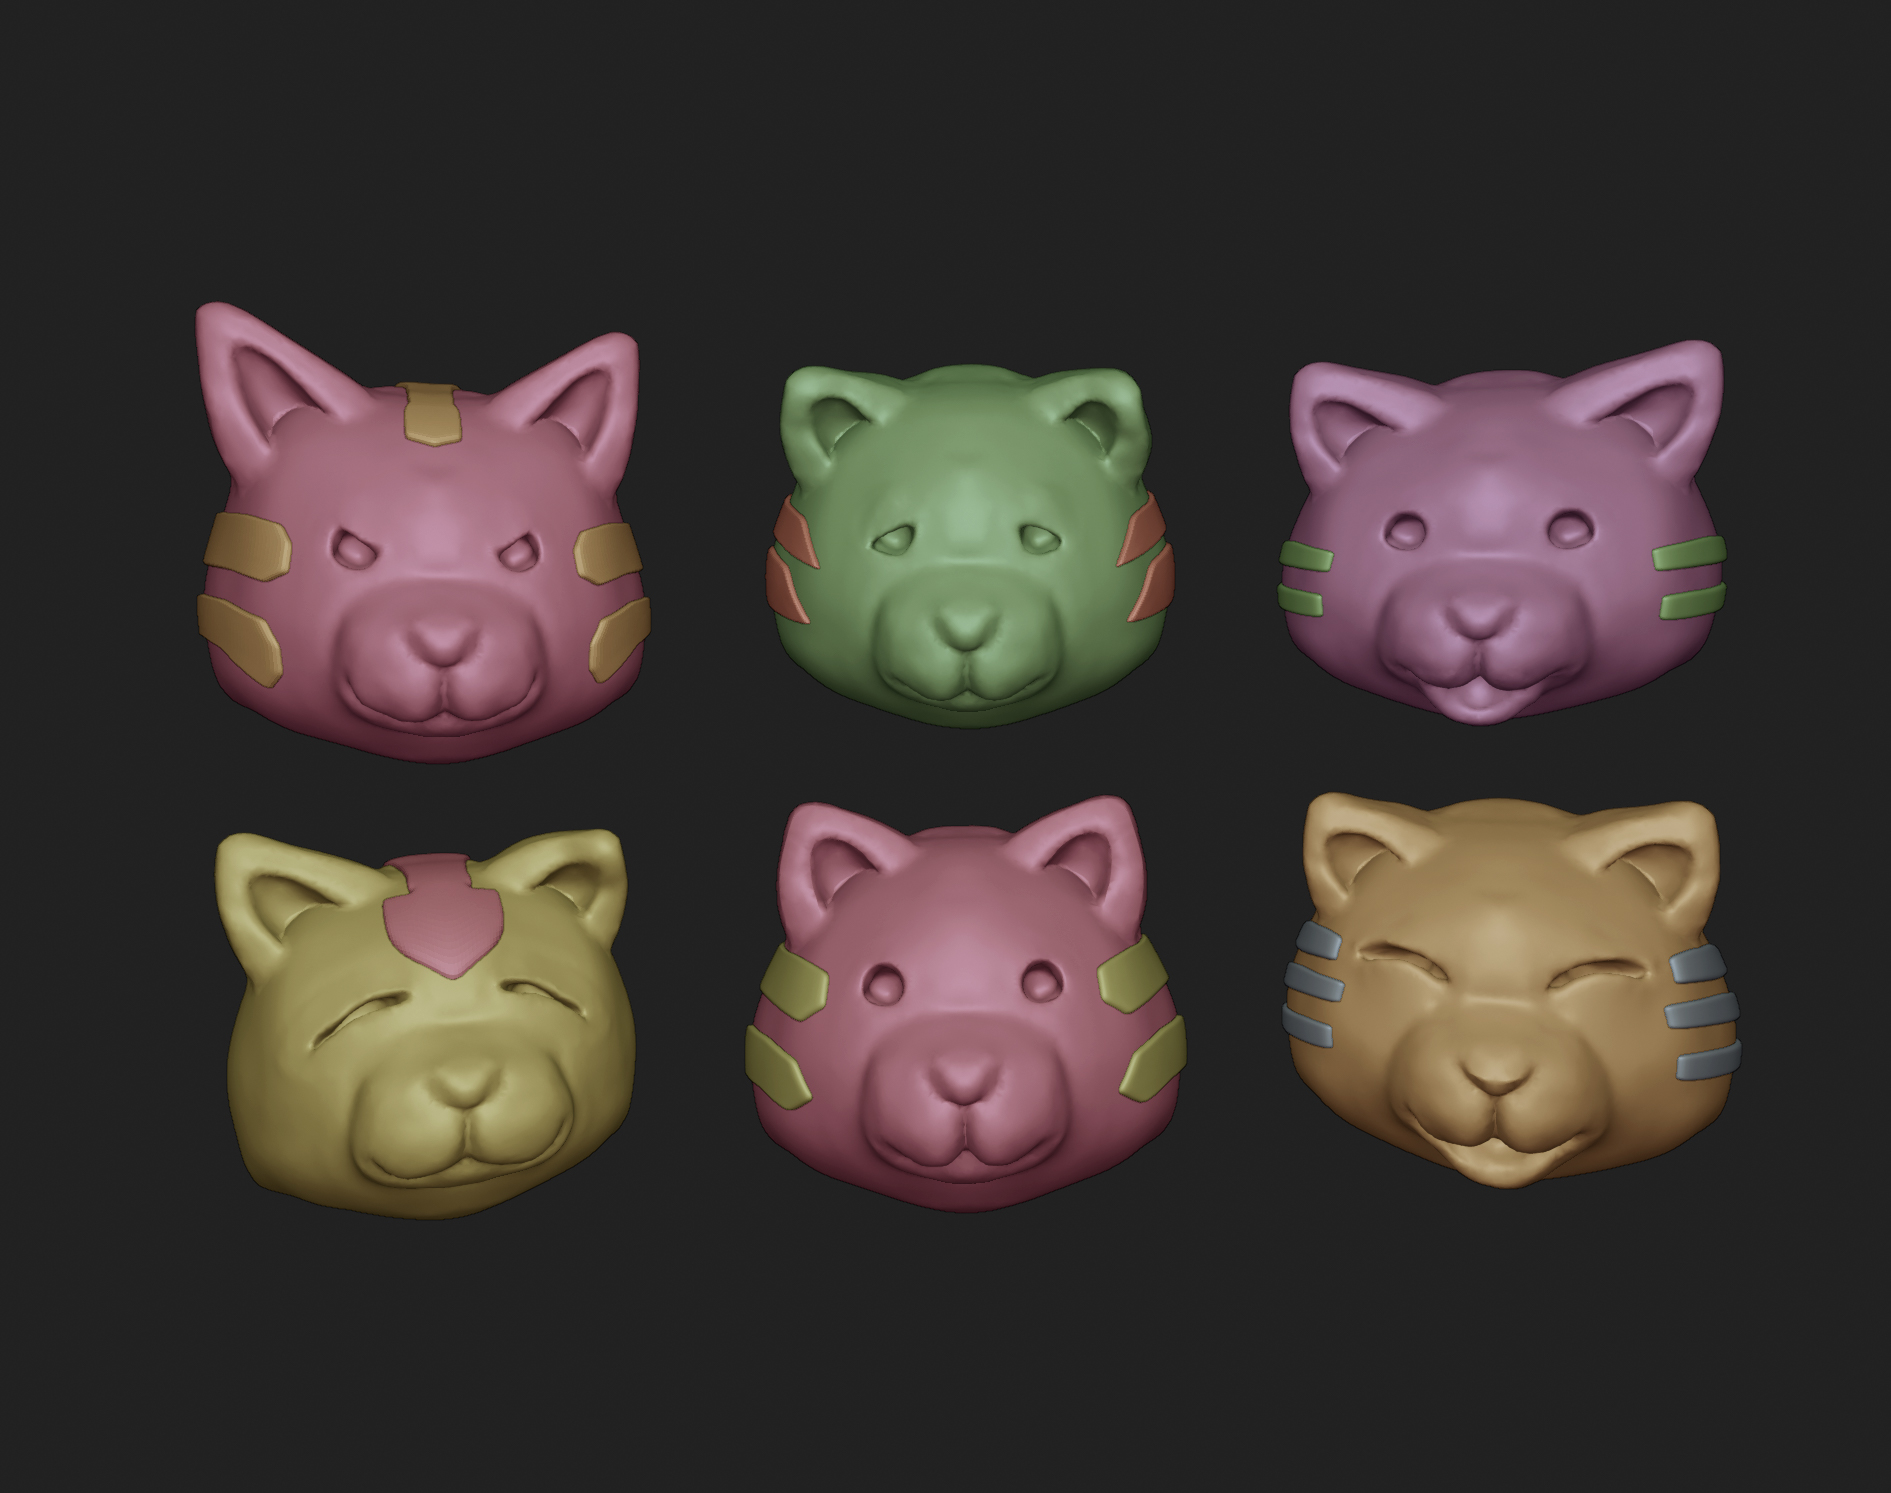
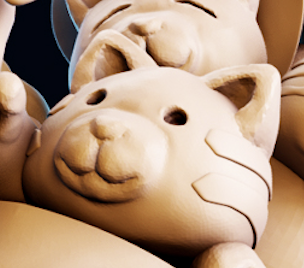
After sculpting a single cat head from a sphere, I duplicated it a few times and created variations with different expressions. The stripes were made in the exact same way as the eyebrows. I was going to add eyeballs and make more elaborate expressions, but for the sake of saving time, I settled with simple cavities instead.
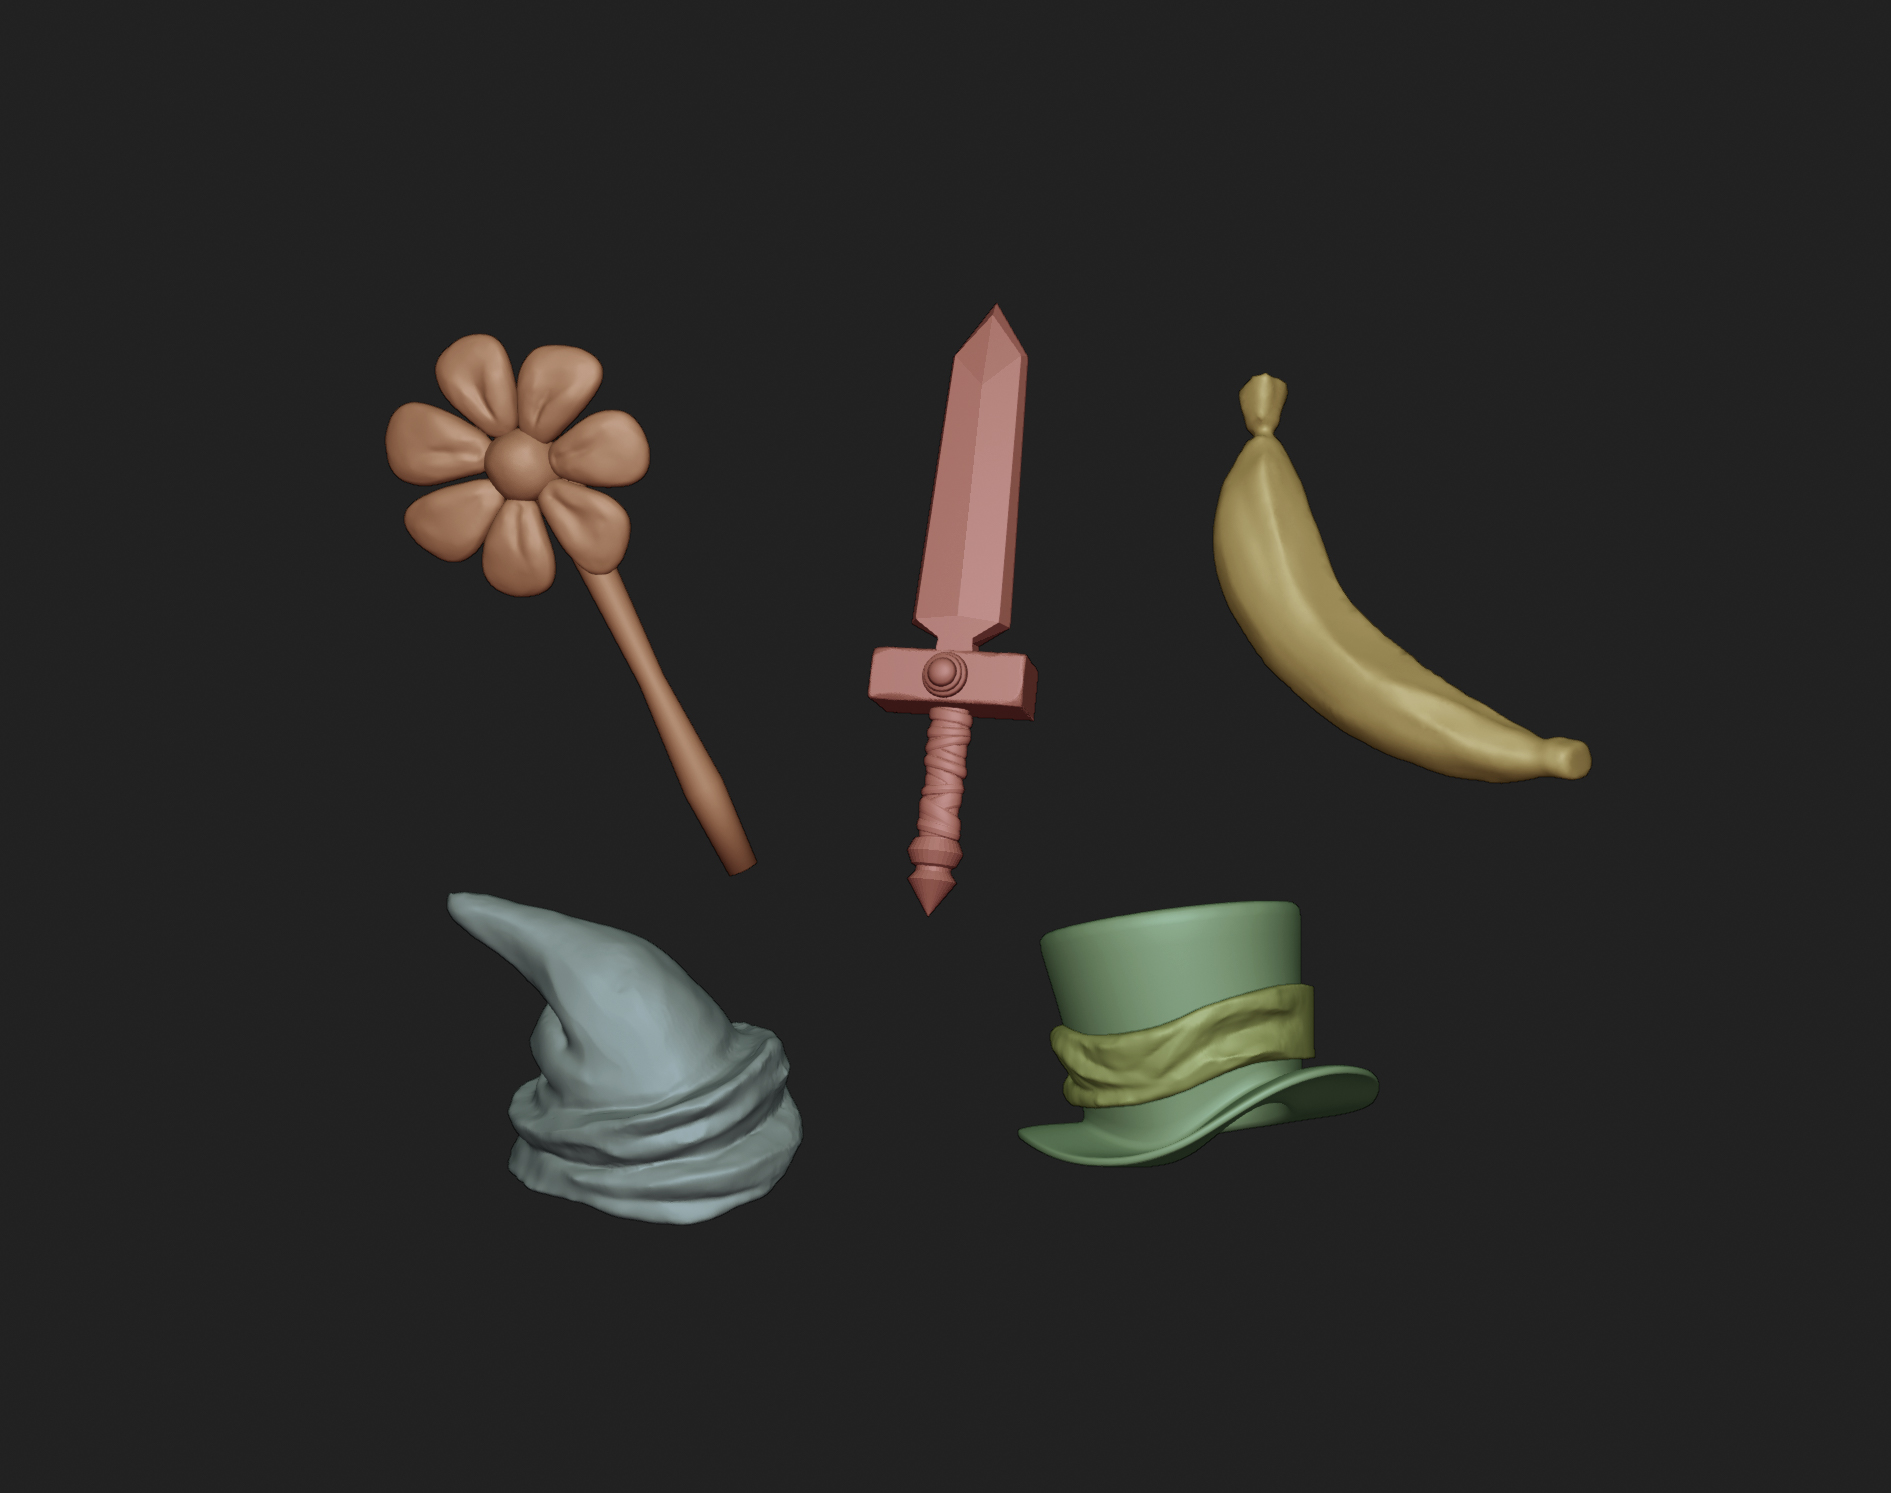
The accessories are a combination of simple modeling and sculpting I did in a rush, except for the sword, which I reused from a previous entry (Day 20).
Some Tweaks
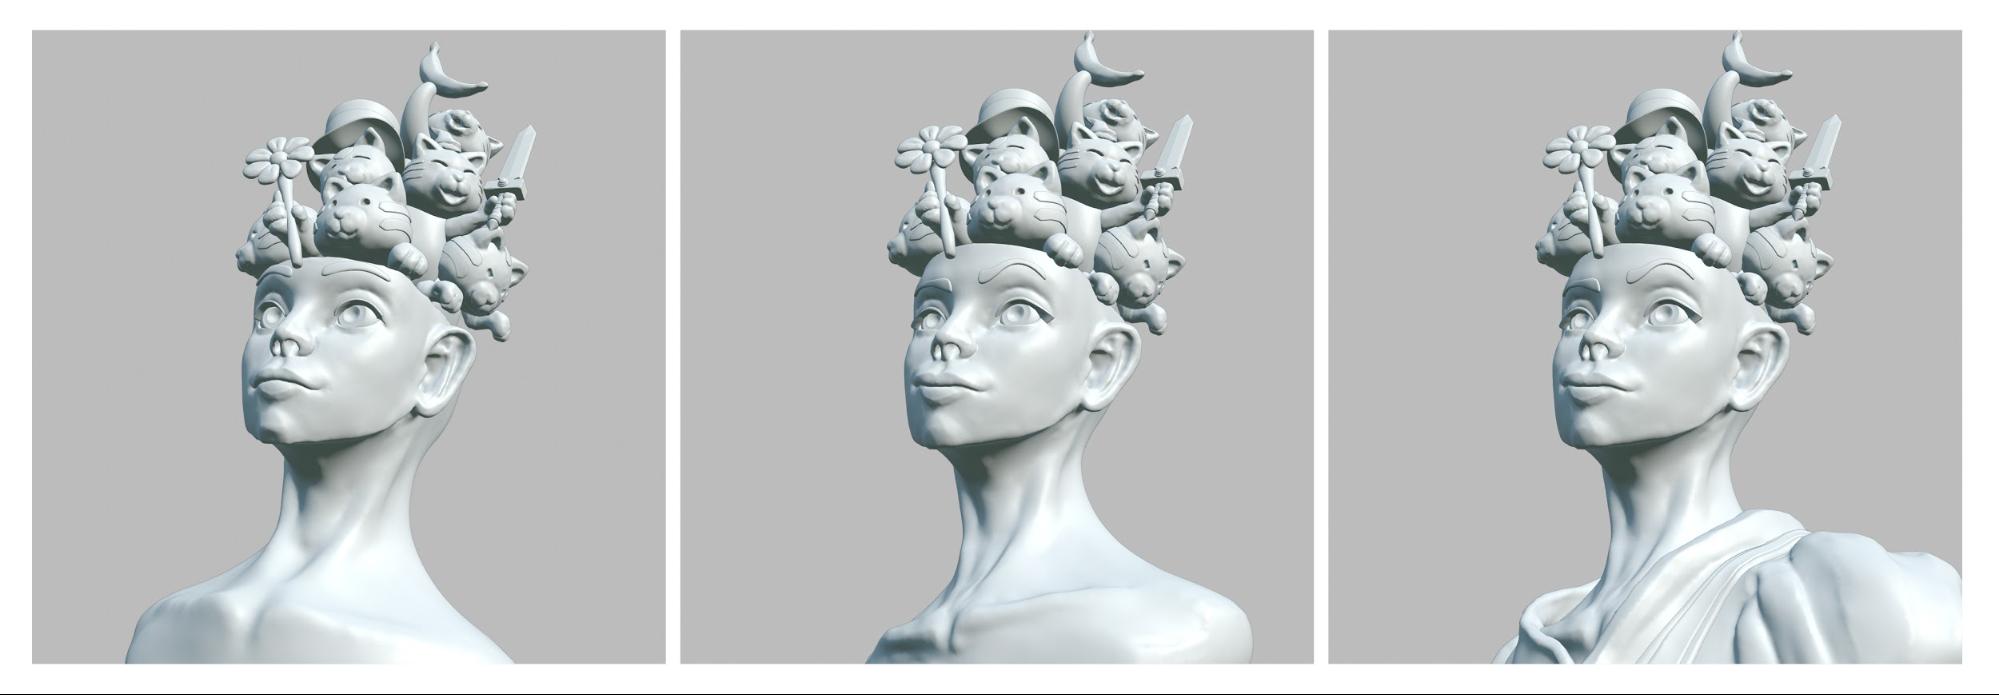
Before proceeding to the final step, I changed the facial expression by moving the eyelids and mouth in sculpt mode using the Grab Brush and repositioning the eyebrows shape in edit mode. On top of that, I also rotated the sculpture a little bit to give a sense of dynamism to the composition. Afterward, I sculpted the clothing piece very quickly because I felt it would look better than having a naked bust.
Material Settings & Lighting
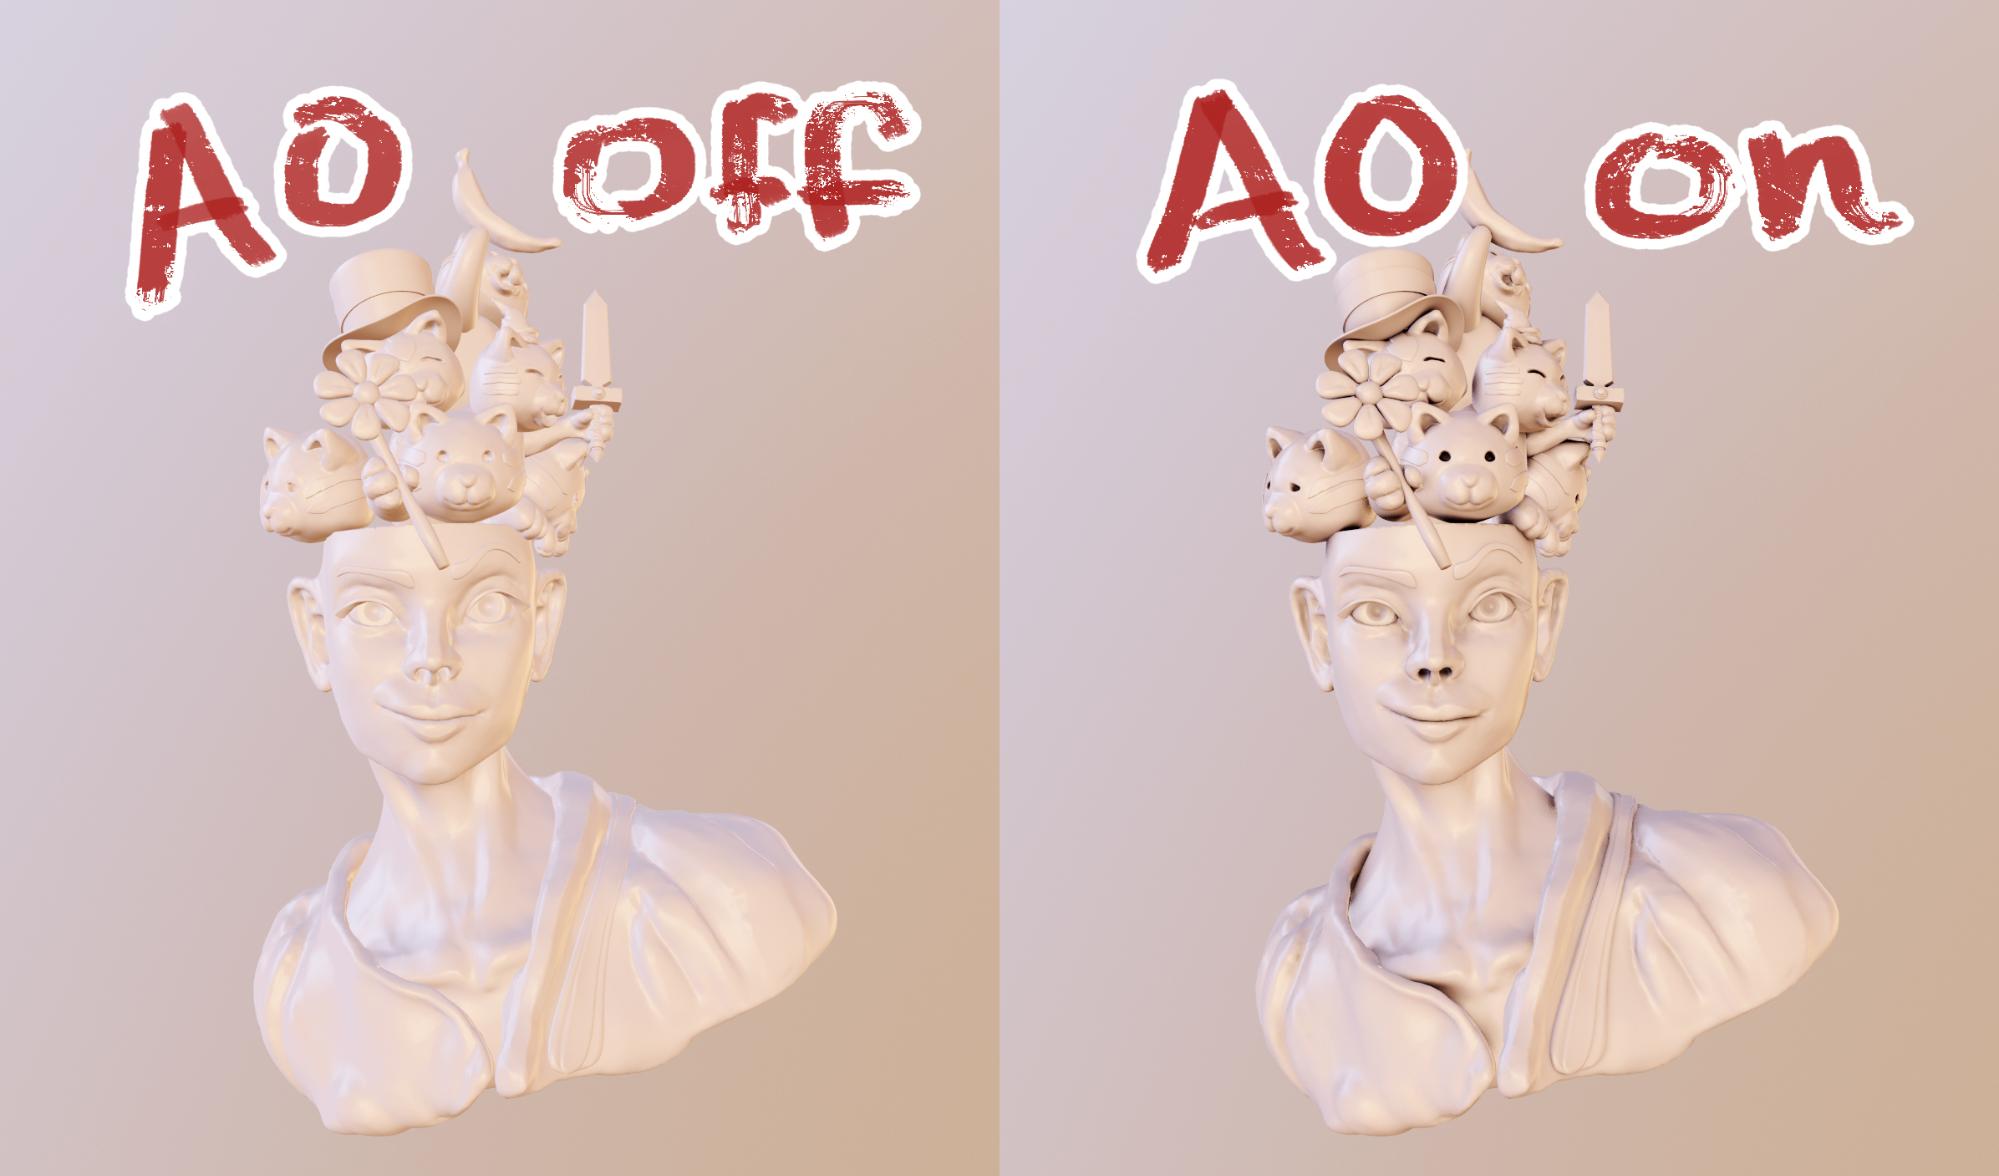
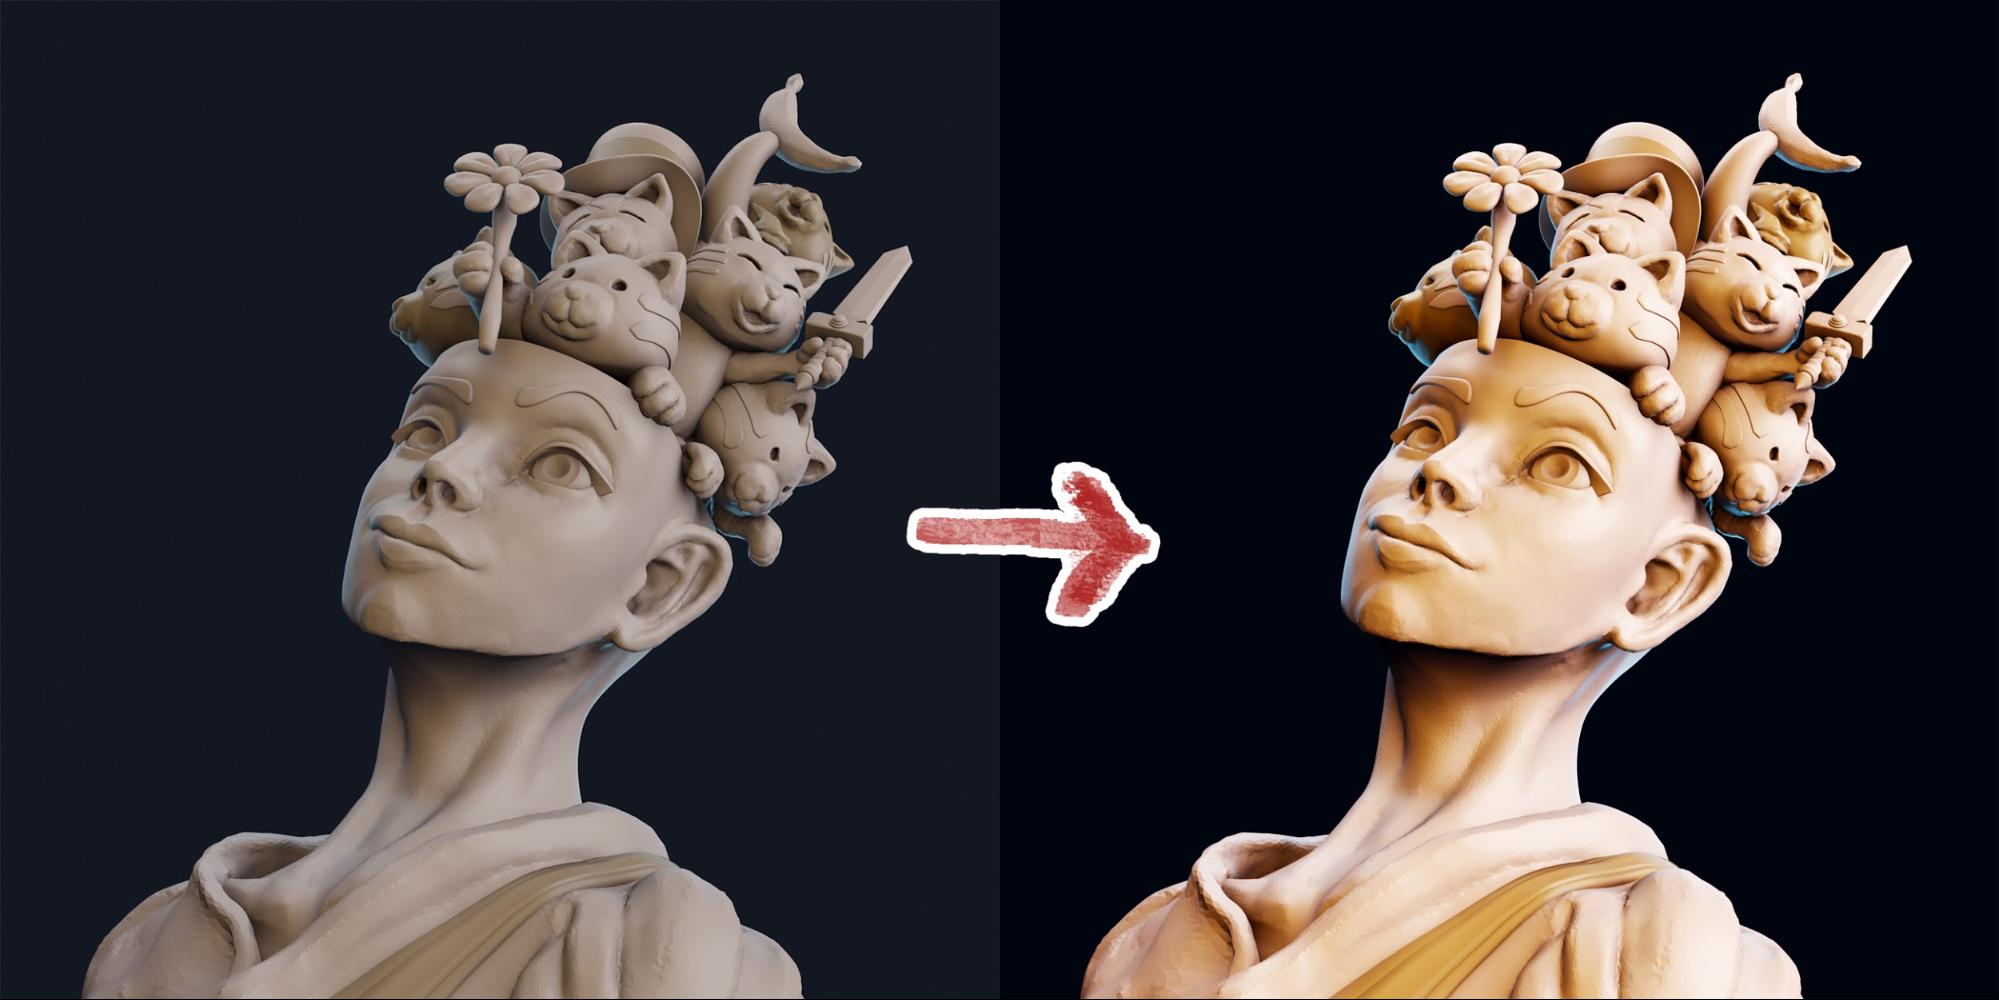
The image was rendered in Eevee and I didn’t make use of any fancy materials since the focus of the challenge was mainly on sculpting (plus, my knowledge regarding shaders is pretty limited lol). I did make use of ambient occlusion to make the subject more interesting. Here’s a comparison image of what it does:
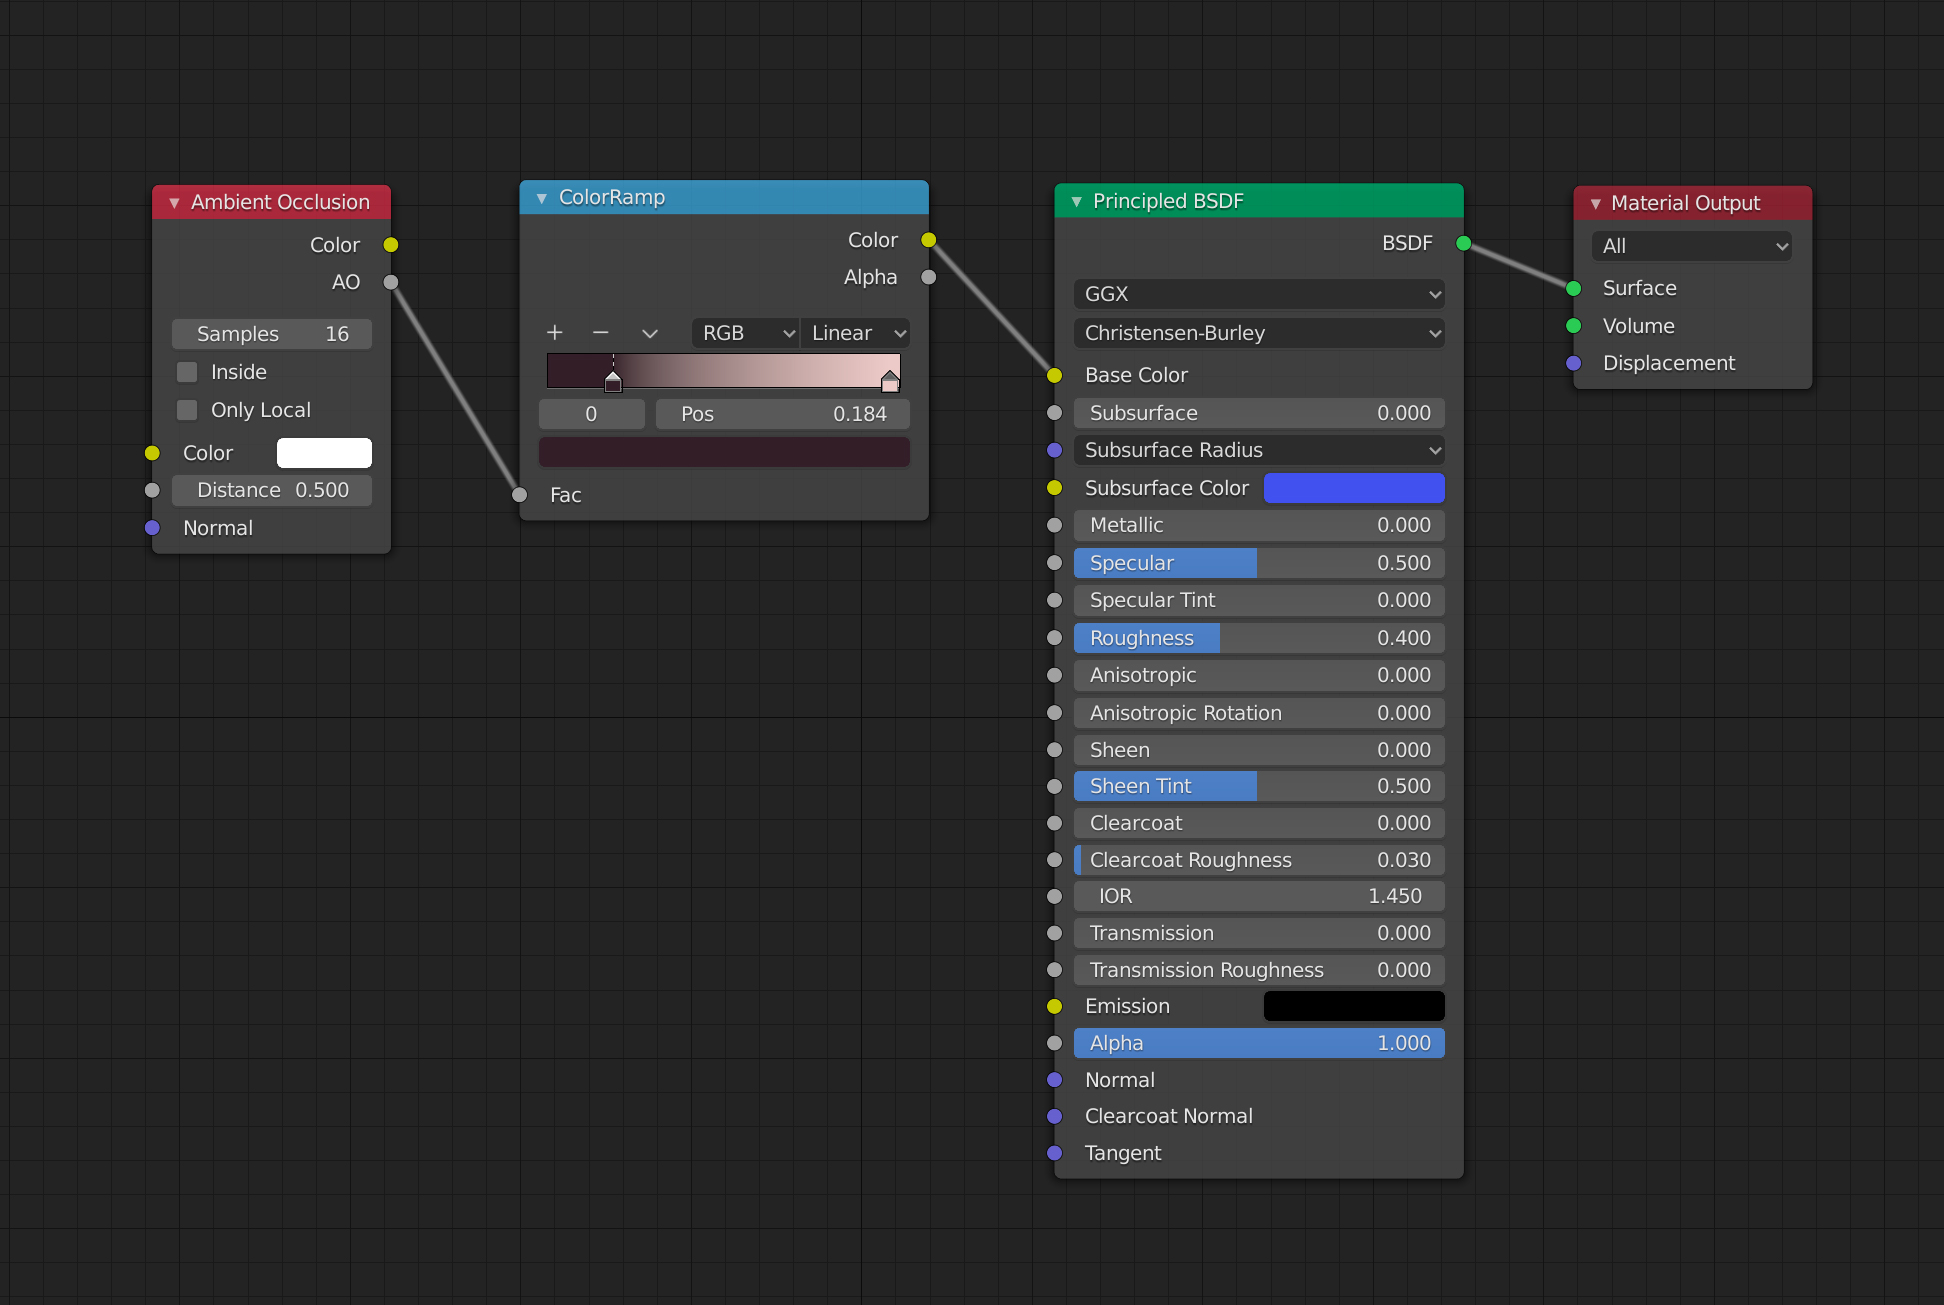
I used a color ramp node connected to the ambient occlusion input node in order to have more control over the shadows. I used the default Principled BSDF shader and didn’t change any of the other settings:
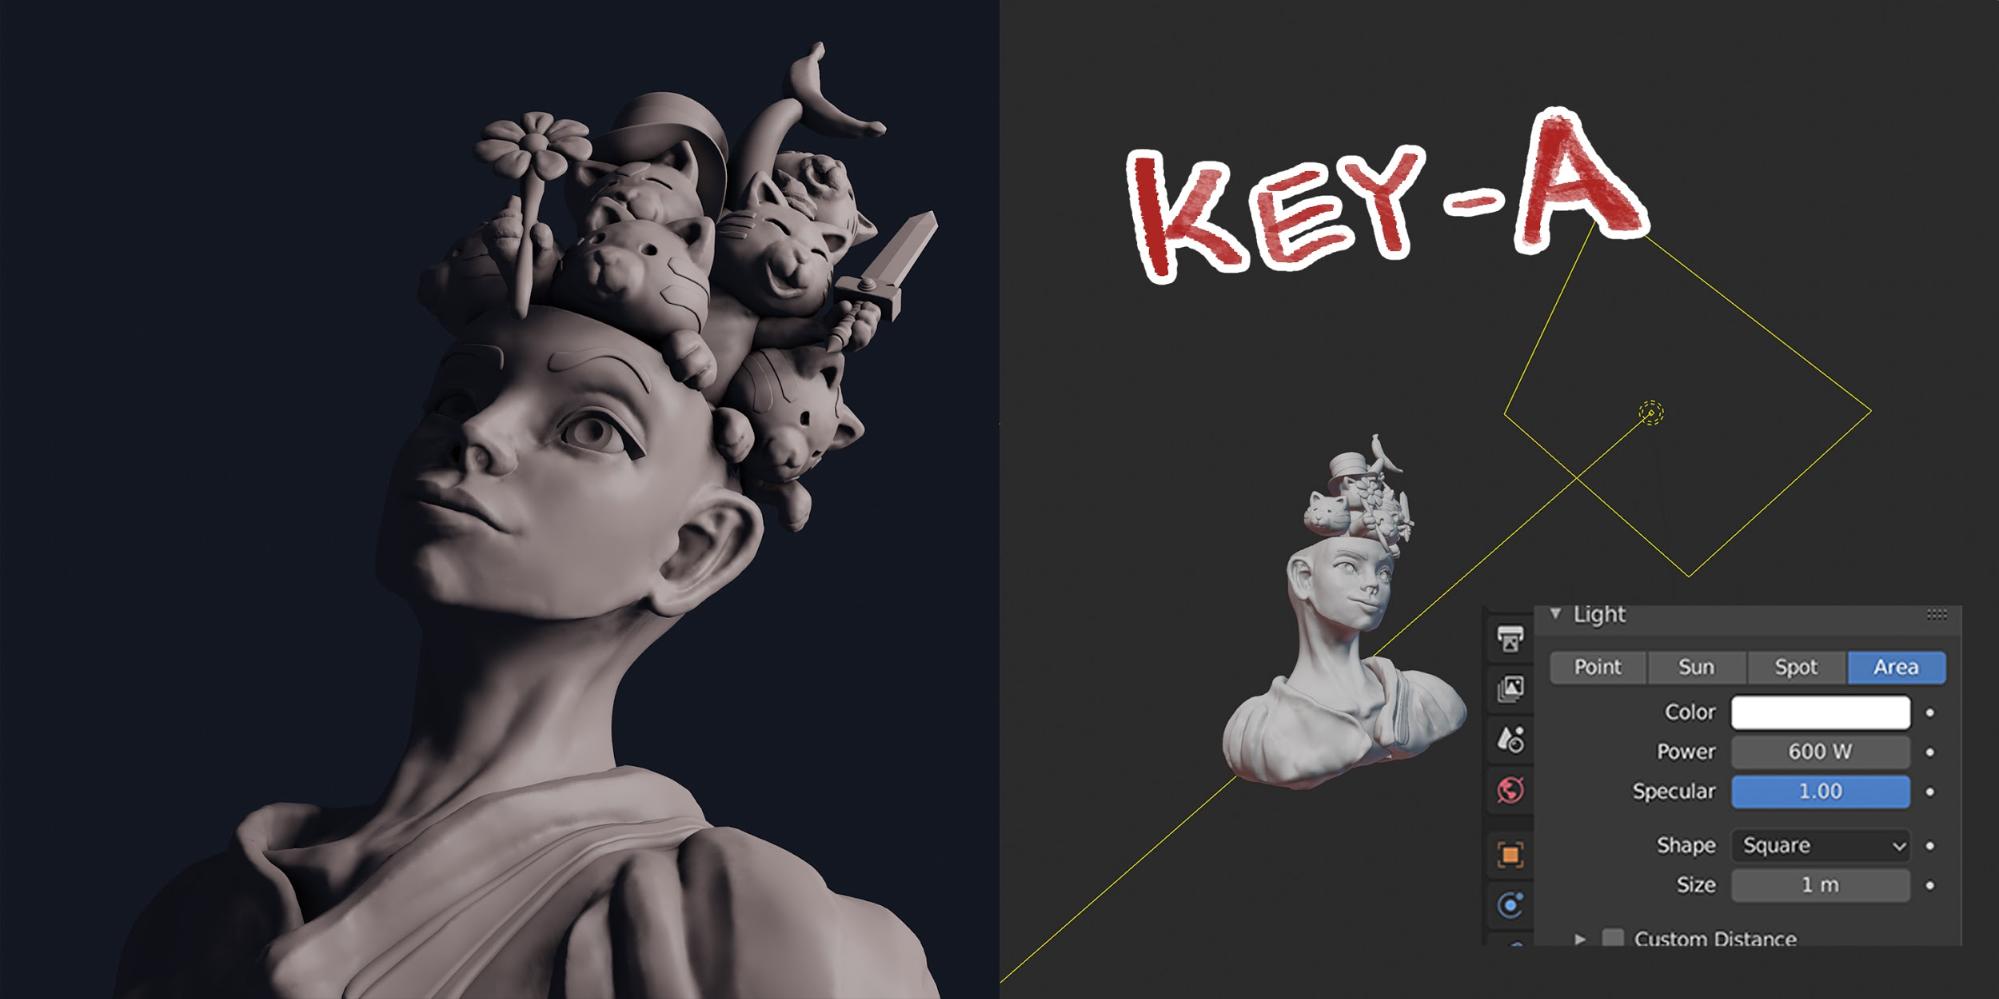
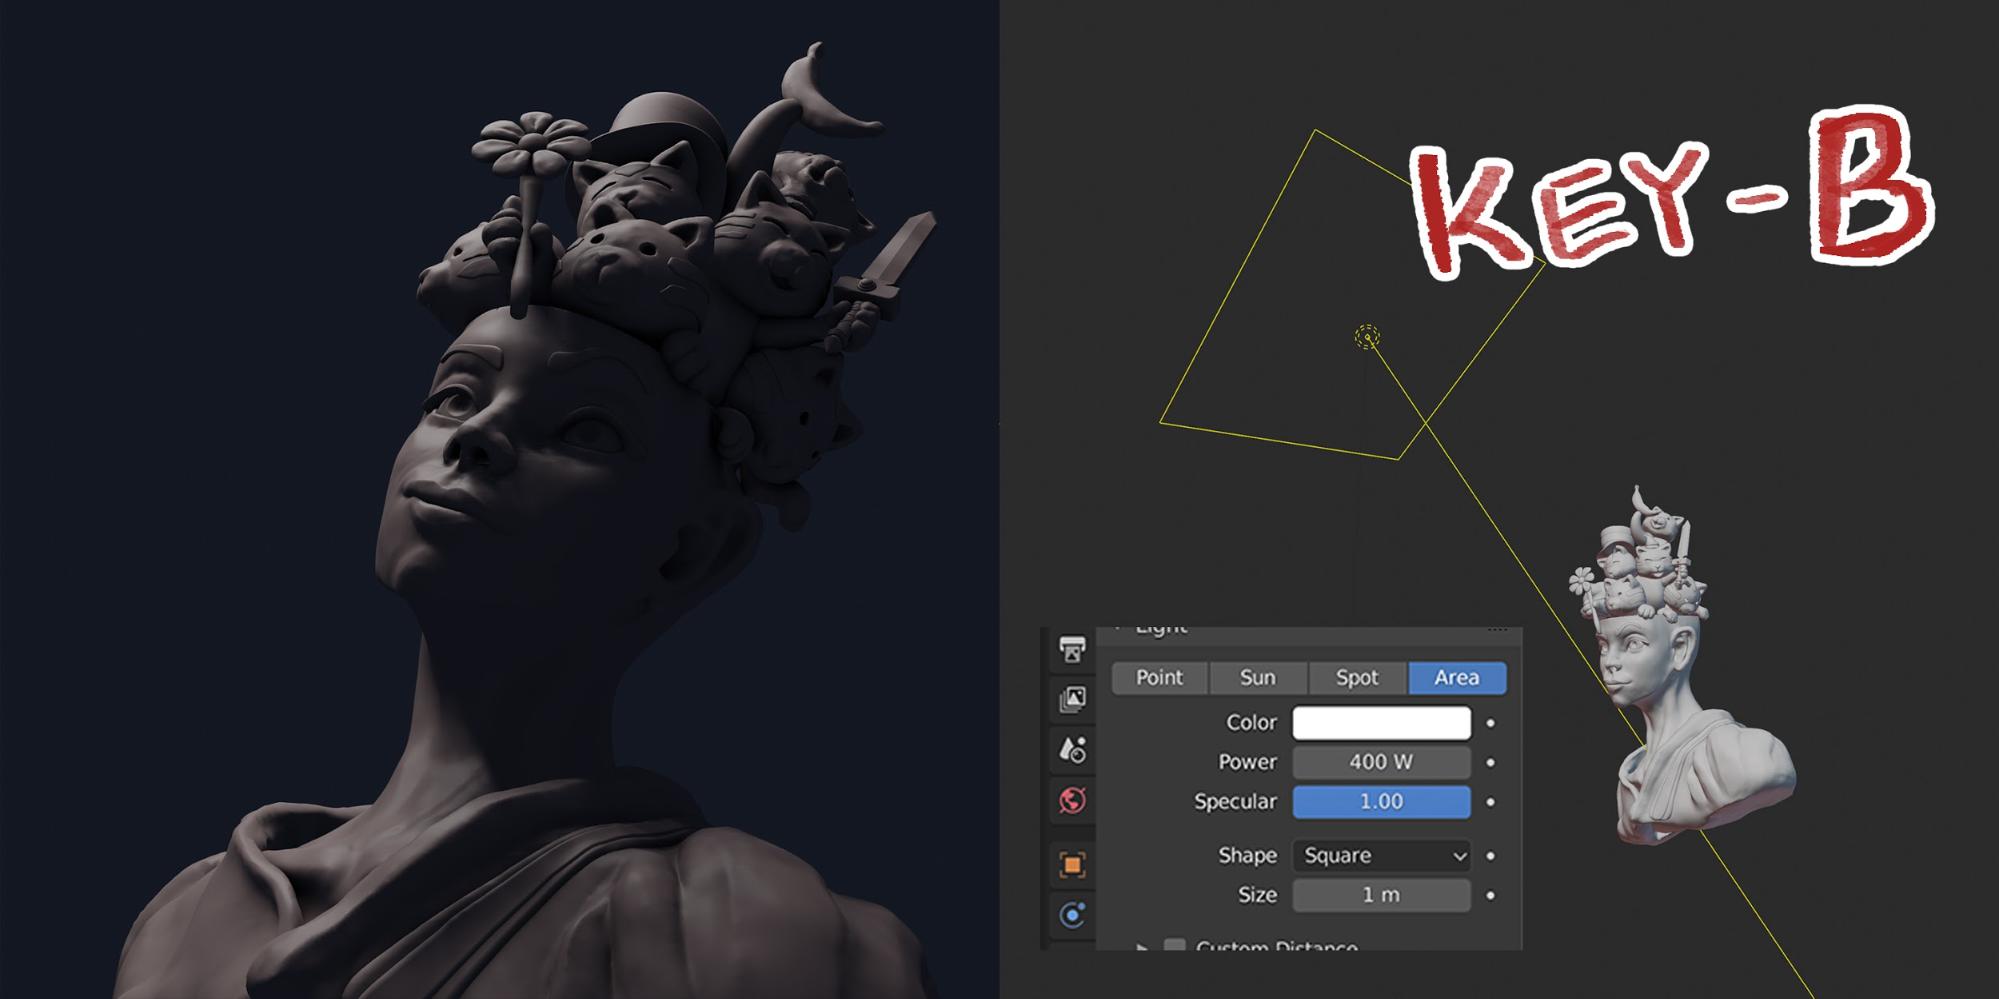
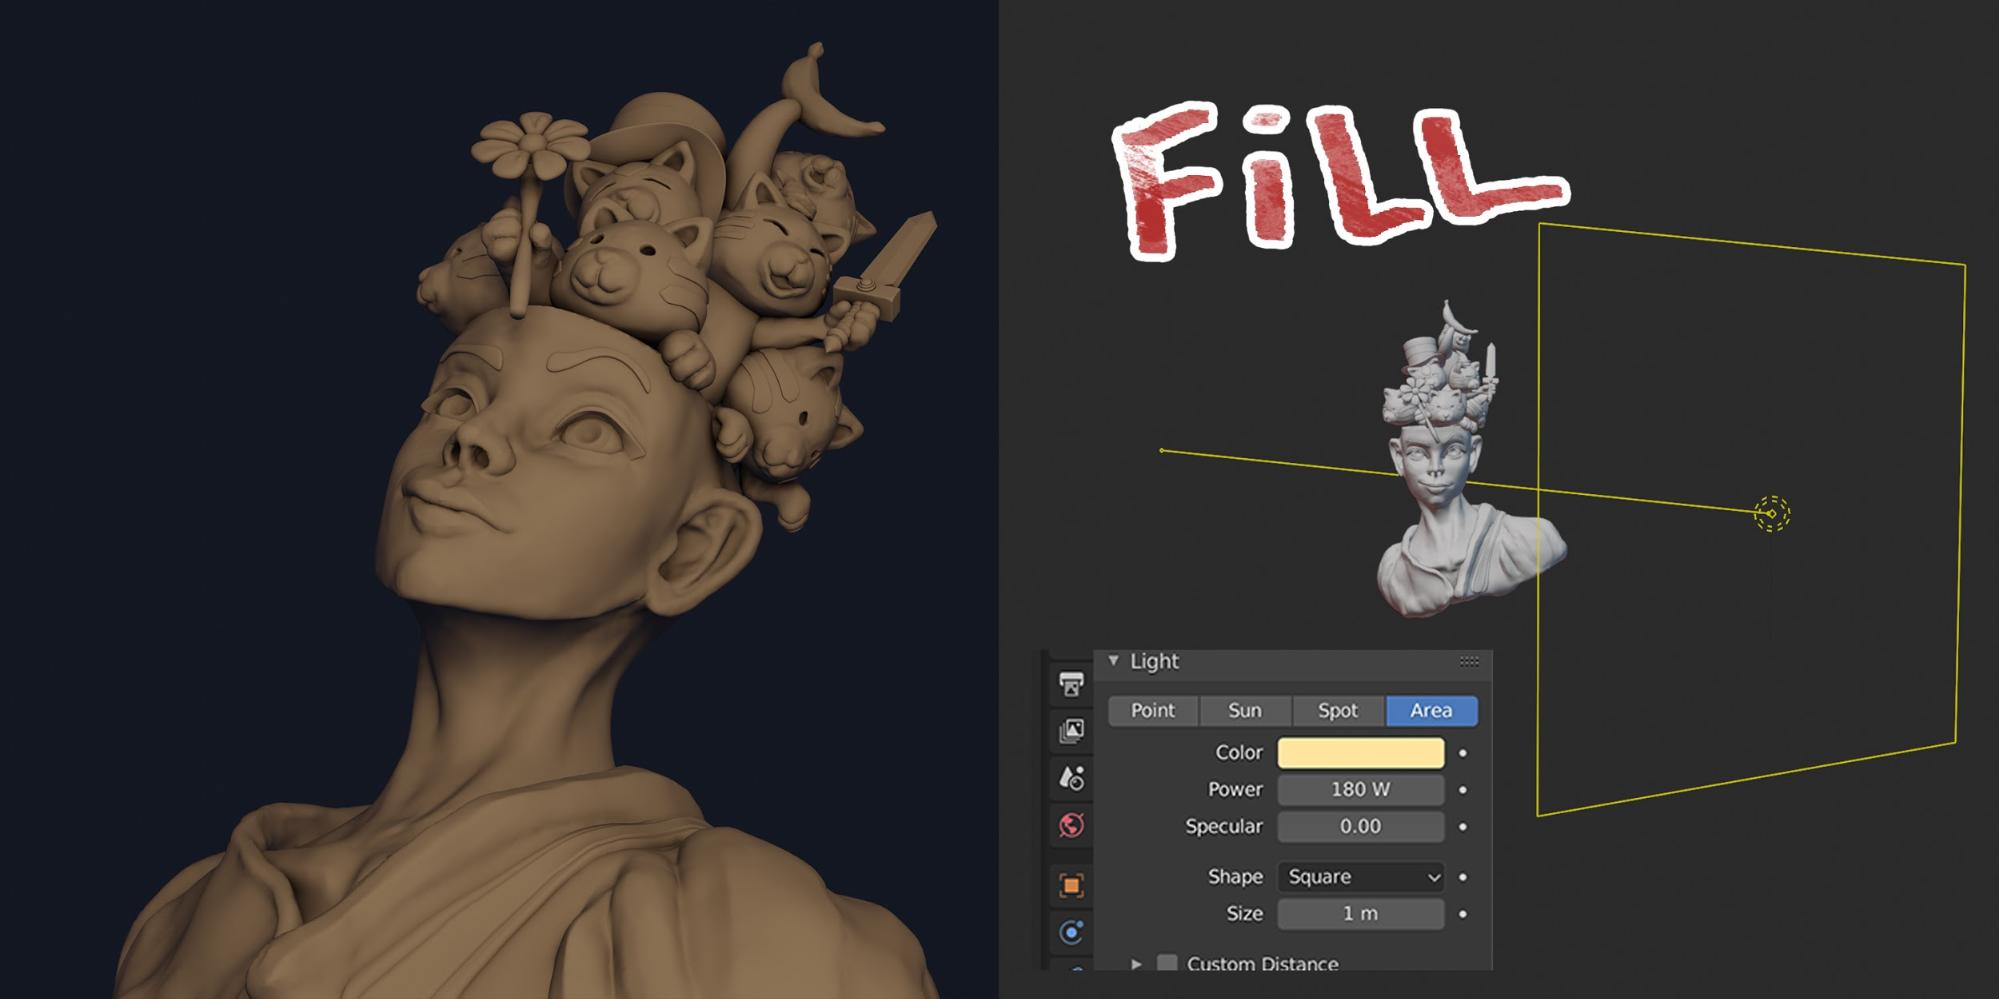
And last but not least, lighting! This final part is one of the most fun parts to work on but is also very challenging at the same time. No matter how beautifully modeled an object might be, it can be totally destroyed by improper lighting. I myself am not very knowledgeable about this subject so I relied on my “gut feeling” and spent a lot of time tweaking the lamps to come up with something that looks remotely decent. Throughout the challenge, every day I experimented with various lighting setups. For this one, I tried to emulate a 3-point lighting scheme. I used two bright key lights on the sides, supported by a yellow fill light, with a blue rim light from the background:

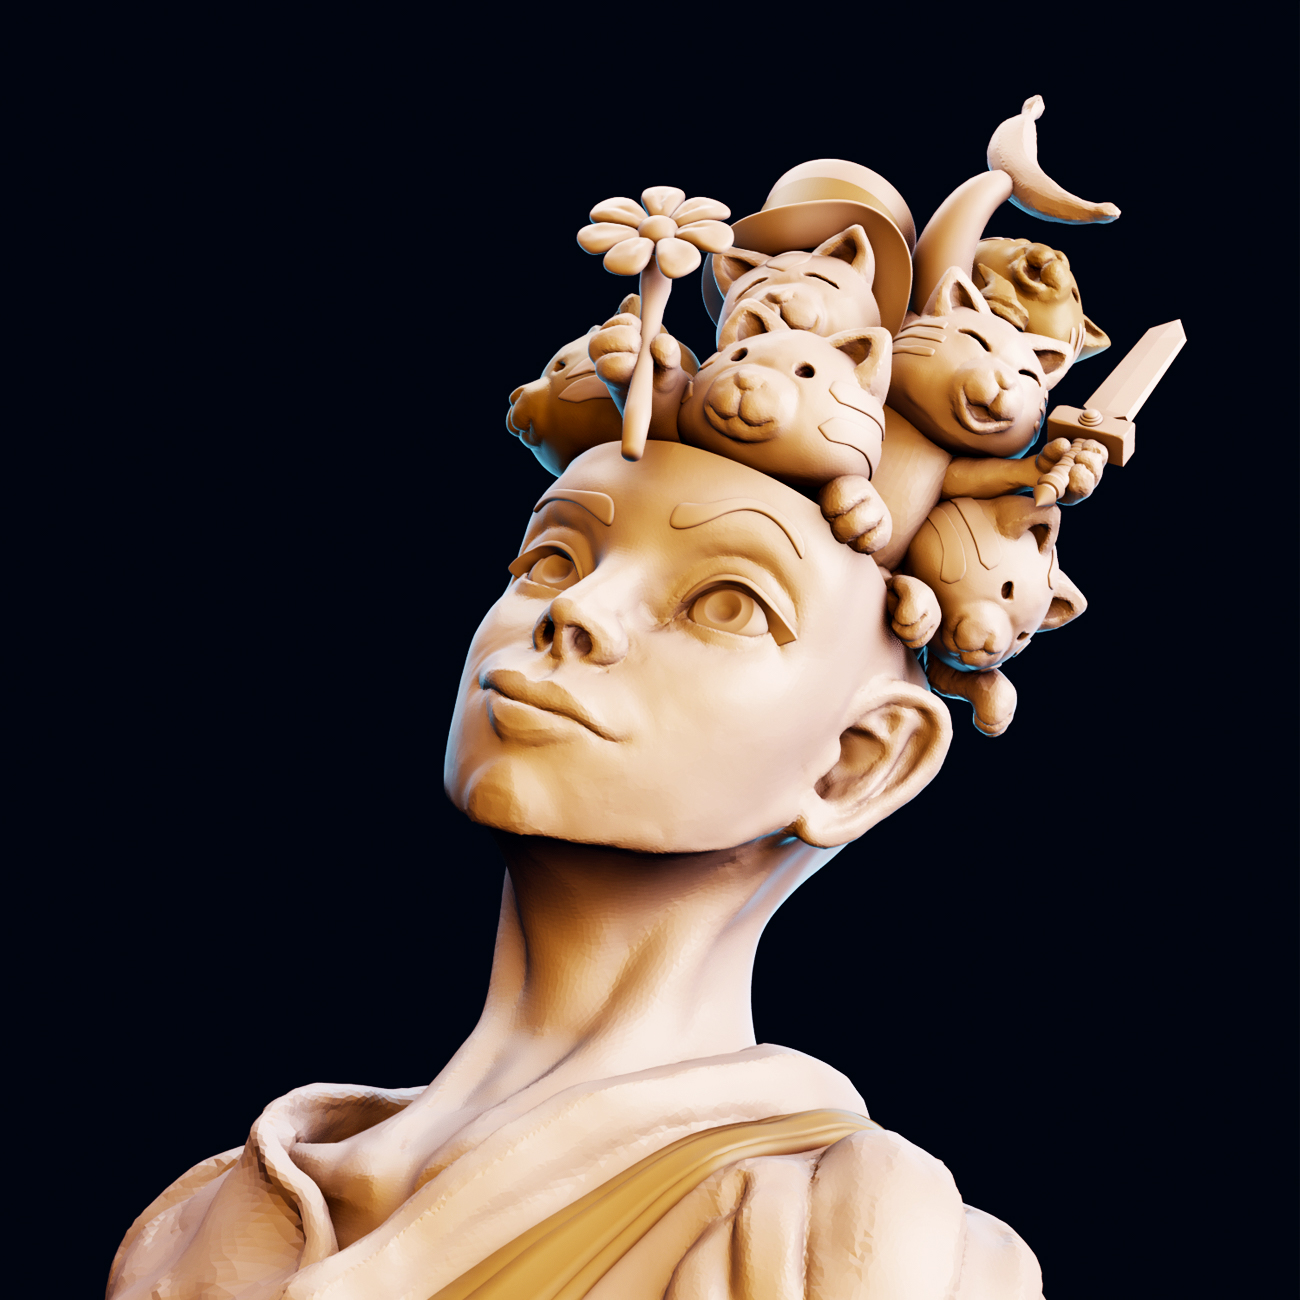
After setting up the light and rendering the image, I did a very simple post-processing in Photoshop to enhance the final image. I basically used adjustment layers to increase the brightness and contrast, adjusted the levels and changed the color balance to make it slightly warmer:
Conclusion & Final Thoughts
What I covered in this article is really simple stuff, which might seem obvious to a lot of people, but I hope it was somehow useful.
By no means do I consider myself to be a proficient artist. I’m still at the very beginning of my journey and still have tons of things to learn. In fact, there are so so many things I wish I could have done better in this piece and looking back at it now all I see are flaws. If you take a close look at the image you’ll find a lot of jagged edges here and there. The sculpture itself is very rough and some of the parts were done in a very rushed manner.
And this somewhat relates to the biggest takeaway of this challenge for me personally, which is learning to finish a piece and moving on. Having the time constraint of one day for each entry, I was forced to make decisions efficiently, not spend too much time on a single aspect, and just finish the piece. I think there is a point where quantity trumps quality when it comes to learning and improving, and this became clear to me here. If it wasn’t for the time constraint, I could’ve spent weeks or even months obsessing over each tiny detail seeking perfection. But this would likely result in wasted time that could be used more productively in other projects. So yes, doing the best you can within a given time frame and taking it to completion is the way to go. In the end, even if it turned out to be crap, the learning is still there, and that’s what matters in the end.
Also, keeping it consistent throughout SculptJanuary was pretty hard, and being able to have all 31 days finished by the end of January is an accomplishment I’m proud of. I’m not particularly happy about the quality of the artworks, but the fact I was able to keep the pace until the end.
Taking part in these types of challenges is a great way of pushing yourself to explore new ways of doing things, and improving skills overall. I highly encourage everyone interested in it to take a shot at least once.
Thank you for taking the time to read this article!
About the Author
 Felipe Goh, Hobbyist


Your idea is crazy, I like it !
Thank you, I’m glad you like it :D