Behind the Scenes: Style Development for Comic
Background
My name is Lance Phan, I’m from Vietnam. I originally studied 3ds Max for interior design, but in 2013 I switched to Blender for character modeling. In recent years, I mostly do 3D portrait commissions for people around the world.
Inspiration
Doing commissions is great, but it gets repetitive after a while and I wanted to do something different and more creative. So I revived a comic project that I discarded a few years ago because I wasn’t satisfied with the style back then. After some experiments, I came up with the current shading and rendering style.
Modeling the Character
To save some time, I used an existing base model that I created some time ago. It took me about 2 days to make the base, sculpt the dynamic topology model, retopologize, unwrap, paint vertex weight, etc. The process is pretty standard. So by reusing the base, I saved about 2 days of work.
Using 3D for a comic is very time-consuming, so I ended up only changing the face of the base model.

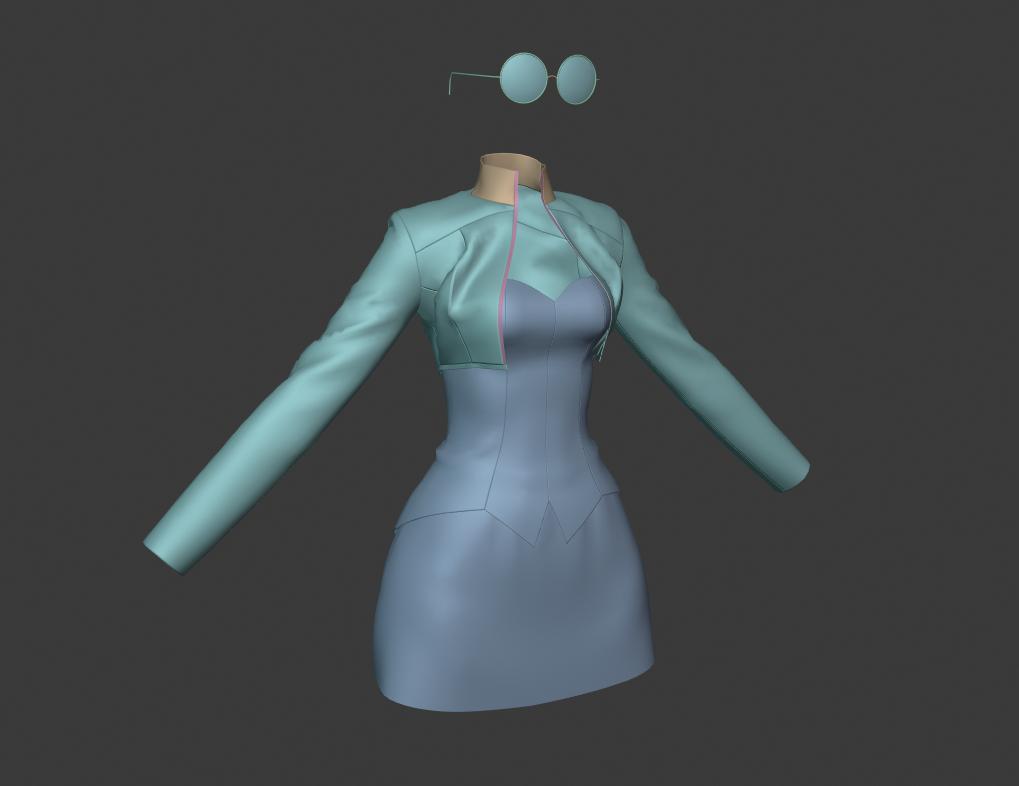
Clothing
Blender’s cloth simulation is great, but it lacks some key features that I needed to achieve my vision for the comic, so I used Marvelous Designer to get the job done.
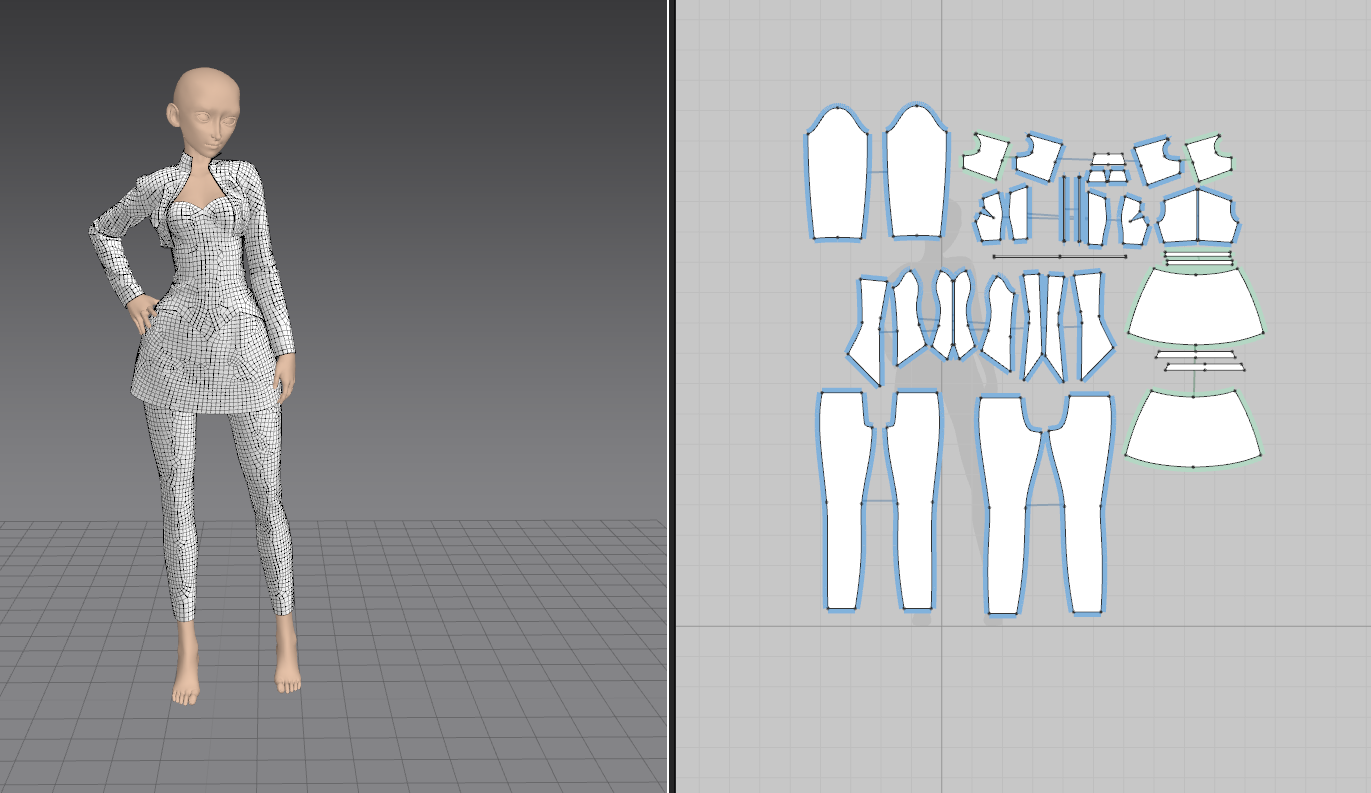
This particular character is a classy but headstrong person from a rich family, and I wanted her clothing to say something about her. So I went on Pinterest to find some inspiration and designed her clothing by combining multiple styles of clothing together.
Render Setting
To achieve the 2D comic style, I had to forget about being correct and get more creative in faking elements of the rendering. All the faking and incorrectness combined together to deliver a feeling of 2D painting to the final render.
So I turned off the diffuse bounce in the Cycles’ light path setting, which resulted in pitch-black shadows. Instead of relying on the path tracing engine to calculate the colors and shadows, I used the shaders to manually control them instead.
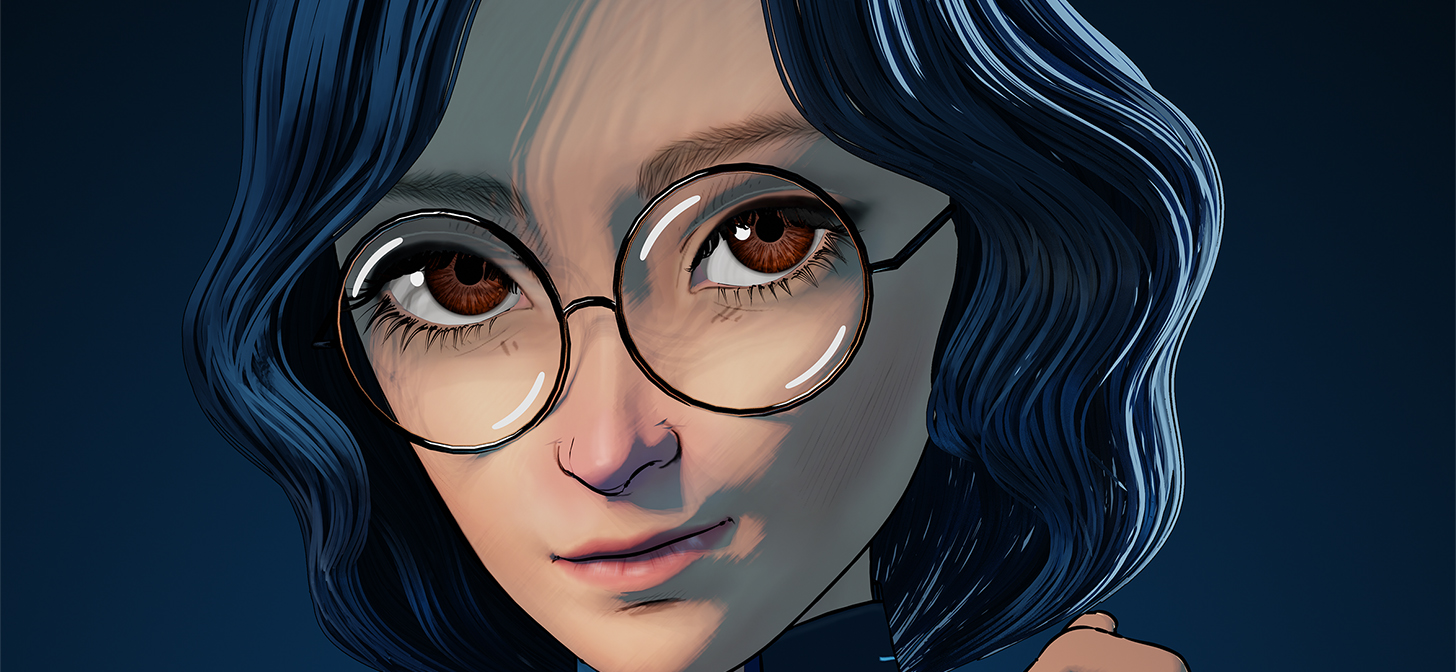
Skin Texture
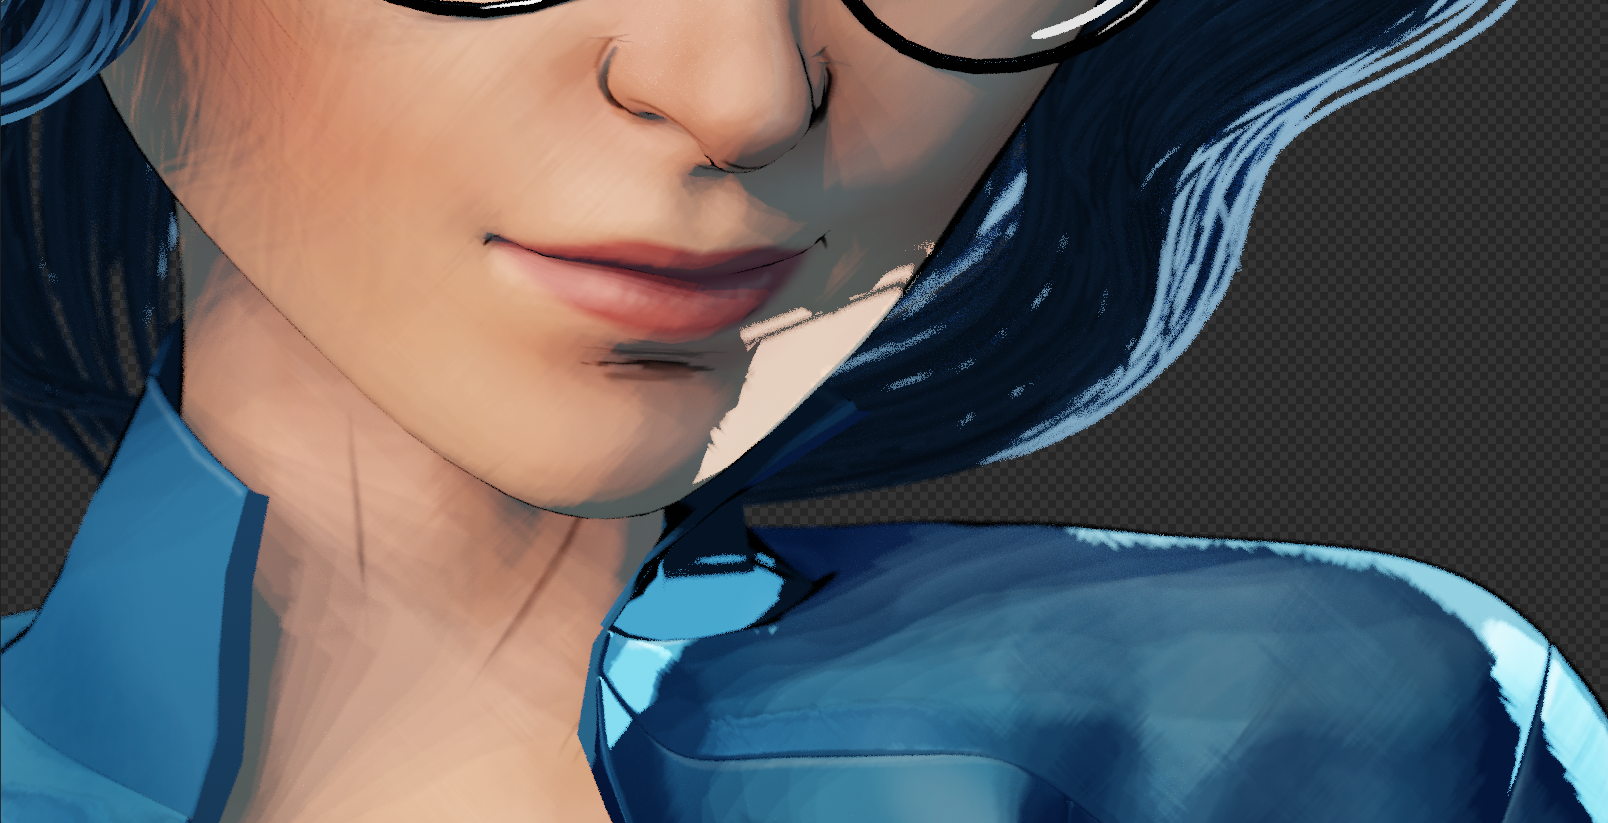
I painted the skin texture, but, unlike what I usually do, this time I also painted some fake highlights and shadows, which further enhanced the 2D painting feel of the rendering. The gloss on the nose, the highlight on the cheeks, etc., were all painted.
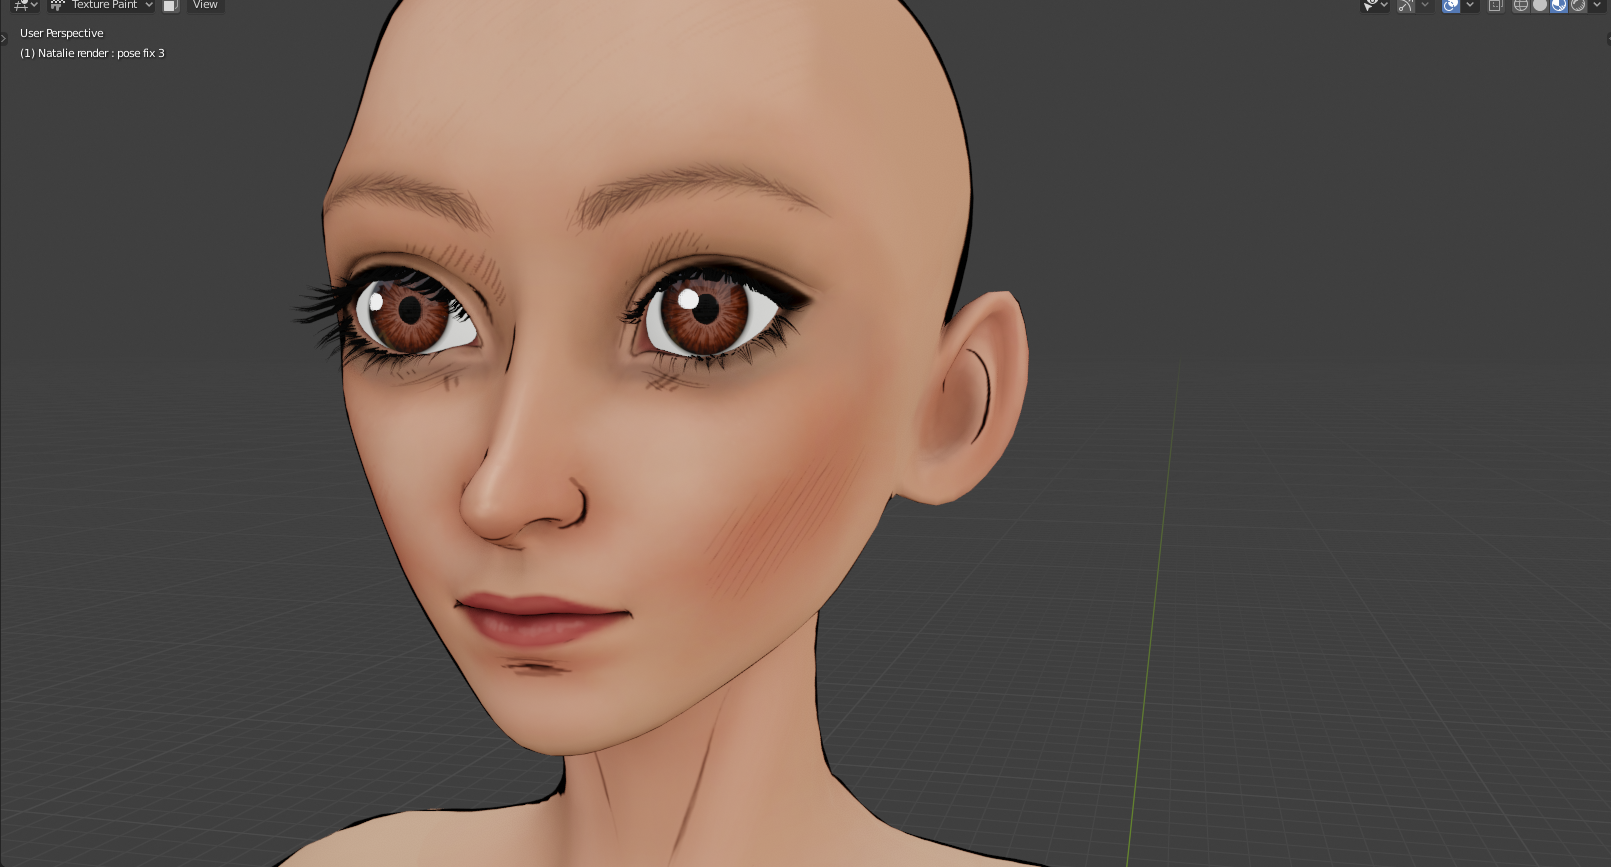
I separated the lines to another texture so that I can still make a realistic rendering from the base color alone, if I ever need to do it.
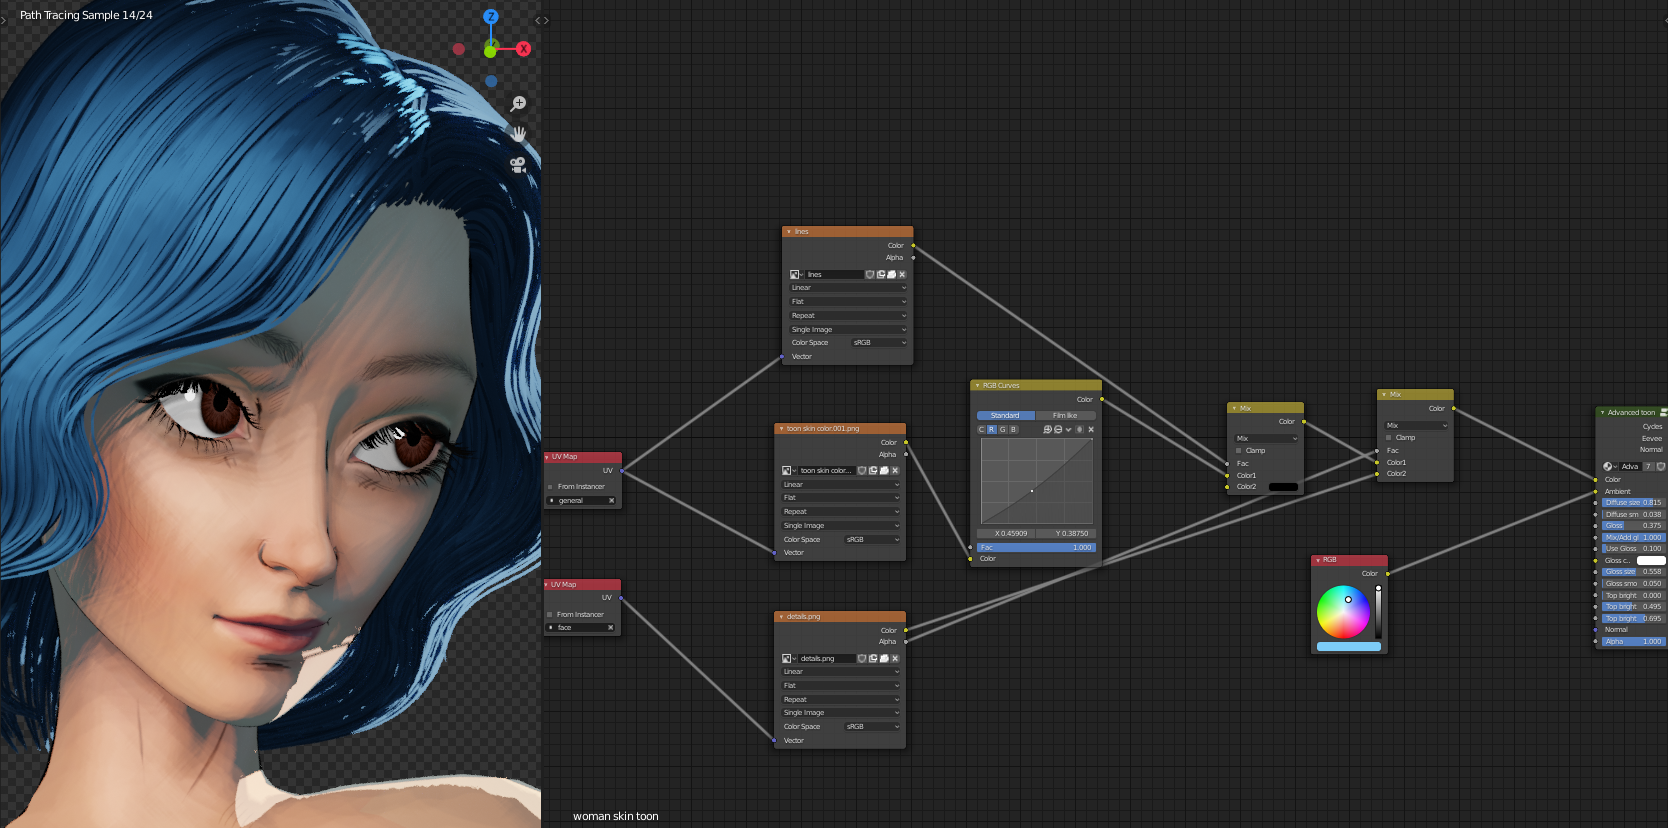
Painting details on a full body is not a great idea as it requires a very high-resolution image. At the time of this project, UDIM is not yet available in Blender, so I added another UV channel that focuses only on the face, and then added another texture for the high-resolution details.
So in the end, I painted 3 textures: The base color, the lines, and the details.
Shading
I had tried to develop a decent 2D shading style in the past, but it didn’t look good enough, which was why I scrapped the project a few years ago. But this time, I had more knowledge and new ideas, so I tried again.
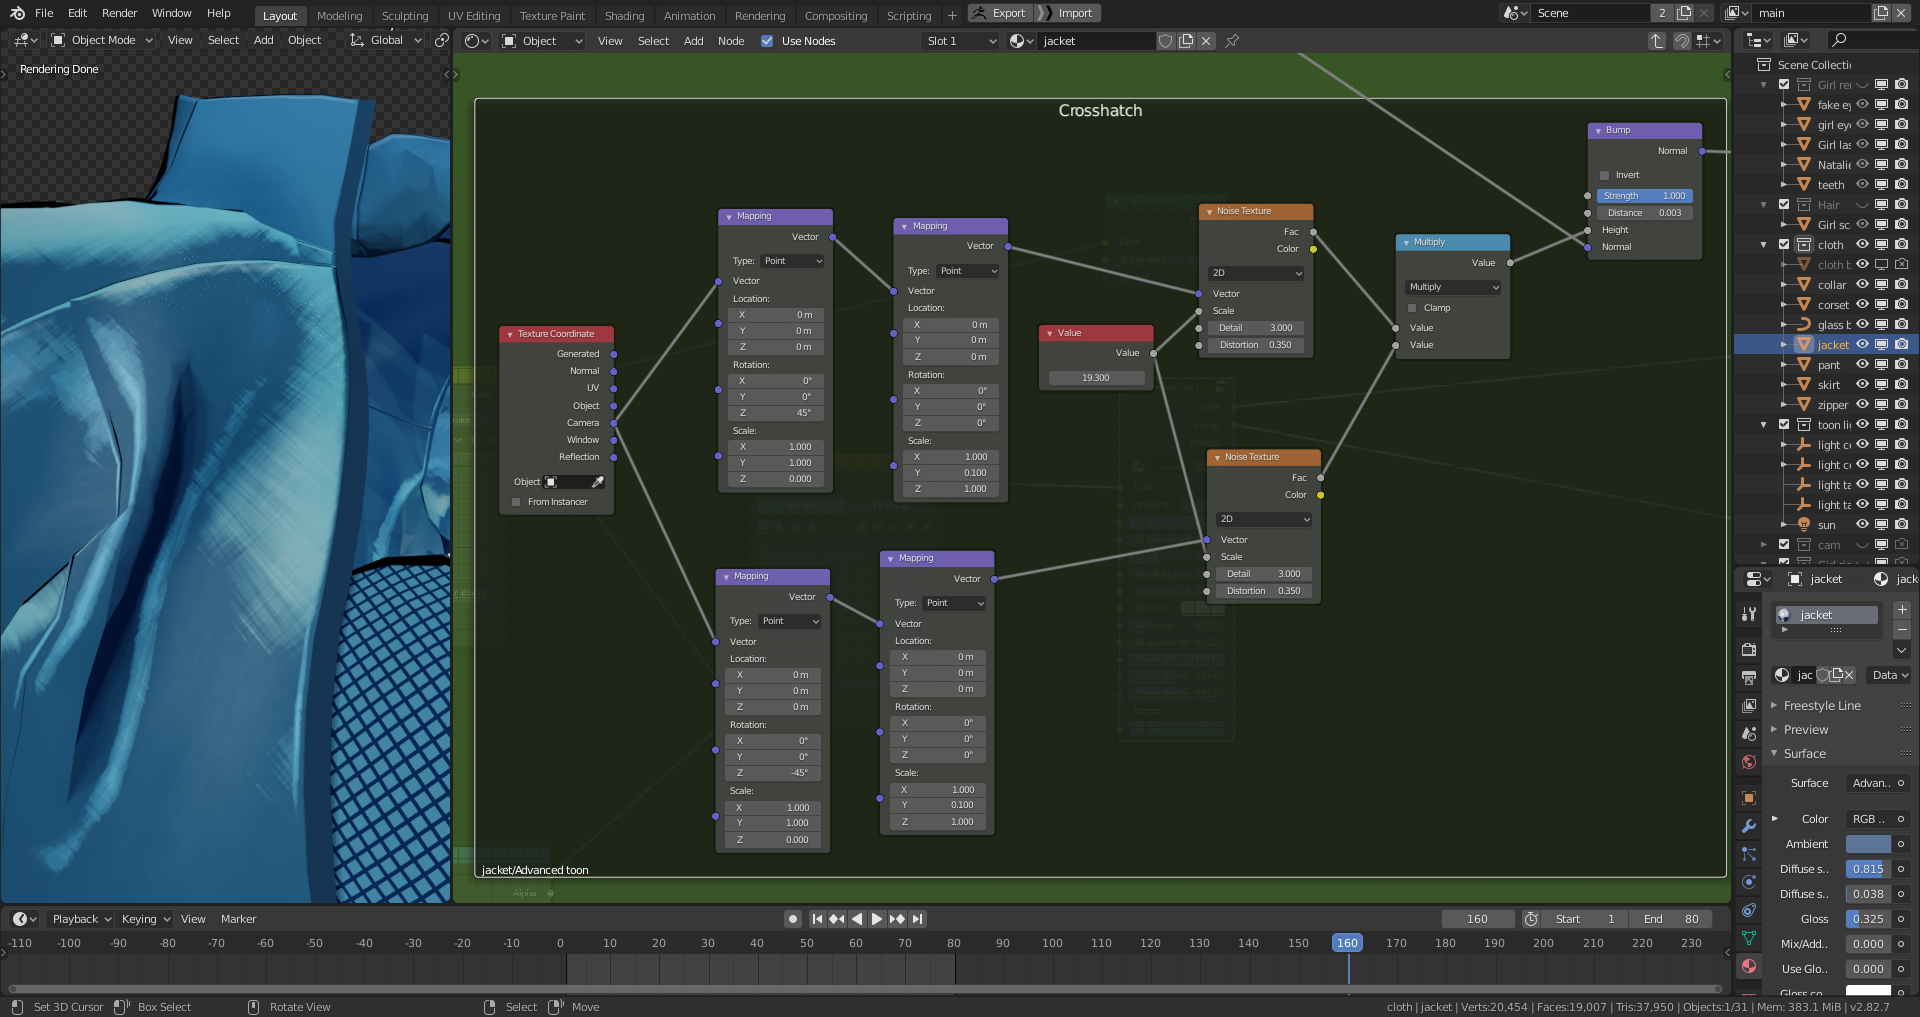
Using Camera texture coordinates, I created a crosshatch bump that distorted the transition between light and shadows. The crosshatch made the rendering look like it was painted using a dirty brush.
The shading for the hair is similar to the skin and clothing, but with some translucency. I also removed the crosshatch and changed the hair geometry to Strip and Curve segments.
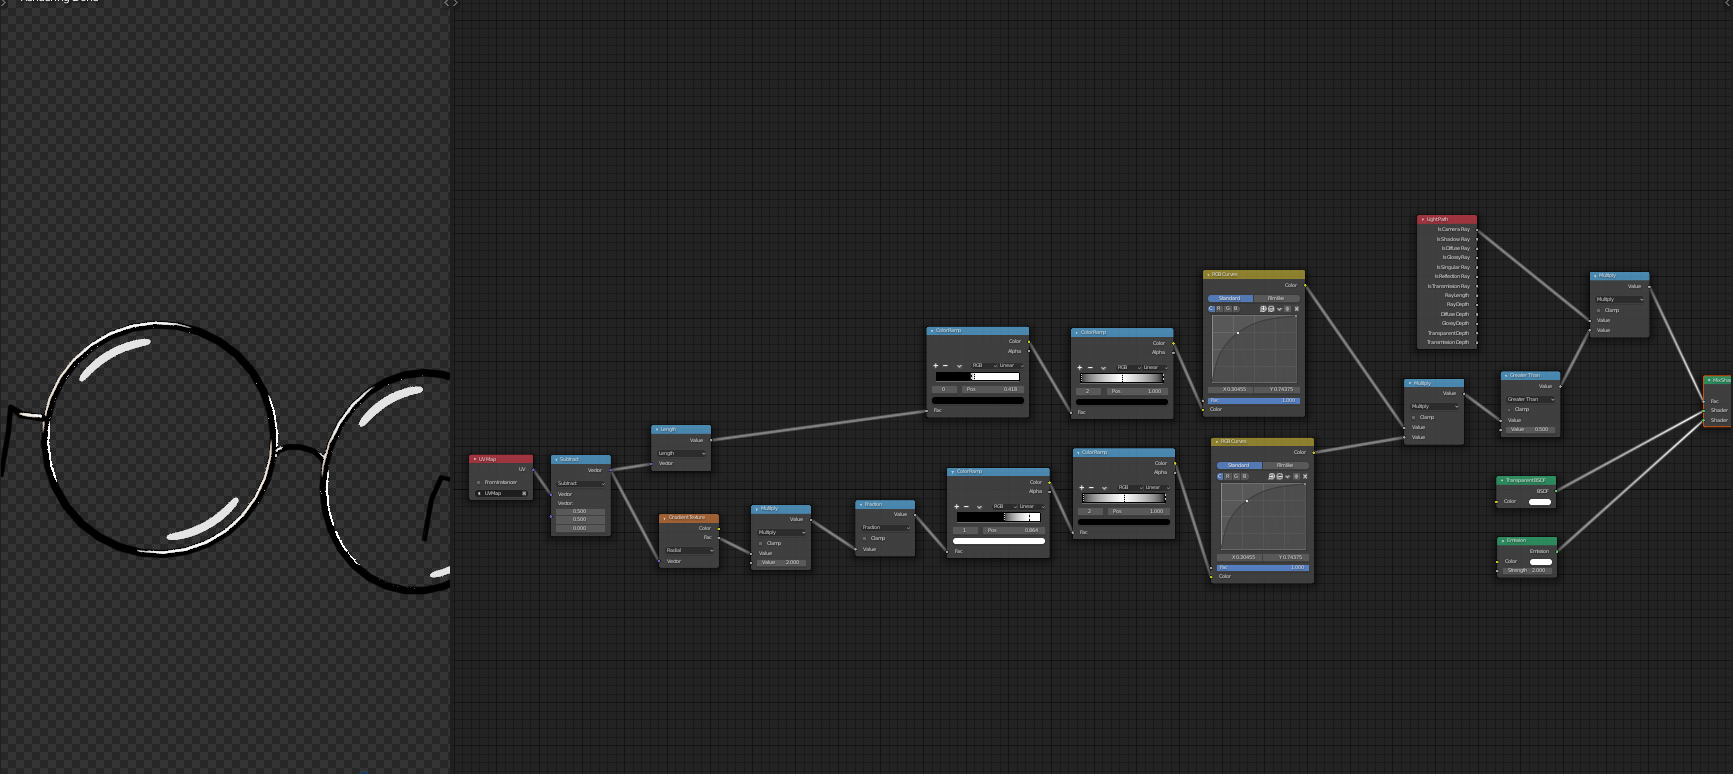
The glossy highlights on the glasses are not reflections of the light, they’re just a prodedurally generated texture.
Lighting
I did not want to use a large size for the lights because the large lights produce realistic soft shadows, but I also didn’t like the harsh sharp shadows of the small lights. So I created a rig of 8 linked spot lights, all pointing to the same target.
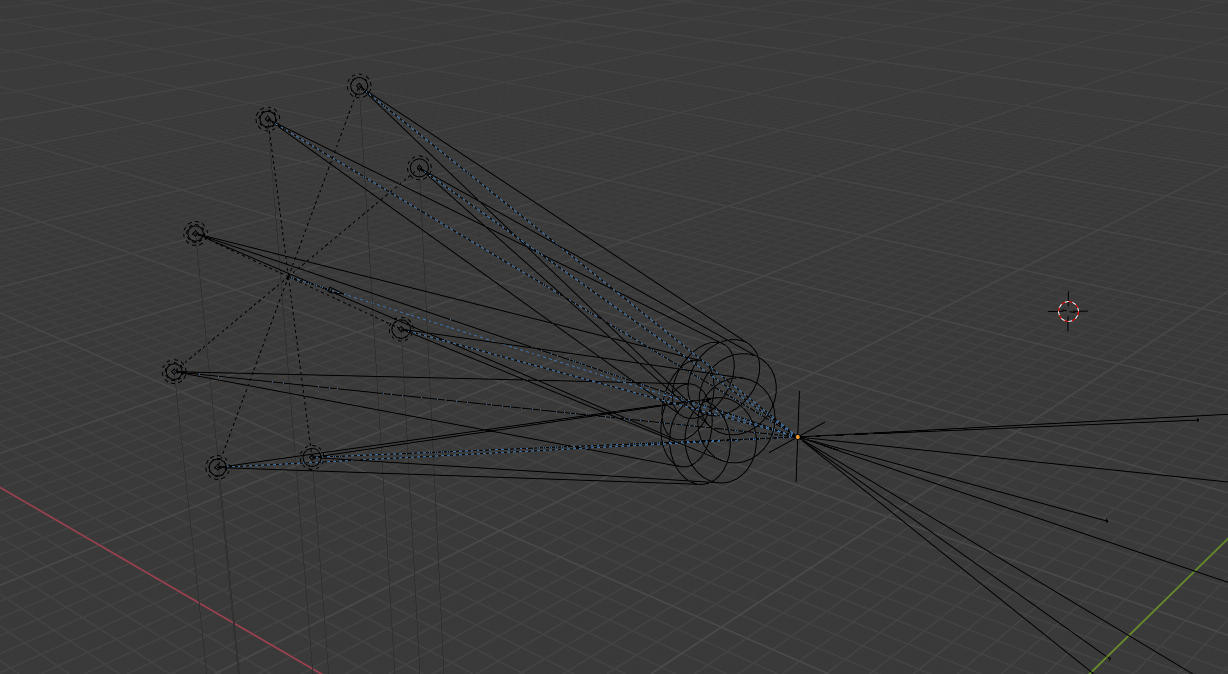
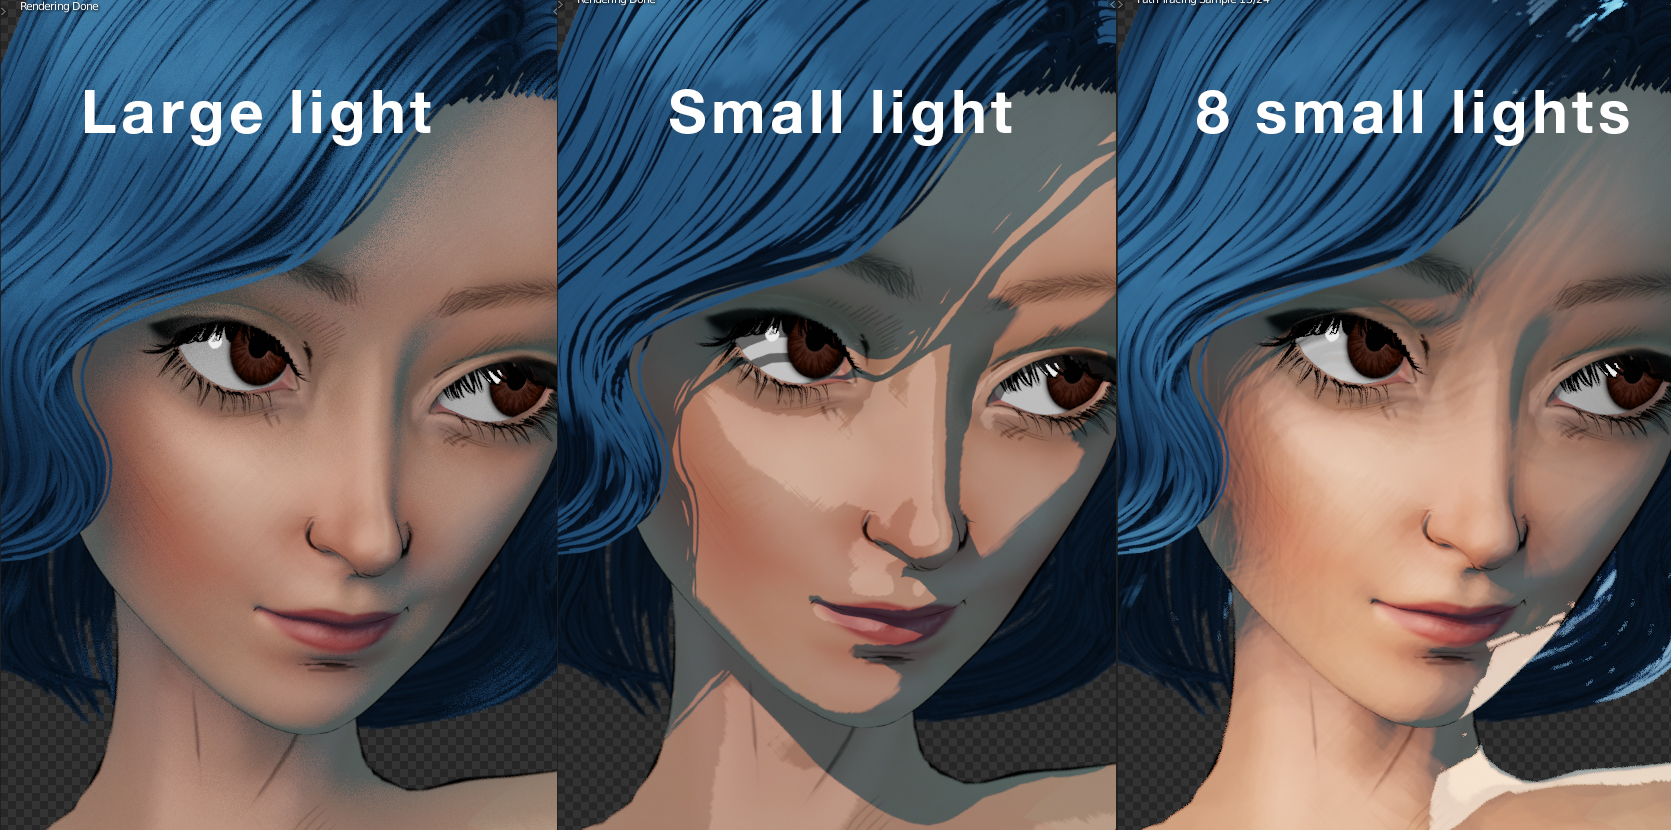
The 8 lights set up created 8 bands of shadow. The shadow bands, combined with the crosshatch, created a very nice 2D paint effect; it looked like it was painted using a low opacity brush in Photoshop.
I also increased the blend value of the spot lights to 1 so that I could focus more light wherever I wanted and less light in other places.
And lastly, I put a sun light in the back to create a uniform rim light.
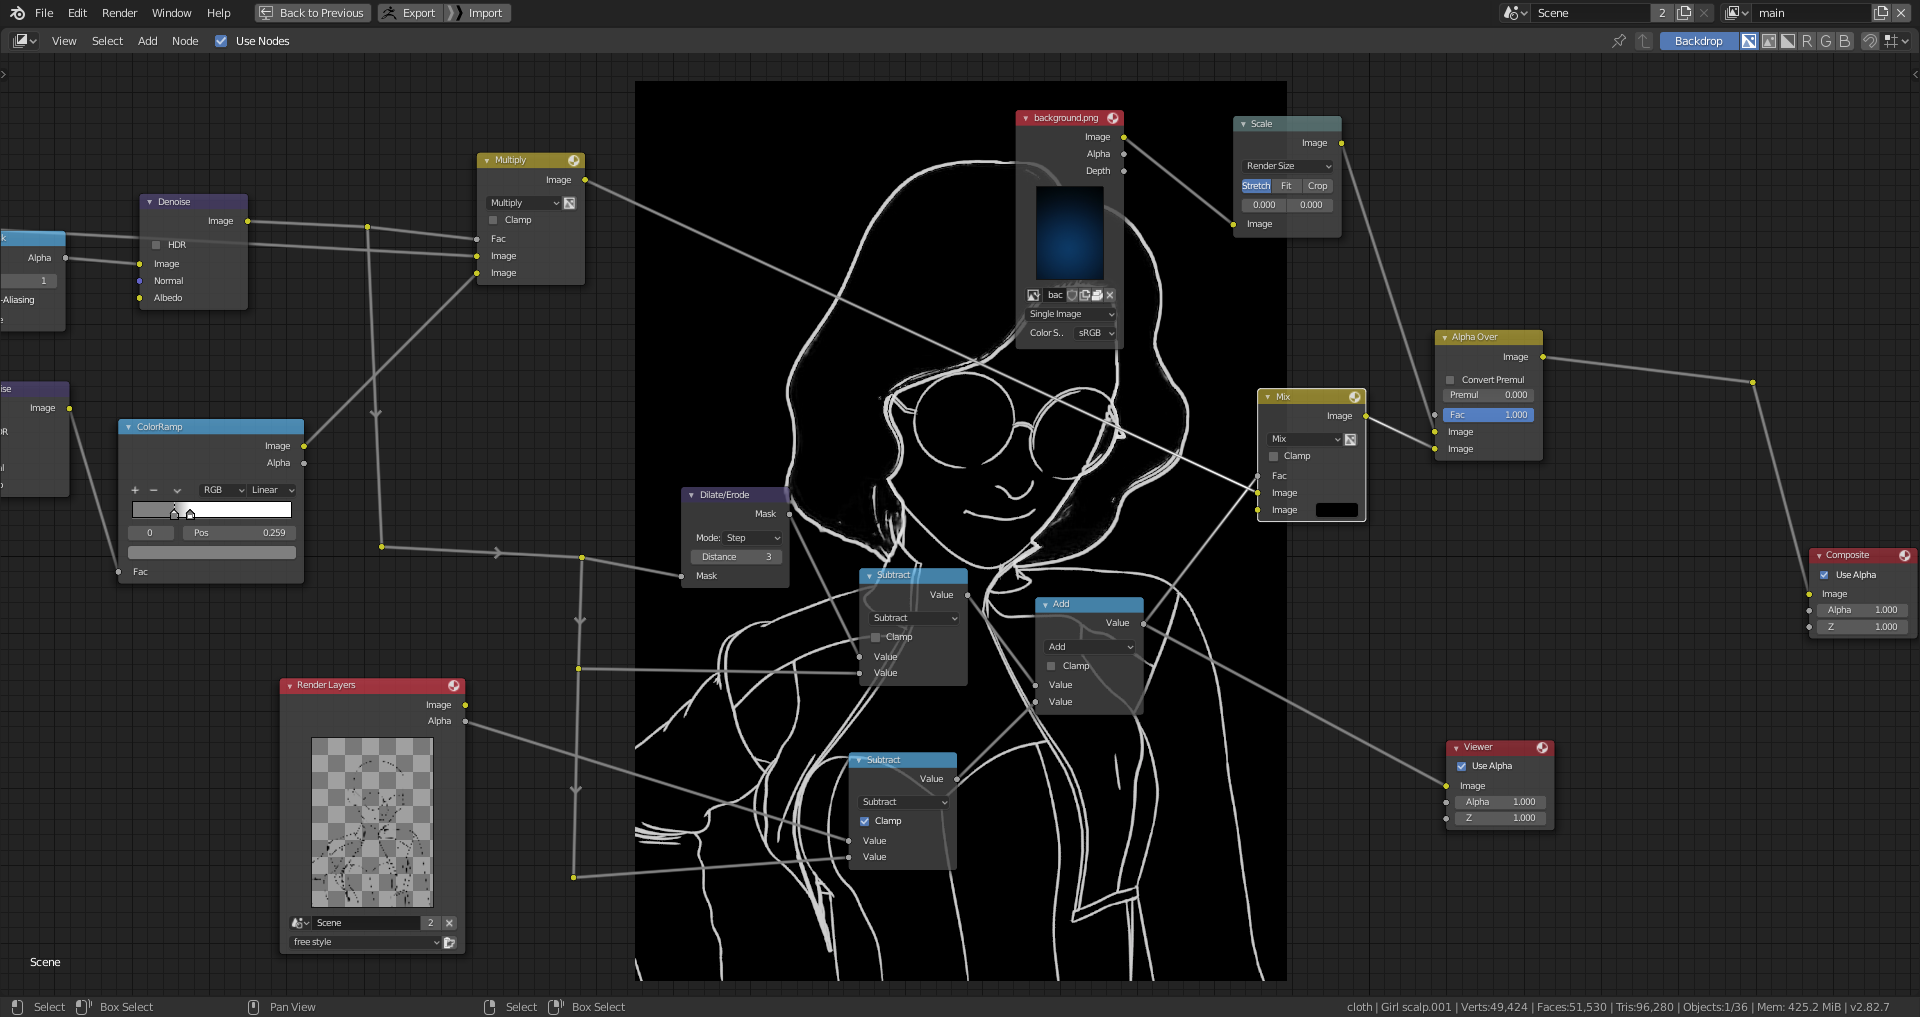
Freestyle Rendering
The Freestyle doesn’t work for hair, so I created another render layer just for the freestyle and excluded the hair mesh from it.
In the compositor, I used the Dilate/Erode node to create the outline from the hair’s material index and combined it with the freestyle to achieve the final linework.
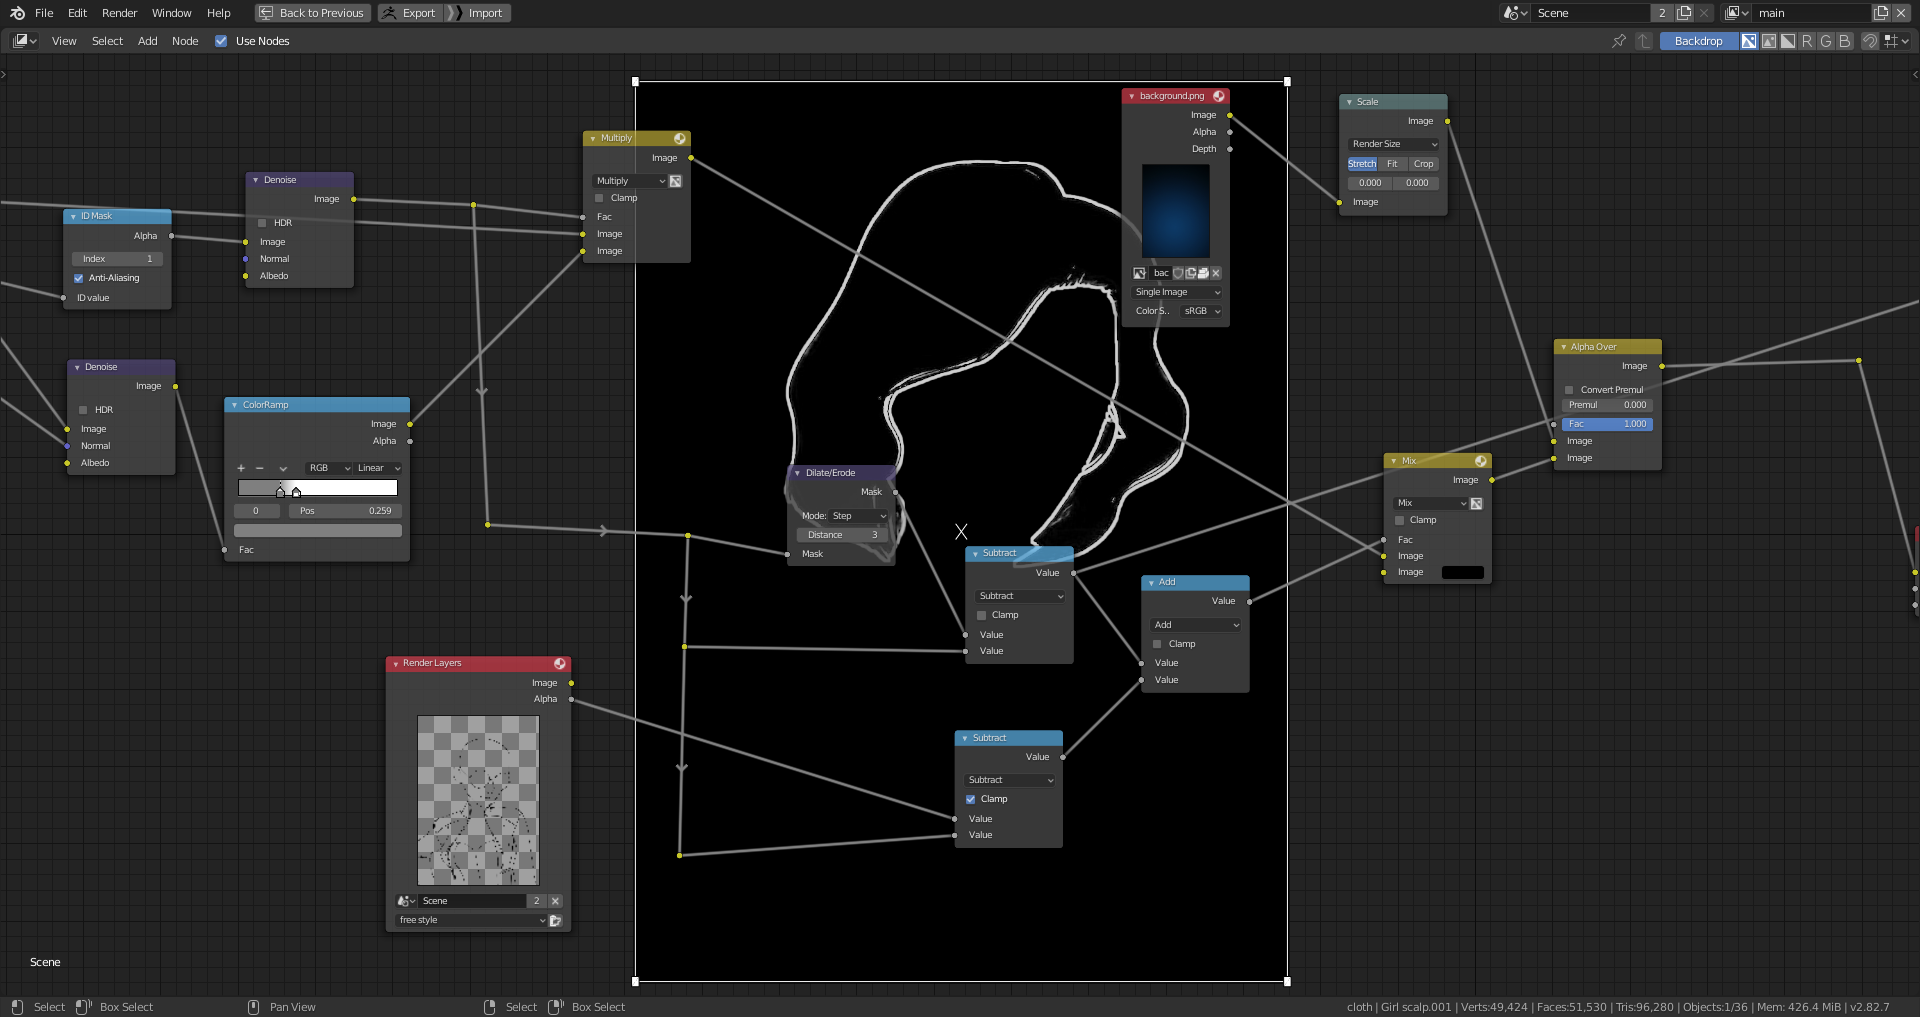
And finally, I put the linework on top of the base render and it was done.
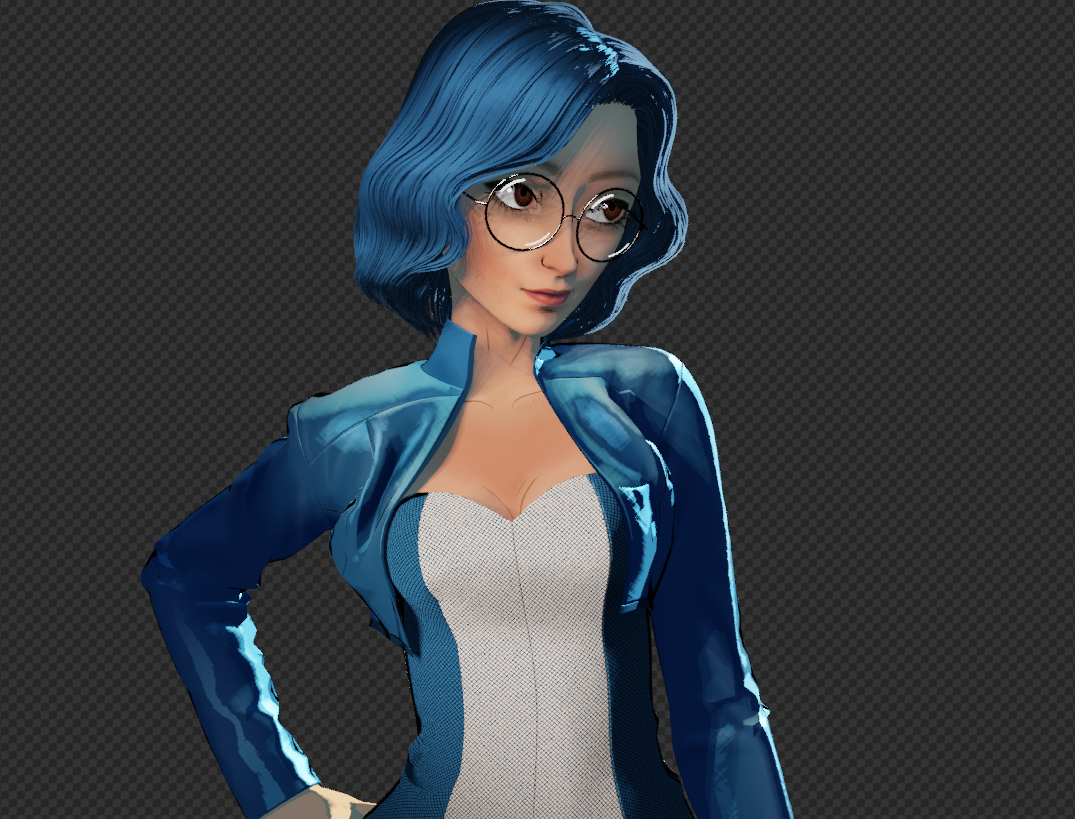
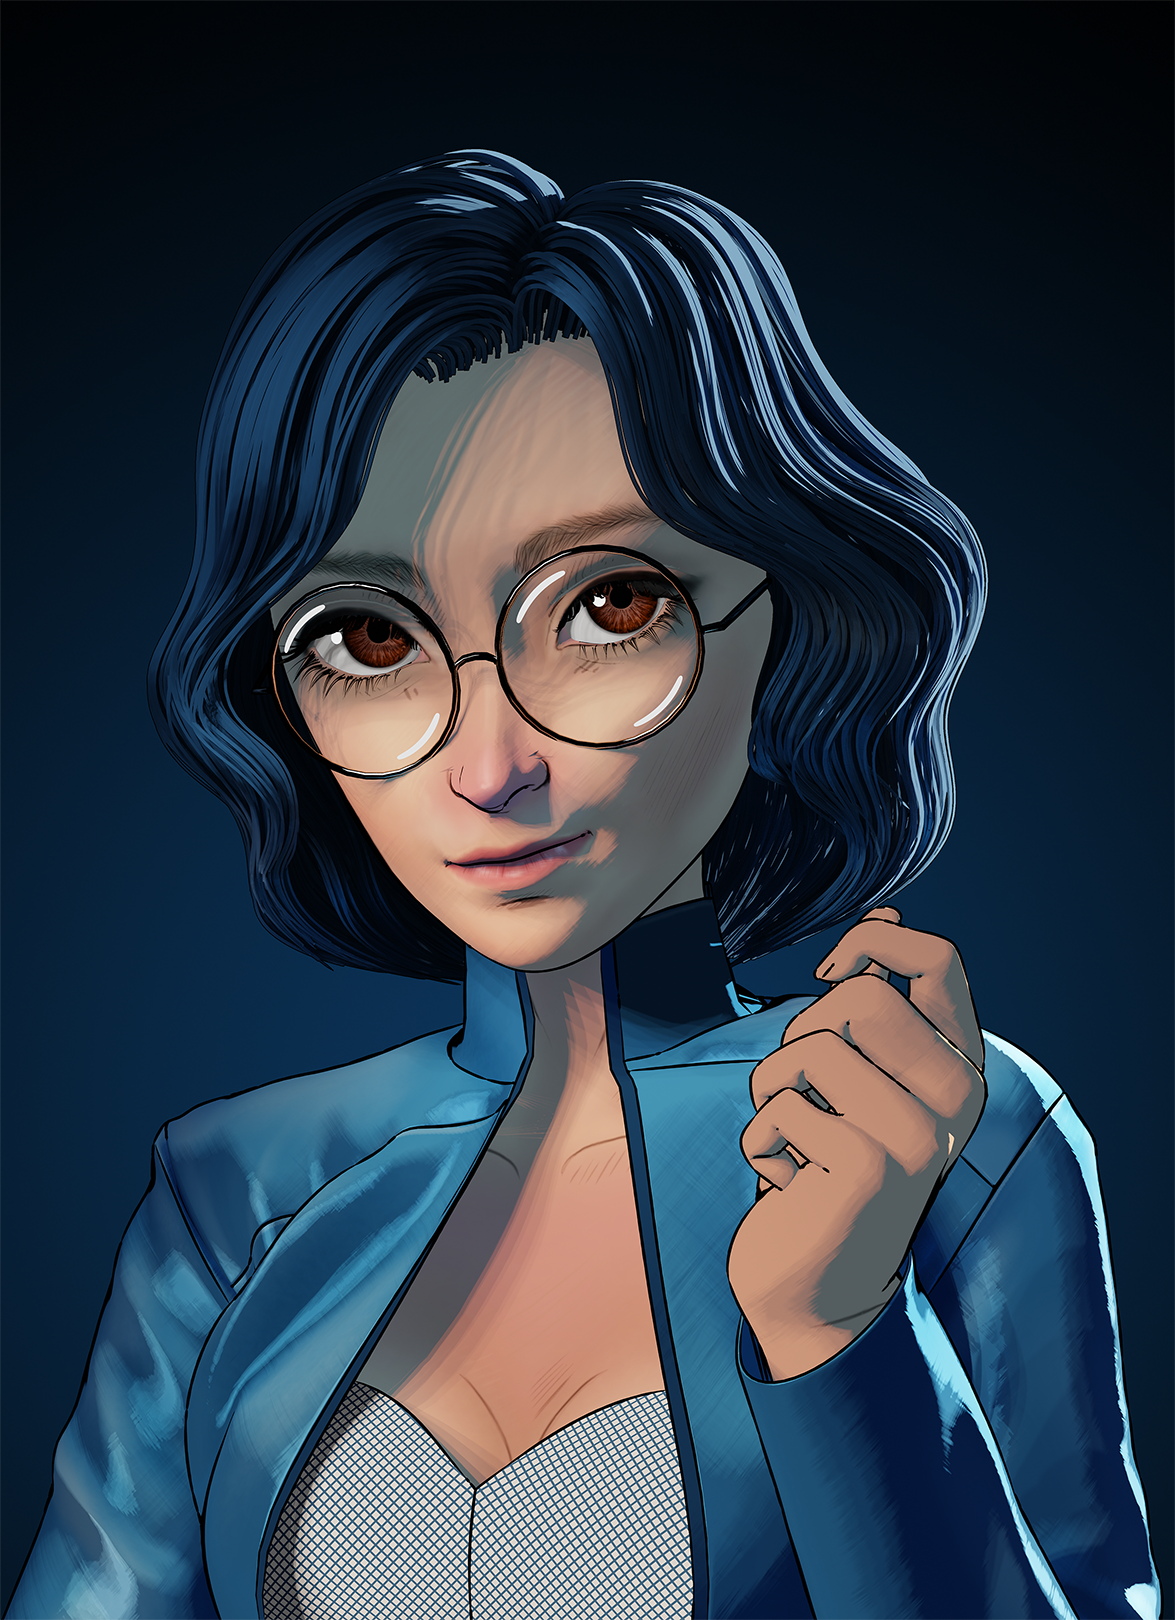
Final artwork
You can learn the detailed process of creating this style here:
About the Author
 Lance Phan, Indie character artist


Very impressive art! Thank you for sharing this knowledge. To achieve your level this knowledge must be practiced for years
Wow, this is a very valuable tutorial with great details.
Thank you!
still realistic trought