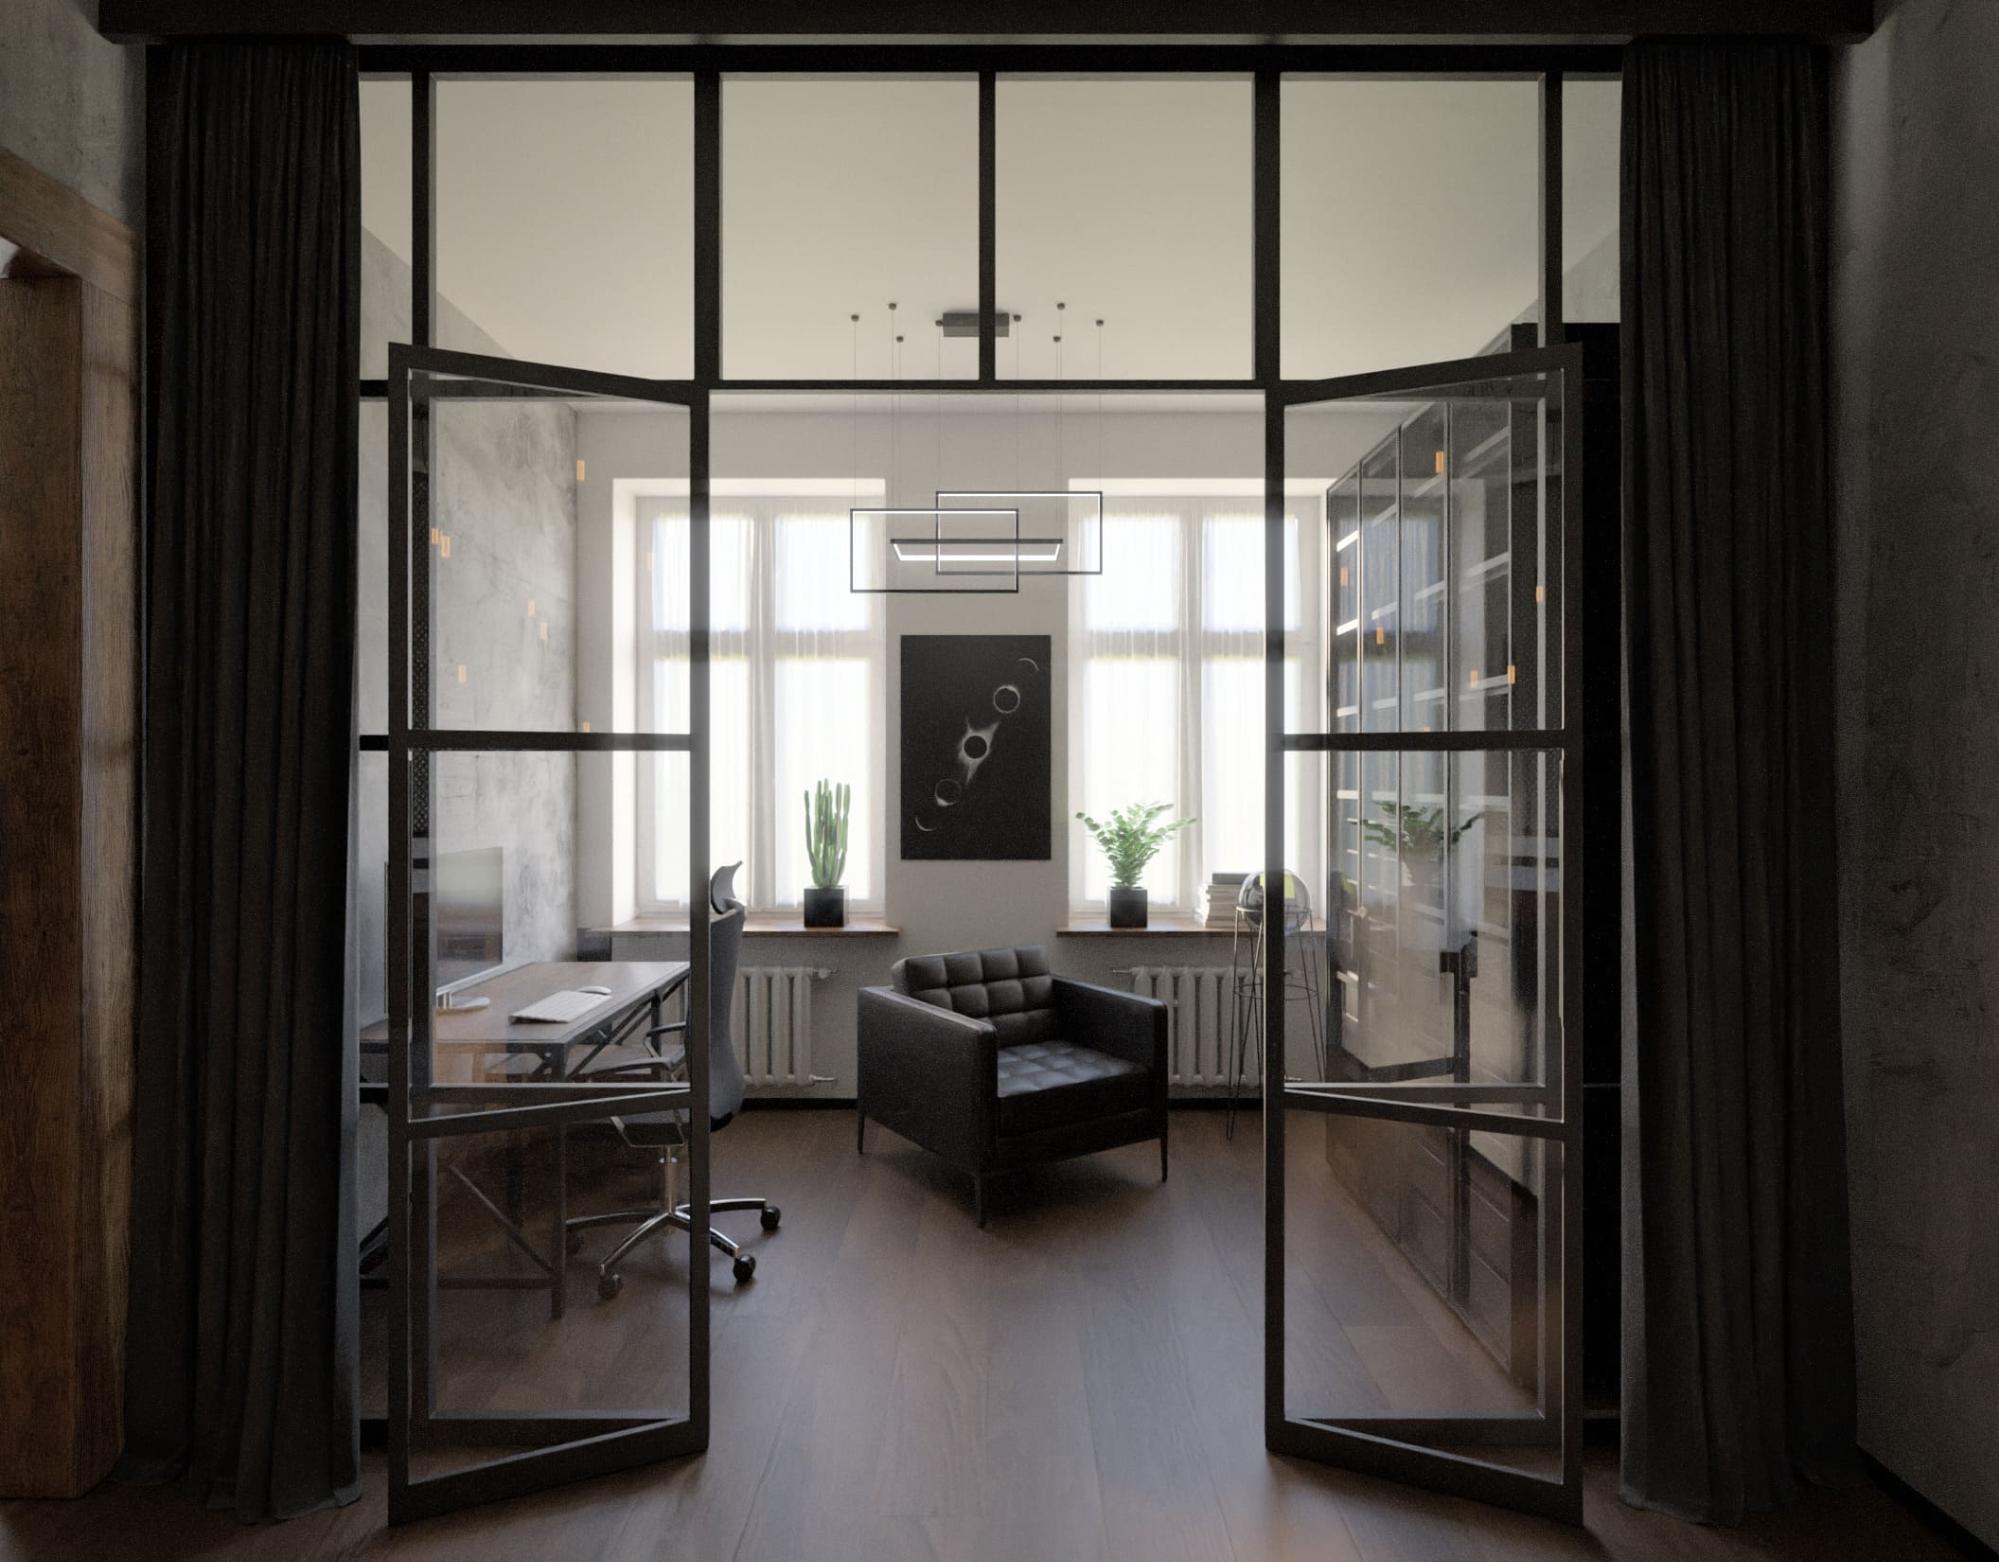
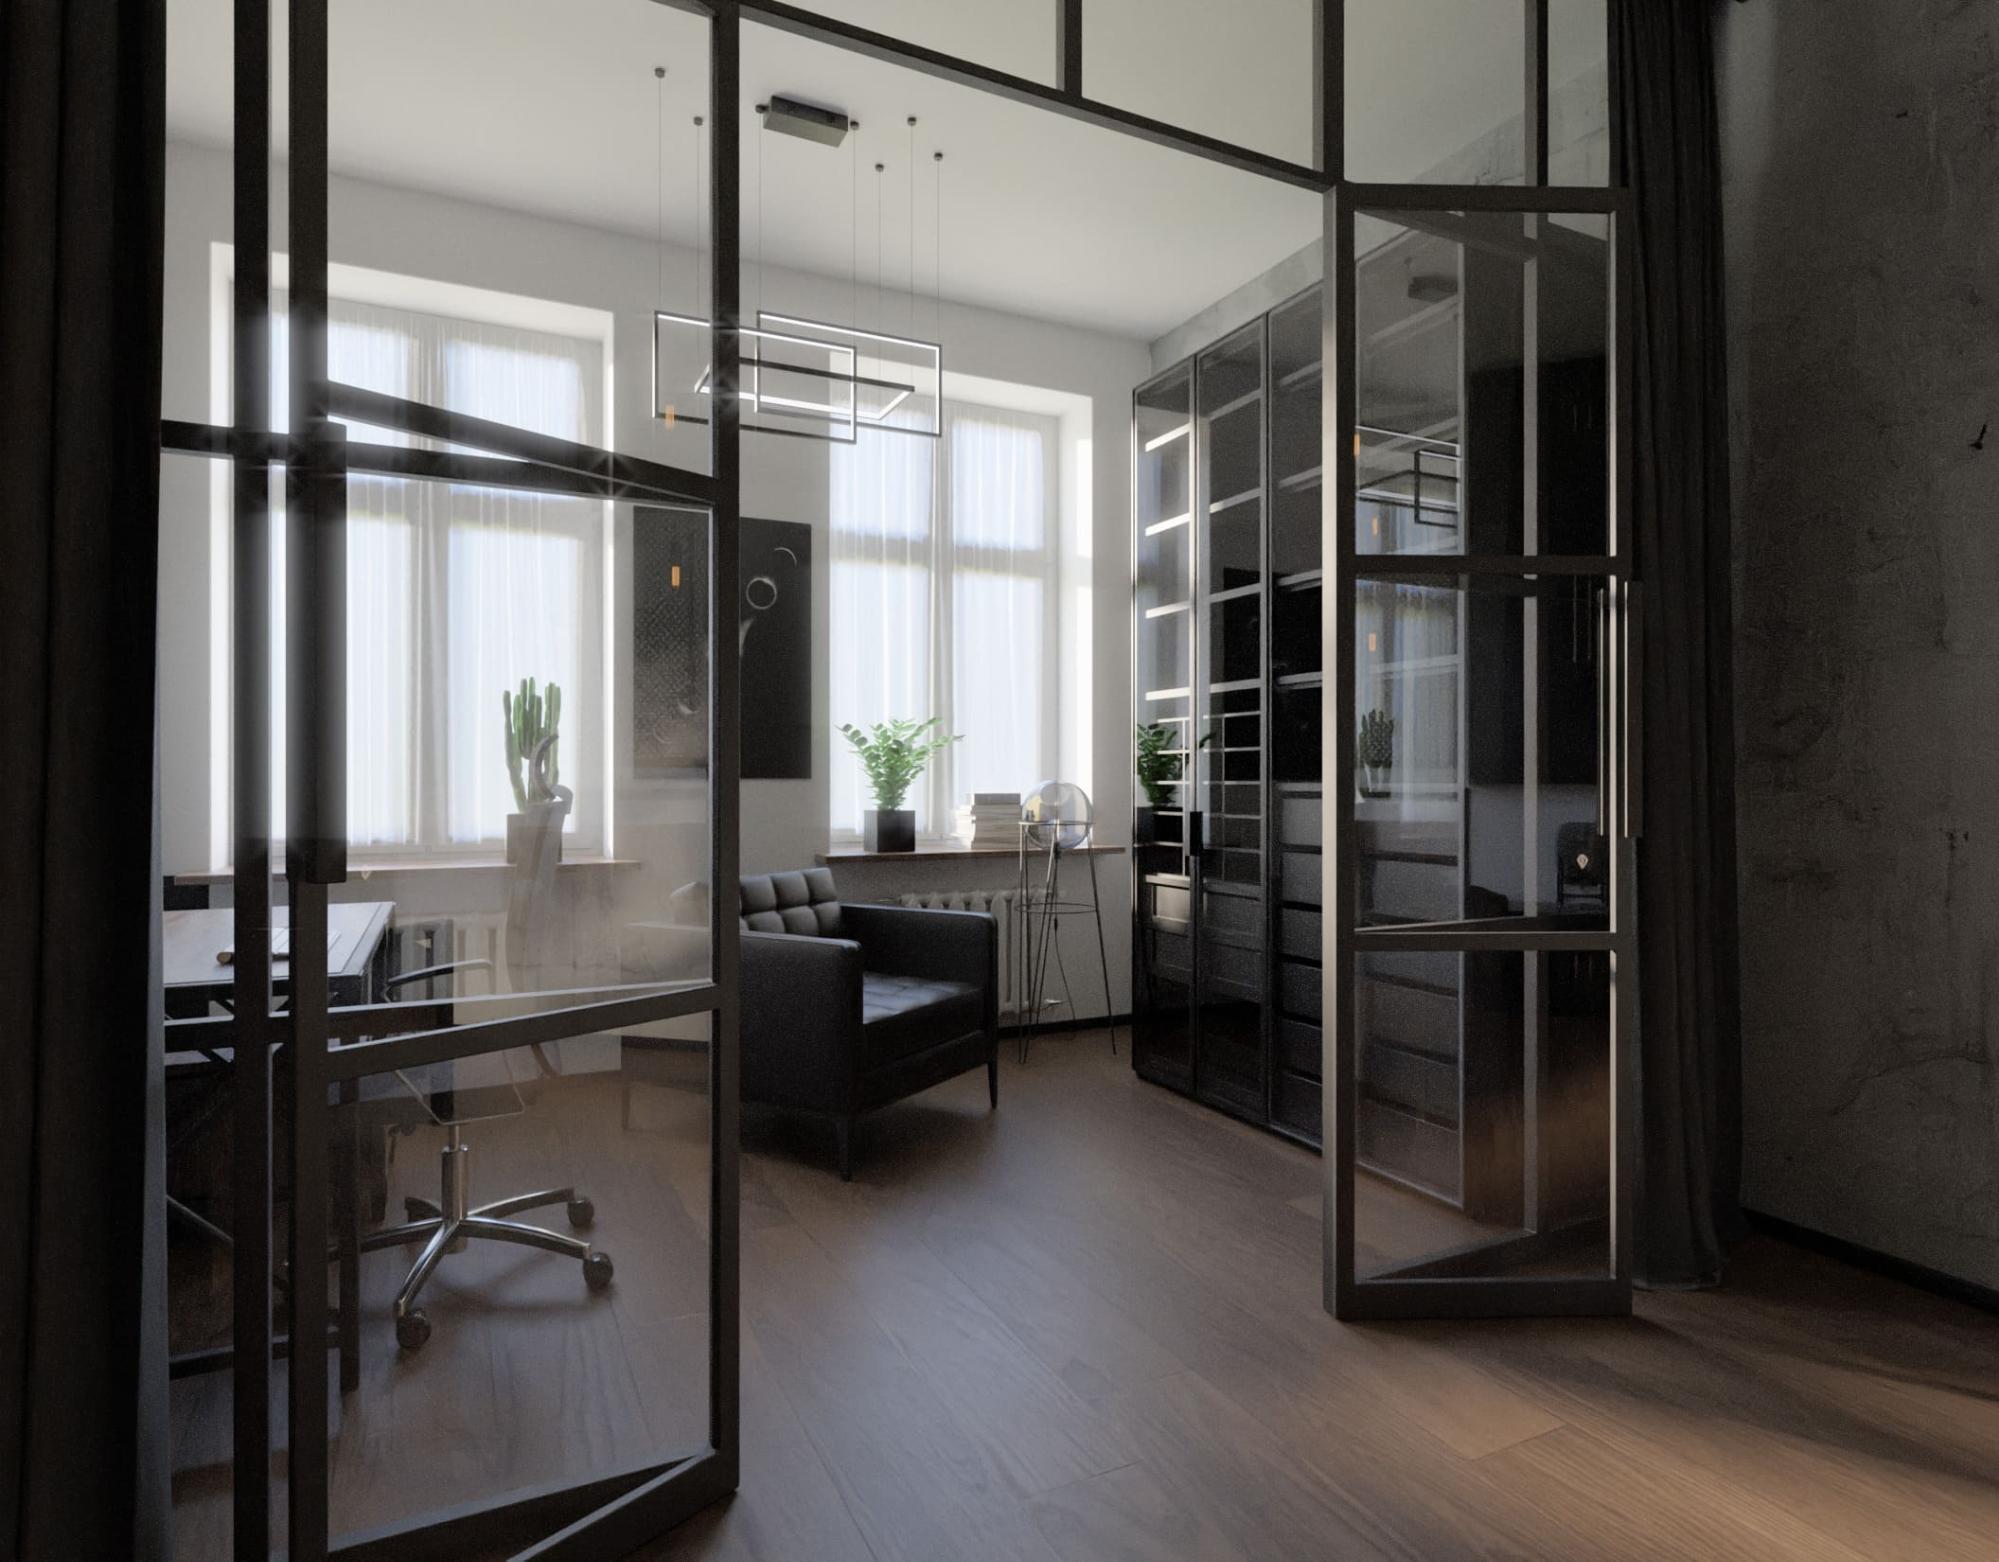
Behind the Scenes: Loft Interior Design
About Me
Hi, my name is Tadeusz and I work as an archviz artist at Holi Home, an interior design studio located in Wrocław, Poland. My workflow is based mainly on free software—Blender, GIMP, PureRef and GDrive packet. This project was just one more day in the office. ;)
Inspiration
There is a lot of archviz out there that is technically brilliant, but nonetheless looks fake. The lighting and materials are perfect but somehow you know that this place doesn’t exist. It’s because it couldn’t be constructed in real life. There are limits to what can be built and manufactured. Tiles have to have grout lines, a fireplace can’t be made from a 2m long block of marble and you can’t build a house on an ocean cliff. You are probably experienced in looking at real rooms, so recognizing any flaws happens unconsciously.

That’s why even while learning Blender I was working with real floorplans and imagined real people leaving there. This project is no different.
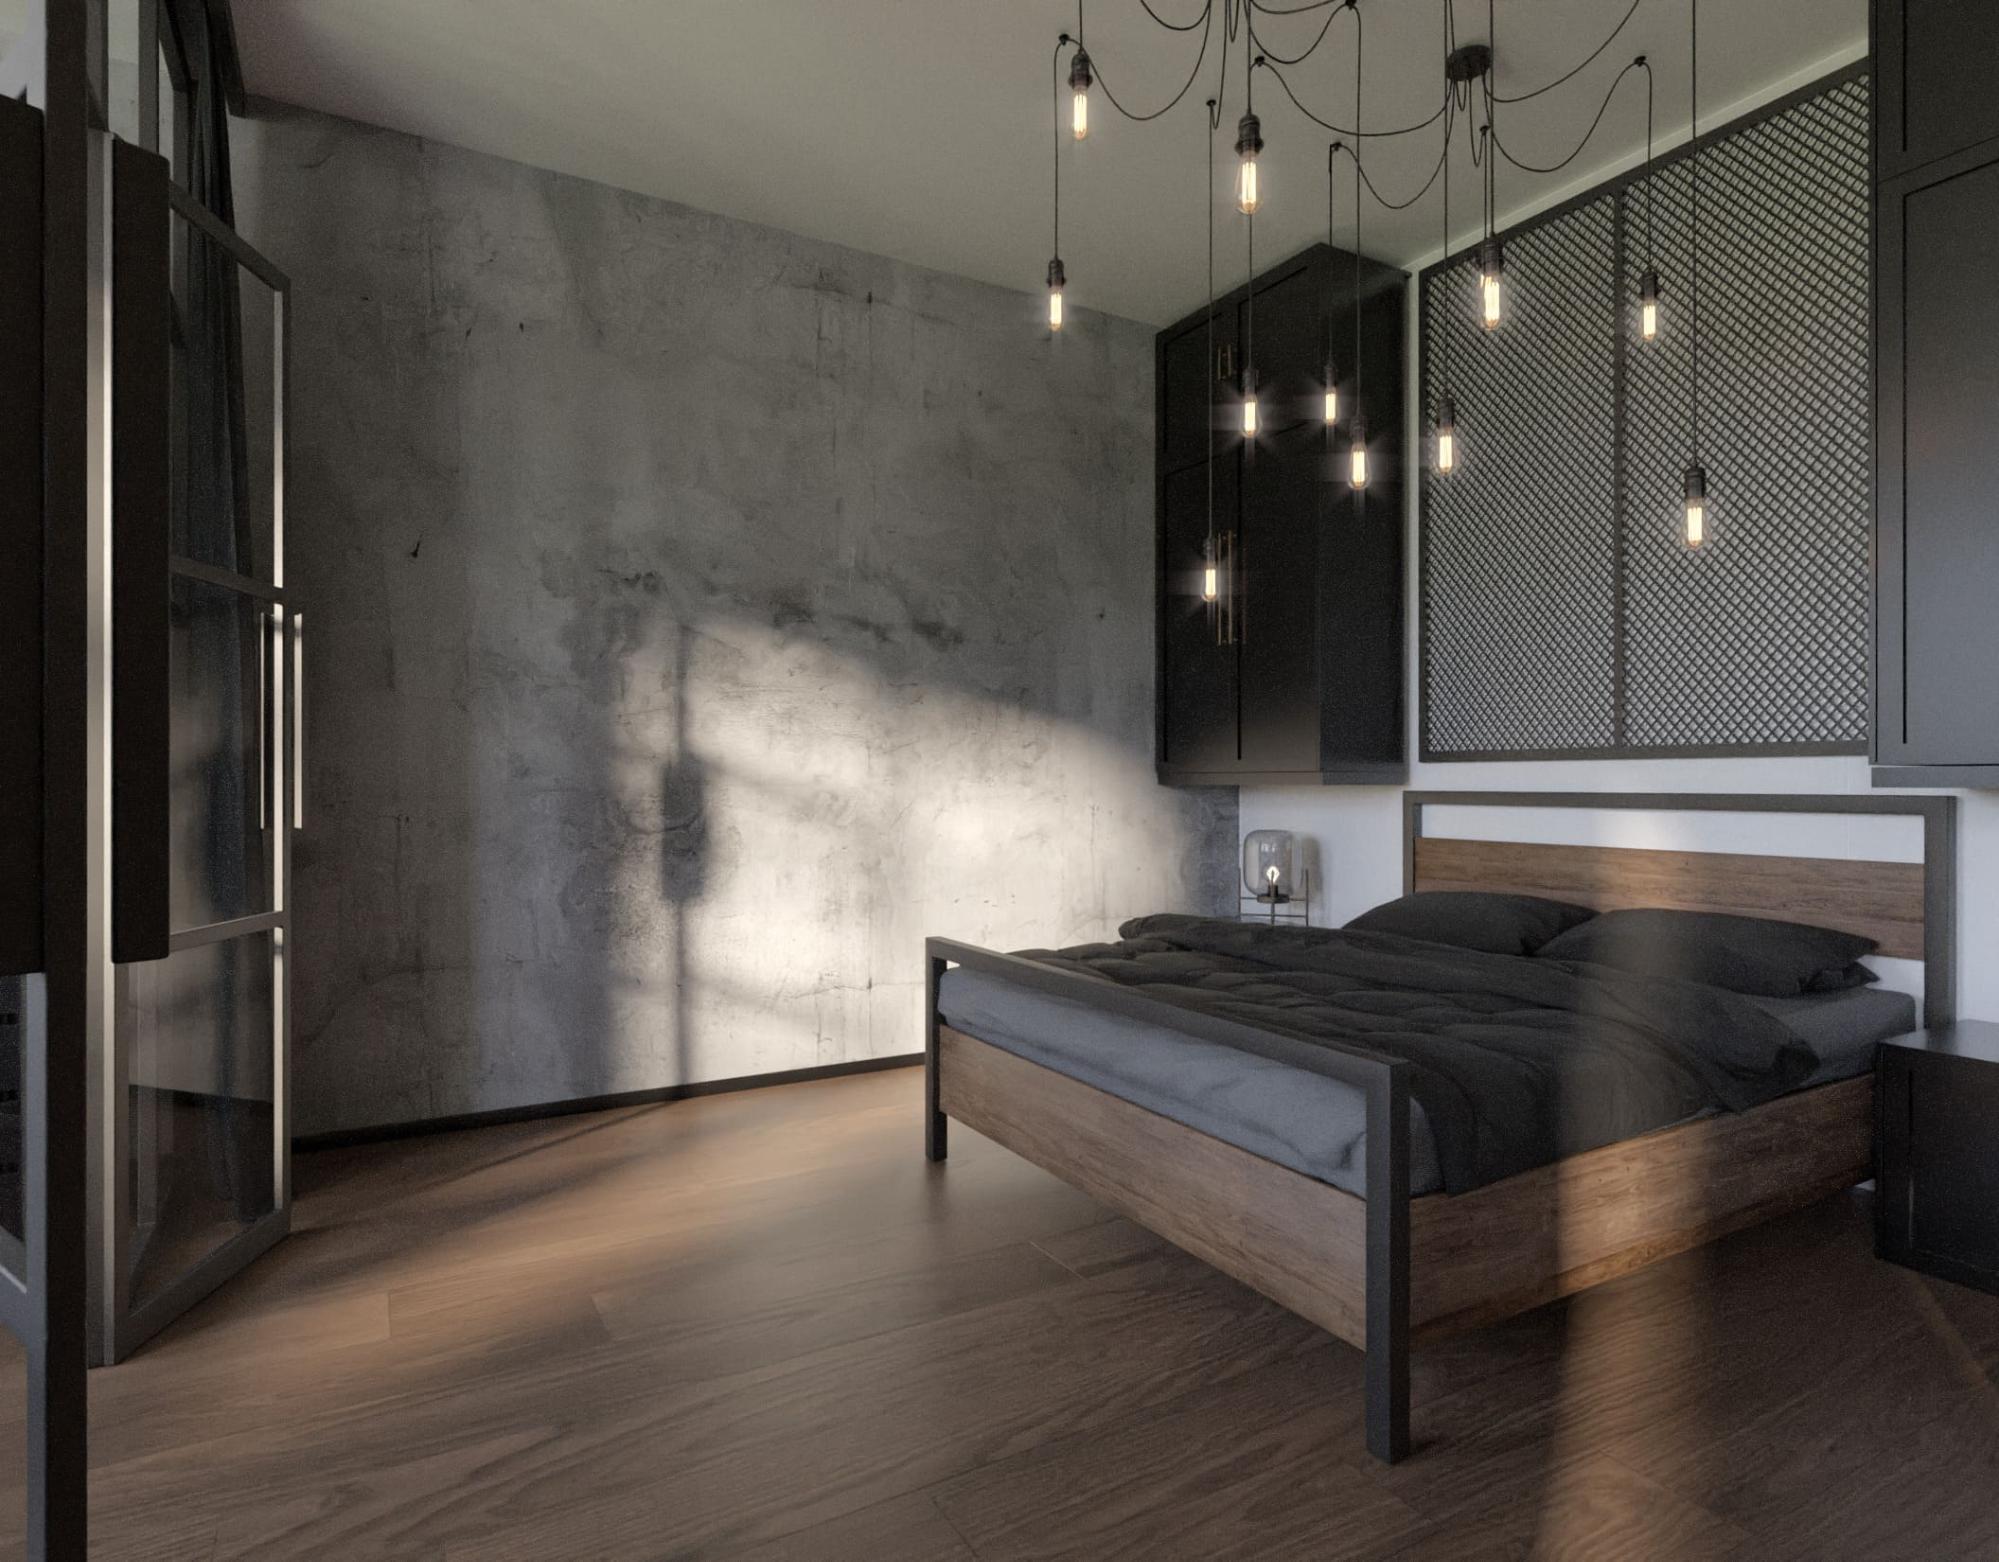
Pinterest is the go-to source for all my design ideas. Based on my pins, I created a reference board in PureRef. Additionally, creation of a mood board is often helpful to get the style and colors right.

Modeling
All modeling has been done in Blender. Making the basic shape is dead simple. Draw the shape of the room and extrude Z by 0.18+0. 72+1.15+0.27+0.23 (standard heights for various openings). Add solidify of 10 cm, add loop cuts, and delete the faces where you want to place doors and windows.

Furniture models were downloaded from manufacturer sites and the non-standard elements are just a bunch of beveled primitives. The Chocofur Model Manager comes in handy for speeding up the process.
Lighting
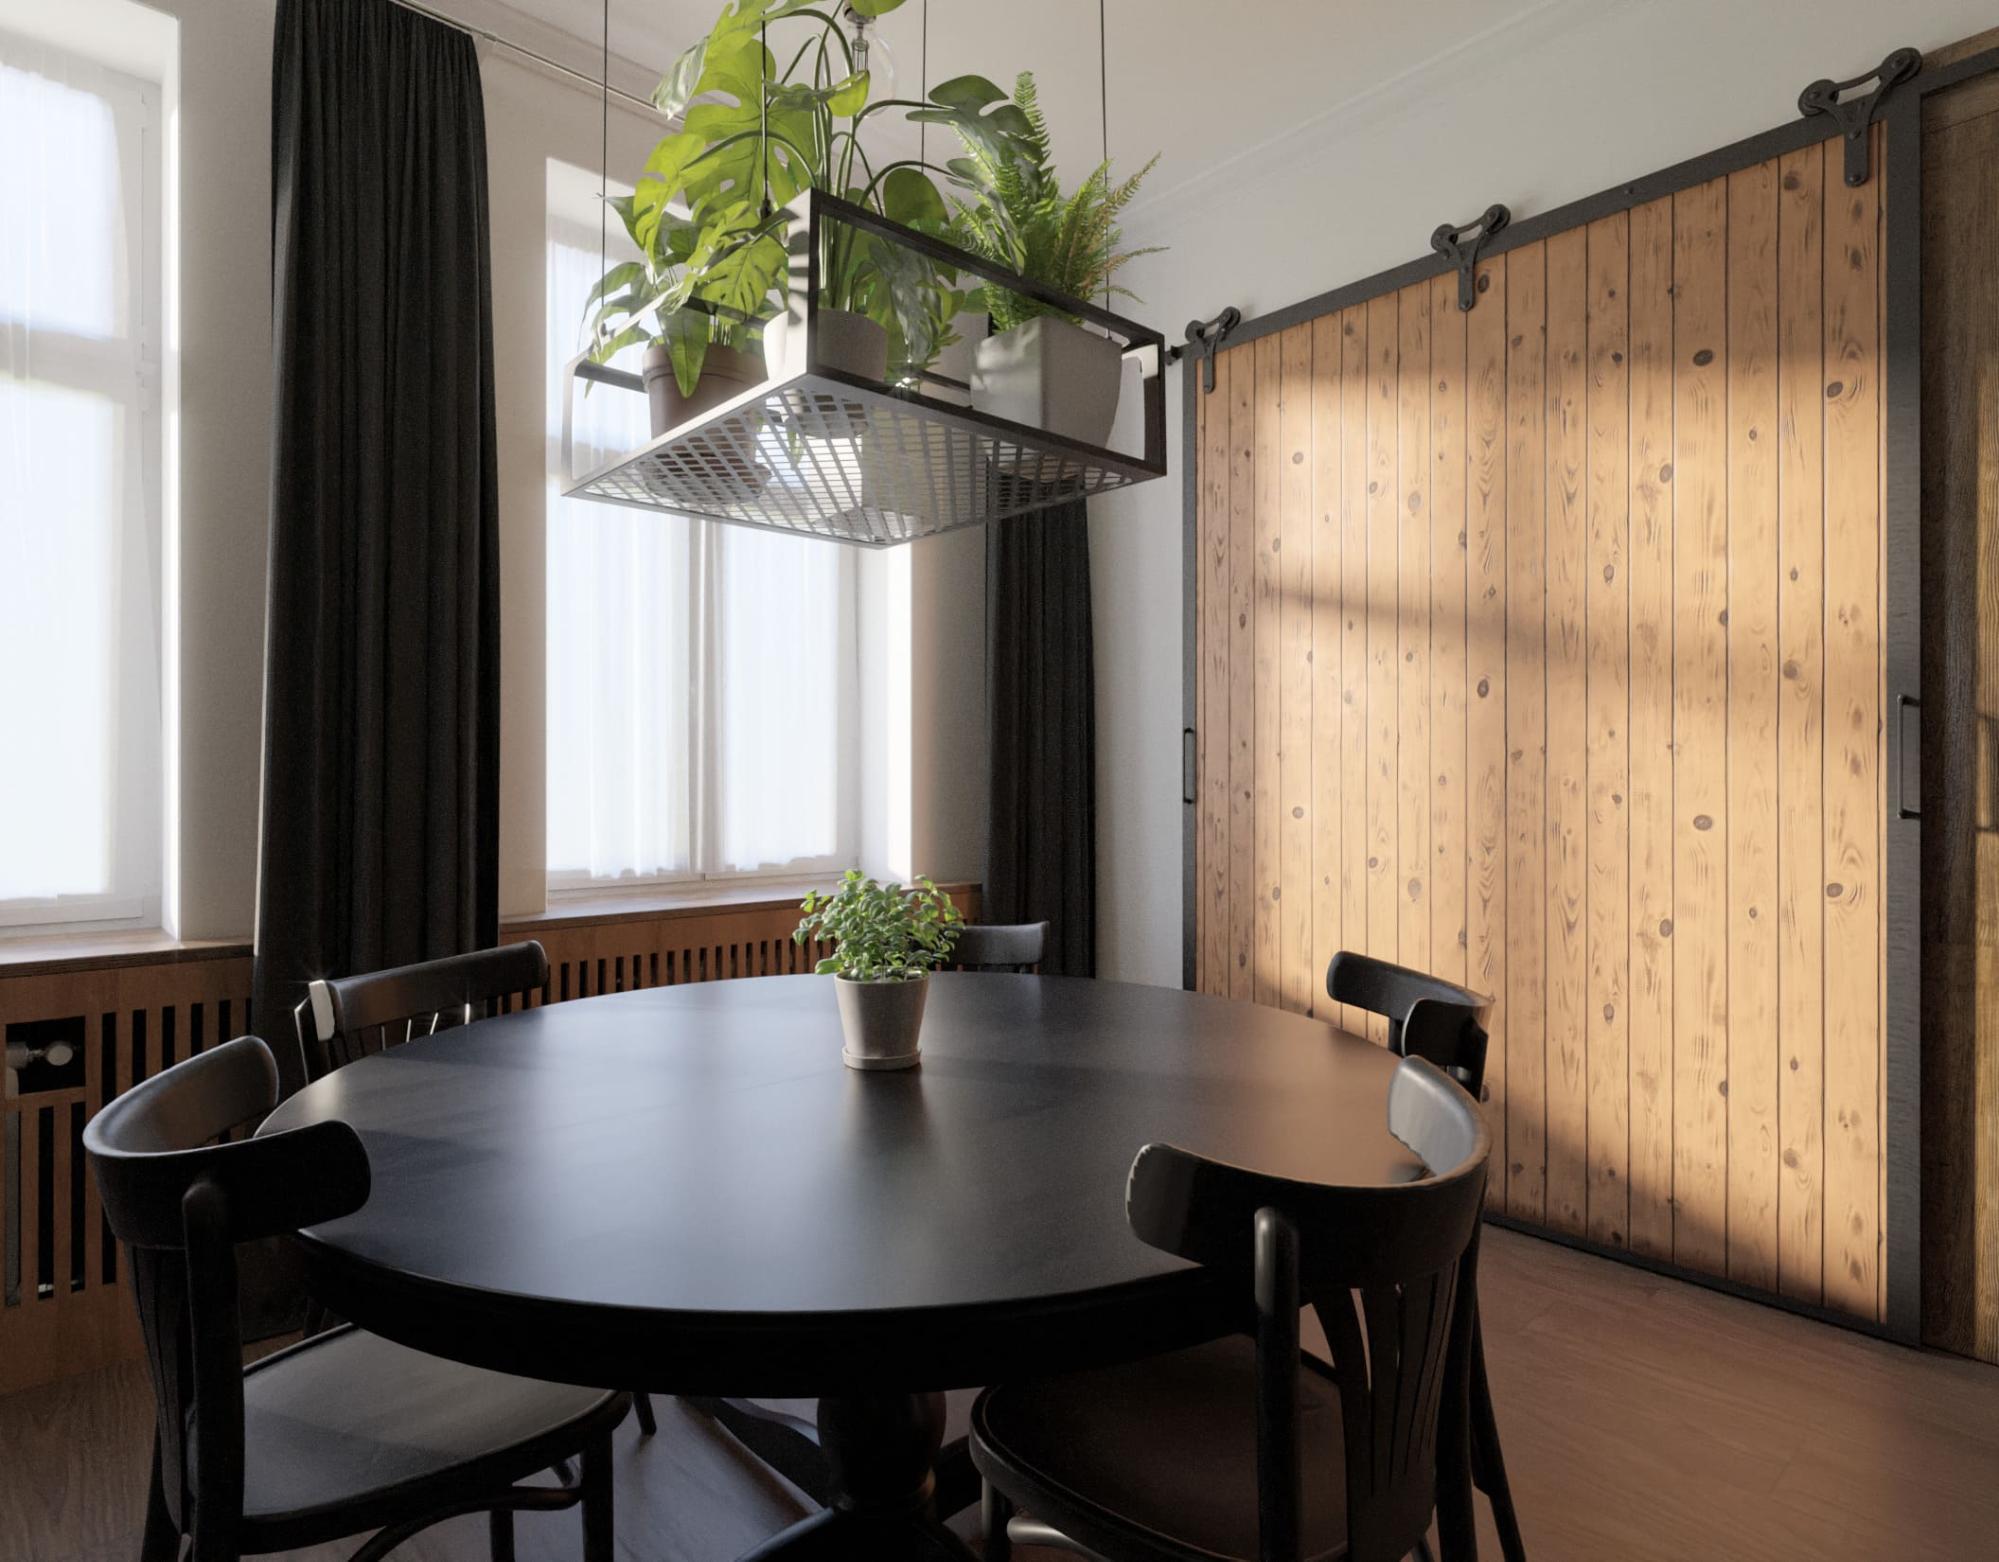
HDRI at 7500K, Sun lamp at 5500K, over the countertop is an area light at 4000K and emission shader for light bulbs at 2700K. I am always trying to set up the sun rays in a way to guide the viewer through the scene.
Every window has curtains—I don’t want to distract the viewer. The material used is a Principled BSDF with 0.5 transmission and Ray Visibility turned on only for Camera and Glossy.
Texturing
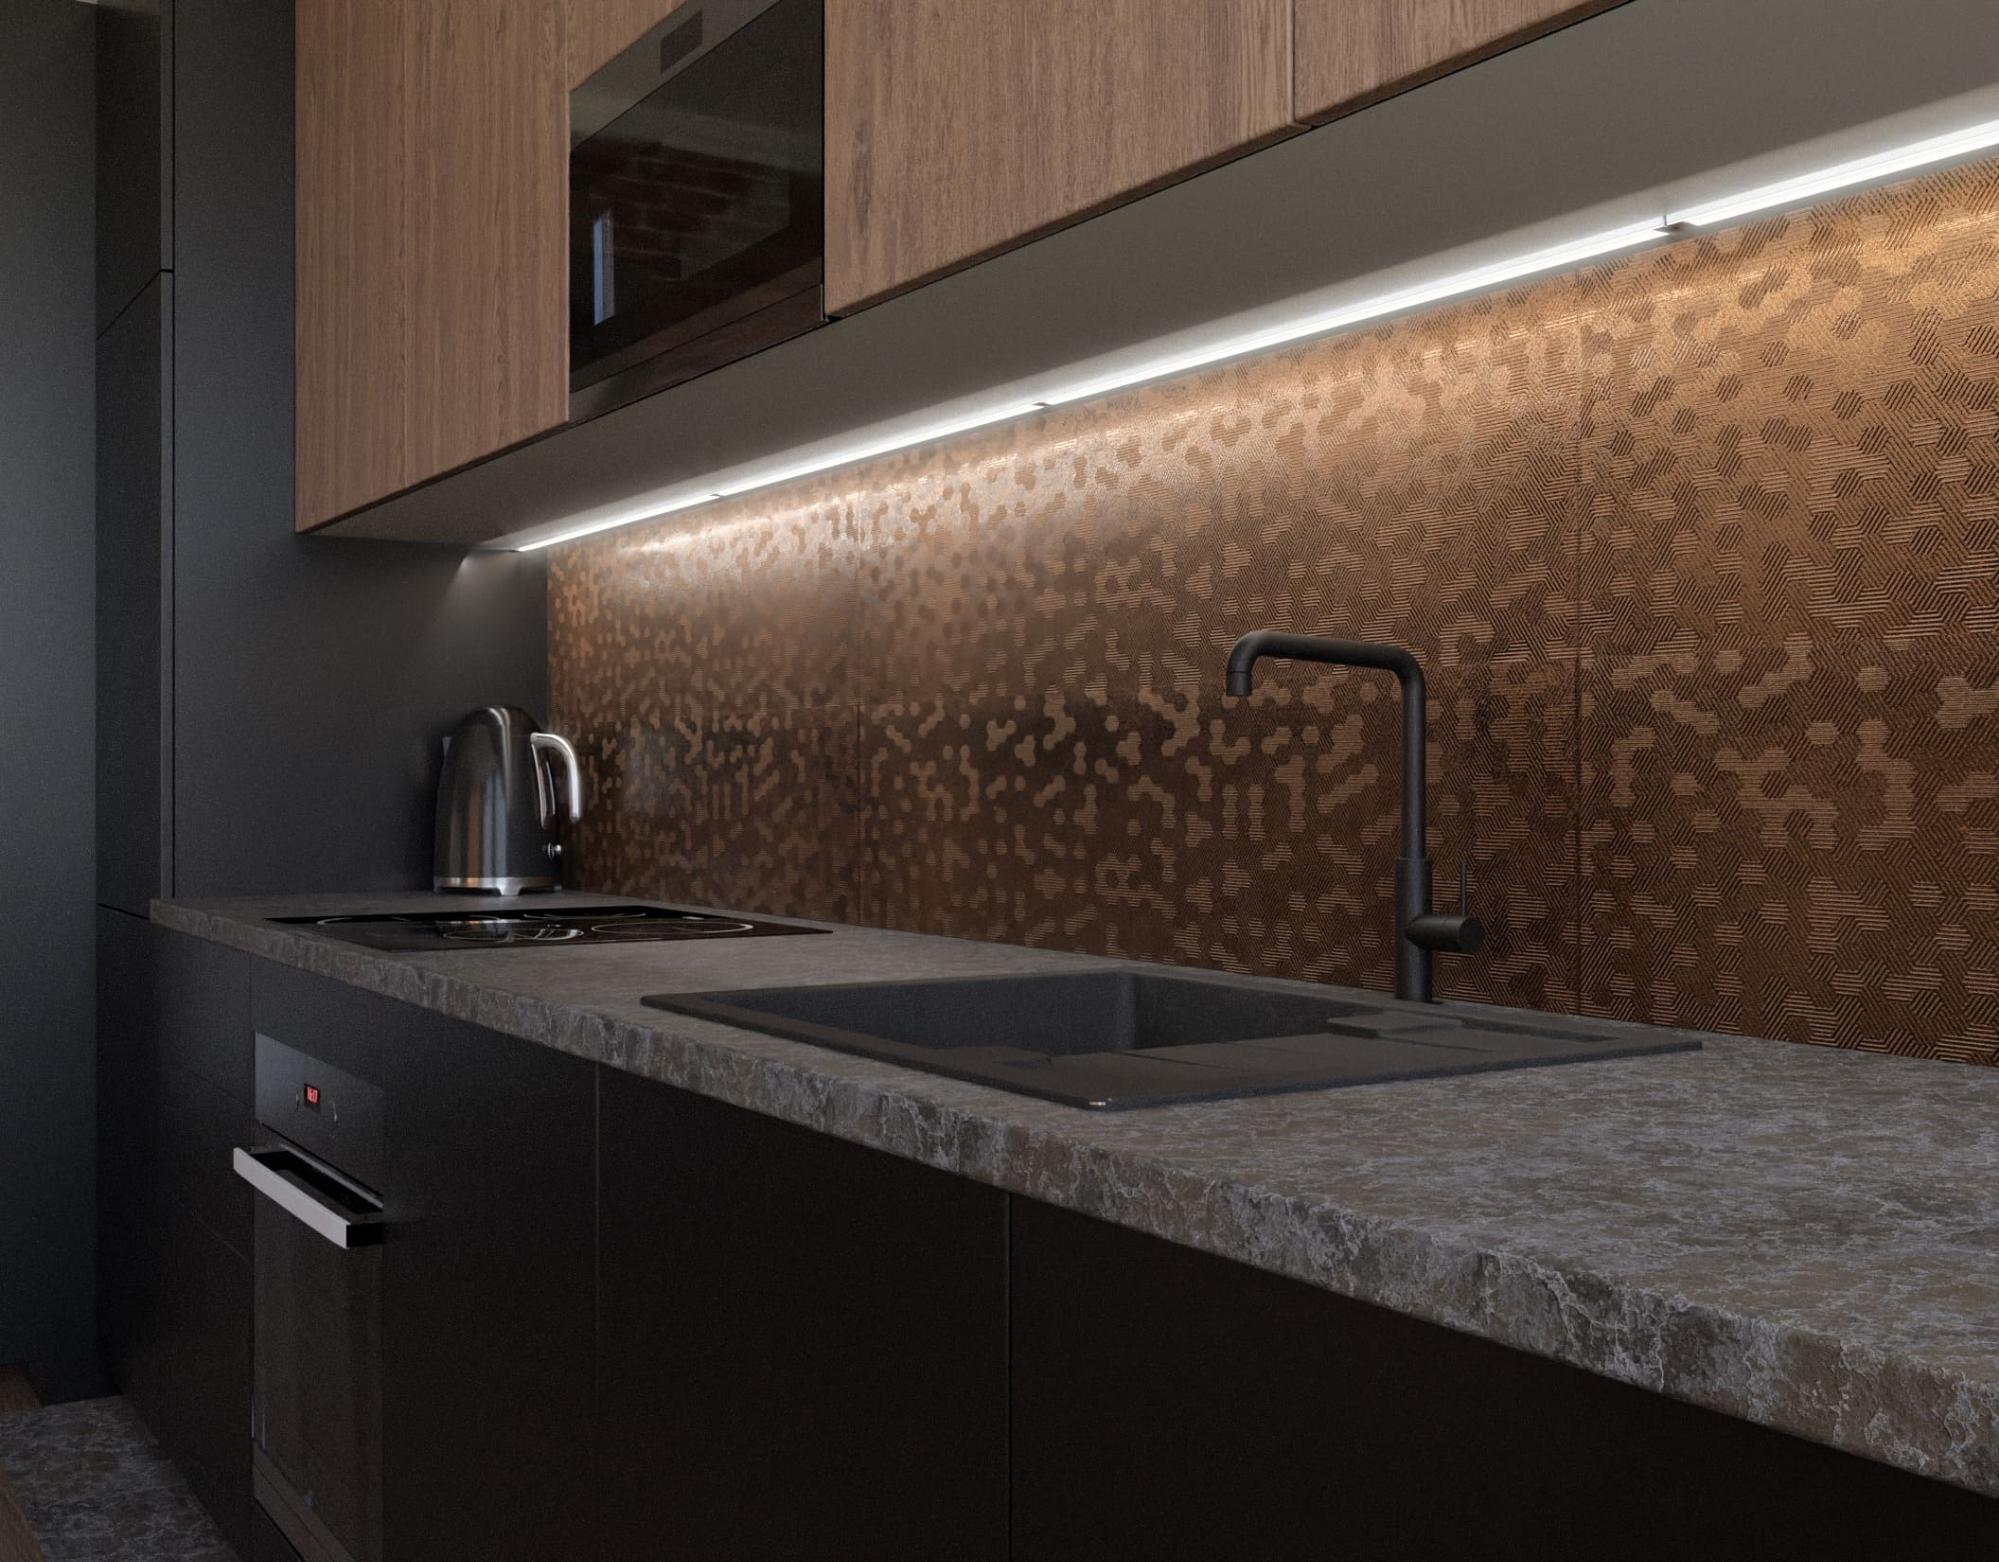
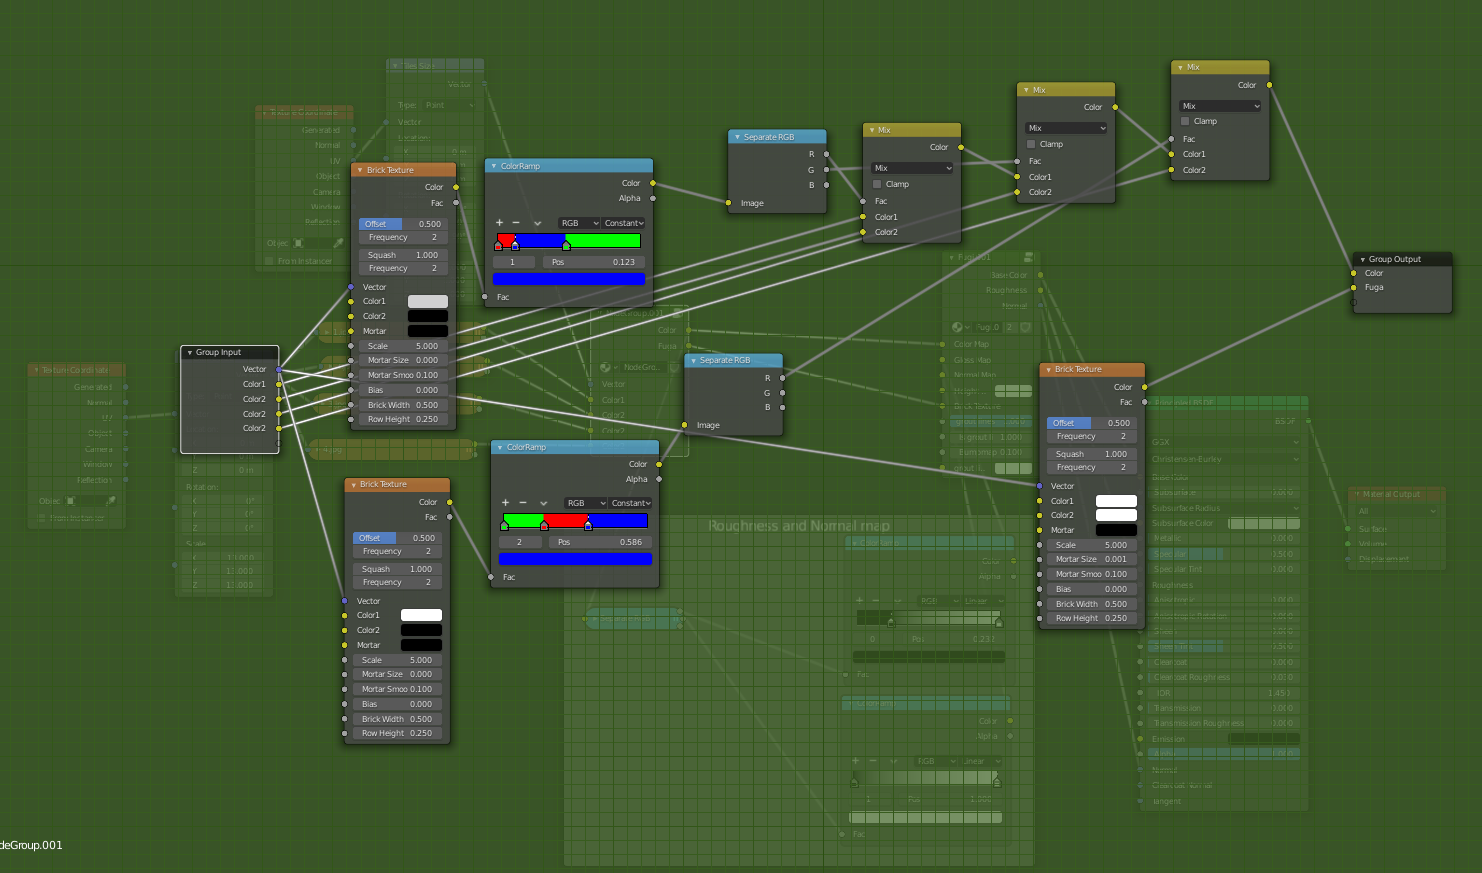
Of course, Poliigon is the main source for textures, but the tiles’ textures were downloaded from a local manufacturer site. They often offer good quality JPGs and, after making them seamless, I plug them into my PBR material. It adds grout lines, randomizes the texture, adds roughness and normal maps and offers some customization.
Post-Processing
For a preview, I use the composer with values tailored to my general setup. The denoised pass is mixed with a composite pass so more detail is visible and, as a bonus, I don’t have to add grain in post-process.
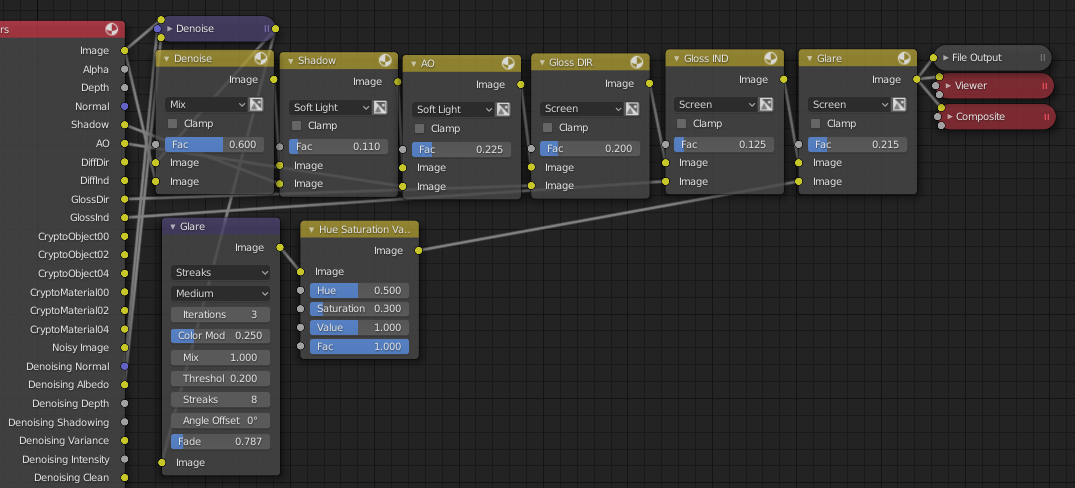
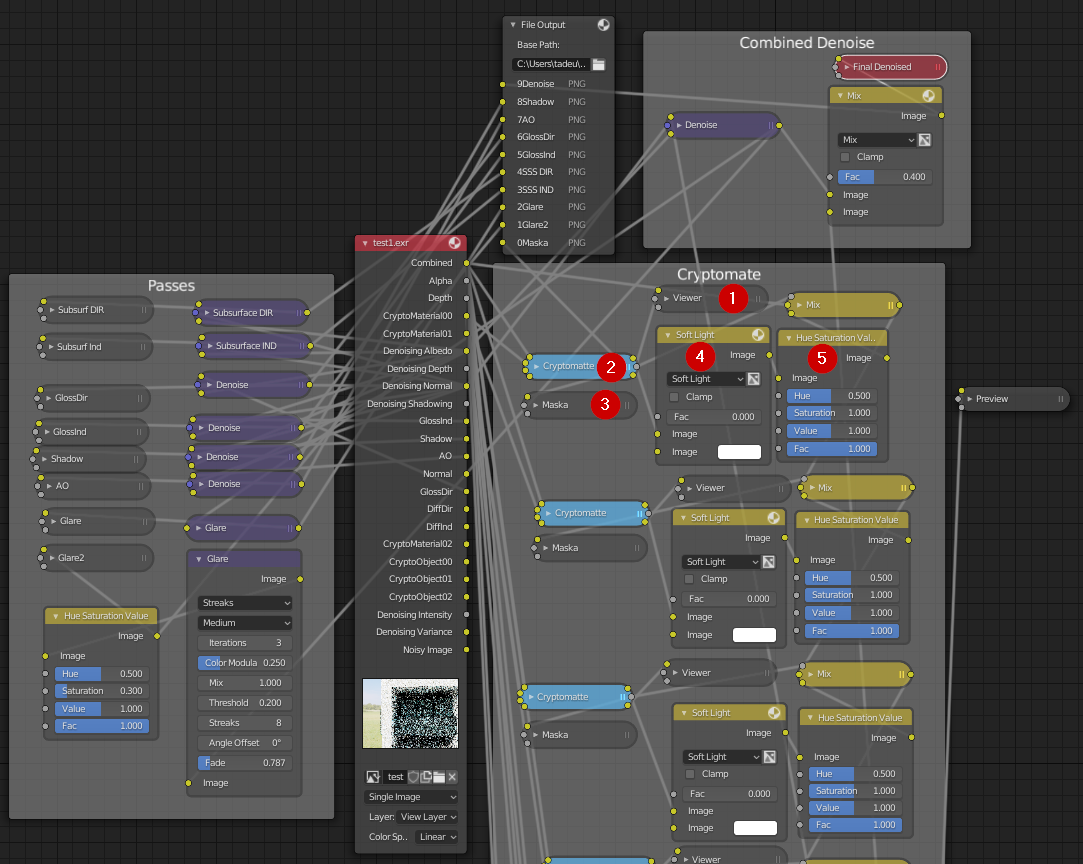
For the final image, I save the render as a Multilayer EXR file and then open it in a .blend file made for compositing purposes only. F12 saves all the relevant passes. Cryptomatte is ready to go: 1) Open the viewer 2) add objects you want to change 3) check if the mask is correct 4) change the color 5) change saturation and value.
Postprocessing in Gimp is based on my composer setup. Final light and color balance is done in Google Photos.
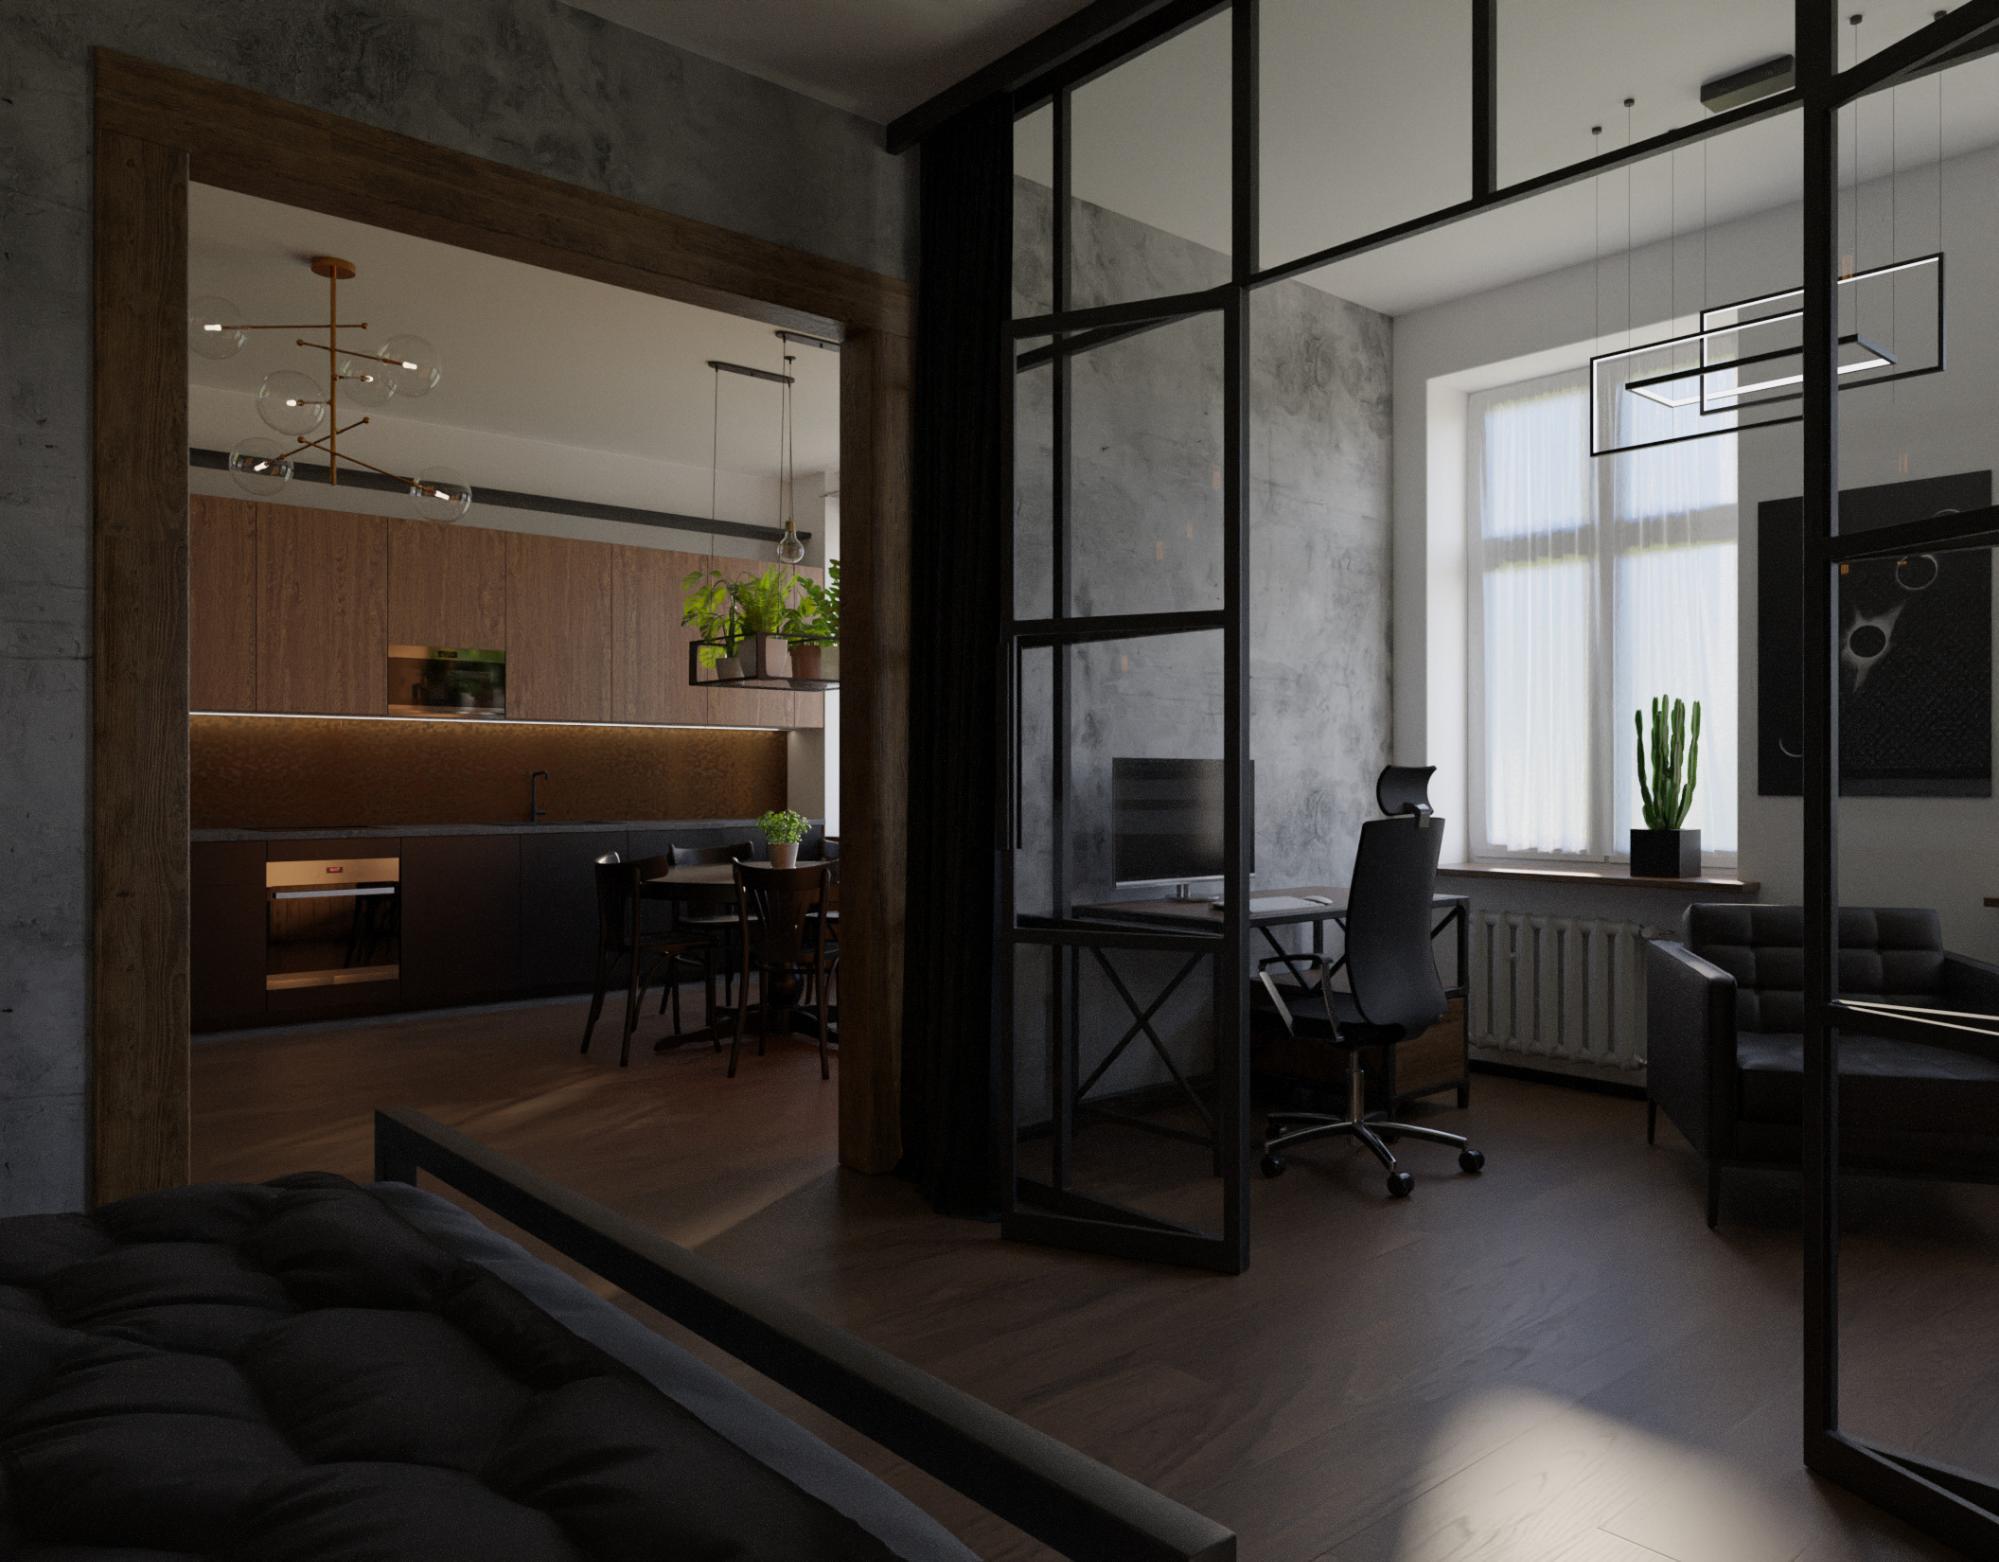
Raw:
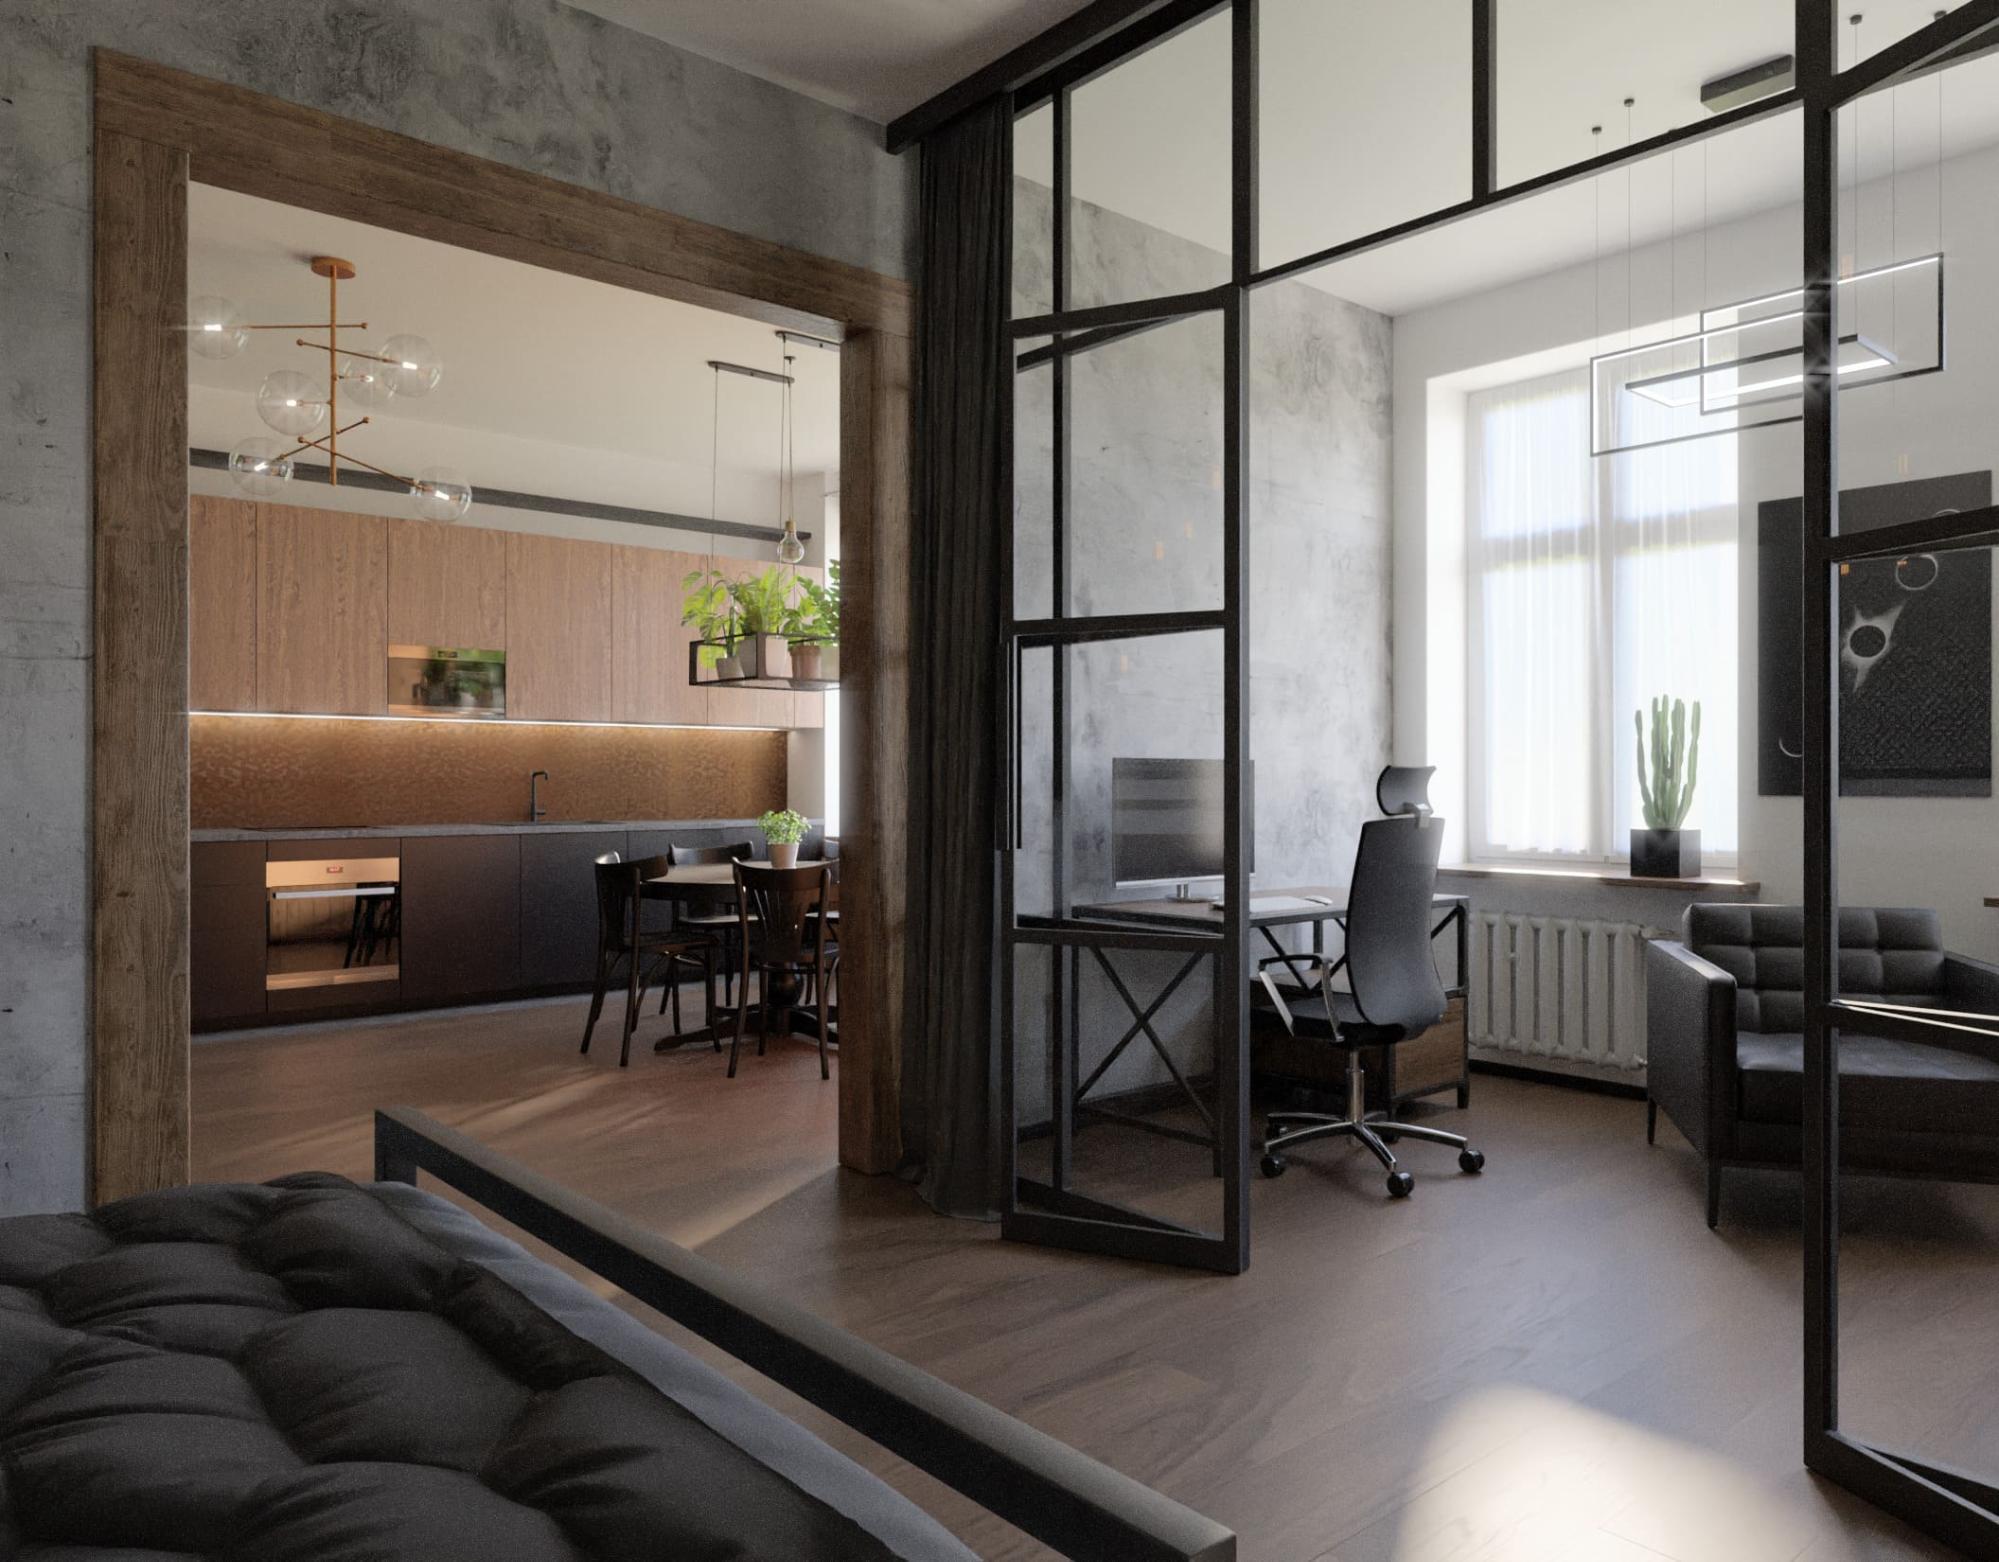
Final:
About the Author
 Tadeusz, Interior Designer at Holi Home Wrocław. I started learning CG 10 months ago, but have prior experience in the automotive industry (interior and exterior concept design).
Links
- Blender Starter Files
- Original Loft Interior Design Blog Post on Holi Home
- Loft Interior Design on Blenderartists


Great work. I’m making my own house in 3D and there are some great tips here. About the Furniture models from manufacters, can you give examples of where you get them?
Thanks!
Thx! My main source is 3dsky.org .You can sort by OM -meaning original manufacturer. Another one is archiup.com There are also a couple of polish companies that give away their 3d models, but be warned, quality can vary.
Sliding door:
https://www.reno-reno.pl/modele-3D/
Good source for tiles textures:
https://www.paradyz.com/en/catalog/shiny-lines-copper-struktura-rekt-298×898-g1
Thanks! I also use 3dsky.org. The other one I didn’t know :)
Hi, love your great scene, but the blender download link was expired. Could you fix it? Thank you.