
My name is Vladimír Stáňa and I am currently living in Prague,Czech Republic.
I started with Blender a couple of years ago with no other experience in 3D modeling and the beginning was quite hard :). Since then I have learned the basics of modeling, texturing, and rendering as well as using other softwares like Photoshop, ZBrush, and Substance Painter. Recently I have started to work with game engines (Unity/Unreal) and a few years ago I got my first job as a 3D artist.
Inspiration
My childhood is mostly connected with the many fantasy books I have read. My favourites were books by J.R.R. Tolkien, A. Sapkowski or Joe Dever. I loved the imaginations of these authors and I drew images along with their books. When I started to work with Blender, my dream was to create such fantasy images.
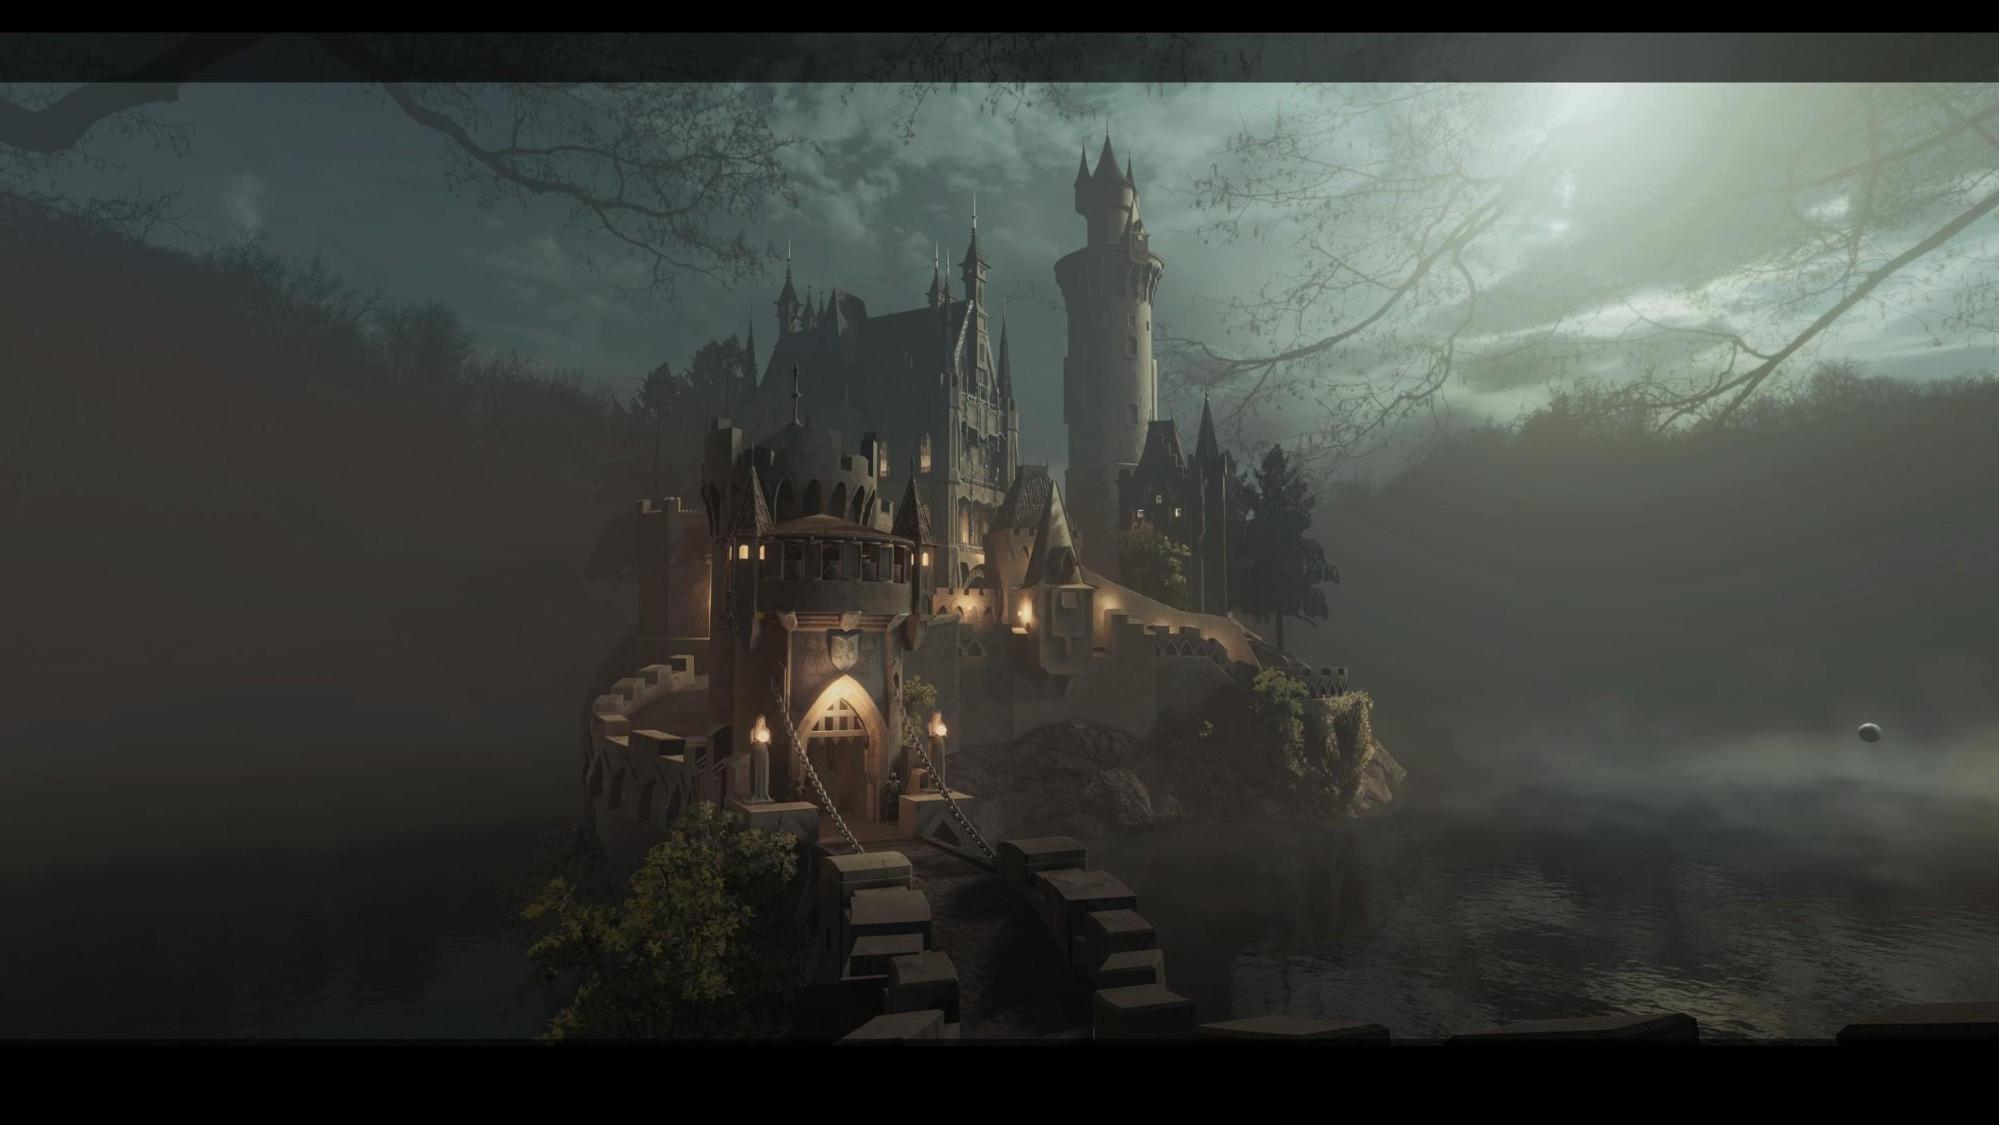
Castle Night is based on concept art for Falkenstein Castle by German painter Christian Jank (1833 - 1888).
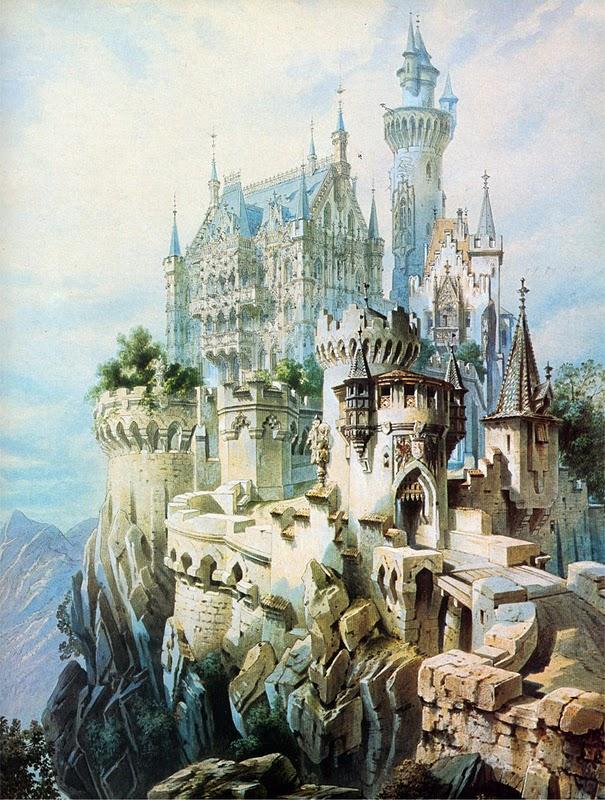
Concept for Falkenstein Castle by Christian Jank (via Wikimedia Commons)
Tools
Everything was created in Blender 2.79, except the rocks, which were sculpted in ZBrush.
For texturing I used various seamless PBR textures and for rendering I used the amazing engine EEVEE in Blender 2.8. Affinity Photo was used then for the post-processing.
Process
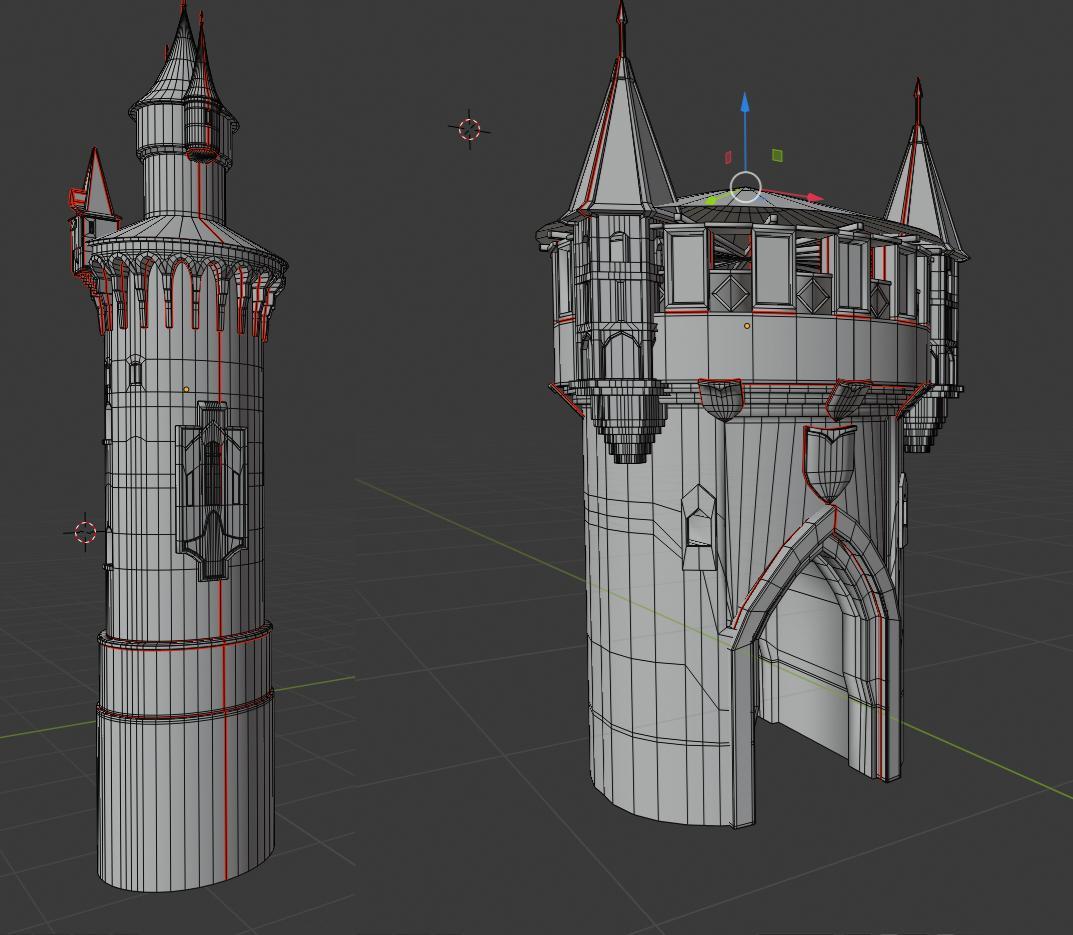
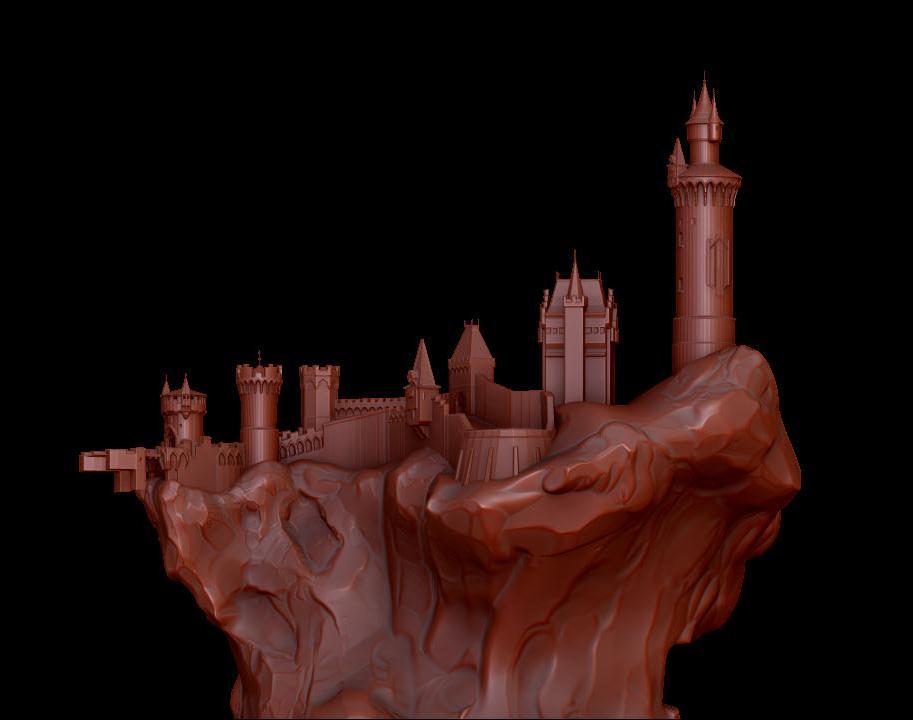
Modeling
I started to model the castle from basic shapes (cubes, circles, etc.).
Basic shapes of rocks were created in Blender and afterward sculpted in ZBrush. Trees came from the great Grove add-on.
UV Mapping/Texturing
UV Mapping was, for me, the most laborious thing because I created seams for every object in the scene, no matter how small it was.
Texturing, however, was very simple. I used several seamless textures that I modified directly in Blender with nodes.
The most challenging and fun tasks were then lighting and rendering in EEVEE.
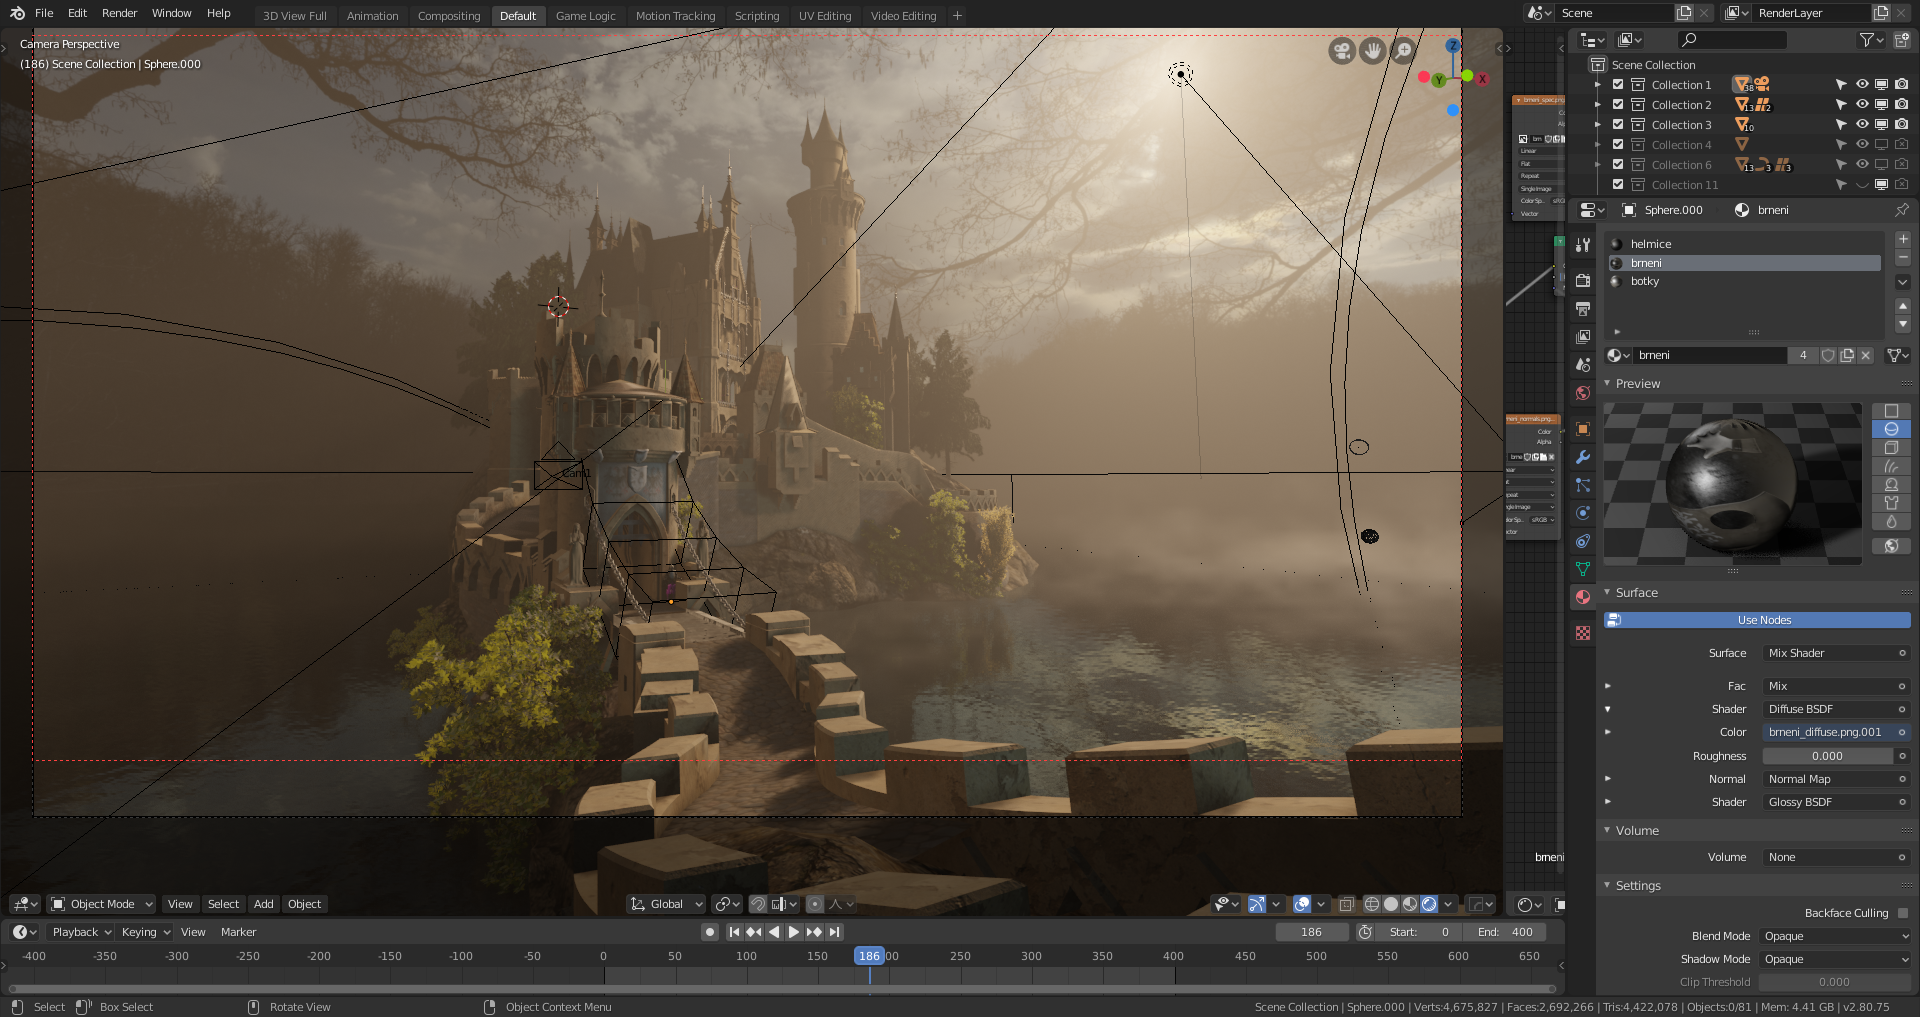
Lighting and Rendering
For lighting, I used an HDRI texture with relatively low intensity, which gave me a first pass.
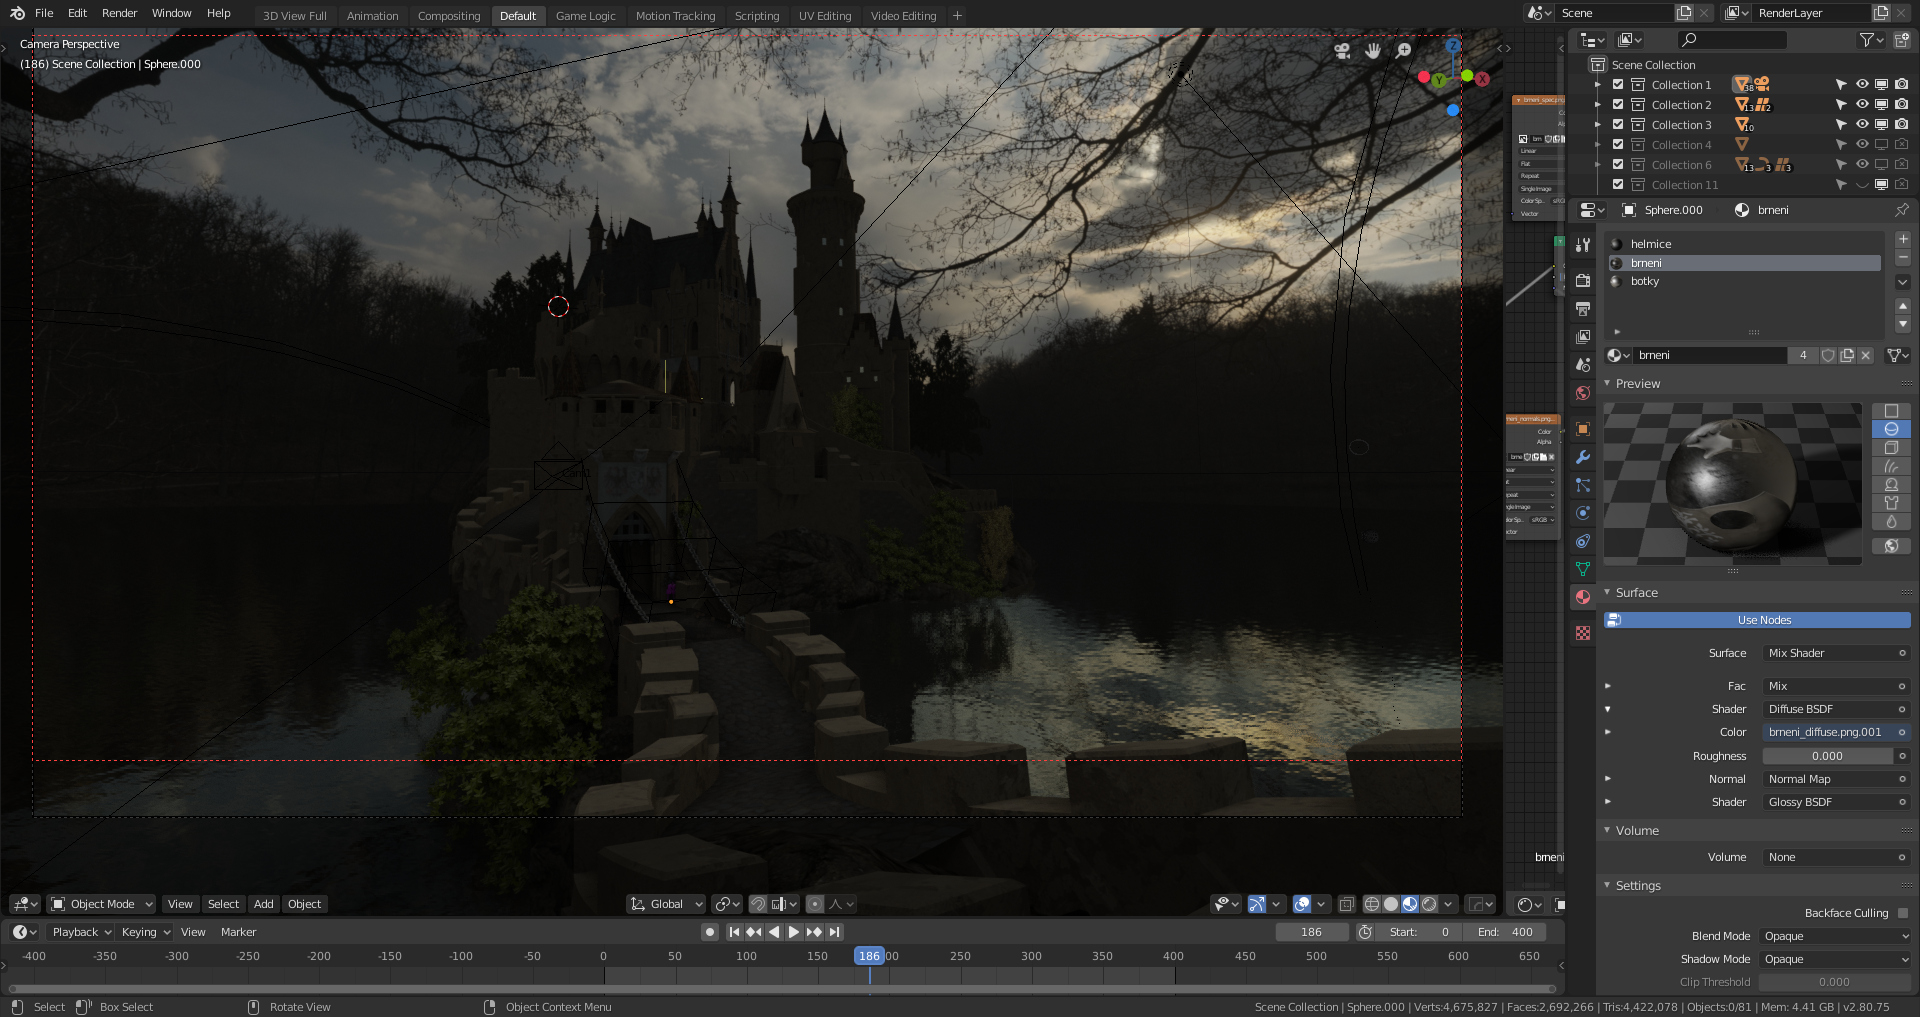
For the second pass I added some small lights like torches and lanterns.
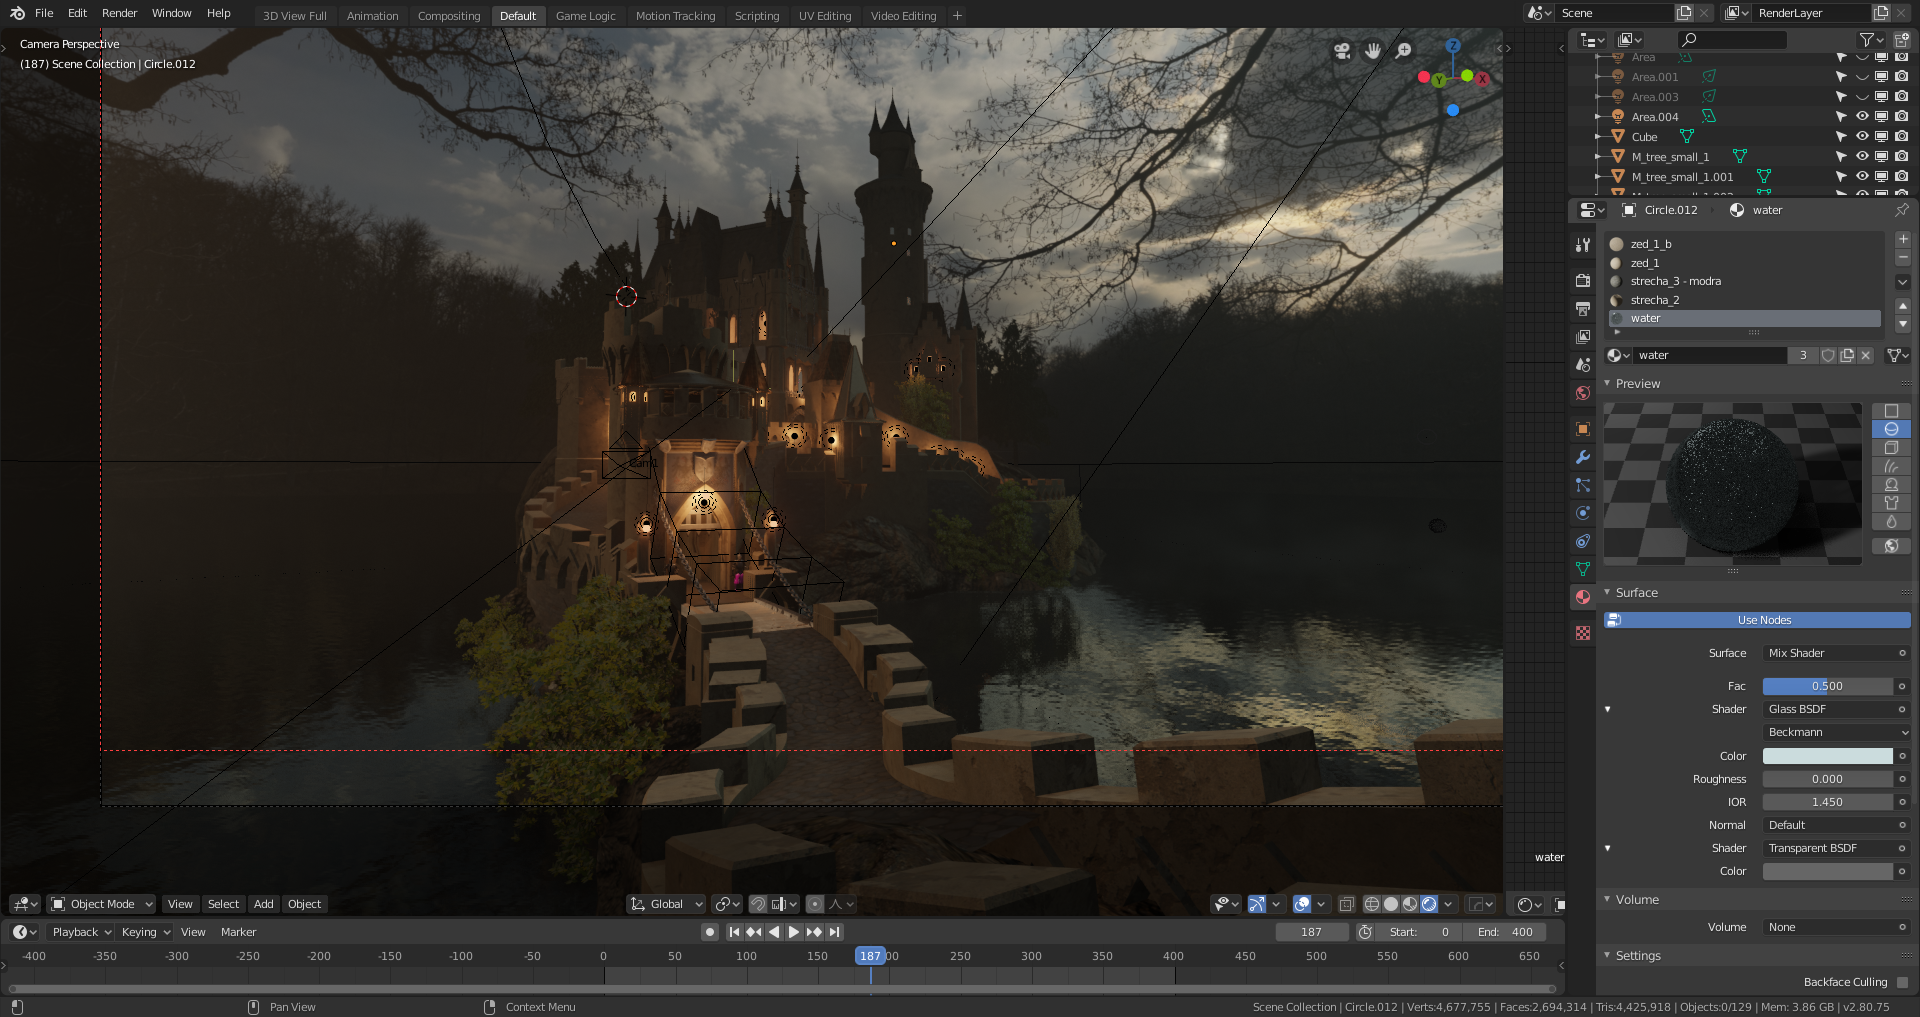
And in the third pass I used several spot lights to illuminate the whole castle and the fog.
These three images were then combined together in Affinty Photo:
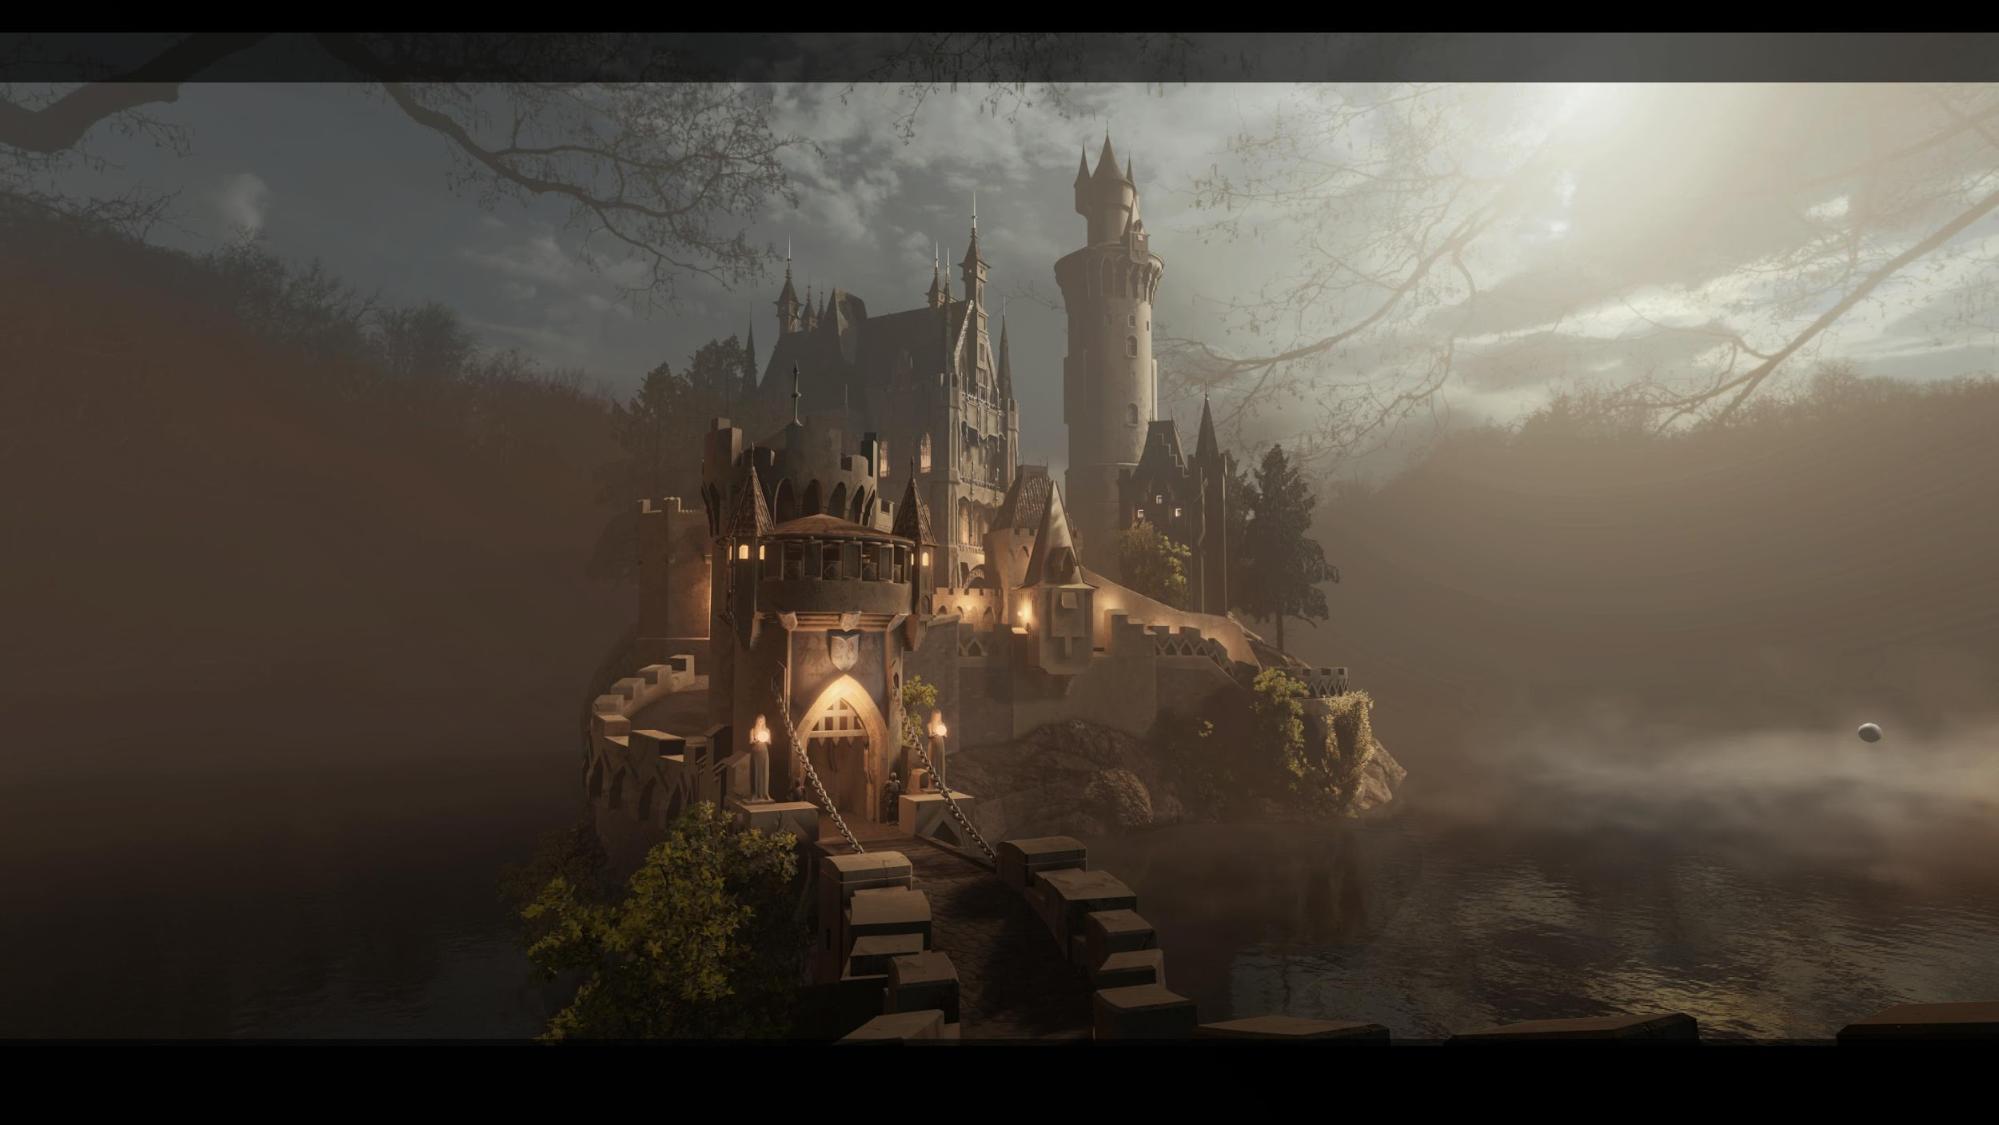
Final touches were made then with the help of LUTS (you can learn more about LUTs in this article).
Thank you for reading!
About the Author
 Vladimir Stáňa, 3D Artist
8 Comments
Pretty nice!
Props for a Joe Dever books!
Beautiful work! Thanks for sharing.
Attractive result, thanks for sharing this!
Great final result! When you say passes, where these individual renders?
Hi Karl. Thank you. Yes they were individual renders.
Wow
Great final result!
In the guest paragraph you said you started with blender a couple of years ago with no other experience and at the end of that paragraph you said you got a job doing this a few years ago. How is this possible?