
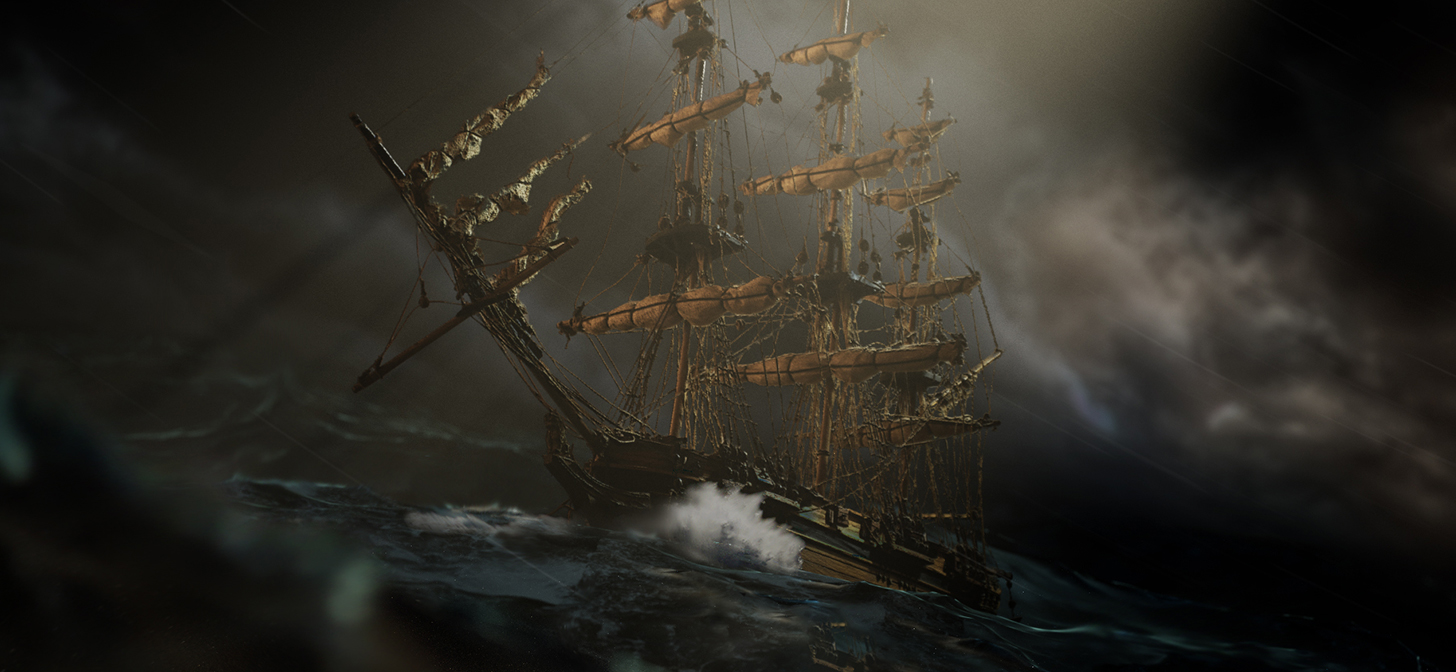
Behind the Scenes: Ship in Rough Sea
Background
My name is Novak Miler and I got into visual effects as a compositor in 2008/2009 working primarily in After Effects for Sinister Studio in South Africa, after completing my degree in Fine Arts at Rhodes University.
I took an interest in some 3D packages but found that Blender suited me best when I started learning about it in 2015. YouTube has been my primary source of education in Blender and when I had any spare time, I would find myself watching tutorials. As time went on, I started implementing Blender more and more into my jobs.
Now I would probably refer to myself as a generalist, working directly with agencies and directors on-set for VFX supervision, generating the 3D assets, and working on the final compositing with most jobs that I am involved in.
Inspiration
Many years ago, my father bought a model of a ship, which was always displayed in the sitting room while I was growing up. Soon after my father’s passing, my mother asked that I take the model, and it now sits in my own sitting room.
A few years back, I took a keen interest in photography but was especially influenced by the works of Felix Hernandez, who is truly a master of his craft. I wanted to simulate what Hernandez does, but enhance it in a slightly different way by using Blender.
I was also always impressed by classic paintings of old ships in rough seas…the depth and mood these skilled painters evoked would fill me with awe and fear of nature’s power.

Process
I had the real model, a keen interest in photography, and Blender. I now had to put it all together.
Photography
The first step was to photograph the ship in a way that I could extract it and light it in a real environment to create some mood.
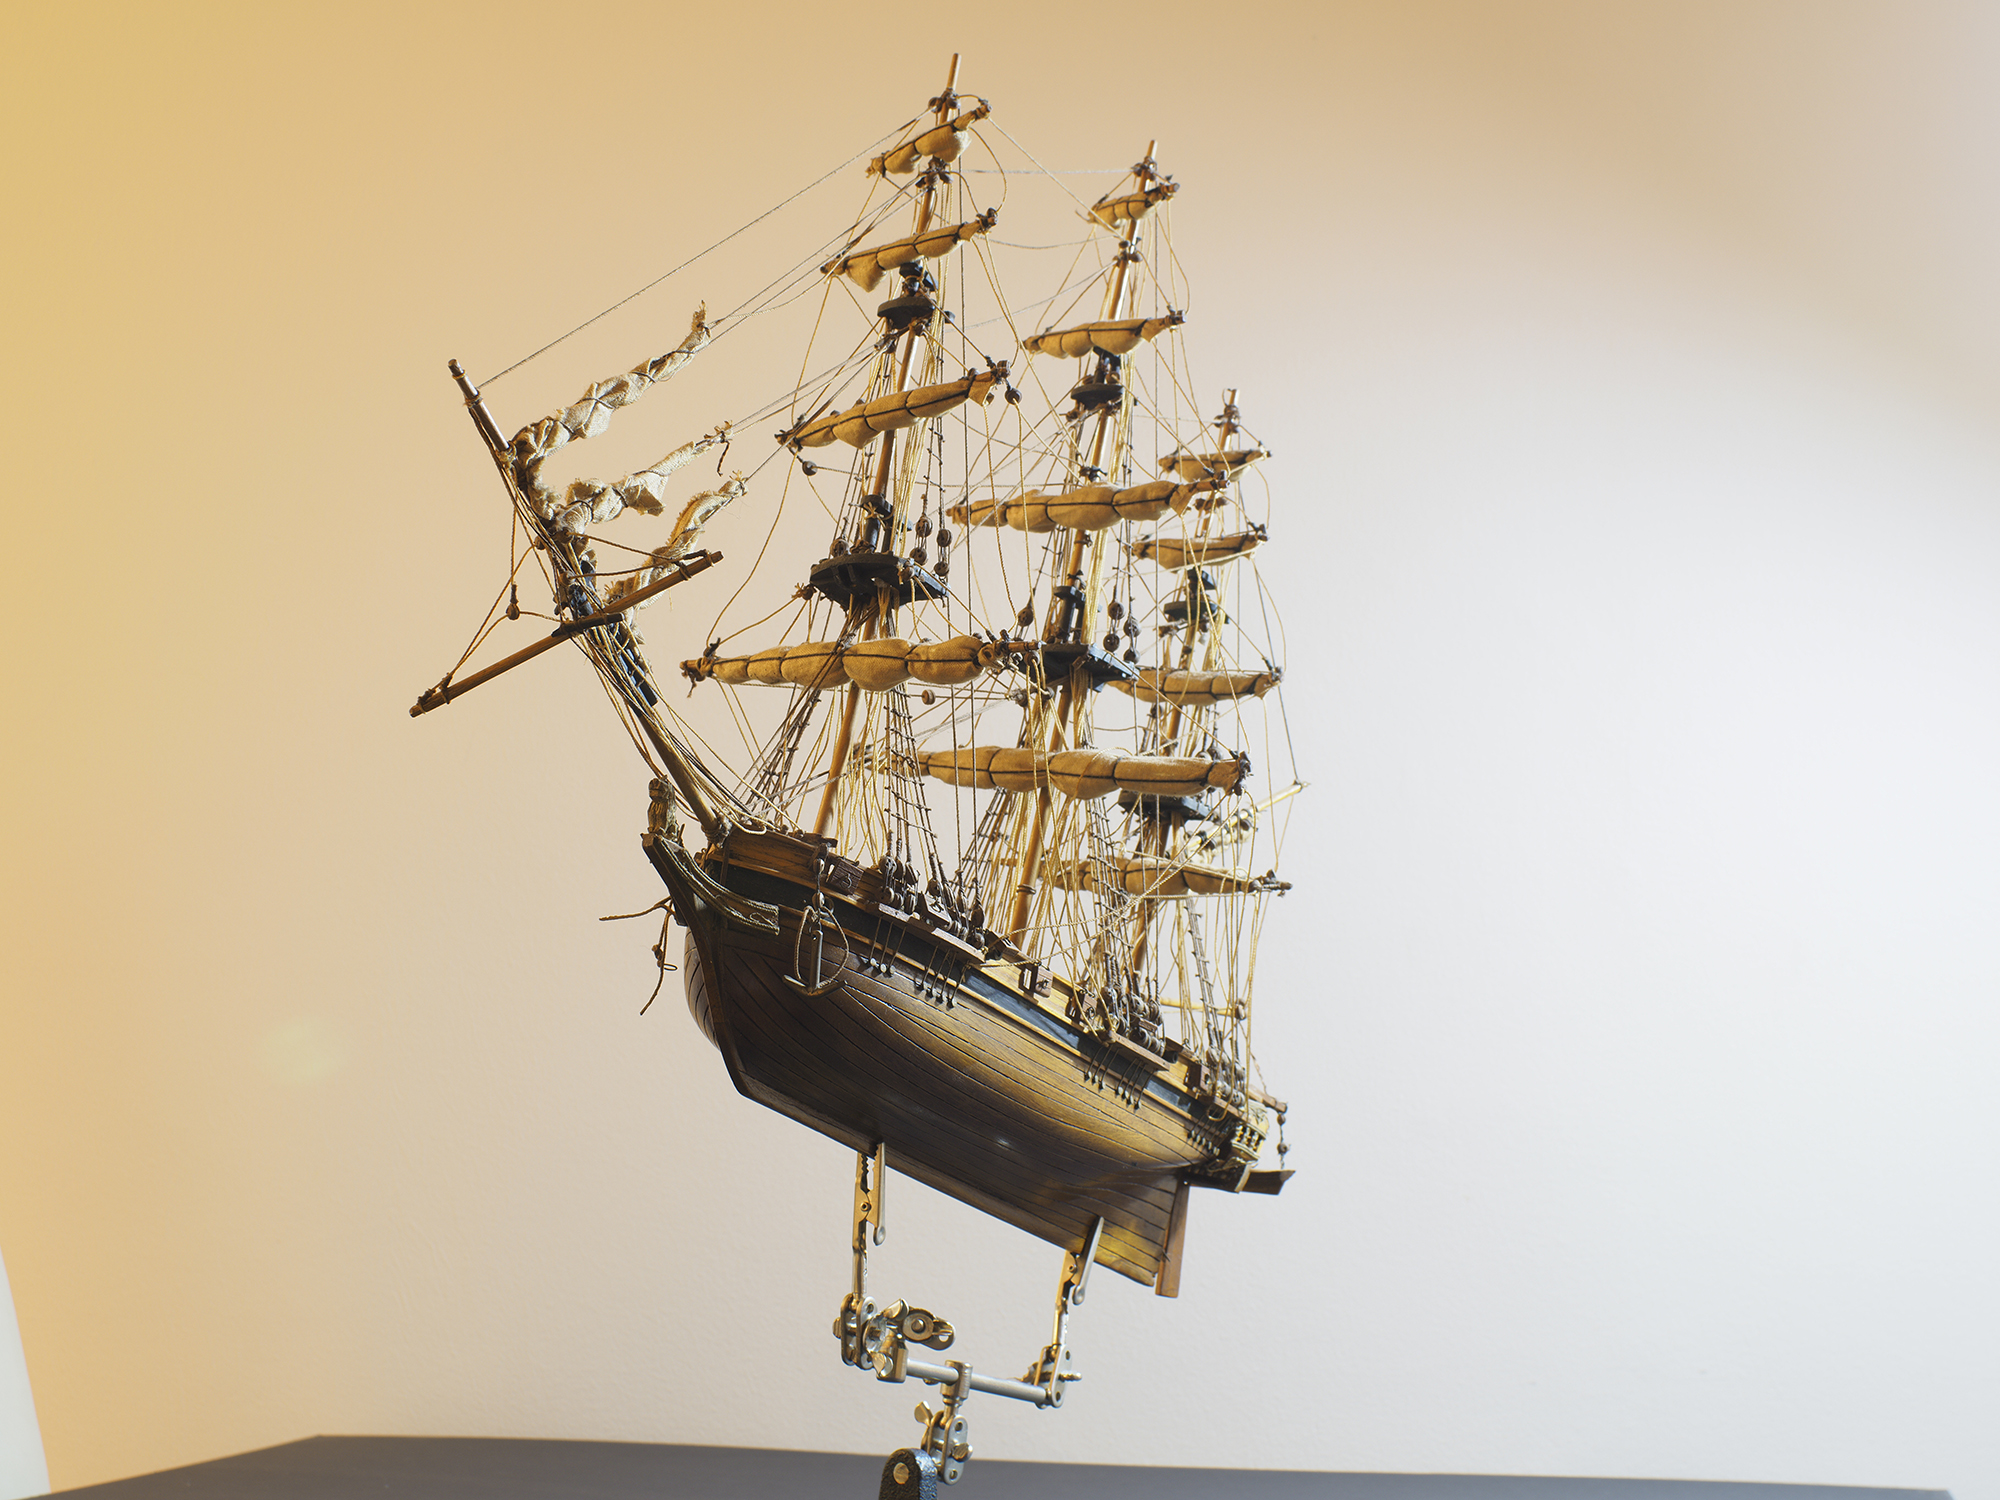
I didn’t have any sort of chroma screen at home so I simply mounted the ship up against a wall in my living room. I knew that extracting the ship was going to be long and painful, but with the use of Photoshop and its background erase tool, things went quicker than expected.
Modeling/Texturing
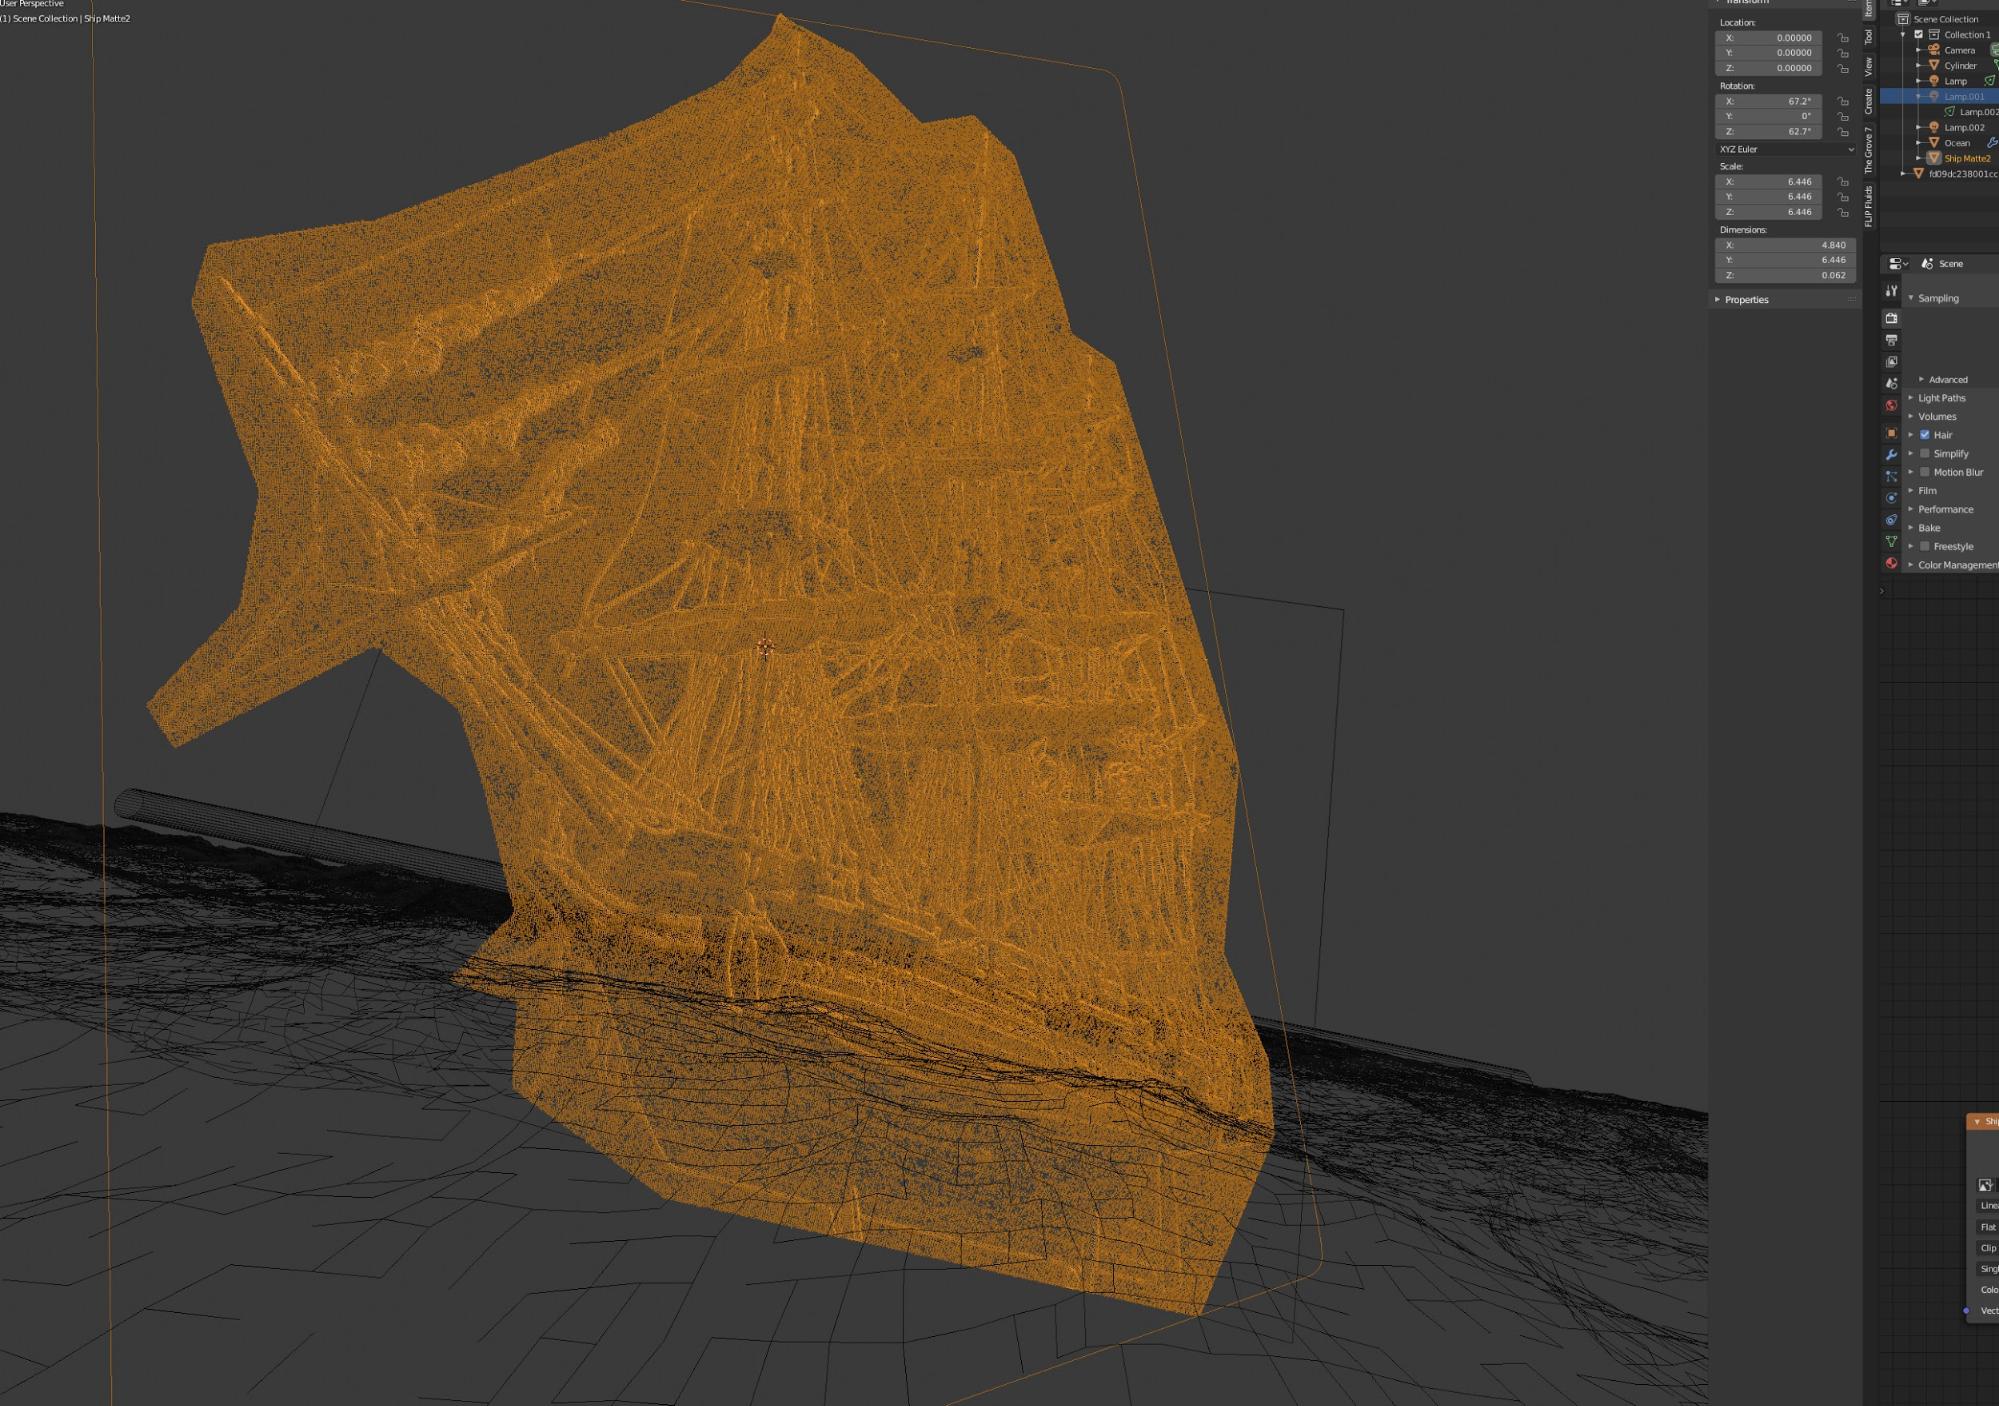
With the ship extracted, I now had an image on an alpha matte that I could bring into Blender. The rest of the process was the fun bit. The hard parts were now out of the way.
I saved a second image of the extracted ship as a black and white image which I could use to drive displacement in Blender. I didn’t want a flat image in the scene. Small amounts of displacement allow for the 3D model to react to lighting in the scene more realistically when compared to a flat image that has to be matched to in Blender.
To get detailed displacement, I had to subdivide the image of the ship to quite a high level. I made around 10 subdivisions before I was happy with the level of detail being displayed.
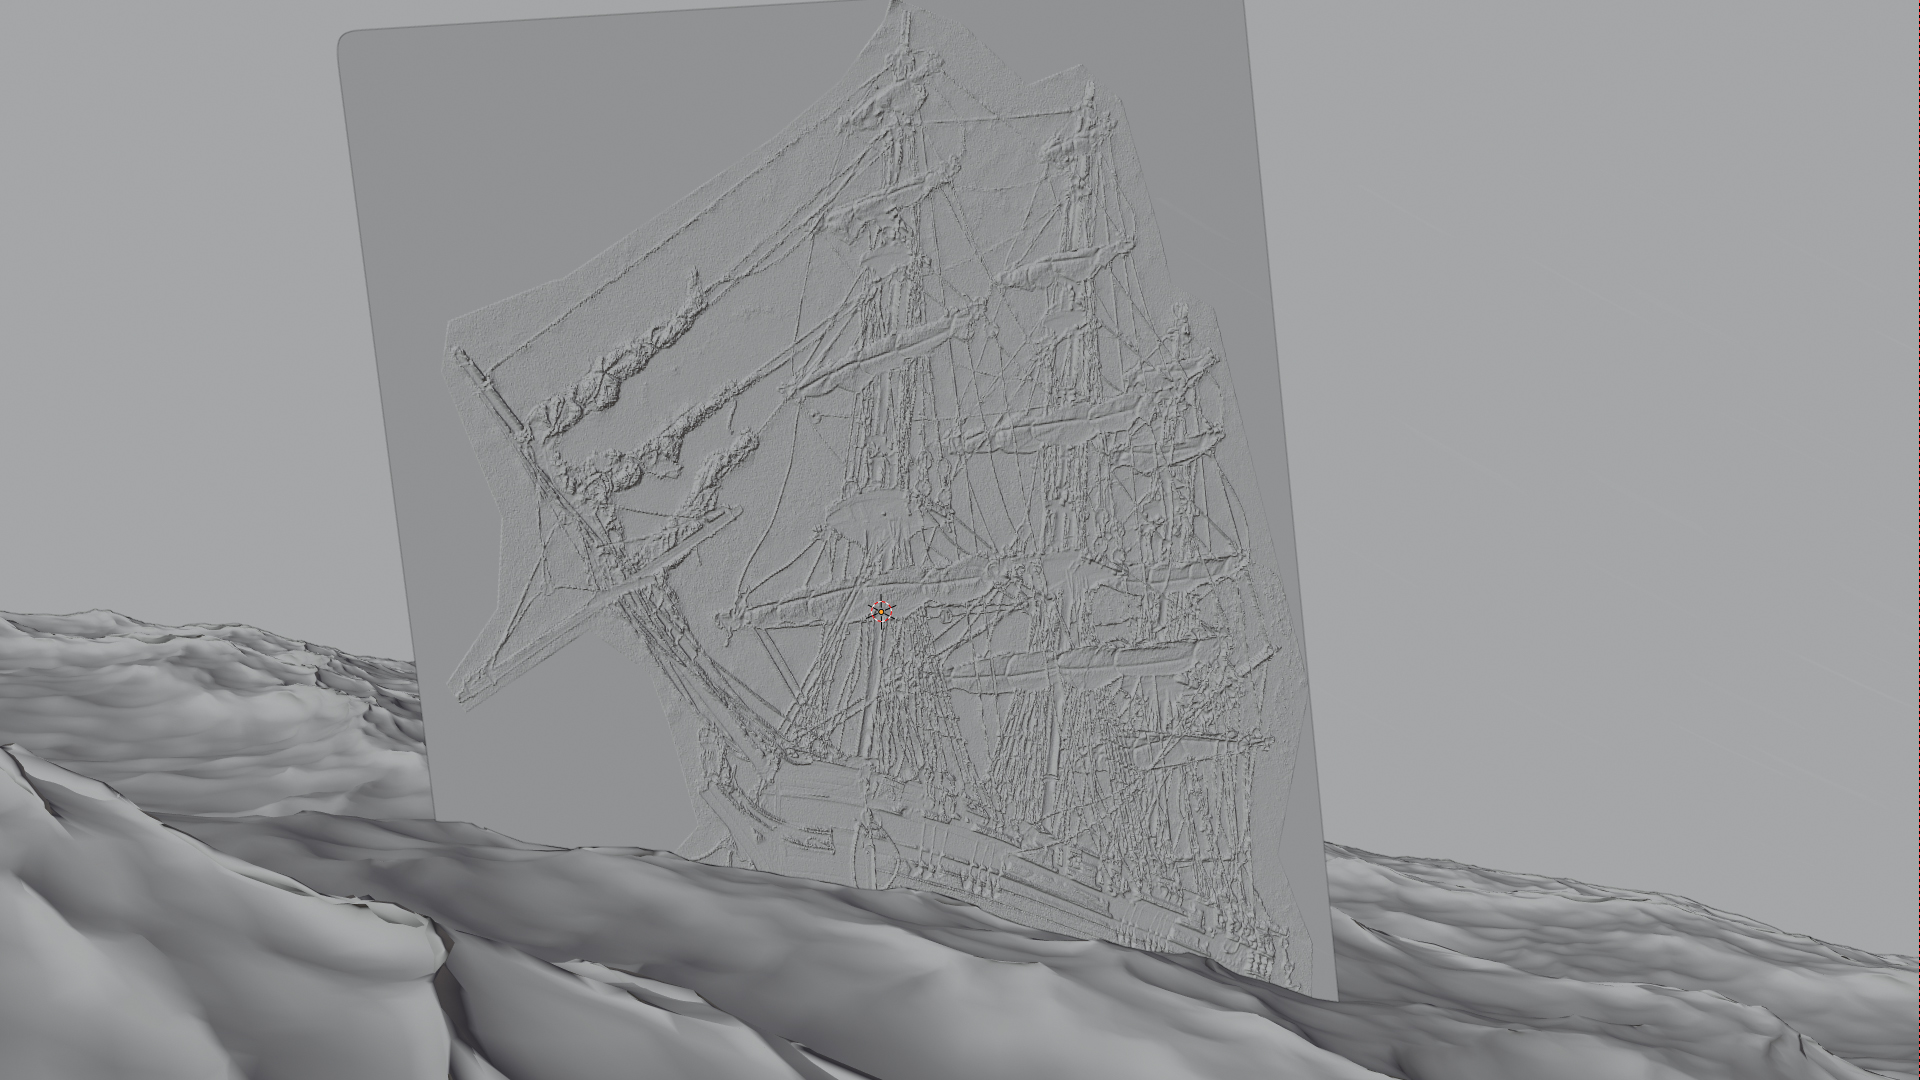
I added a color ramp node to the black and white image to crush/remove any errors I had made in removing the ship from the background of the original photo.
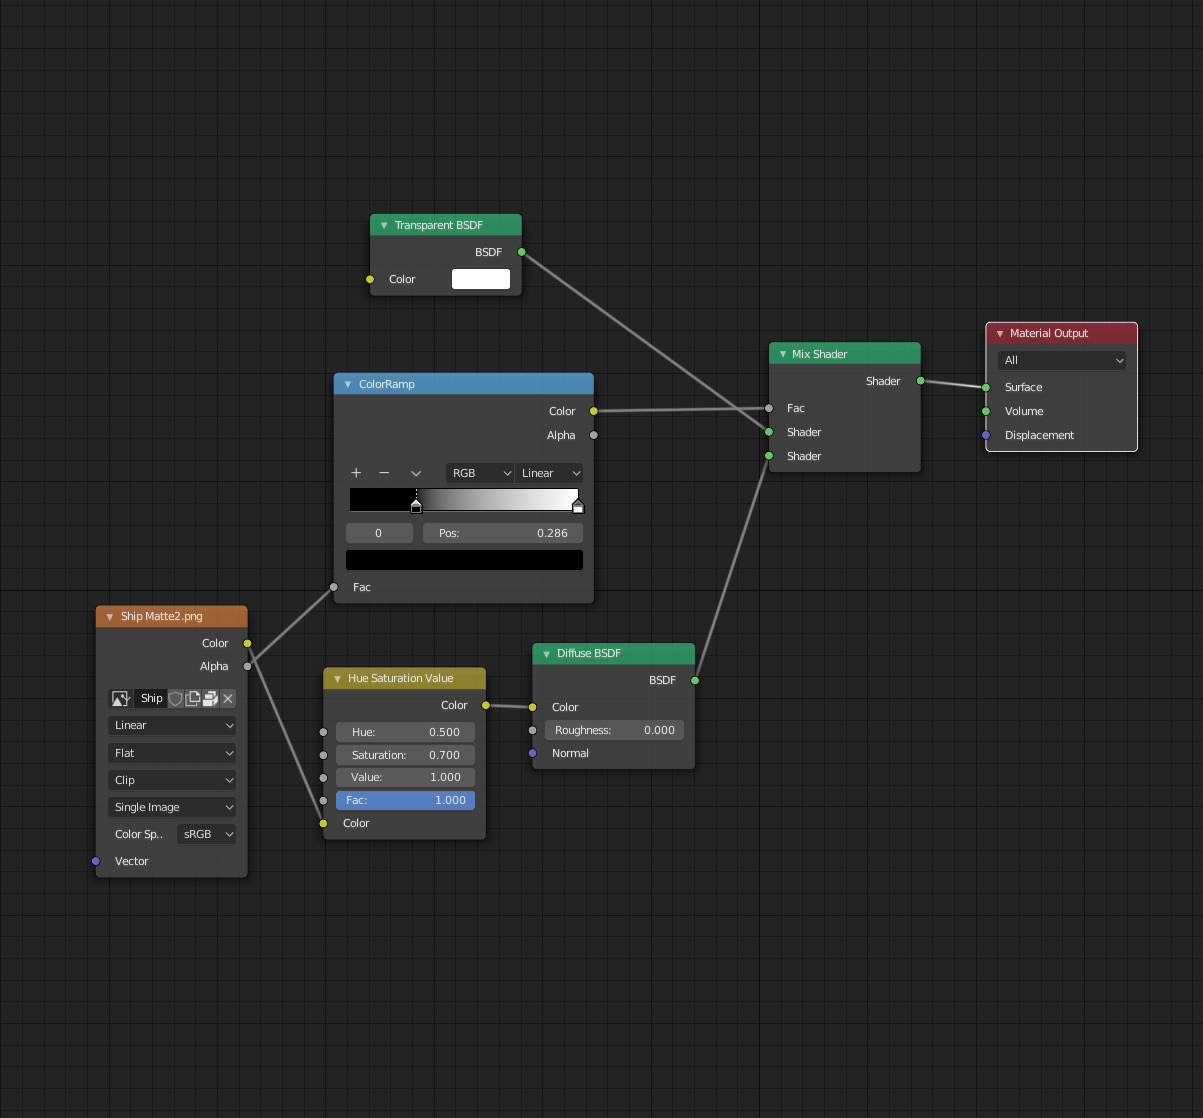
I then added a plane with the ocean modifier to generate an ocean.
The ocean plane was textured with an image of foamy water, and I added a second plane behind the ship that was textured with some dark and moody clouds.
Lighting
The final steps in Blender involved adding one spot light above the ship to match the direction of the light, and changing the world material to act as a volume so that I could get a light streak in the scene.
This allowed the one spot light to isolate the ship in the scene compositionally.
I rendered the scene out in Cycles and brought it into Photoshop for any final clean-ups and grading, as well as adding a splash at the bow of the ship to make it look like a wave had just impacted the hull.
Final Image

About the Author
 Novak Miler, VFX artist at SinisterStudio


Amazing work!
WOw first i thought dang thats some impressive modeling skills :)
But really nice HOWTO, great job and thanks for that link of Hernande. Also stunning work :)
Very, very nice!! The end result looks fantastic!