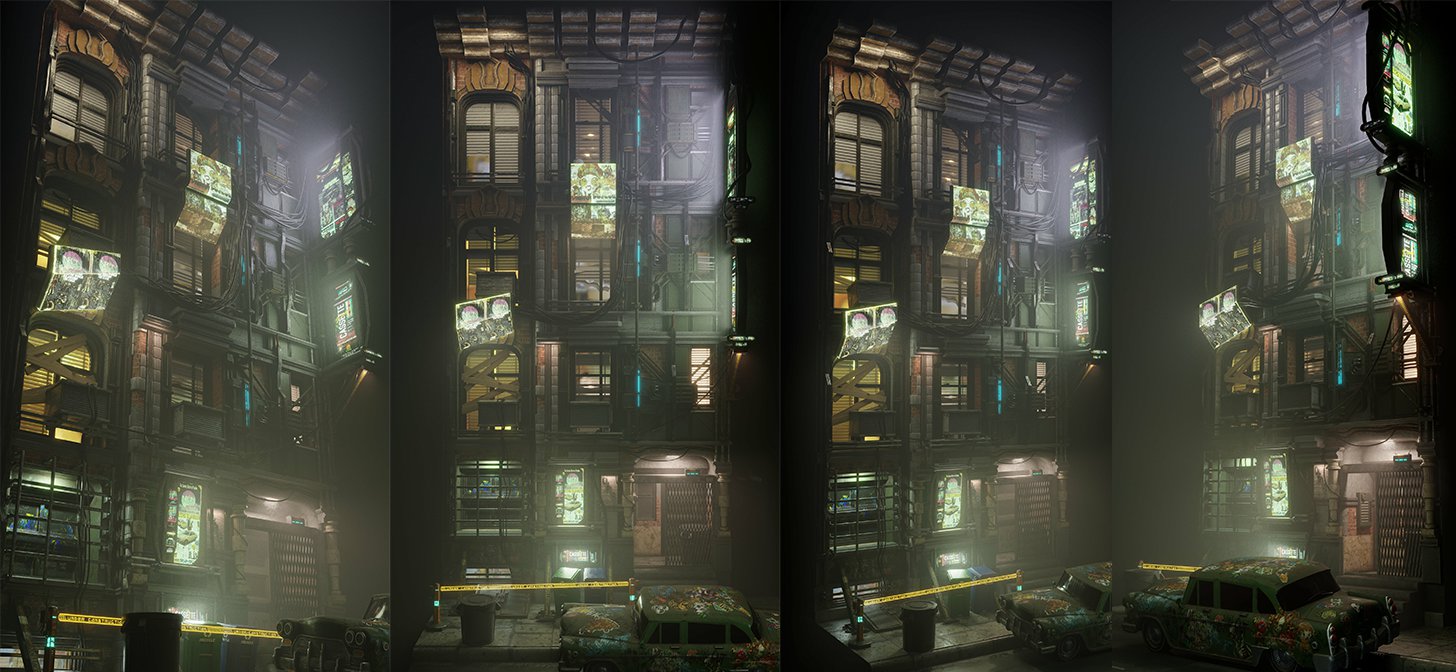
Behind the Scenes: Old Brick Building
About Me
Hey everyone! My name is Sady Fofana and I’m an aspiring 3D environment artist based in the Pacific Northwest US. Most of my work consists of sci-fi/futuristic stills and real-time environments. The science fiction genre has inspired most of my renders over the years. For the most part, I am self-taught and have been using Blender for at least 5 years now. About 4 months ago I also started working in Unreal Engine 4.
Inspiration and References
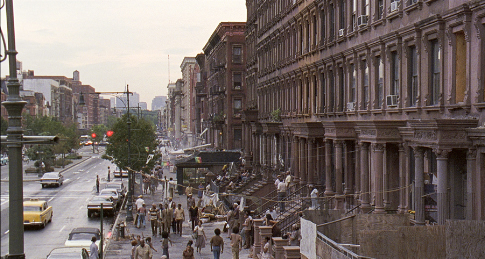
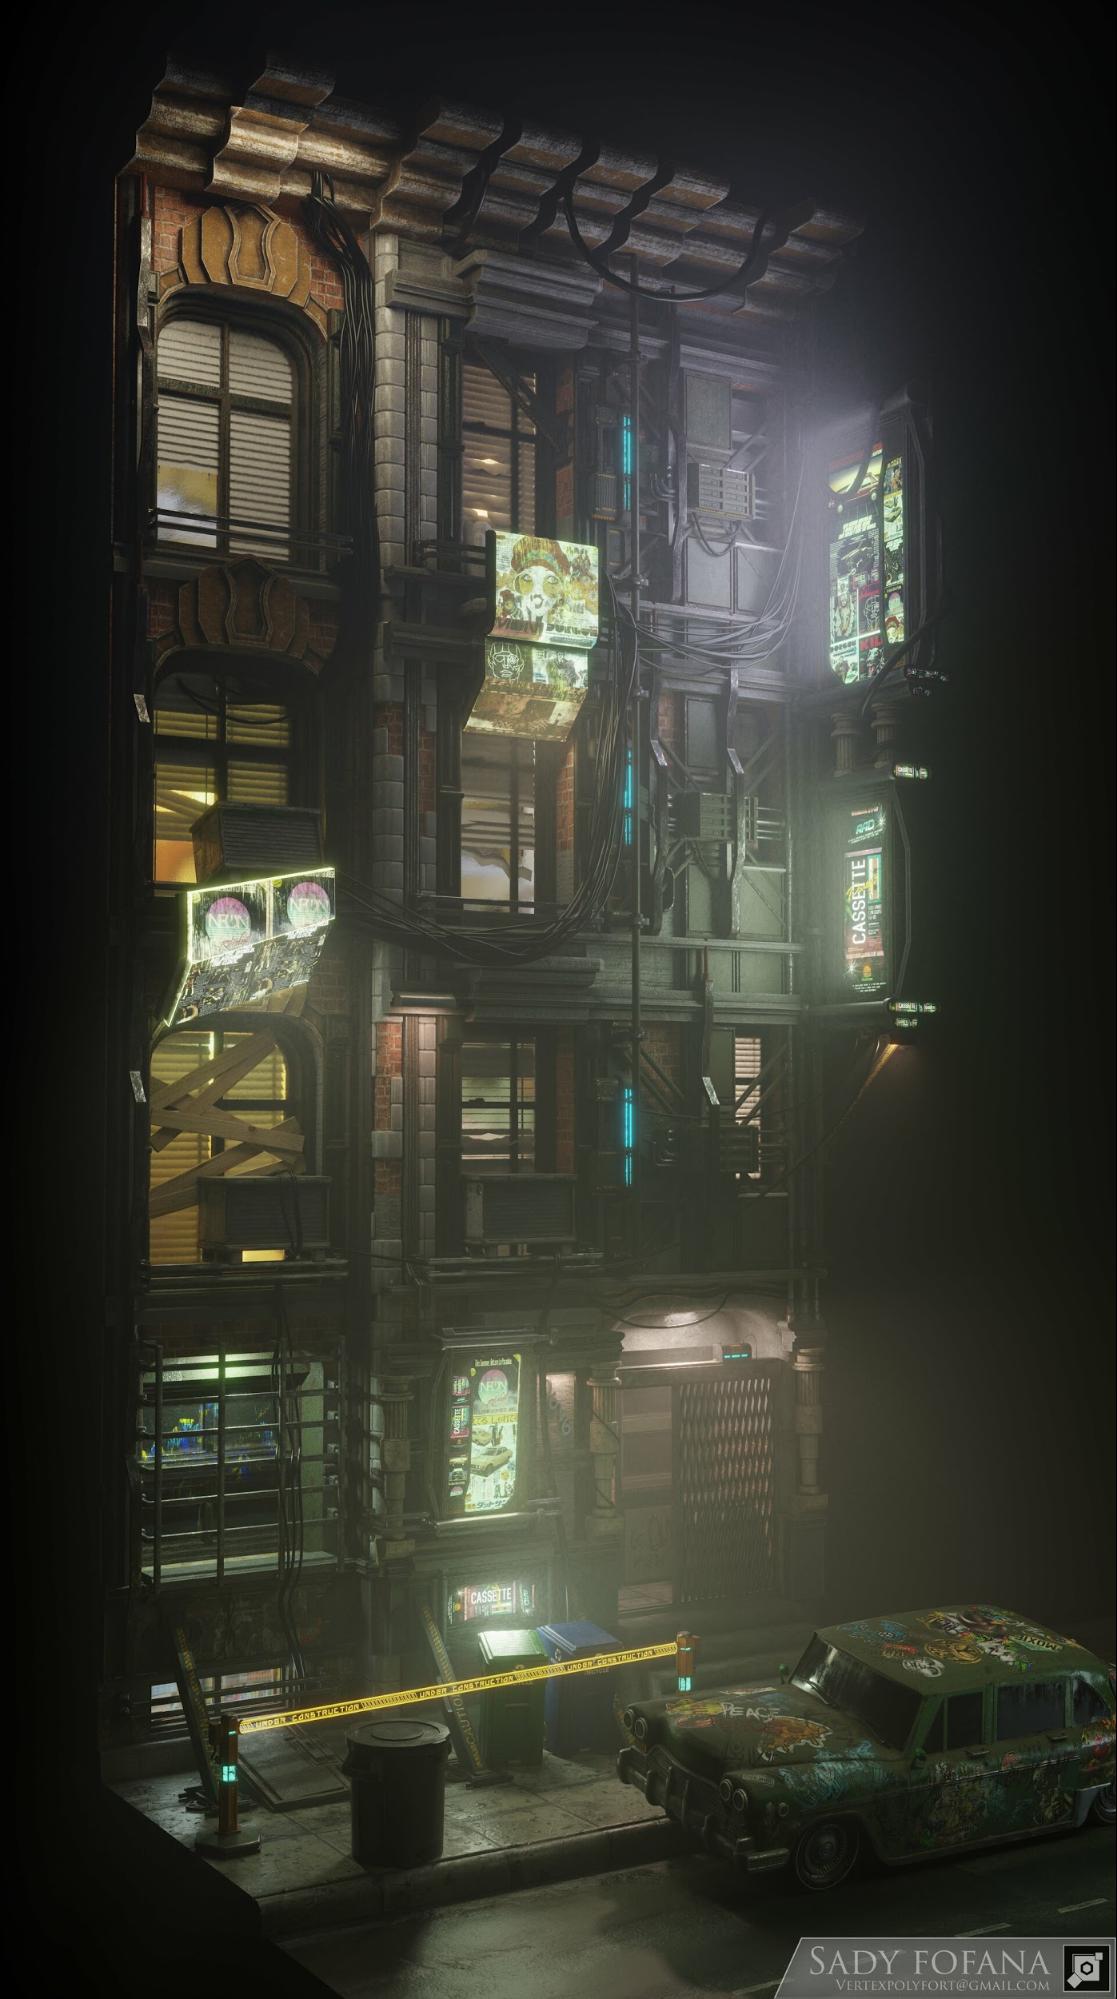
When I started the old brick building project I was heavily inspired by the Italianate architecture style that is used in the majority of older Bronx housing. I wanted to take that into consideration when creating a building for a grungy sci-fi setting. I love watching how movies & TV (e.g., Altered Carbon, Blade Runner, Cowboy Bebop) craft their tech to be integrated with old-world structures, giving a depressingly beautiful atmosphere to the settings they achieve. That approach also adds the symbolism of decay that comes with tech slowly leaving the physical past behind.

With that in mind, I had a good basis for how I wanted the building to look. During the early stages, I found reference images of Bronx apartments as a template to work from. When modeling the building, I used screenshots from different sci-fi movies and TV shows, which provided a style for the technology.
Tools
- Blender
- Substance Painter
- Substance Designer
Modeling
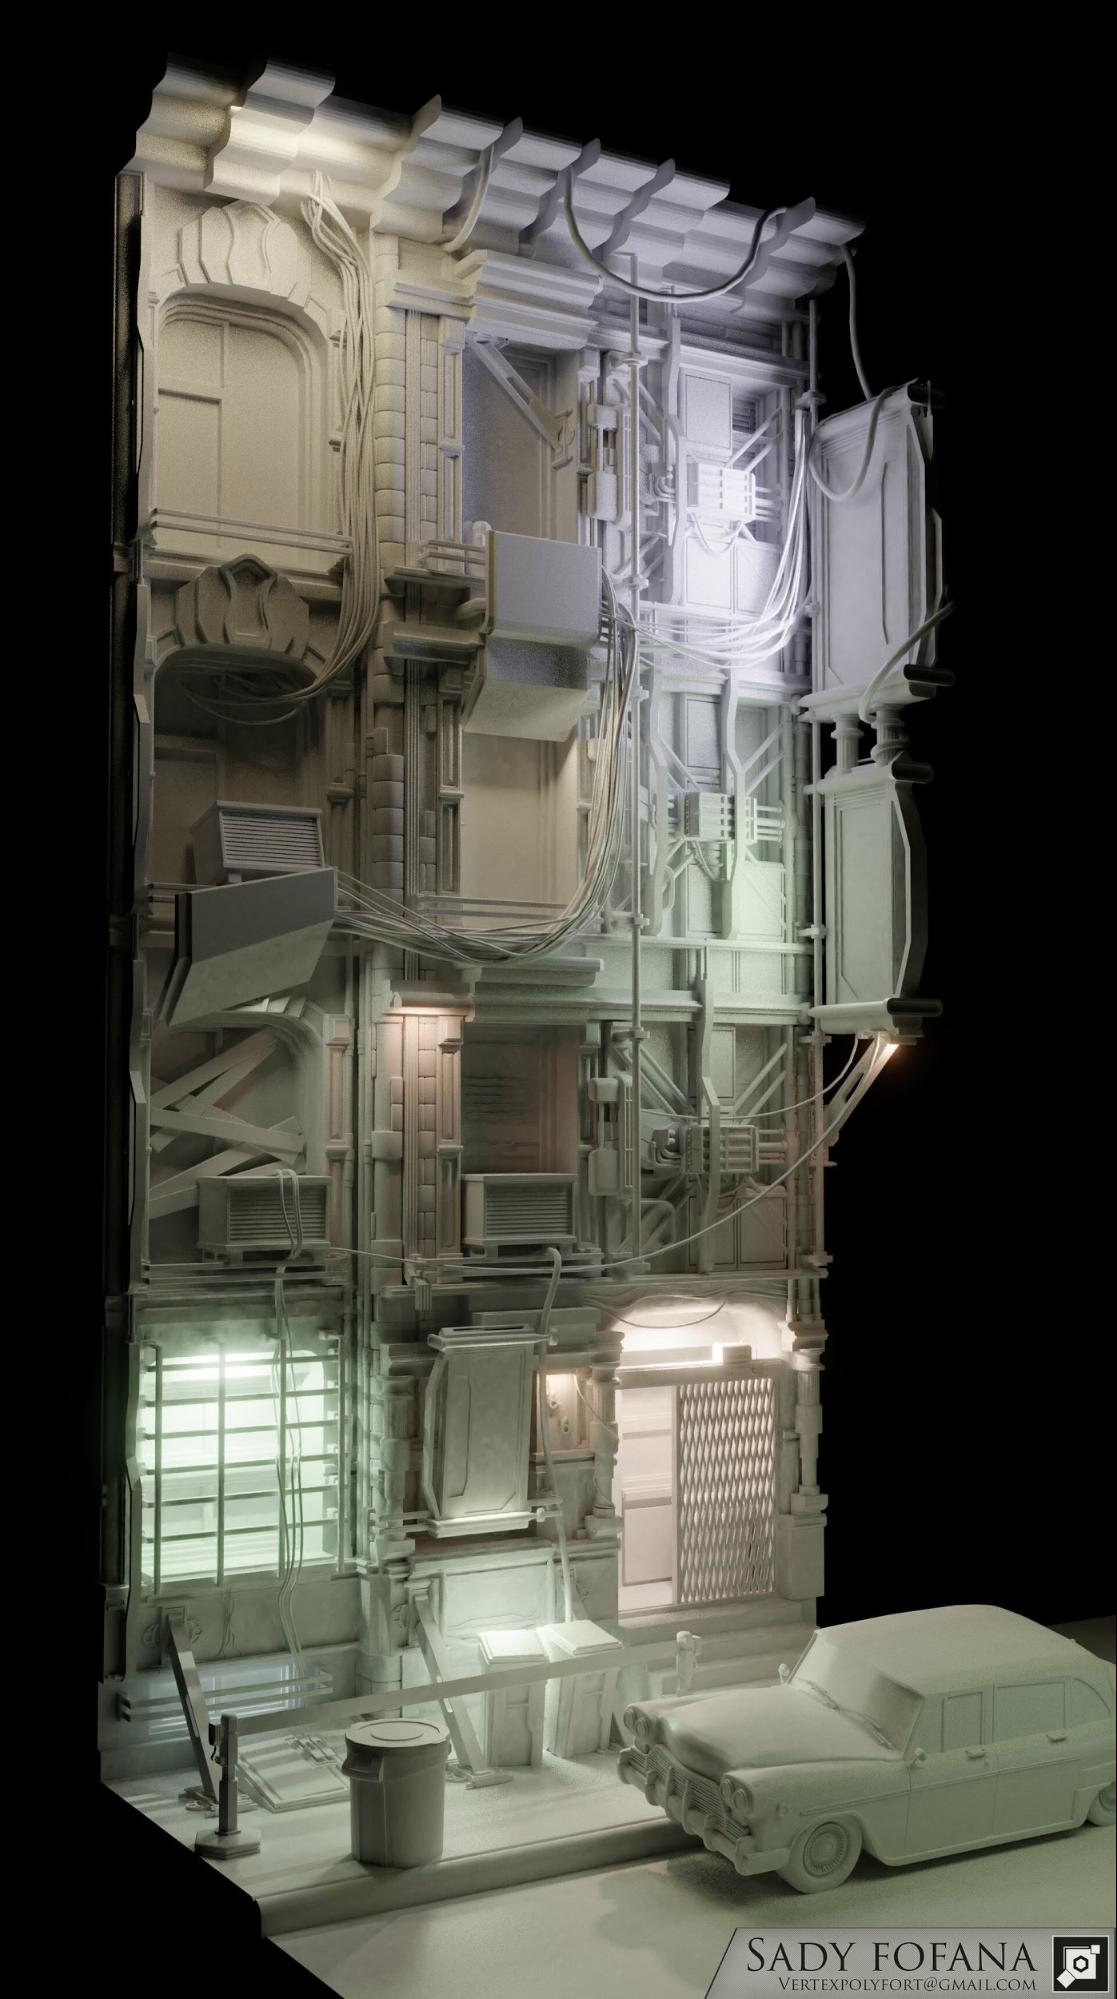
With the reference gathering done it was time for me to start modeling. The best thing to do when starting a project is to begin with lower poly details (simple shapes & geometries) first and then work your way to the higher poly details! This rule of thumb helped me pace my work during the brainstorming process and gave me time to think about the setup of the assets. After I was done with the mid to low poly details, I then decided to add some of the smaller details to the scene.
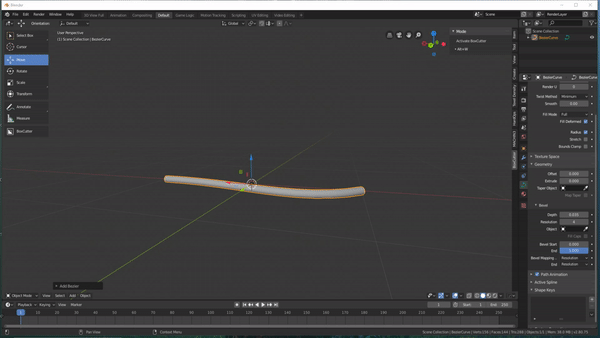
I started modeling the wires by adding a Bezier curve, then, under Object Data > Geometry > Bevel, set the bevel depth according to size (example: 0.055). Next, I went into edit mode and positioned and extruded the wires. I use this method for making fast wires and, for the most part, it is also pretty good for making braided wires! To keep everything at the right scale I used a character model as a reference.

Shading and Texturing
I wanted to give the windows a bit more depth when it came to the physical depth of the space, so I used a mix of very small interiors and images to give the building a lived-in look. The glass shader I used was a node setup from Gleb Alaxandrov’s glass tutorial; I changed the normals to get a frosted glass look. I then modeled out the signs and textured them individually in Substance Painter. Then I did the same for some of the smaller building assets, like the supports and the door gates.

On the texturing side of things, I decided to use a mix of repeatable seamless textures and painted textures from Substance Painter/Designer. I used Substance Painter for most of the smaller assets and kept the texture resolution between 1024 and 2048px. Then for some of the assets I decided to add a few custom alphas and PNGs on which to paint text and other details to give the scene a grungy, dirty look.
Lighting and Post Processing
Lastly I worked on the lighting and post processing, following the rules of color theory.
I wanted to go for a moody smog-filled setting, similar to what I see in a lot of sci-fi cities. I tend to go about lighting the same way I do with modeling, which is to start with simple colors with broad light points and then work my way down to smaller lighting details.
I learned a bit about how lights interacted with technology and spent a little more time on the sign lighting than I did on the rest of the scene. In post-processing, I used a mix of warm and cool lighting and overall I was happy with how the scene turned out!
Final Renders
About the Author
![]() Sady Fofana, 3D Environment artist, weird cyberpunk fetishist, 3d printing enthusiast. Making the best of 3D artistry in general!
Sady Fofana, 3D Environment artist, weird cyberpunk fetishist, 3d printing enthusiast. Making the best of 3D artistry in general!


Very nice work! Would you mind sharing some insight into the volumetric lighting effects? It’s such a touchy thing that seems to require a lot of fine tuning I’d be interested to hear about your approach.
I read your article and I see your all images this is very nice and helpful I have also work on that, after all, I like your work and interested in your work. I appreciate it and keep it up.
I red your article, I liked. your article is Very Help for Every Designer.
Align Studio – https://www.align-studio.com/
HII
Thanks for the Sharing information, it’s useful for making a design & 3d animations..
such as a great article….. thank you
Nice Article.we are Highly recommended 3D Visualisation Melbourne company across the vertical. We deliver quality 3D renderings to a scope of customers including planners, architects, engineers, realtors, developers, mortgage holders and showcasing creatives.
Hello,
Great points there, thanks. And here is another relevant article, maybe someone will find it useful to.
AR Studio is 3D Architectural Visualization Studio serving clients for needs spanning 3D Rendering services for clientele across the USA, UAE, and India.