

About
My name is Gabriela Fuentes, I’m from Monterrey, Mexico. Since I was a little girl I have been pretty into art and the creation process, but I didn’t follow that path. In college, I studied something that I was not passionate about and I wasn't happy at all.
I felt at that moment that I didn’t have anything that was "my thing" or that made me feel enthusiastic about life. That was until I met the 3D world and—as much as it makes me sound like a drama queen—I felt that it was what I had been looking for and it changed my life completely.
Now it has been 4 years since I started my journey in the wonderful world of the 3D. I'm trying to learn as much as I can as a self-taught artist, but I have also been so lucky to be able to find the best guru: Iván Rojo. He introduced me to Blender and taught me everything!
Nowadays I am still working and growing up as a 3D artist.
The Idea
During my spring break, I made a trip with my boyfriend to a magical little town in San Luis Potosi, Mexico called Xilitla, where I had the opportunity to have a close encounter with the surrealist art of Leonora Carrington. Her work dazzled me but one of her sculptures, in particular, caught my eye, the sculpture called "Chango en balsa". I felt an instant connection and was thinking about it for the rest of my trip. As a result, I started to develop my own interpretation, letting my imagination flow.
I imagined an old ancestral sensei sailing alone down a cold river, perhaps returning to his last journey, and then I realized that would be a great challenge and a really good opportunity to be able to improve my skills. Feeling very excited and motivated, I decided to start!
Execution
Making this scene was a real challenge for me because it involved a lot of things I had never worked with, such as water, animal fur, a stylized character, lighting, and complex shading. So I started to gather ideas, making a mood board for inspiration and choosing what type of monkey would be the best option for what I was looking to create.

This is my mood board; I looked for rivers, traditional Asian outfits, characters, environments, and boats to make it. I used the PureRef app to organize it all.
Character Design And Modeling
Oh boy, it was hard. I will be honest, I didn’t think about how much work it would be to make a character with all that hair. After a few preliminary sketches and sculpted failures, I finally had the character base. At the beginning I had decided that the monkey would have no hair made of particles, so instead, I modeled it.
I usually follow a pretty common workflow; I sculpt the character and use it as a base for making the cleanest topology I can. I started with the head and then the body, then finally the hands and feet. After that, I used the sculpt tool to give a little bit more detail to the hair and face.


Texture and Shading
I painted all the textures for the character using Blender texture paint. I basically just played with the shadows and lights in the same gamma of colors, and after that I used the nodes and, with the help of the different texture maps, I was able to get the bump of the wrinkles for a realistic (old and damaged) skin shader.


Bringing It All Together
Building a scene is one of the things I most like to do. I always feel super excited to bring all the things together and start feeling that my vision works. So I took the monkey and the boat and placed them at the center of my scene. For the background I used a plane with an image of tall dry trees and then added some rocks and a simple cube for water, and another one for the fog. At this point, I was using a sun lamp but it wasn't what I was looking for.

Turning Day Into Night
I needed to transform my highly lit scene into a more dramatically lit night scene. So I chose to erase my old lights and implemented new ones, but now in a blue tone, so that the yellow light from the lamp would be the one that stands out. I also felt that the background needed a little more vegetation, because it was too clean to be near a river. So I added some branches and trunks in the background. I wasn't happy with the result yet; although the lighting was getting close to what I was looking for, I still felt that it lacked drama.
Looking For The Detail
One of the biggest mistakes I made was the overwhelming lighting over the monkey. I was so obsessed with the idea that the monkey needed light to stand out in the scene that I didn't realize I was actually losing details. I decided the monkey couldn’t have front lights, and instead, I chose only one white area light, a big plane with an emission shader in a blue tone for the "moon/night", and an area light in a yellow tone for the lamp.
I added some vegetation to make it feel more alive, and some moss to the rocks because of the humidity. My boyfriend felt it would be cool if the monkey carried some plants in a basket, so I added that to the scene.


I chose a solid hair because, honestly, I didn't want to deal with the particles. But after seeing the final result, I felt like the hair looked too stiff and did not match the rest of the scene. I tried to modify it several times but still I didn't get the results I wanted. So I started to experiment with hair particles to achieve a more natural look that would better complement the character.

The Hair Particles
For the hair I used an individual particle system for each part of the monkey, using vertex groups. Then I combed them into the shape I wanted. It worked well to use my old model as a reference.


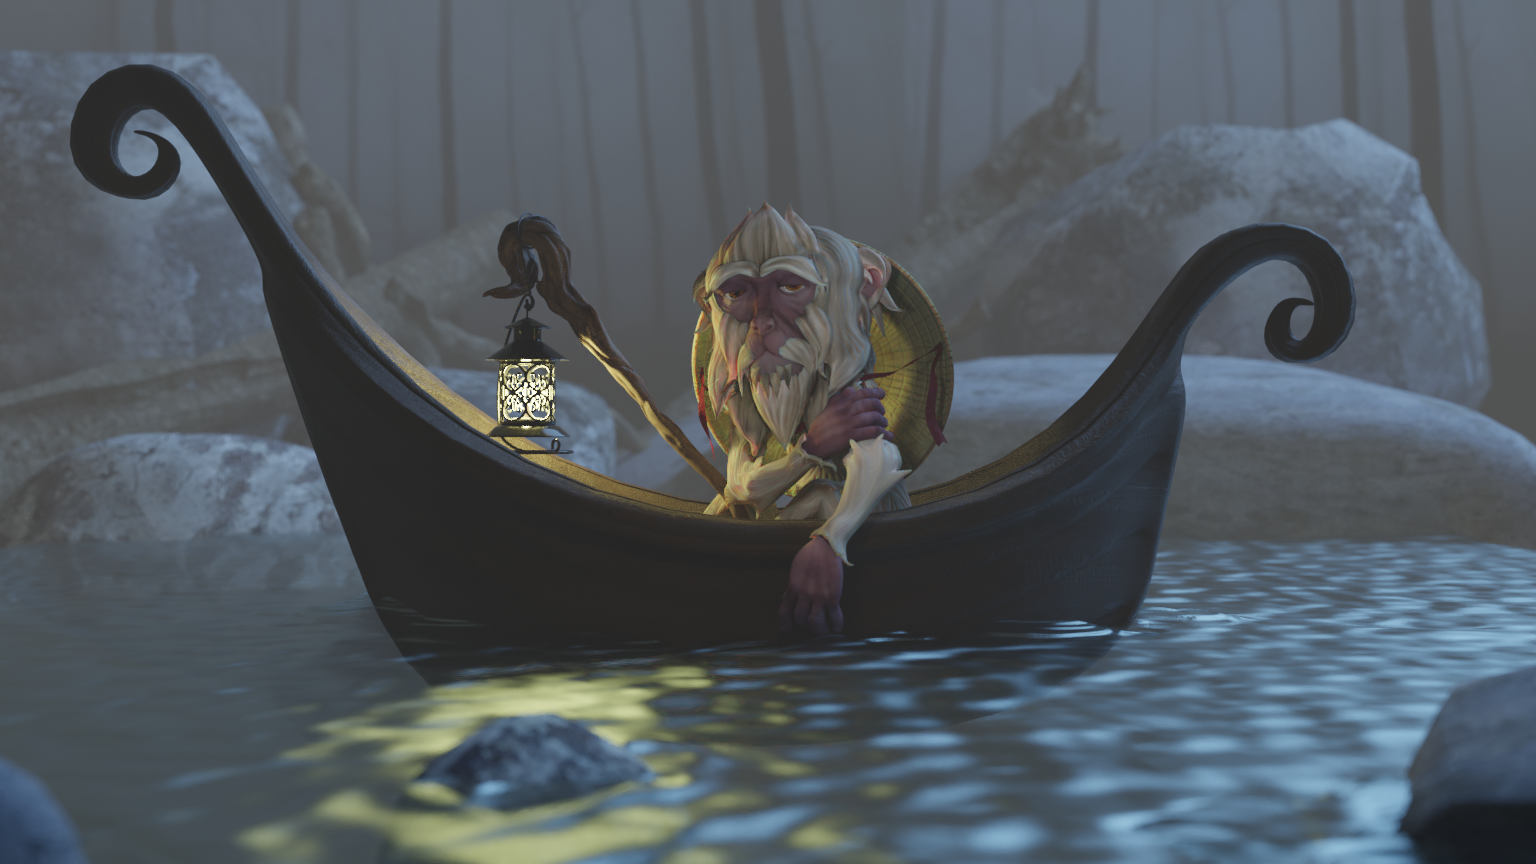
Final Render
For the final render I adjusted the water’s waves because they didn’t look like natural water. So I scaled the distance in between the waves and made the shader a little bit more clear and glossy. I also adjusted the inclination of the walking stick to change the way the light of the lamp touched the boat and to throw some light on the monkey’s face. Finally, I changed the direction of the eyes on the monkey so that he looked tired and gave the feeling of meditating on his long journey.

I felt satisfied that I had created a character that I really liked.
Usually when I work a scene, I make it in the shortest possible time, which means that I do not include enough detail. I felt that I was not improving as a 3D artist.
This is the first work that I have done without feeling pressured to finish it quickly. I did it for me, I wanted it to be exactly as I had it in my head, I took my time, I was honest with each self-criticism and I let it become one of my favorite pieces.
Gaby.
About the Author
 Gabriela Fuentes, 3D artist
2 Comments
That's amazing. Thanks for your post!
Wonderful, you are amazing!!!