Tutorial: Creating Fake Anime water Blender 2.8
ChrisKearford writes:
Hey, Thanks for reading.
I couldn`t find a tutorial for creating Fake water in an Anime Aesthetic so I decided to make one from my testing.
Due to the toon shaded nature of the brief, if your using Eevee like me, you can put the render samples down to 1 on most of the layers and leave most of the other options off.
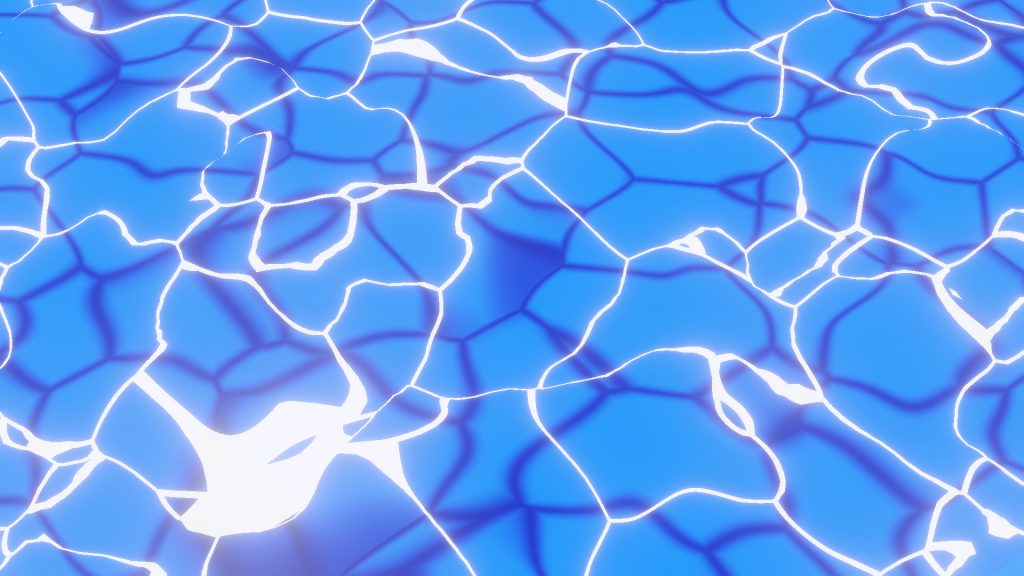
Water Type 1

This one is really easy, and has a real strong anime aesthetic. It`s just 2 x simple 4 vertex plane one for the bottom, and another for the white highlights on top to represent the water. Each with a simple material.

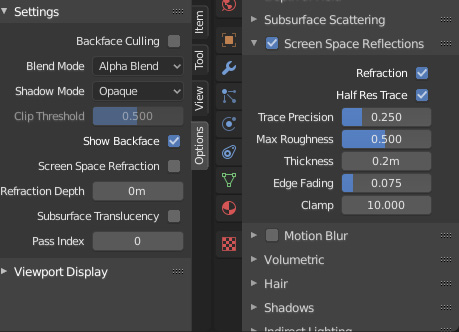
For the water material to work youll need to change its properties to Alpha Blend and enable refraction in Screen space reflections.
You should only need one scene. If your only creating a single image, your done.
But if you want to animate it, you`d be expecting the highlights and shadows to move, this is really simple, you just need to add a driver to either the Y or Z axis of each of the materials mapping node.

The driver to add is #Frame*0.001, you can alter the number you multiplied the frame by in order to slow or speed the movement to your liking.
Water type 2
If you want the same effect as above but with a wave effect on the water, this is really easy to achieve. Subdivide the plane 10 or so times, then add a displacement modifier

..and use a basic cloud texture as the influence, scale the strength back to about 0.1 to 0.2 depending upon your needs. If you want just a single image, you’re done.
But if you want an animation you want the waves to move. To do this, add an empty to the scene, the go back to the displace modifier

and tell it to use the empties location for its mapping. And then anime the empty for the amount of frames in the scene.
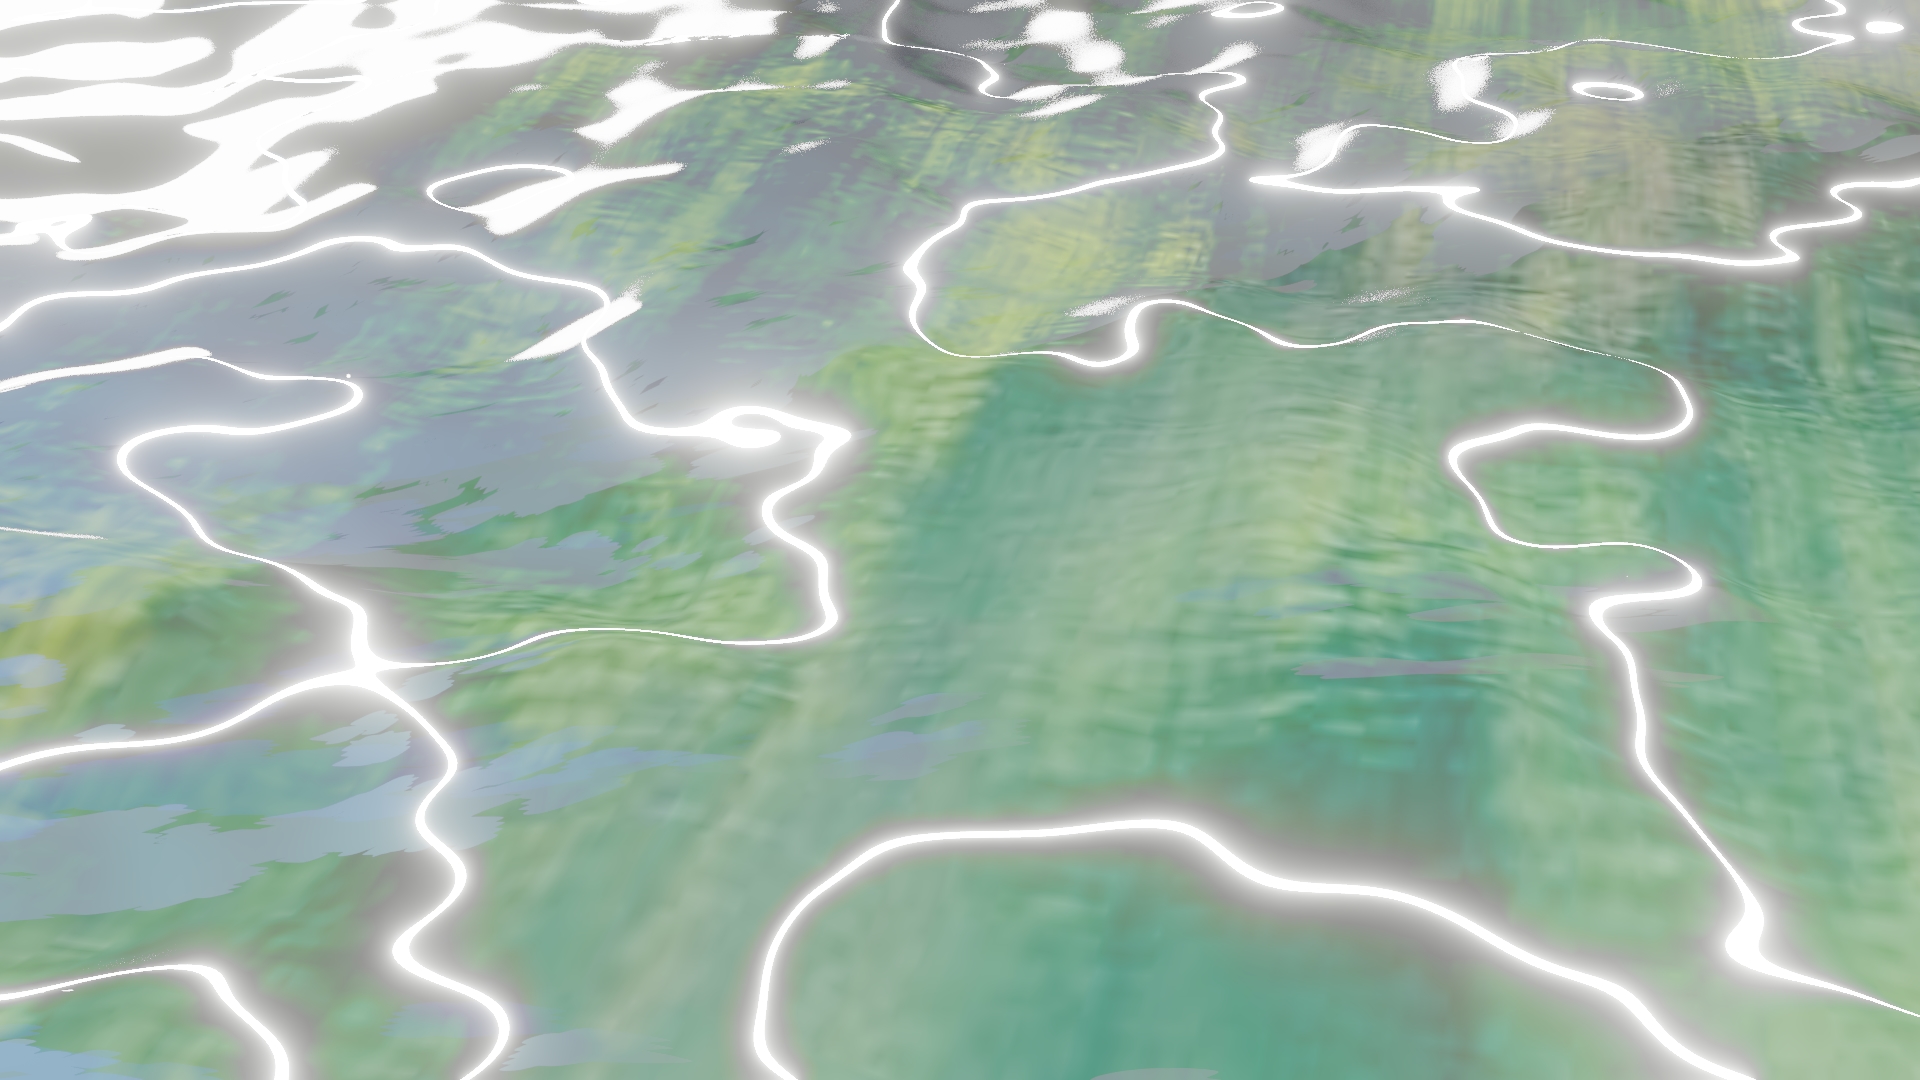
Water Type 3

This water effect has a bit more of a anime romance feel. Its basically the same as type 3, but with only 1 plane and 1 material, as due to the reflection on the water you cant see the bottom. The reflection isn`t a real reflection, just a material on the plane.

Water Type 4

This is the most complicated in terms of layering, but I think its also the best looking. Let`s ignore the badly animated fish, rain, Lilies and bush and just focus on the water for this tutorial.
I`ll start with the composition, then detail each scene.
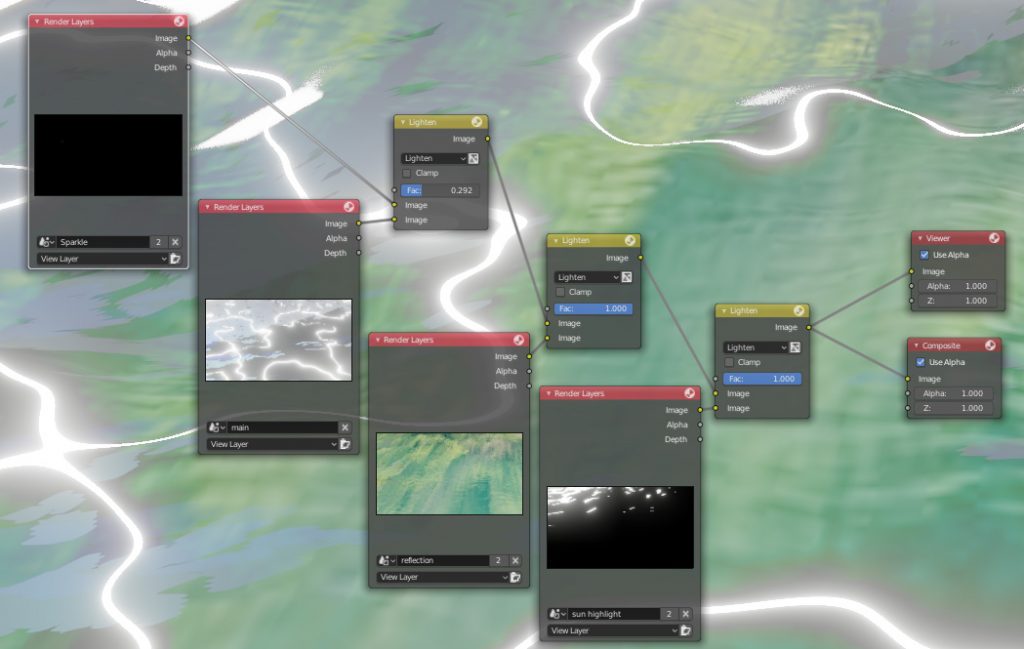
So there are 4 scenes, The main scene where most things will happen, then a highlight scene, a sparkle scene, and finally a reflection scene.
1 Main scene
This scene starts with a subdivided plane with a displacement texture linked to an animated empty, same as type 3, but the material is different. Use this material

This material, instead of using the voronoi texture to generate the lines, it created a narrow band or white at a fixed point on the z axis, and any part of the mesh that intersects that narrow band receives the white color.
2 Reflection Scene
Start with a copy of the last scene, then change the material of the water to

Its better to keep the sun in the same position as in the last scene, so if you decide to change it here then also change it on the previous scene.
3 Highlights scene
Start with a copy of the last scene same as above, then change the material of the water to

Mind the position of the sun again.
4 Sparkles scene.
Just set up a plane, get a picture of a star, put it on the plane as a material

Add another plane and set that plane to emit as many sparkles as you want throughout the length of the scene. point the camera directly at the particle emitting plane. You can make the sparkles grow by using a radial texture.

So when the scenes are composited together as shown above, your all done!
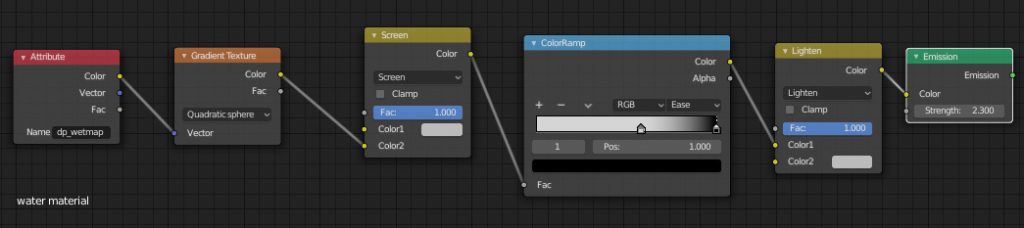
If you want anything to interact with the water, like an obstacle, you`ll need to use vertex paint. Set the water as a canvas, with waves. And whatever you want to interact with it as the brush. You`ll need to reference the paint in the material if you want to be able to see anything, So use the Attributes node, and enter the wetmap from the dynamic paint settings as the input.
And thats about it for Fake anime water. If anyone has any questions or a better way to do this please share as I`m still learning.
Thanks!


Thank’s you so much !