
Behind the Scenes: Thai Island Life
My Background
At 53 years old I am probably old enough to be most 3D artists’ father or even grandfather; in fact, in some parts of this community I am sometimes known as ‘Uncle Steve’, which I have to say I quite like!. Having said that, I don’t feel 53—unless I climb a hill with a heavy bag…then I do.
I grew up in Scotland and my interest in art developed at an early age, driven by my vivid imagination and a constant desire to ‘escape’ from the sometimes harsh realities of real life. To be honest, I would have to say that I never really found my ‘thing’, my own style, in those early years, which I found very frustrating. As a consequence I became a commercial artist to earn a living, working over the years in many different areas of the business from graphic design, to illustration, and exhibition design and installation, as a visualiser for an advertising agency and even spent a spell drawing comic strips for the UK’s Dandy comic and a football magazine.
At 35 I decided I had had enough of the rat race—there had to be more to life than this! So I bought myself a round-the-world ticket (which I don’t believe they do anymore), which eventually led me to Thailand where I felt right at home almost immediately and before long I had made the decision to relocate here, to Koh Samui, a small island in the south of the country known for its warm weather, paradise beaches and coconuts—quite different from Scotland! Here I set up home and ran a fairly successful graphic design company catering mainly to the real estate development market, which turned out to be quite lucrative. But I still carried with me this nagging feeling that I was still not fulfilling my true creative potential.
I had always enjoyed looking at 3D artists’ work, a subject which fascinated me to some degree, but one which I knew nothing about. Not to mention half these guys (and girls) were in their early 20’s and I felt a bit of a dinosaur and past my sell-by date.Then on Christmas Day 2015 I read an article about a free open source 3D software called Blender. This was not long after I had turned 50 and that fact alone made me think “Well, I’m old now anyway, I have nothing to lose.” So Christmas Day afternoon, whilst my wife and son watched movies and ate chocolates, I decided to download this thing called Blender and have a look. And that was the start of it, I was totally hooked. In my first month of learning I spent over 200 hours of my spare time, sometimes pulling all-nighters and many weekends. I did most of my learning on YouTube and I found the experience to be highly rewarding every step of the way. I, like many others, owe a huge debt of gratitude to these people for sharing their skills and showing me how it is done, not to mention all the wonderful people involved in giving Blender to the world—thank you all!
I had always liked the low-poly style, as I like artistic interpretation more than photo-realism, and after a year or so of learning Blender I decided to give it a go: no pressure, just a small piece for myself where I could create what I wanted without any external influence or opinion. I like quick results so I decided to keep it simple and try the internal renderer in 2.79 and just go for flat shaded colours and let the environment do the work—no texture maps, no bump maps, nothing overly technical. This is what I came up with after 2 days work:
I was very happy with the result, I was only trying to please myself and I had at least managed that! This was the first time I was able to get the idea that existed only in my head onto paper (or in this case a screen), which was a huge result for me, personally. After a couple of days of plucking up the courage, I decided I was going to post this onto some Blender forums and websites, so I took the plunge and did just that. Then I hid behind the sofa and waited for any response….It was less than a minute before my phone started beeping with notifications. With some trepidation I peered down at the comments and the likes and to my amazement, people—3D artists!—absolutely loved what I had done. Over 1000 likes in 24 hours and a huge thread of positive comments. I was on cloud 9! There I was, a 50+ year old guy with a year’s knowledge of a 3D program, getting fantastic feedback from something which took me only two days to complete. I would be lying if I didn’t say at that time there was a small part of me that felt like an imposter, someone who had inadvertently sneaked in the back door.
From that day forward I have not looked back. I now feel I have finally found my creative calling and discovered a medium that allows me to express my creativity as I like: the mighty Blender!
So let that be a lesson to anyone who feels they are either too old, too tired, not good enough, or whatever, to start out with 3D (or anything else). It’s never too late!
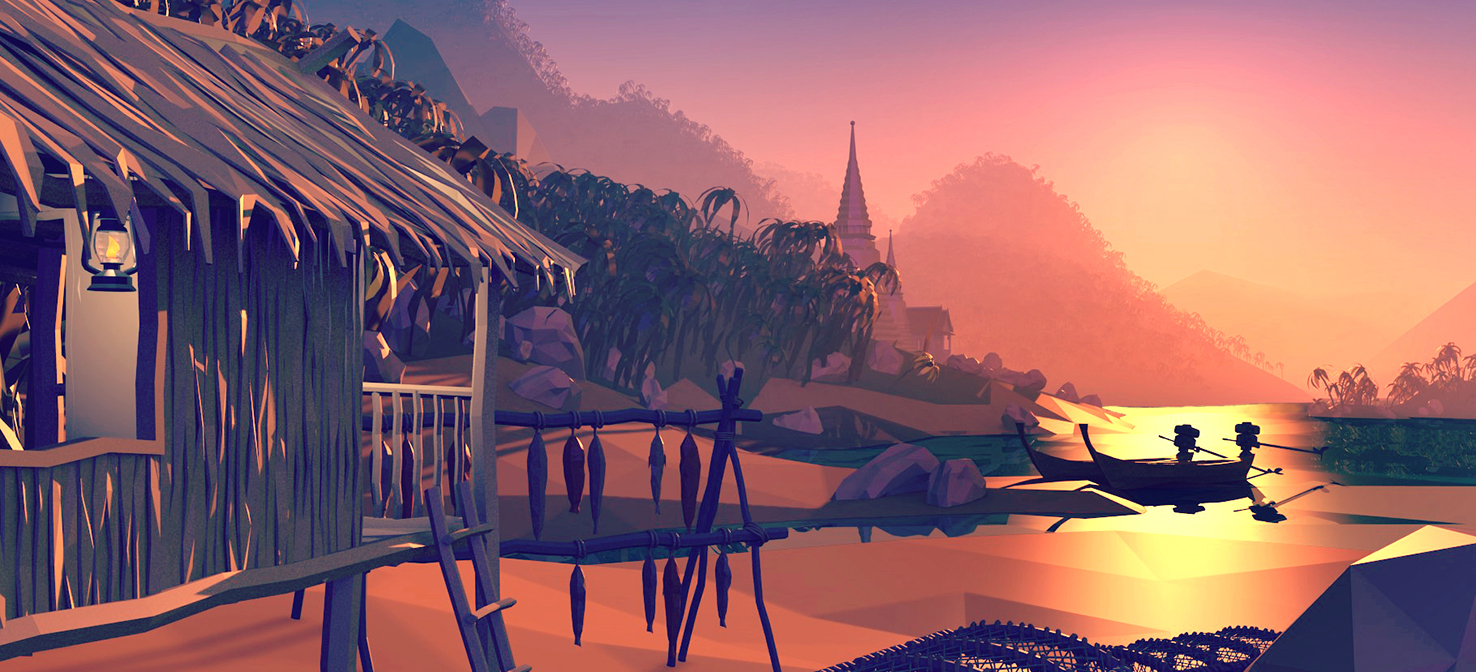
‘Thai Island Life’
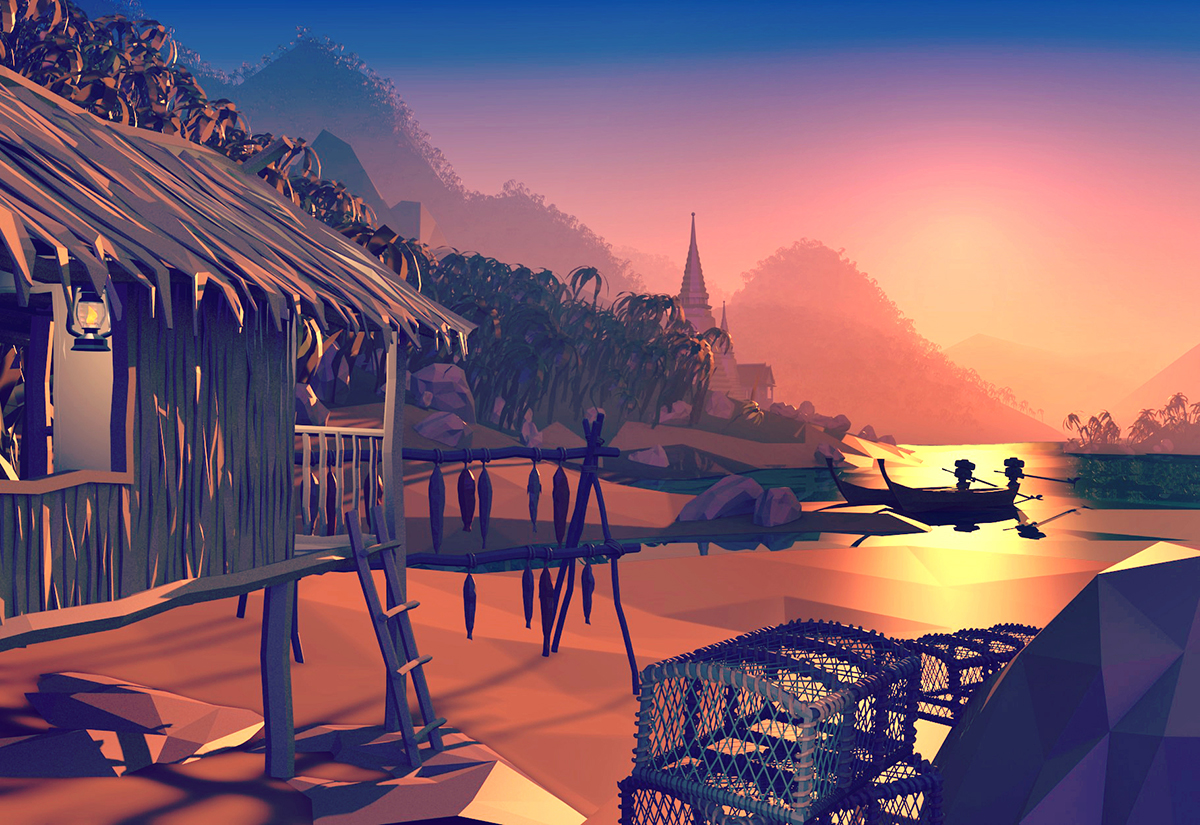
This piece was obviously inspired by the place I live, though I should point out that this is not my house. I do not live in a wooden hut on the beach, though that would be fine too. However, scenes similar to this can be found within walking distance of my home. The natural light in Thailand, especially early evenings and mornings I find quite magical and I tried to recreate that lazy, balmy pink/orange glow that makes you want to sit down and enjoy a nice glass of wine. I think I captured that with this artwork.
Software Used
Blender and Photoshop.
I used Blender 2.79b and the internal renderer for all the modelling, texturing, and rendering. I then did some post-processing work with Photoshop, some colour adjustments with RGB curves to add some colour into the shadow areas, and some overlays to enhance the sun’s colour and glow.
Where did I Start?
I will always begin my scenes with the most prominent object in the scene, in this case it was the grass hut.
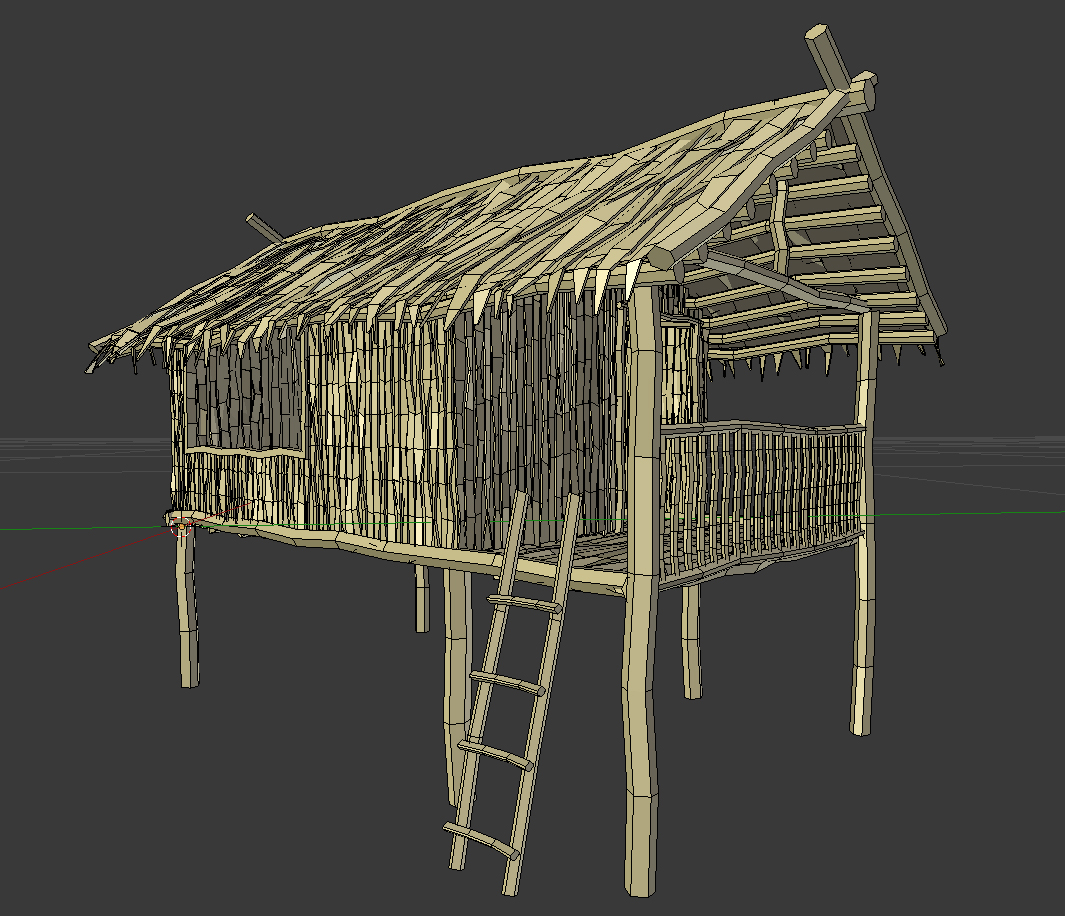
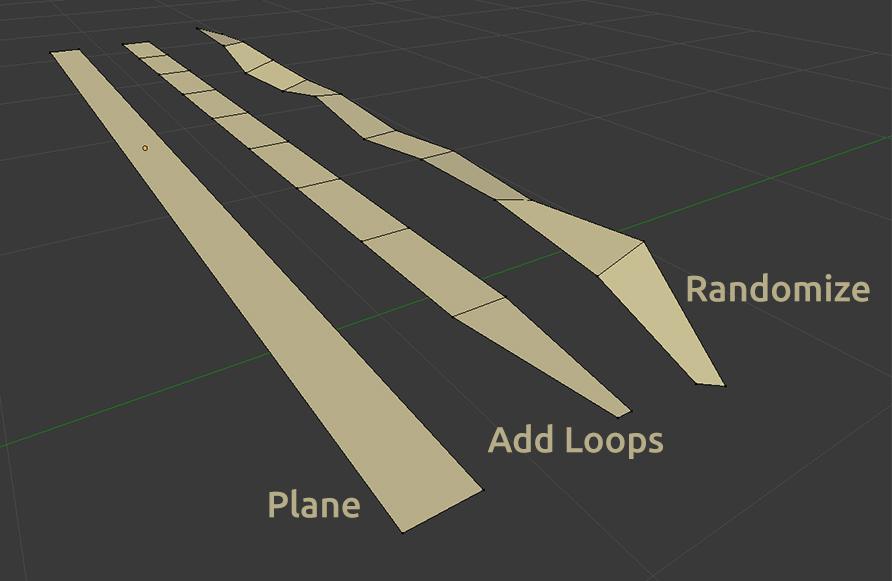
I started by blocking the model out using cubes and hexagonal cylinders. Even though I am not going for photo-realism I still like to achieve a ‘natural’ look to the models and in nature most things are not perfectly square, straight lines are very rare. So after adding some edge loops to each piece I used the randomize feature, set to a very low value, to slightly distort the model. This generally works very well though often requires going back and manually adjusting some parts of it to suit.
After that it was time to cover it in ‘grass’. For this I used a similar procedure. I made some long thin planes that were of a length I required, added some loop cuts and then randomized. This required a bit more manual work afterwards to get the right look, for example the grass flowing over the edge of the roof. After that I used a solidify modifier to give the blades some thickness.
Blocking out the Terrain
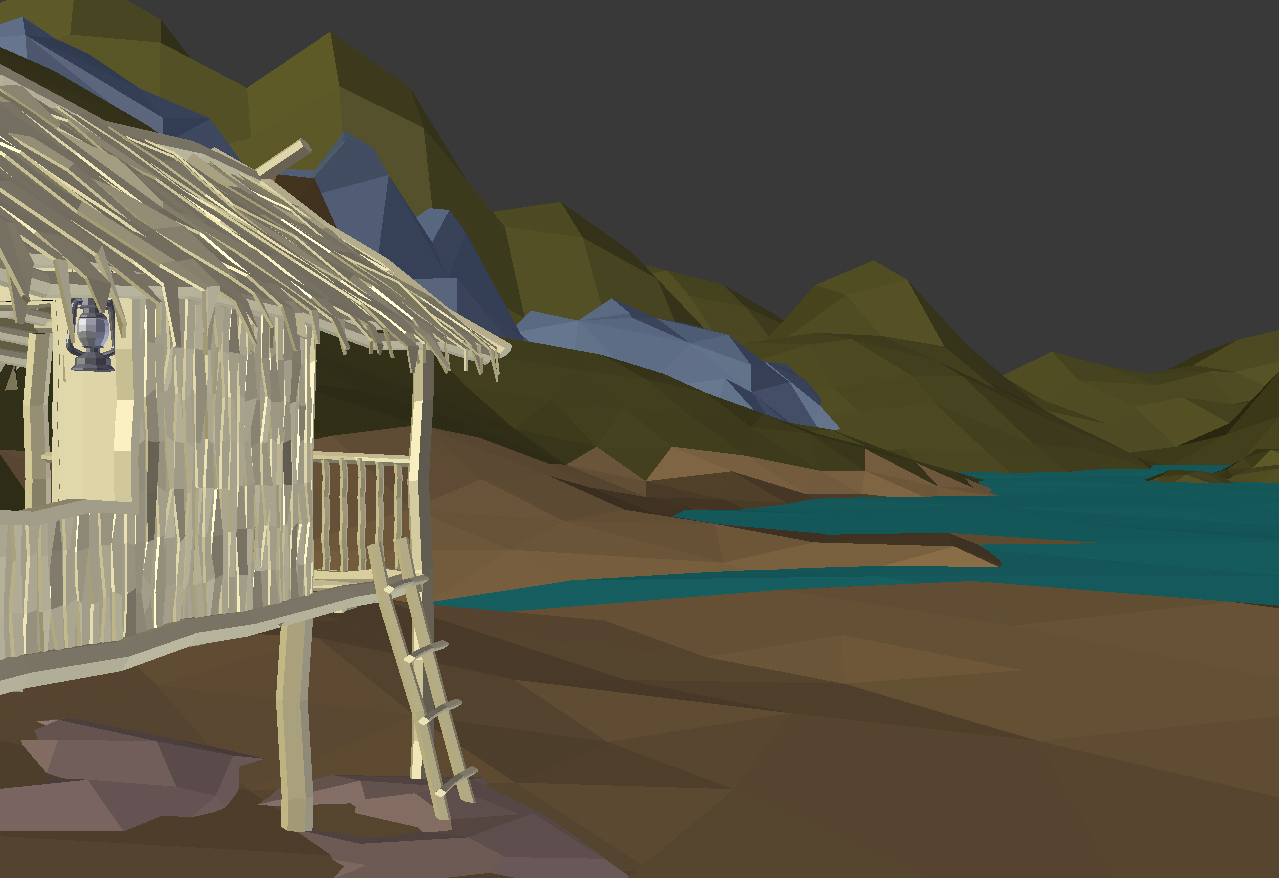
It’s important for me to quickly build the general layout of the terrain and not get too bogged down in details at this point. Having worked in traditional oils for awhile I know the importance of quickly covering up the blank canvas—just get something down!. So after establishing a camera position with regards to the hut I added the hill objects and sea and added some basic flat colour shading to all the objects.
I built the terrain using a similar procedure to the hut, start with a plane, subdivide it and then use proportional editing, this time with various settings to ‘pull up’ the hills and mountains. Additionally I will often use vertex slides to distort and ‘hide’ the square grid made by the faces, again thinking about the non-uniformity of nature.
Having such a simple scene at this stage allows you to focus more on the composition as opposed to being distracted by details. I had a vision of some fishing boats in the water and so my other objects all colluded to draw the eye to that area. I always try to incorporate some water into my landscapes if I can, as it adds another dynamic element and offers the opportunity for interesting object and light reflections.
Adding the Environment
It’s at this point that I started defining the environment. I wanted to get a feel for the mood of the image and the environment and lighting is everything- if I cannot capture a mood I am not content, so this part is important!
Again I used the standard internal renderer’s world settings only and tweaked them to get the following:
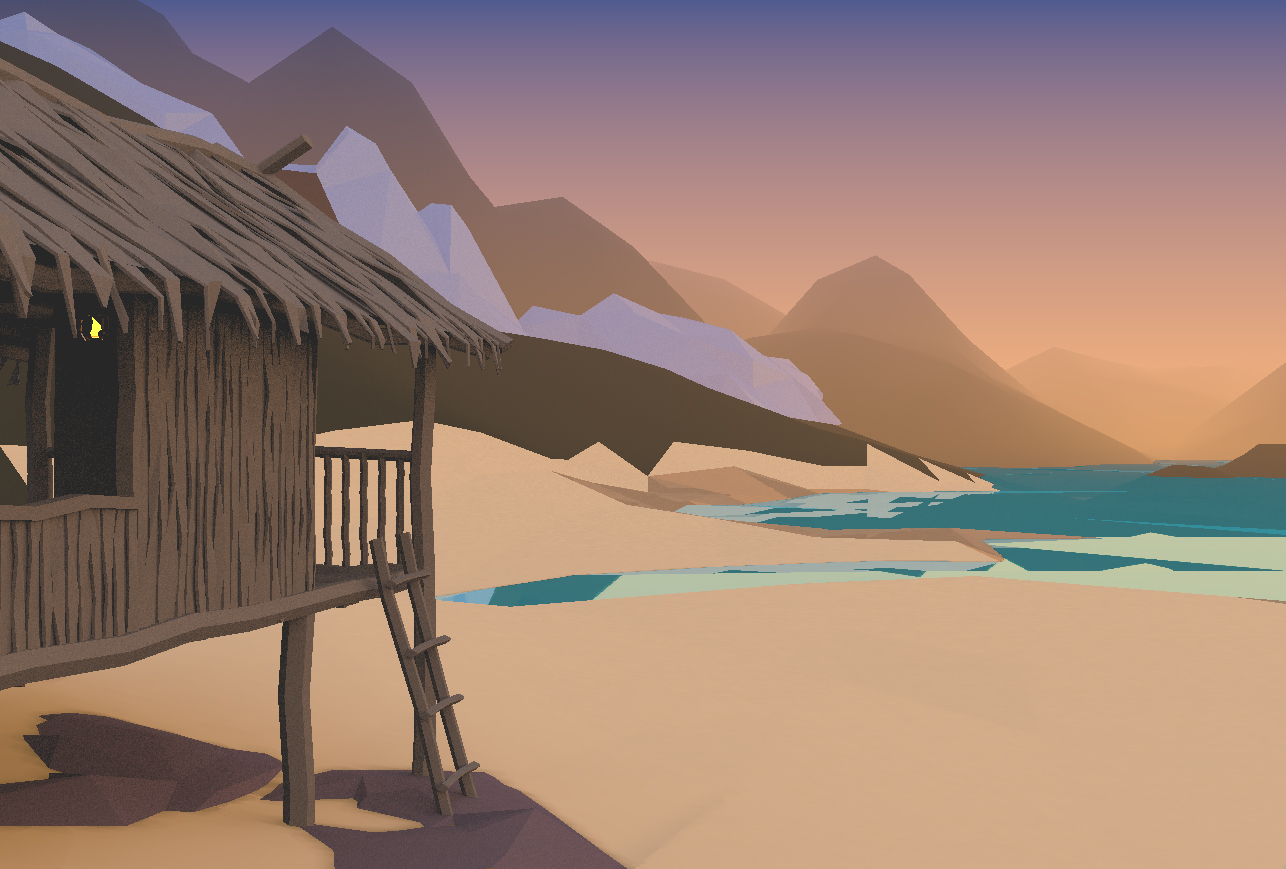
I always use the mist setting in landscapes as it is great for giving the illusion of distance. It uses a z distance to fade objects further away as opposed to a volumetric object, so the rendering times are still really fast. I also use the Environment lighting settings to spill those sky colours into the scene along with a small amount of Ambient Occlusion.
With that done it was now time for the Sun, the one object in the scene that can bring the whole thing alive. There was a natural place for that on the lower right side of the sky (I wanted that low light effect). I also wanted the sunlight to be reflecting on the water so the sun would need to be pointing in the general direction of the camera. I chose a pinky-orange colour for the sun to give me that warm, wine drinking feeling I mentioned earlier, in fact I’m feeling it now. Making sure I have both ‘Sky’ and ‘Atmosphere’ checked in the sun lamp settings I tried a render, and voila!:
Well actually it was a bit more time consuming than that. I spent a couple of hours sliding things around in the settings both in the World and Sun properties panels to get the result I wanted but it gives you the general idea. A preview render for this kind of model is quick; you can see any changes almost right away, allowing a great deal of fine tuning without waiting times and frustration.
Adding in the Details
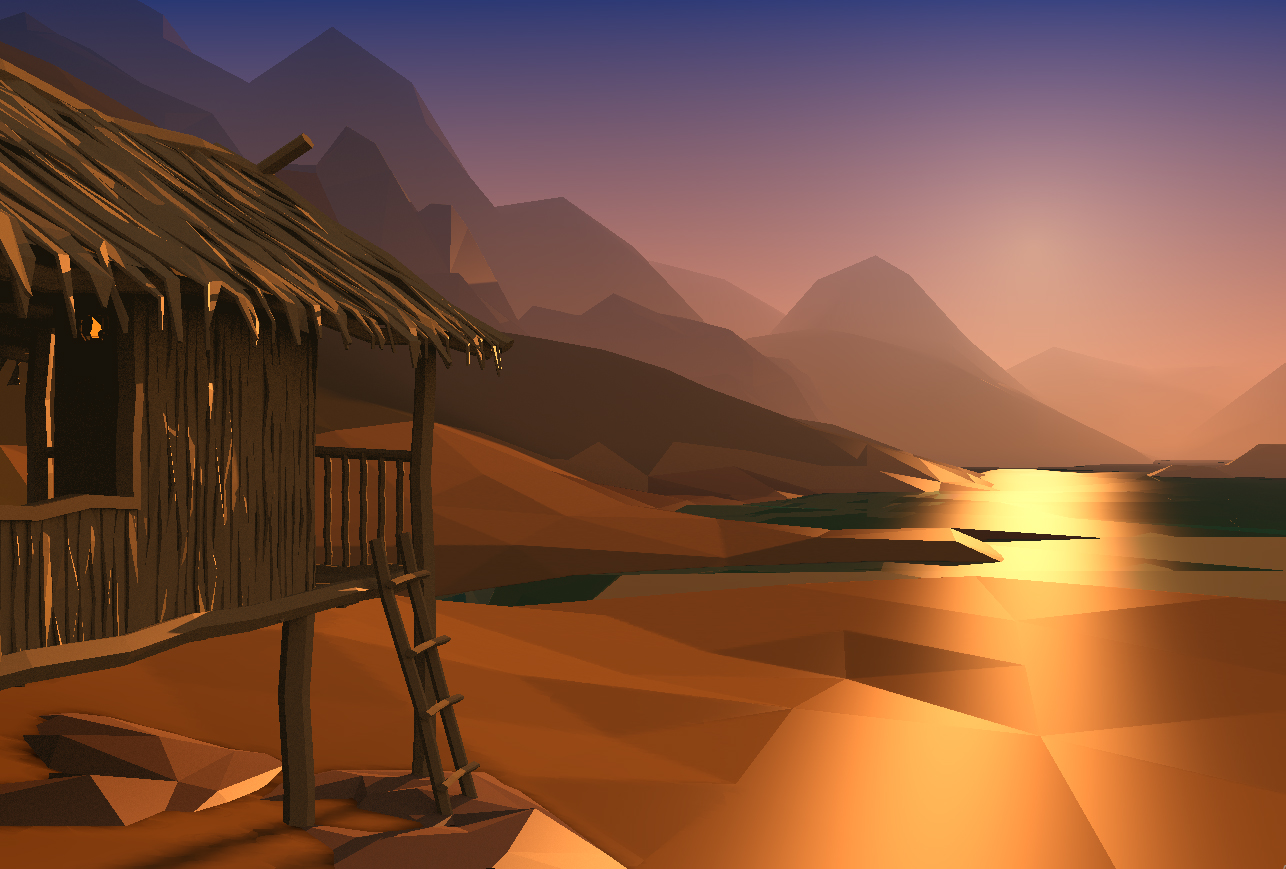
So now it was simply a question of adding in the boats and the remaining details- the temple buildings, the fish rack and the lobster pots—all simple low poly models—no rocket science there.
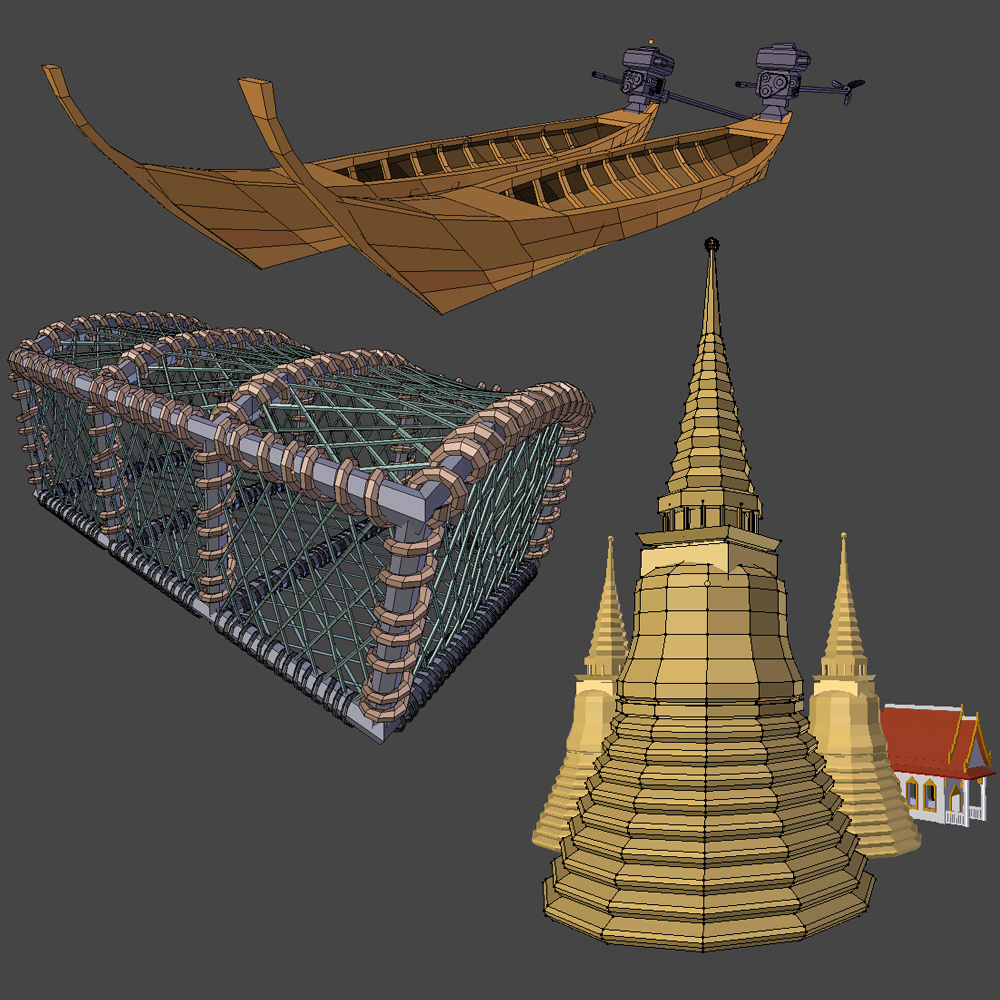
Finally I built some low-poly coconut trees and rocks and applied particle systems to parts of the landscape using weight painting.
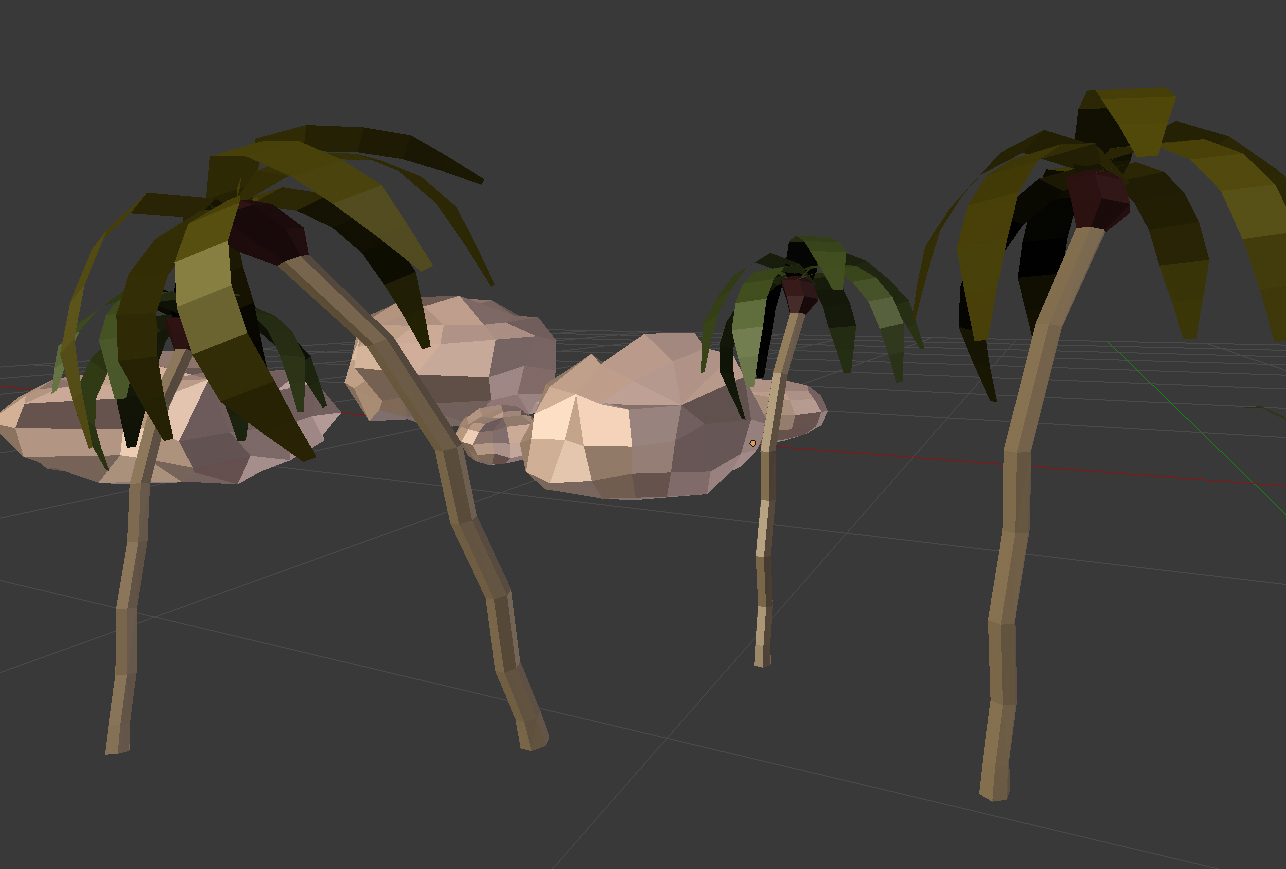
I added the large rock in the lower right corner of the piece to help draw the eye in to right of centre, and balance the ‘weight’ of the hut on the left side.
I like to set up the environment early on as it makes this part of the process a lot of fun. Sometimes I will ‘cheat’ the system by using higher reflectivity on some objects that would definitely not be highly reflective in order to give their component faces more contrast and hence show better form in the environment. Sometimes I will even use a second sun (shadows off) with a complementary colour coming in from a different angle. This can create some highly dynamic lighting effects and colours
All that remained then was some post processing work in Photoshop. The main thing I wanted to enhance was the sun’s glow, as in the finished render it was not spectacular enough for me. I could probably have used Blender for this but I used Photoshop instead as it was much easier and faster to achieve. Basically I built up extra layers of blurred circles placed over the sun, coloured and then blended with various blend modes: overlay; soft light etc. With some additional masking this allowed me to quickly achieve the effect I was after.
All it required after that was a simple levels adjustment and an RGB curves layer tweaked to give me some complementary colours in the shadow areas.
Anyway, I hope that gives you some insight into my thinking when I approach these landscapes because it is more about that than it is about the technical aspects of Blender that I am utilising, which are essentially all quite simple.
About the Author
 Steve Earl, All-round Artist & Blender addict.


LOVE THIS!!! Fantastic!!
(I’m not far behind you in age either . . .)
Thank you! i didn’t think for one minute I was the only senior citizen around here. Bingo Wednesday night?
LOL!! Maybe bingo . . . if I can still see my cards/sheets. :)
You sure know how to use the right palette of colors! Beautiful.
Thank you!
EXCELENTE!!!!, tengo 48 años de edad y eres inspiración para mi!!!GRACIAS POR COMPARTIR!!!!!!!por favor , continúa hacíendolo!!!!
Thank you. I am glad I have inspired you, that’s awesome.