Behind the Scenes: Mars Rxver
Hey, my name is Aleksandr Kilimnik and I am working as a freelance Concept Artist in the Entertainment Industry. I started using Blender just over a year ago and have been blown away by both the software and the community behind it. It has become my main 3D program and I am excited to show you guys how I use it, so let’s get started!
Usually when I create a personal project, I have a few ideas bouncing around in my head and then I decide on the best way to execute my favorite idea and begin. In this case however, I started in the reverse order. I had no idea what to make, but I knew how I had to make it.
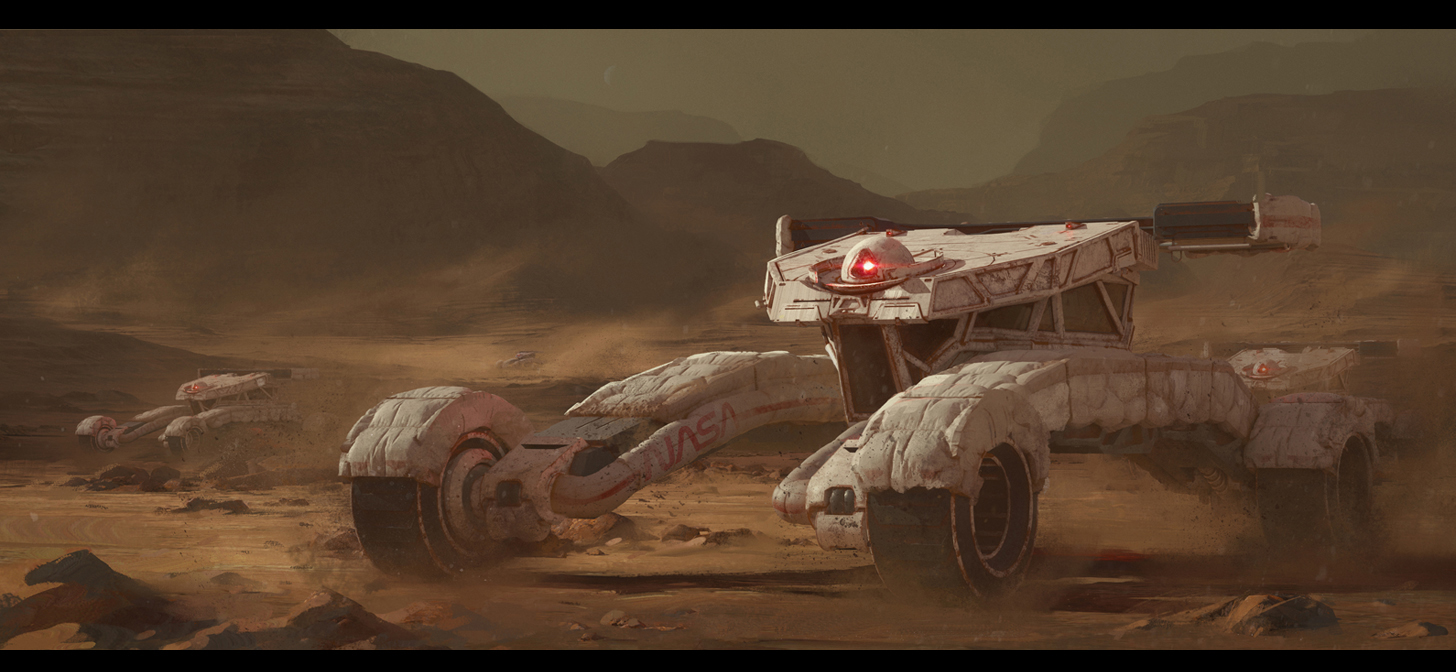
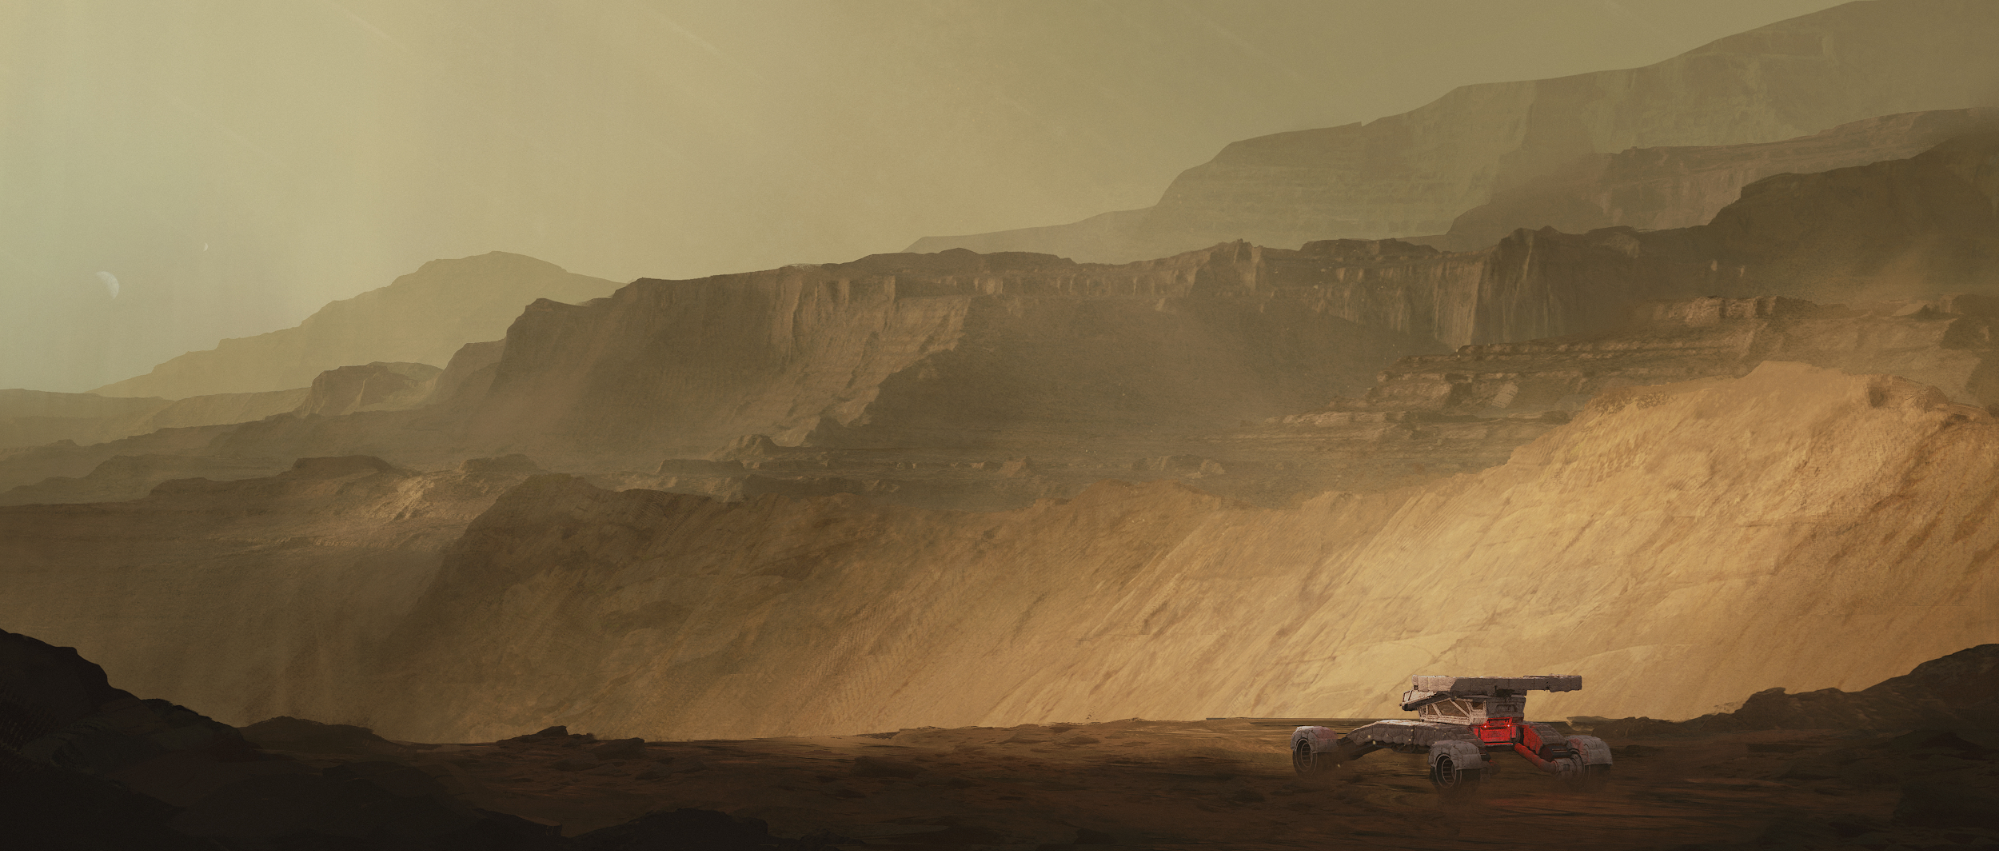
I knew that I was starting to develop a Blender Addon named quickDraw that would help me sketch with Grease Pencil and convert that sketch to geometry very quickly, I knew I had bought this program named World Creator and wanted to put it to the test, and I knew I had to put it all together in Blender! So working backwards, I decided that the perfect project for this task would be a Rover with soft cloth elements in a Martian-esque environment.
World Creator
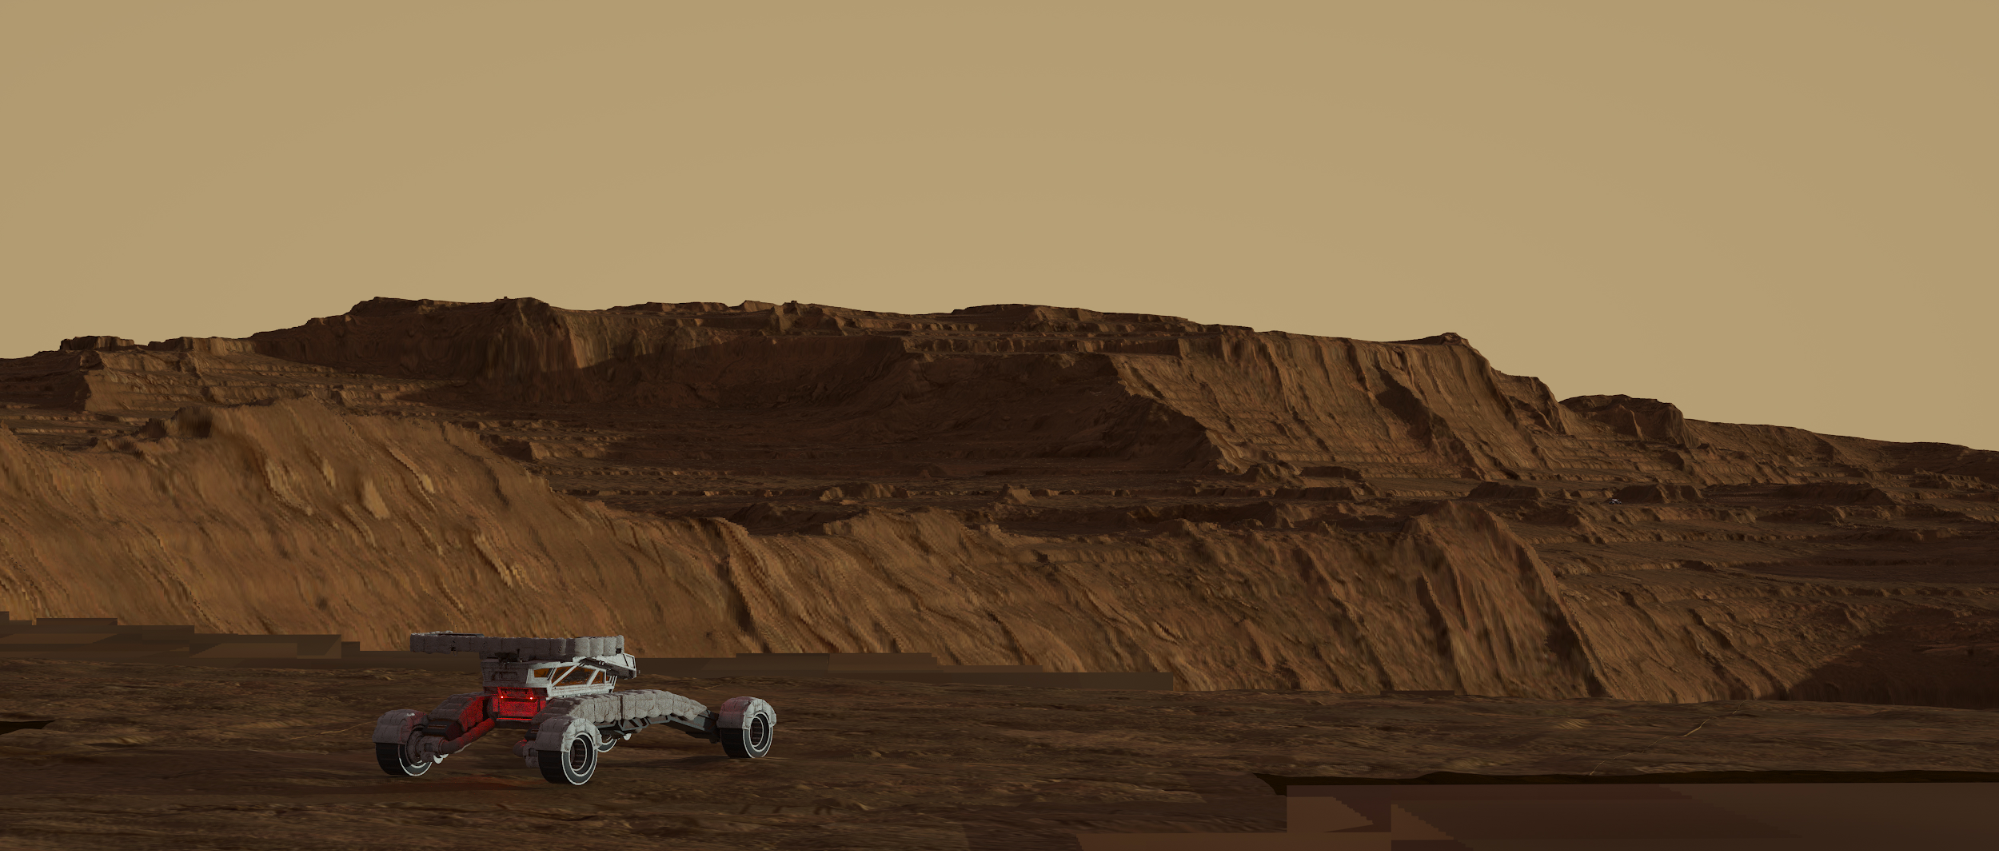
I made 2 very high res displacements using real Mars hi-res scan data and then re-shaped the environment with built-in filters to suit my purposes.
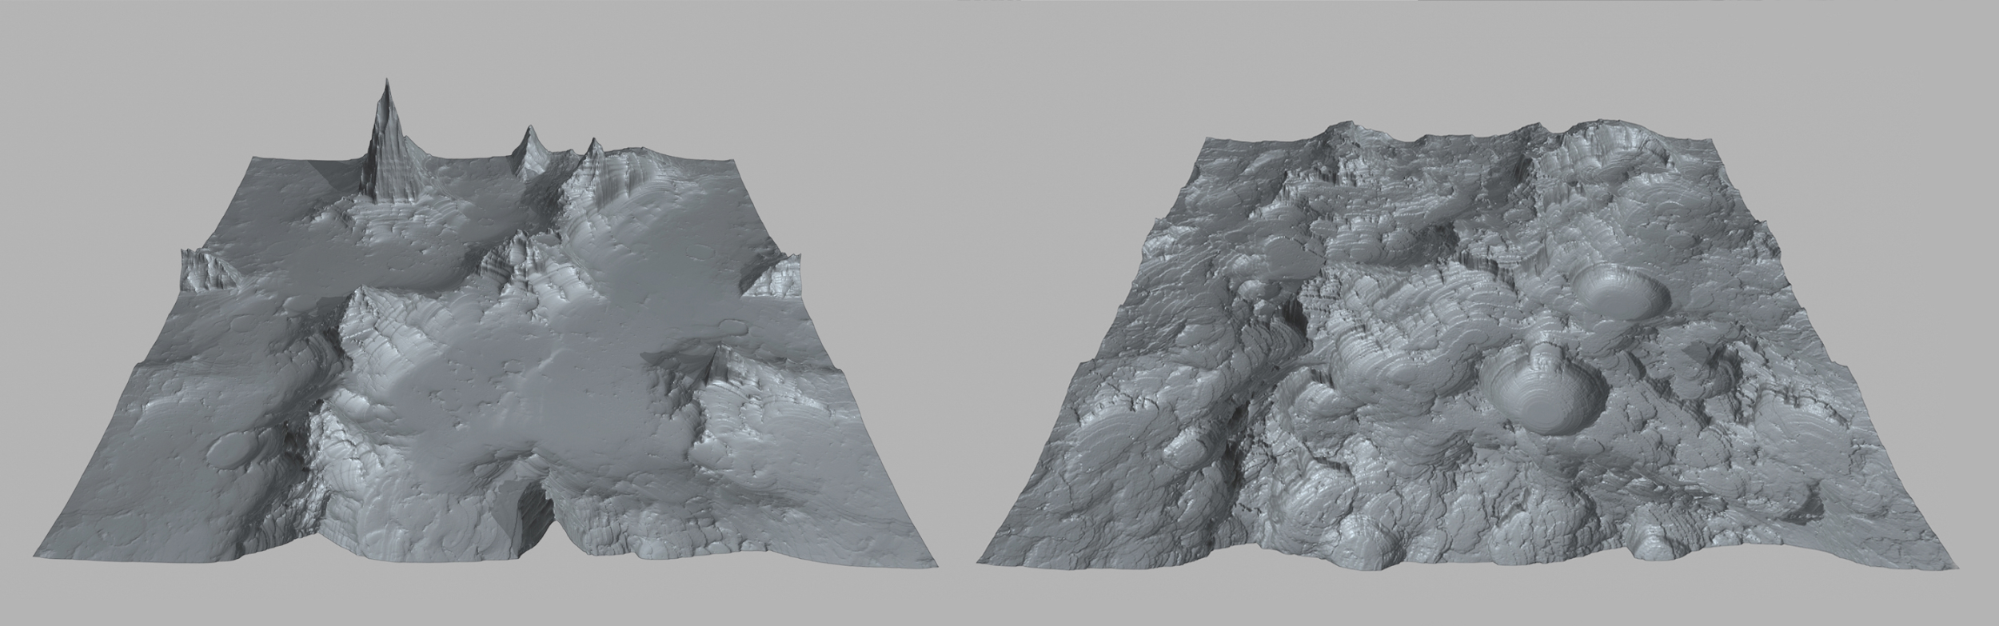
Here you can see 2 grids in Blender with the displacement maps applied, I like to preview things in Blender with a simple subdivision and displace modifier. Later I brought them into Octane and copied/moved them to create the full landscape. Limiting the amount of unique assets you use to just 2-3 helps with keeping everything unified; you can get plenty of variation just by scaling/flipping/moving things around.
Blender
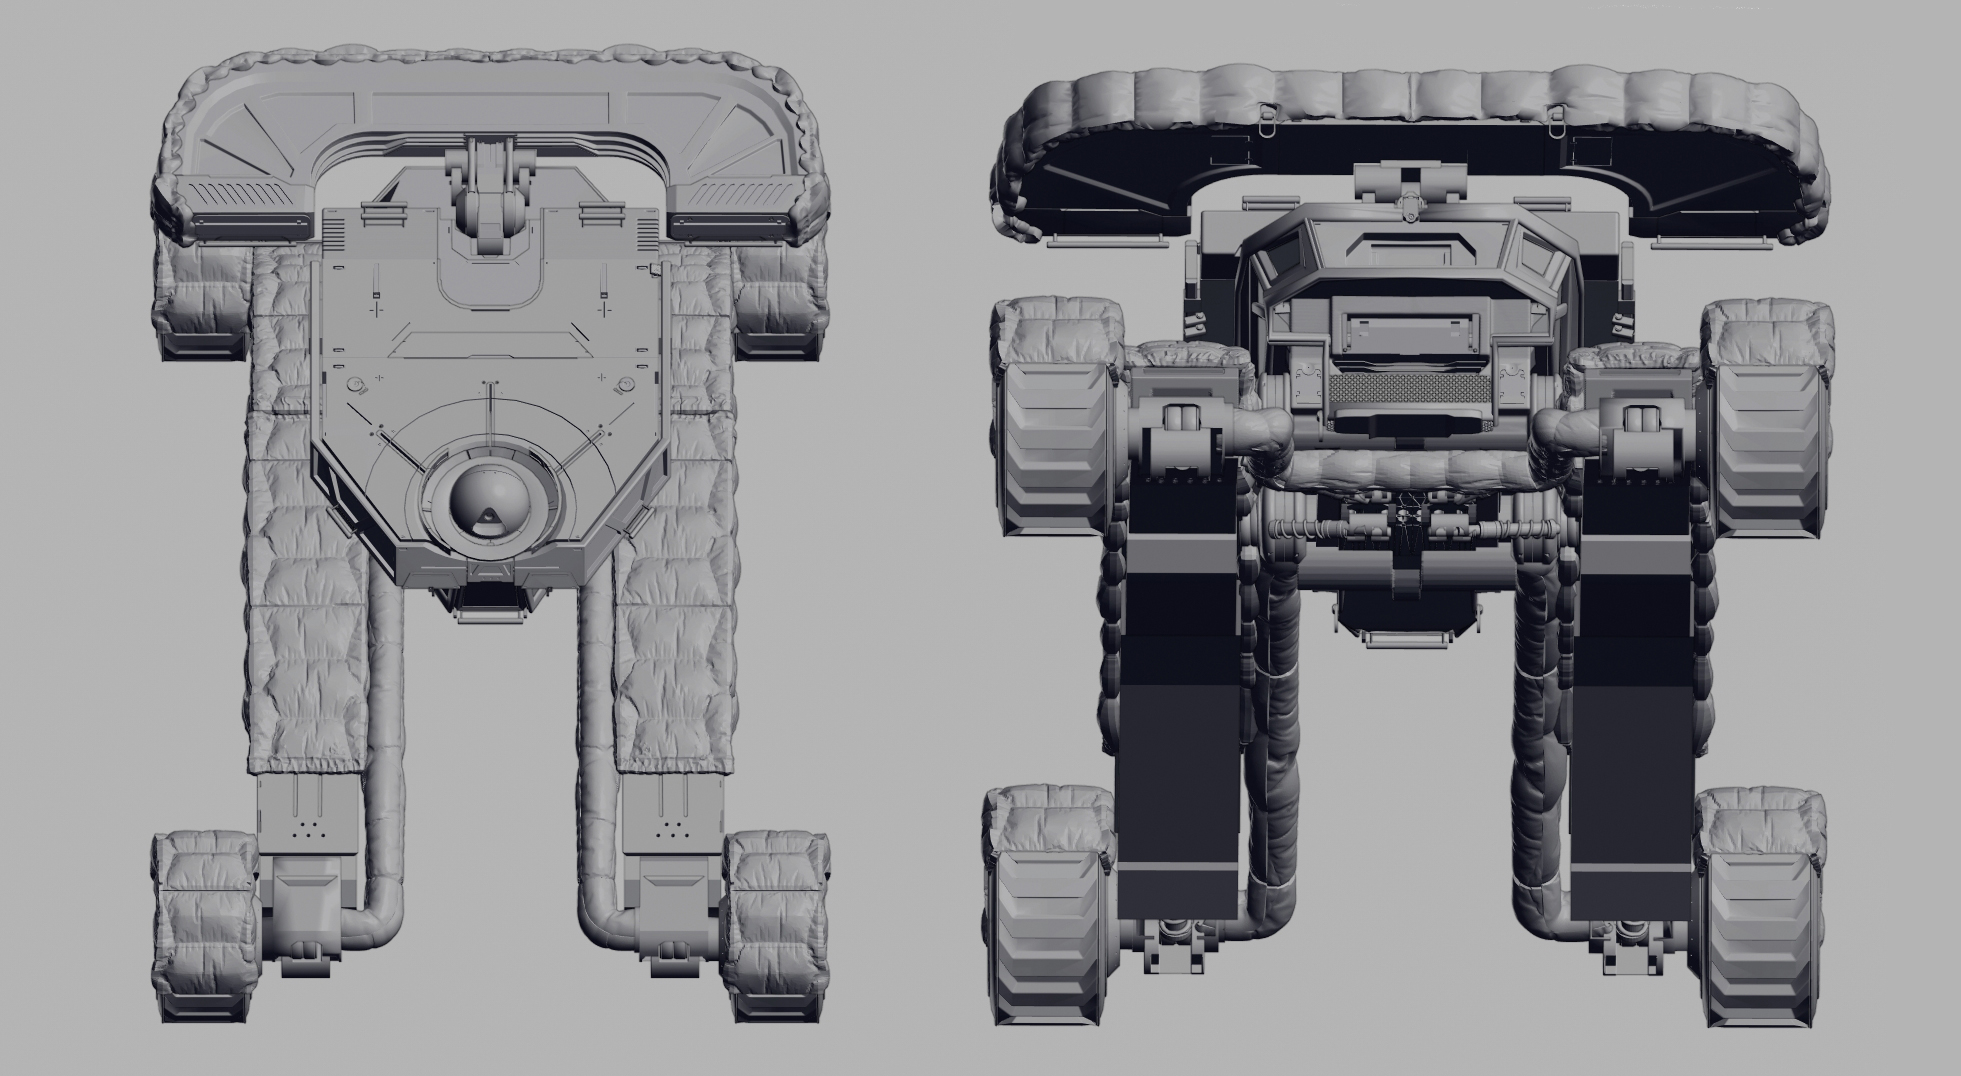
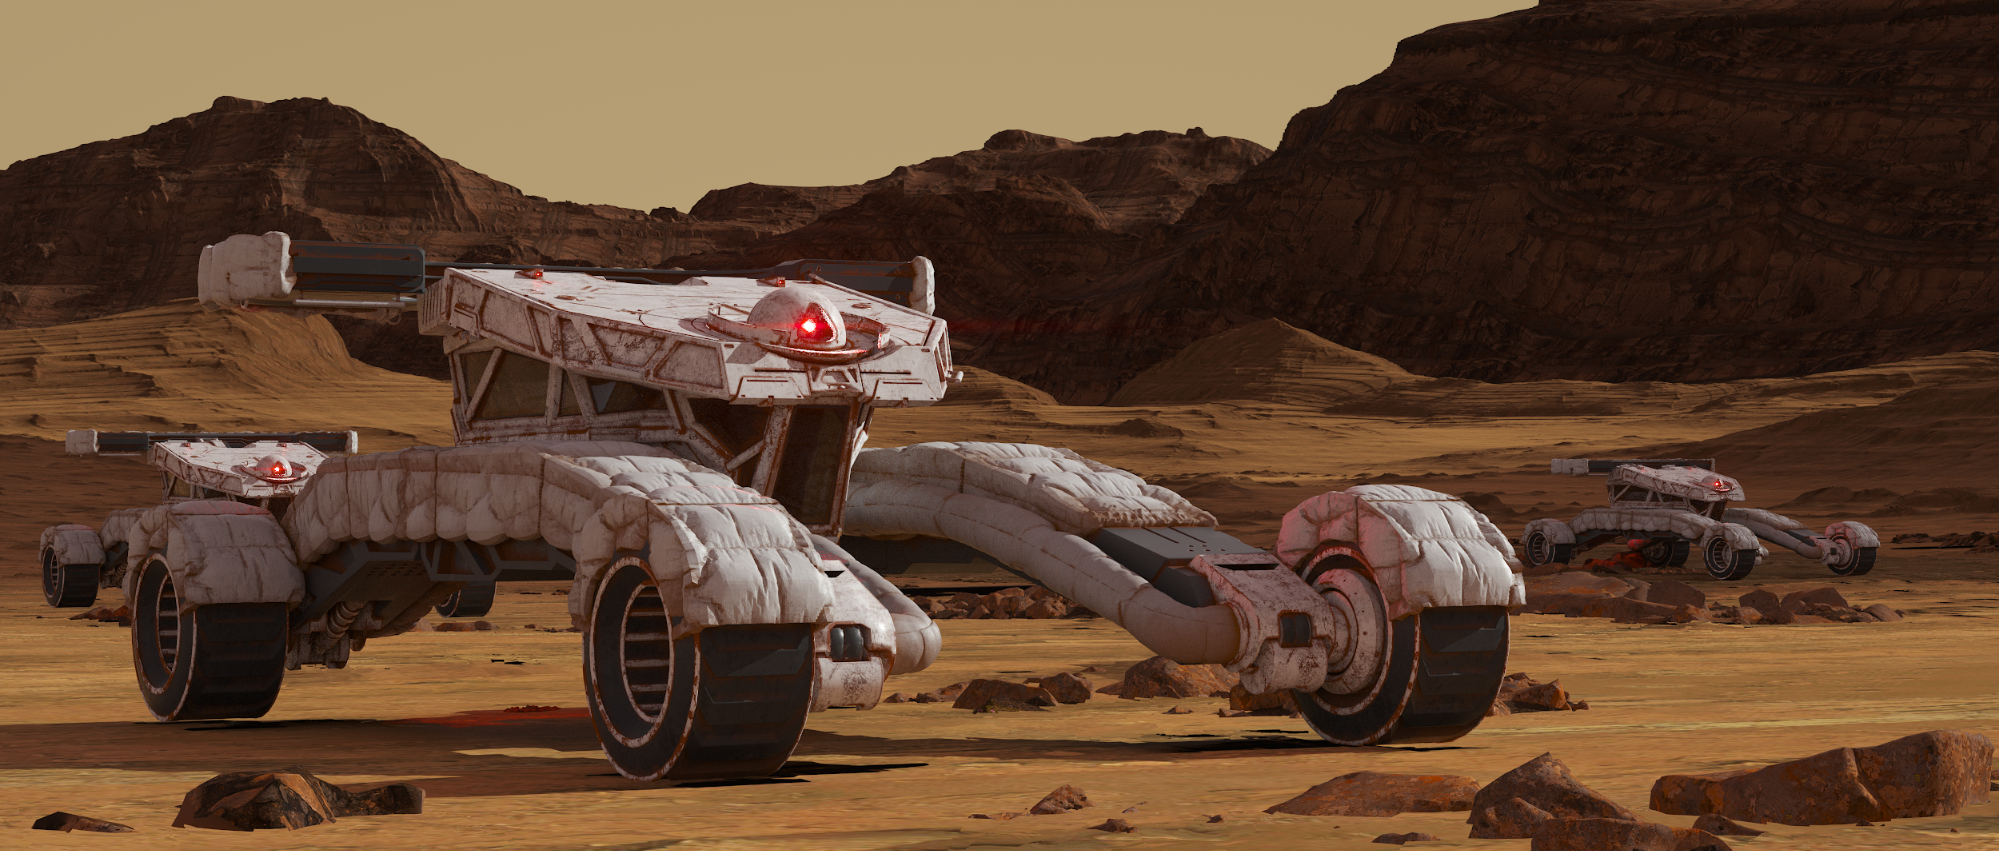
I began making the Rover by taking inspiration from this sketch by the amazing John Park and building a quick 3D model trying to capture the feel of his original design. I used EEVEE for initial design visualization; I find it really fast for creating nice looking turntables with simple materials.
https://www.instagram.com/p/BzHITB0hEqg/?utm_source=ig_web_button_share_sheet
I took what I learned from modeling that and continued to refine my addon quickDraw. I will briefly mention the addon here and there but please just check the link at the bottom if you want to know more about it specifically! Armed with this new sketching/modeling tool, I redesigned it, pushing it towards a more realistic Martian(film) aesthetic.

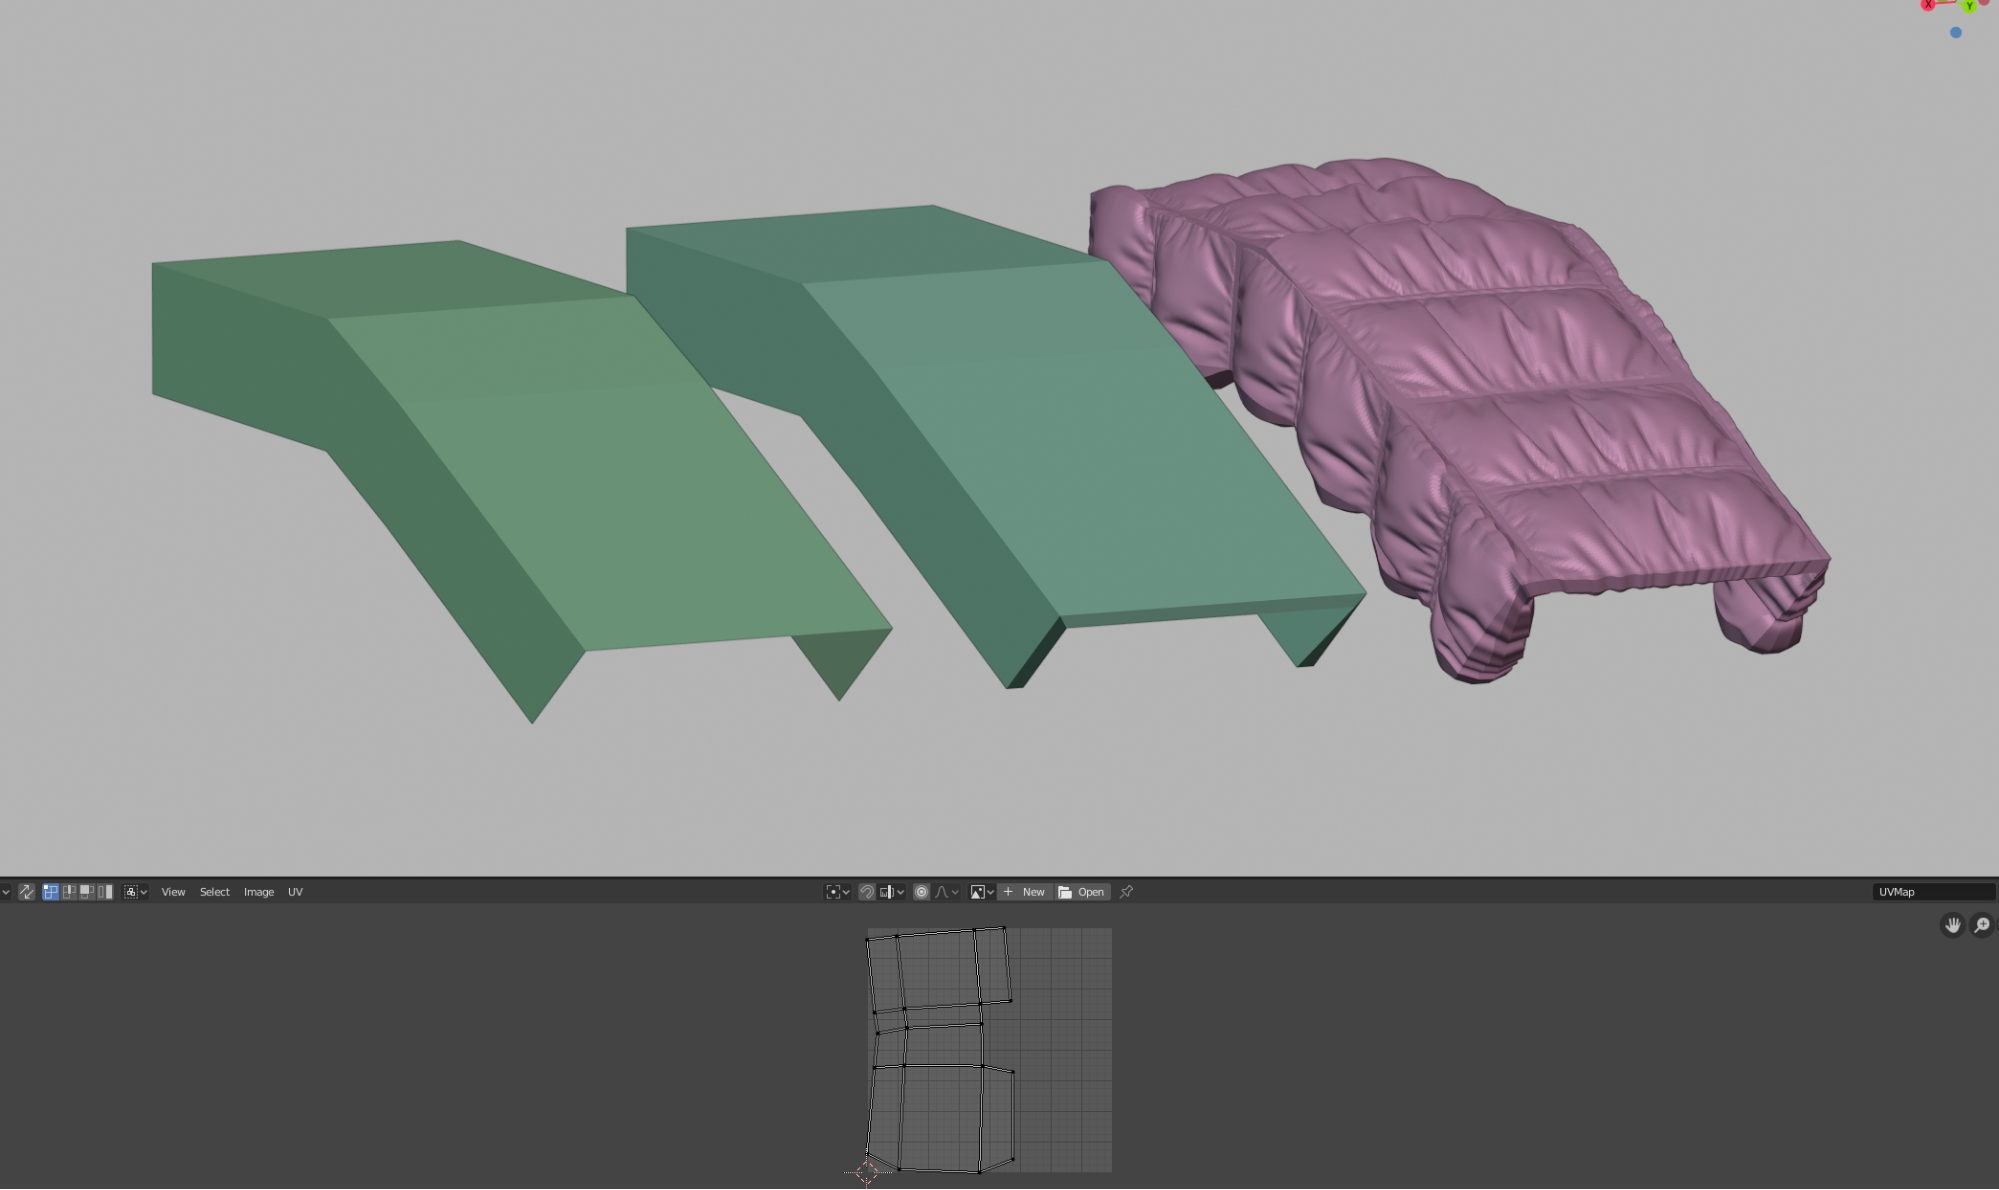
QuickDraw allowed me to sketch out these mechanical shapes very quickly, and then it was very simple to build the cloth padding on top of the refined base.
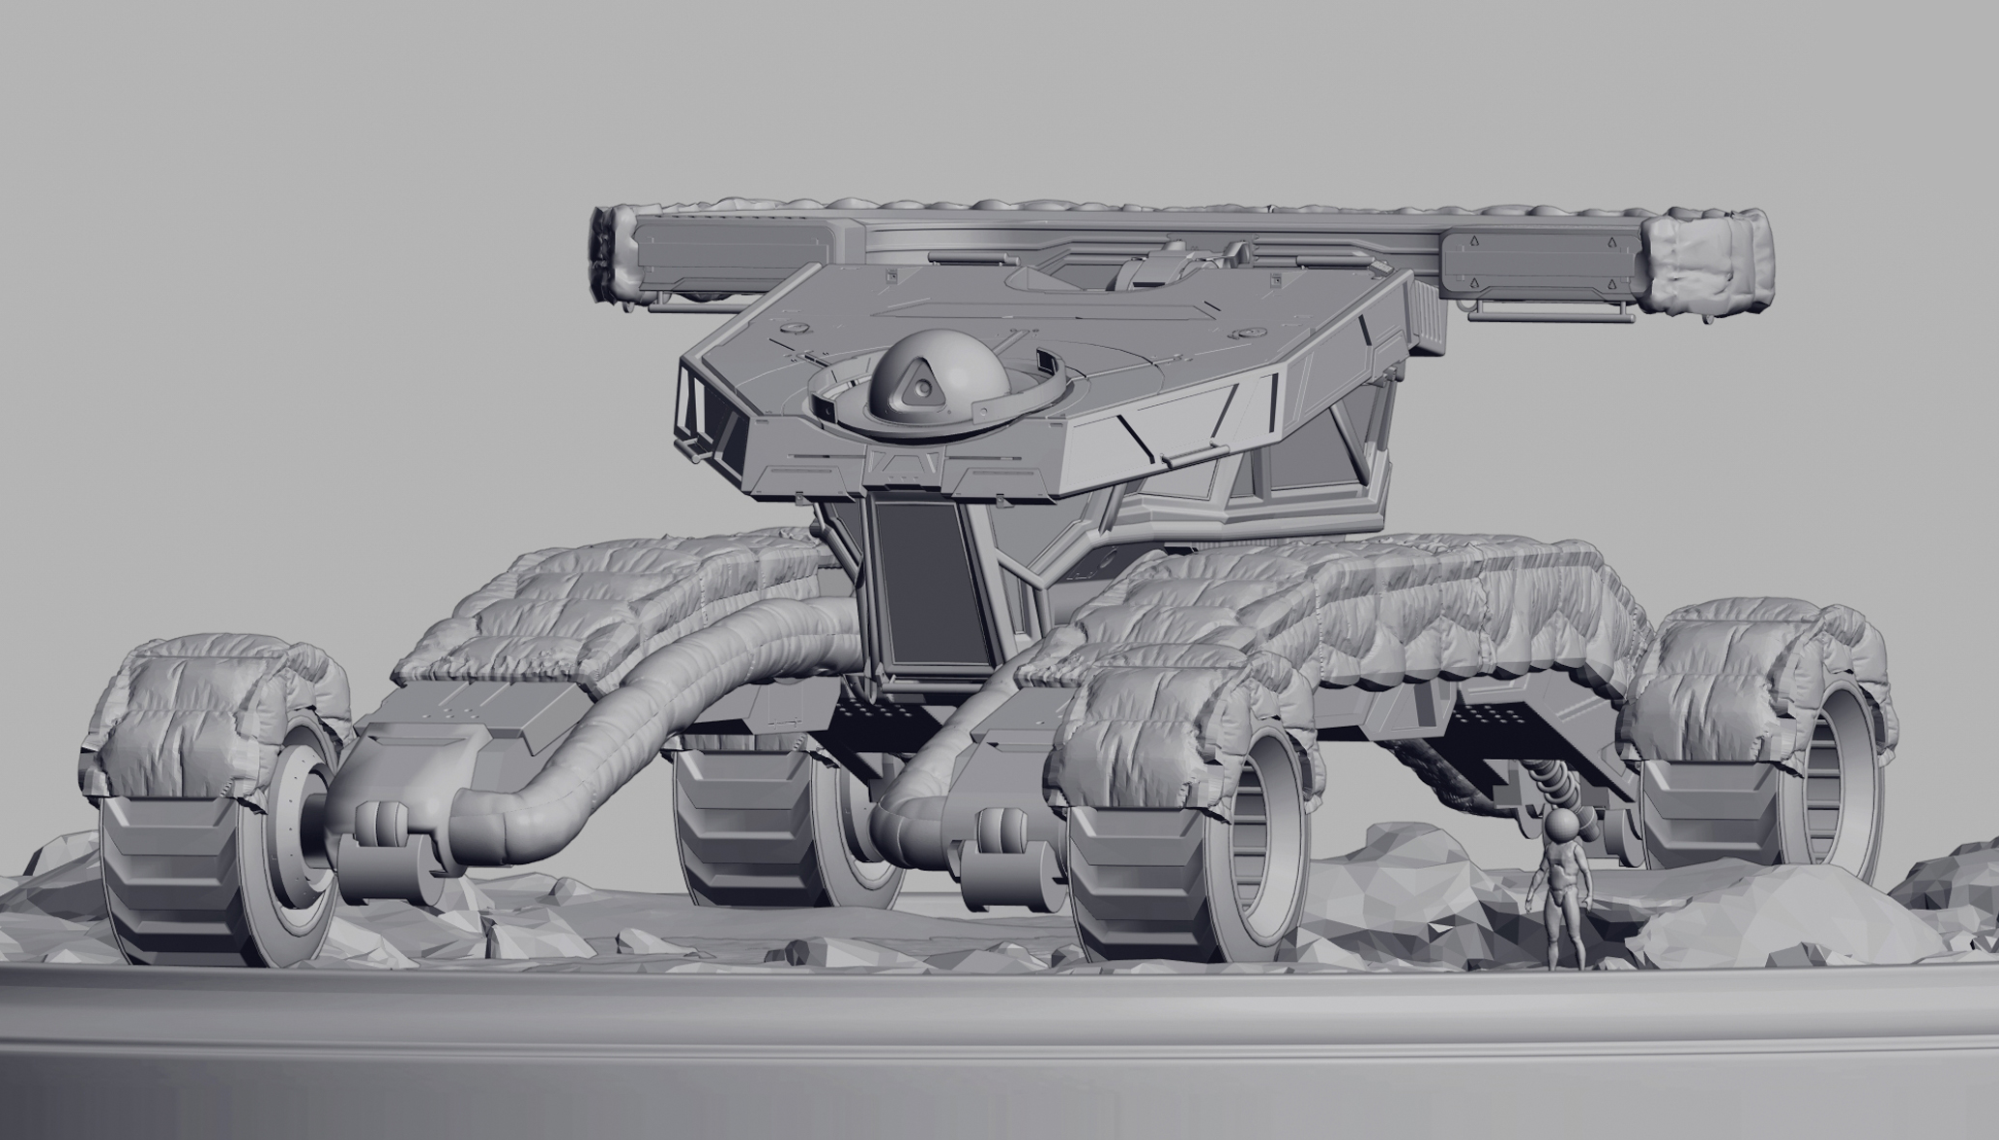
The cloth padding was done by taking some of the hard shapes I made and extracting them, then using solidify/subdivide/displace. I really love the displace modifier with a good high res texture map; you can get great results very quickly with a super simple automatic UV map. Plus, pretty much everything stays procedural!
Octane
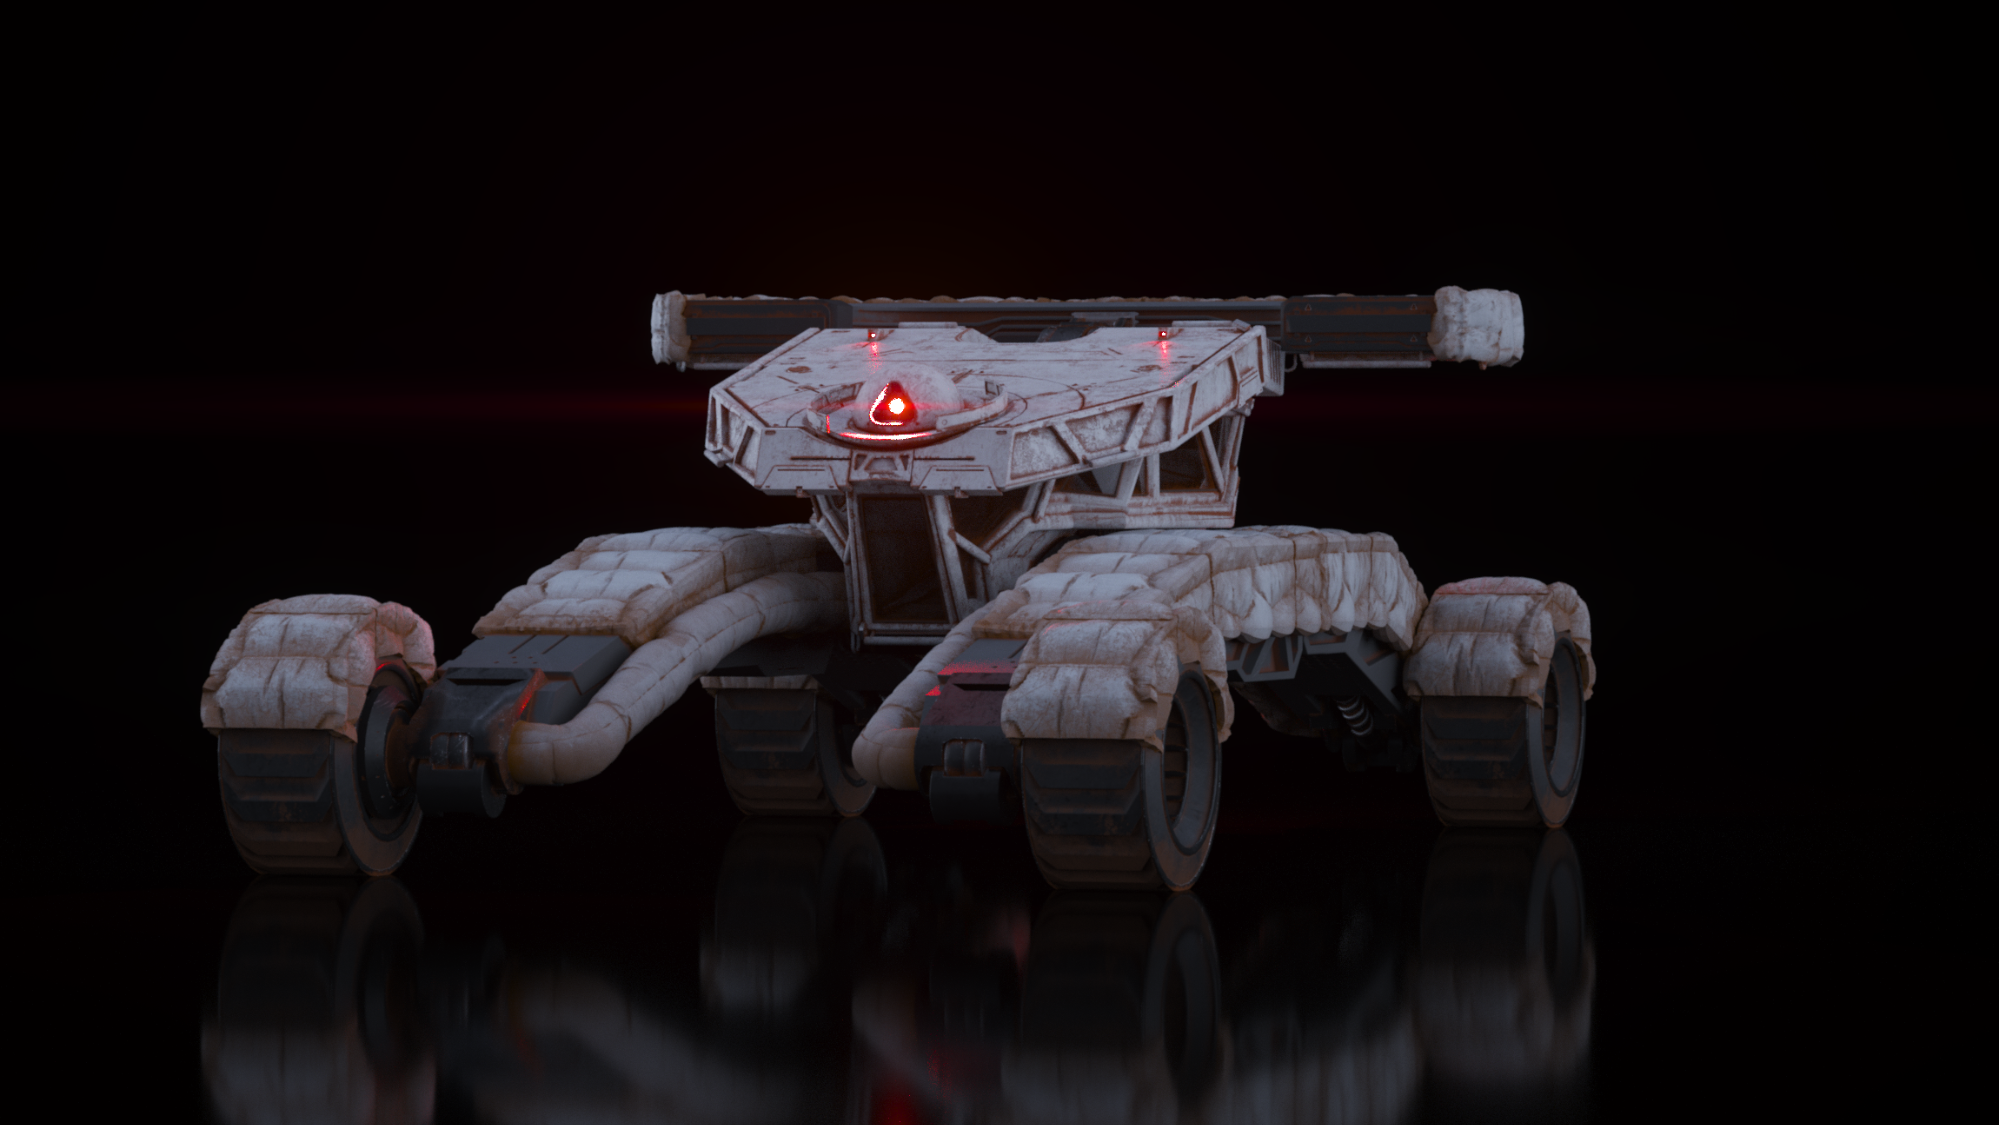
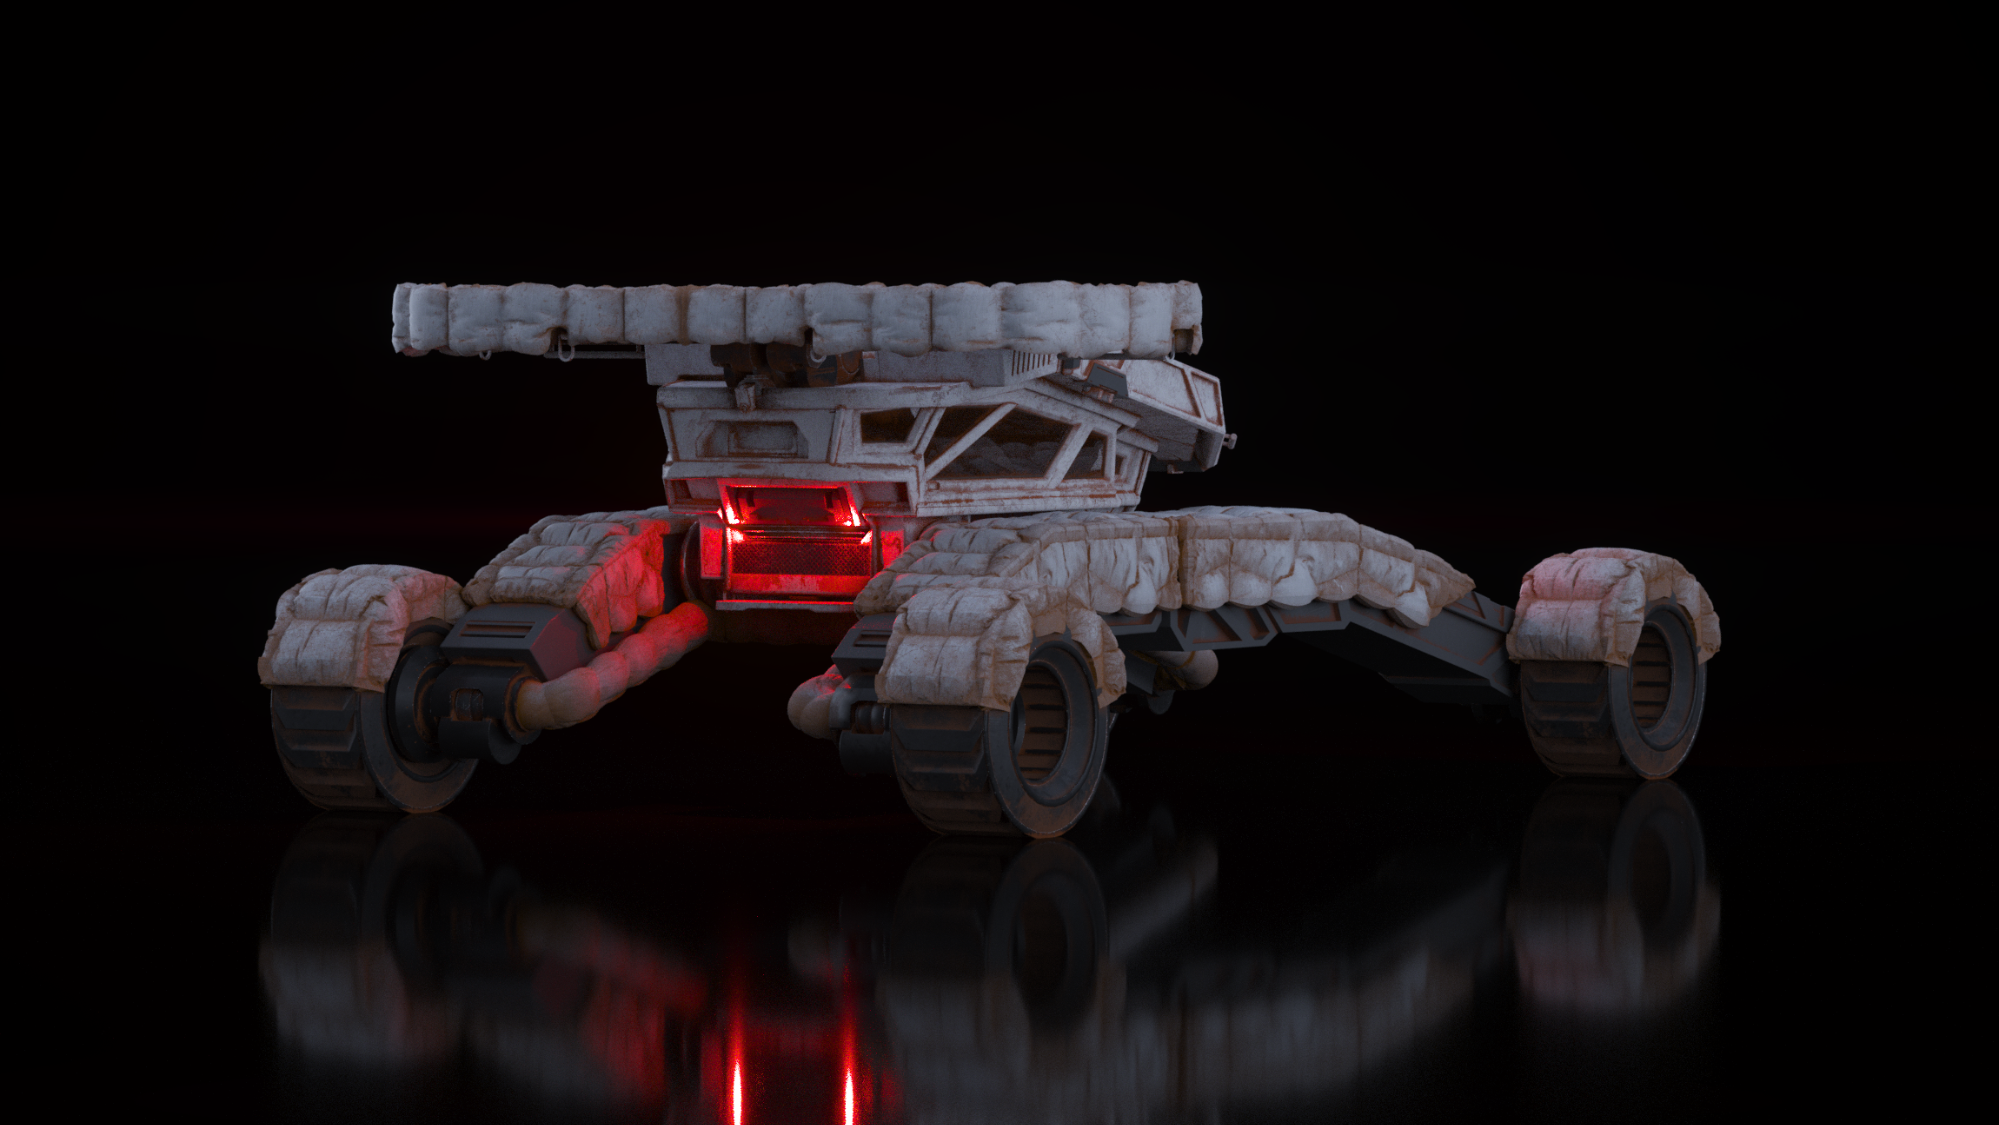
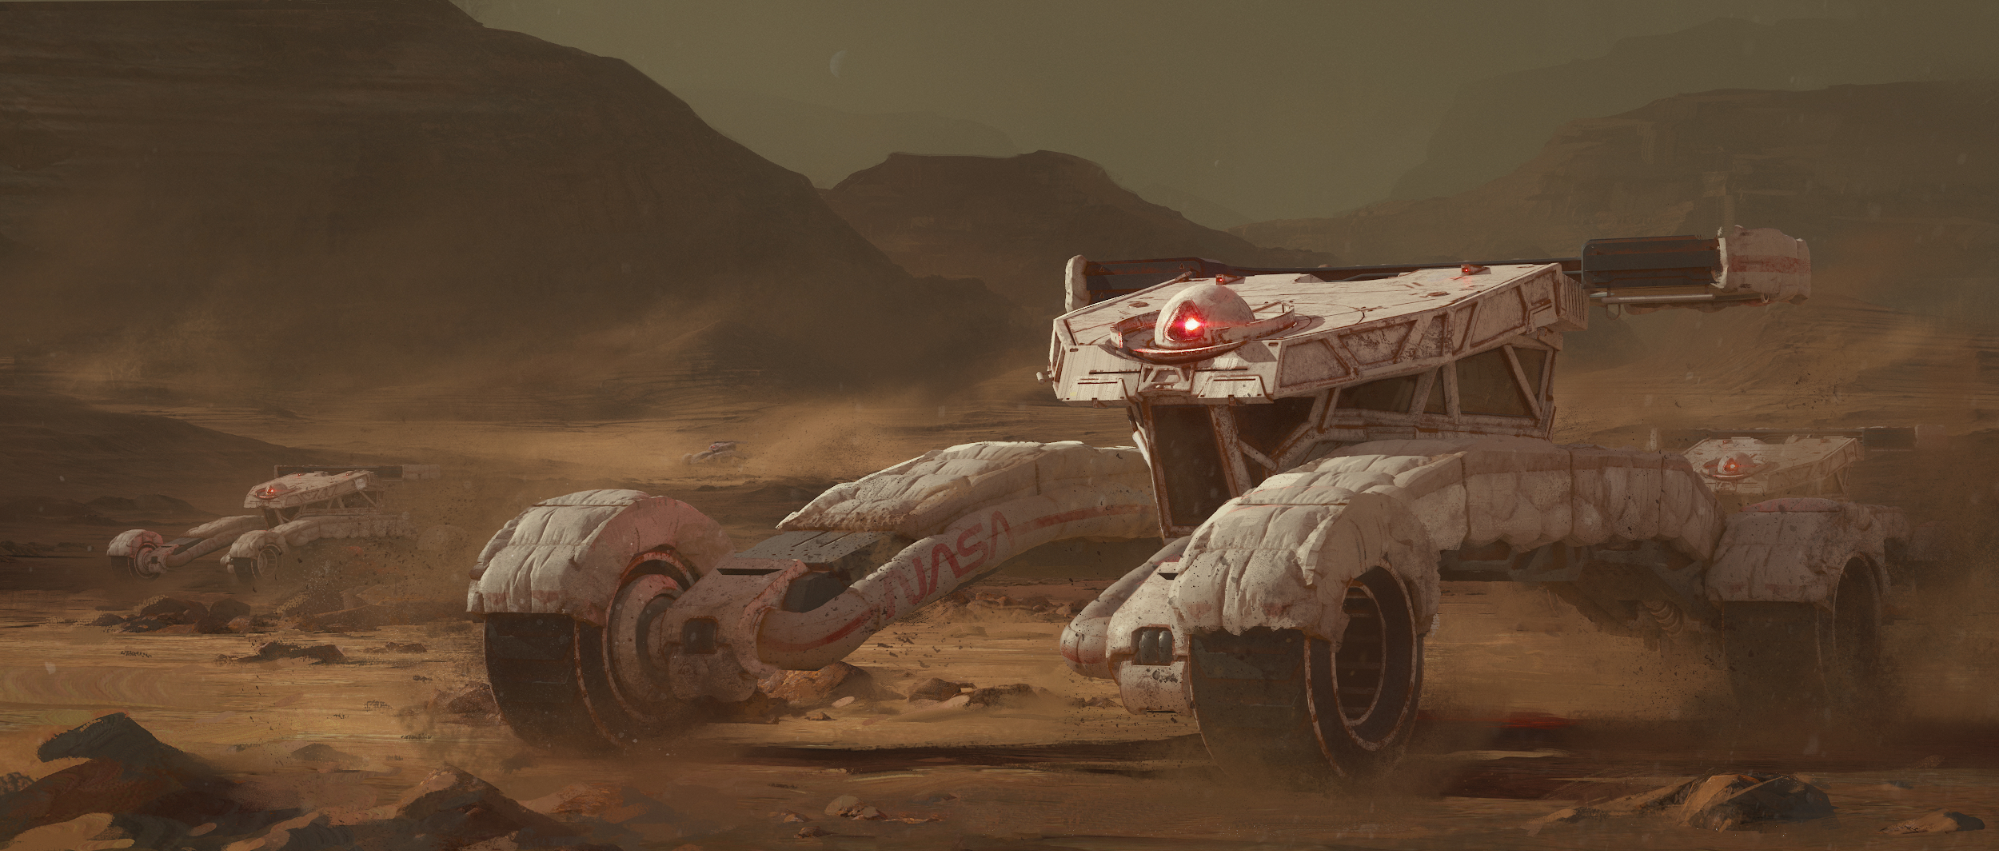
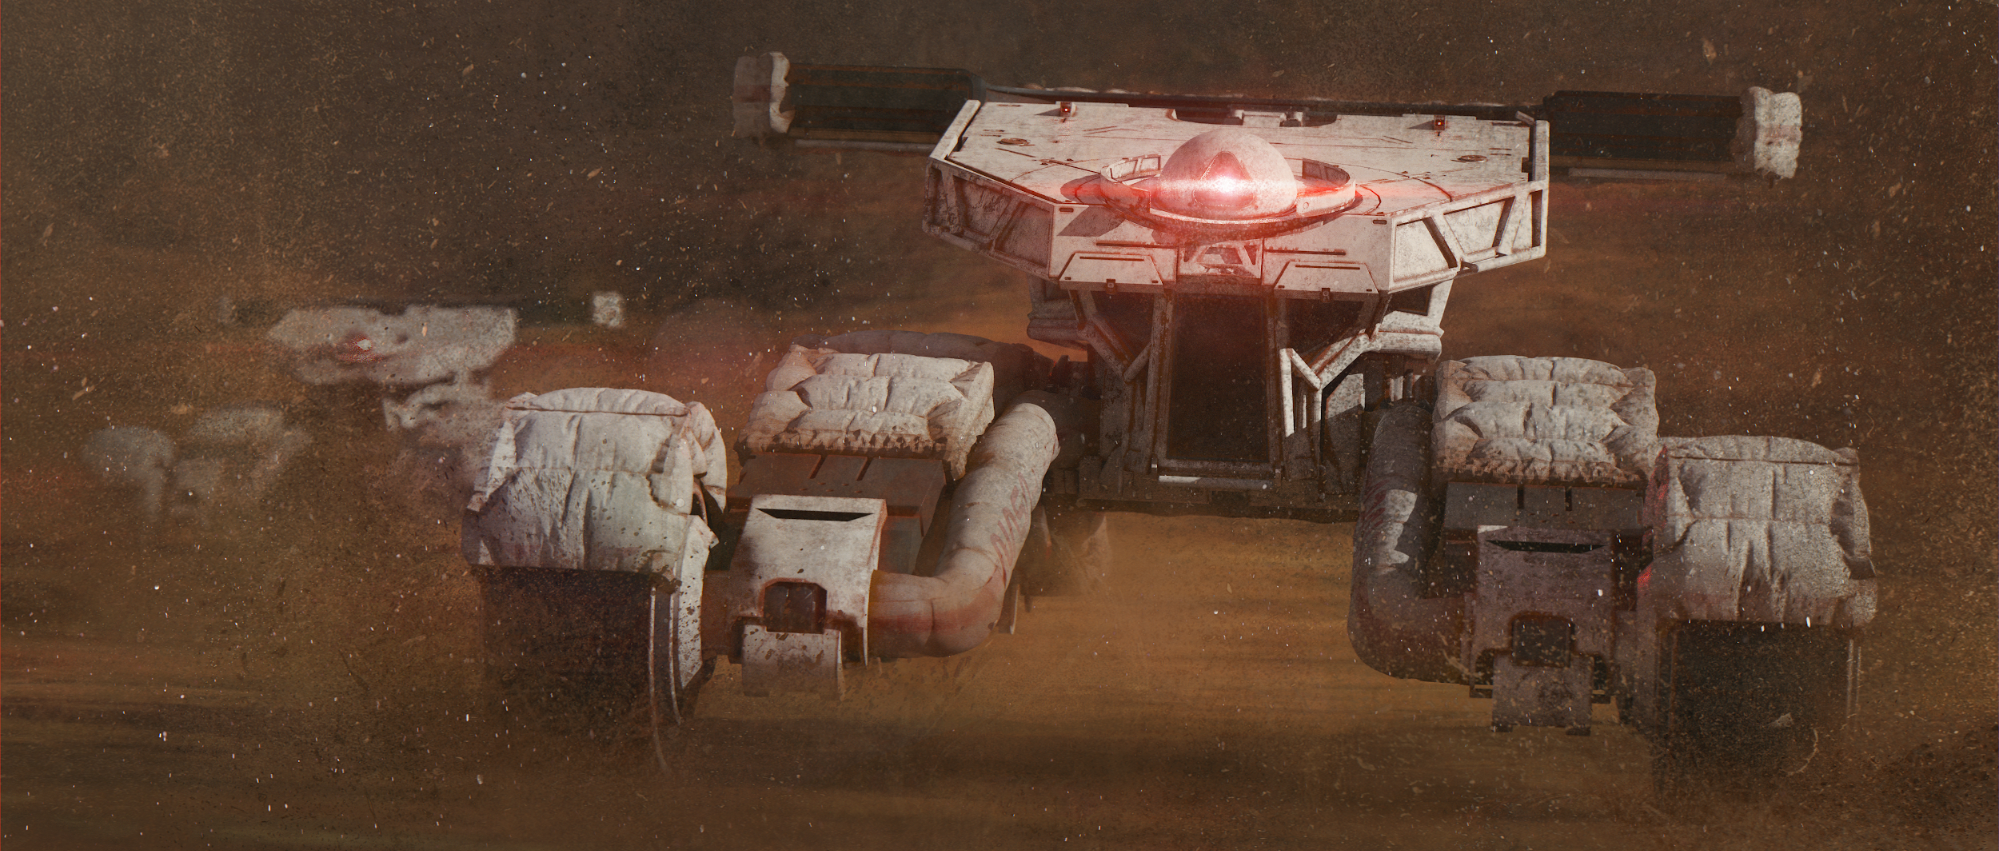
Almost at the finish line, I bring it into Octane and start applying materials. While I use EEVEE for showing design work, I use Octane when it is time to shoot for a realistic finish. These are raw renders with no touch-up, I make sure to render out all the passes that I will need in order to complete the final painting.
Paintover
When it comes to painting I think in terms of FG, MG and BG and make sure everything I do serves the focal point and story of the piece. I’ve done a lot of work in Blender on the model so that I don’t have to do too much painting on the main piece, just simplifying and bringing FX and atmosphere into the image.
About the Author
 Aleksandr Kilimnik, I am always open for new clients, so please feel free to contact me if you require any concept assistance :)


Wow cool read and stunning that you already created an add-on when just using blender for 1 year.
Ps you need to check this new cloth Aaron which was showed this week on blendernation. It could benefit for you. It works real-time and was influenced by marvelous designer. I haven’t tested it but it looks stunning. I think you like it
Thank you! Modeling cloth looks absolutely amazing, I haven’t had a chance to play with it yet but I will soon :)
wow
Amazing work Aleksandr. The wip images are truly eyecandy.
So much wow.
Thanks man!
Thanks for your insights.
I tried your technique of turning HiRISE Data into a landscape in Blender, but i couldn’t find the import Plugin for Blender 2.8. Could you tell, which one you used?
What import plugin?? You were talking about linking data so you have exact duplicate which is easier for sculpting.
Mh, i guess i misread the part saying “I made 2 very high res displacements using real Mars hi-res scan data and then re-shaped the environment with built-in filters to suit my purposes.” Thought it was used in Blender but now i see it’s done in World Creator.
Sorry.
Sorry man, its my fault, I was responding to the wrong thread. Don’t take note of my prior comment
Ps he did placed them in blender, yet he didn’t describe how. My guess either fbx or obj. I thought no you export them from worldmachine. You could always use a lattice on that map to shape it a bit in blender. You could do that on the low Res and use that as a cage for the high Res. You can do it again n many ways
There is a program called HiView that lets you open the hirise DEM files and export them to tga, then world creator imports the tga and outputs the displacement map. Its better to just make it in world creator from scratch though, I was just having fun seeing real Martian landscapes
Thanks for the info. :)
Do you really need that much details? I mean it’s backdrop and it’s hardly visible in the details :)
Totally unneeded, world creator by itself is more than enough. I was just nerding out over seeing actual martian landscapes :) thats why I didn’t really cover hiview in the article, its just something for fun