Behind the Scenes: You Will Never Catch Me
Hello everybody! I’m Jim Wild – 24 old general artist from Saint-Petersburg, Russia.
Some background
When I was a child, I was very curious about the world—I liked to explore it and then express myself by creating things that make it better. It doesn’t matter what tool I have—a pencil, a lego block or a computer mouse, I think everything around me is just another reason for some creative fun.
As you guessed, it was just a matter of time for me to get into 3D stuff. So I started my journey in 2015 with Blender because of a sci-fi project that my friends and I wanted to film. The result was not satisfying (*Cough *Cough total disaster) and it made me forget about the 3D artist path until August 2017. Back then I was just starting to make little things for myself. None of them were really finished but I learned a lot from just practicing and experimenting. Blender is very friendly for those who seek new horizons and this is truly amazing! So here I am, with my first finished project.

Inspiration
The idea comes after my suburban rope jumping session. 80 meters of freefall (with the belay of course) is just a perfect catalyst for the brain to make cool stuff :D

Process
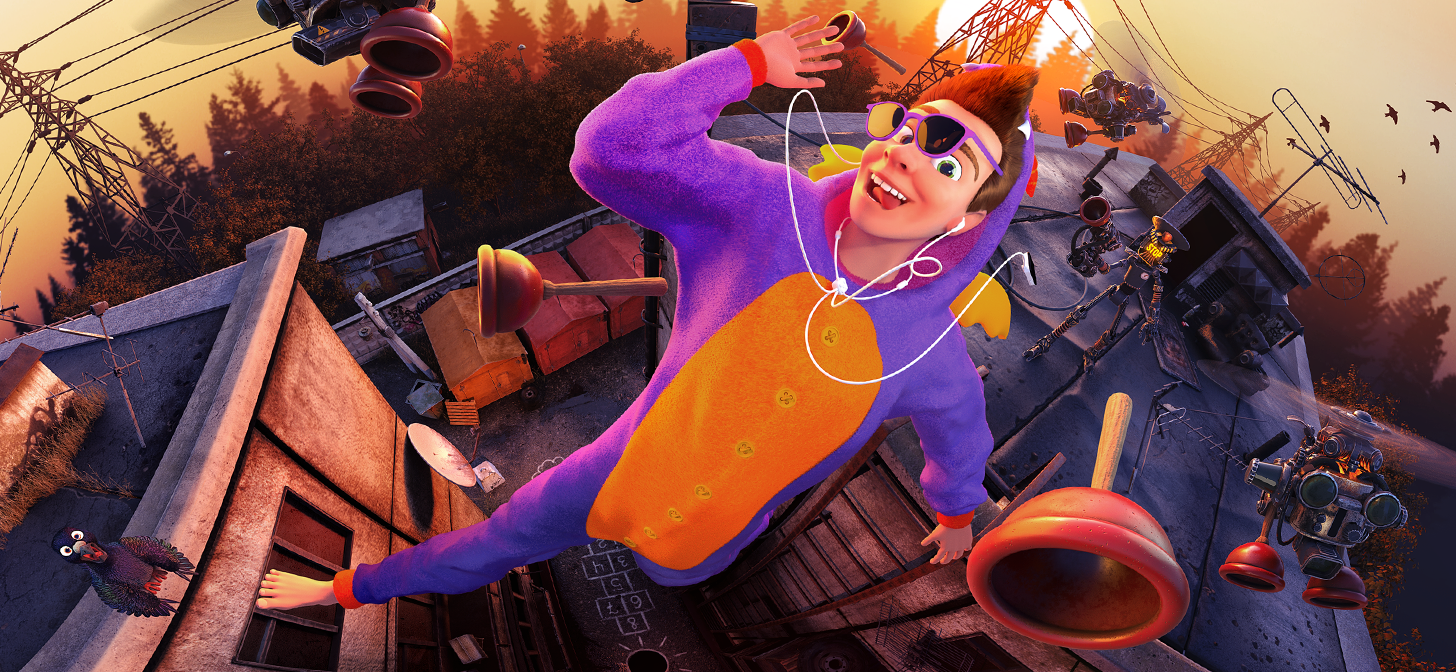
The main idea was to create this feeling of absolute freedom in a place where it can’t be. At first I wanted it to be a short animation, but then I felt that this would be too much for me alone, and I wouldn’t have enough skill to pull this project off. So for beginning I decided to make just one resumptive shot from the whole story.
It all started with “this sketch.”

The main character represents the bright and creative sides of human beings, that can’t be locked up in the rusty world of systems and robots that accepts only logic.
I wanted to create an extreme fish eyed effect so that we can see two high buildings and the gap between them at once. It will tell us many things about the main character that is making this risky jump with a smile on his face. Also the scene and characters will look cartoonier because of the stretching.
That means that a big part of composition would be strongly built around camera setup. And this is tricky because it behaves not how you expect it to behave. (Thank you Captain Obvious.)
So, first things first.
To be honest I didn’t even think that I would write about the process of making this project so the early stages of work were deleted just because I needed free space on my HDD. But I will describe it anyway :D
Main character

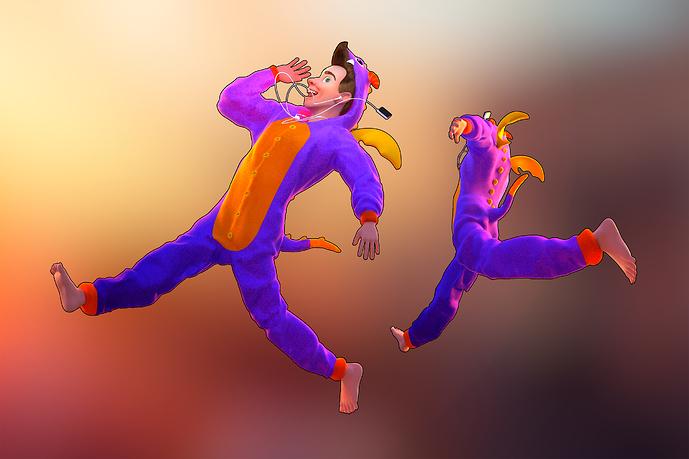
The sculpting process is simple as it can be. I created several primitive cubes, subdivided them multiple times, and used vertices as control points to make primitive shapes look curvier. When I was done with this I used Boolean operations to join all shapes into one. After filling all unexpected holes, I switched to dynamic topology in sculpting mode and made some “artistic adjustments”. (It may seem generalized, but I don’t really know how to describe this “adjustments” in detail—you just pick a sculpting brush and start poking the model with it until you have something nice :D . Also I probably need to start learning anatomy).

At this point I didn’t really need a high poly body mesh or mesh with the right topology. Because of cloth simulations I didn’t need to worry about the mesh underneath the clothes, so I keep it low poly and triangled. Also in these particular circumstances it’s way faster to make a basic rig and pose the character. For posing I used bone chains without inverse kinematics. Also, two keyed animations helped me to switch from pose to pose and make proper looking wrinkles on kigurumi.
Ha gotcha :D Never mind that was terrible joke (*Cough not even sorry)
After simulations were done I started to detail my sculpt: face, hands, feet, wings, spikes, additional wrinkles on the cloth.
Also as you can see, I added some buttons, audio player and glasses. Next step was retopology. All of the parts, except the cloth, were retopologized by hand in a traditional way with a mirror modifier. I use “Instant meshes” to automate the process of cloth retopology, because in this particular situation I didn’t think it was worth the time to retopologize the cloth manually.

Then I marked seams, unwrapped the model and baked AO, normal and cavity maps so that I could use them in the texturing process and materials. Most of the materials use a principled BSDF shader with slight tweaks. I referenced Skin material from a CGBlender tutorial and added to it some modifications so that it looks a bit cartoony. For hair I used a principled hair BSDF node.
The whole project was textured in 3D-Coat with smart materials and projection instruments in PBR.

The last things in this pipeline were the particle systems. For my old PC build it was a real test and I think it probably heated up the whole northern region of my country a little bit. So yeah, I think I accidentally sped up global warming.
So I used particle systems to make hair, eyebrows and create a fluffy effect on the pyjamas. For better pattern control I used a small number of parent particles, then I groomed and cut them until the whole thing felt right. The parameters of particle systems were set to default. There were only two modifications: the number of children particles to render, and texture masks with noise for particle distribution.
I think that’s all I can say about making the main character.
Pigeon

The core workflow for modeling and posing this character is basically the same as the first model. Feathers were created with different particle systems that include object groups of planes with alphas.
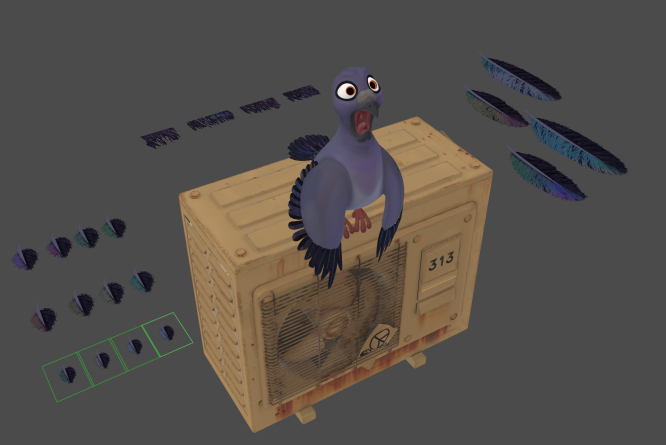

For these feathers I created a material that imitates a polarization effect. Glossy shader colors for the feathers were taken from body texture. It mixed up with transparent shader and uses several different textures of alphas.

There are 7 different feather types to cover the entire birdie.
Other materials that applied to this model use principled BSDF shaders. The reference for the pigeon’s expression is actually taken from my face while I’m watching “Spring” by Blender animation studio. (By the way that was truly breathtaking and inspirational. Go and check it out if for some reason you haven’t done it yet)
Iron Patrol, Plunger Gun and Flying Toasters
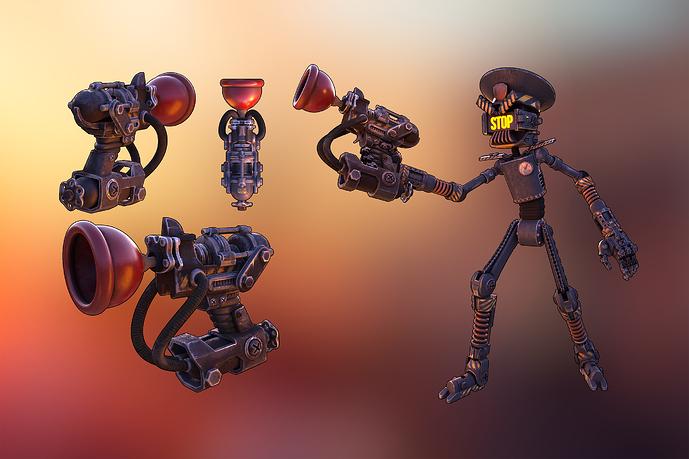

These characters were made by traditional hard surface methods without any booleans. I wanted them to look rusty and outdated. The forms and silhouettes of body parts are based on industrial type mechanisms of the last century and some scrap from modern days. They are very flimsy and, as you can see, the aiming potential of these characters is actually non-existent :D. Because of the simplicity of the forms I didn’t even need to retopologize the mesh. All I needed was just to create a low poly base form, give it some holding edges, add a subsurface modifier to create some approximations, apply this modifier and optimize the obtained mesh by using dissolving functions. For example:

As you can see there are no special workflows.
The whole process is just adding simple meshes part by part starting with the large forms and ending with small ones (*Whoosh! Now everyone knows the ultimate secret of all 3D artists).
Later I added seams, baked maps, and textured the model in 3D-Coat.
Environments and Lighting
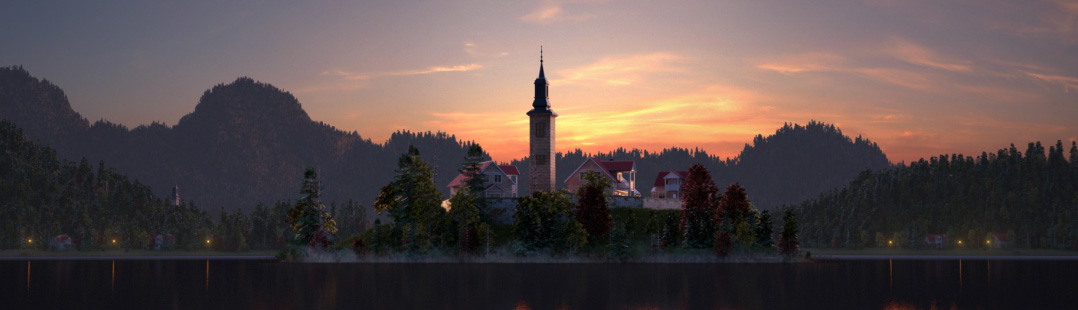
The image of the old district is based on abandoned areas of my native small mining town. I wanted it to feel half forgotten or like it’s located on the edge of the world or something like that.
Also, I wanted it to feel peaceful and warm even though it is autumn.
The modeling technique that was used is basically the same as I used before with robots. Trees were generated and modified with the help of the “Modular tree” addon.
For lighting I used a free HDRI sky that I found on HDRI Haven, but you will never see it because I replaced it after rendering with a sky that I drew myself to create the right mood. Also there are some area lights to create artistic global illumination in special places.

Rendering and Compositing
The amount of particles in this scene did not allow me to render the whole image at once. So I decided to tear it apart and render it bit by bit: characters, roof and props in the foreground, buildings and all the things that are on the first floor in the middle, trees and power lines in the background. And the mist also rendered separately. The results of the render were imported to Adobe Photoshop. I used some curves to bring color balance and the right contrast to the scene. I also applied some filters that make the image sharper. The last thing that was I added was post processing—glowing effects and little flares from the sun.
And that’s all.
I think the whole project took me forever and 21 days. This was a very special experience for me and I’m glad that I can share it with other people. Hope you like it.
About the Author
 Jim Wild, General Artist


I think making a video tutorial about all of this would have been nice and much more helpful
PEEEEEEEEEEEEEEEEEEEEEErspective!