Behind the Scenes: Farm Diorama
My Name is David Pisano, I’m an arcade manager, 3D Generalist, traditional 2D artist, as well as game designer creating a variety of projects experimenting with different styles and finding new ways to combine my knowledge to create each project. I started my schooling in computer science and found the lack of creativity in the classes unbearable. I always grew up creating animations in the corner of my math textbooks so, honestly, switching to studying animation shouldn’t have been a surprise.
As a 3D artist I primarily use Blender but I was formally taught Cinema 4D at Ramapo College of New Jersey. There I learned modeling techniques, the principles of animation and an iterative design process through student-led critiques, which prepared me for successful interactions with clients. I soon found and quickly fell in love with Blender and, with the soon-to-be-released Blender 2.8 and the UI changes with a modern design (not to mention it’s free), that appreciation was solidified.
Inspiration for the project

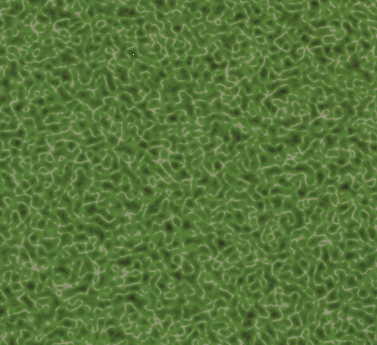
Several weeks back I found a reddit thread detailing the creation of a felt material in Blender. After getting accustomed to the node setup I began playing with the idea of creating a dynamic composition using this felt material.
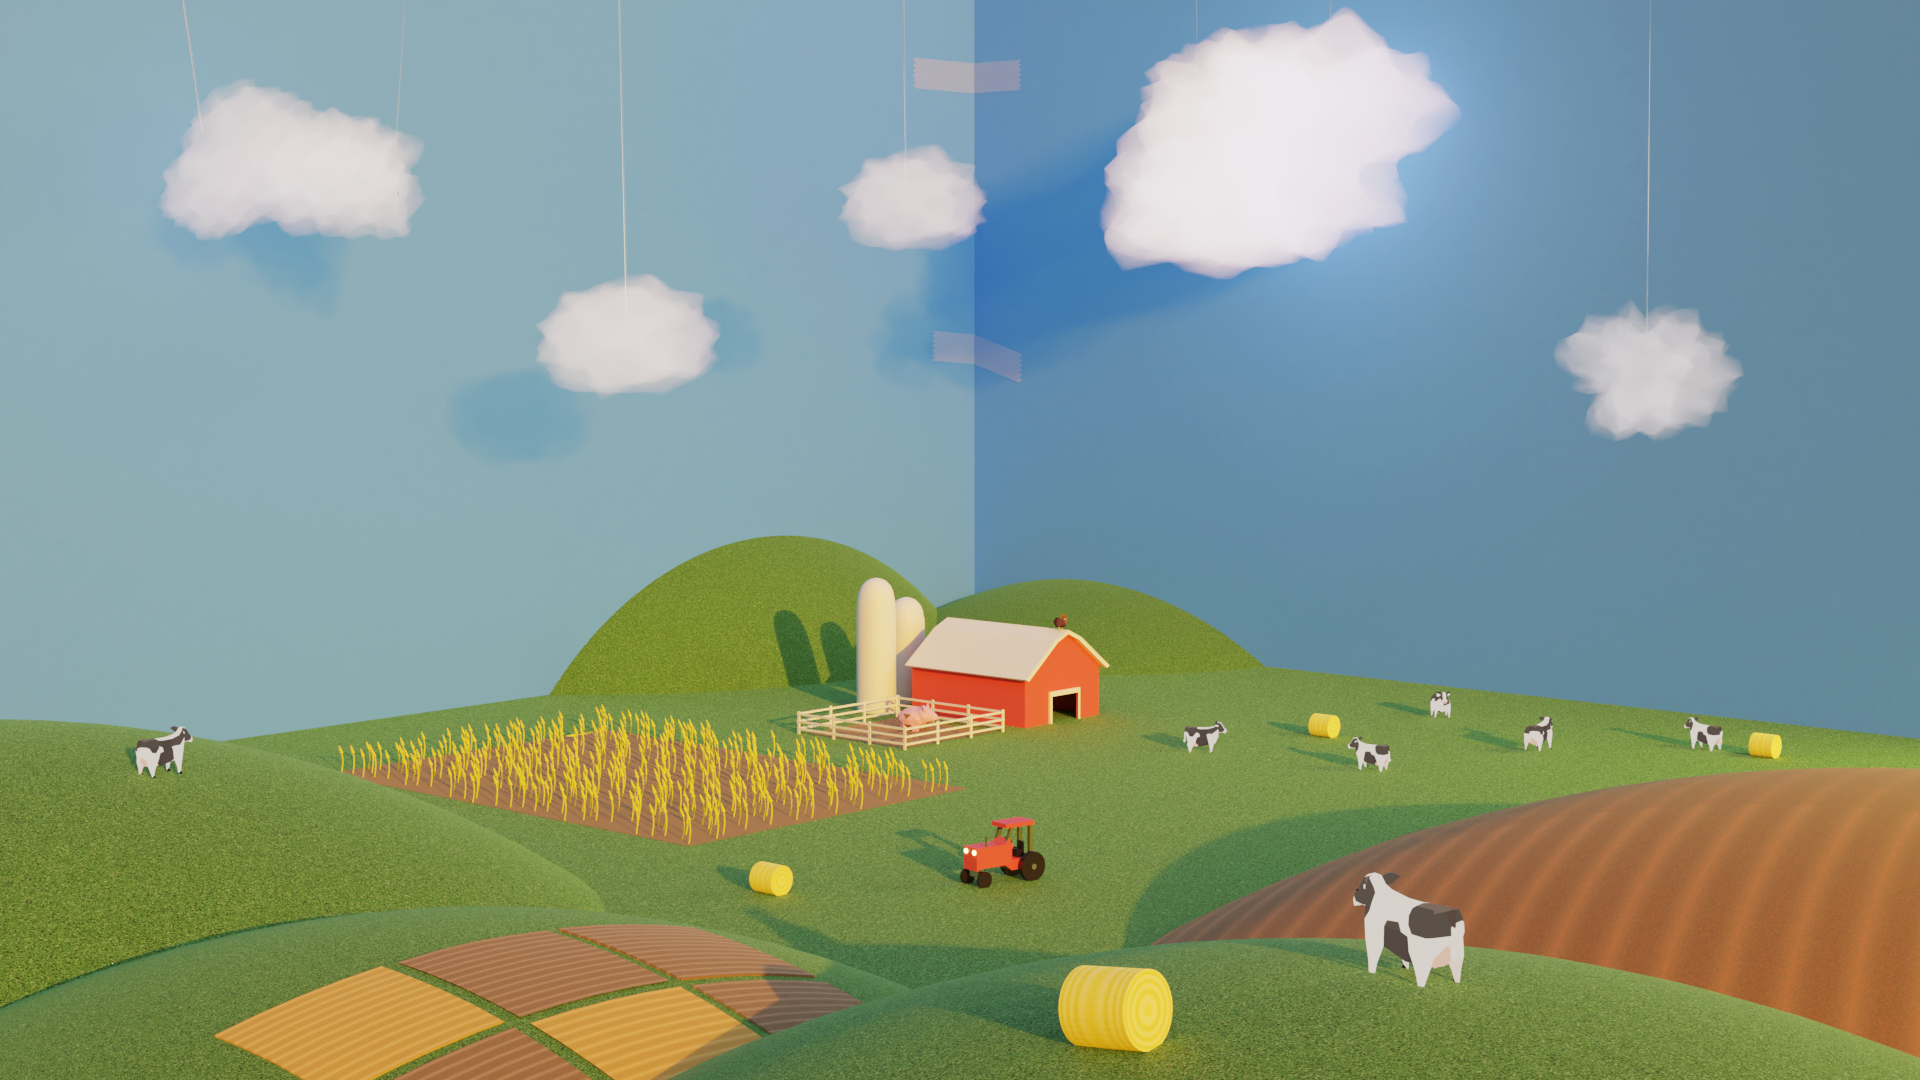
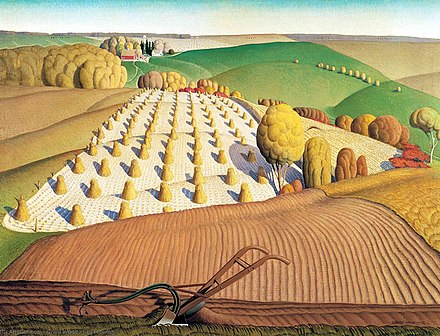
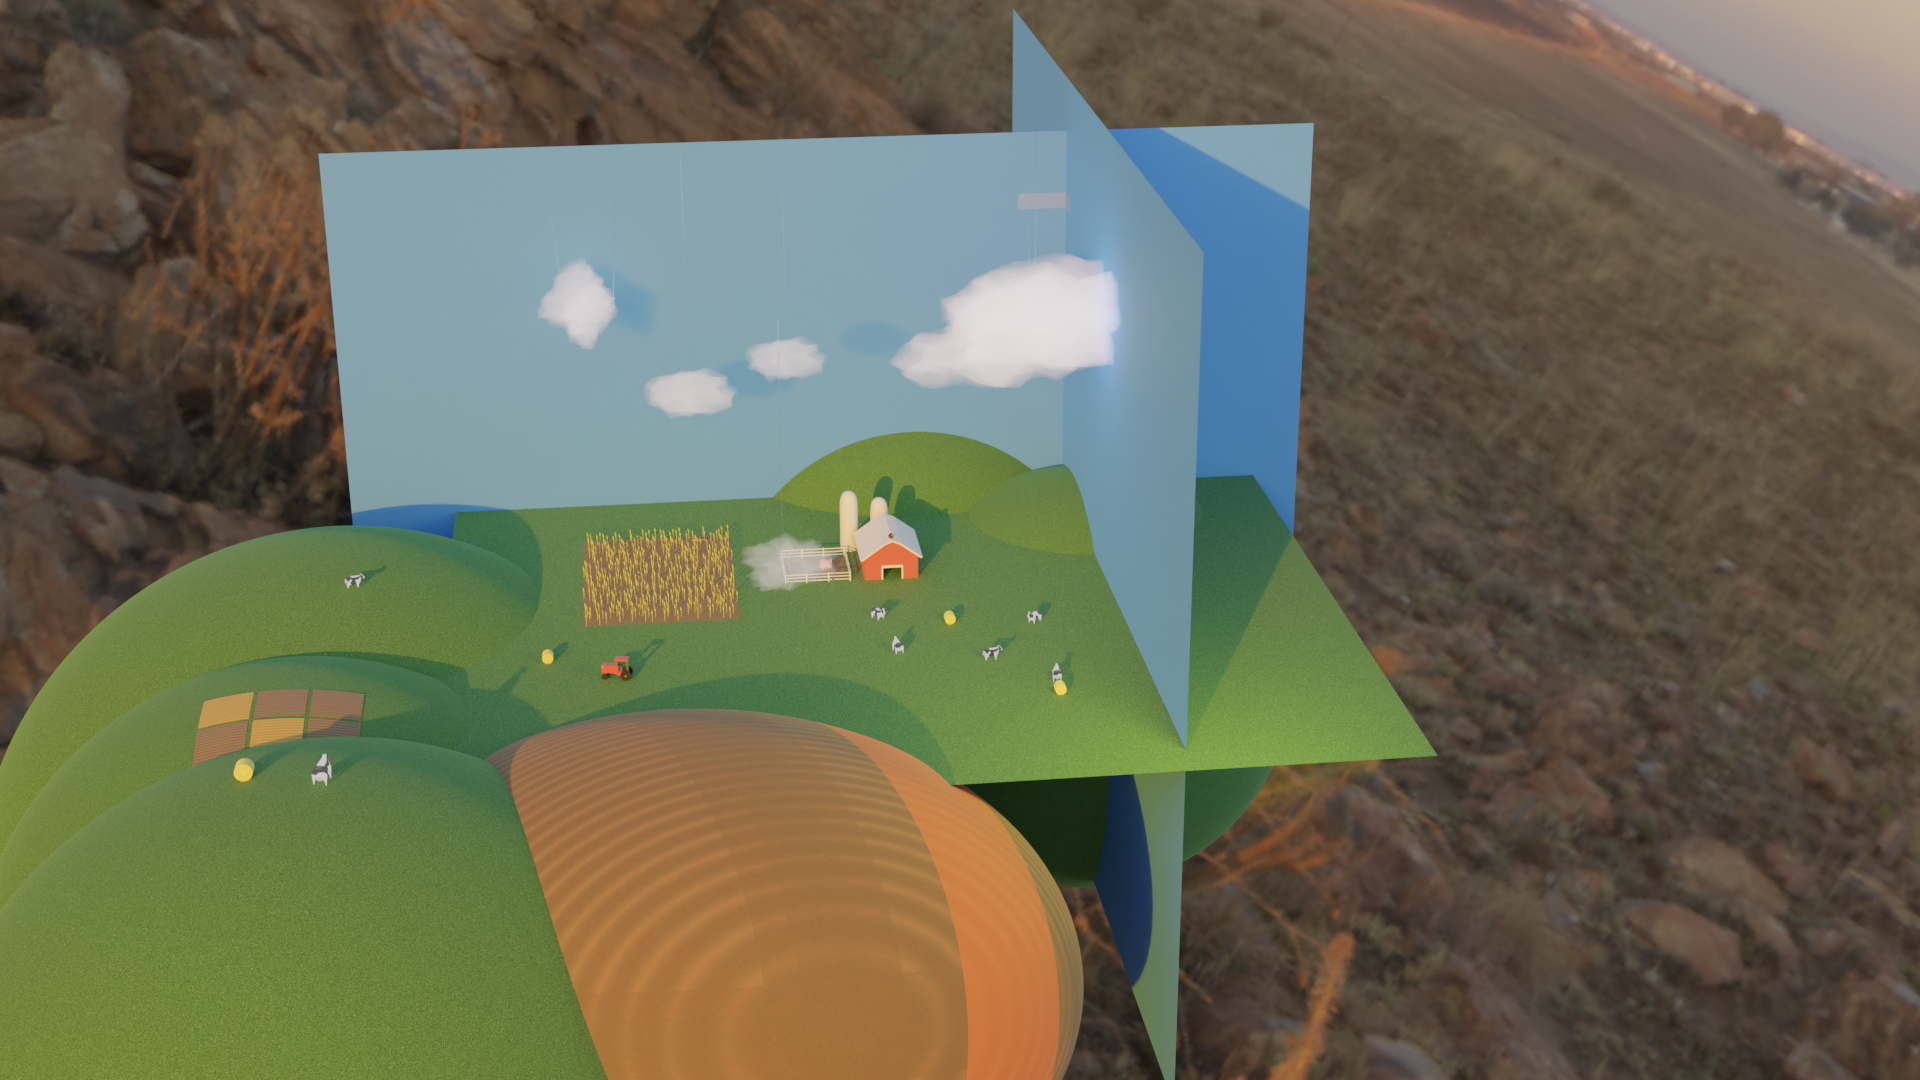
Creating this test render I was immediately drawn to create rolling hills and use them to create a sort of midwestern landscape inspired by American Painter Grant Wood.
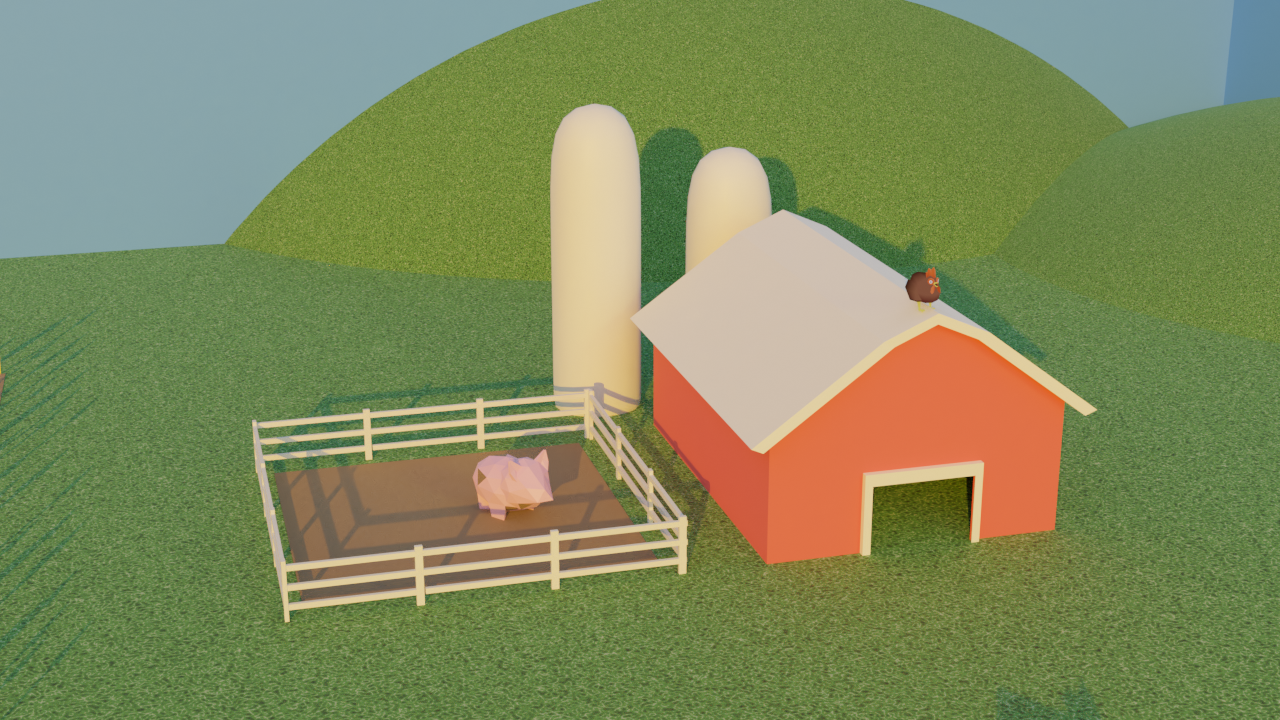
I built the farmhouse and silos using basic modeling techniques and textured them with principled shaders.
The idea for a diorama came from the way I quickly fabricated the background using planes for another piece that I had created a few days prior.
Clouds
I began creating the clouds for the project using simple extruded cubes with a subdivided surface and a displacement modifier. Then, I textured the clouds using a volume scatter shader mixed with an emission shader. I began to think of how I would physically place the clouds in a real diorama and decided I could fabricate “strings” to hold the clouds using long thin cylinders and a glass shader.

Repurposing Nodes
Next I began creating the patches of tilled soil. For this I repurposed and modified the node setup for the felt texture by scaling the musgrave texture with the mapping node, editing the colors to dark and light brown and then changing the rotation to create parallel lines of darker and lighter colors. I repurposed this technique to create the textures on the hay bales by changing parameters, as well as a few nodes. Then I added this texture to a few subdivided planes and added a shrinkwrap modifier to allow it to conform to the surface of the hills.
Tractor

For the tractor I was inspired by a small handmade wooden toy car and plane that I was given as a kid. So I based the design after several real tractor models, but simplified the design into basic forms that could be created physically with wood, nails, and glue. This even includes a small steering wheel and throttle lever that isn’t entirely visible in the final image but it was worth creating the detail in case I decided to use a different camera angle!
References for Scale and Worldbuilding

Another example of a small detail that I enjoyed creating was several pieces of tape holding the “sky” of the diorama together. This detail is really an attempt to convey that handmade look of the project. It was an idea from my girlfriend and I had to implement it! This is a good example of getting feedback from friends and other artists because they may have skills and ideas that you don’t/wouldn’t have. The tape is a simple rectangle with an edge extruded at a 90° angle and textured using a mix of a diffused principled shader and a transparent shader. Adding the tape helps the viewer understand the scale of the models using a universally understood object as a reference. This, along with the “strings” holding the clouds, helps build a world that exists beyond the image you’ve created. The diorama has a story; we may not know what it is but that hint of a story builds a world and creates a “deeper” image that keeps the viewer engaged.
Using Premade Assets: Designing Smarter and Faster
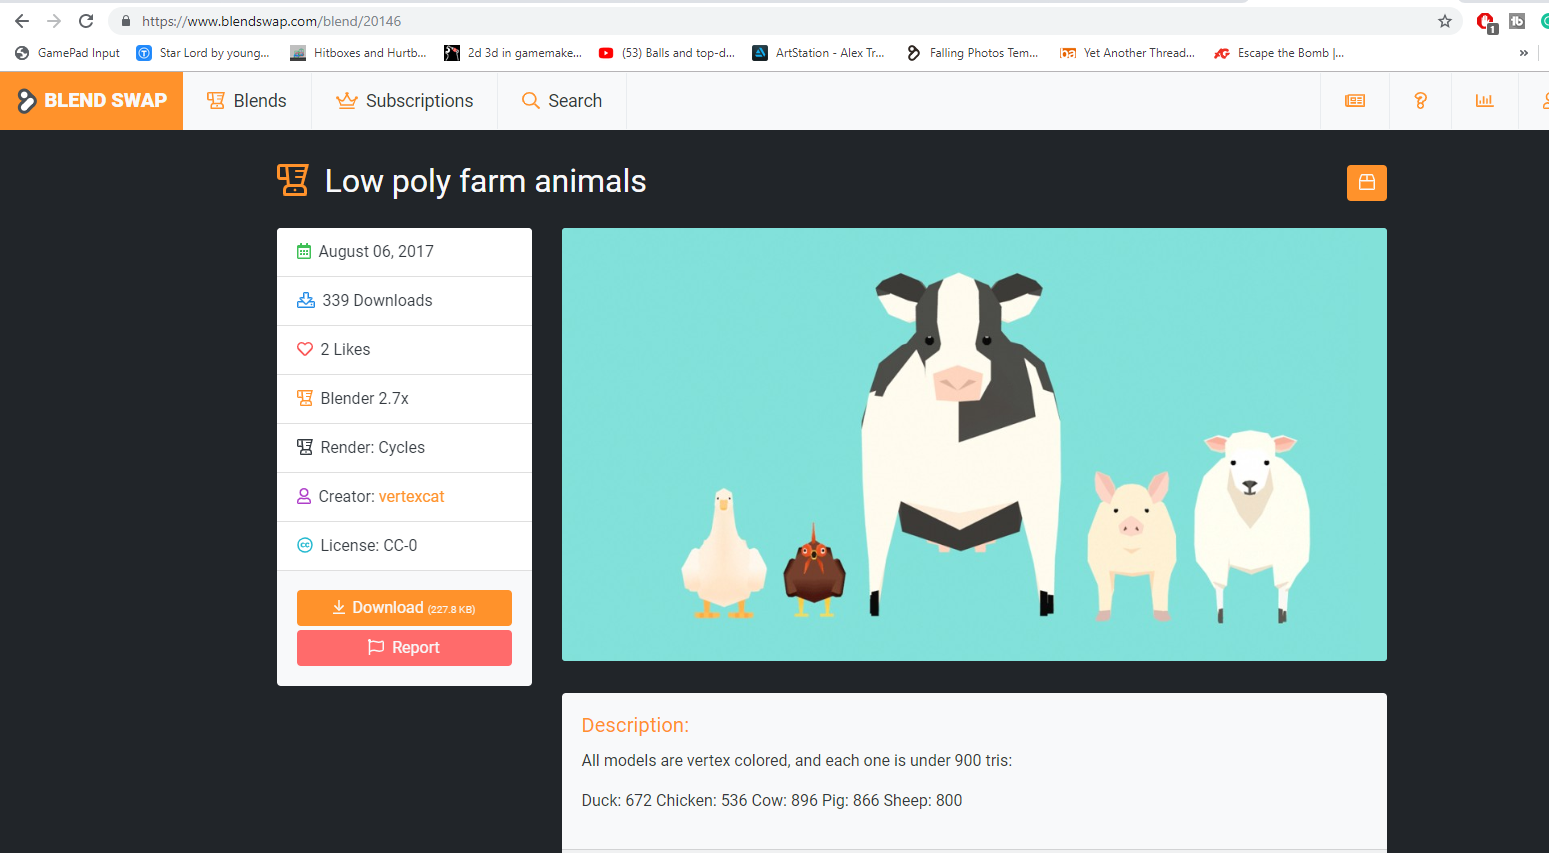
Sometimes it’s good to be aware of how long it will take to finish a project if you have deadlines to meet. A simple way to increase efficiency is to use all of your resources, including the internet. There seems to be a stigma against purchasing or using free assets for 3D design, animation, and indie game development. What many people don’t know is that even big budget films and games use asset libraries, whether they be texture libraries, sound libraries or effects libraries full of fire assets, and muzzle flashes, to save time and money. All of the animals used in this project were created by a wonderful artist called vertexcat for free on blendswap.com. With the time and knowledge anyone can create their own low poly farm animals (these ones are very wonderfully crafted), but for some professionals on a deadline, it’s not always economical to dedicate this much time to a minor detail when someone else has already done such an awesome job sharing it as a free asset.
Also, for those interested in creating assets there is money to be made selling models and textures that many people would pay, for example, $5 or $10 on rather than take 2 hours creating salt and pepper shakers for a kitchen visualization project.
HDRI: The Icing on the Cake
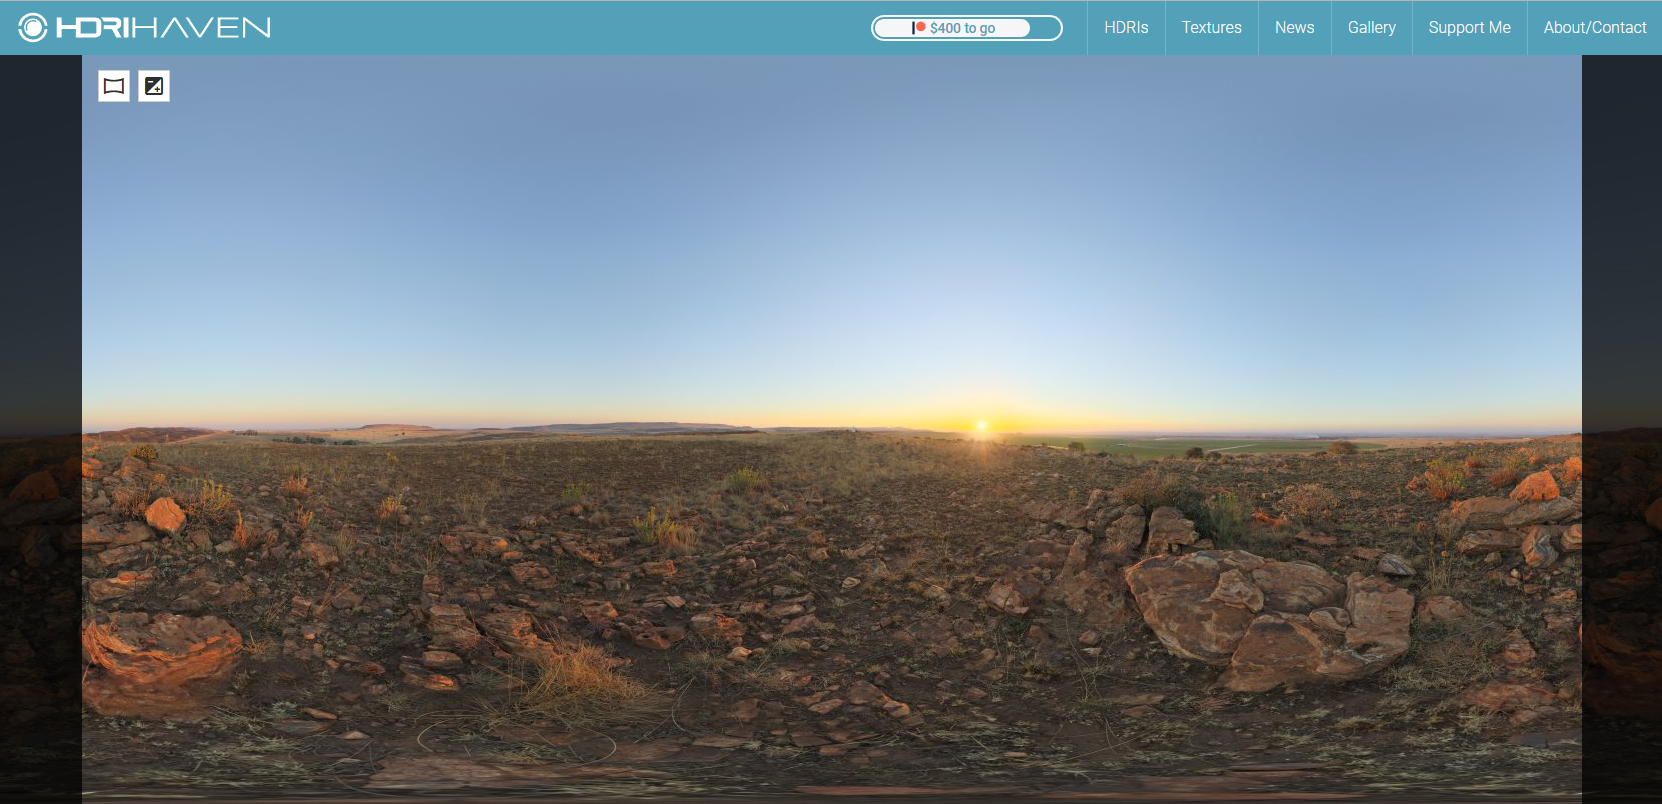
HDRI’s, also known as high dynamic range images are 360° images that save a large amount of light data. This information can be used in a 3D modeling program such as Blender to better simulate the lighting of a real environment. In this case I used a sunset scene that can be downloaded for free at hdrihaven.com. This HDR image of the sun setting in a desert was the right feel for what I was going for with this illustration. In Blender 2.8’s shader tab, having switched from “object” to “world” nodes, I was able to change the rotation and location of the HDR image to have the sun setting behind the camera to create the dynamic shadows that bring interest to the image. This doesn’t mean you shouldn’t add lights to your image, but it gives a good base to showcase models as well as help start with a strong foundation when lighting your scenes.
Rendering
For viewport testing of composition and textures I used Blender 2.8’s new real-time engine EEVEE. For the final render I used the Cycles engine, making sure to optimize the render settings for more efficient processing and lower render times. I have an Nvidia graphics card which allows me to use Blender’s CUDA option, rendering with both my GPU and CPU, increasing render times by twofold.
For general tips on improving render times check out this article.
For those on lower end hardware or rending large projects I’d recommend trying SheepIt Renderfarm, a free crowdsourced renderfarm solution for Blender users.
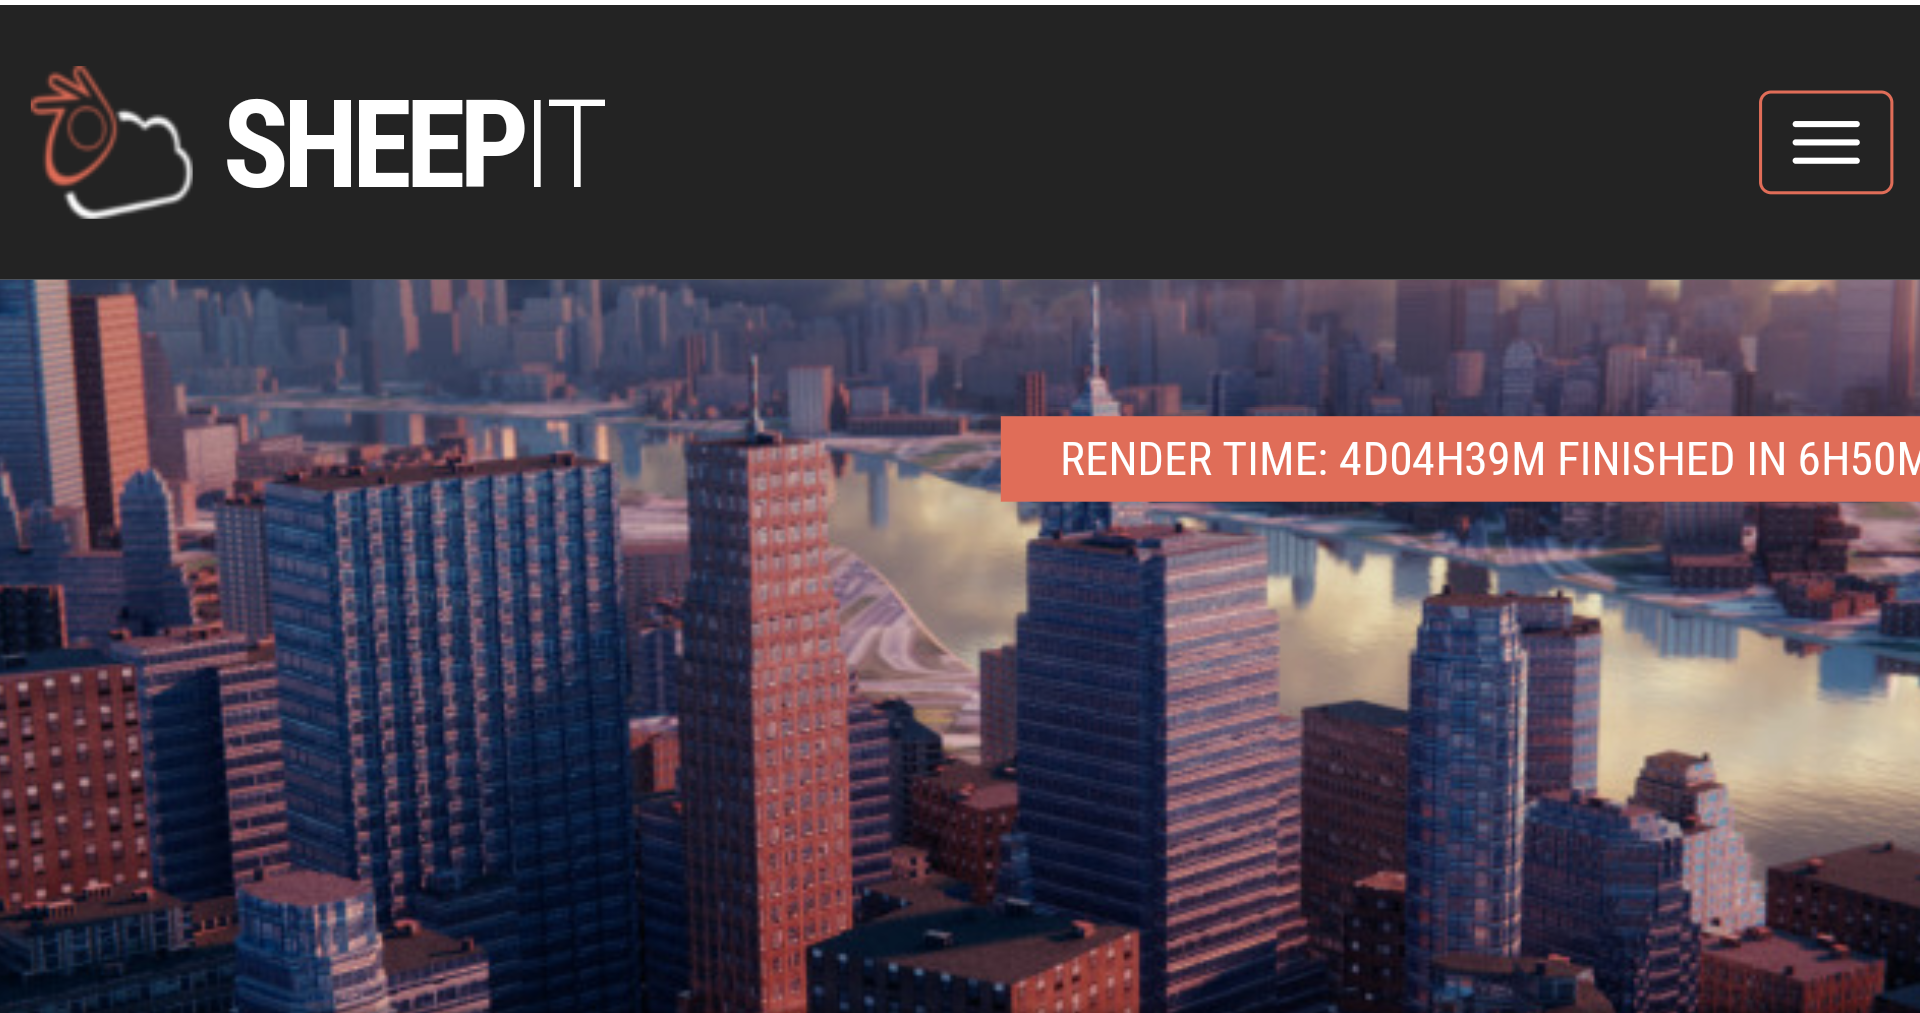
On average there are 500 computers on the farm rendering projects. You can accumulate points to render your frames by using your computer to render other people’s frames. I had a client project that I rendered on SheepIt that took 4 hours instead of 7 days, if I had rendered on my computer alone. It’s been an extremely useful resource!
Finally, in the render settings I changed the output base contrast to a medium-low so I’d have more control editing the color and contrast manually in Photoshop.
Thanks for reading I hope you guys learned a thing or two. Send me a message if you have any more questions or want to connect!
About the Author
 David Pisano, 3D generalist. Growing up I would make flipbook animations in the corners of my math textbooks. Years later I wonder why I changed my major from computer science to Animation.


I noticed on your IG a post about modeling a realistic bottle. How come that took so long? You have been to a school which though you modeling, how is it possible that you took 2 days to do so?!?!