
Behind the Scenes: Nosferatu
About me
My name is Daniel Aubert, I am from Maceió, Brazil. I graduated in Architecture and Urbanism, but I always loved drawing, painting, and creating things to make me take a break from reality, so I decided to follow a career as an artist. My aim is to work as a character designer for games, but I also love book illustrations and animation. Today I work as an illustrator in a publishing company.
Background in 3D
It has been 9 years since I was introduced to digital art with my Wacom Bamboo. 3D just followed in the same year, 2010, when I started learning Sketchup. But at the same time Blender appeared in my life and I fell in love, hahaha! Learned a bit of modelling with Blenderella, made some ugly animations… But I started sculpting with Sculptris and ZBrush, because sculpting in Blender at that time wasn’t as good as it is today, and my computer was very low spec. But ZBrush somehow used black magic and made sculpting possible even with that machine.
Anyway, at some point around 2013 I stopped sculpting in 3D and focused on 2D illustrations. Only in 2015 did I start venturing into 3D again and got the passion for it. Since then I have kept trying to learn more and more as I go forward, taking courses such as “Mastering Sculpting in Blender” by Zach Reinhardt, “Texturing in Blender for Beginners” by Yan Sculpts, some training from Alex Oliver, and now I have “Hard Surface Modelling” by Gleb and Aidy in the queue. I won third place in the Weekly CG Challenge “Forest Creature” and the CG Boost Challenge “Cute Warrior”. And I must thank the Blender community for being incredible and making us support each other in this artistic path!
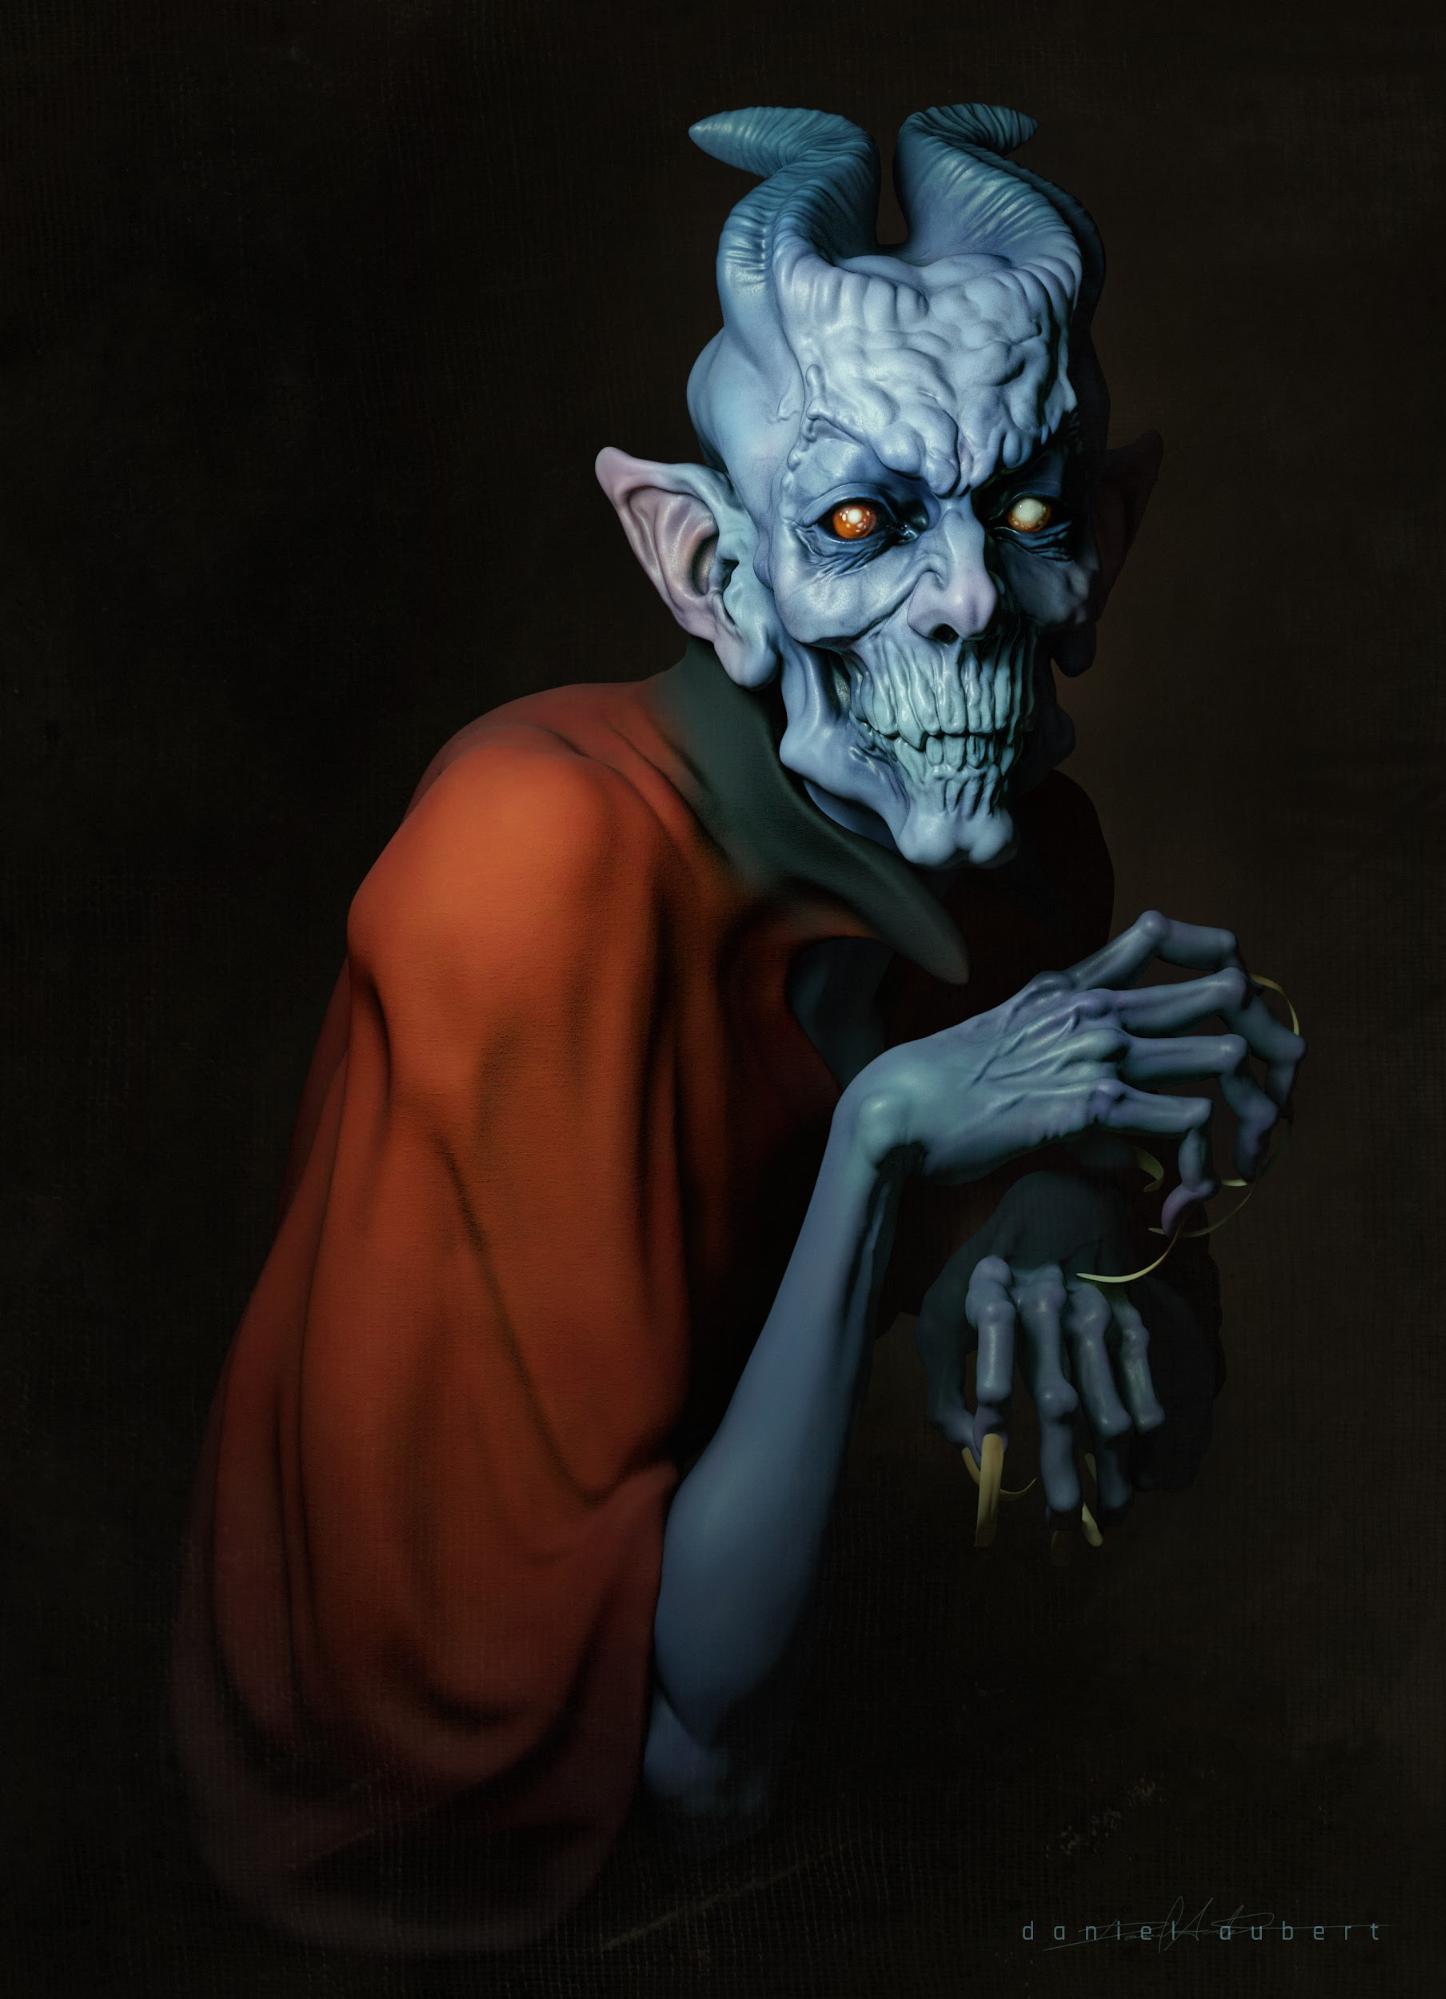
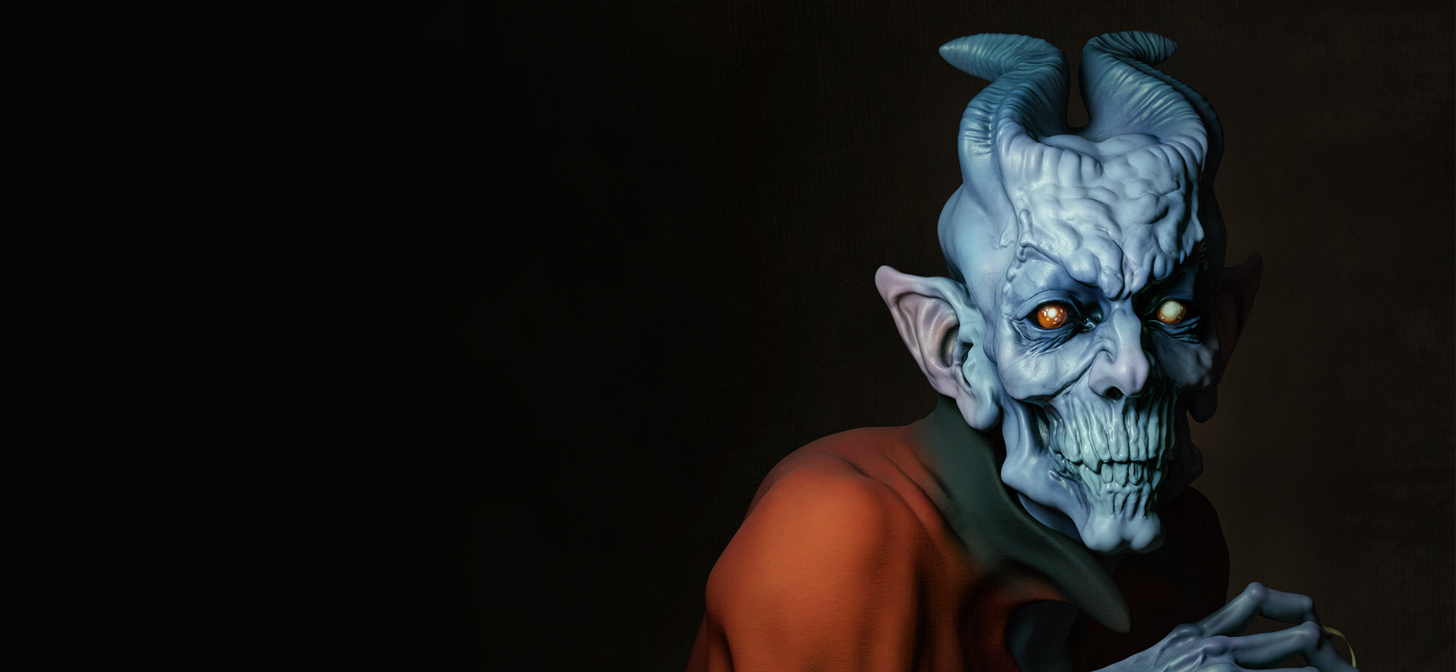
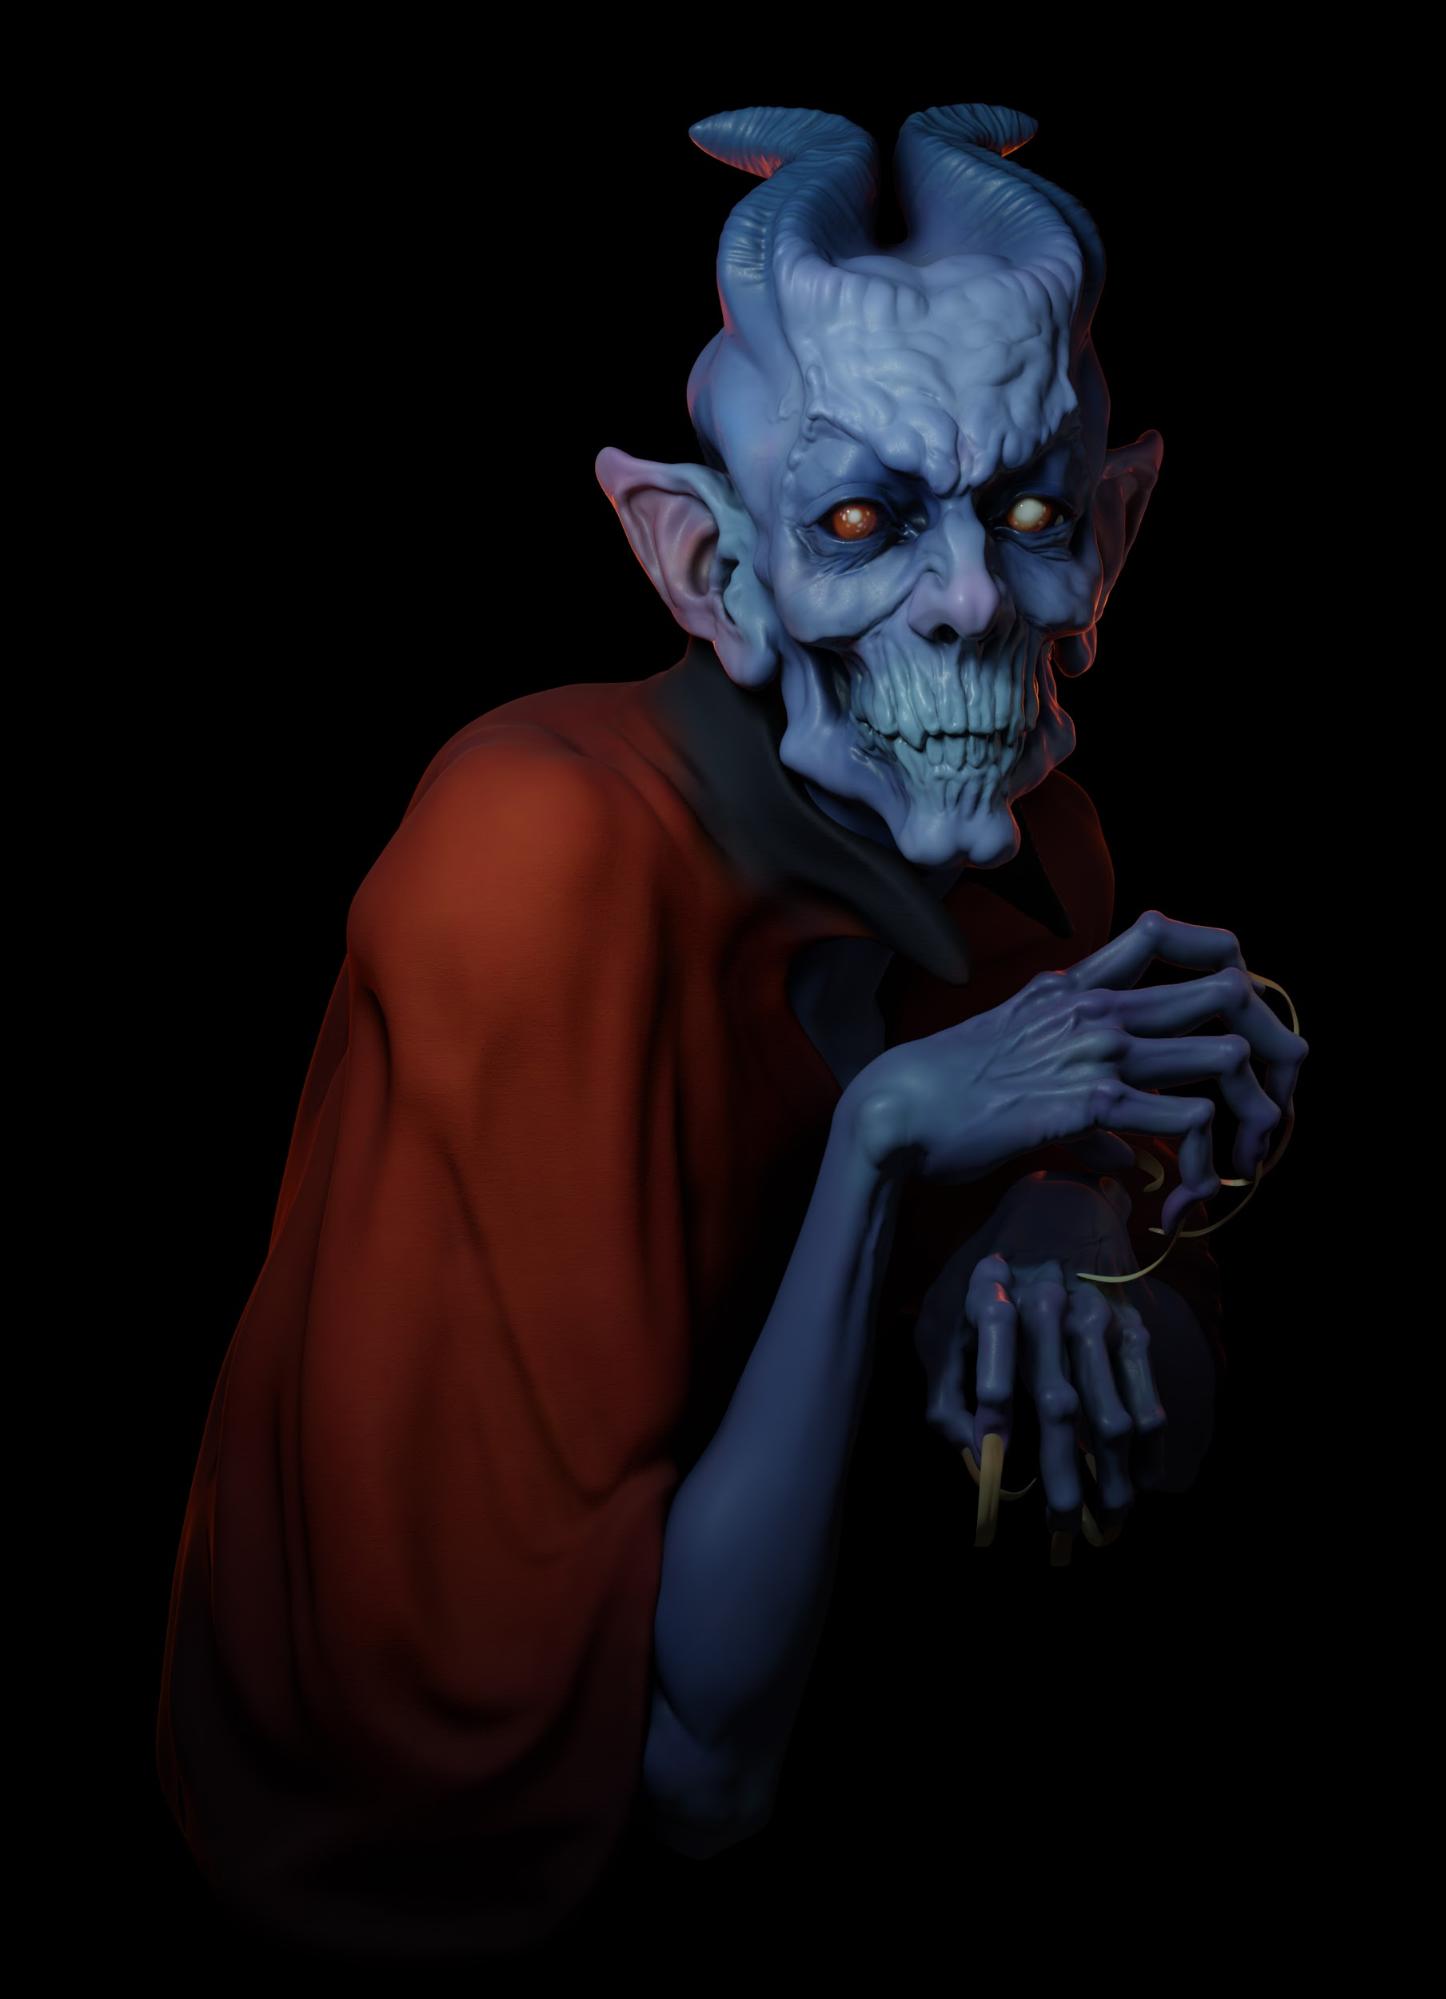
Nosferatu
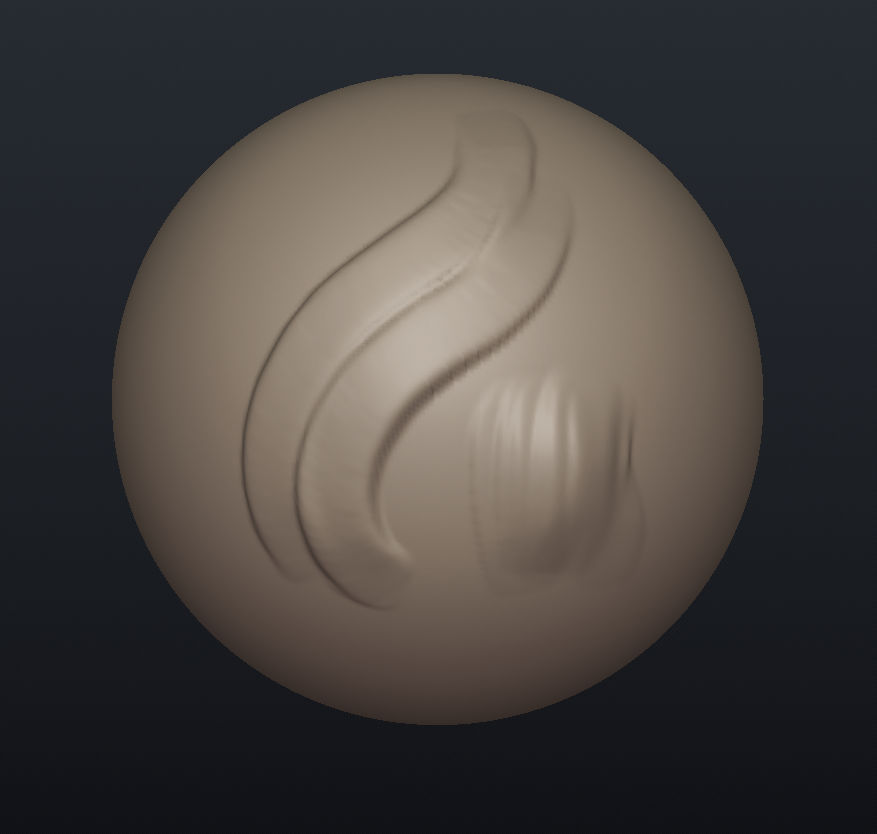
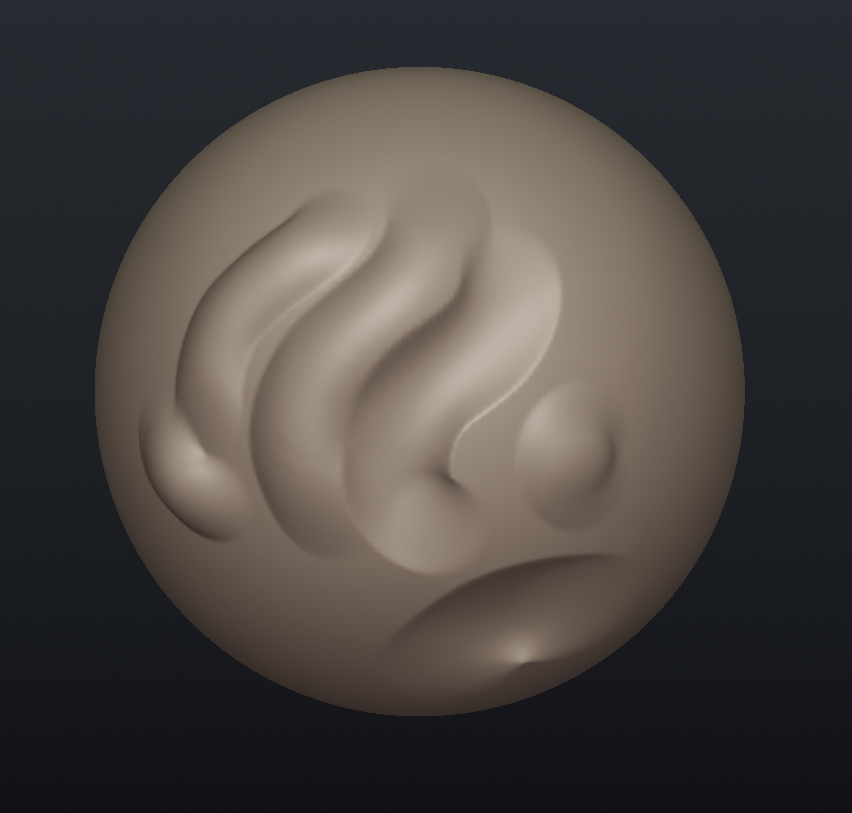
As with many of my pieces, this one started just as a sphere in Blender and me—tired after a day of work—not knowing what to do with it. Actually I was trying the amazing sculpting build by Pablo Dobarro, messing with the vertex paint in sculpt mode, the remesh tool, the cursor that responds with the normals… What an amazing build!! This guy has shortened a lot of the gap between Blender and ZBrush.
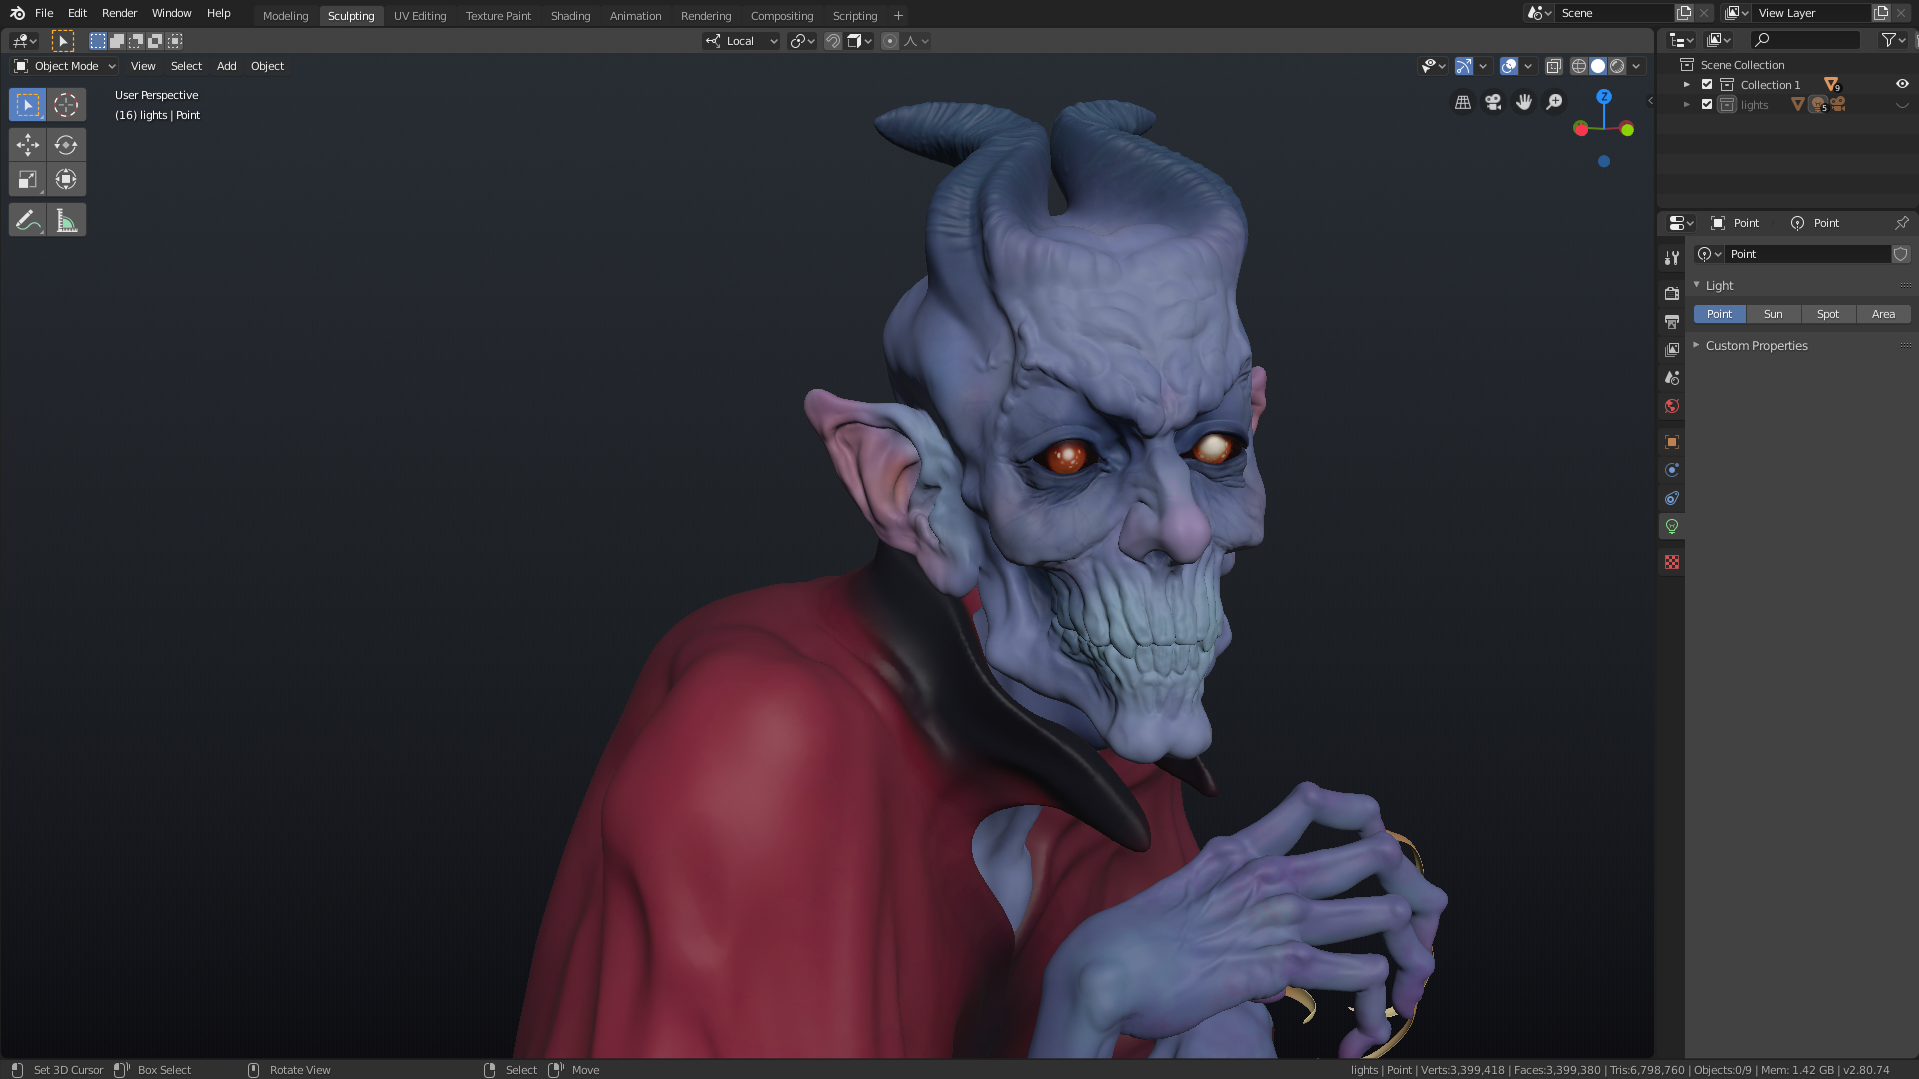
Well then… a head appears, a skull, eyes and horns. I start painting it (inspired by the blue demons by Niyazi Selimoglu), and realizing it could be a demon, or maybe a version of Nosferatu. A creepy and dark vampire, not charming and social like Dracula, but a creature that needs to hide from society, crawling in the shadows, lurking for its prey. Heavily inspired by the Nosferatu clan from Vampire: The Masquerade – Bloodlines, he leans into the darkness, away from the camera. The light hits his face stronger on one side, and his white sensitive pupils contract asymmetrically. He is a creature, but human, he still knows that, he still knows people will run from him, from his demonic appearance.
As I said, I used the Sculpt branch of Blender 2.8. And I keep struggling to decide whether to use ZBrushCore or Blender to sculpt. Because I know how fast and powerful the first one is, but it has an ugly interface, stuttering navigation and the absence of real conic perspective, which is quite an obstacle for me; it detracts from it. I think the software must be fluid to use in every way, but especially when it comes to orbiting an object in 3D. And Blender 2.8 has a beautiful interface, amazing navigation system, and I am so used to this software that I have reached a point that it feels natural to use it, unlike with ZBrush. But I know I am very biased because I love Blender, haha.
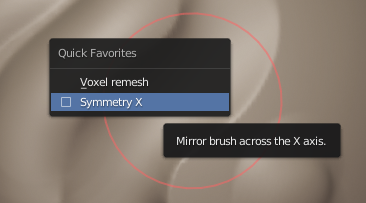
For this model, I started using Dyntopo to create the basic shapes, then moved to using the new voxel remesh system (which I highly recommend to be set as a quick favorite), defining the shape and adding details. I used smooth shading for this study, but I also recommend trying to sculpt with flat shading, so you know better how detailed your mesh is, and then decide if it can be subdivided even more.
I also used Speed Sculpt add-on by Cédric Lepiller to quickly add objects like spheres and vertices with skin modifiers automatically applied to them (very good to make limbs); and I always use Sculptors Toolbox – Ultimate Brushes by Jim Morren, especially Clay Strips 001 and Blob 001.
I strongly recommend adding symmetry and whatever is convenient for your workflow to the quick favorites.
And I also set the resize brush shortcut to the right button of my Wacom pen, so I don’t have to keep reaching for “F”.
Symmetrical sculpting in Blender is amazing because it uses local space, so this way you can pose the parts of the body and still keep sculpting with symmetry. That’s how I added the pose to the character. But always remember to turn off symmetry at some point, in order to make the character more natural and less static.
(Sorry, I don’t have the initial steps saved.)
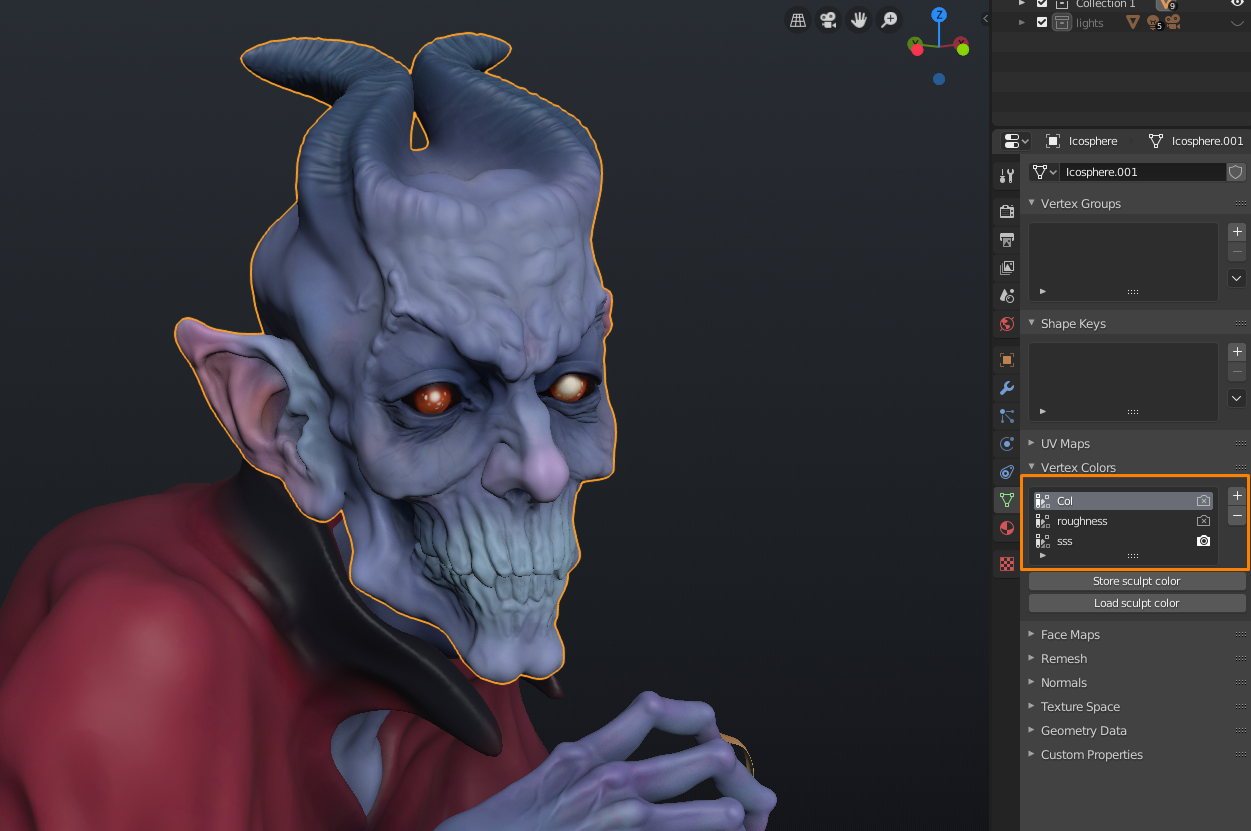
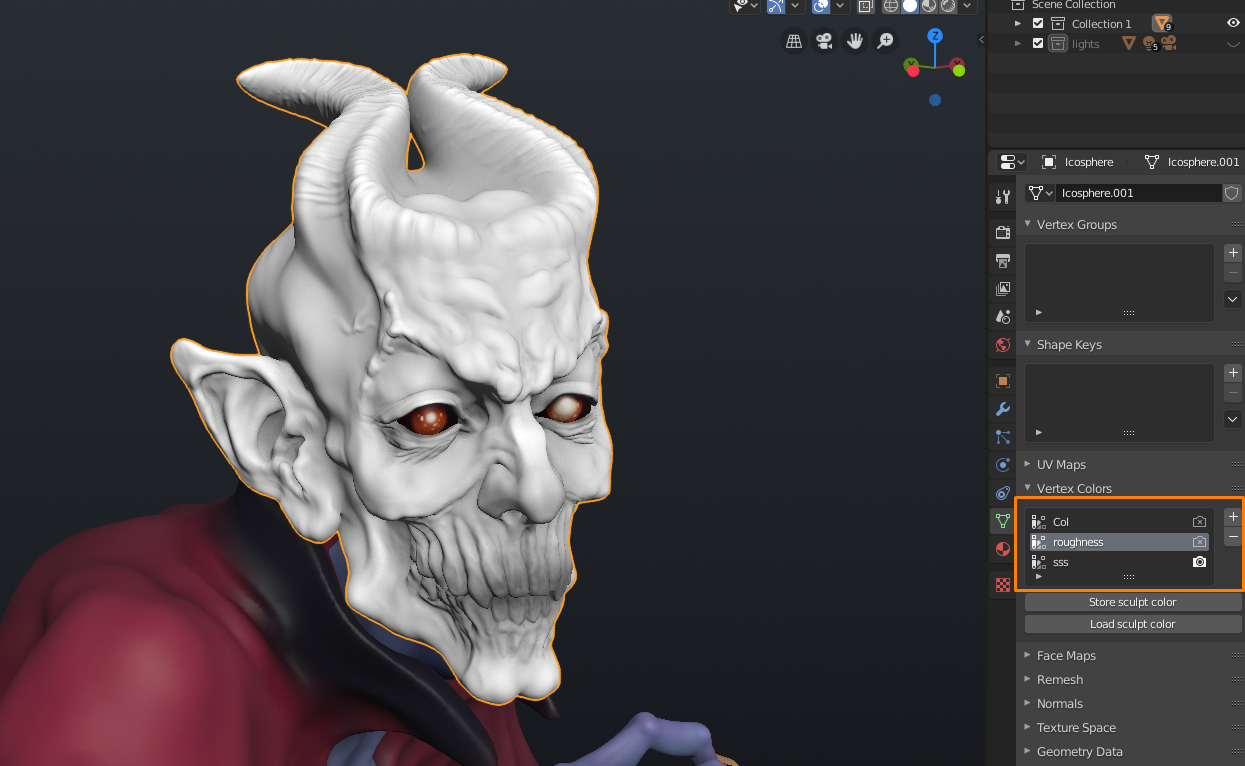
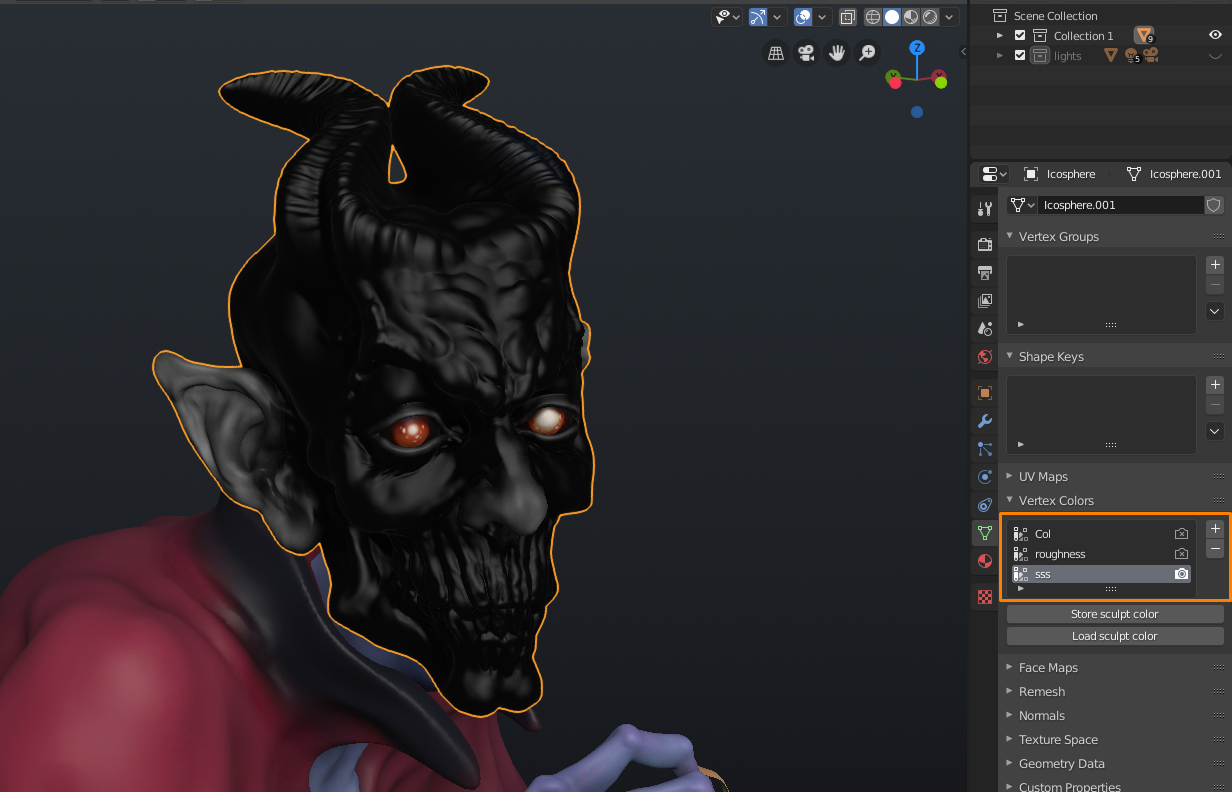
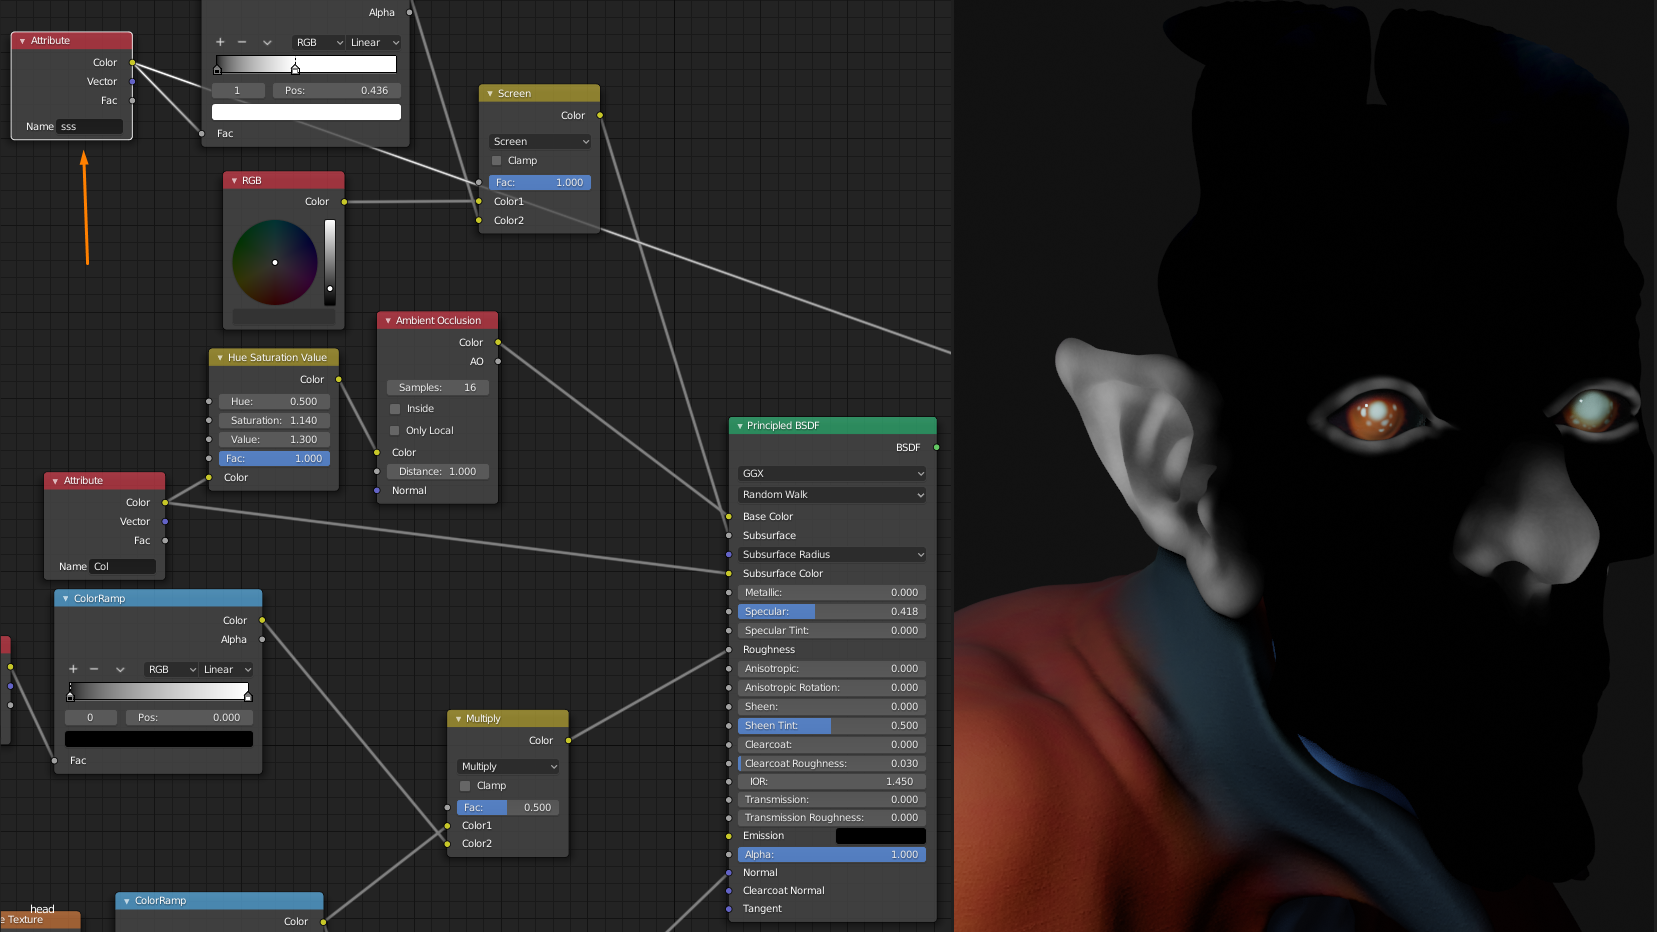
In order to paint the different layers, I used vertex color groups. This way I could separate subsurface scattering map, roughness and albedo. The only problem is that I can’t see the effect in real time in workbench or render mode (like in Substance Painter), as I would if I were texture painting. Maybe this build has it implemented, but I don’t know how it works. In order to see the vertex paint as part of the material in workbench, I have to click on “Store sculpt color”. But it was easy to understand where I wanted to paint the roughness and SSS.
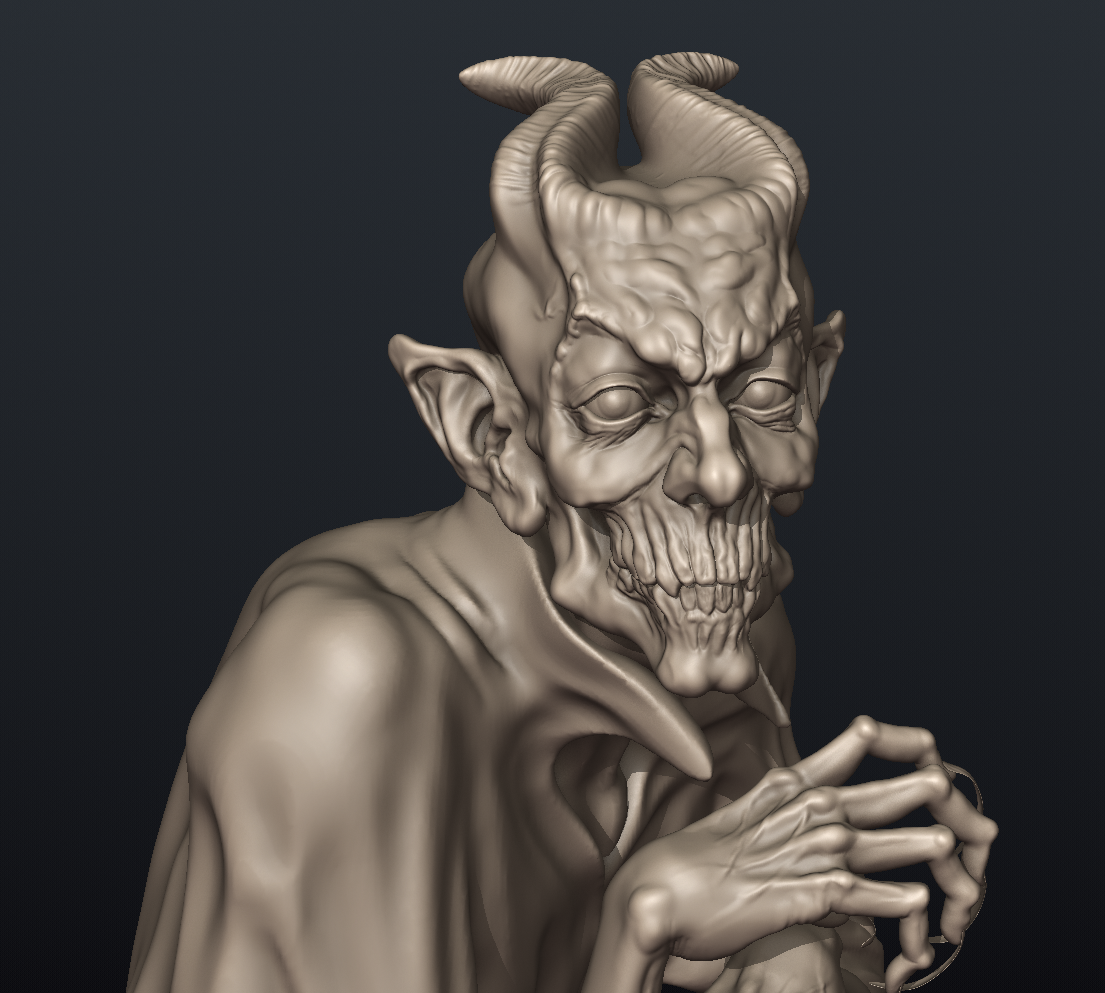
I wanted to make this a fast study, so I didn’t add details such as skin pores or too many wrinkles. The materials helped a bit to mimic the skin texture, although I think I could have made them a bit stronger.
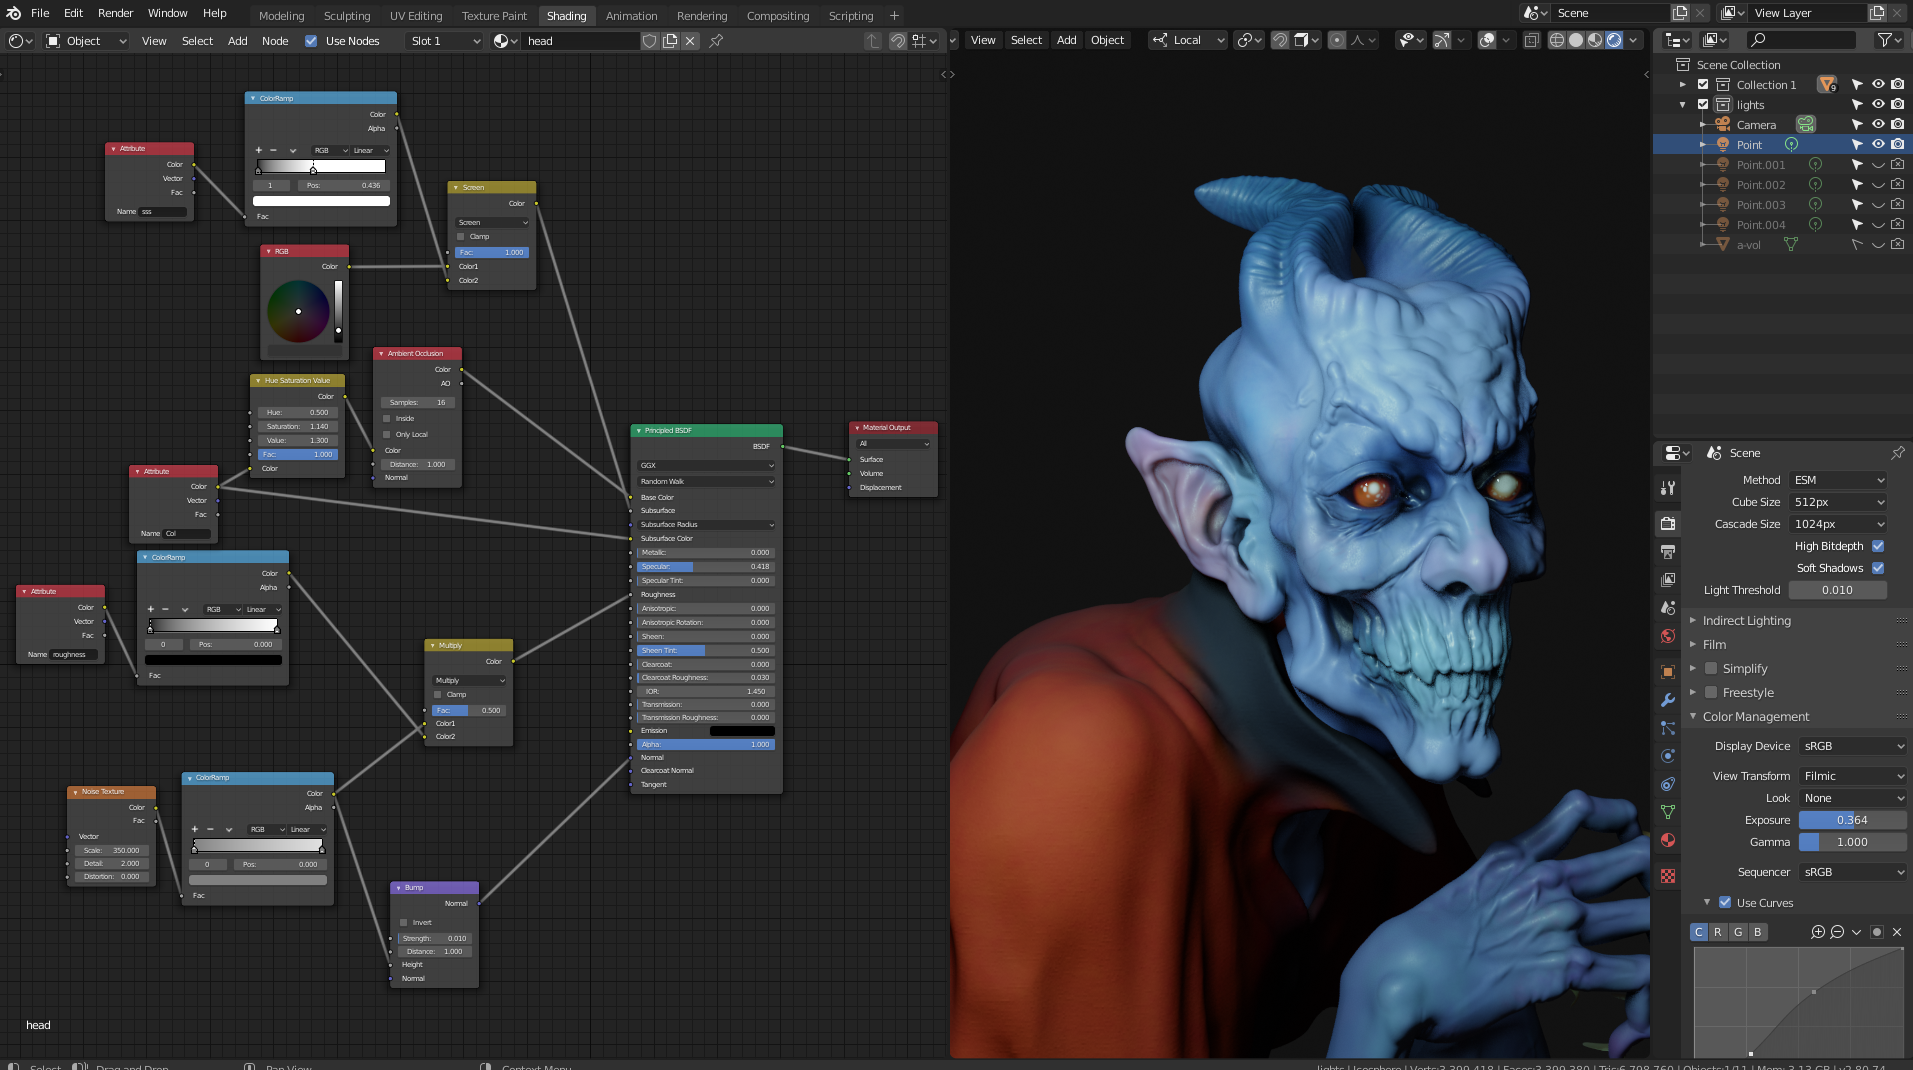
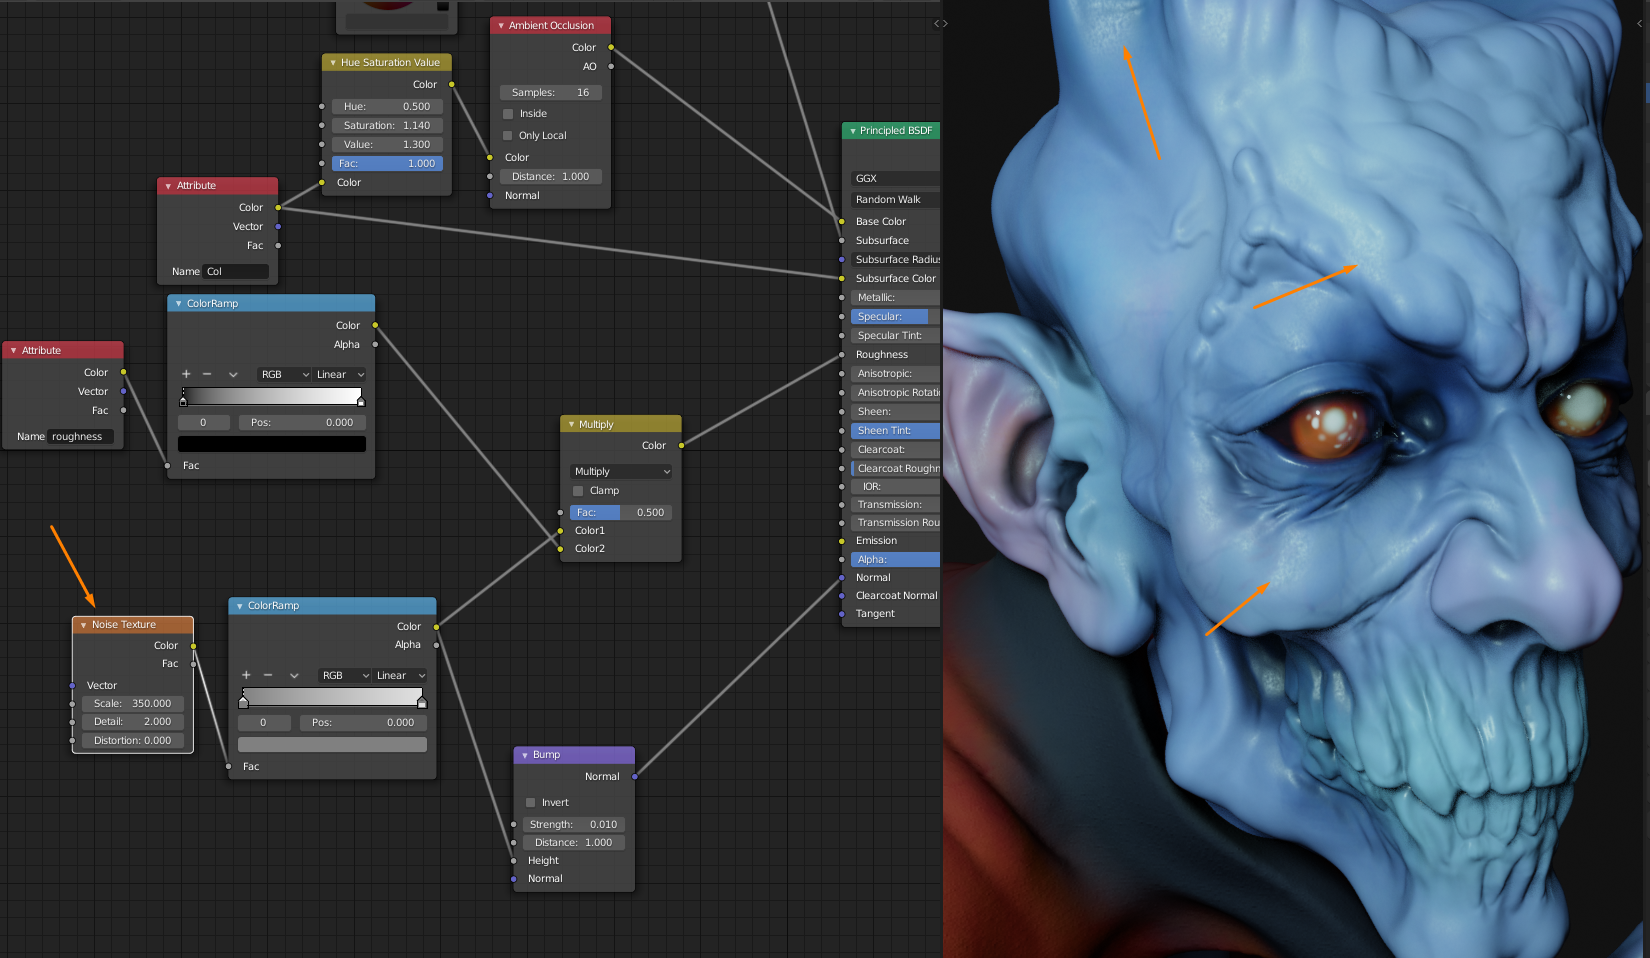
Adding a small scale noise texture as roughness and bump helps to fake a bit of skin texture. And then I mixed it with the roughness map to separate where I wanted this texture.
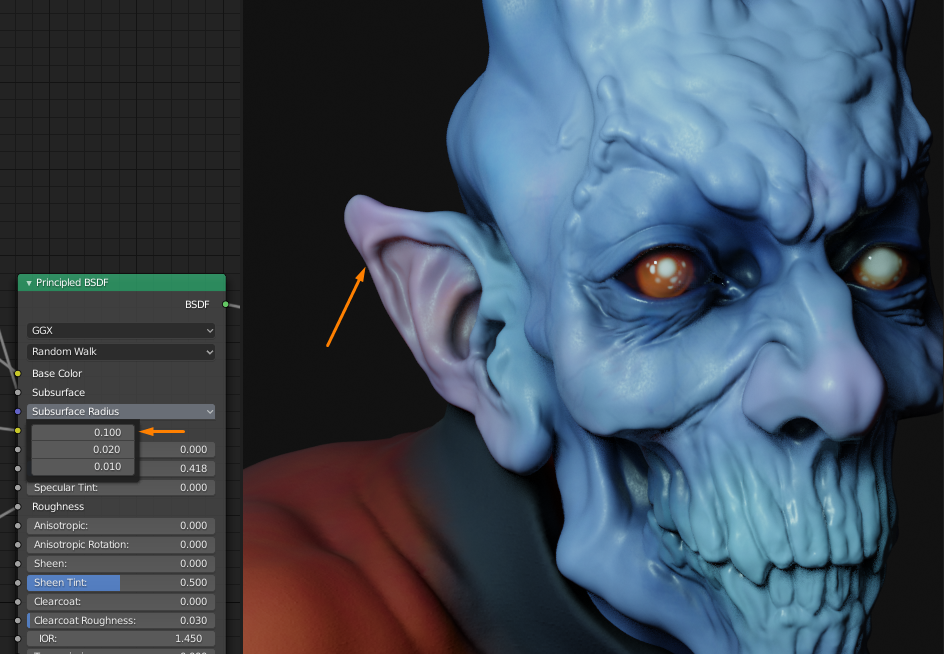
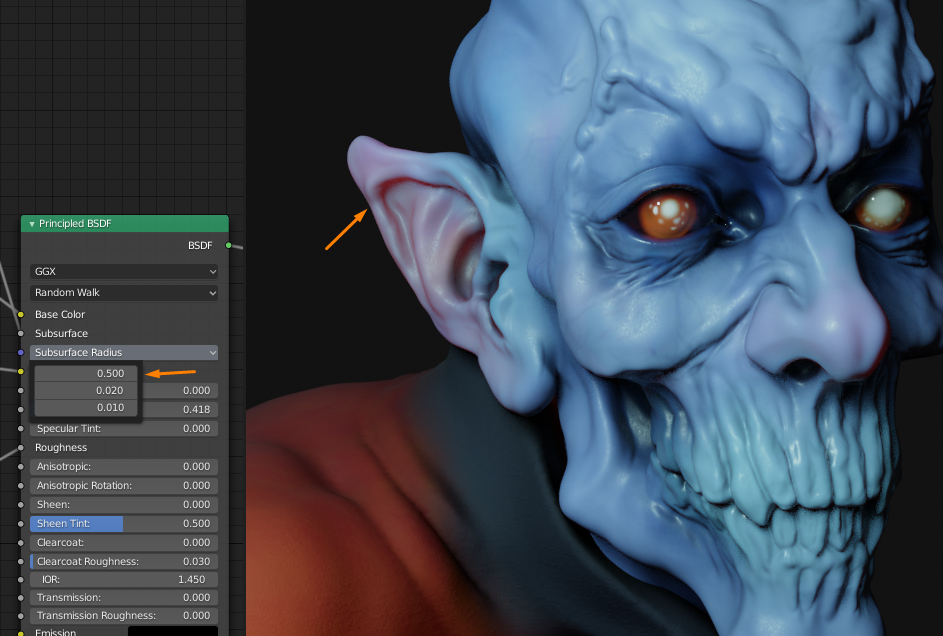
The subsurface radius helps to increase the SSS areas. Looking at it now, I should have gone for a stronger value. The mask below shows the areas where I wanted it to be SSS. You can control this value with a color ramp.
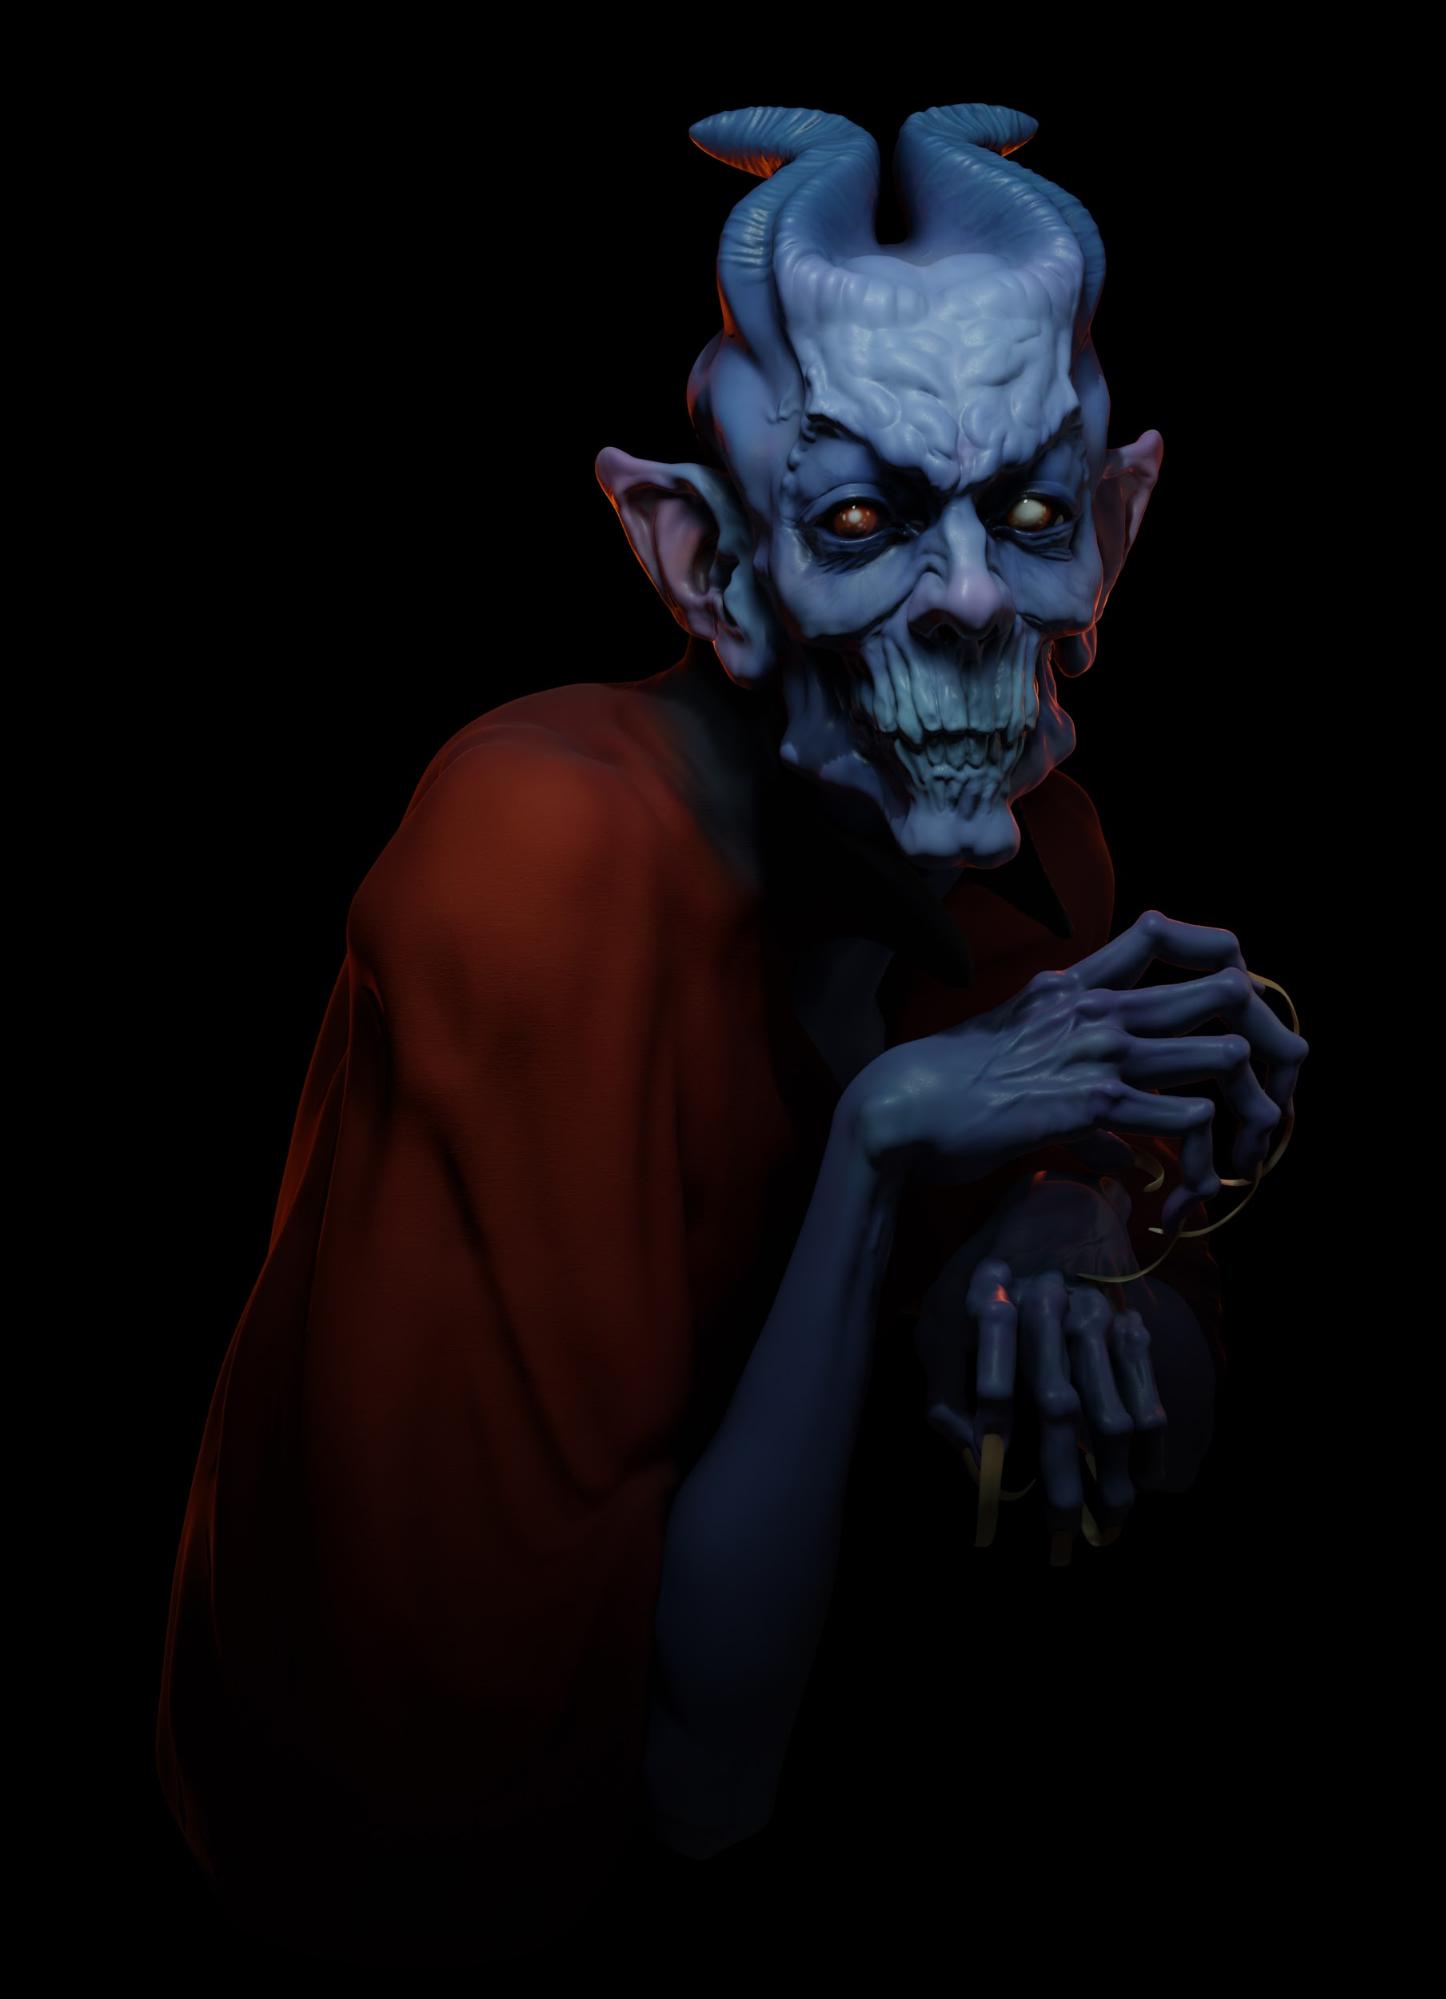
In order to light the scene, I wanted a mysterious look, so I only used one simple point lamp.

The character has one side of his face in the shadows. His body blends with the dark background. I tried different light scenarios, before choosing the one above. That is one of the biggest advantages of EEVEE, that you can quickly try different lighting configurations.

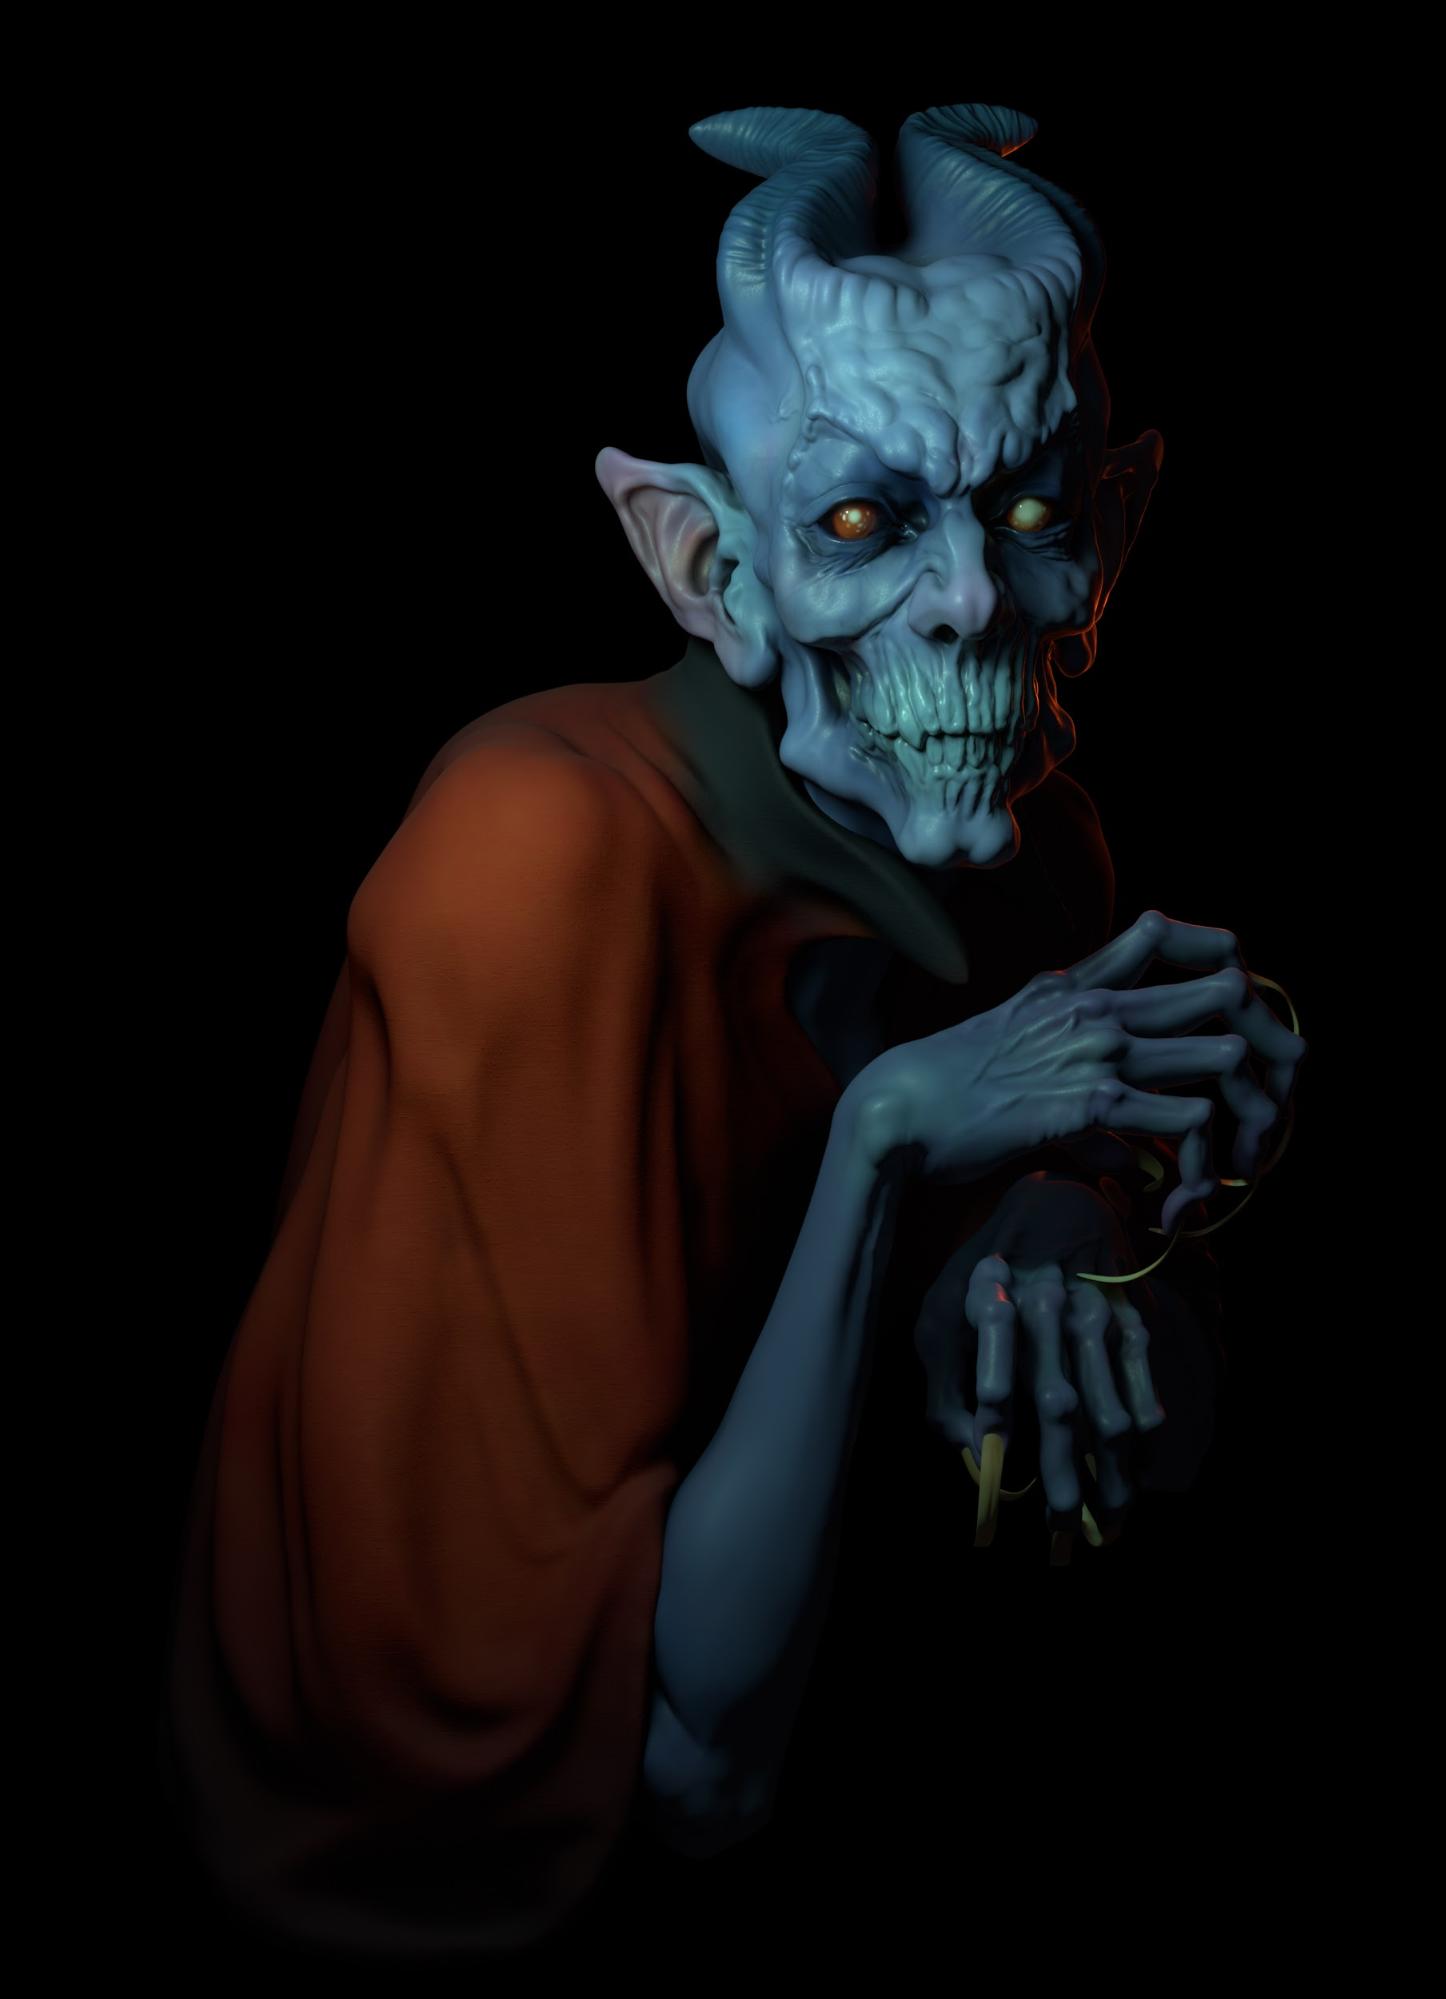
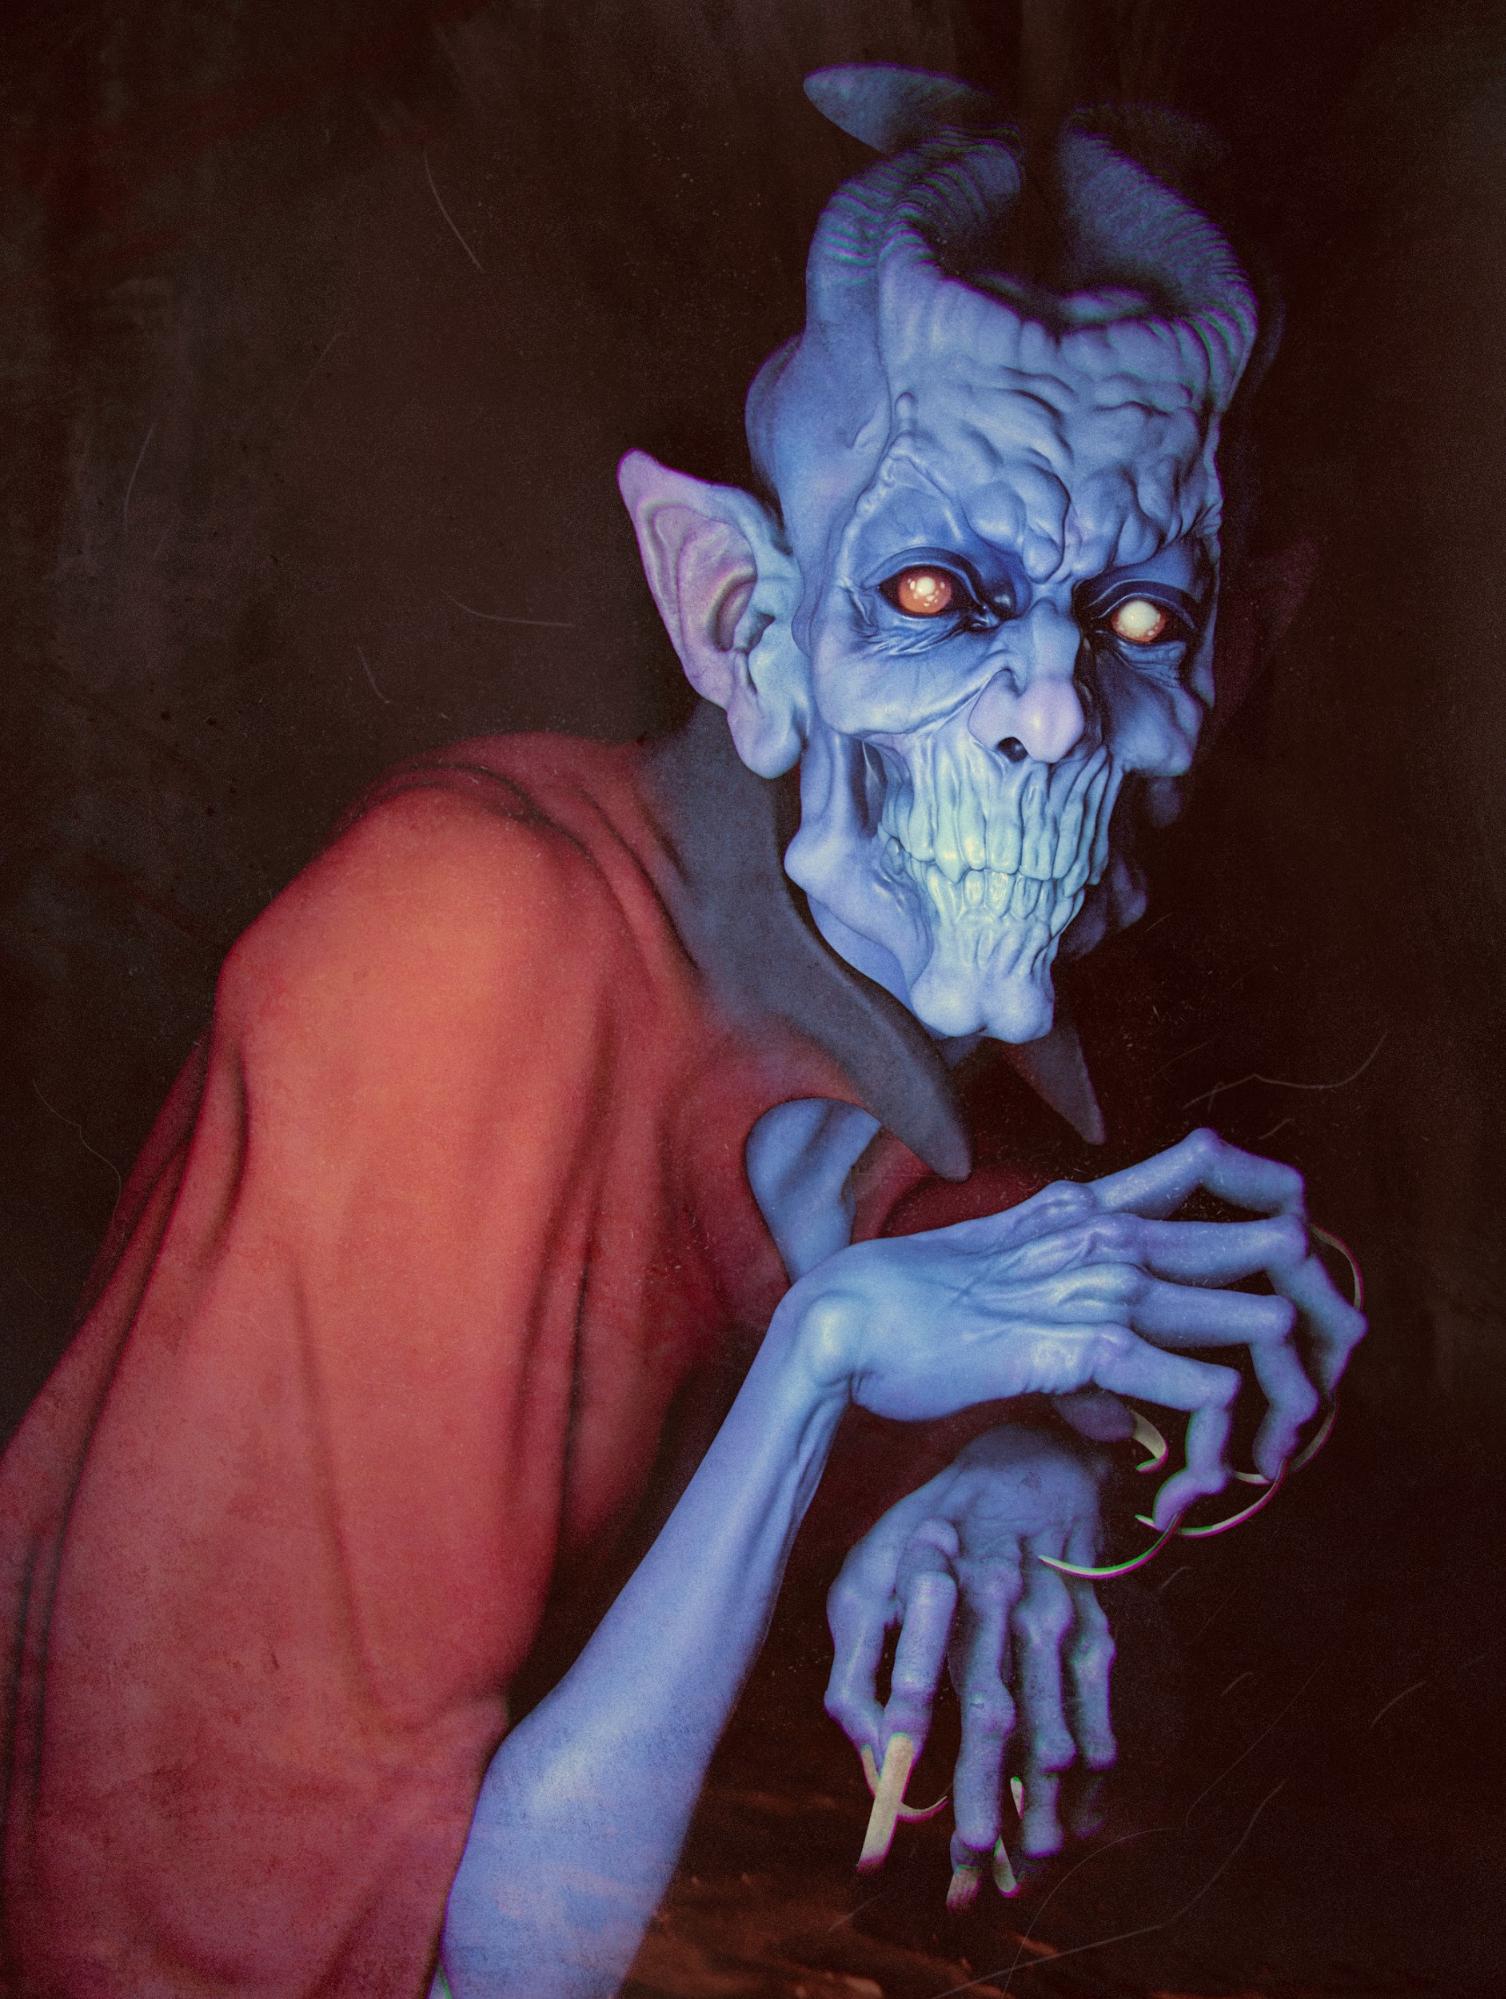
After rendering, I took the images to Photoshop and Affinity Photo for post processing. I added a background, a bit of noise, sharpened the image with HDR toning, some color correction, and some rough textures to give it a feeling of an old canvas.
There is also an alternative version, like if it was taken by an old camera, with chromatic aberration:
And that is about it. It was very good to make this study. I got more used to the sculpt branch with all its features, especially with the voxel remesh method.
Thanks a lot for the opportunity!
About the Author
 Daniel Aubert, Character Artist


