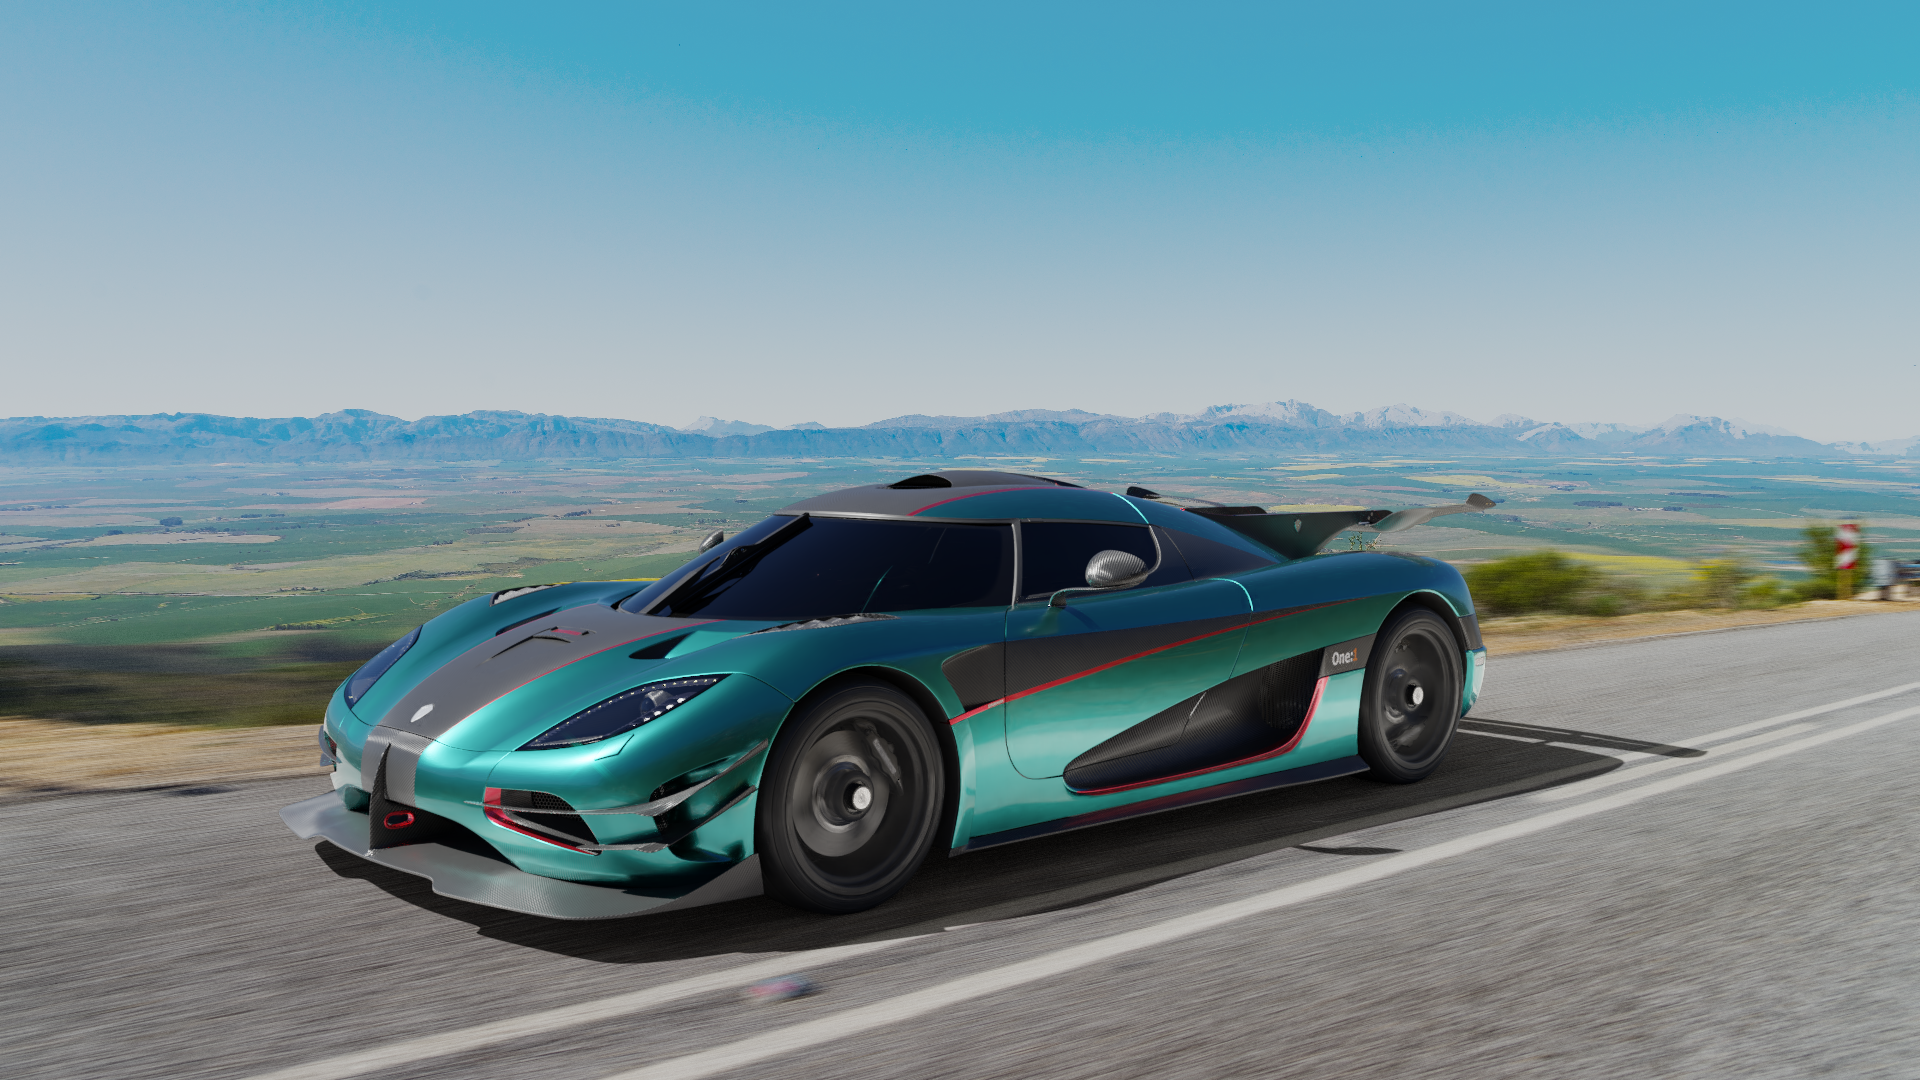
Behind the Scenes: Koenigsegg One:1
Hello!
My name is Abhinav Gajmoti. I am a B.Com (Hons.) graduate from New Delhi, India. I started learning Blender around two years ago by watching YouTube tutorials and Google. I have no art school experience or any art background.
Inspiration
The shape of the car inspired me to take on a bigger challenge as a learner because I personally think you gain more skills by taking on complex shapes and objects, rather than simple objects. This car seemed perfect for my skill level, as it has an interesting shape and something I never did before: car texturing.
Tools I Used
I used Blender 2.79 for modeling and 2.8 for rendering, GIMP, Inkscape, and Photoshop for this project. I mainly use Inkscape to create dashboard icons and all, as it gives me more control on the shapes and is much easier to work with for resizing.
References
I got the blueprints from SMCars.net and the blueprint was a perfect match, almost, as it was created from a 3D Model. I also gathered many reference images from a video by Globalcars.net on YouTube (too bad I stumbled upon it quite late and had to make many changes after that). The official website has some really good reference images.
Modeling
This is the first time I fully applied the shrinkwrap modeling technique. Shrinkwrap technique takes a bit of time and a small toll on the render time, but it is worth it and makes your workflow faster. It was tricky around some parts of the car, especially around the vents.

I begin modeling, generally, starting with the wheels and calipers. Whenever I had trouble modeling a part, I jumped to a different part of the car. For the curved part of the door, I simply made another guide mesh for the curved part.

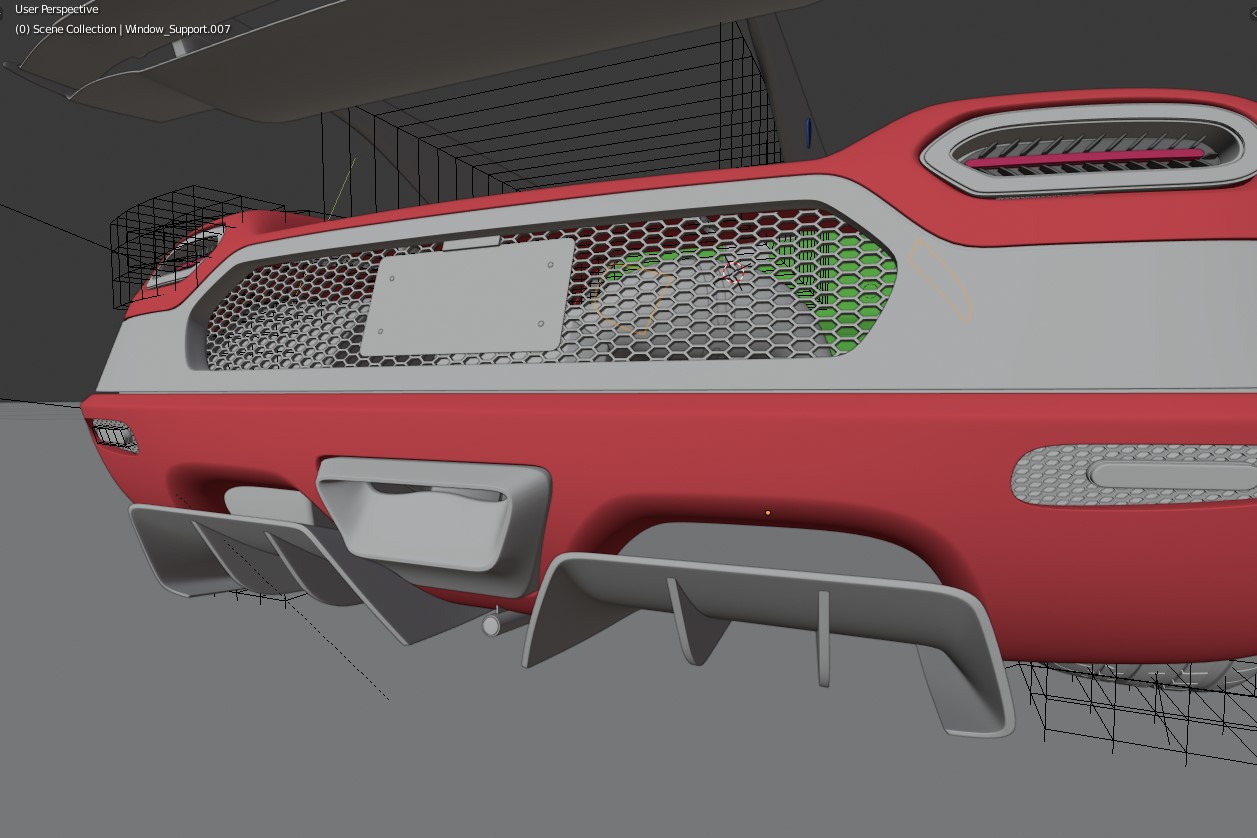
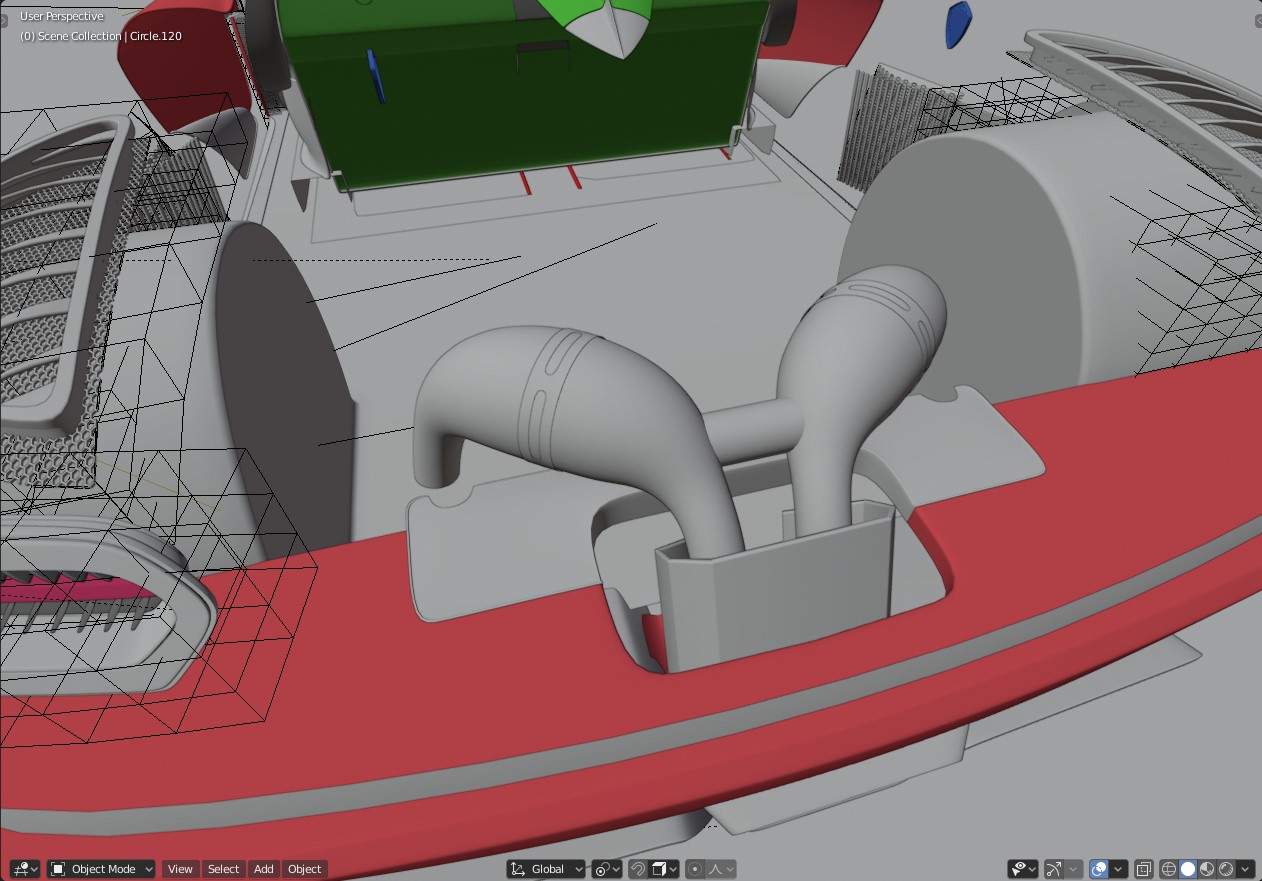
The inside of the Koenigsegg is so complex that I only modeled the exhaust pipe to fill in the empty space behind the grill.
Sometimes, even the simplest of shapes can be hard to model, like the active rear wing. Seems simple, right? Well, not so much, I personally found it one of the hardest parts of the car, if you are going for accuracy.

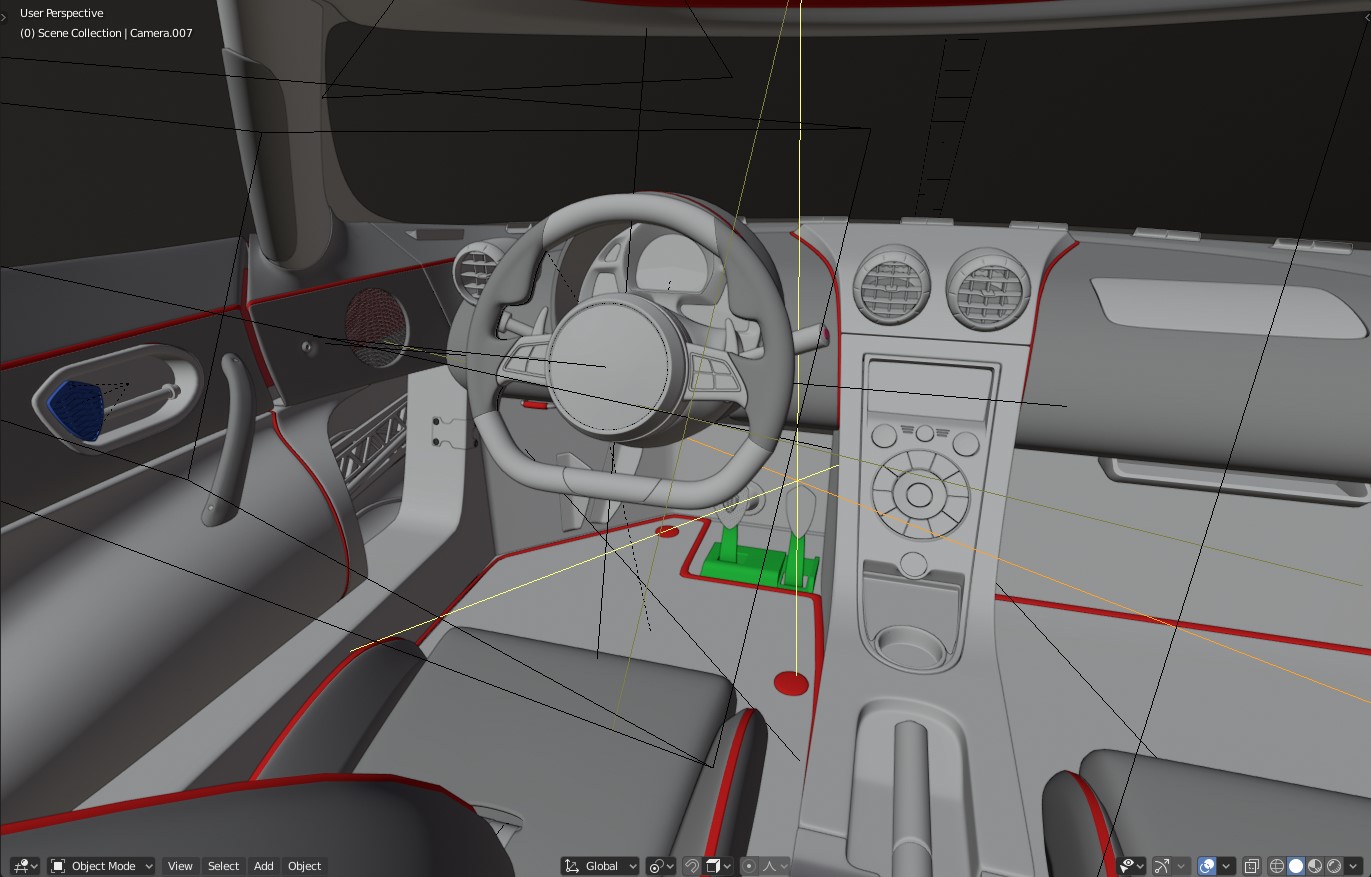
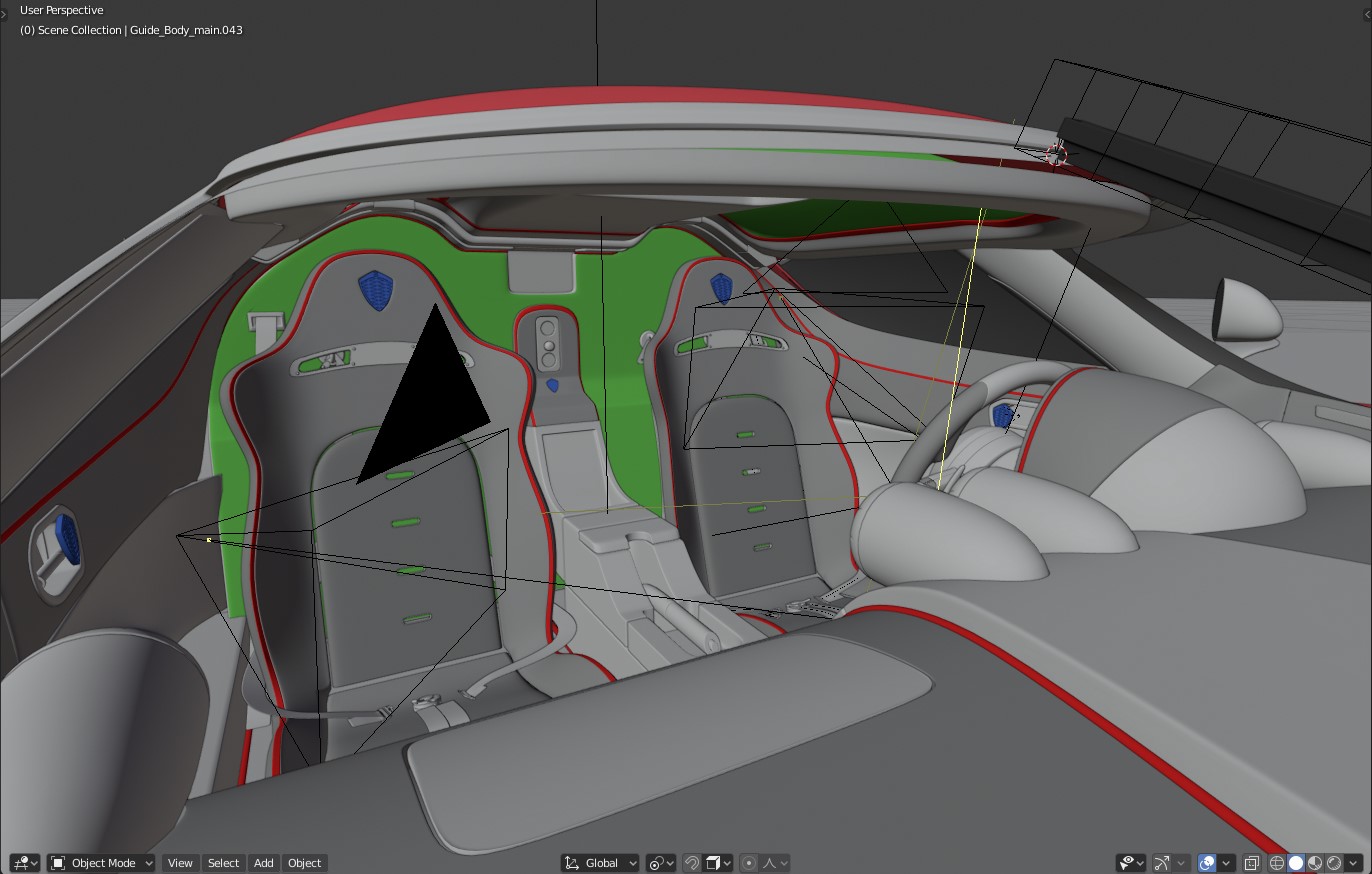
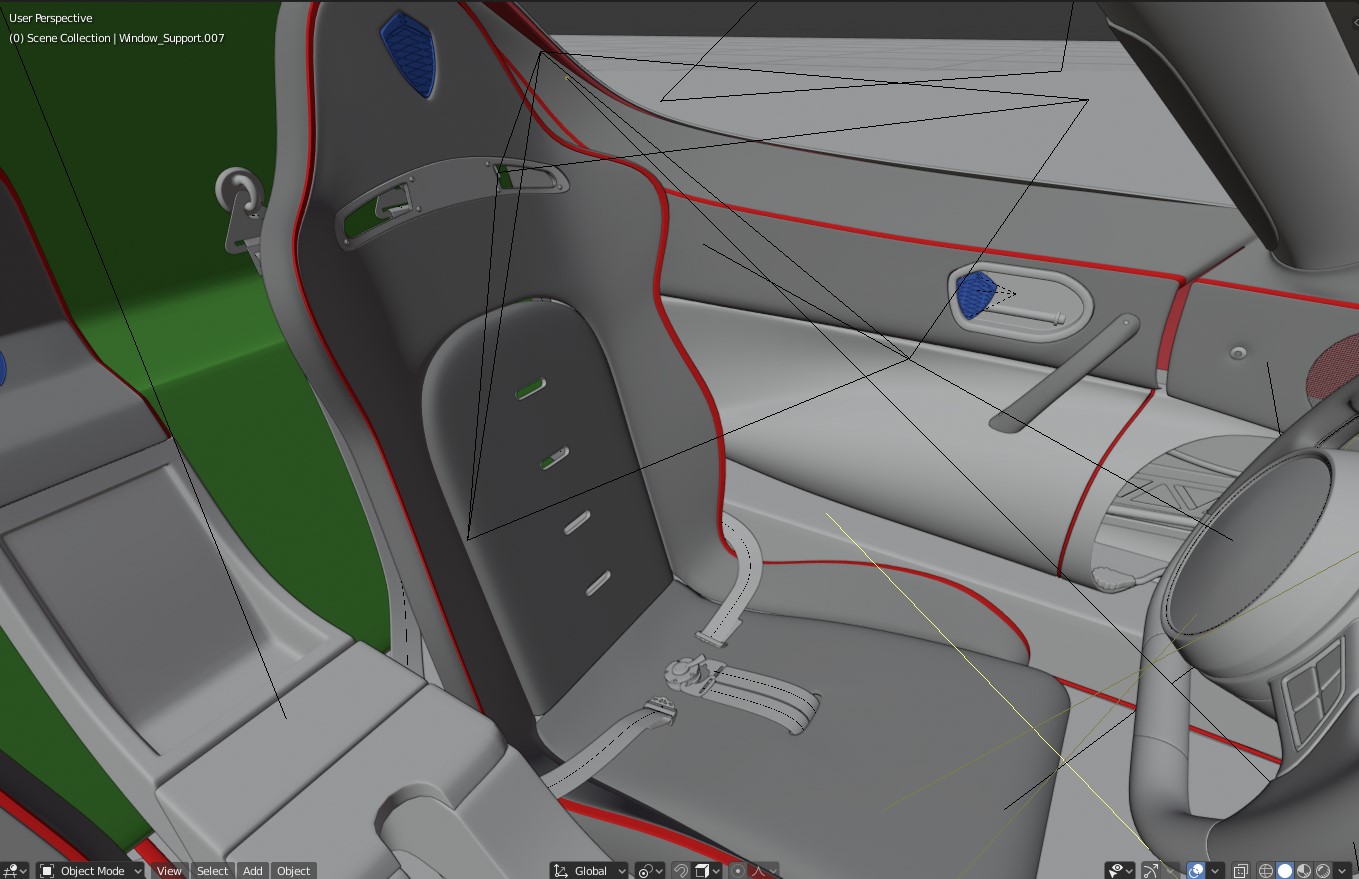
Modeling the Interior
I find modeling the interior of a car to be a challenge. While it may not be accurate or properly aligned, it was pure fun modeling the interior. I didn’t use any blueprint for the interior or any CAD drawings. All of the interior work was done by eyeballing and taking hints from reference images. It’s not accurate, but it gets the job done.
Texturing
For this project, I used the cut-out technique I learned from YouTube. Basically, you create a high poly shape of the texture part. You duplicate the original part (UV unwrap first) and then use Boolean with the intersect method and you texture paint it and then use the texture image for the original model.

I made the mistake of texturing the car before finalizing it, and it turned out to be a huge pain. For instance, I forgot to make the fuel cap before texturing and after making it, the texture was distorted because of the change in the UV. I then had to repeat the whole process of texturing.
Some texture areas were simple and were merely done by adding a different material to the part. Other textures were created in Inkscape, like the control panel:

The hardest texture to create was the carbon fiber. Because carbon fiber is more than a zig zag pattern, I couldn’t do it procedurally. So, I used the texture from textures.com. Here’s how a carbon fiber texture looks:

Lighting
I generally use HDRi only for lighting. I don’t add any other light source other than HDRi to light the scene, even for the studio renders where I used a different HDRi. HDRis, most of them, give enough light information to light an outdoor scene. However, it might not be the best method in all cases.
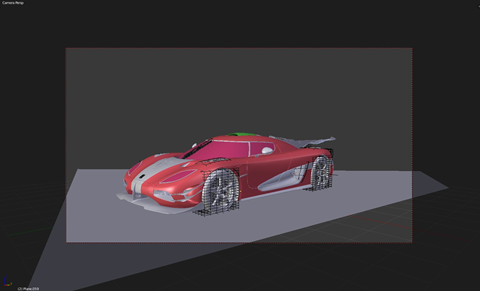
Setting up the scene
I read online that to make good renders, pick the car and backplate you like and make them match. I used the Versveldpas HDRi from HDRihaven and the backplate from the same. I used Photoshop for directional blur to make the scene more realistic and also for the fact that GIMP cannot do path blur as of now. I did quite some testing with different backplates and HDRIs, but I ended up settling with the one I liked in the beginning.

Because I am only modeling the car, I needed something to catch the shadows of the car. WIthout the shadows, the scene would not look real at all. This is quite easy to do. Add a plane and check the shadow catcher option. As the name suggests, it “catches” shadows of objects placed in the scene and only renders the shadows it catches. I also UV unwrapped the plane with the backplate as image texture to give more realistic reflections. For this, I used the Project from View method with the UV covering the ground beneath the car.

For the wheel rotation, I find the motion blur in Blender very fast and easy to work with. I applied the usual method of adding blur:

The Blender community was quite helpful in critiquing and improving the scene, and I really appreciate their help.
Composition
I used a very basic composition with glare and some color adjustments.

About the Author
Abhinav Gajmoti, 3D Artist


Is that lattice for making the tire bulge a bit at the bottom? That has quite some sub-division by the way.
I did find the part a bit confusing about modeling with shrinkwrap method. First its said it takes some time, but it does speed up the workflow.
Could you elaborate a bit more on that subject?
Yes, that’s lattice. More sub-divisions give me more control on how much part of the wheel gets bulged. I first used few sub-divisions, but the lattice was also pulling the part of the wheel out under the rims .
I suck at explaining, so bear with me, please.
It takes time to master the skill of modeling your car in a single piece. Since modeling different pieces is easier but doesn’t give smooth reflections that passes onto another mesh perfectly. So, it takes some time to model the base mesh (upon which you put the pieces together) but once you have a base mesh ready, like shown in the first picture, then adding panels (like door, hood, bumper) is so much faster and easier because now you don’t have to adjust your mesh much. We can get away with triangles and more edge loops without creating creases and distortions. (I always take the all quads approach)
If you model piece by piece, then managing the mesh is much more difficult since you have to retain shapes while adding cutouts in mesh and making sharper corners. This can take more time if you are working with a car/object that has many cutouts/vents, etc than if you were to make a complete single mesh before and later add panels on top of it using shrinkwrap. This is what I mean when I say that it takes time since you basically model the object twice. But once you get good at it, then it saves a lot of time.
It’s just like how people spend hours on sculpting a figure but then quickly add mesh on top of it using the shrinkwrap technique.
I hope I explained well. If not, I can try again.
Yeah I understand the lattice, I had same issue with a model of mine
I didn’t add that much divisions though
Hi Abhinav ,
Awesome art work , without art school you making amazing artwork 3d work , thank you sharing this post and art work. I am from india (Gujarat) , i am multimedia artist , i am working on blender as 3d artist past 6 year.
I can’t believe your this good after 2 years. I have been Using blender since 4 years now and my brother, after I saw your work, I realized that it doesn’t matter how long but how well you study and practice. I probably haven’t been practicing efficiently.
Please can you give me tips on how to improve. I have really tried my best. Downloaded lots of tutorials but I don’t think I can produce what you produced. I envy you. It was only recently I posted one of my renders on the Facebook Blender group page and I got 200+ likes. It’s the highest like I’ve ever gotten on that group with less critiques.
Help me improve Sir!
Thanks, Jeremiah!
I have no idea what tutorials you watched and how much information they contain, so try to look for quality tutorials from the likes of Blender Guru, Penfinity, Gleb, etc. And try to develop your field. I have found that the interview sessions from Blender Guru can help you much.
If you are interested in car modeling, then there are few courses you can purchase. Just keep practicing and you will get good. Like, you don”t have to model a complete stuff but a part of an object to learn something new. We just use the basic tools for modeling all the time, so learn the techniques.
Also try to get critique from other social media sites like reddit/r/blender or Blenderartists. I have not seen your work, so I have no idea what you can do. But keep practicing. Also take on more bigger projects. I remember seeing the forest tutorial by CGGeek, and I produced this: https://blenderartists.org/uploads/default/original/4X/c/1/a/c1a86cc8e2dd909ea83cedf31042e1c1b04ef18a.jpg
I didn’t like it. I immediately created something different. I didn’t use anything special, just my mind and the stuff I learned from the that tutorial: https://blenderartists.org/uploads/default/original/4X/5/8/e/58e342b9d9386a0ca20cc61991116b8bb0bc99a2.jpg
1. Start something complex
2. Get stuck/Fail
3. Find solution (anyhow)
4. repeat.