About me
My name is Jakob Scheidt, I’m an artist from Germany, living near Stuttgart. I have been drawing all my life and started to use digital applications like Paint and ArtRage for 2D painting and drawing. At that time a friend of mine showed me some 3D models he created in the free 3D software Blender. I was fascinated and downloaded Blender 2.6 right away. After 2 years of experimenting with the software I started to really get into 3D. I tried different disciplines of computer graphics, first creating simple objects from primitives, later trying game asset creation, animation, and vfx. In the last few years I focused on organic modeling and creatures in particular. A big passion of mine has always been turning drawings of fantasy creatures that I do regularly into 3D renders.
Tools Used
- Blender 2.8
- Blender Add-ons: Cycles Material Vault, Graswald
- Substance Painter
- Photoshop
- Wacom Tablet
Concept Art
A common practice of mine is looking at concept art and illustrations on ArtStation to get inspired. Sometimes I like a particular artwork so much that I ask the artist if I can use it to create a 3D artwork out of it. One day I stumbled across Jens Kuczwara's ArtStation page, he’s a very talented Concept Artist & Art Director.
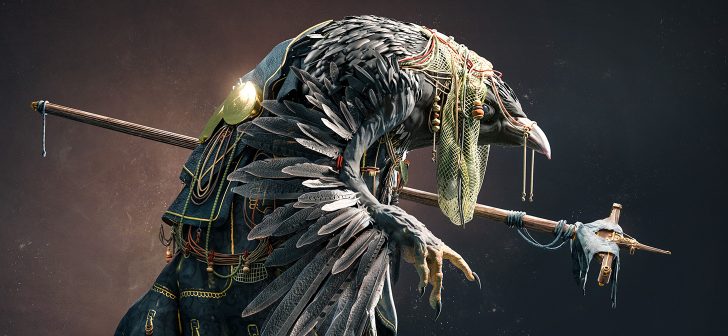
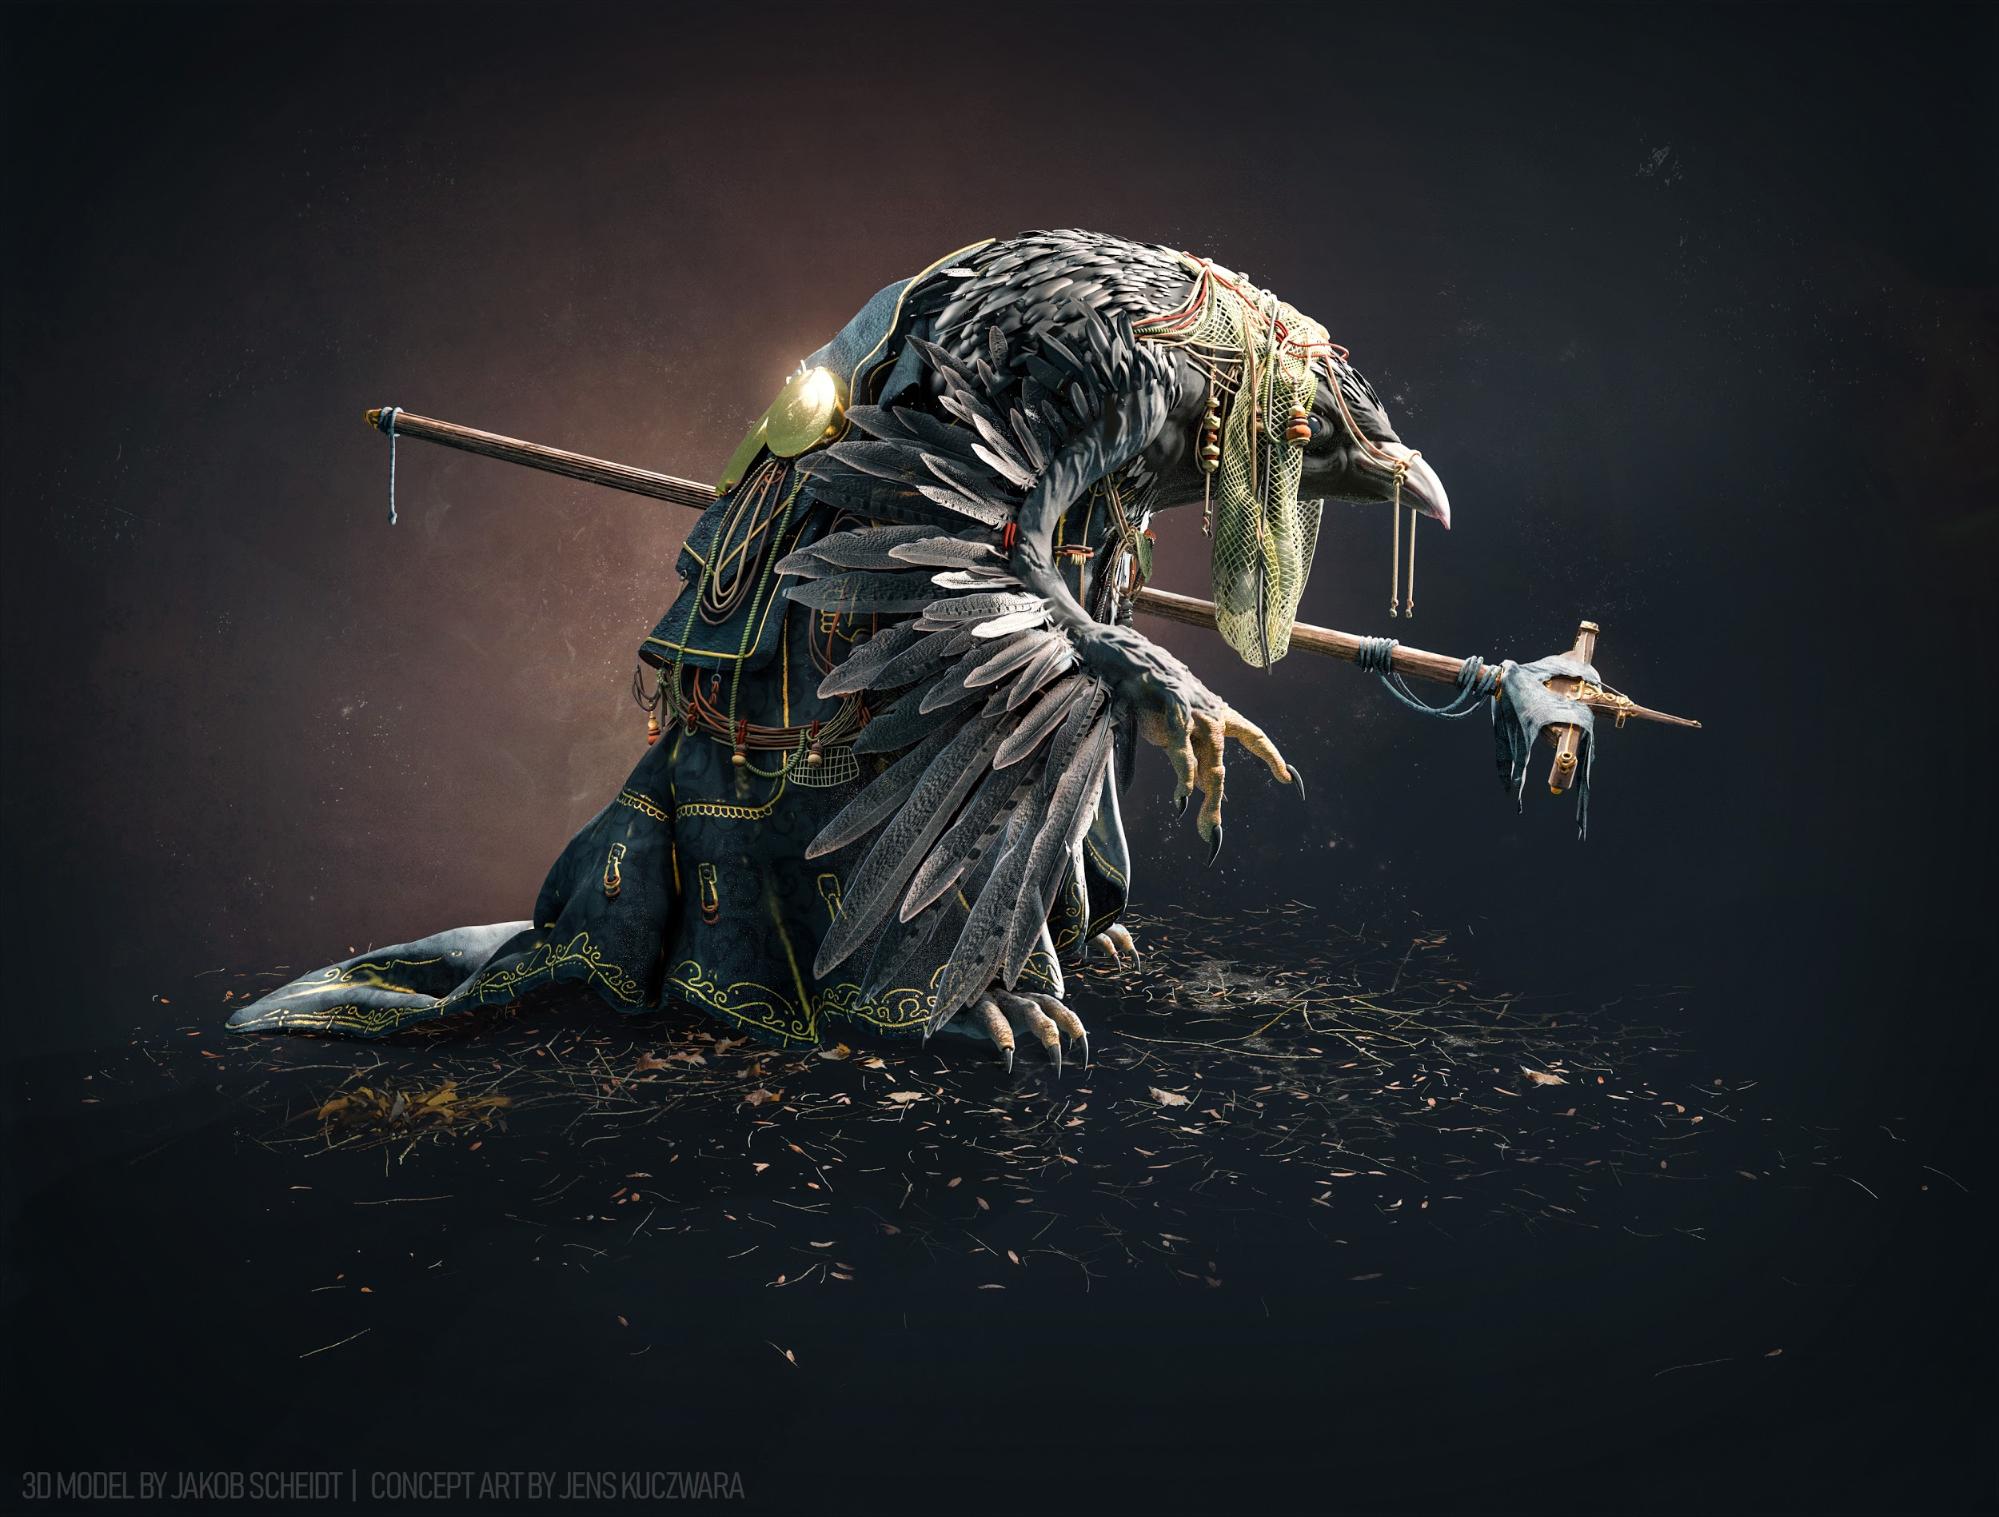
I wanted to capture the interesting vibe of this creature and present its appearance with dramatic lighting and all the oriental details.
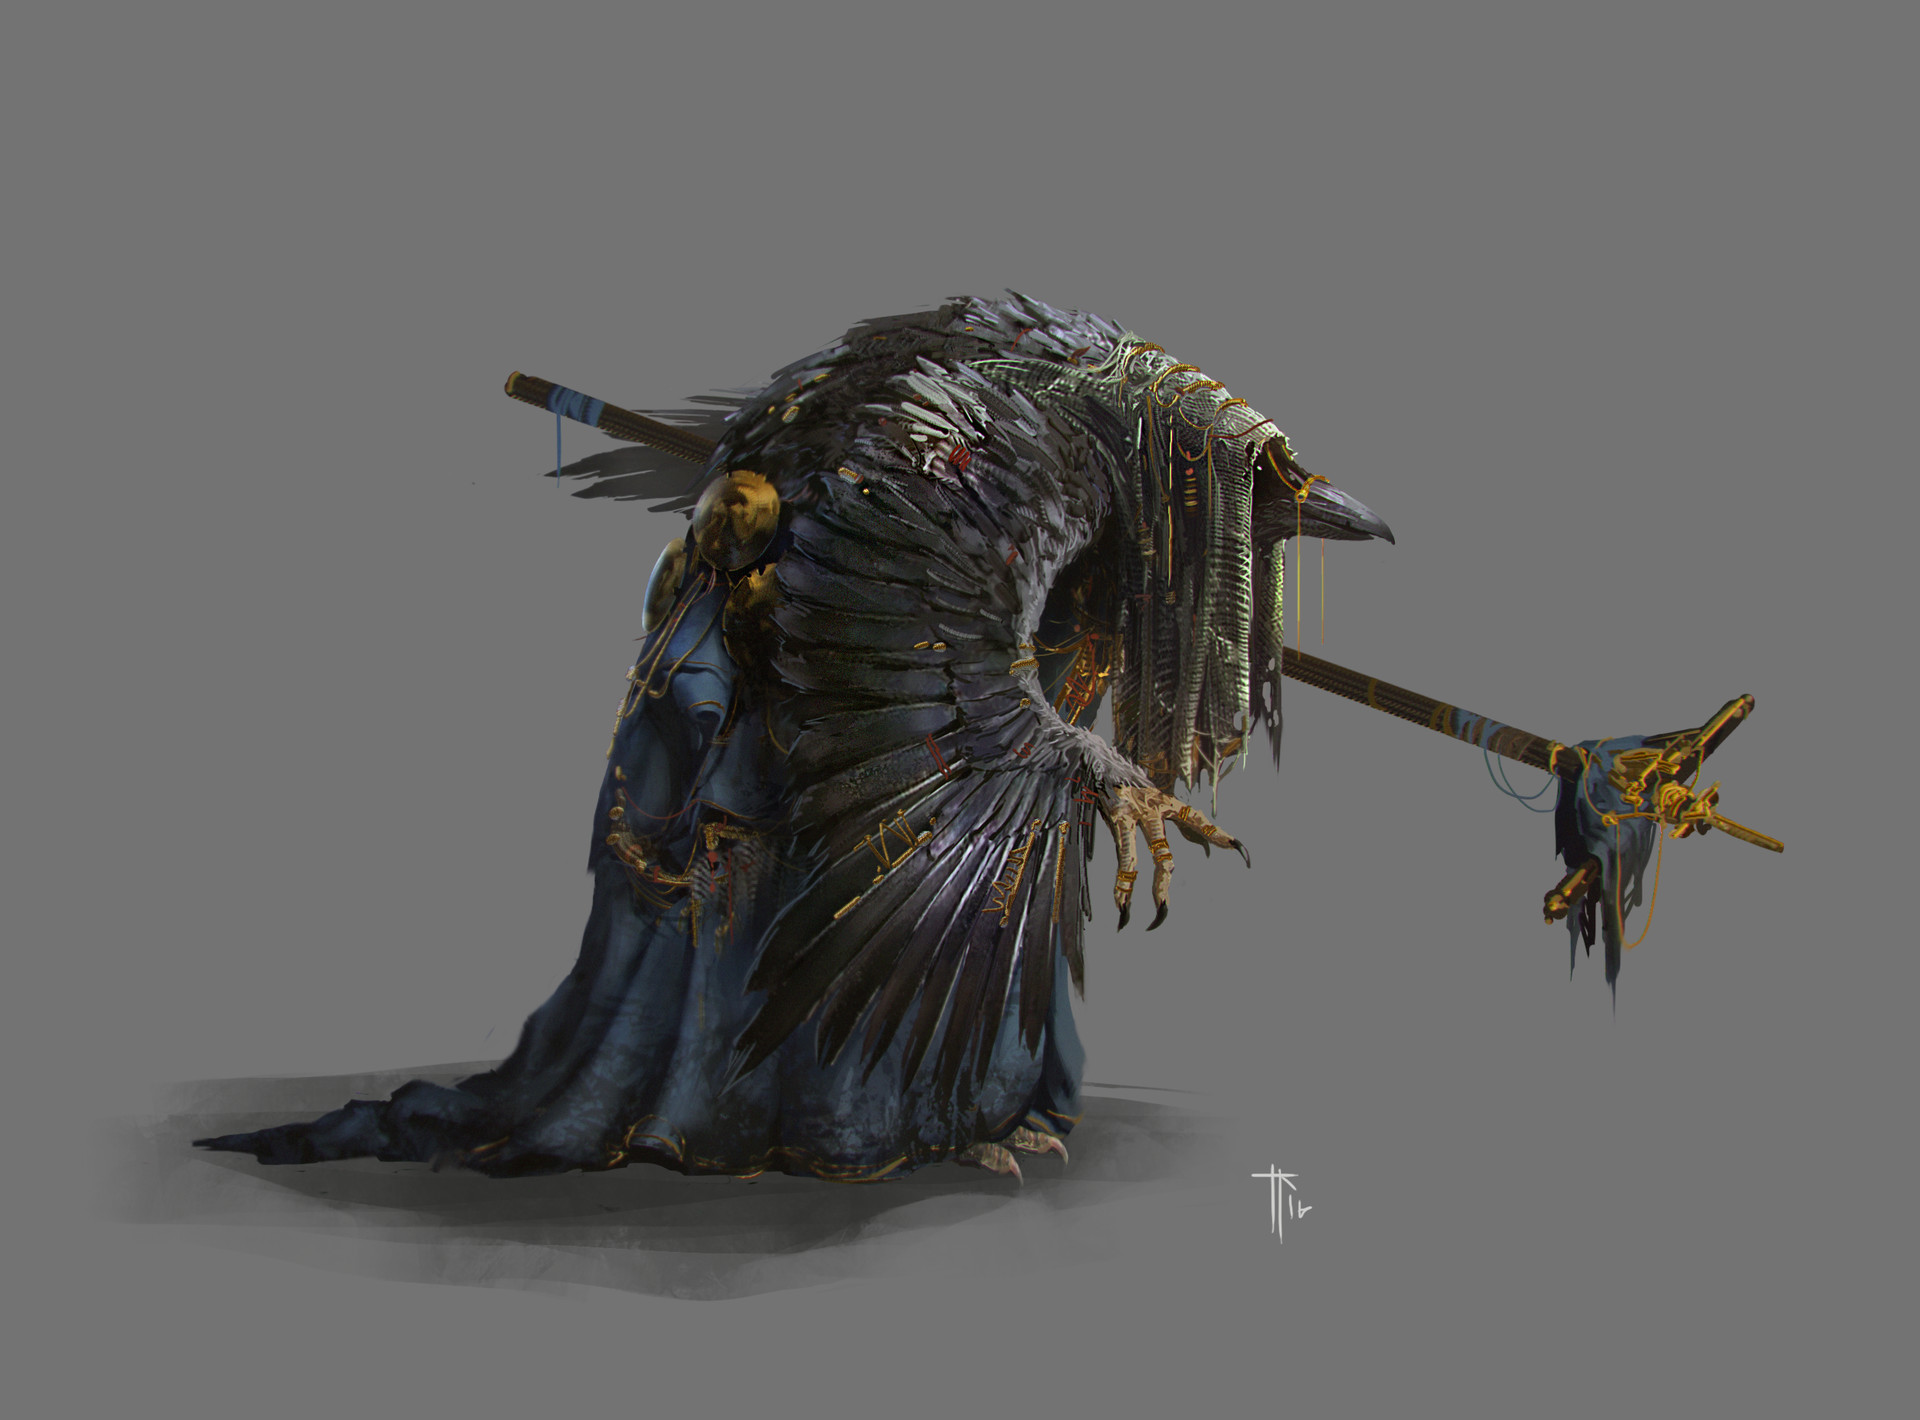
Concept Artwork: “Bird Person” by Jens Kuczwara
References
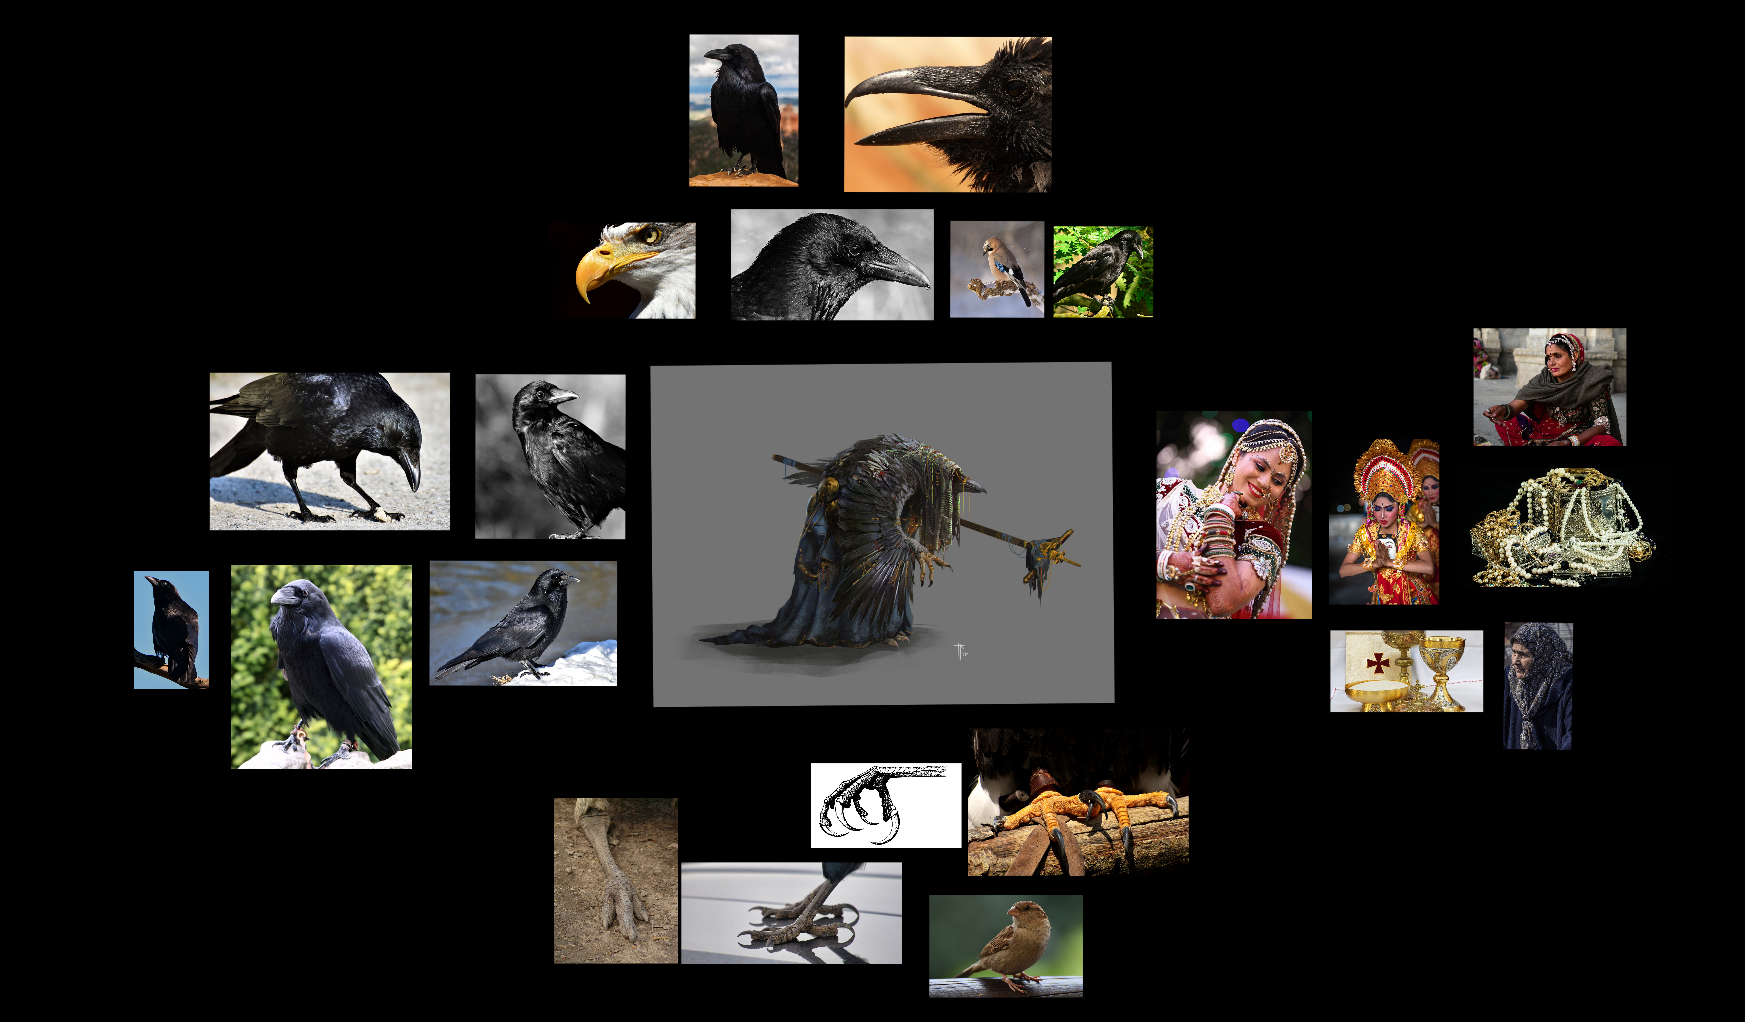
Jens Kuczwaras’ concept gives a very good idea of the mood and atmosphere of the creature. Except for the hands, the bird itself looks similar to a crow, so I did some research and gathered some reference images.
Blockout
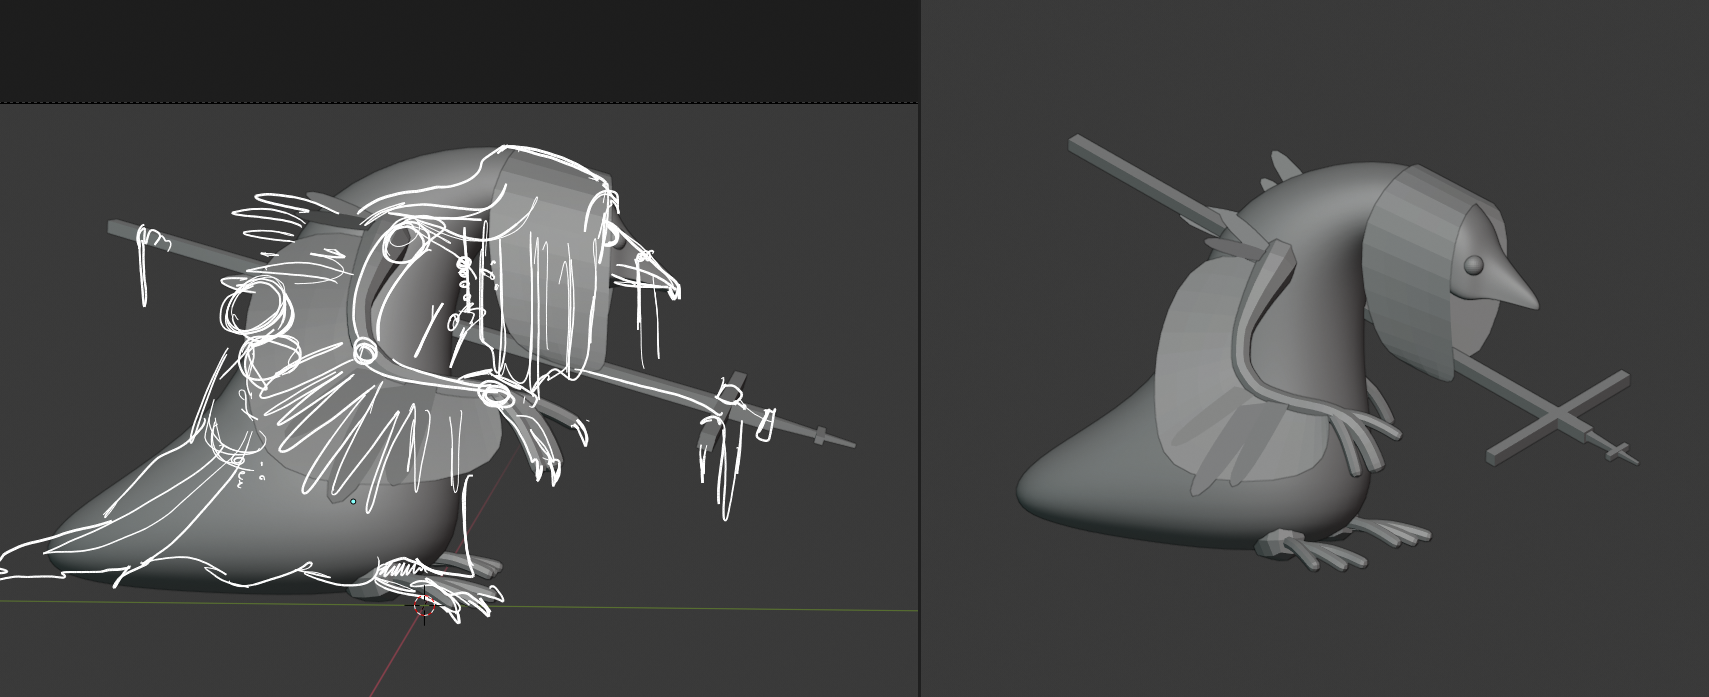
I started in Blender, using primitives with a subdivision surface modifier or skin modifier to get the main forms blocked out in 3D. After tweaking the proportions and playing with the silhouette, I used the grease pencil feature to draw on top of the model and add the most important details. At this stage I was already thinking about the order in which to model the different parts and what parts of the concept to change.
The different parts of the blockout were placeholders for the detailed objects that would be added in later. They also gave an idea of the pose, the main volumes and the proportions.
Sculpting the Body
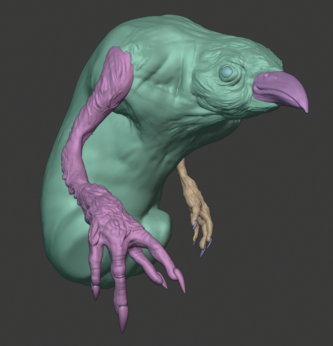
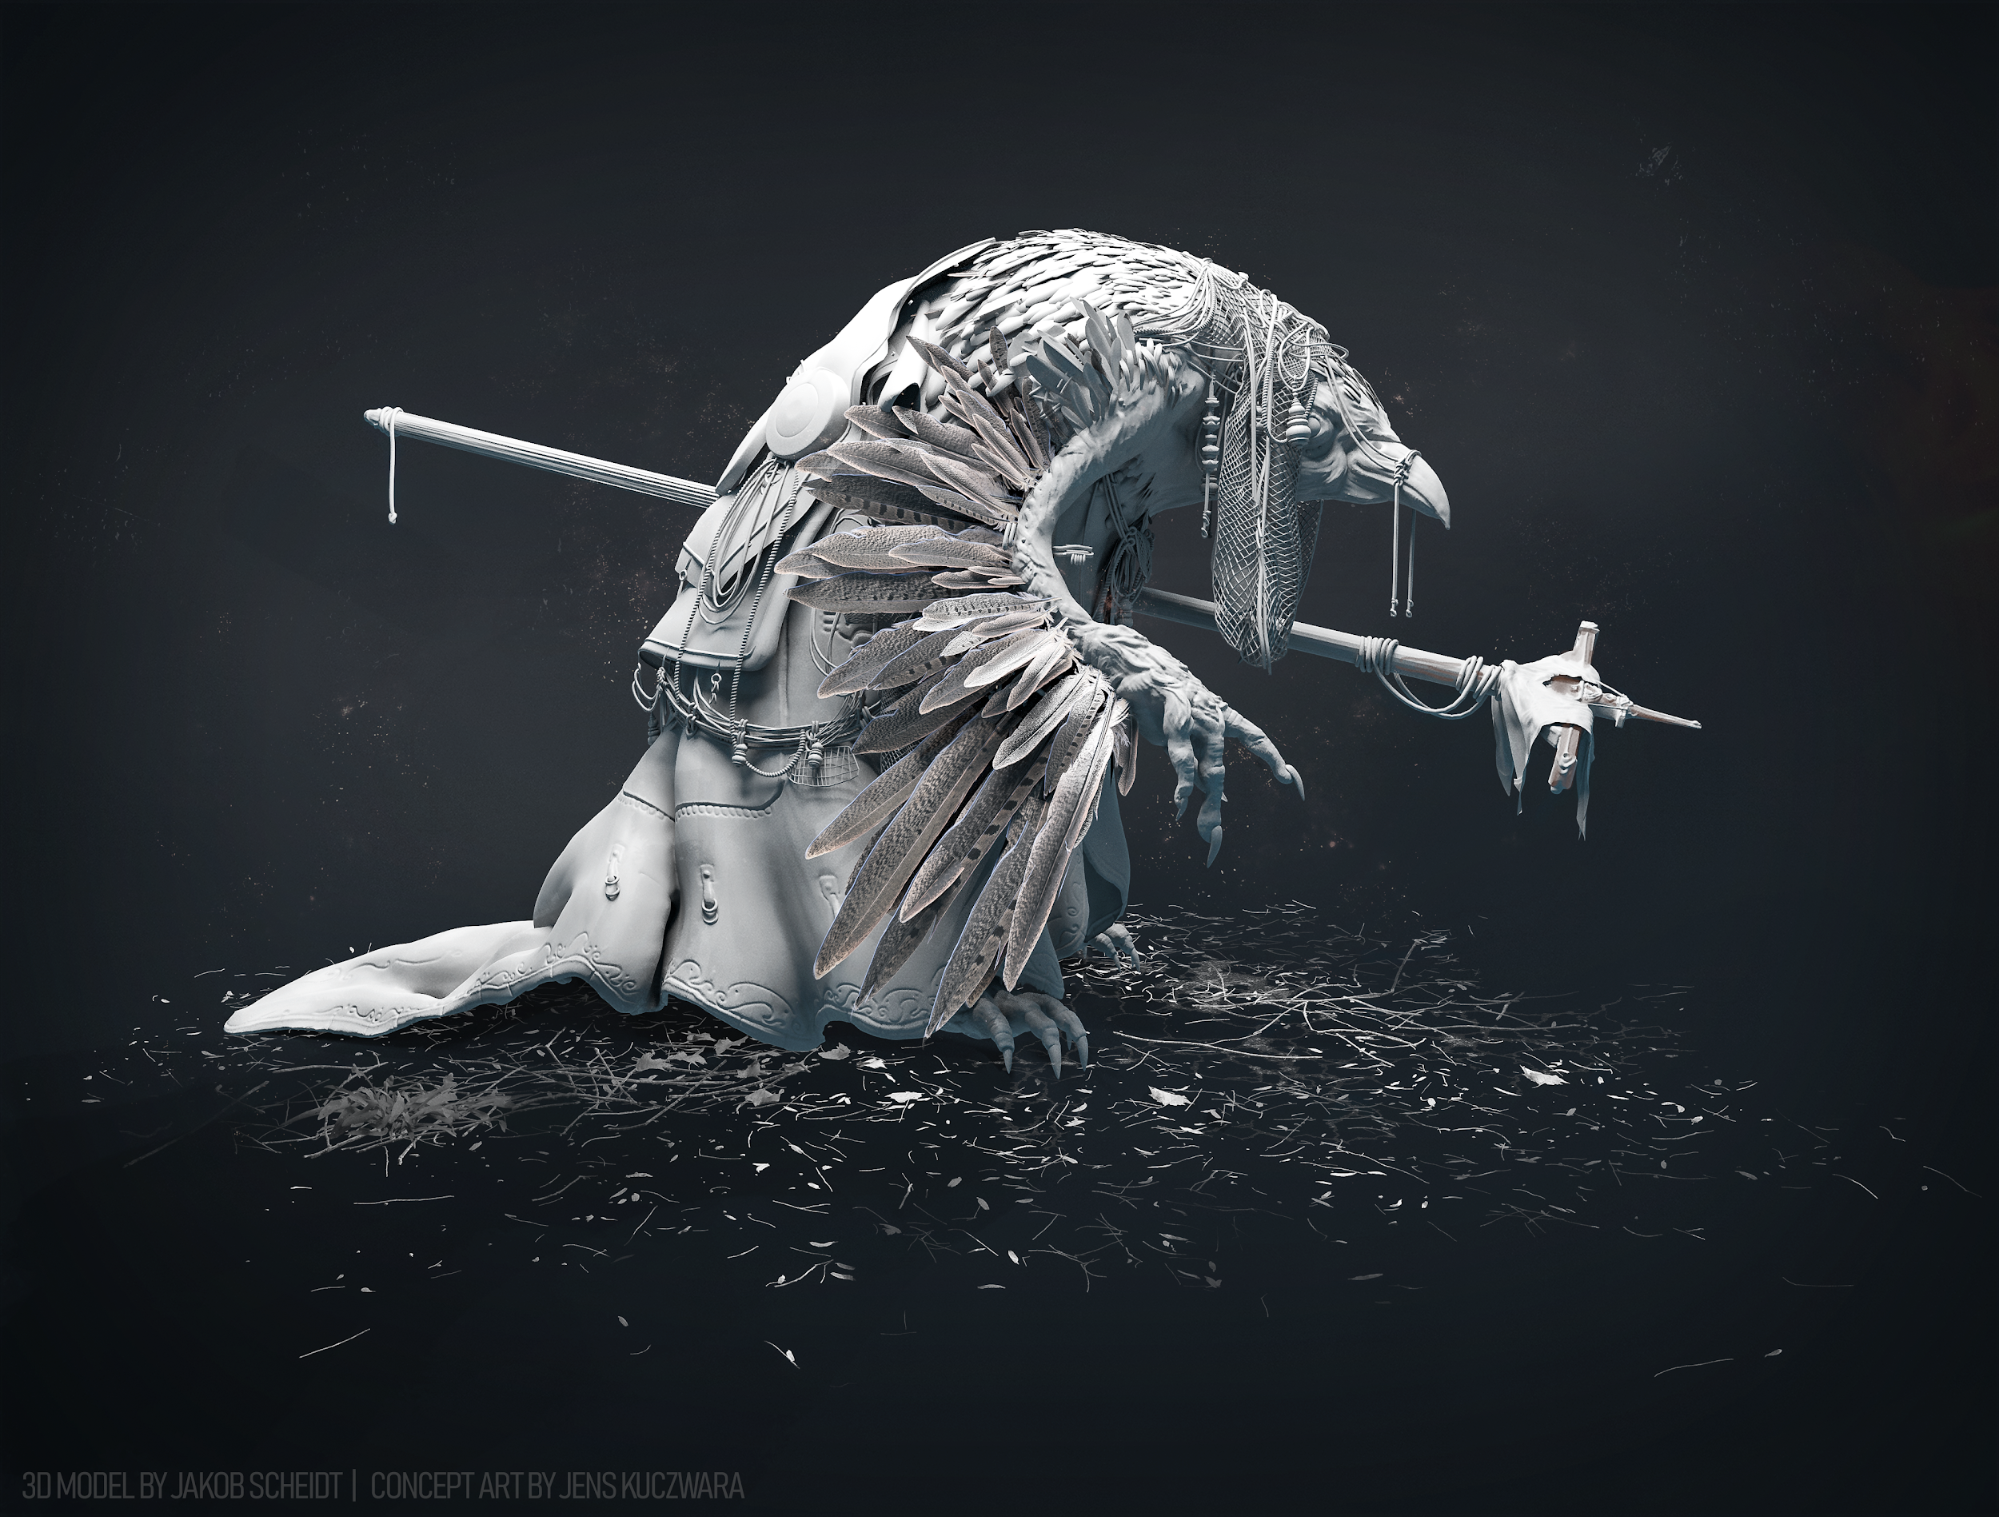
I started to create the detailed sculpt of the head in Blender sculpt mode. Starting with the basic forms and the eyes and the beak separated, I used dynamic topology and symmetry for fast sculpting. I sculpted one arm and copied it to the other side using Alt+D so the second arm updated when I worked on the first one. While sculpting I had some references on a second screen with images of different body parts of crows and other birds. My preferred brushes for sculpting are the clay strips brush, the crease brush, the grab brush, the draw brush and the scrape brush.
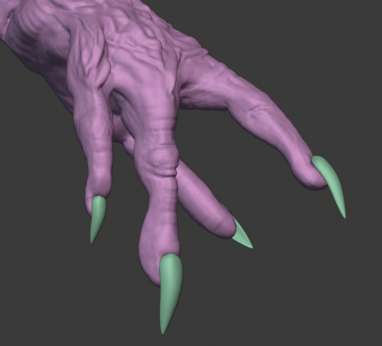
The claws were modeled using the subdivision surface modifier, and later I added some details using the multiresolution modifier. I used a very similar process for the feet as well as for the hands.
To save a lot of time I only sculpted the parts of the body that the camera can see and that would not be covered with clothing. Nevertheless I added the basic form of the back for the collision of the cloth.
Cloth Simulation
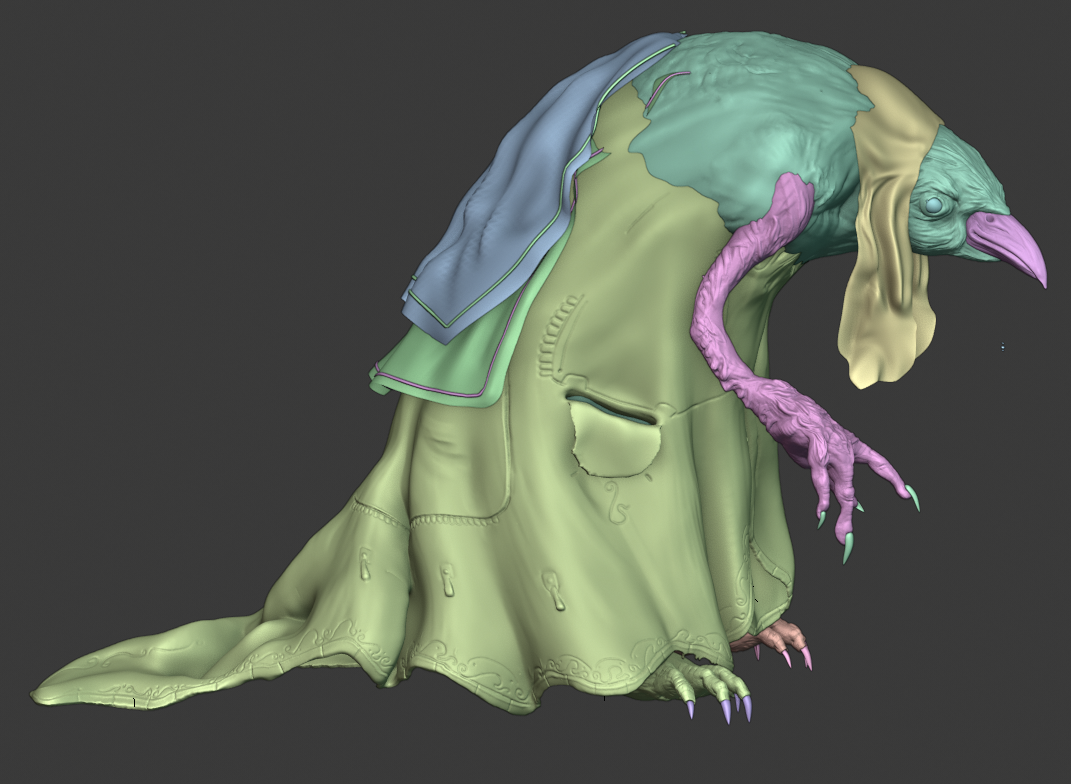
I used the Blender cloth simulation to get the realistic folds. This is a good way to get the basic flow of clothing, but when you want to get more detailed clothing, further editing is needed. I used some alphas for small wrinkles and the basic sculpting brushes for folds, seams, straps, loops and ornaments. Again, I only sculpted the parts that you would see on the final render.
Adding Details
A very important but very time consuming step was adding all the details that make the creature look mystical and interesting. Most of these details were created using modifiers. I will go over the most important techniques used now.
Fabric/Drapery Details
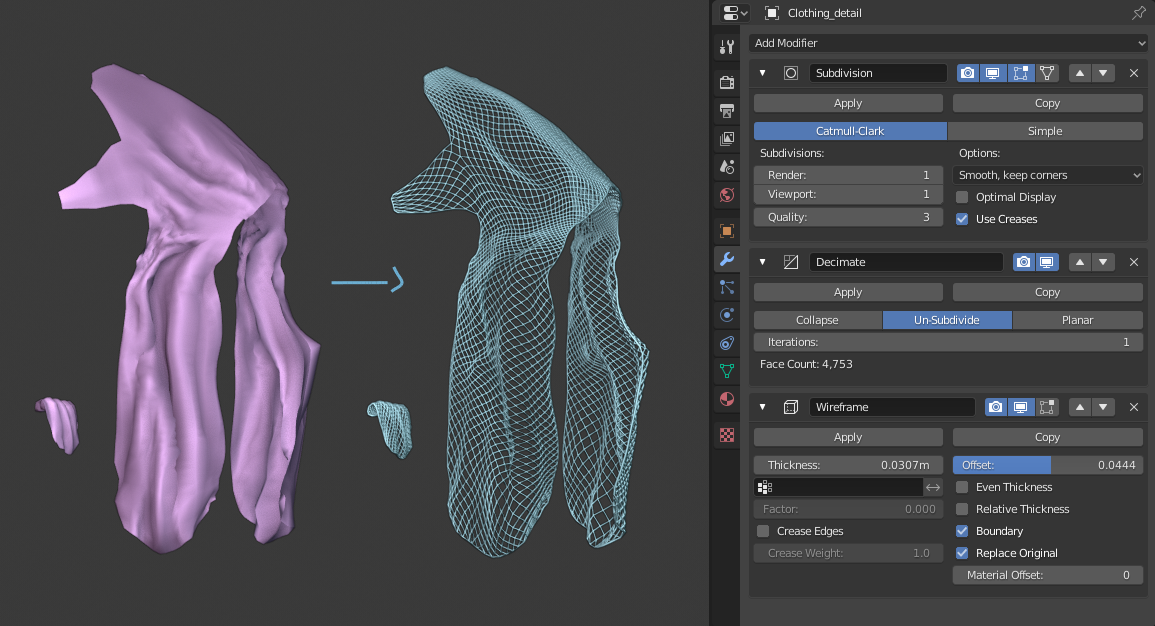
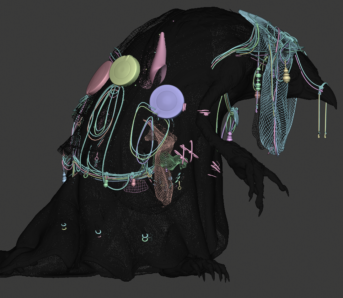
Here I used the cloth from the simulation, subdividing it and adding a wireframe modifier to make the individual strands.
Spiraled Ropes
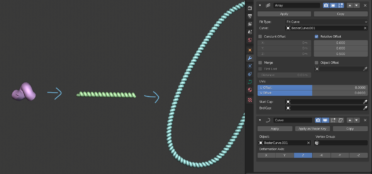
I used one spiral and the array modifier to create a rope that could be wrapped around the model with a curve.
Staff
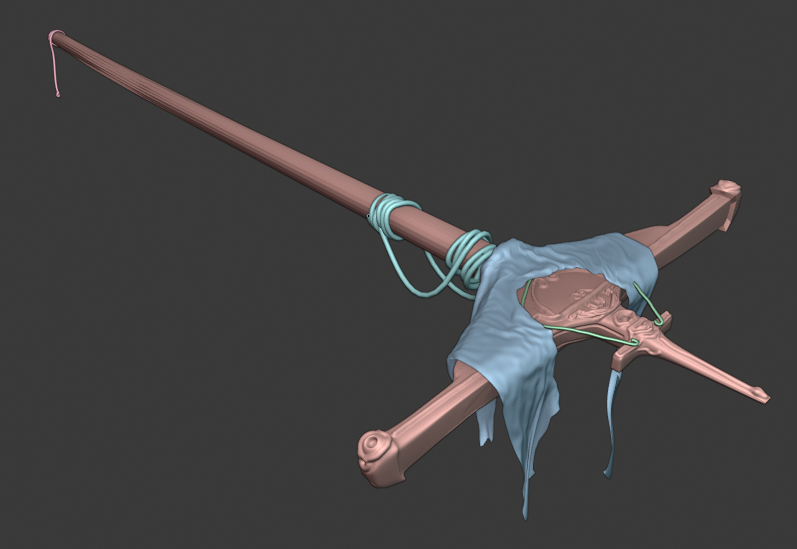
The staff was created using a simple base mesh with the multi-resolution modifier to be able to sculpt the ornaments on top. The other strings are a subdivided curve with the skin modifier. Finally, the piece of fabric was added on top, using Blender cloth simulation.
Adding Feathers
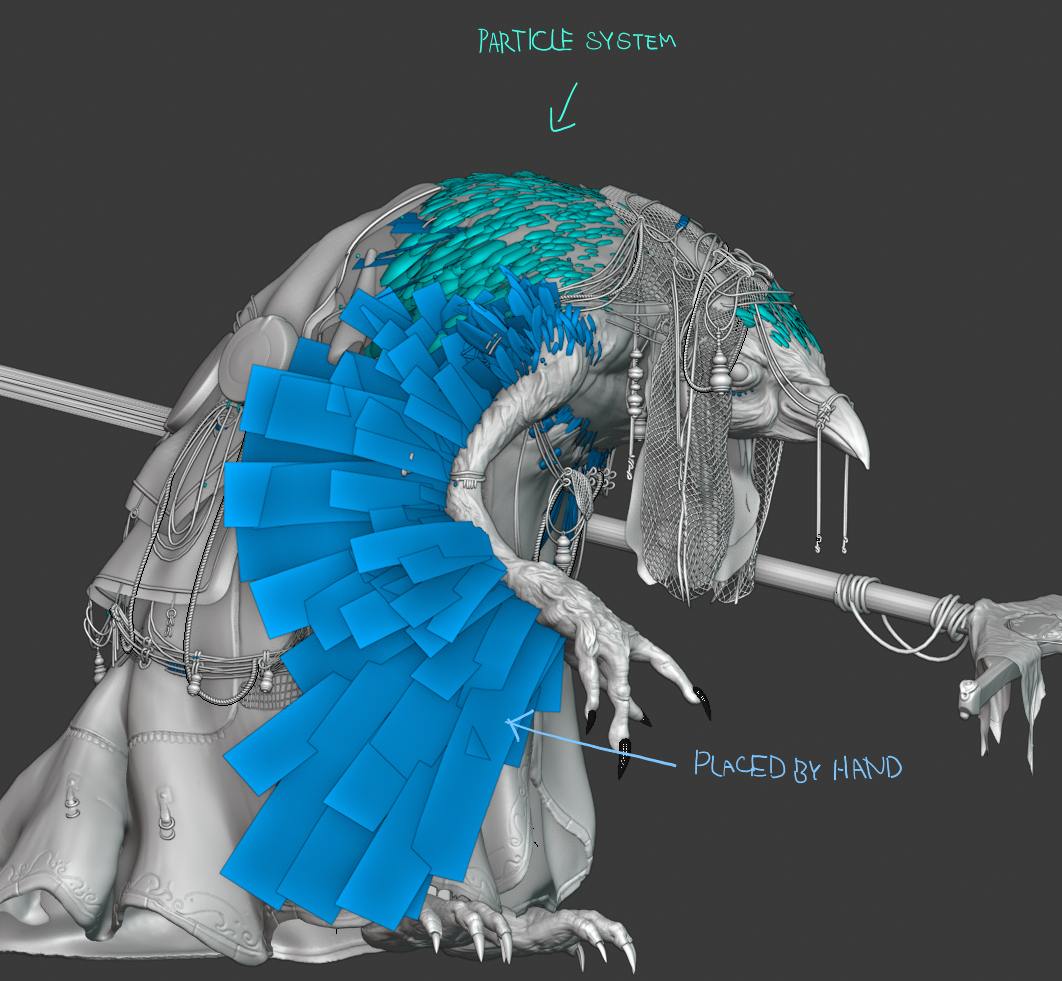
The feathers were created using subdivided planes with a texture. Some were procedurally added using a particle system, some were placed by hand, which makes further adjustments after texturing easier.
Texturing & Shading
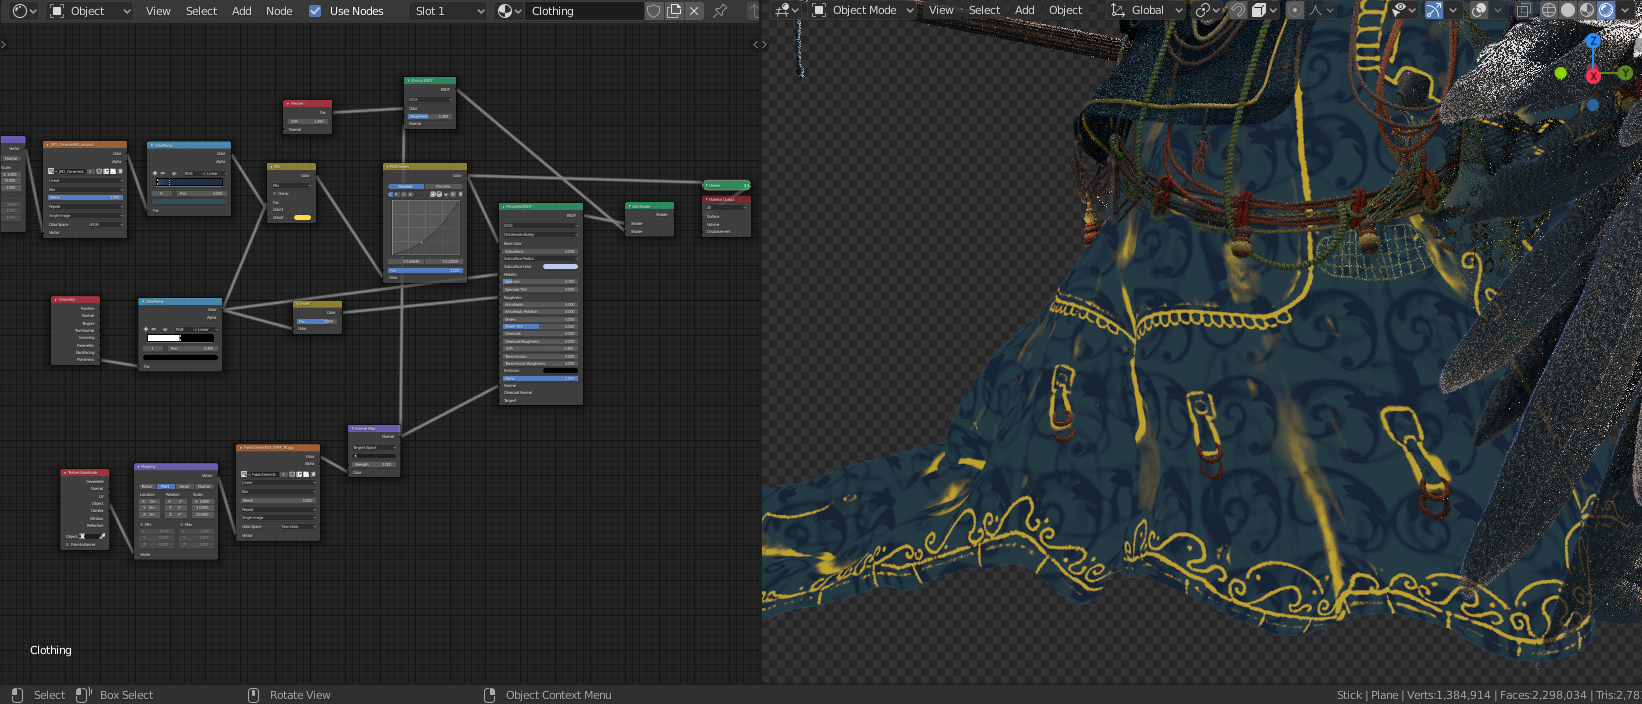
The high density of the models made texturing much easier. You can separate small creases even without baking an AO or curvature map. Blender has the pointiness and the new ambient occlusion node, that allow for easy adjustments even without a UV map.
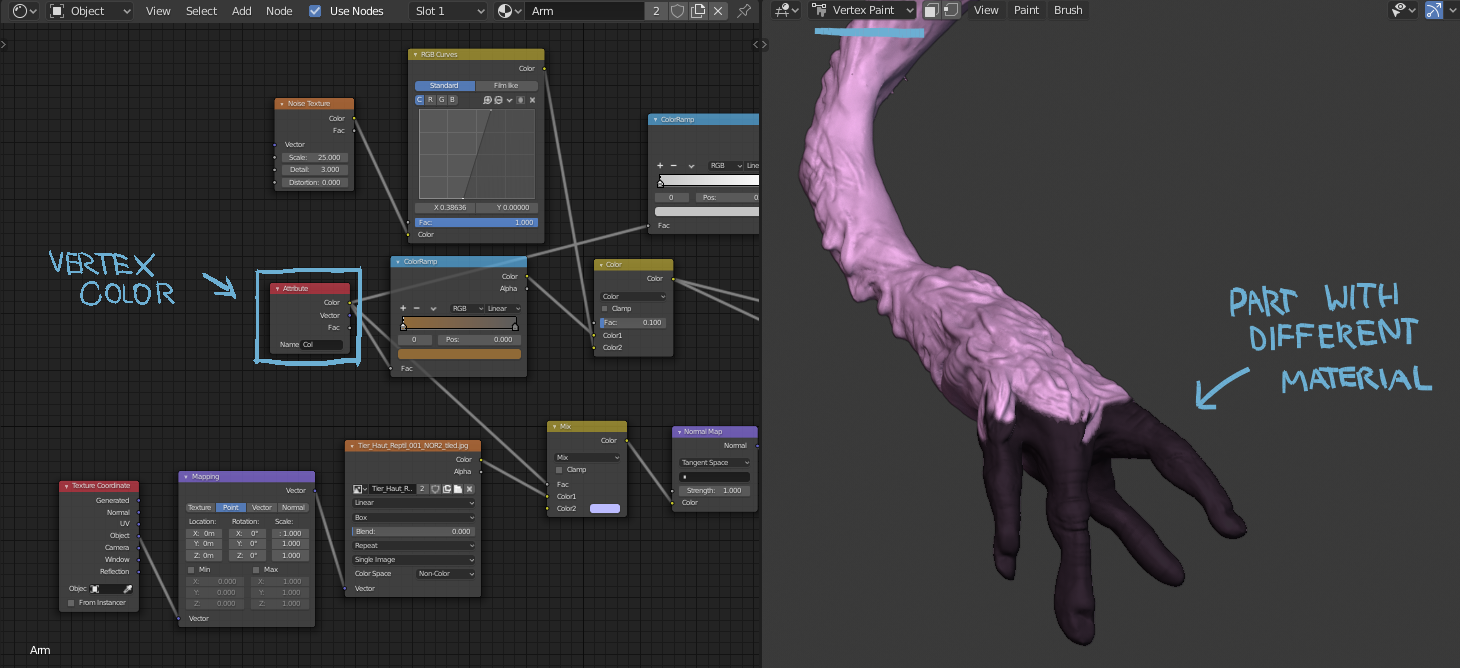
For some parts I used PBR maps, for others a procedural noise or gradient texture was enough. It’s very important to include small imperfections in the model, like dust, dirt or scratches as overlays. Sometimes a procedural noise, musgrave or voronoi texture as a roughness or bump map adds a lot of realism.
Adding vertex paint gives you more flexibility when assigning color, roughness, and normal maps.
The wings are simple planes with a texture with an alpha channel.
Adding the Ground
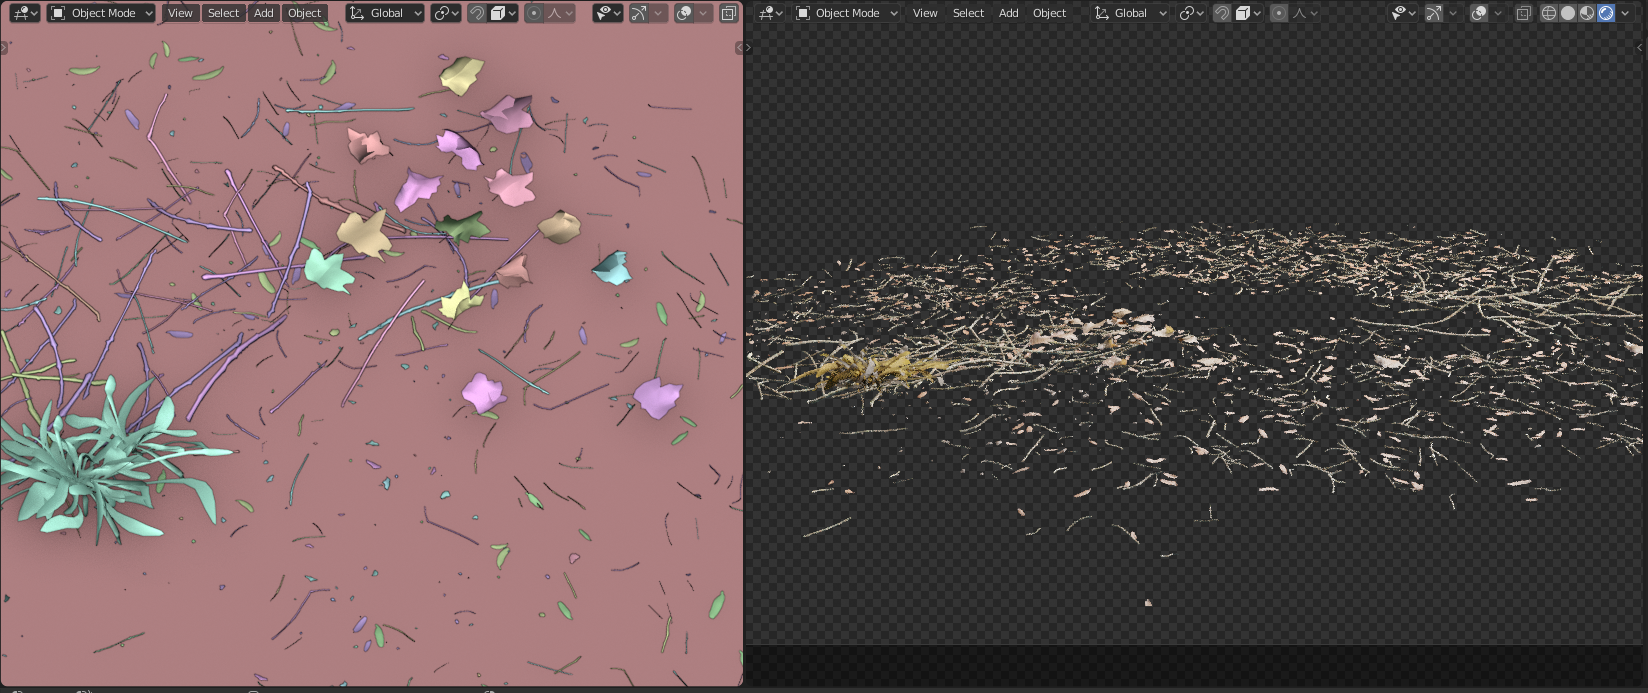
For the ground I used the Graswald Add-on for Blender. I picked some small branches and some dead leaves that show the size of the creature.
Lighting
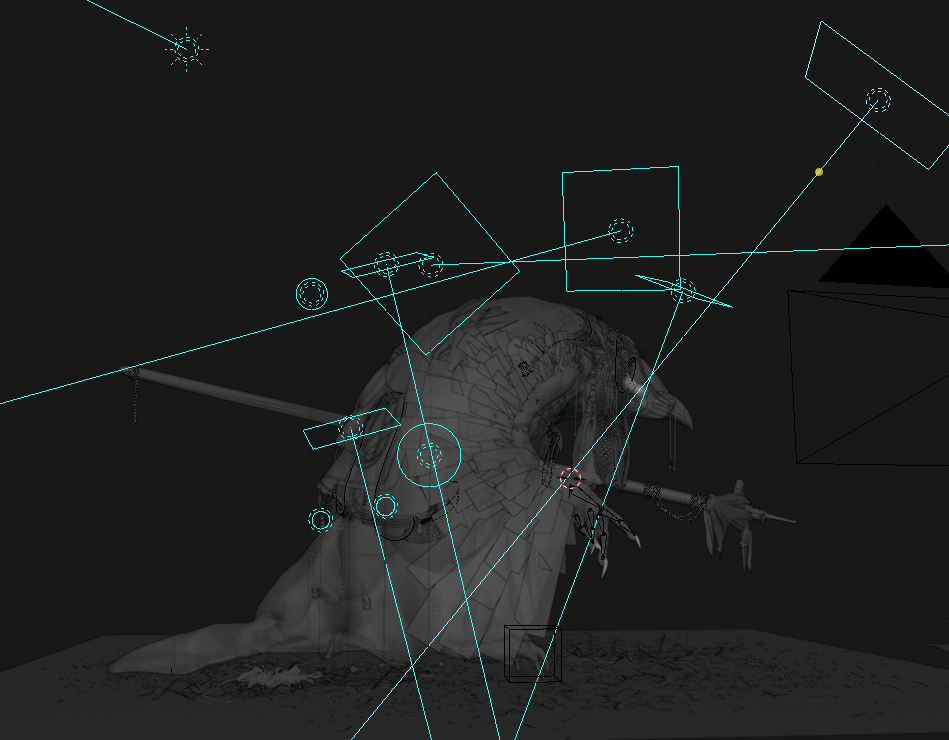
In my opinion lighting is an important tool to guide the viewer's eye and establish the mood of an image. I tried to light the scene with 2-3 lights and an HDR Image, but later on I didn’t hesitate to add more small point or spot lamps to highlight some specific parts of the scene.
Rendering
I used Blender Cycles for rendering. The final resolution was 4000x3000 pixels, rendered with 600 samples and denoising enabled.
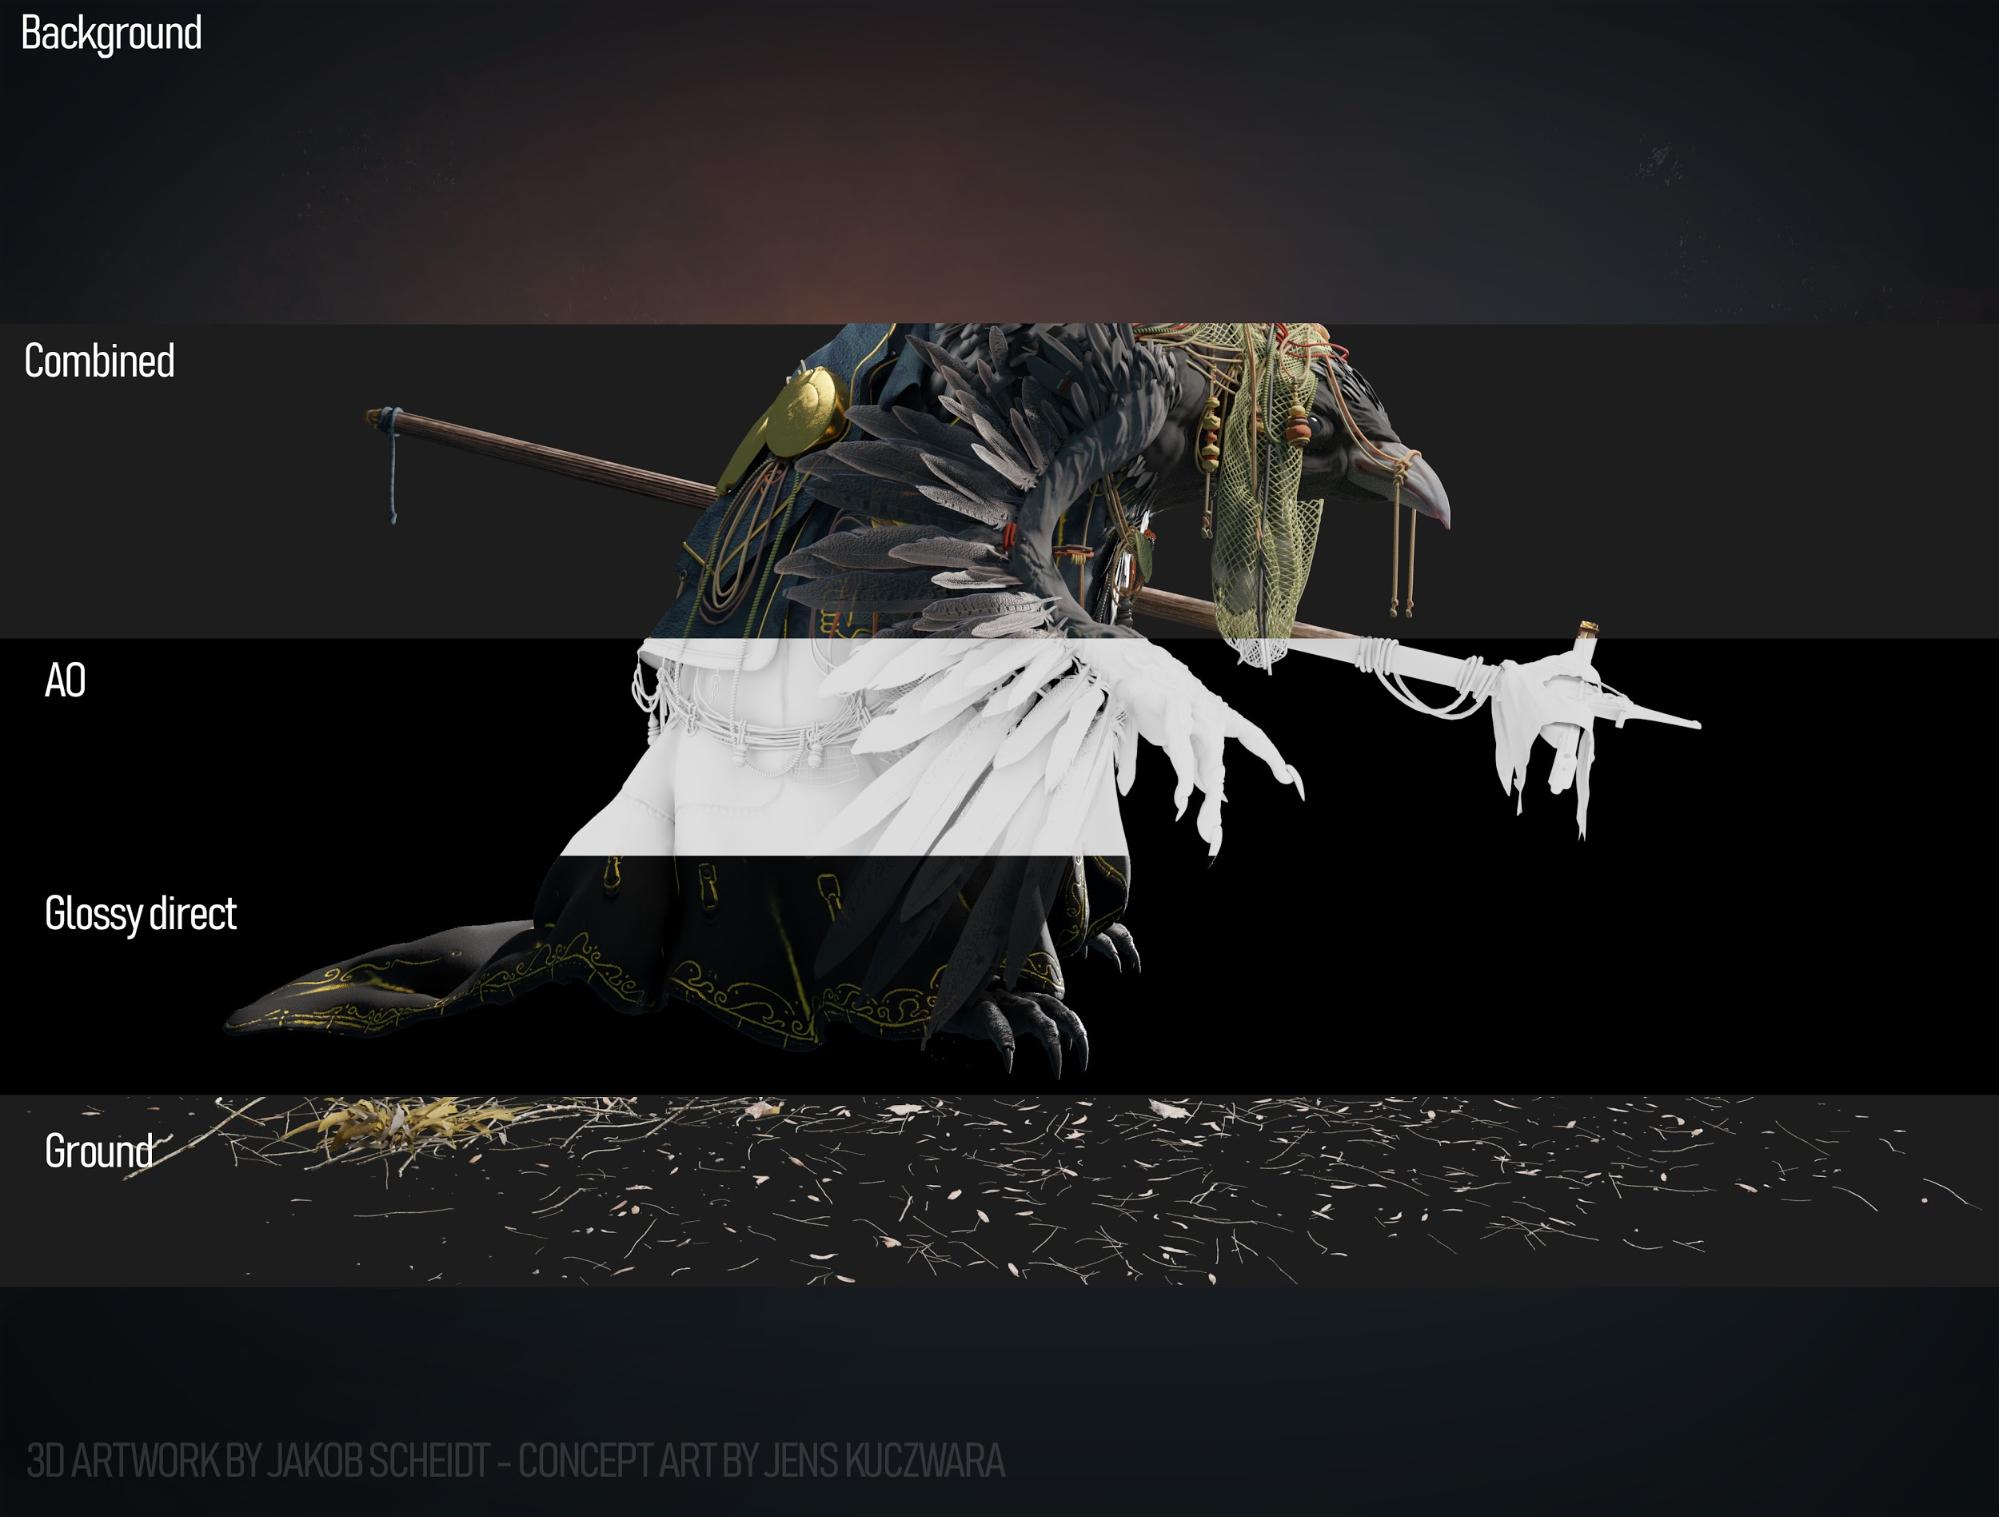
I rendered an AO pass, a glossy layer and the ground separately. The background was painted in Photoshop.
After combining all the layers in Photoshop and adding some glow, dust and other imperfections, this was the final result:
About the Author




7 Comments
Very well done keep on
Super cool! Reminds me of Dark Crystal!
Excellent Work
excellent.....thats cool.
nice and a litlle creepy , too !
Very talented young man !
Keep up your great work !
Really impressive and beautiful work of art!