
Behind the Scenes: Superbike
Background
My name is Amevor Kangni. I live in Togo, West Africa. I’m a self taught artist who learned 3D with Blender in 2008. At the beginning it was only a hobby. I specialized in Architectural visualisation since 2013. Even though I graduated from a Civil engineering school a few years ago, I mainly work as a freelance 3D Artist.
From time to time I do a personal project like this one to learn new things.
Inspiration
In 2013 I wanted to practice my modeling and decided to model the BMW K1200S. As far as I can remember there was nothing really special about it. I saw a picture of the motorcycle and decided to do a 3D model of it (I love superbikes).
The whole modeling process was done in 2013 using 3ds Max. At that time I couldn’t finish the project because there were too many objects in the scene and most of them had turbosmooth (the equivalent of Blender’s Subdivision surface) applied to them. I was using a laptop and couldn’t even do render tests at that point. So I stopped working on the project, waiting for the day I would have an adequate workstation. It happened in 2017 (I built my dream workstation with a Ryzen 1700, 64 GB of RAM and a GTX 1060 3 GB). I could finally finish my project and the fact that I wanted to come back to Blender was also a great opportunity (I did use Blender 2.8 for this project).
Modeling
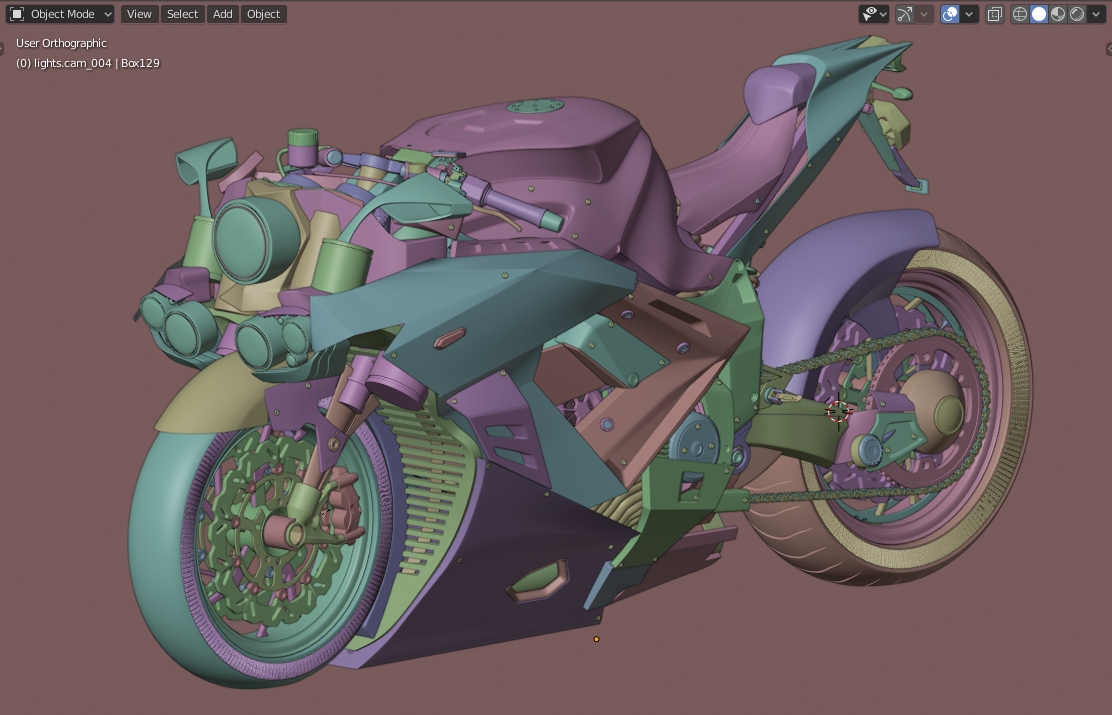
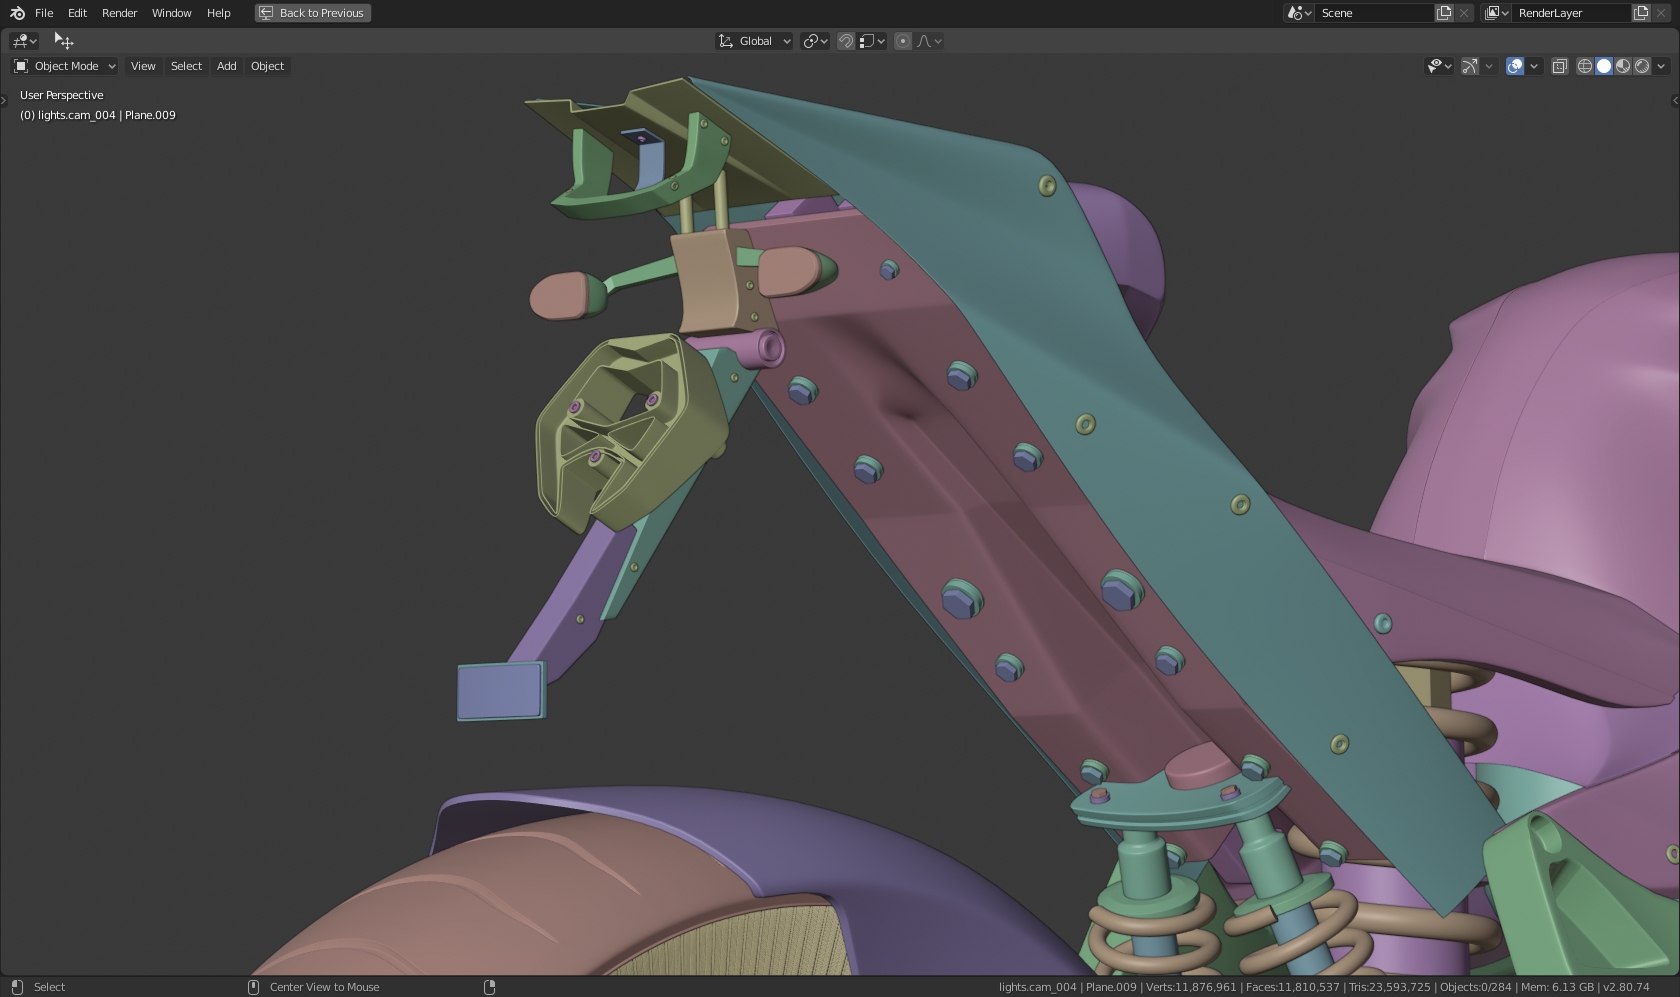
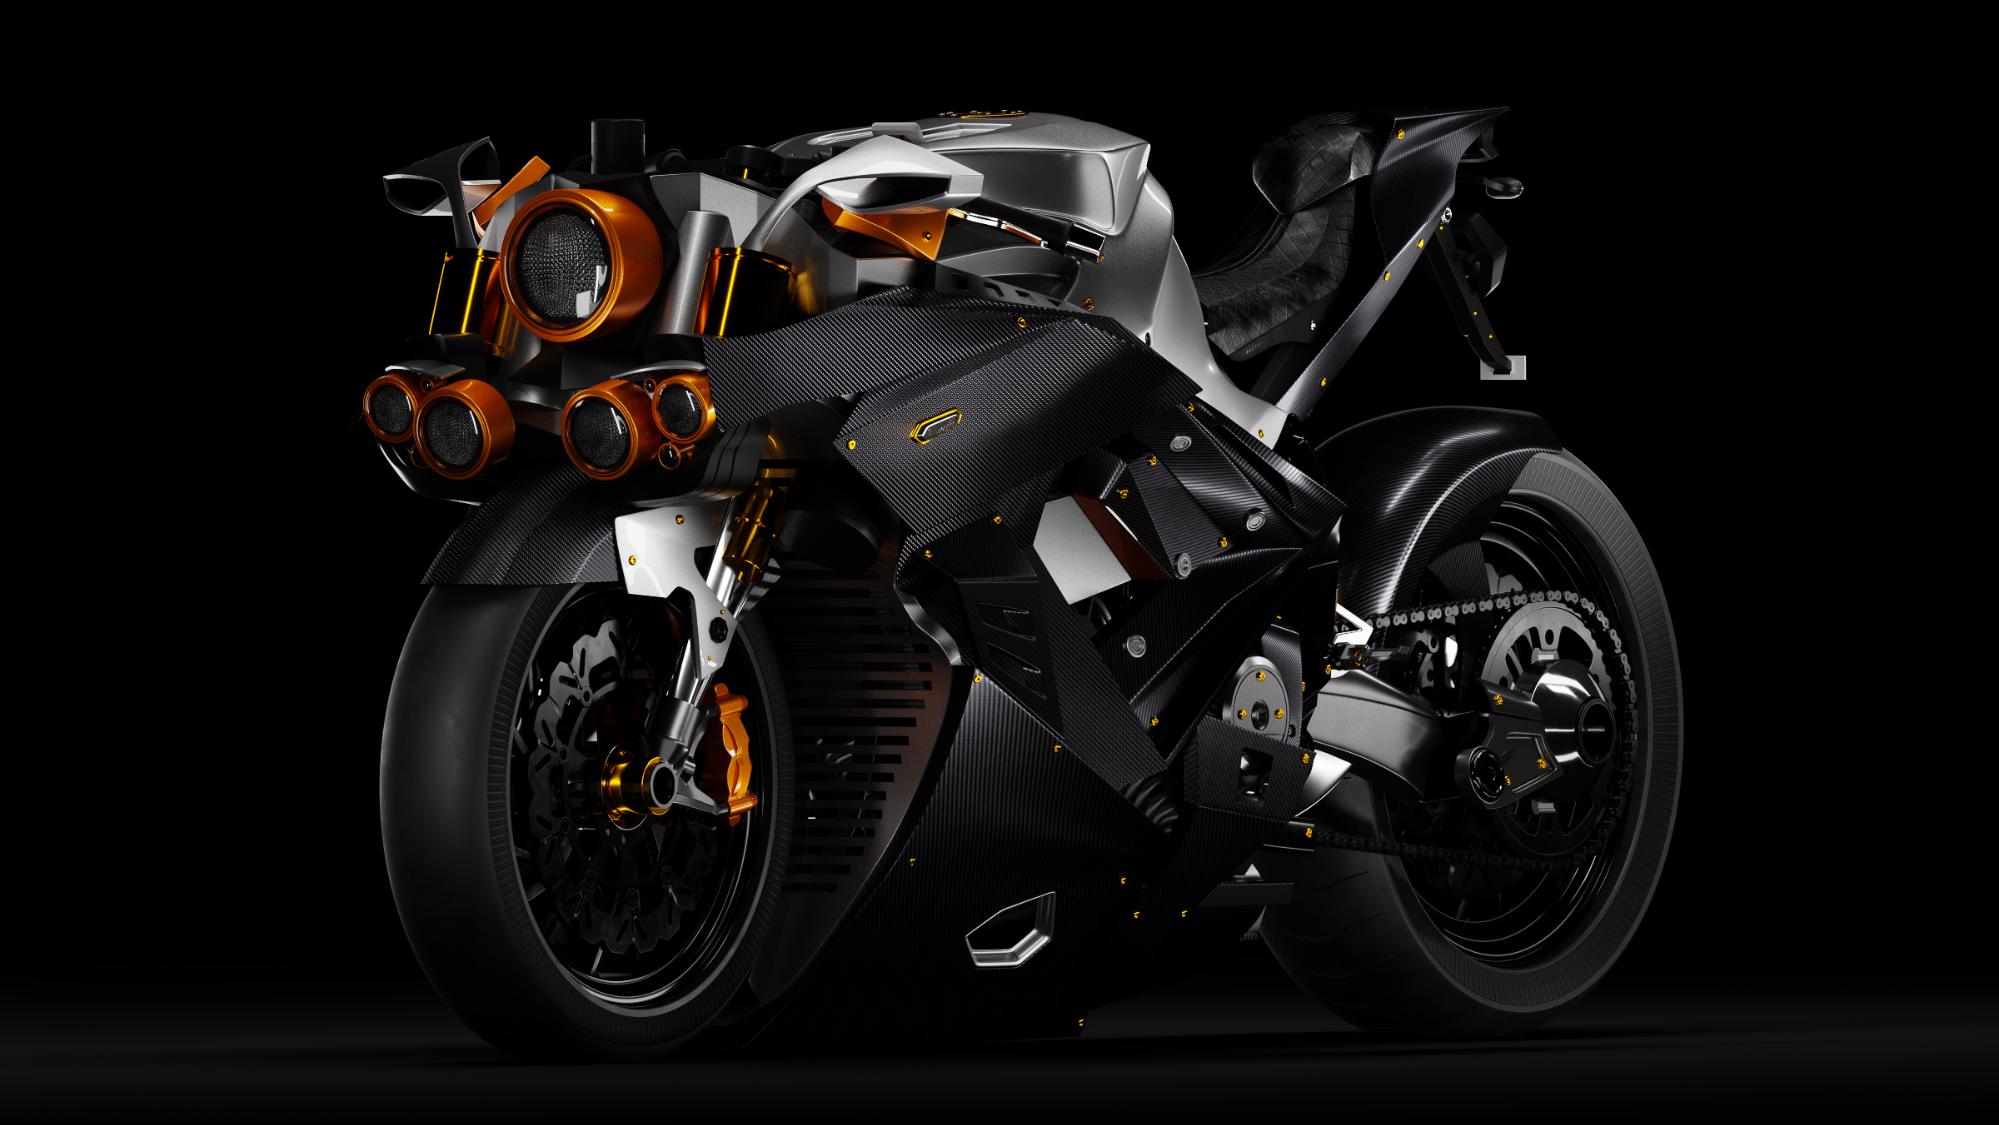
As I said, I did the modeling back in 2013 with 3ds max, but only simple modeling techniques were used. One particular thing is that I had to move away from the BMW K1200S design because I did not find it aggressive enough for my taste. I experimented a bit and came up with something I liked.
After the modeling process, the model was exported using FBX format. (Note: click on the images to see them at their best.)
Inside of Blender
I imported the FBX file in Blender.
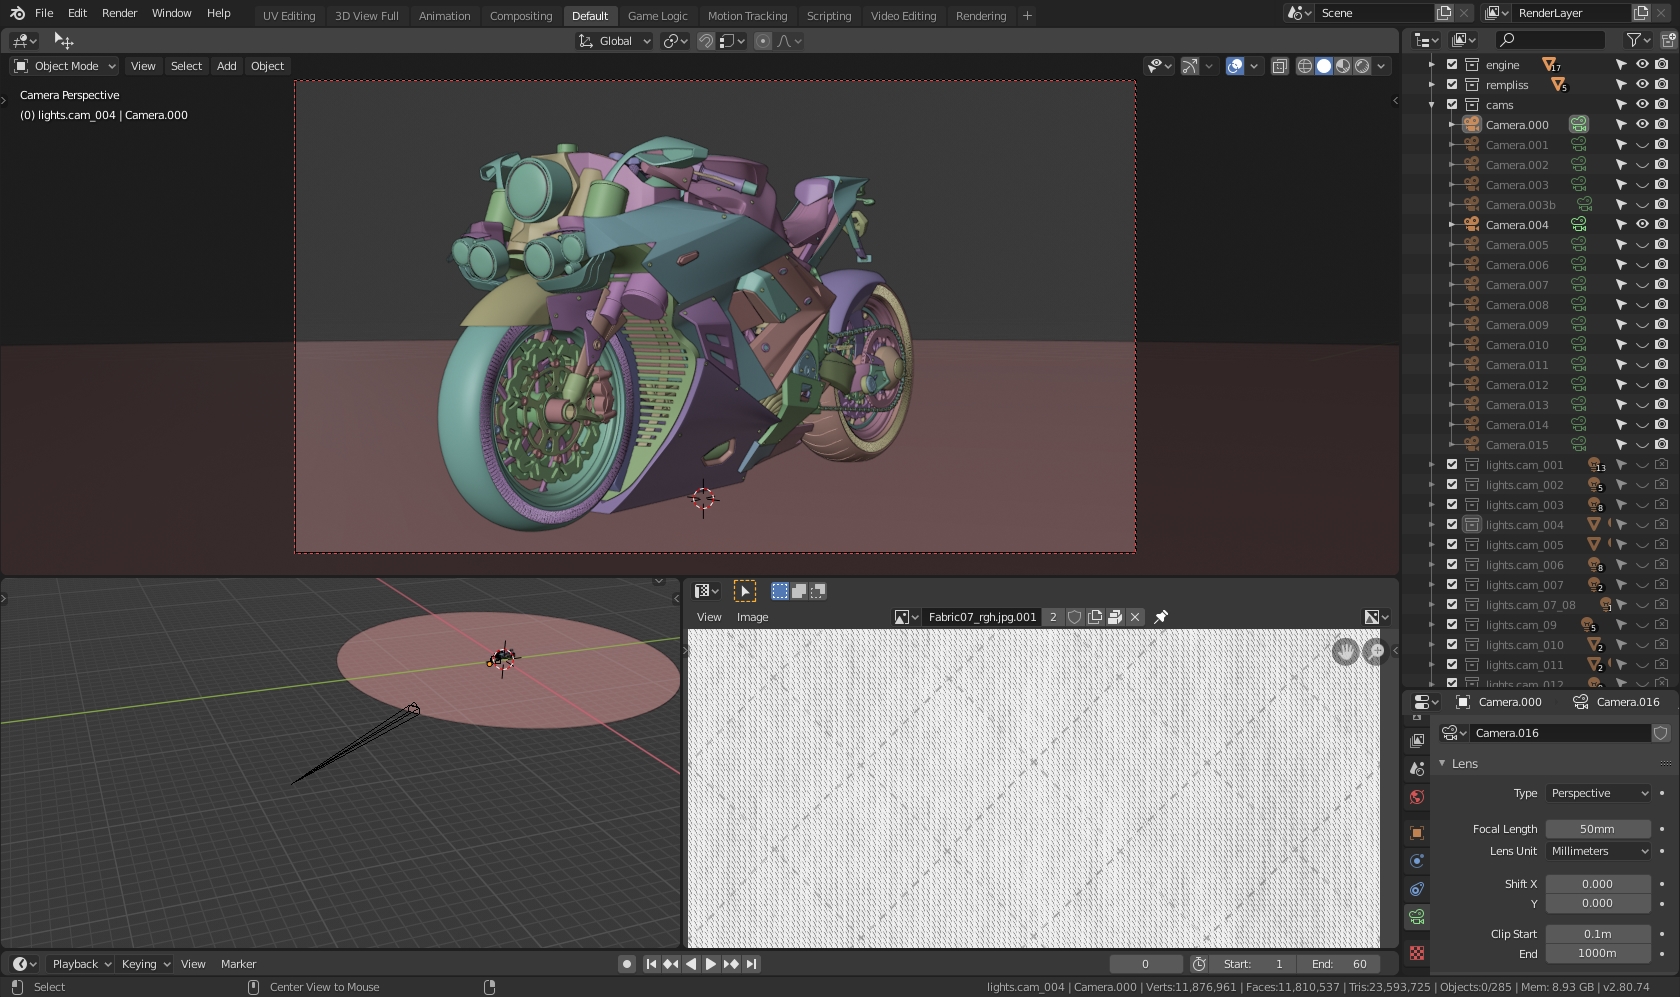
Scene management
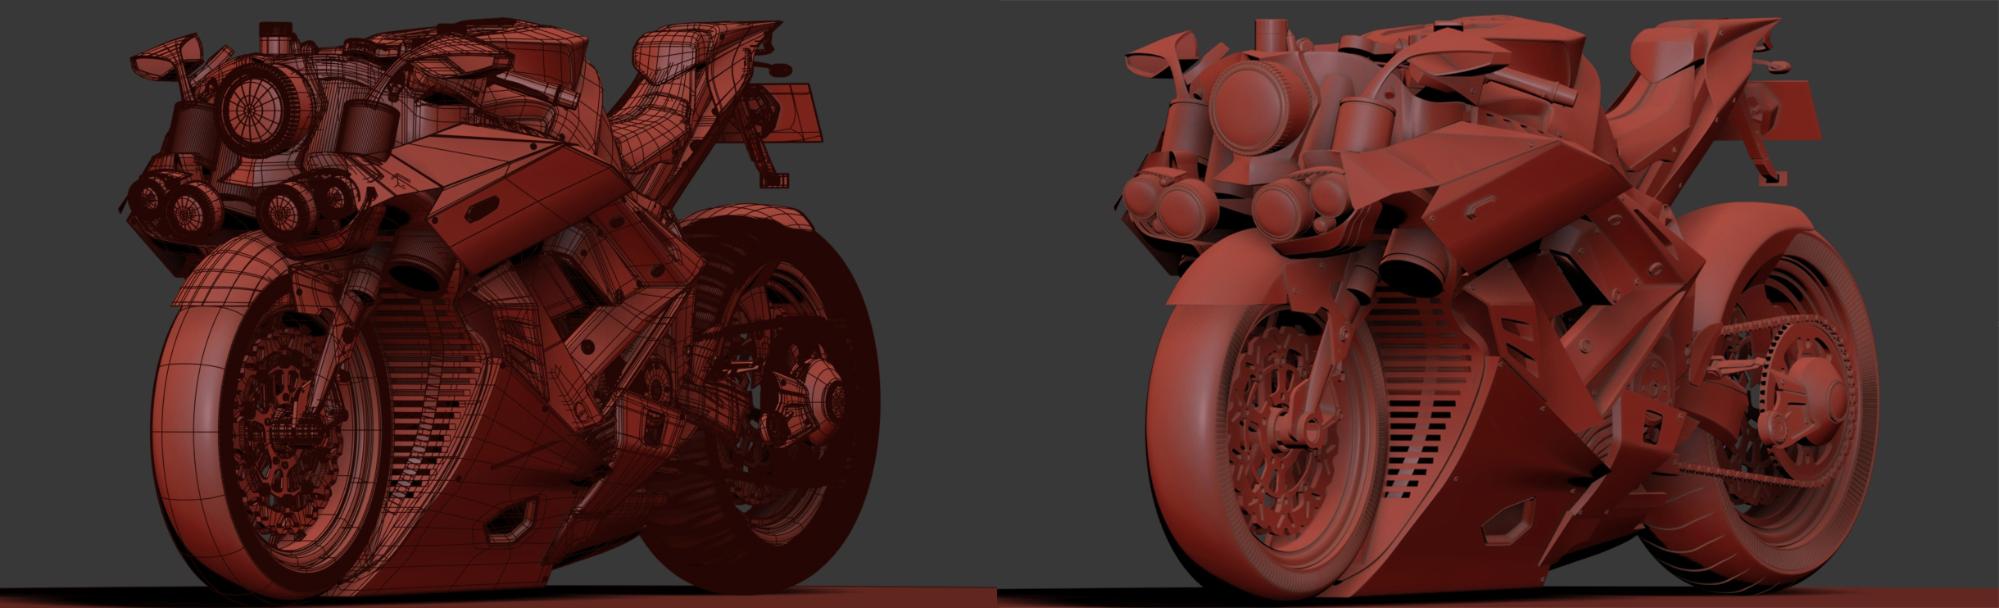
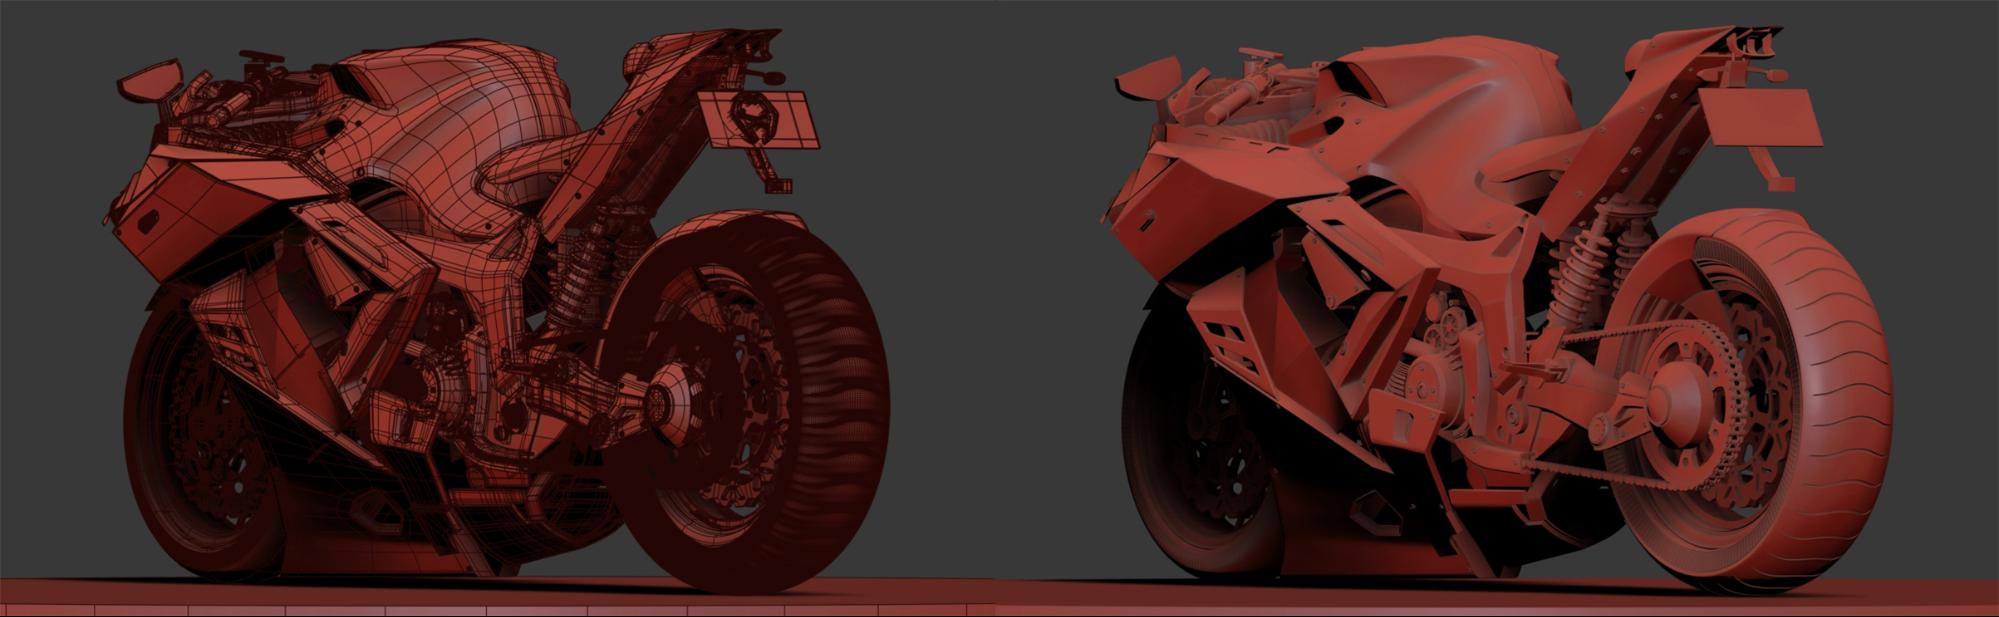
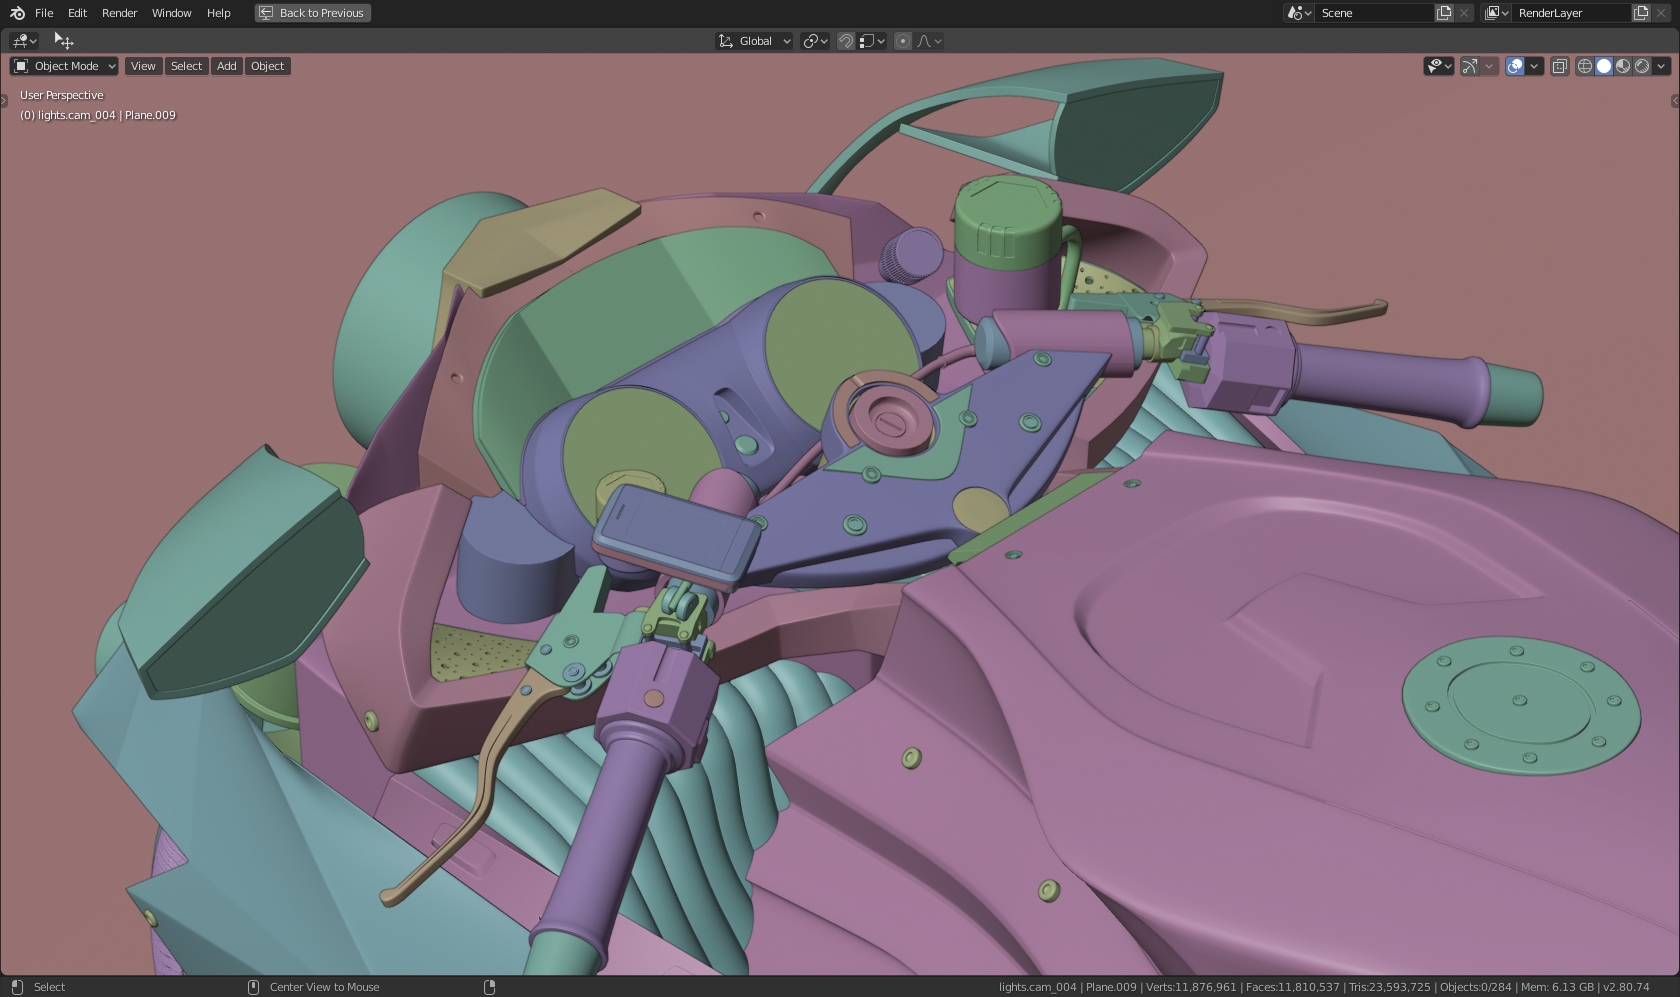
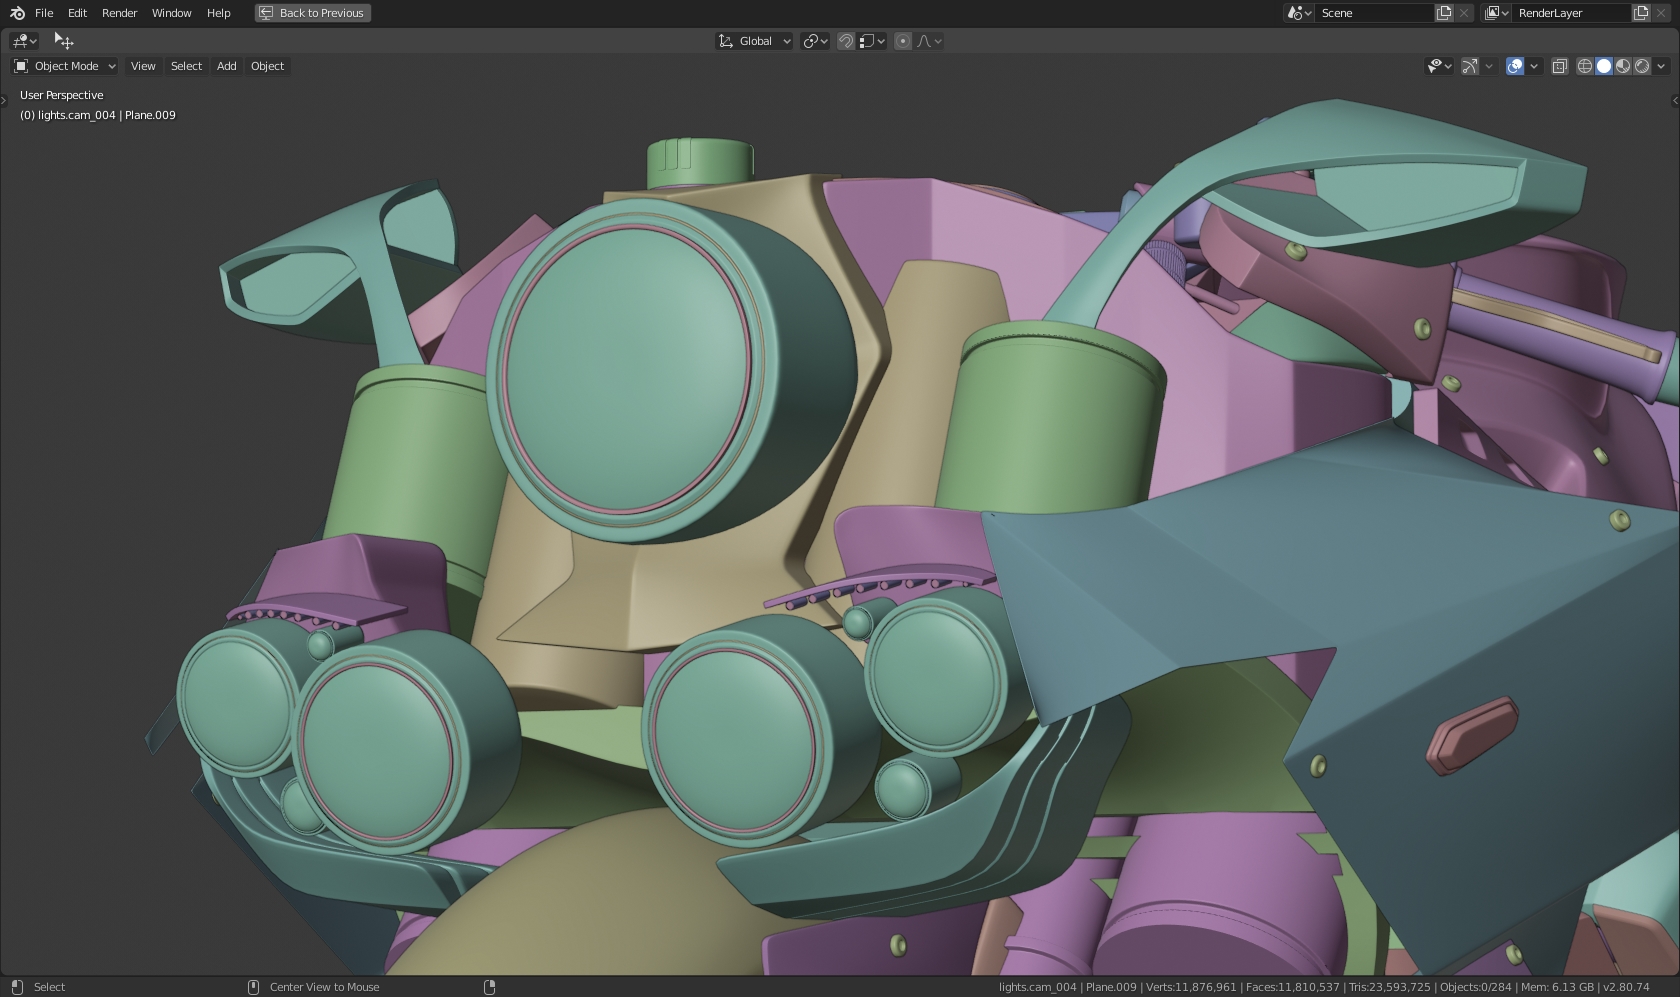
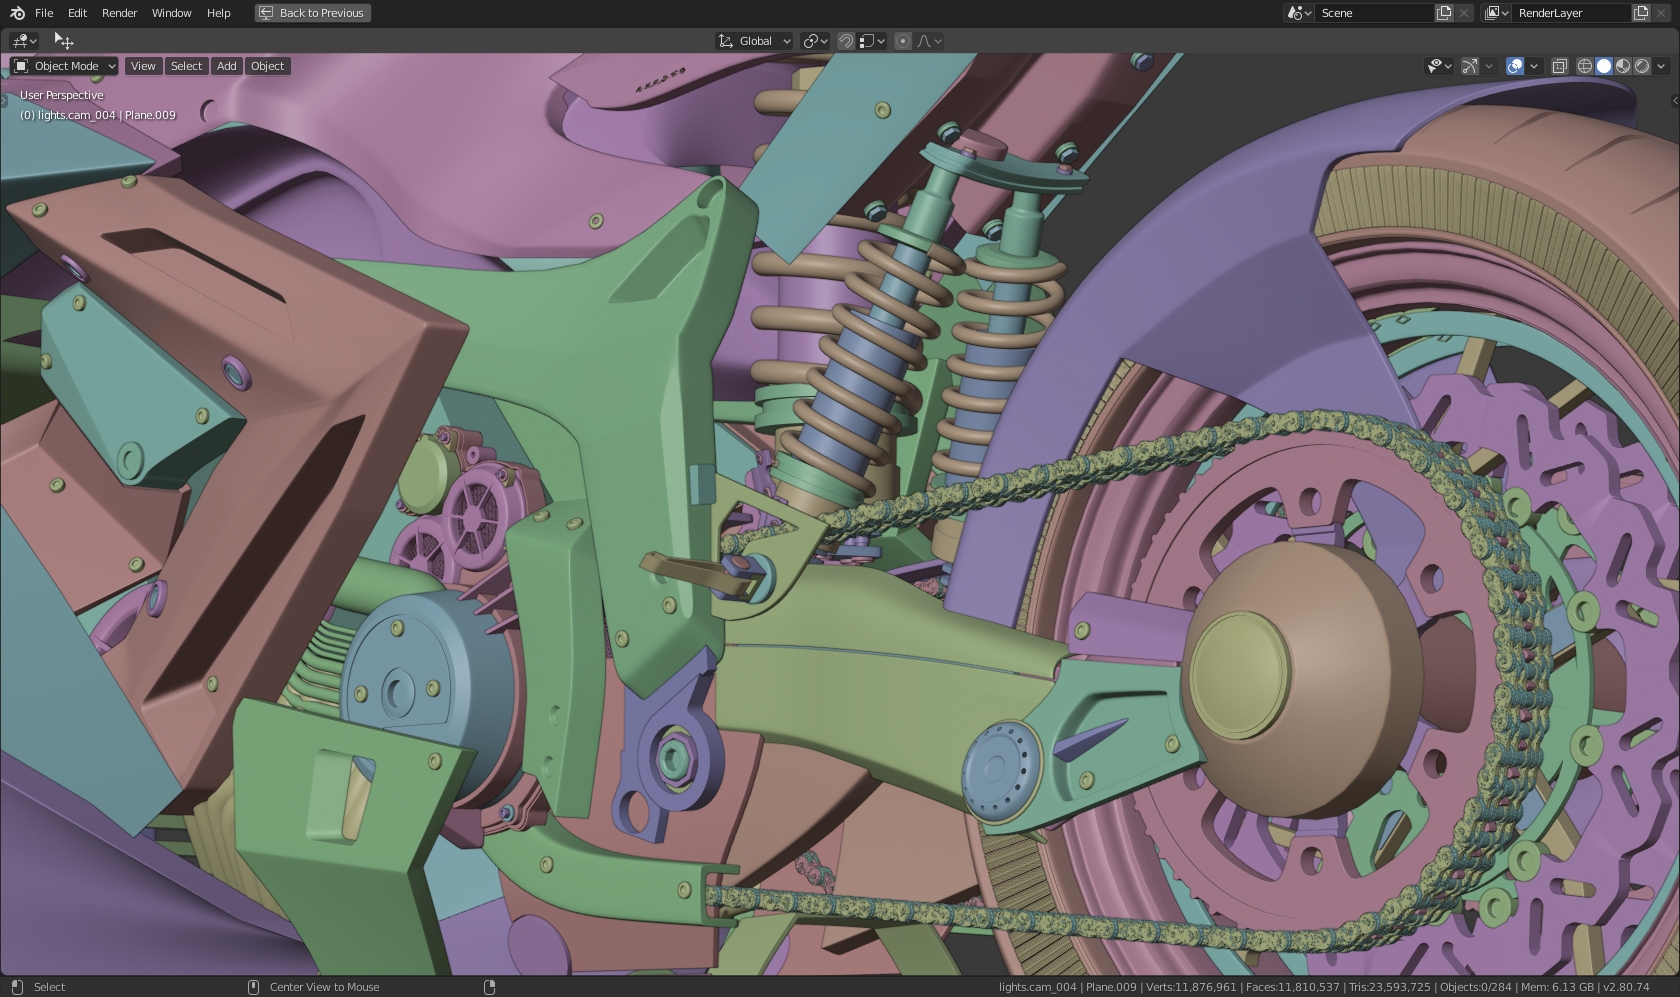
I had 283 objects in my scene and most of them had a Subdivision surface modifier applied to them. I wanted to be able to control the level of subdivision of all the objects at once so I used the Simplify options in the Render tab.
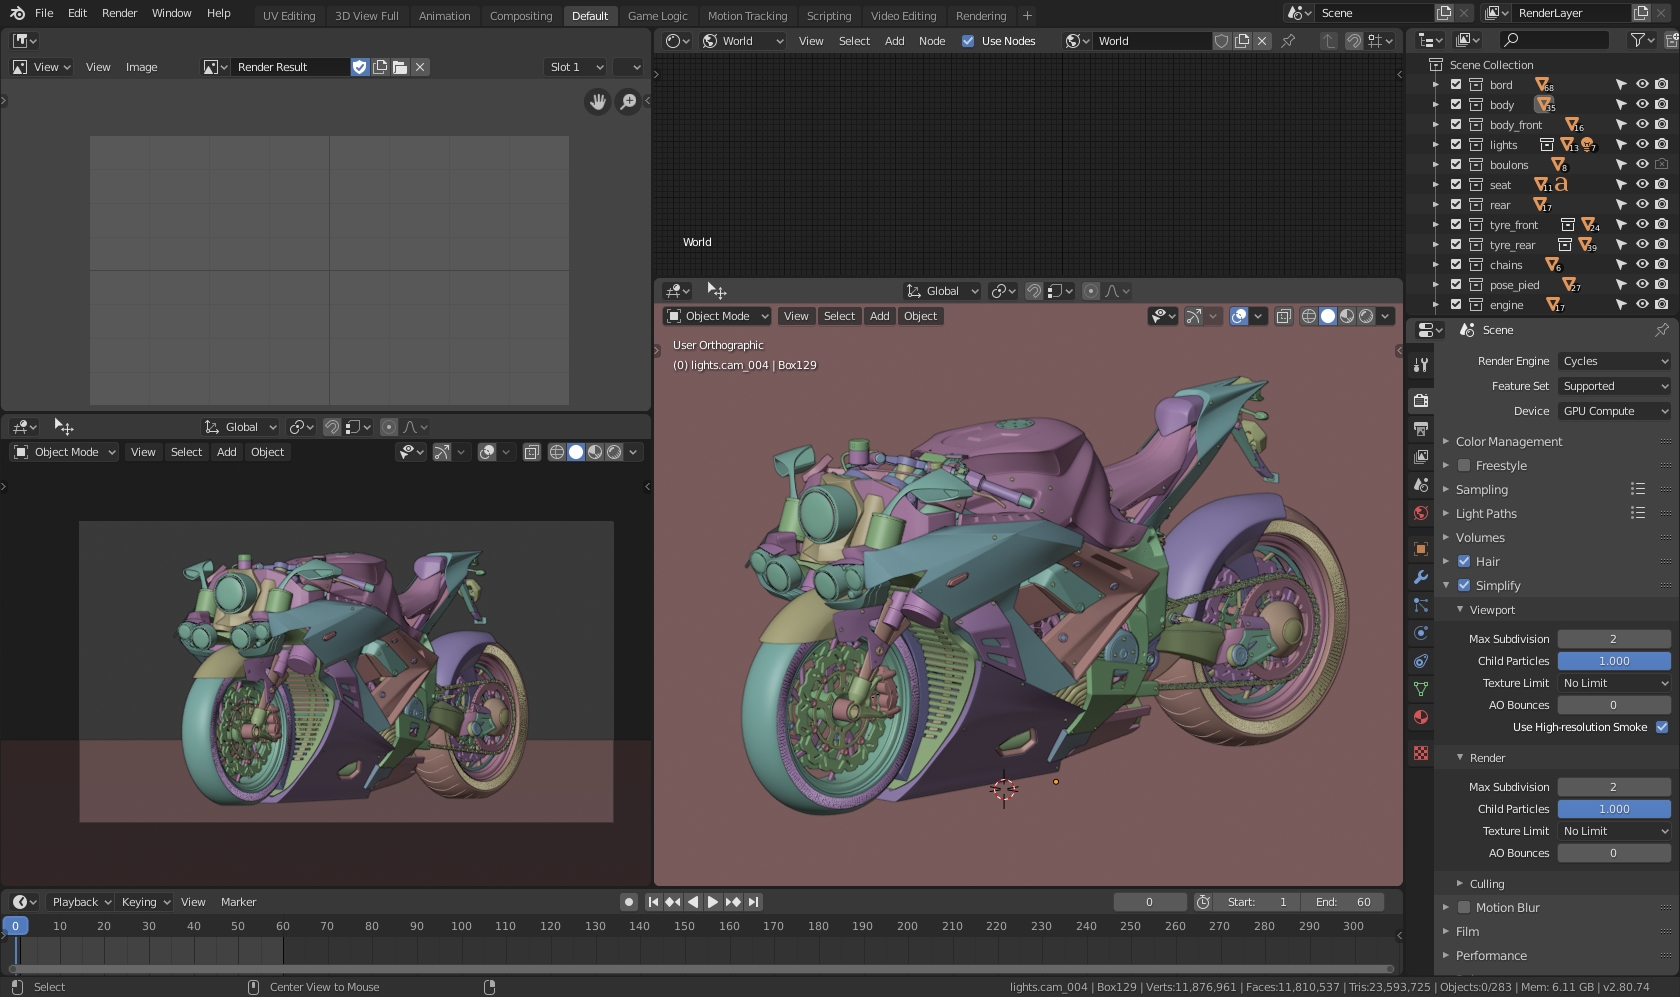
The viewport max subdivision was set to 2 and the render max subdivision to 4.
Every object was organized into collections so it would be easier for me to isolate or hide them. Objects that were not visible in a render were simply hidden to minimize RAM usage.

There were collections for different parts of the superbike, a collection for the cameras and a group of collections for the lights as I use a different lighting setup for every camera. I named the light collections according to the cameras names.
Texturing
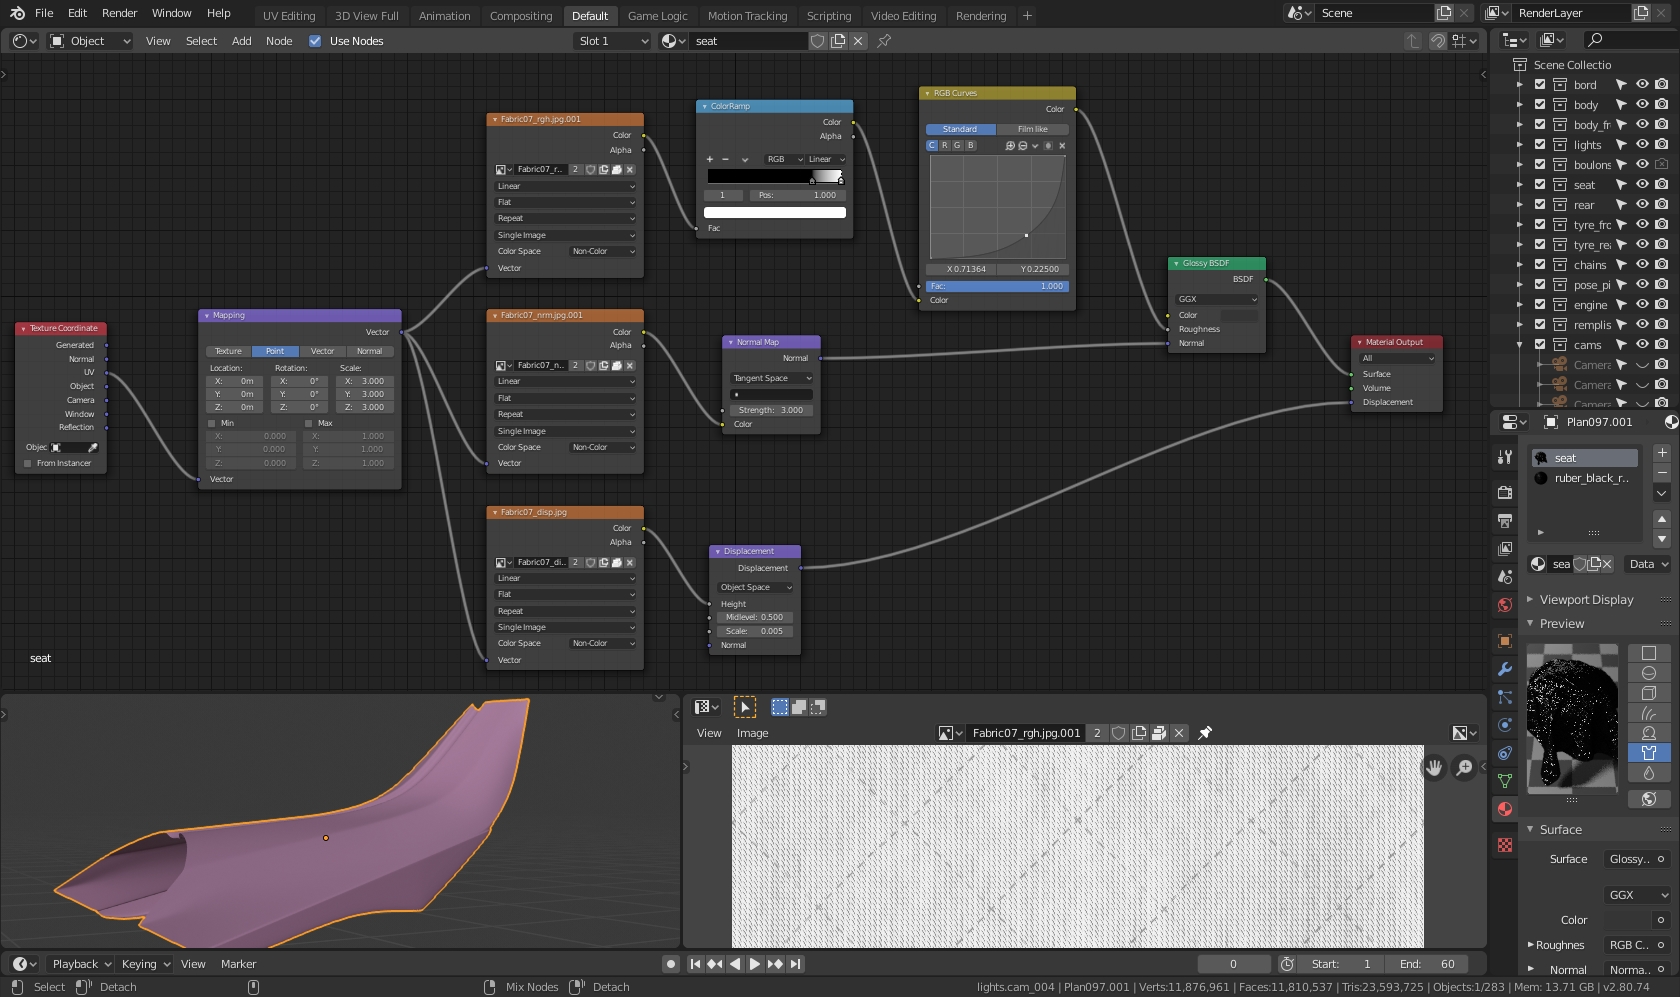
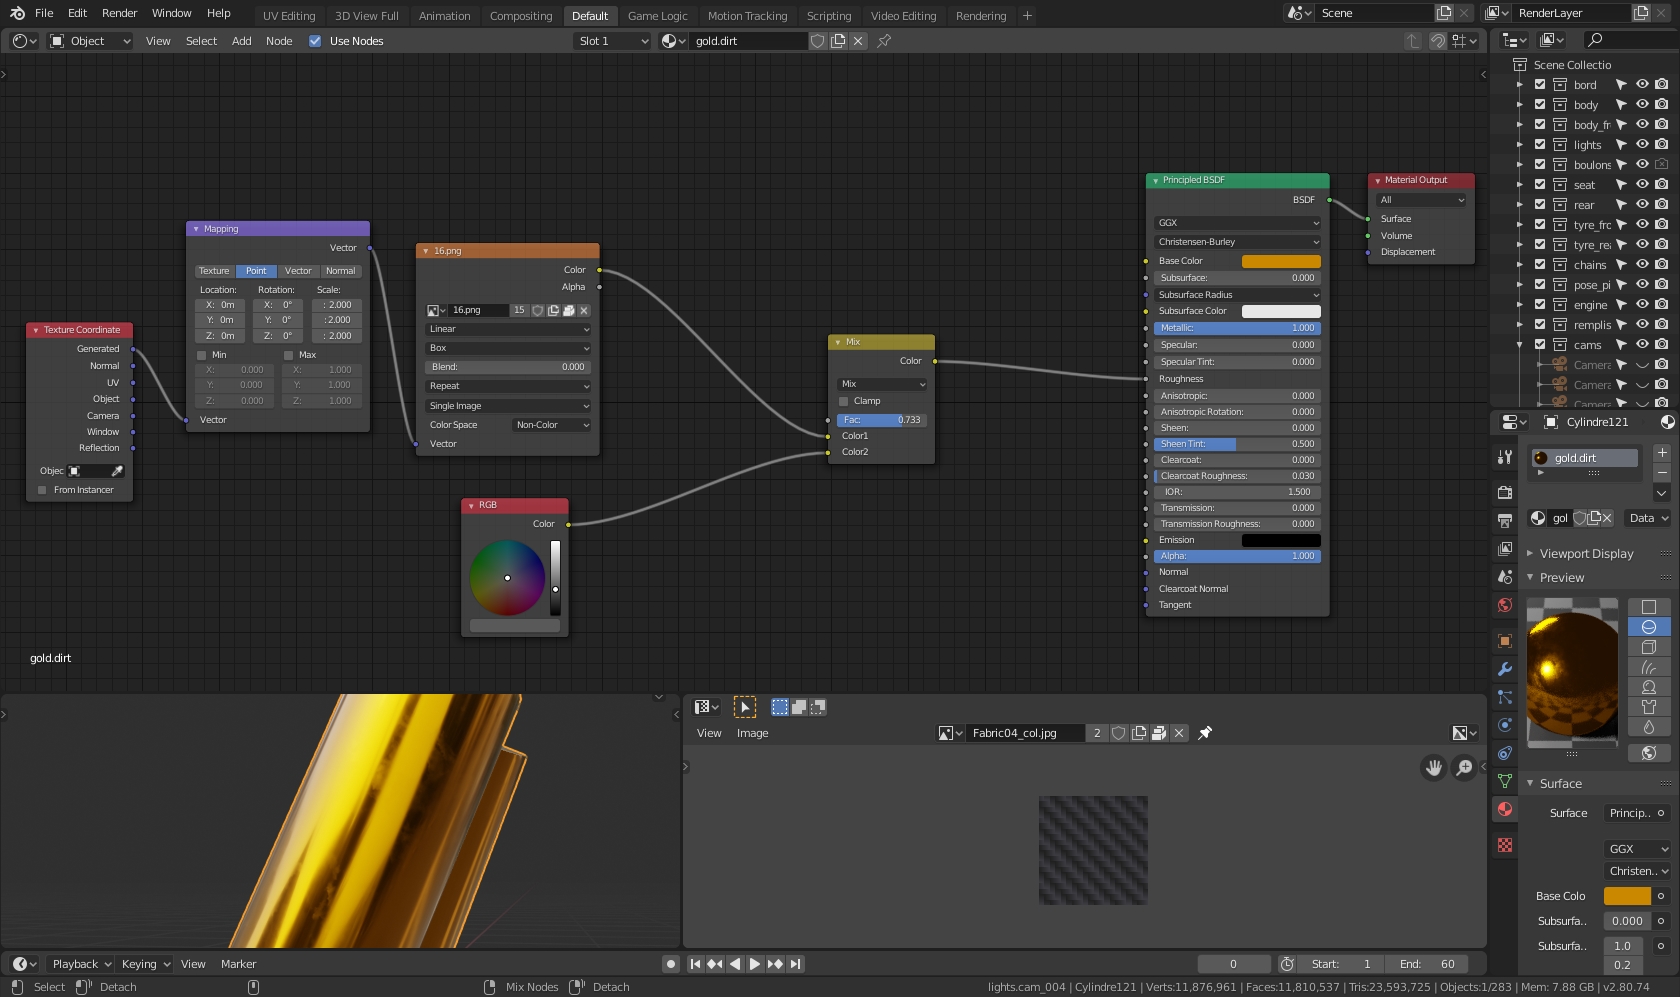
Most of the shaders created were quite simple and I used textures from cc0textures.com. Depending on the shaders being used, some objects were unwrapped, others were not.
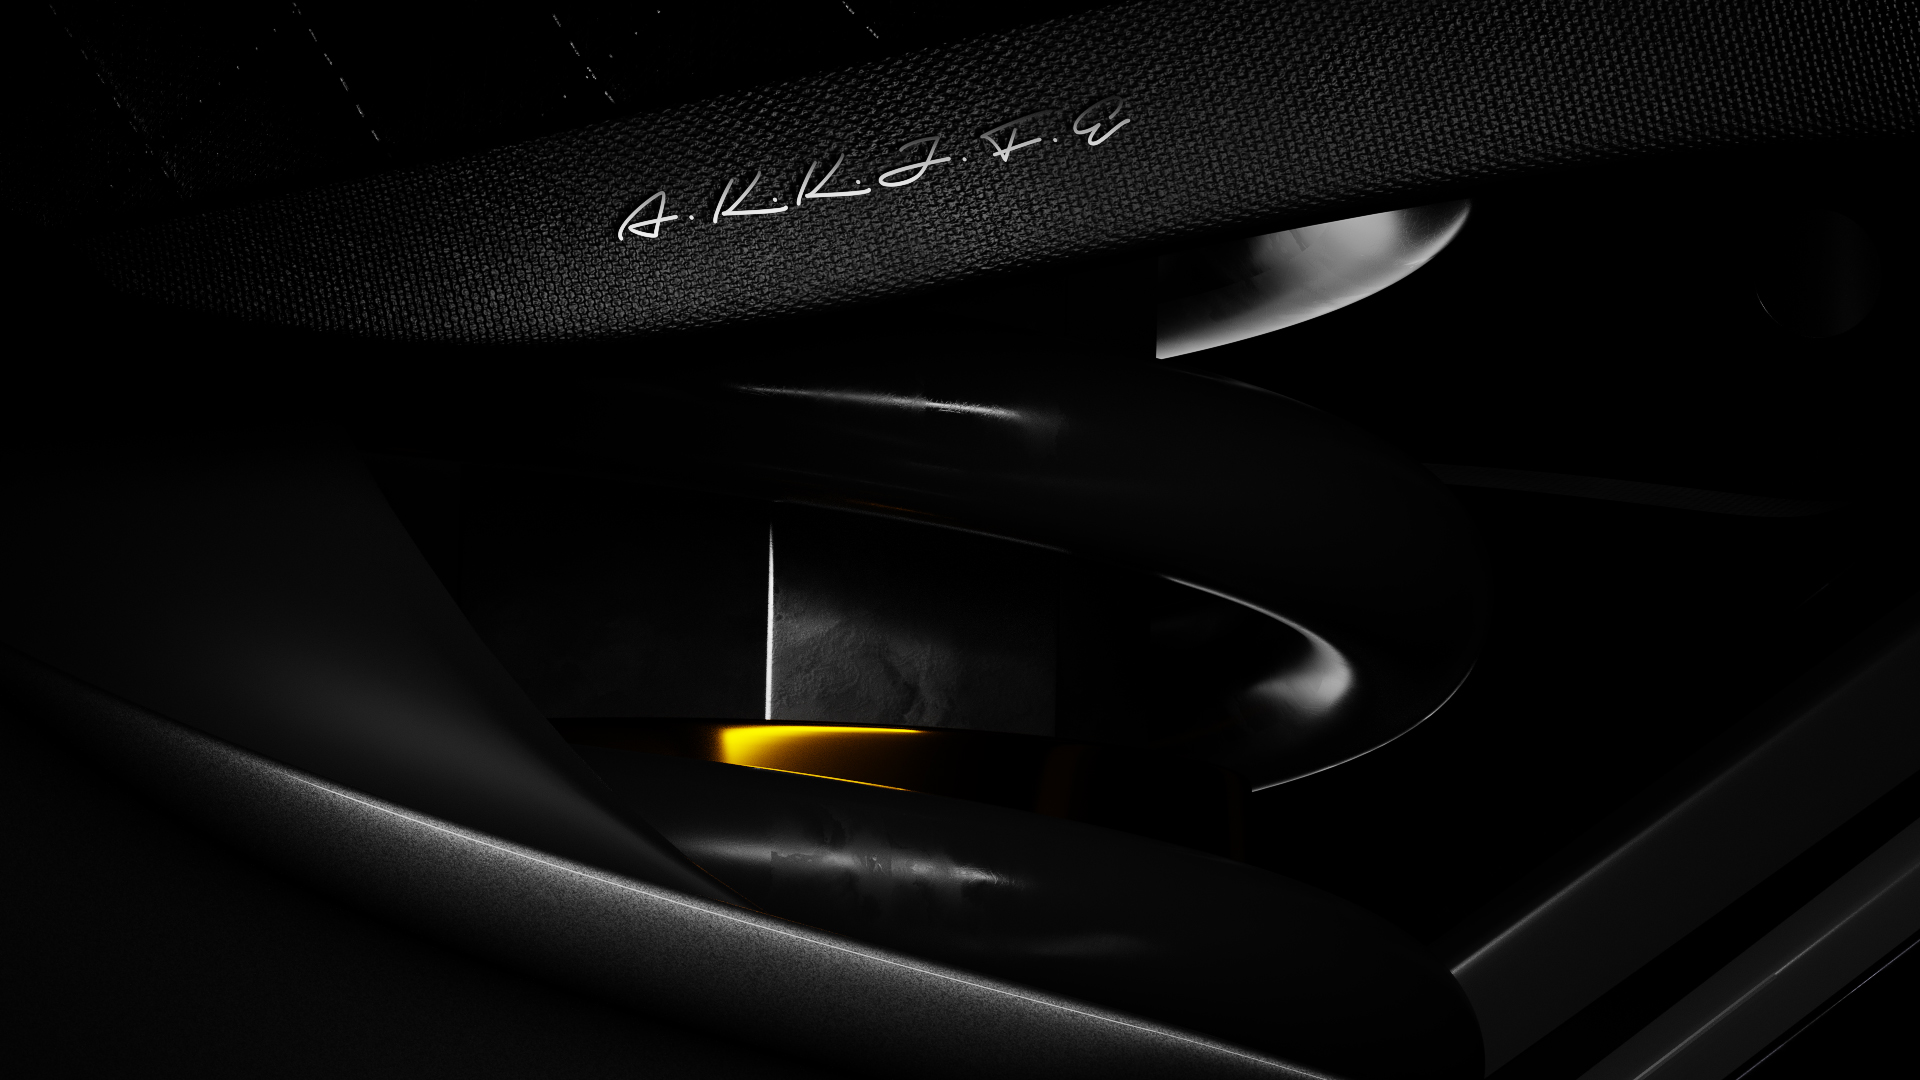
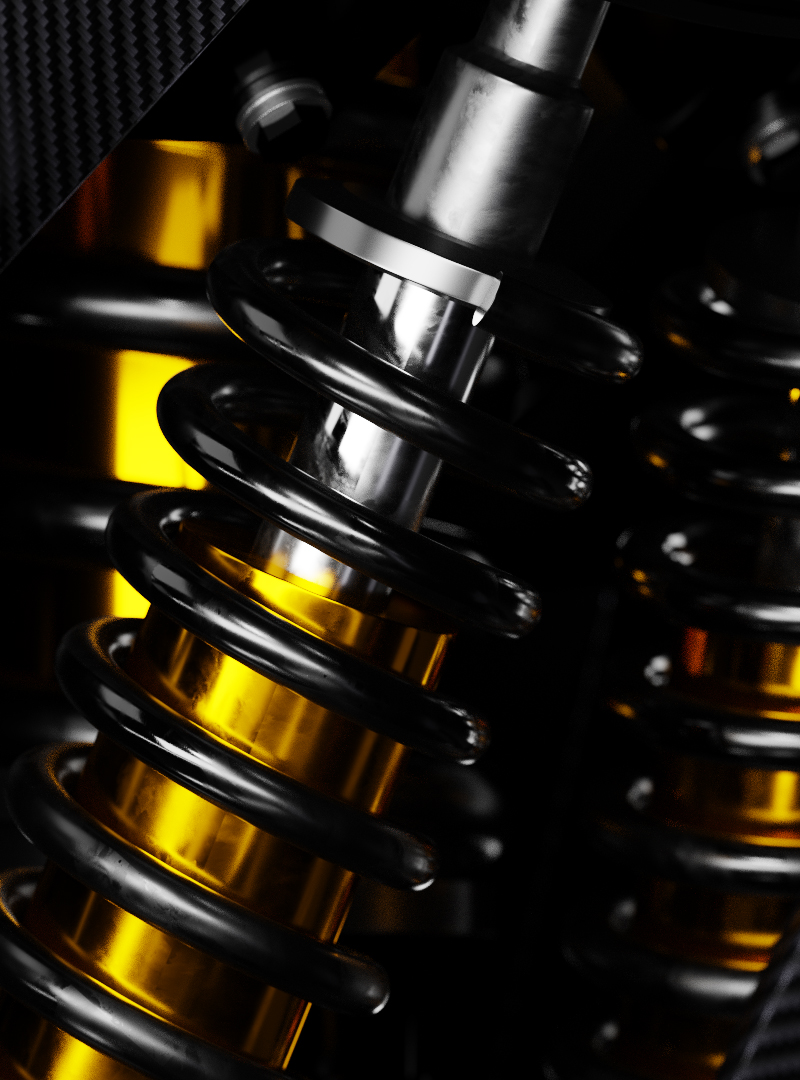
Here are some of the shaders I created.


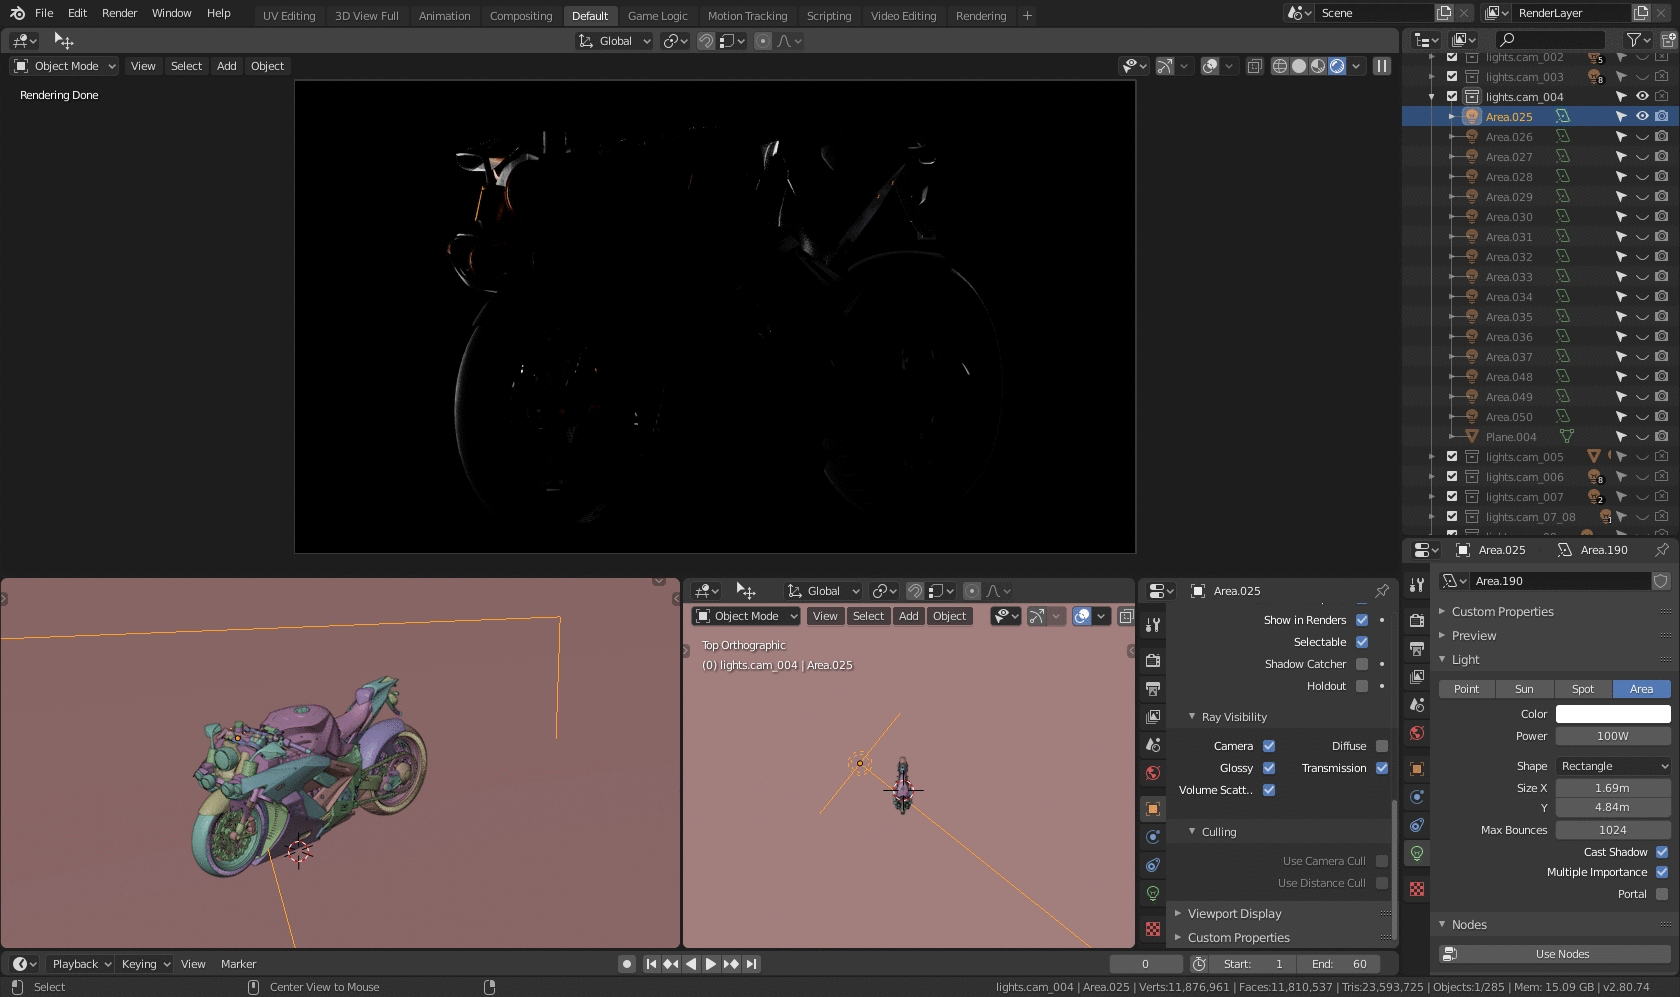
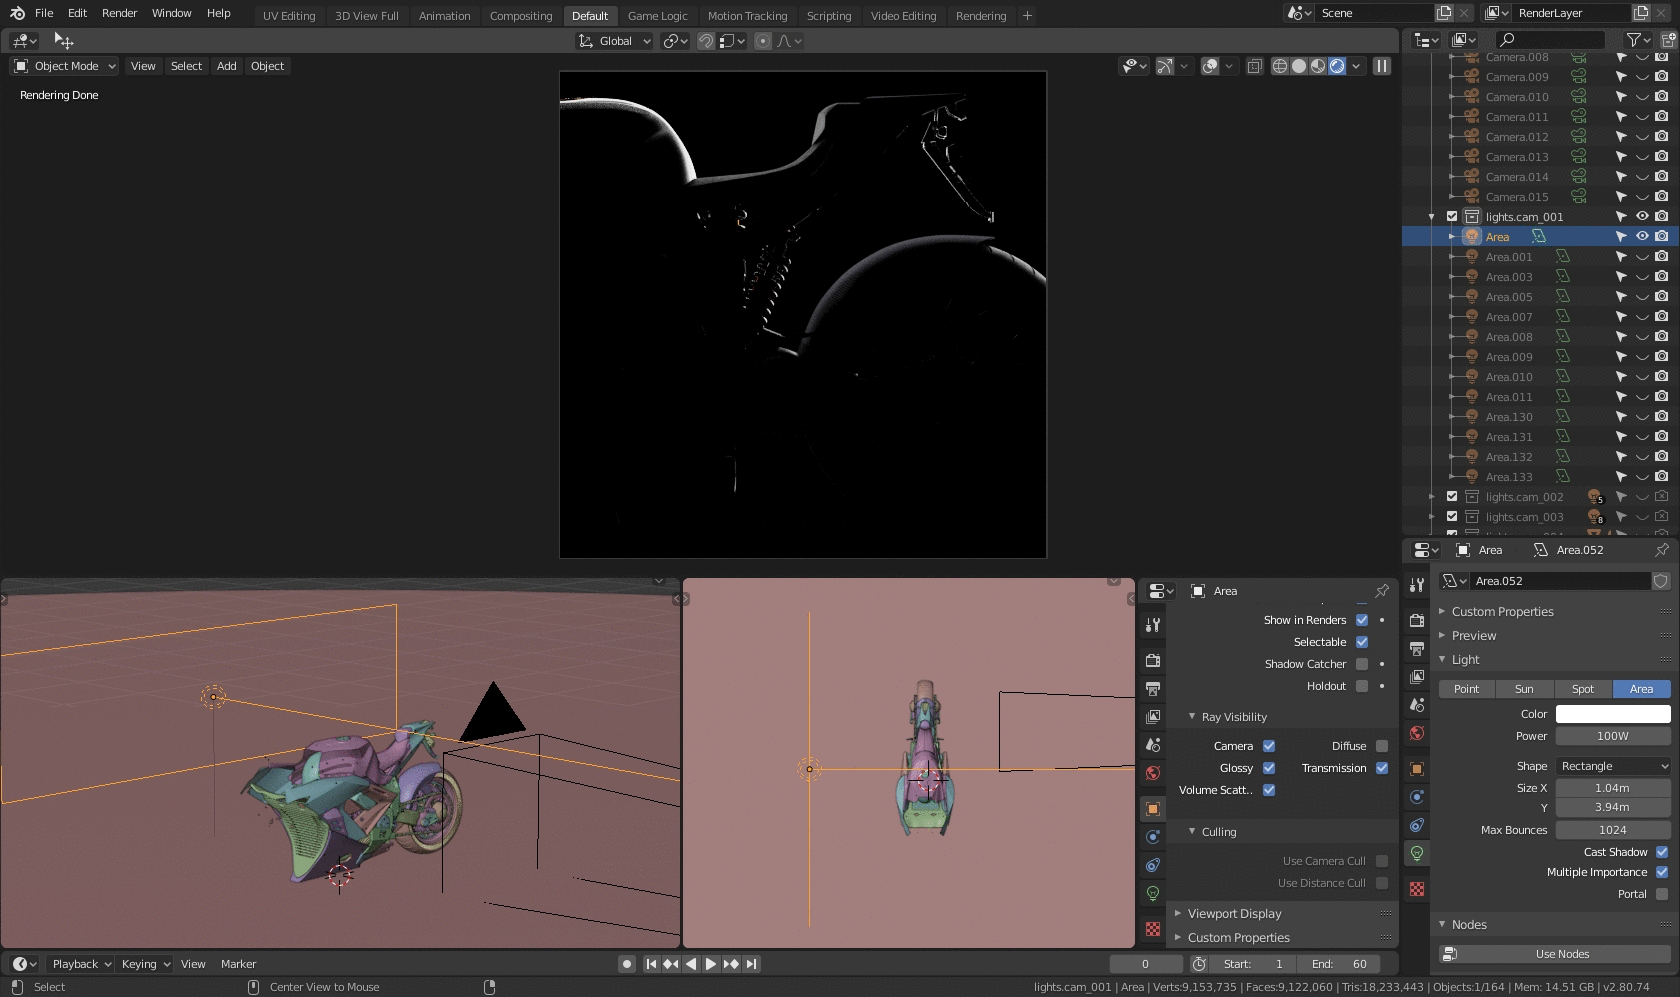
Lighting and composition
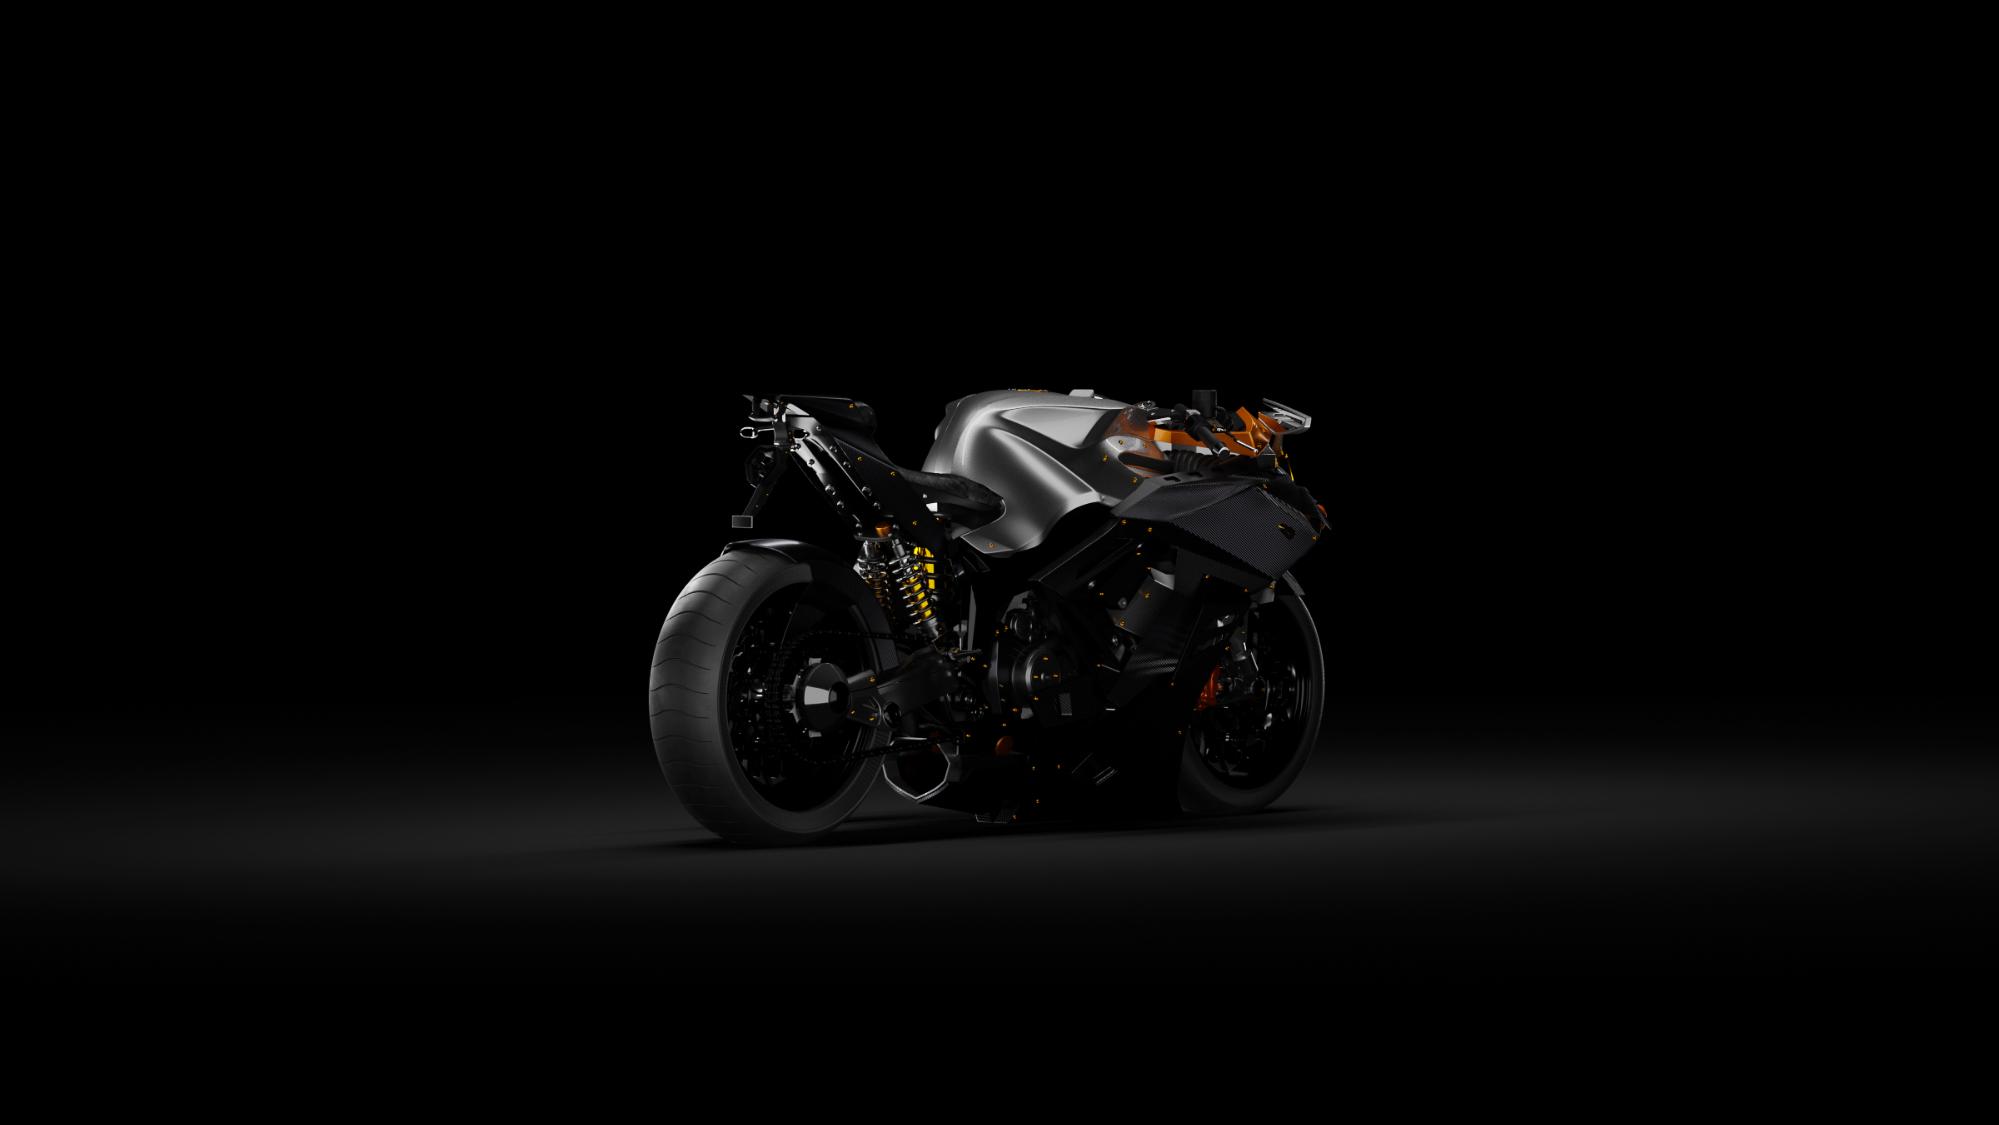
This was the most exciting part of the project. I had a collection with all my cameras and for each camera I had a collection for its lighting setup. I used a focal length of 594mm for most of the renders to give a very aggressive look to the superbike.

Adjusting focal length is a really good technique to use if you want to change the look of your models without modifying them.
The lighting principle I used was to add area lights to light the model and then another set of area lights to obtain the desired reflections (lights were added one by one to control their effect). This means that a lighting setup that worked for one camera might not work for another one. That is why I had one lighting setup for every camera.


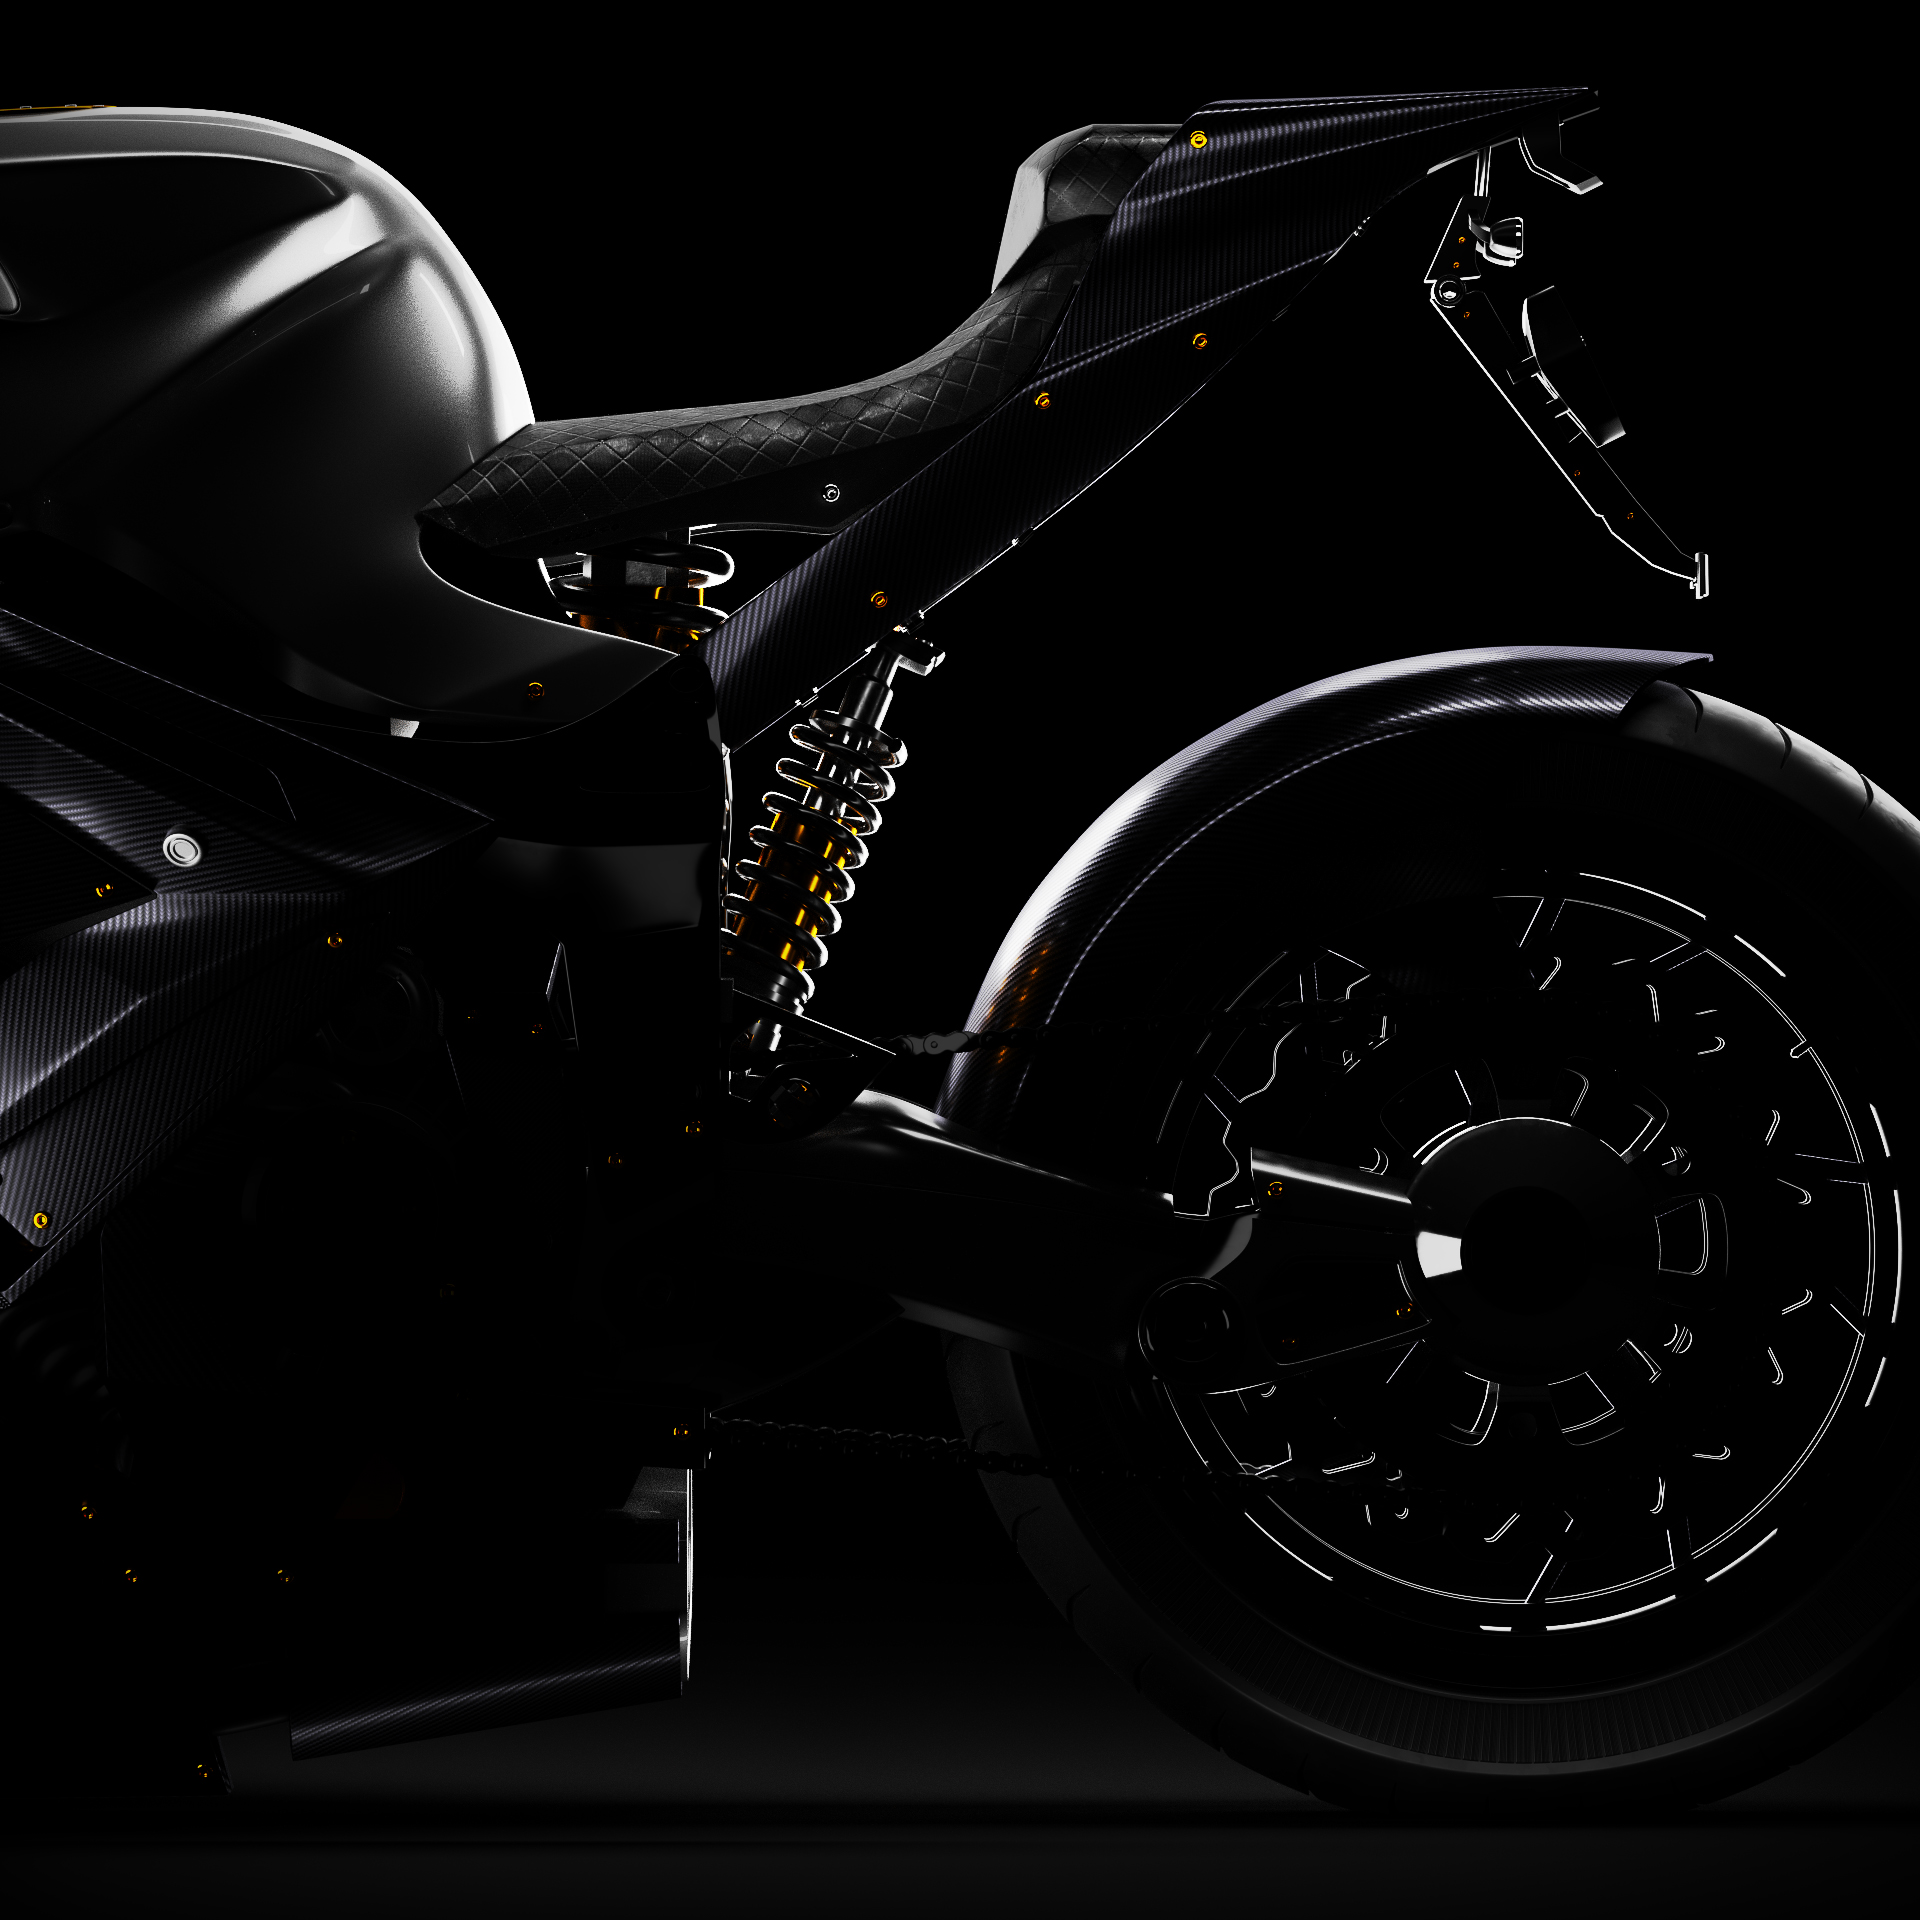
Renderings and Post-Production
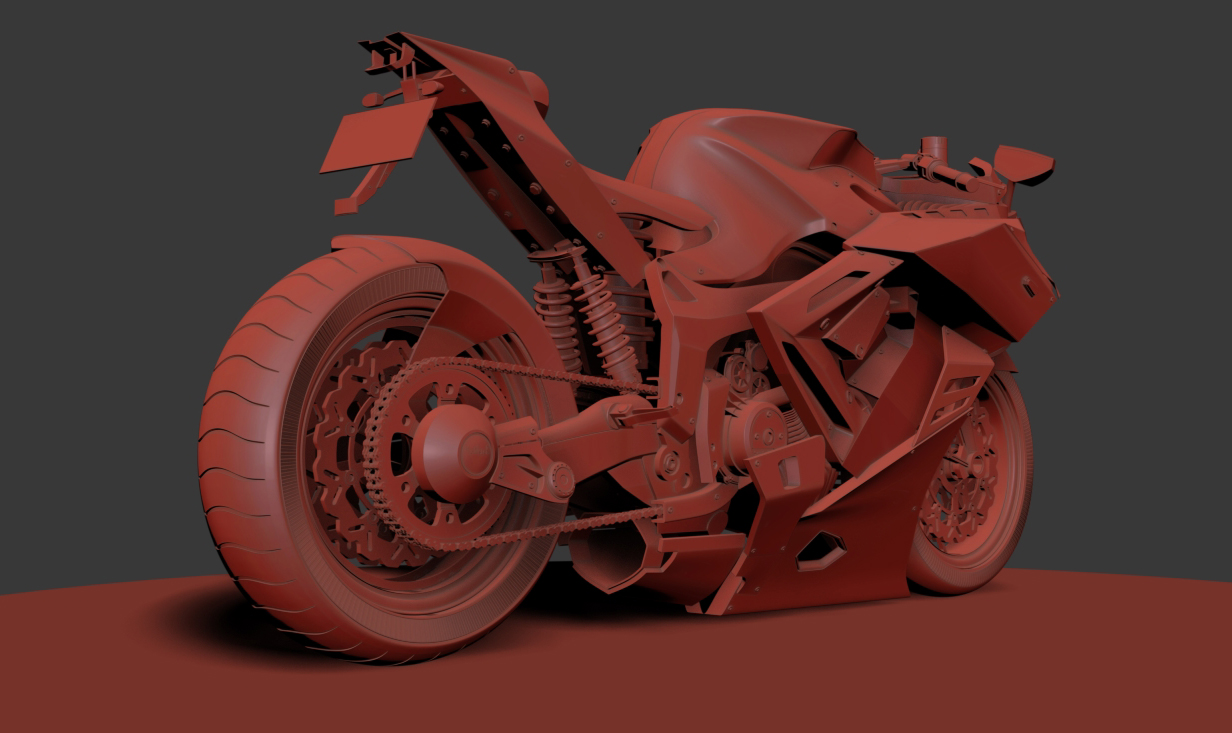
I used Cycles for the render and set Device to CPU, Filmic for the Color Management. I set the samples from 1000 to 3000 depending on the view I was rendering. I did not use the Denoiser because I was losing details in the final render. I used Simplify to be able to control the level of subdivision of all objects in the scene.
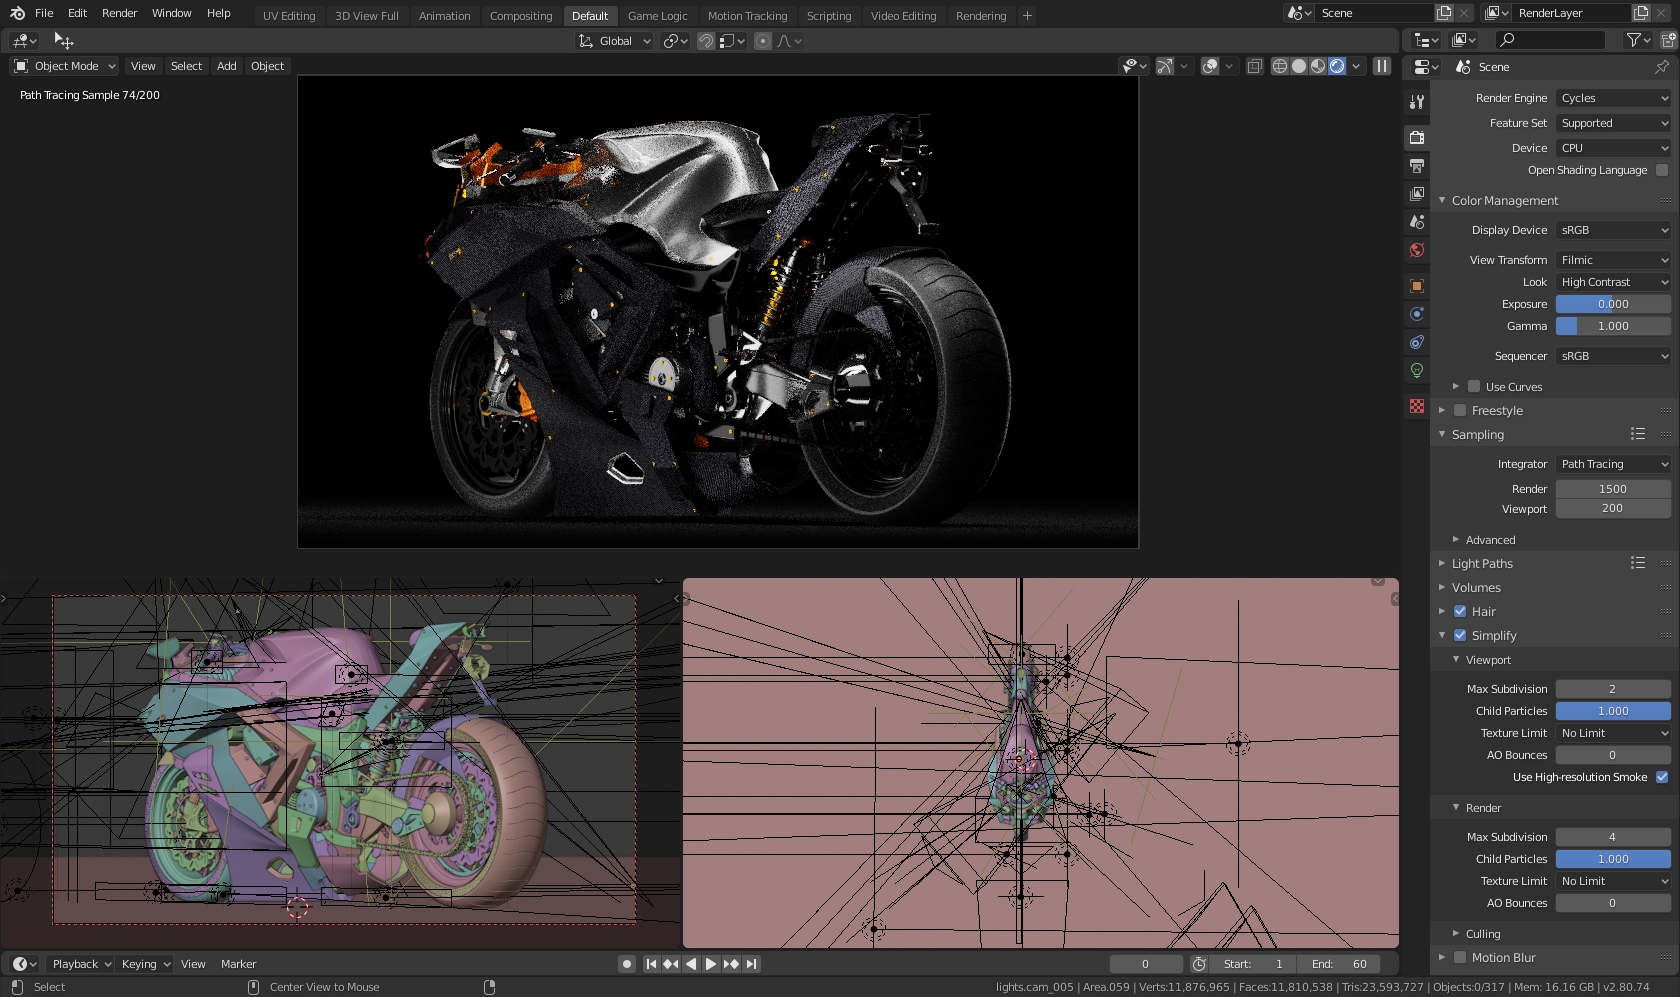
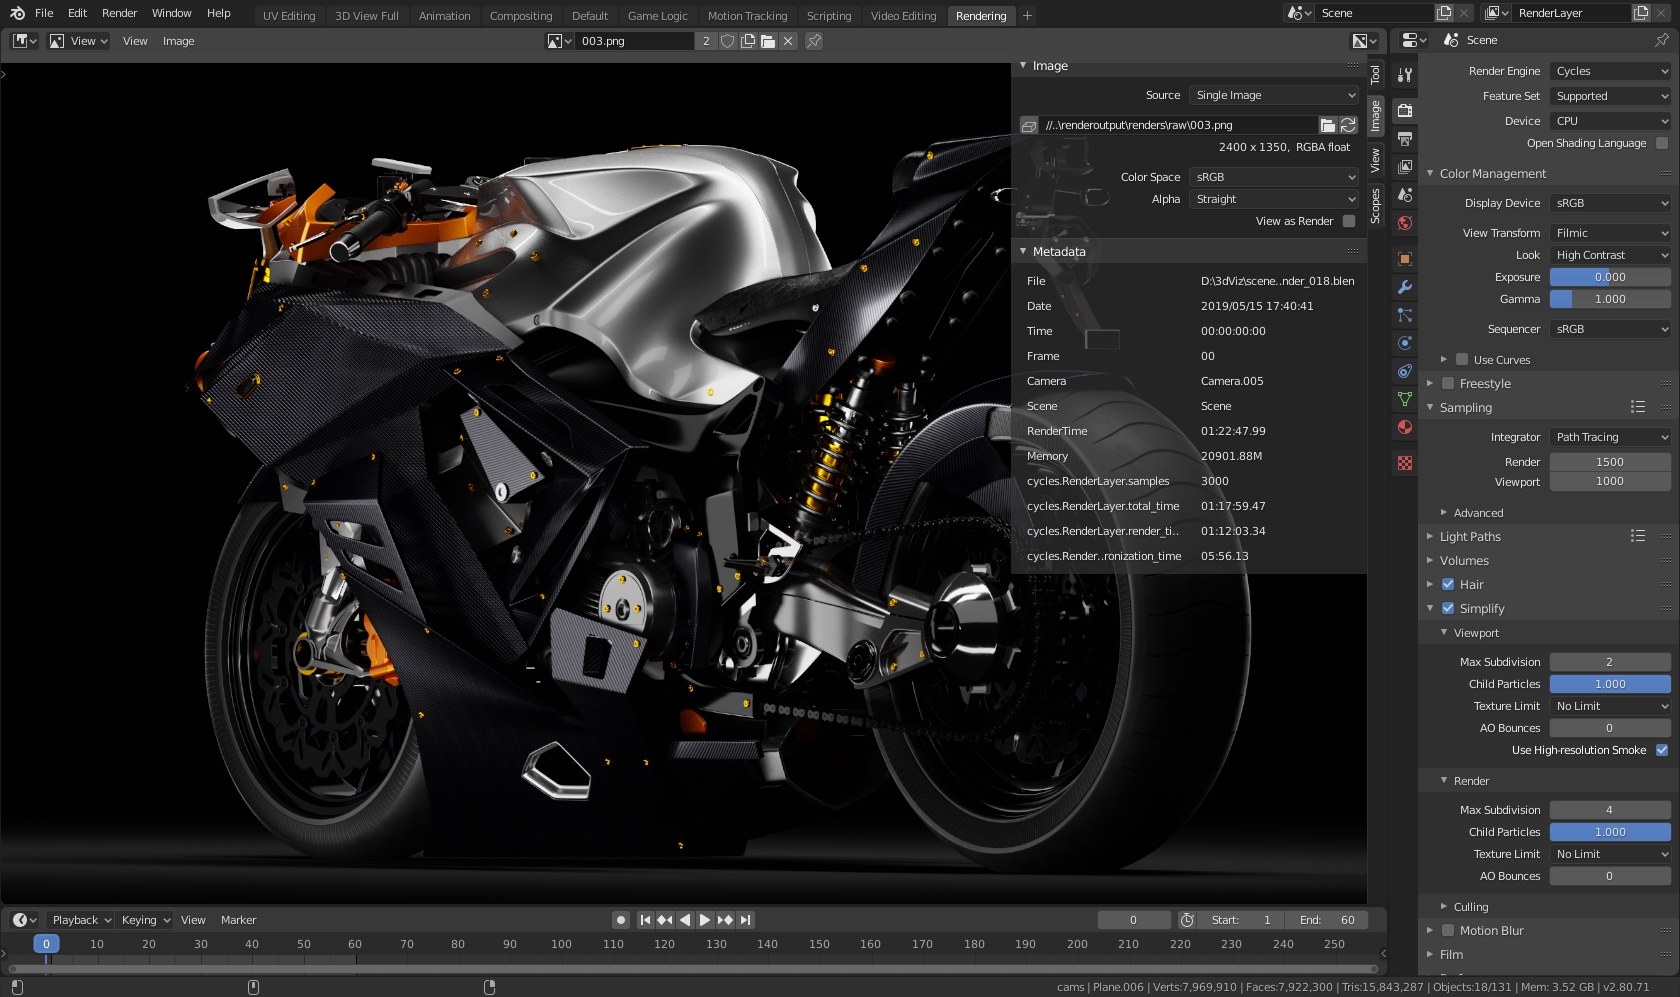
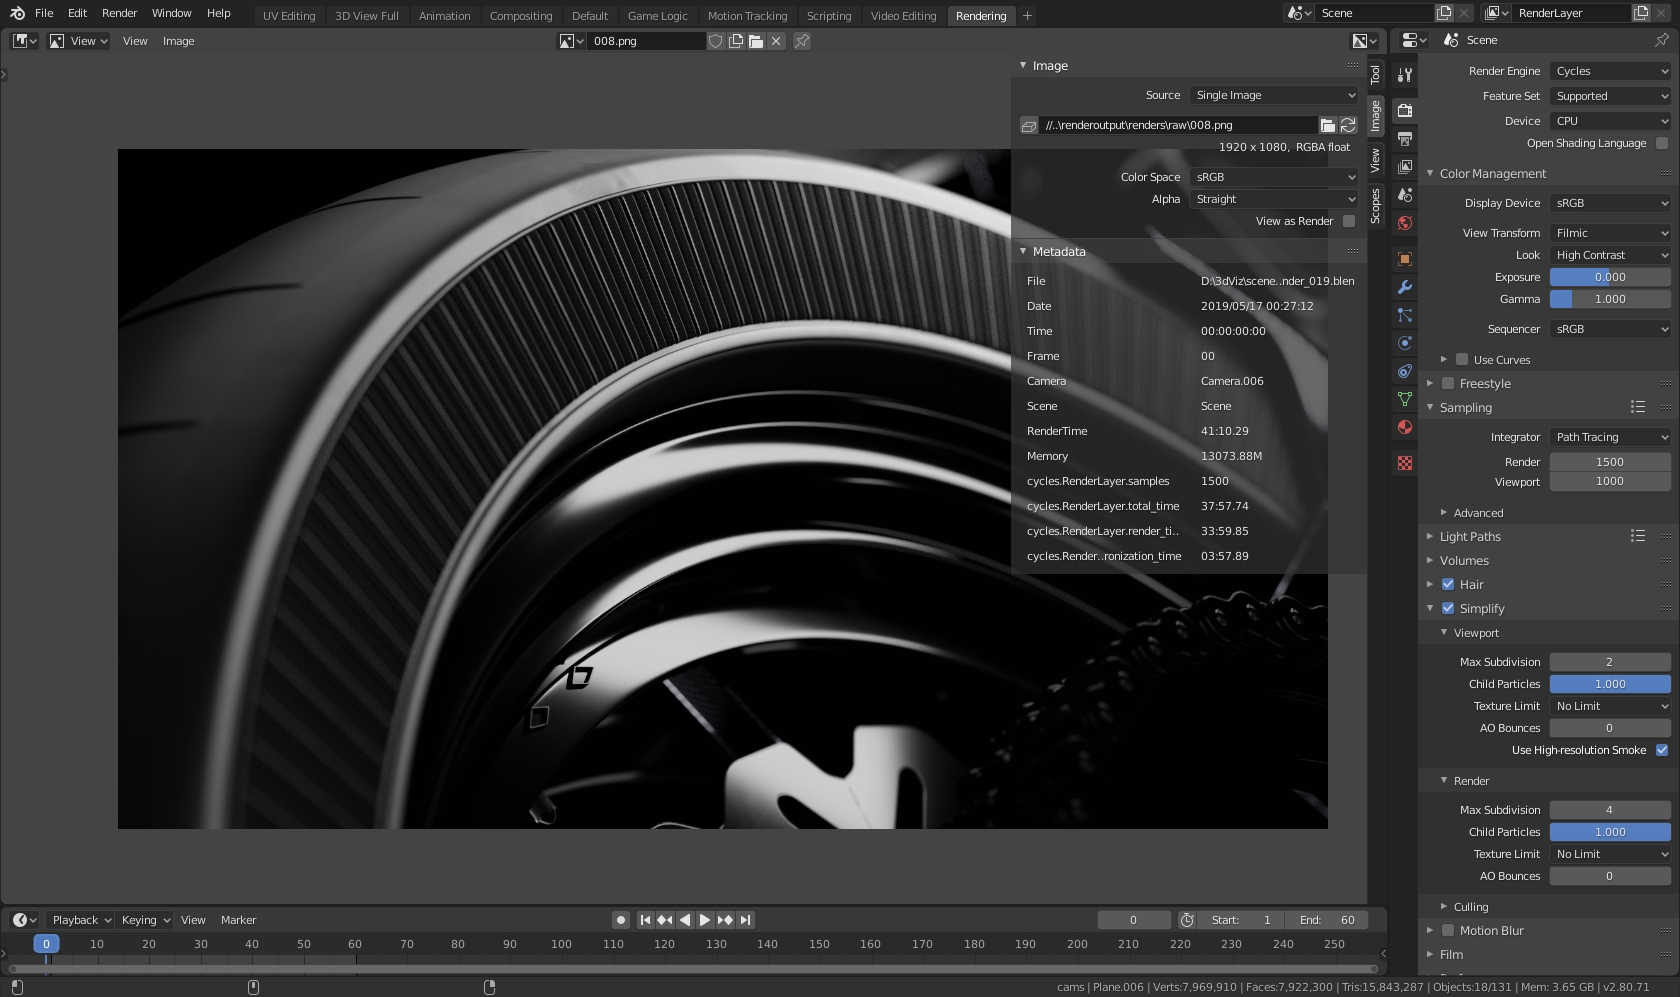
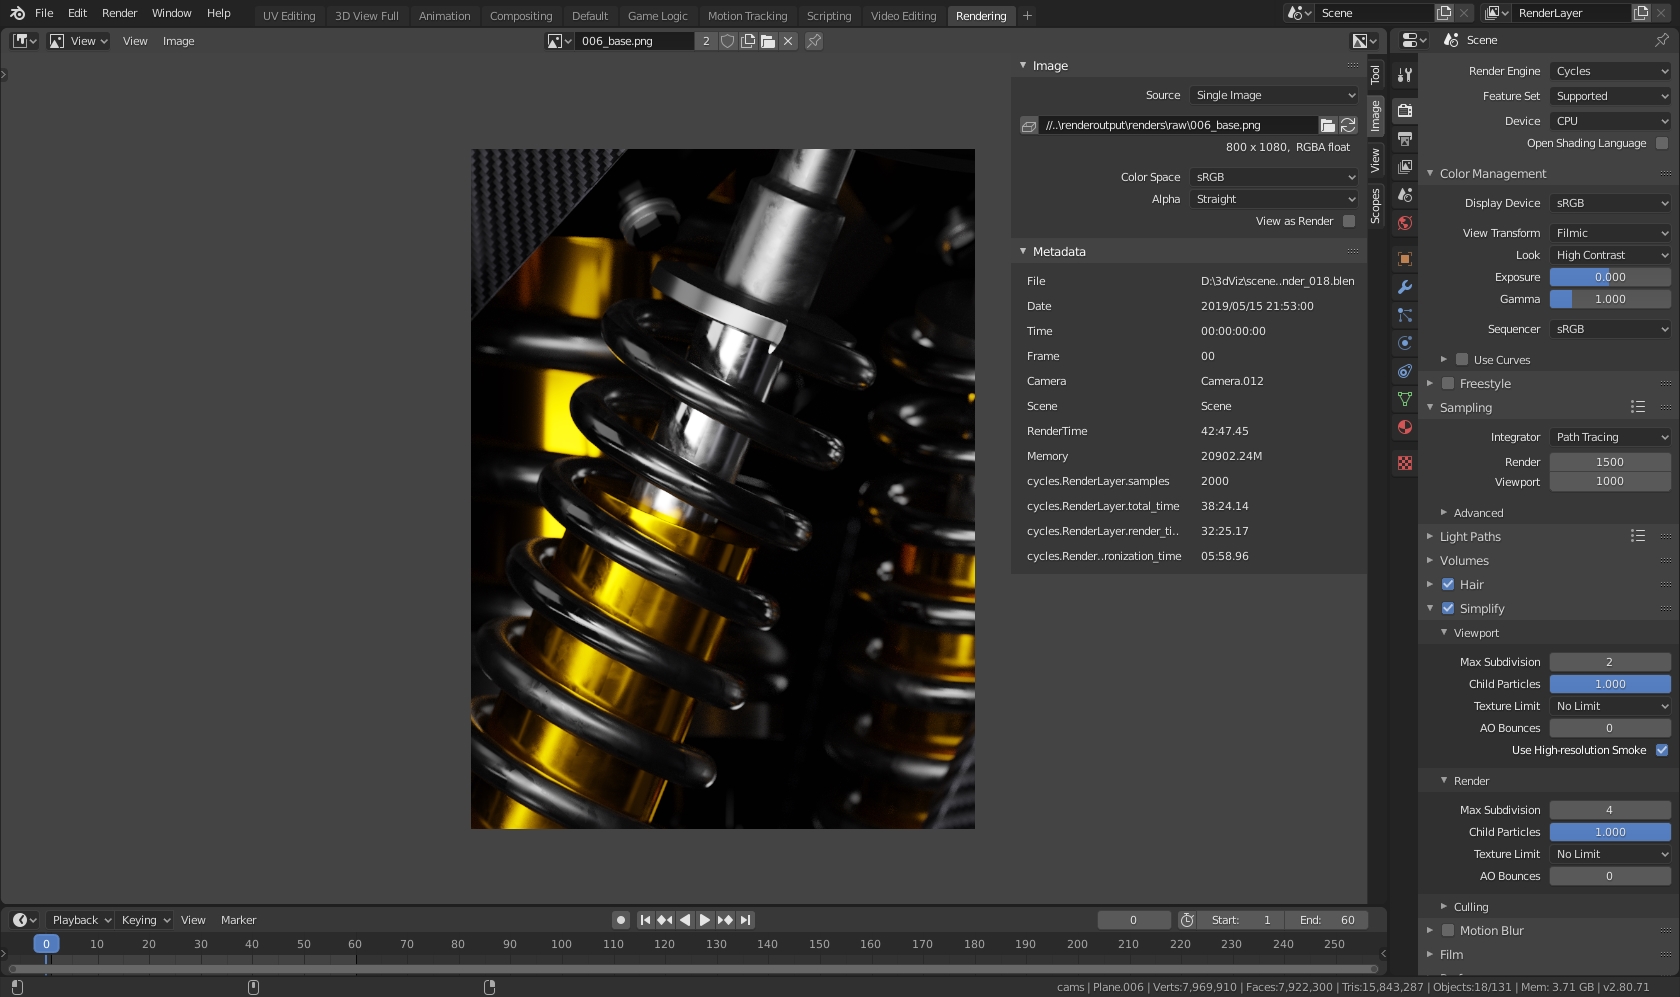
I could not use my GPU to render because Blender used nearly 21 GB of RAM for some of the render. You can check some render metadata in the images below.

After the renders were finished I did a little post production in Photoshop. I mainly adjusted the contrast and sharpness.

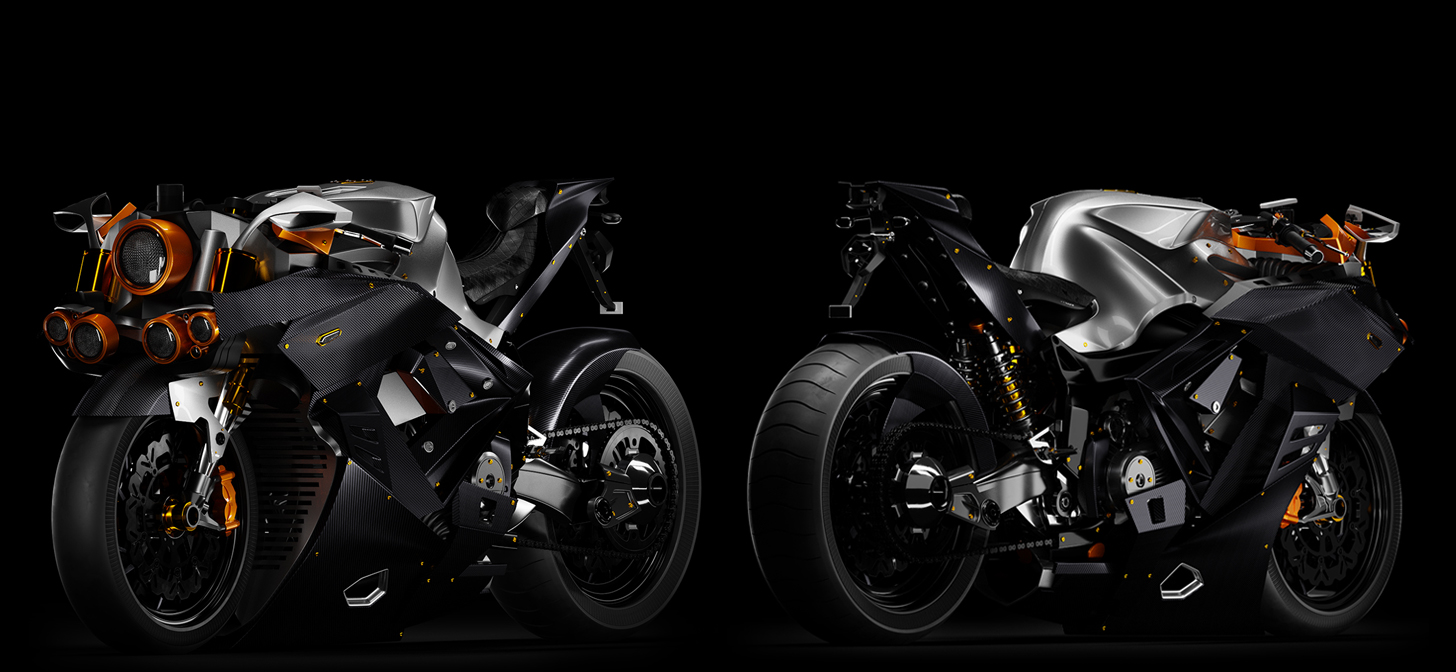
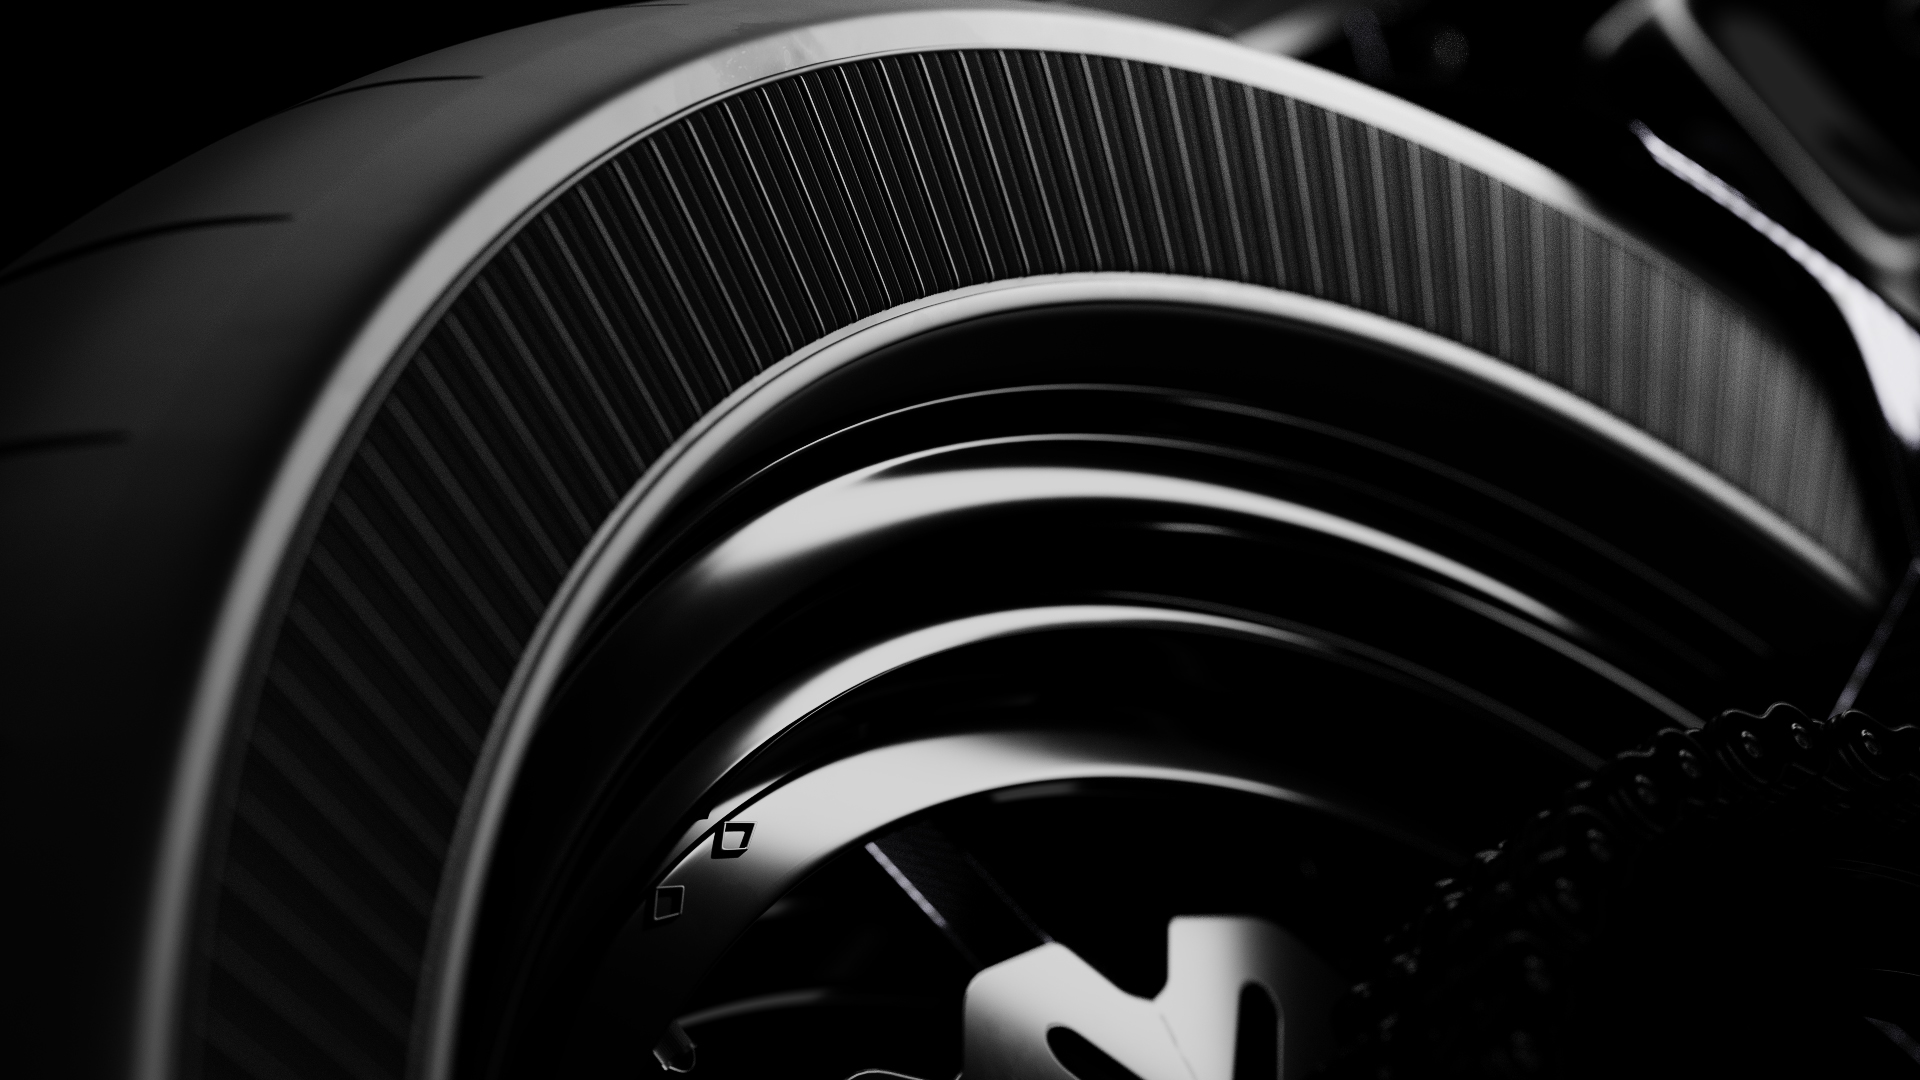
You can find all the final renders below.


Thank you for reading.
About the Author
 Amevor Kangni, Architectural Visualizer.


Amazing work Amevor, thanks for sharing.
Awesome work and insightful article, thanks!
Thank you Billy. Im glad you find the article useful.
really stunning! I can’t stop staring:)
Thanks for sharing your process.
Simply amazing, Amevor ! You’re such a great artist. Keep blending !
Thank you for your kind words Bruno.