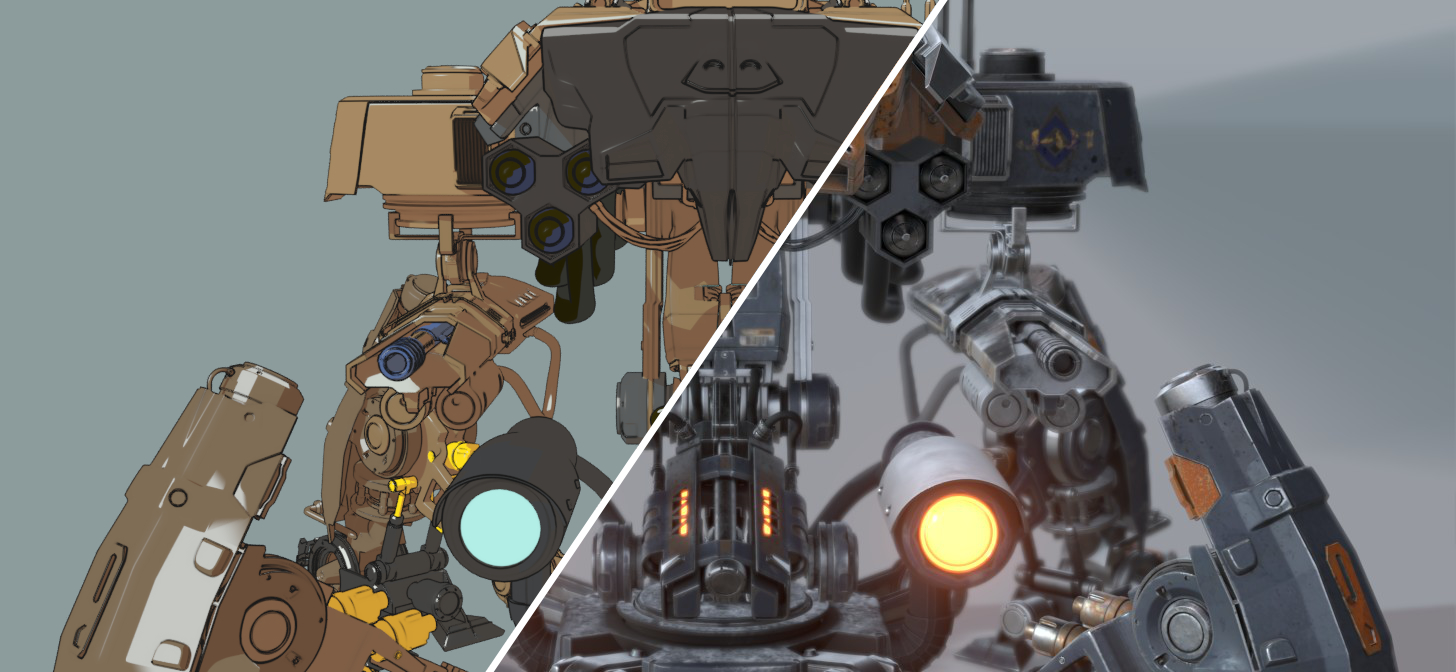
Behind the Scenes: ToonKit Test and EEVEE Render
About Me
Hey there, My name is Massimo Zuanazzi. I’m a 3D artist and I live in Turin (Italy).
Since 2016 I have specialized in hard surface modeling, but my background in 3D started about 20 years ago. I started working in this world thanks to my passion and my devotion to the study of new technologies, both software and hardware.
I started working on Cinema 4D, then I worked on Lightwave3D (until 2015 version) and now I’ve been using Blender for more than 6 months. I’ve been “pushed” to Blender because of its great potential, both as a Render Engine and for its modeling tools that at the moment are really powerful and versatile.
Professionally, I worked as an animator and modeler for comics, and for Multimedia Sci-Fi of the Sinka Saga (Marco Patrito, VirtualViews).
I collaborated with the Bolzano’s Archeological Museum, in this case I created an online adventure about the glacier mummy “Oetzi“. I worked for Ferrero S.p.a, modeling characters that were 3D printed. I also taught 3D in several schools in my town, and I collaborated in areas of architecture and design.
Inspiration
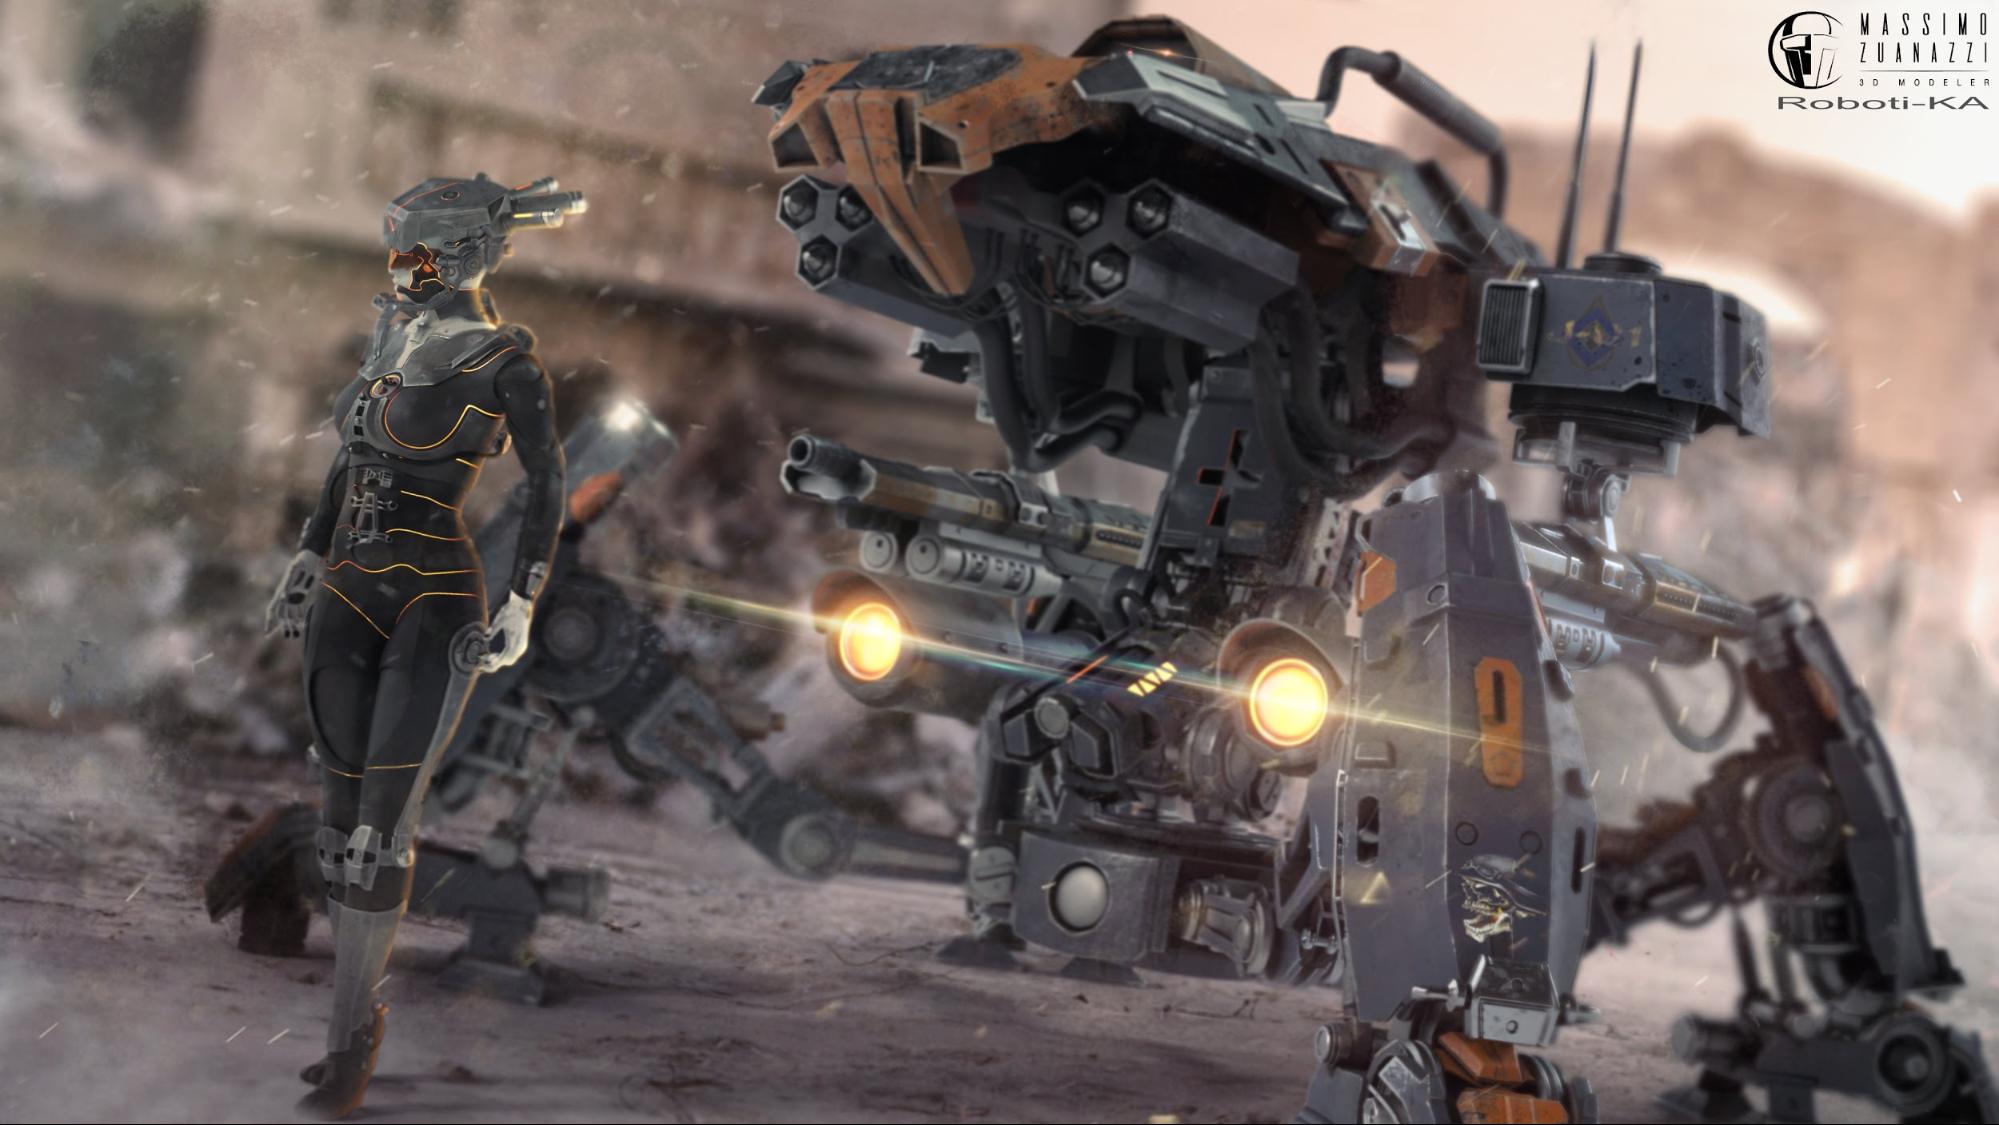
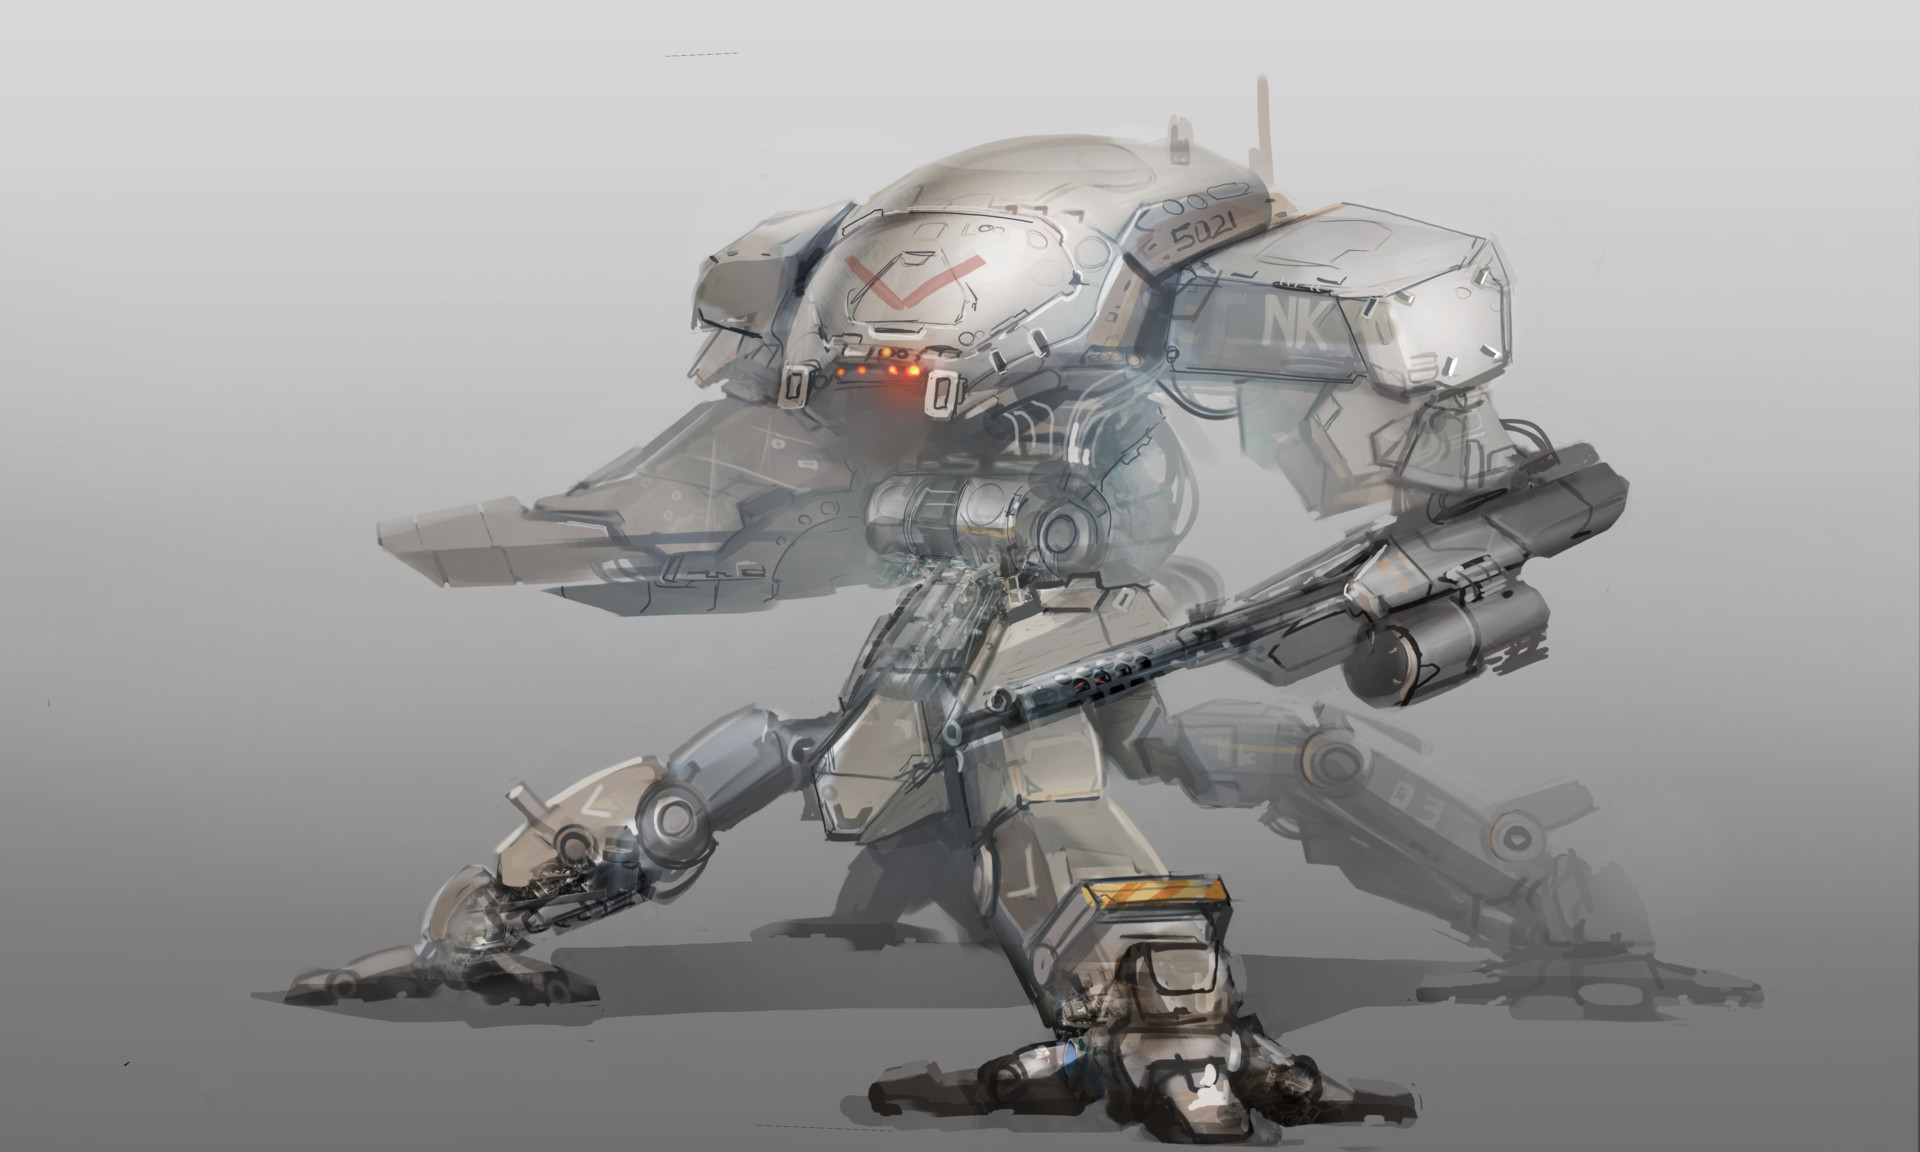
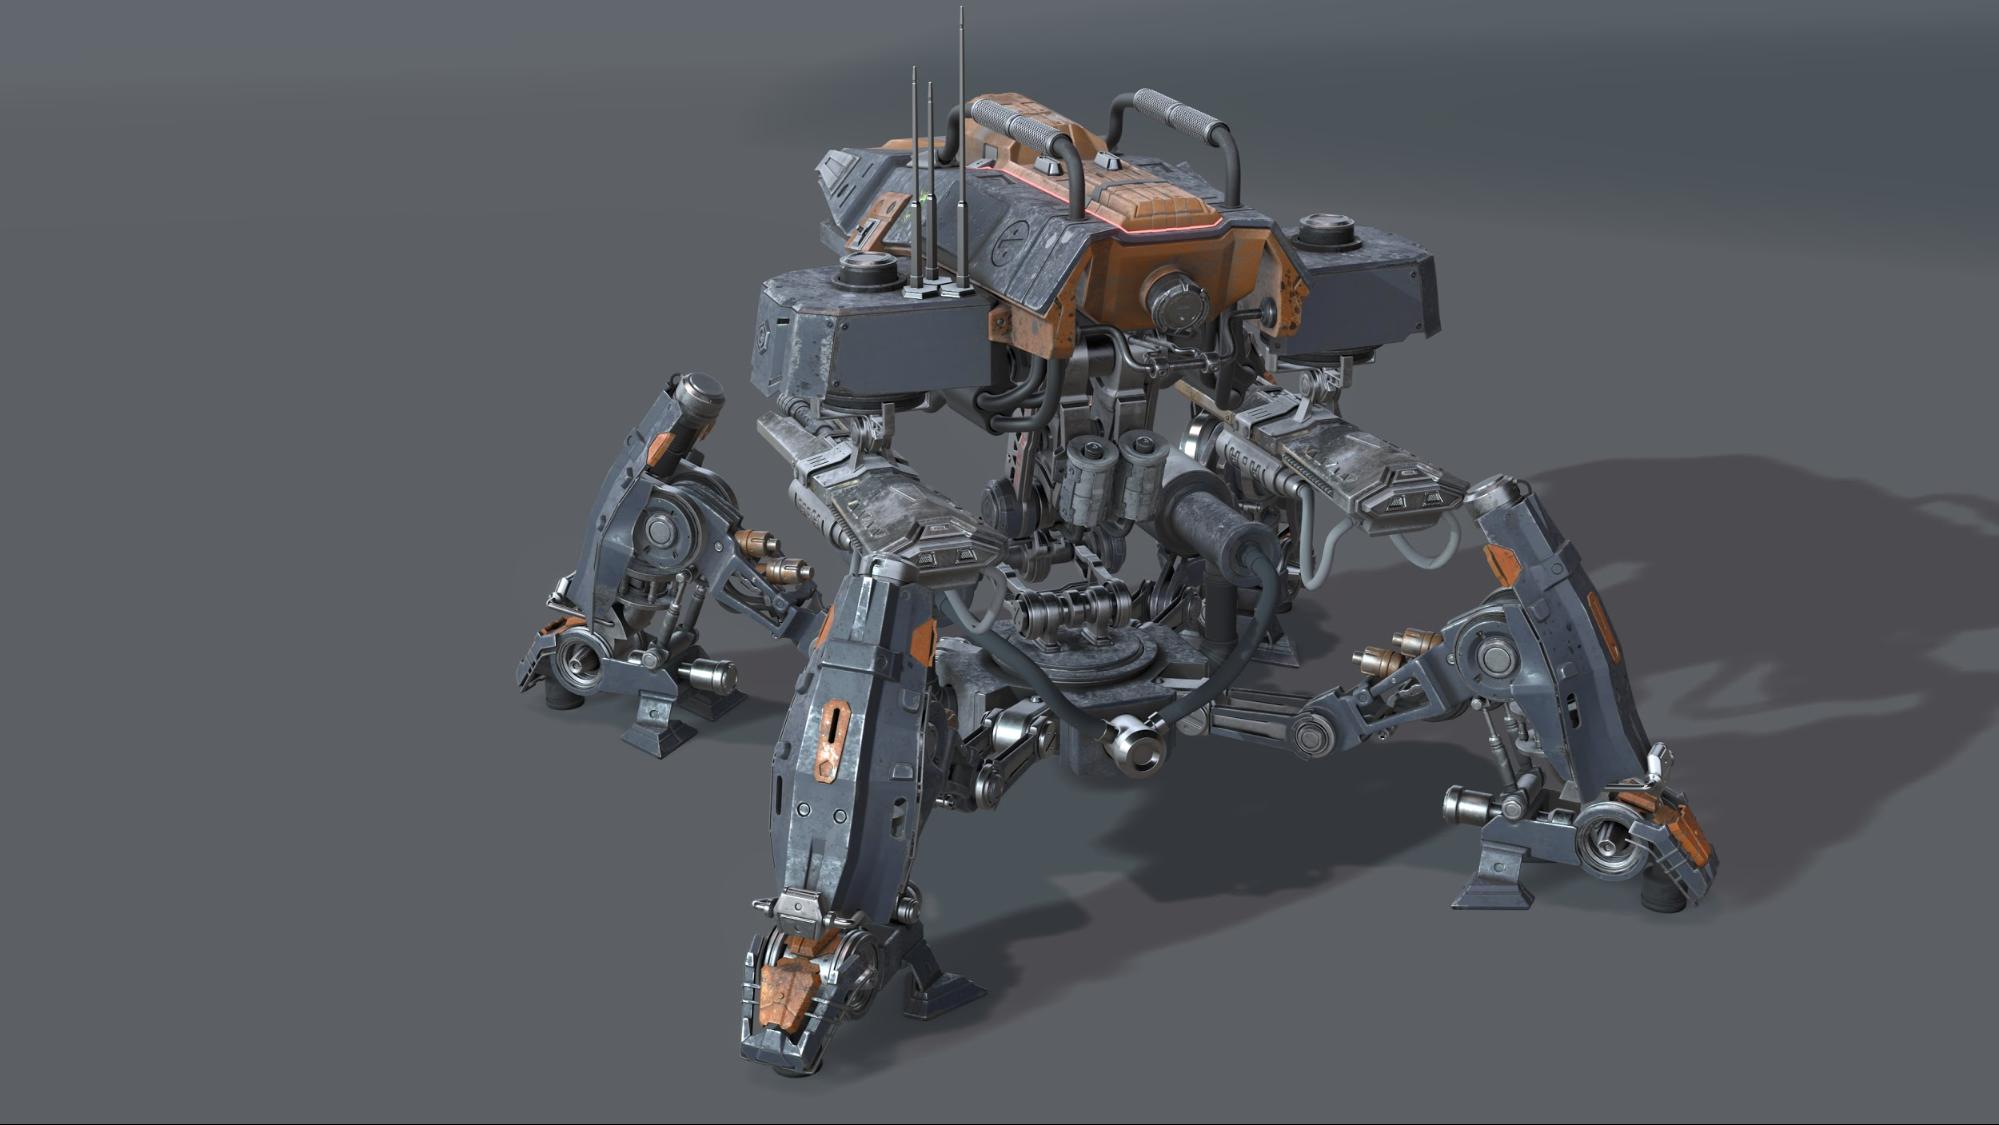
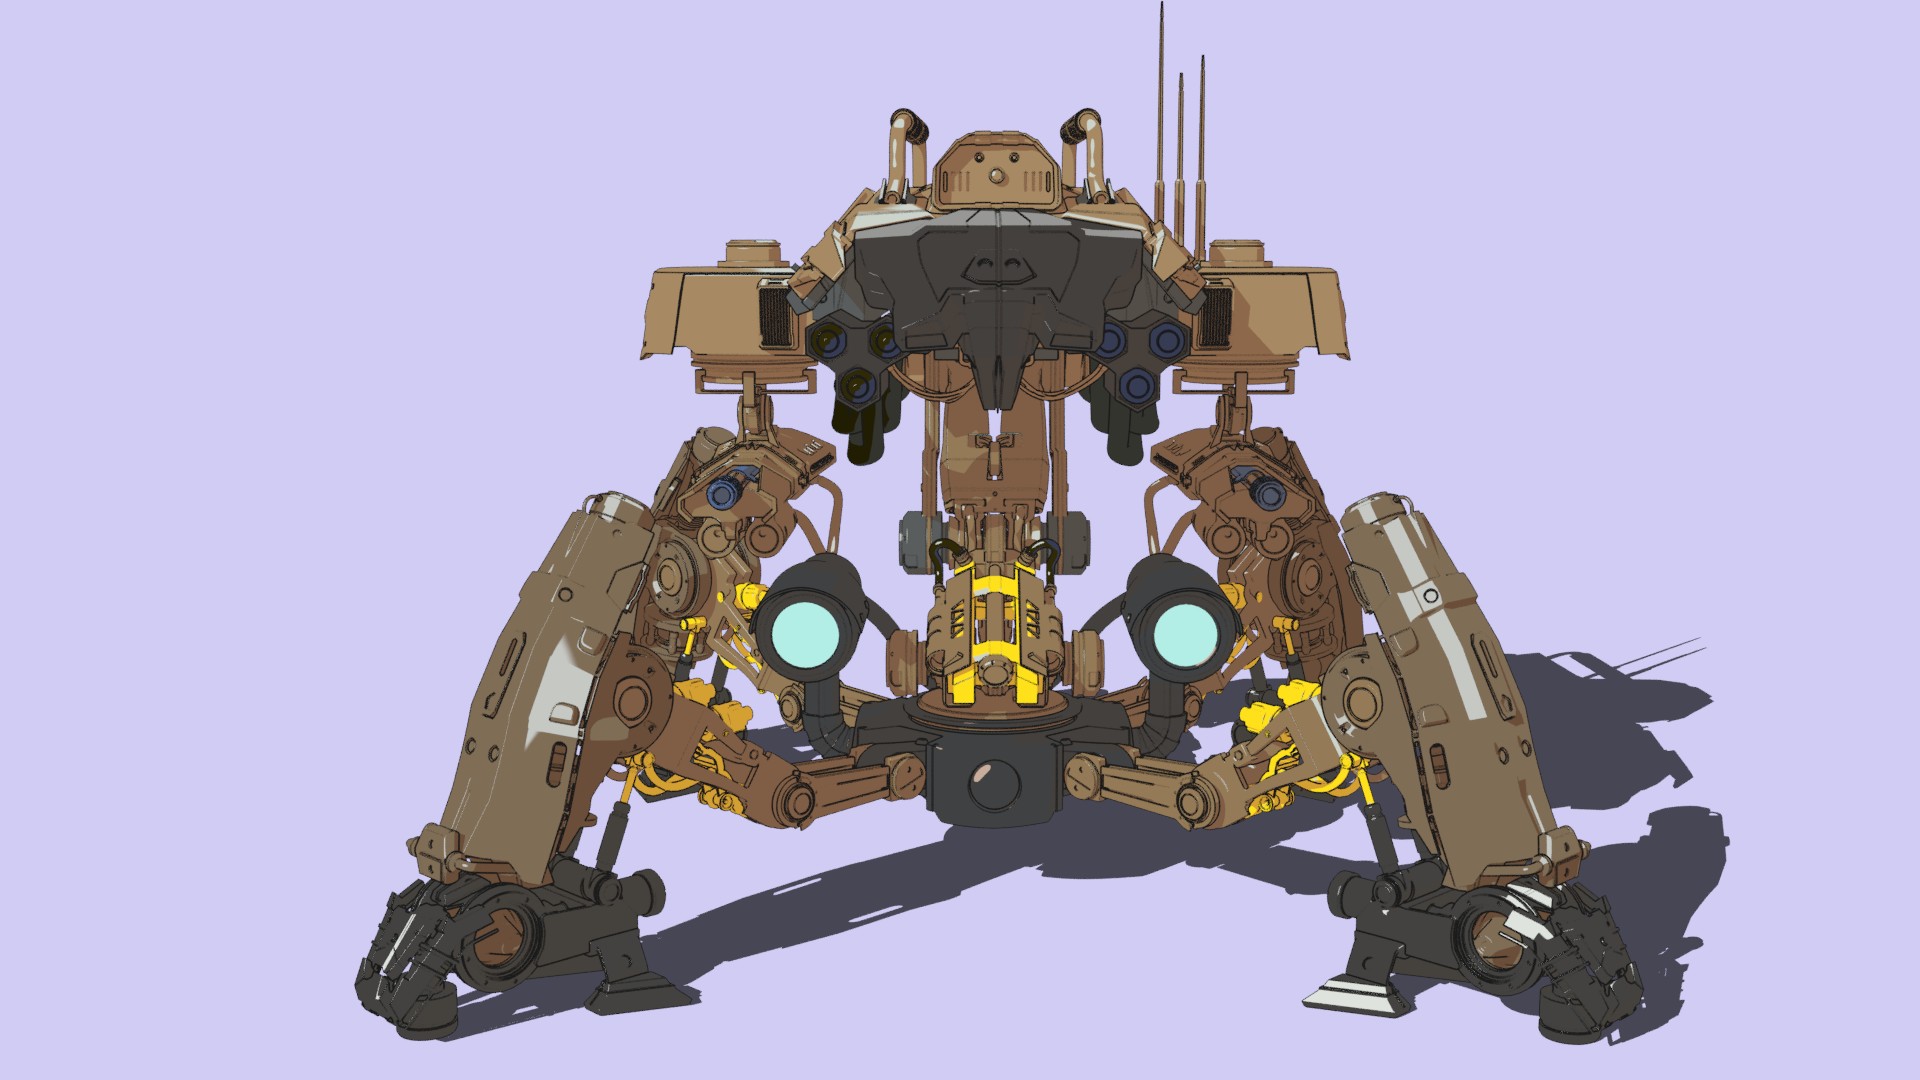
Since I’ve always loved Sci-Fi, I had to create this four legs mecha. A perfect war machine, and that’s not all: this machine is controlled by a cyborg woman. This project started with the scene of an apocalyptic environment with two characters. The mecha was at first less important in the original composition, but I then decided to make it stand out, as you can see in the final image. I decided to re-model it using Blender (the original object had been modeled using Lightwave3D).
This experience helped me learn about Blender’s tools and functions.
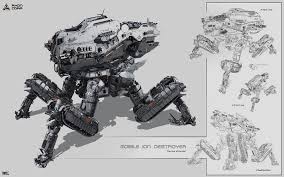
References
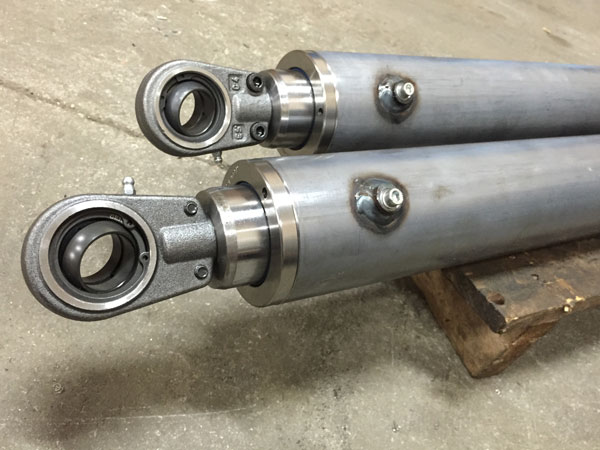
I often search for online references, especially for real photos so that I can study materials (shading) and mechanisms.

Software and Hardware
Software:
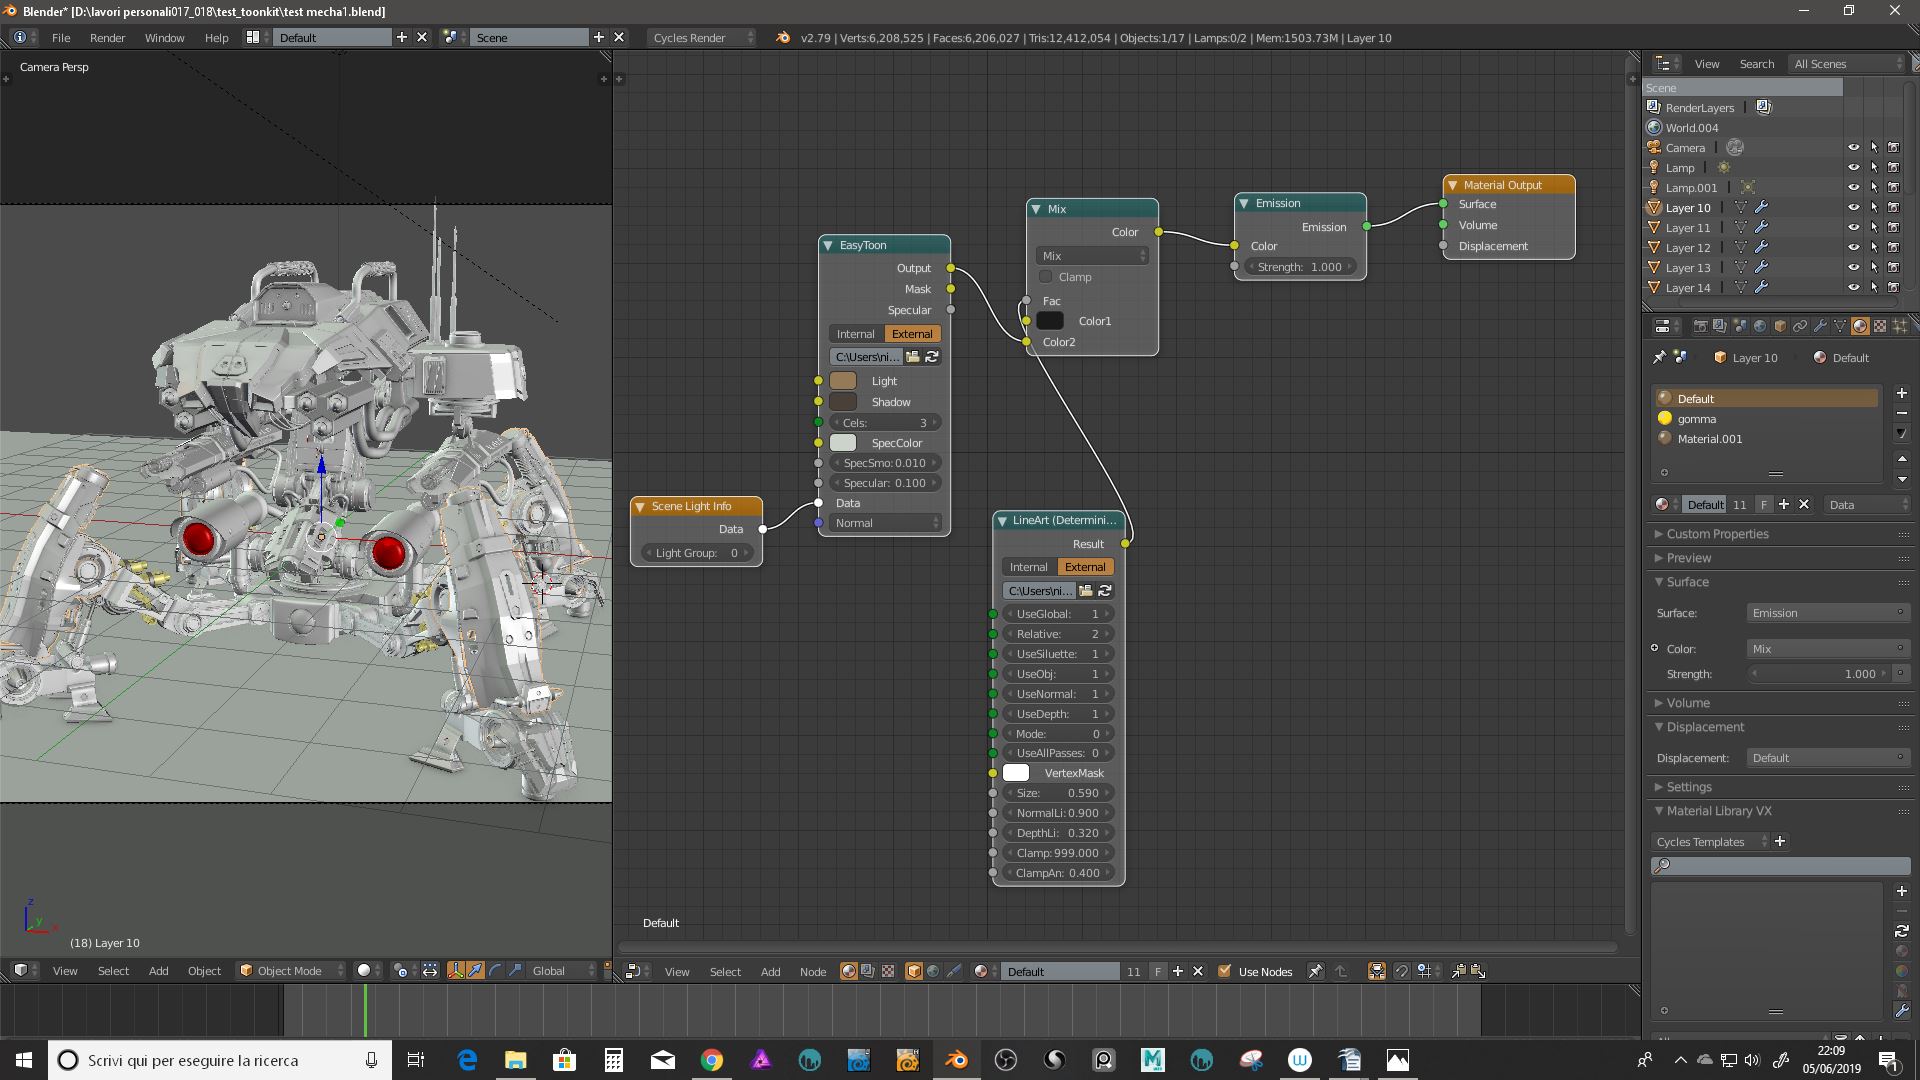
- Blender: hard surface modeling, shading, Render EEVEE/Cycles and Toonkit Add-on
- 3D-Coat: unwrapping and PBR painting
- Lightwave3D: first mecha prototypes
Hardware:
- AMD Ryzen 7
- 16 GB RAM
- GeForce GTX 1080 GPU
Workflow
I usually start with blocking, so that I can have some basic shapes that will soon become the model.
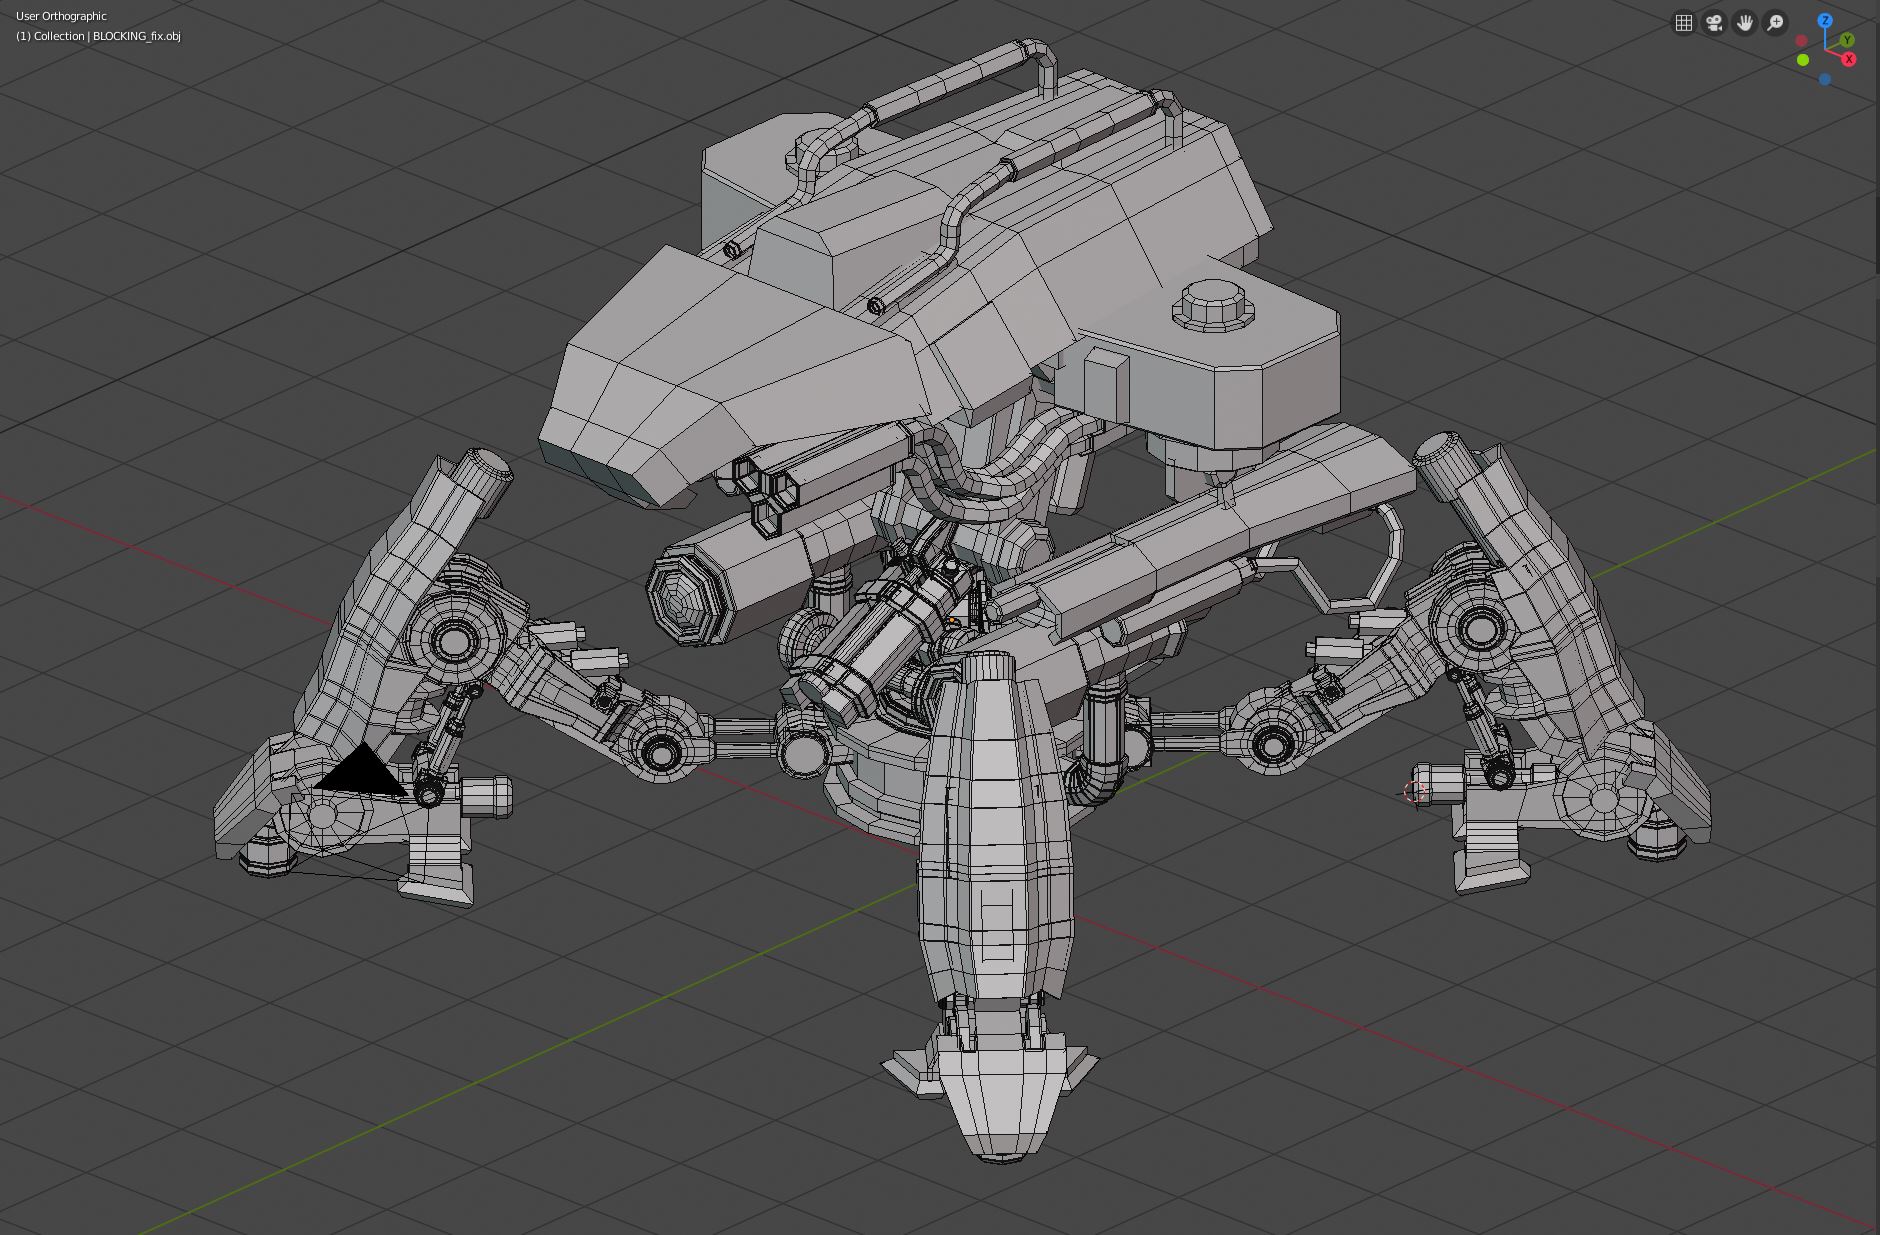
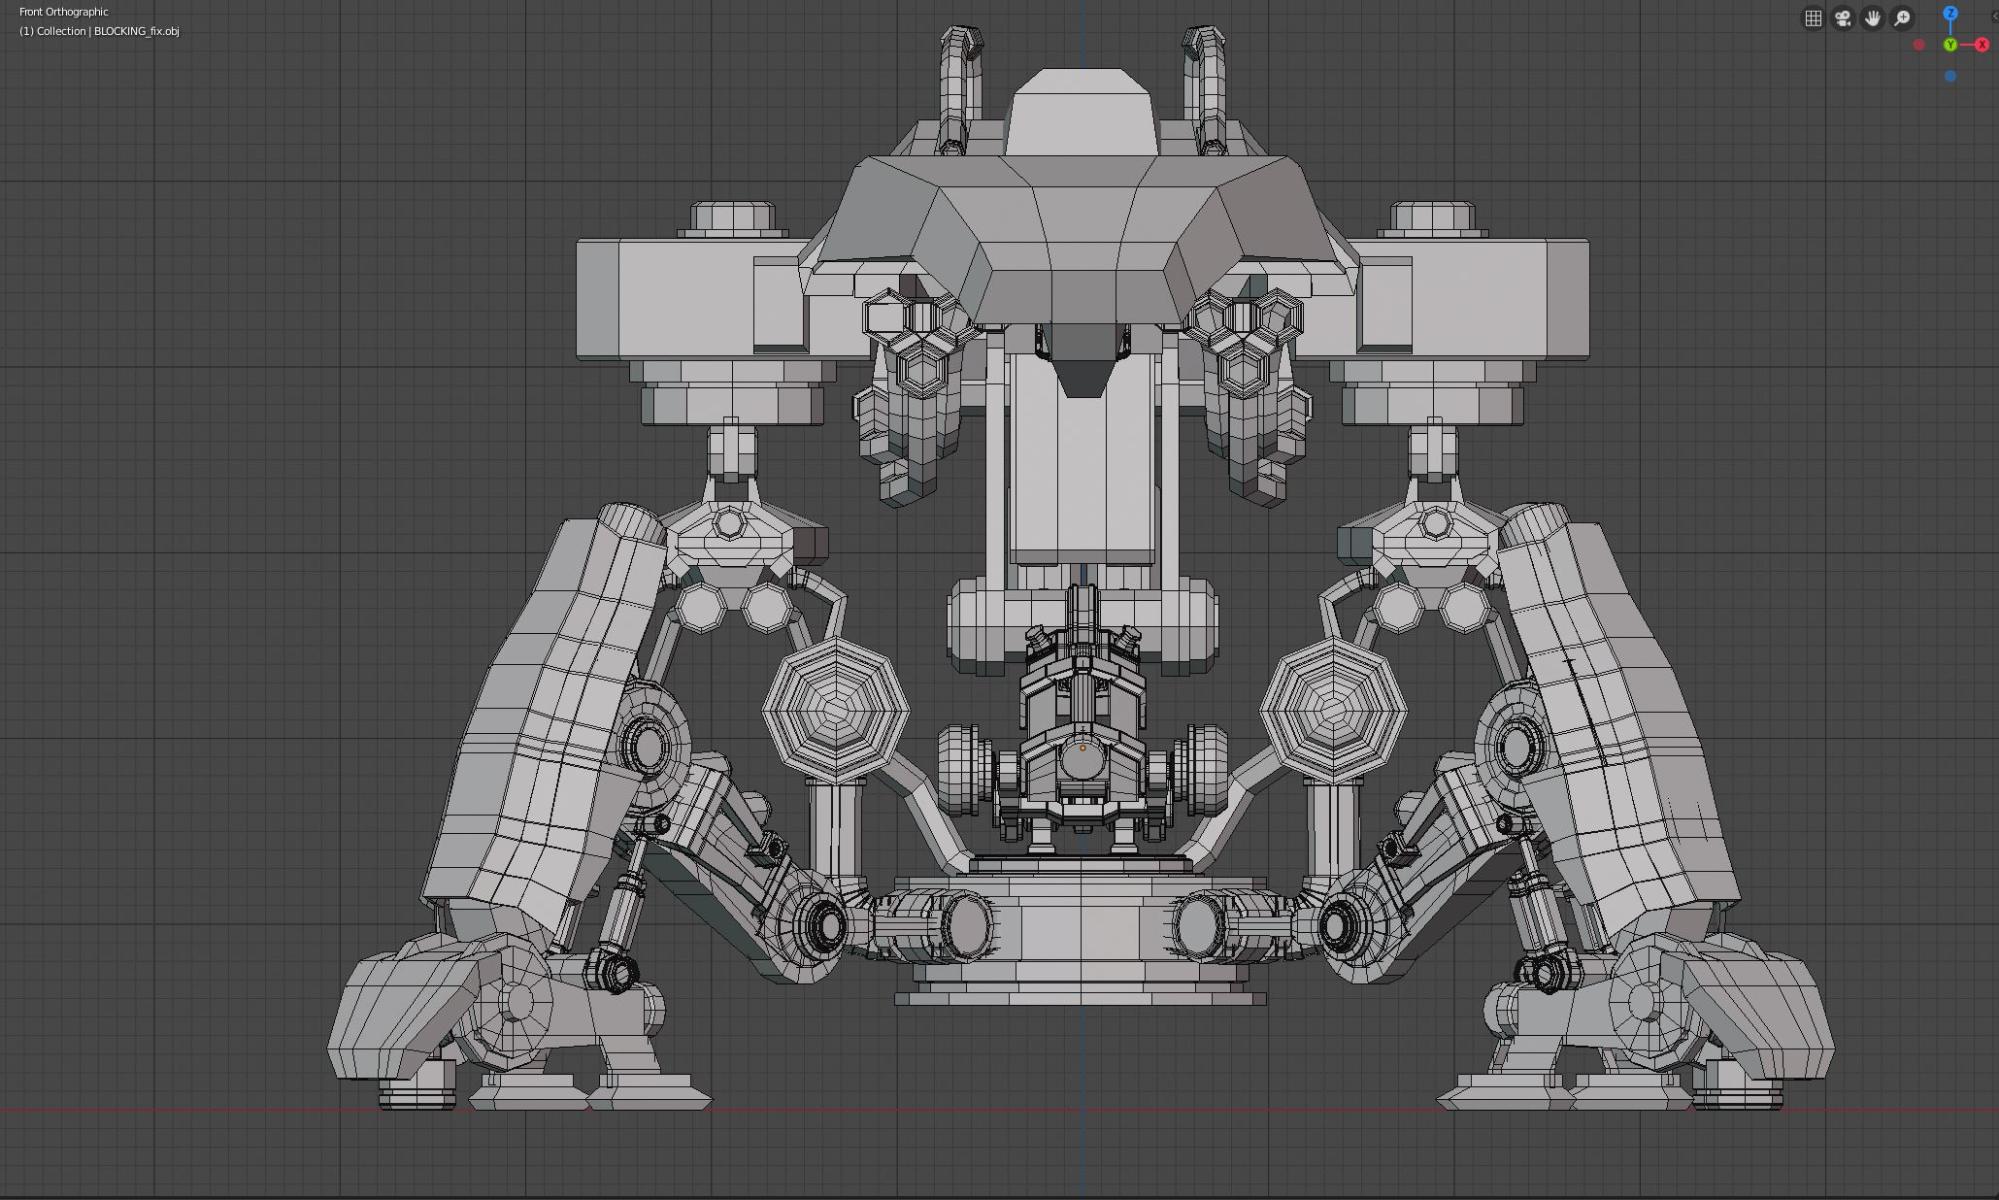
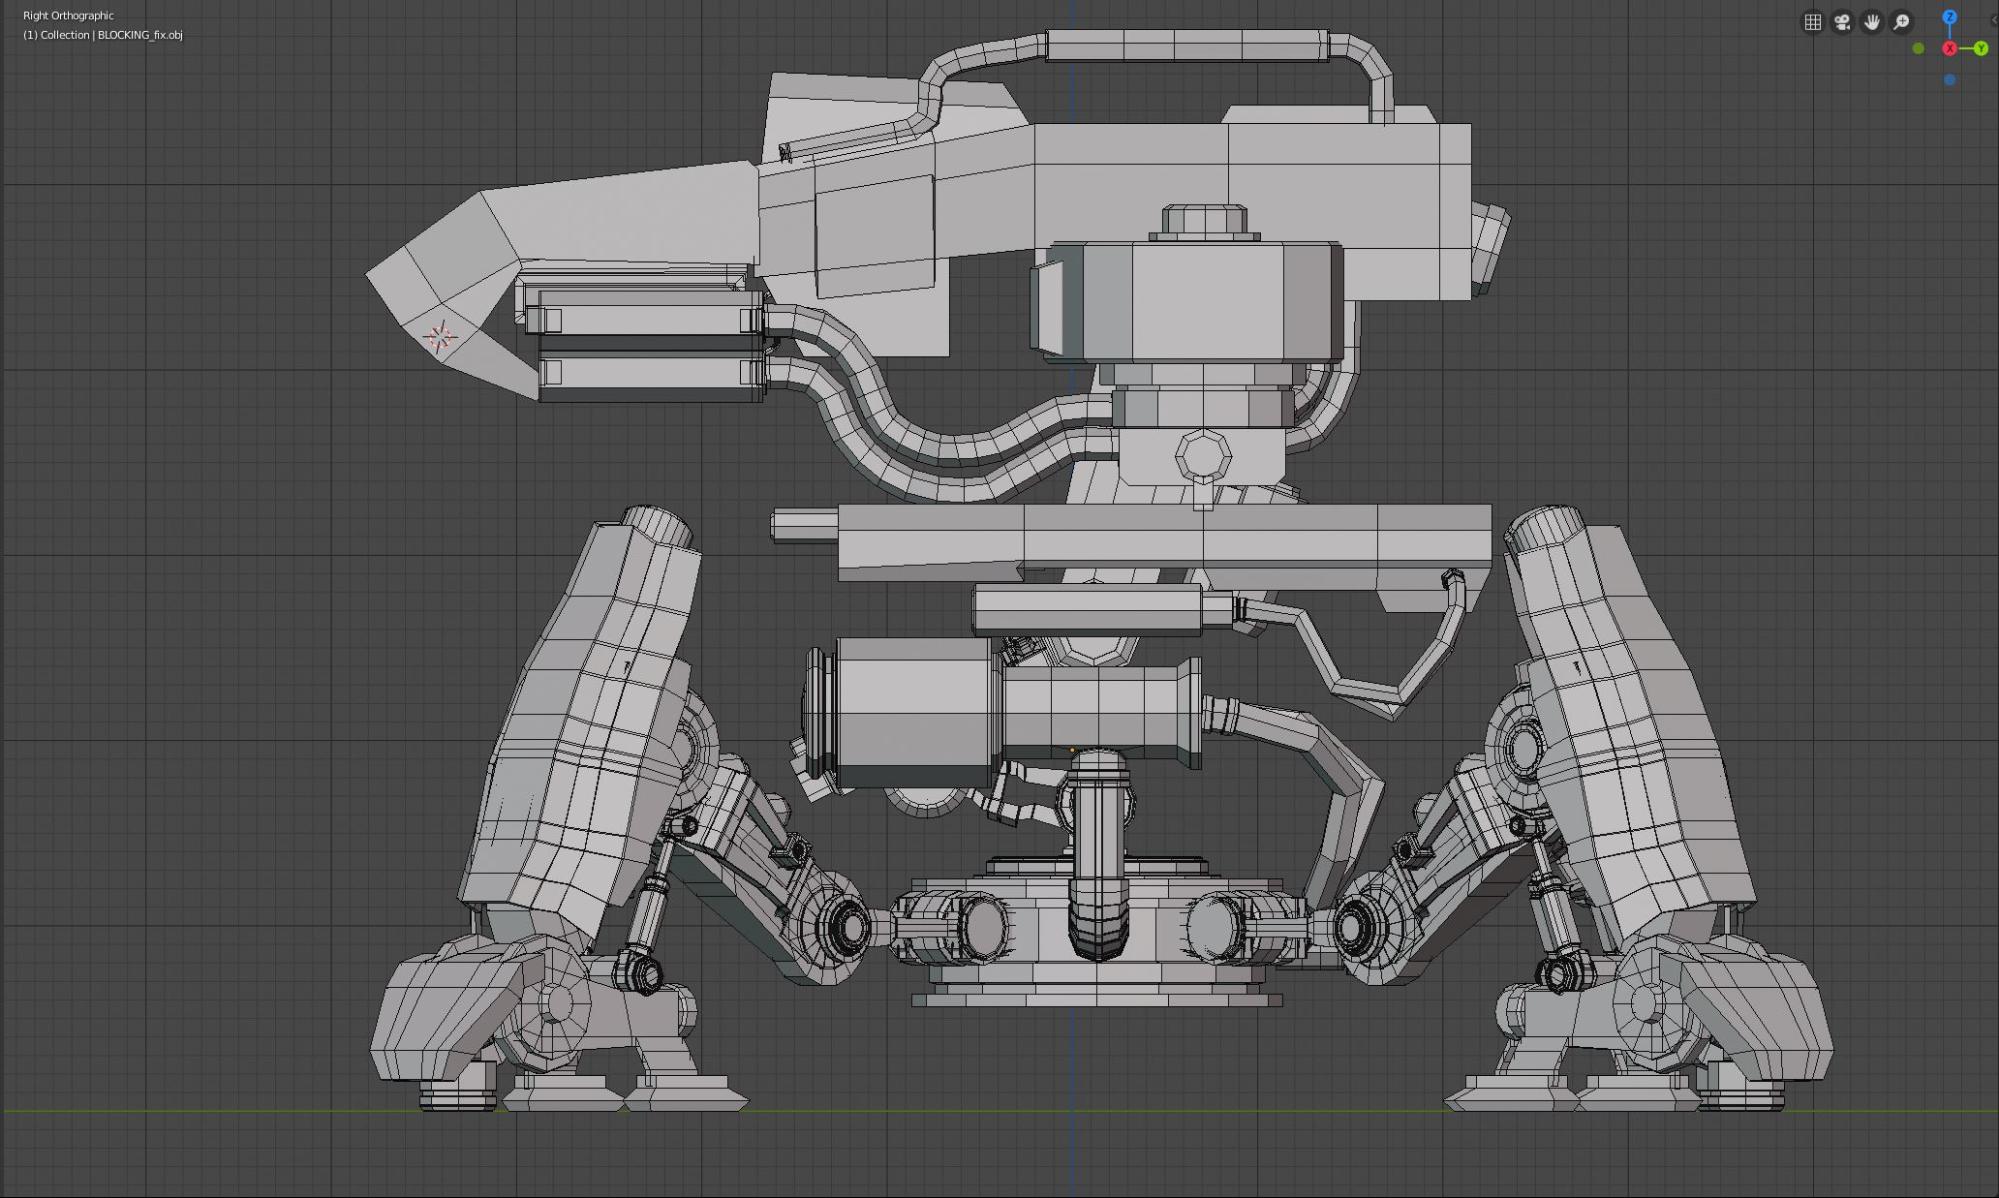
During modeling I always try to keep the poliflow (quad and sub_D only) clean and organized with just a few polygons, paying attention to where I use the edge loops and the hard edges. I need to create angular shapes only where I want them. This concept is fundamental to having better control over geometry, too. In this way, I’ll have a few edge loops, and I’ll create the UV map.
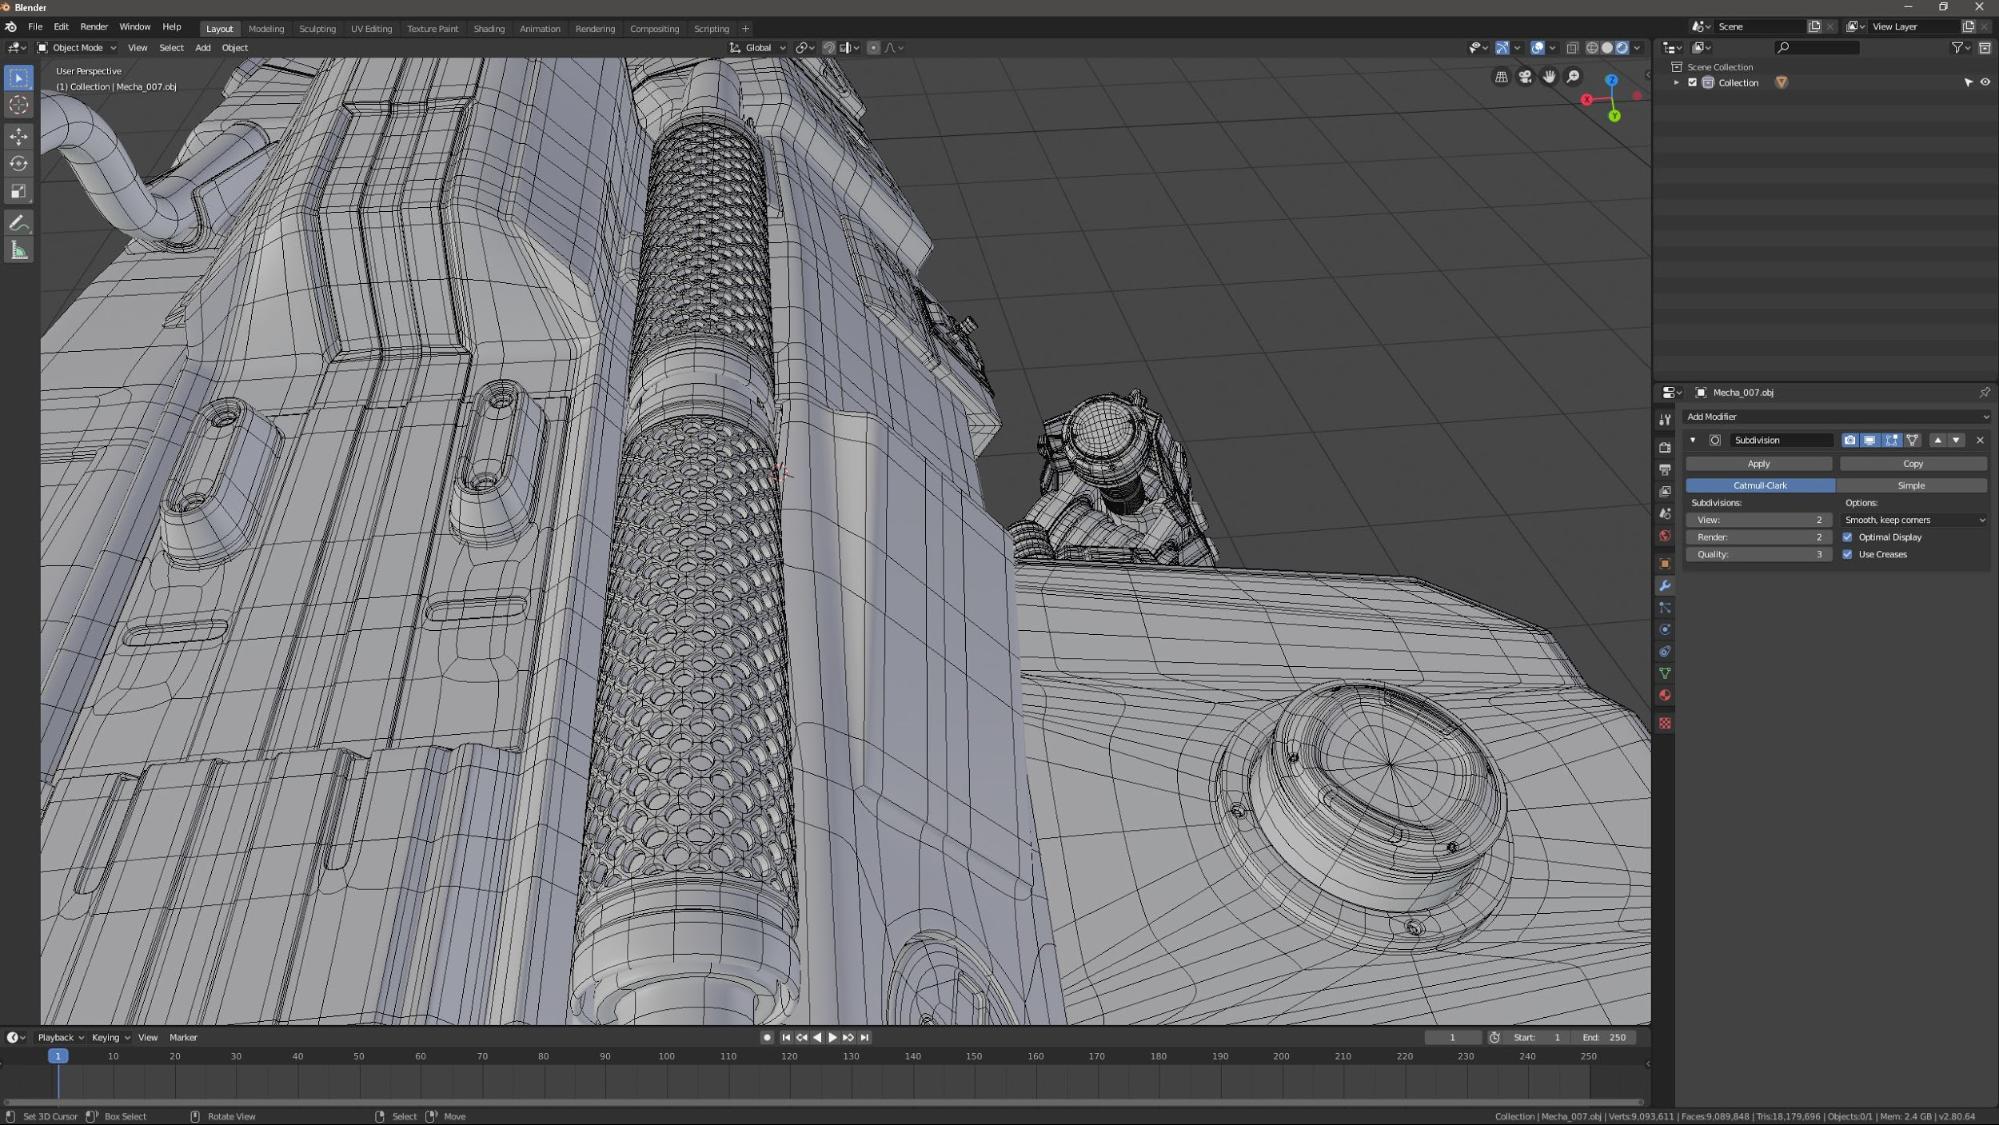


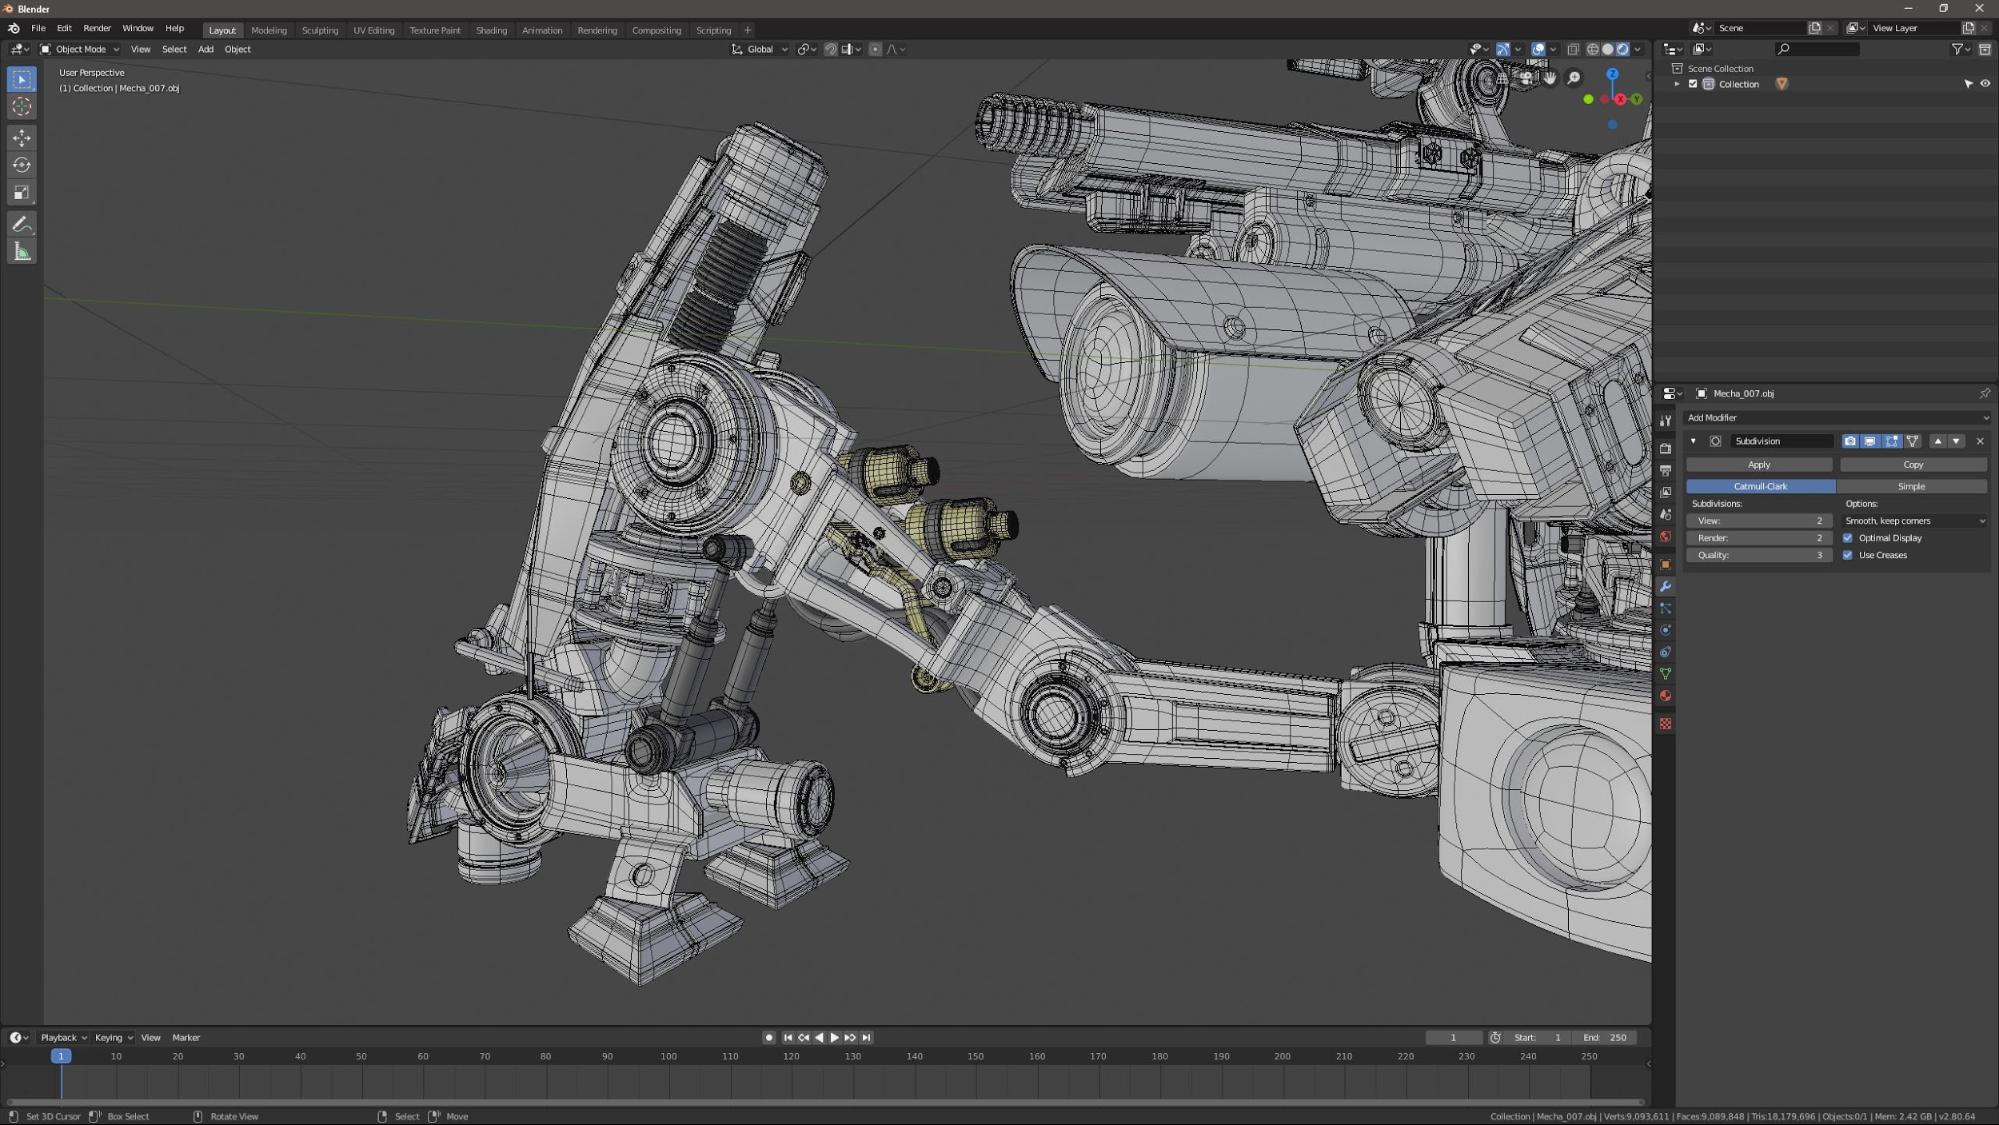
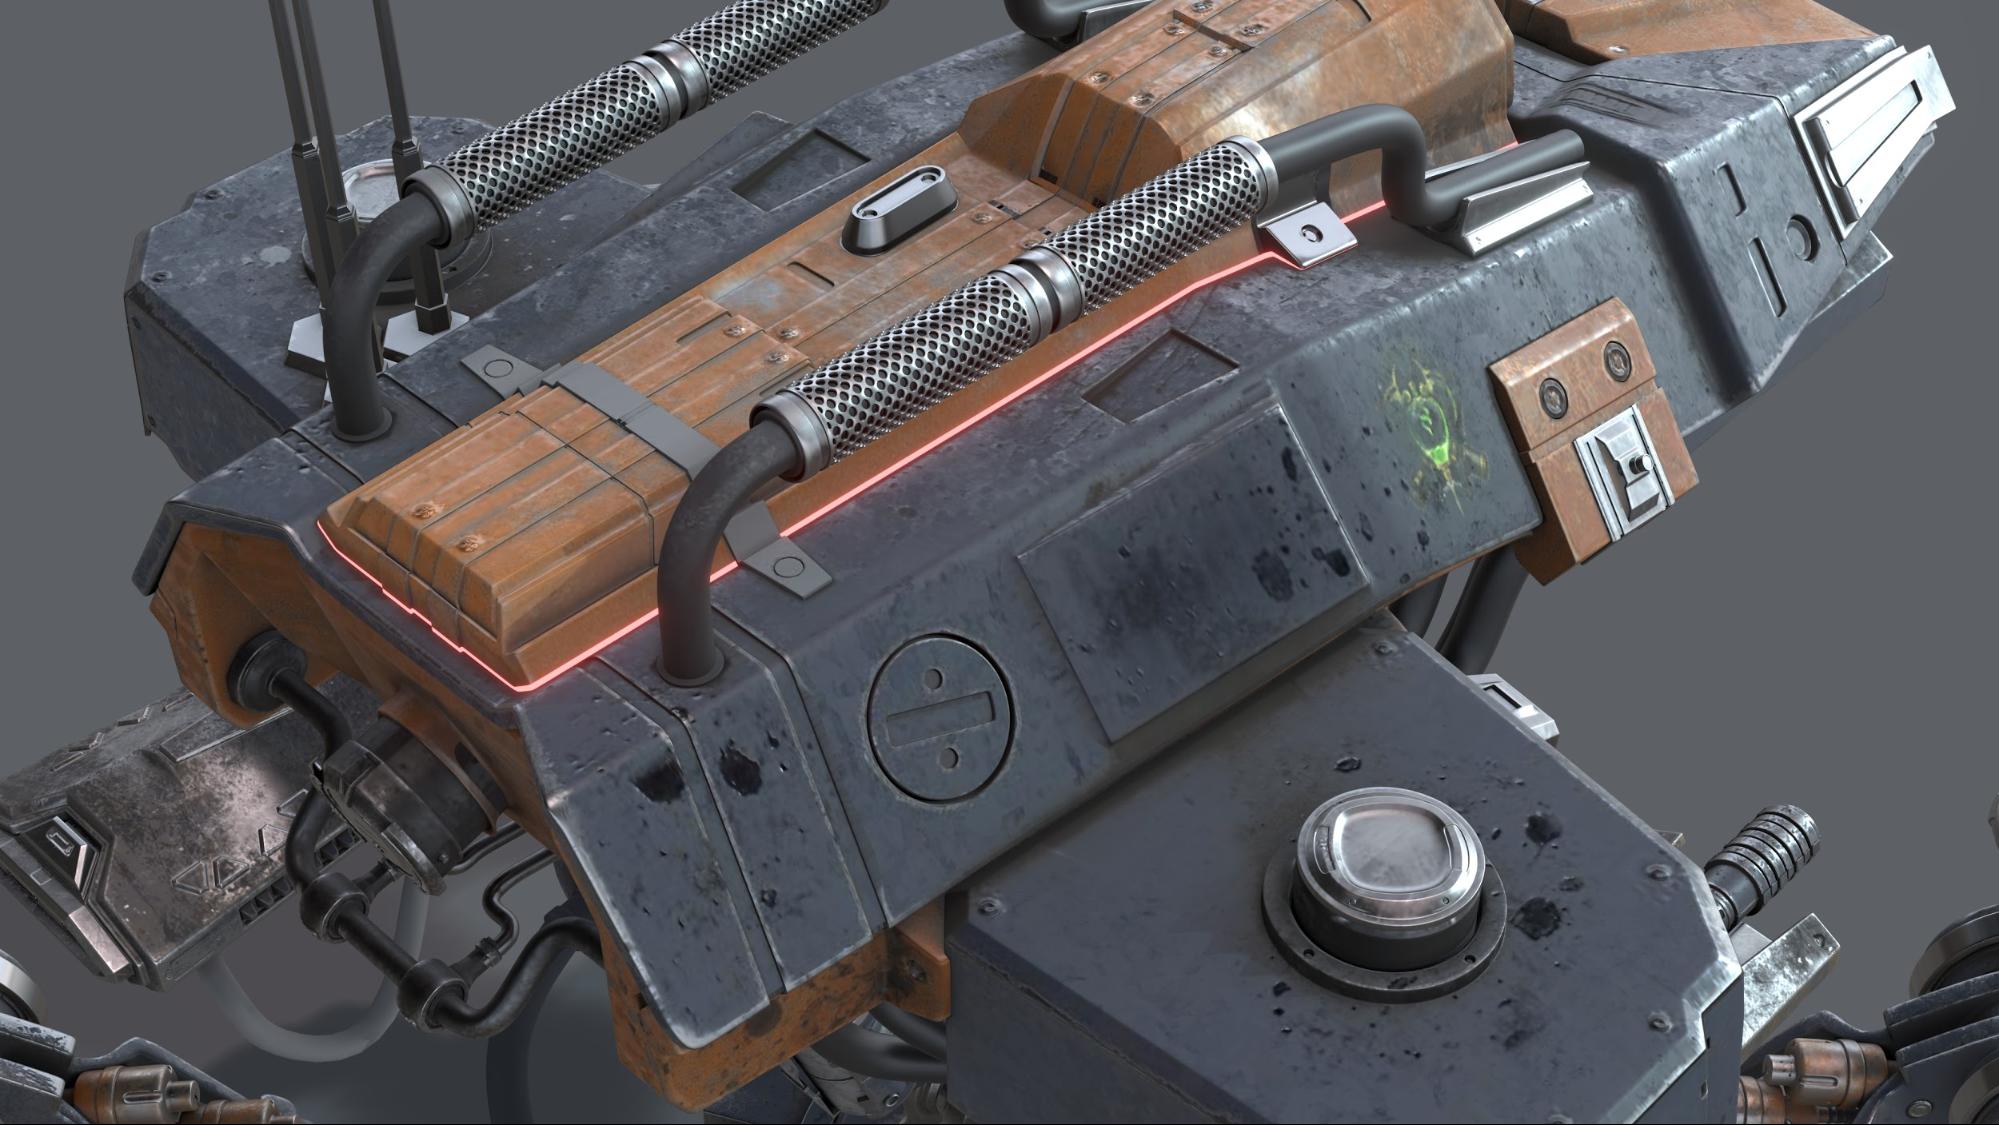
After an accurate modelling, I add details to the objects, even the smallest ones, which gives my work a certain kind of realism.
At this point, I divide the object into several materials (in the case of the work I talked about earlier, I had 6/8 materials), I export it to 3D-Coat for the PBR texturing. In my opinion, the workflow between Blender and 3D-Coat works really well. The result I see in the 3D-Coat viewport is the same that I see in Blender, and that’s amazing!
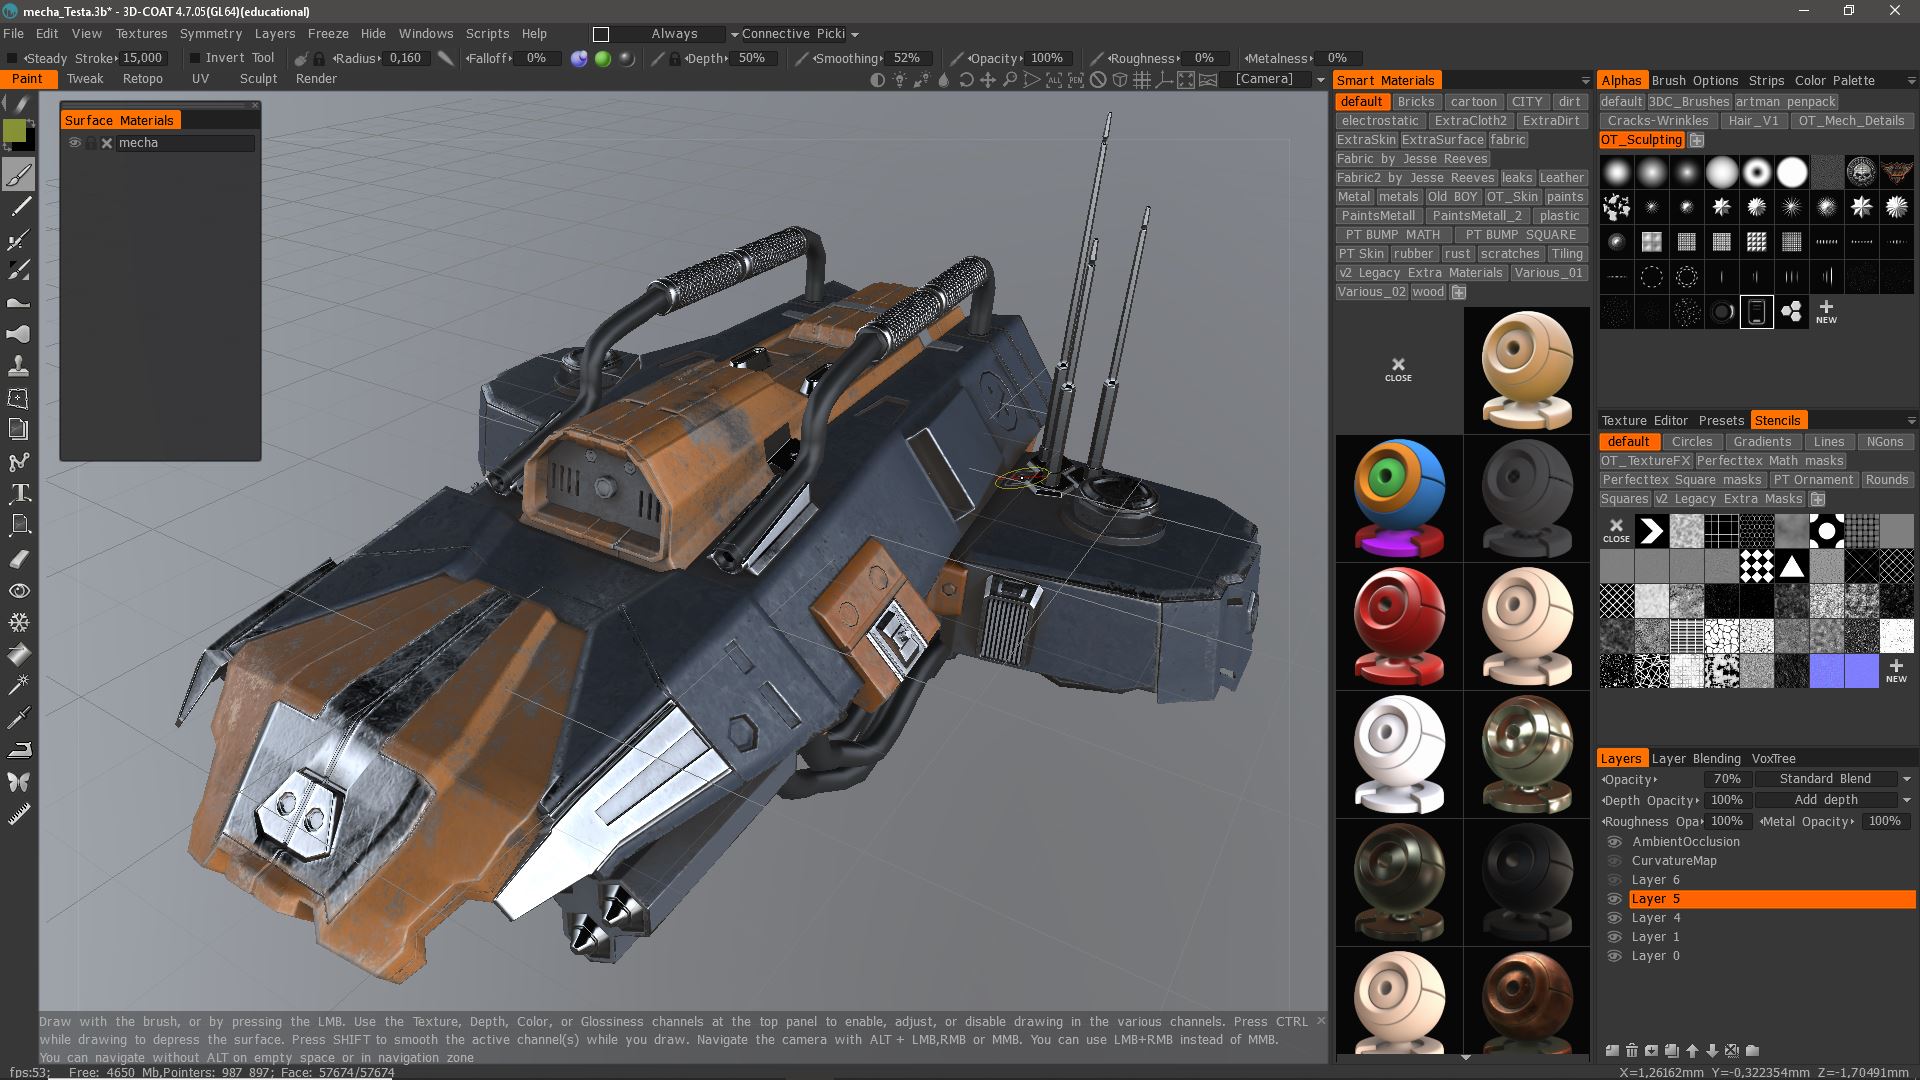
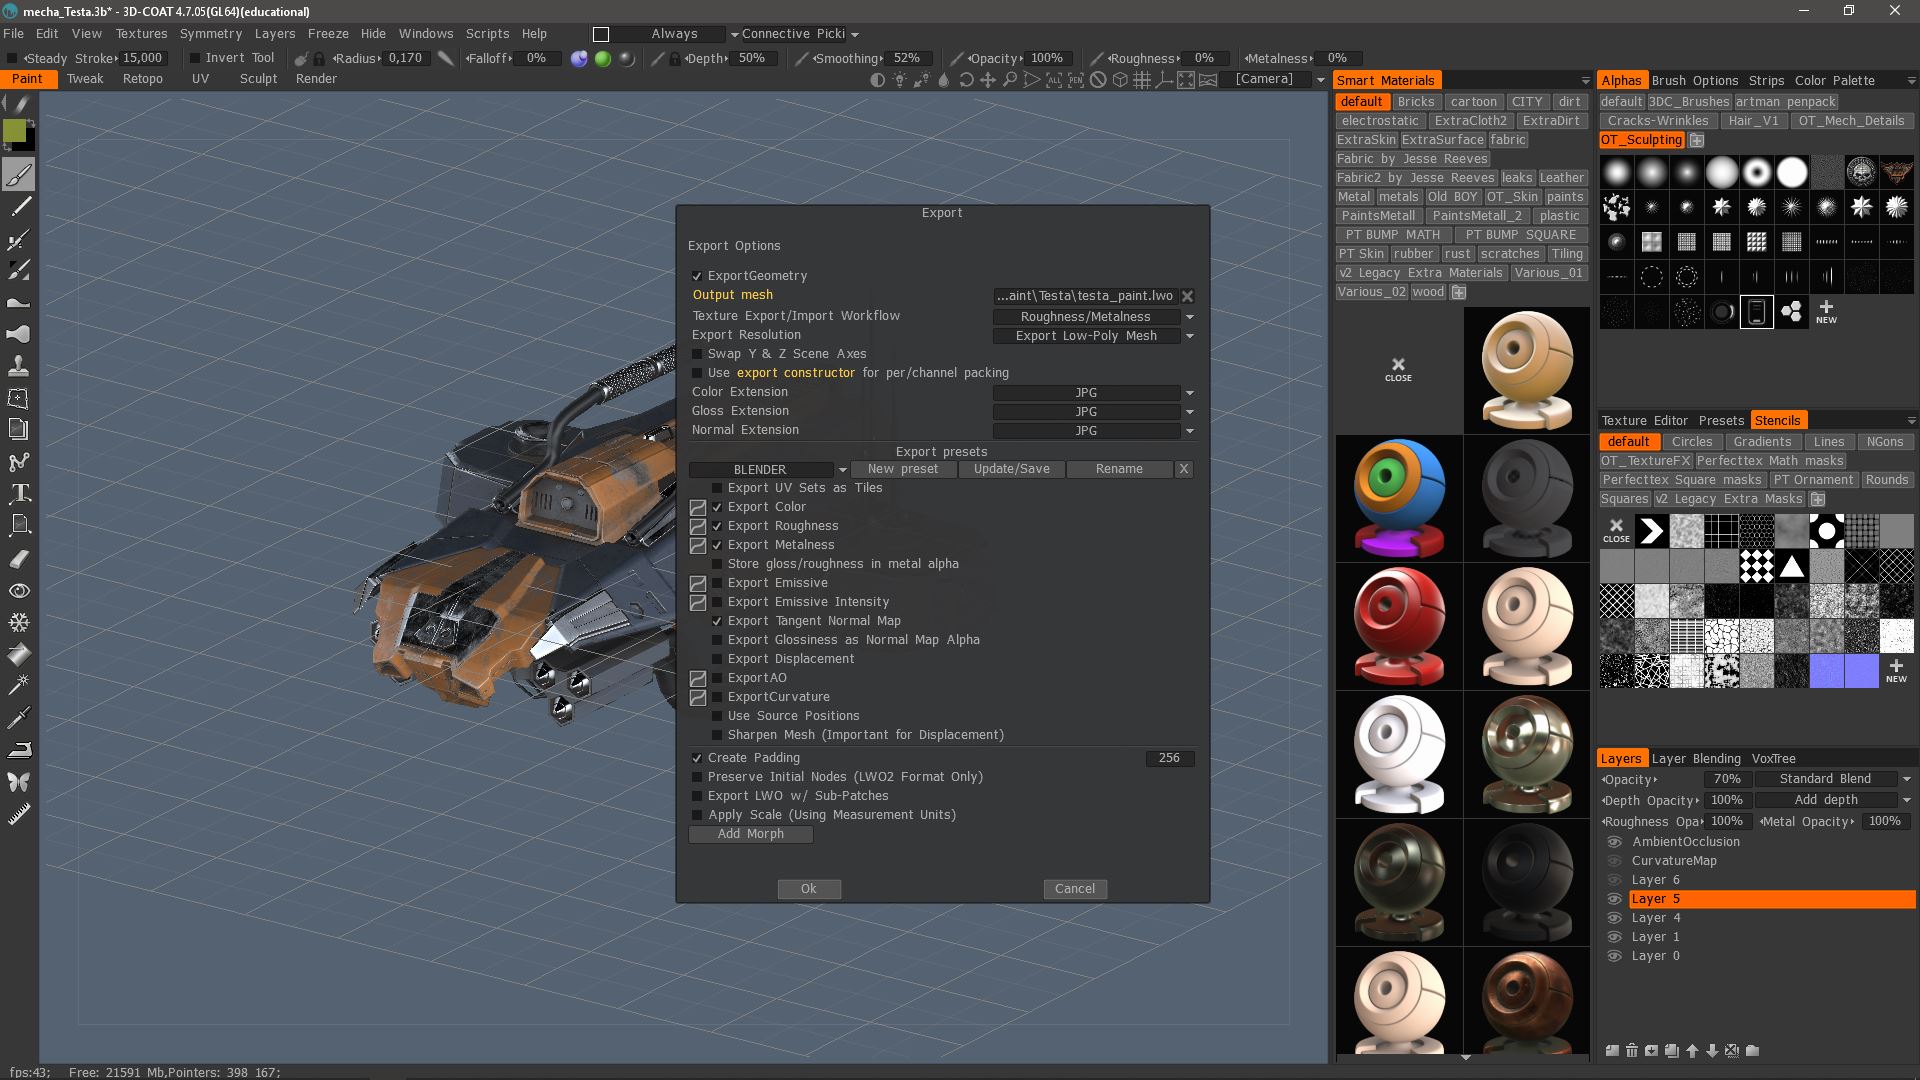
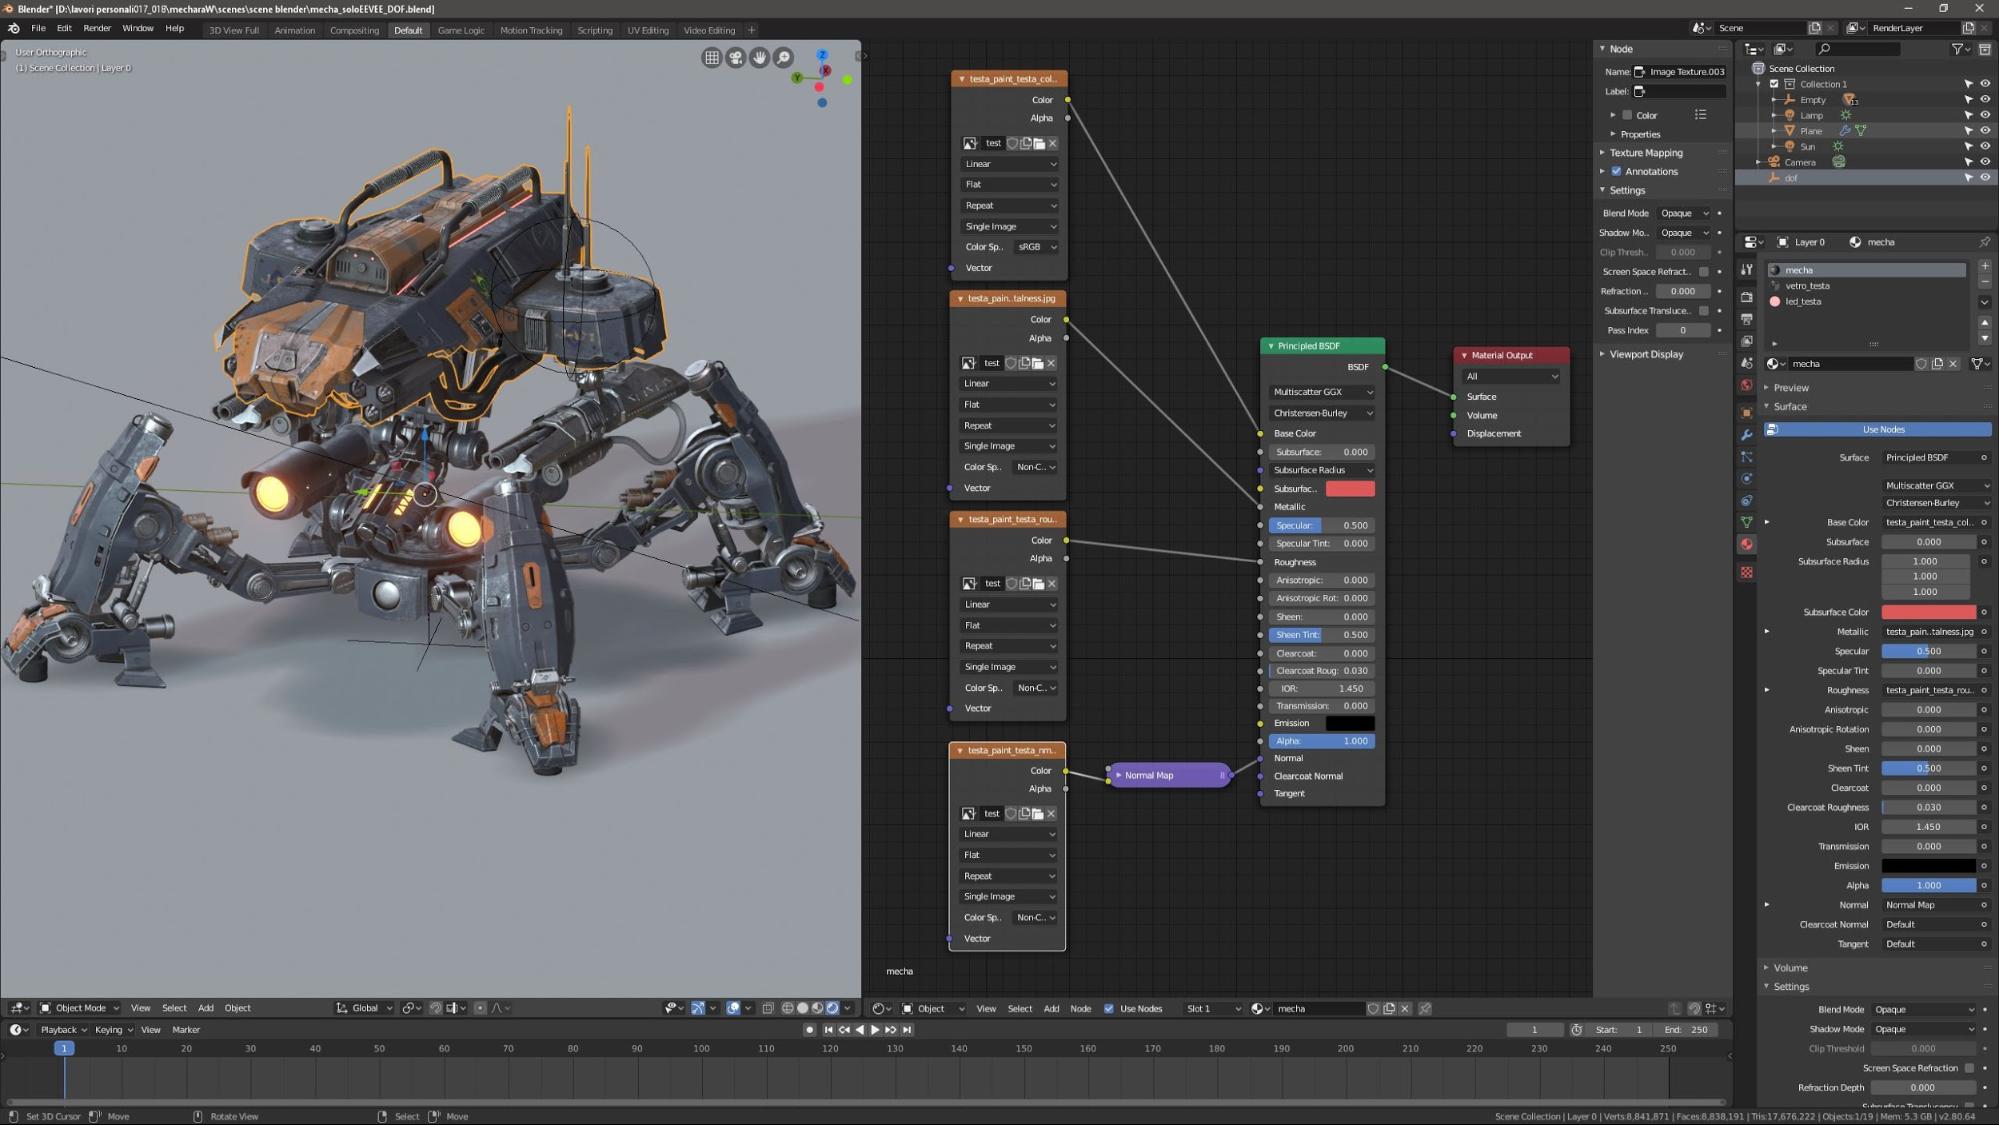
Ok, once I have painted, I export the Color, Roughness, Metal and Normal maps. I import the object and I start the shading using nodes and textures I created earlier.
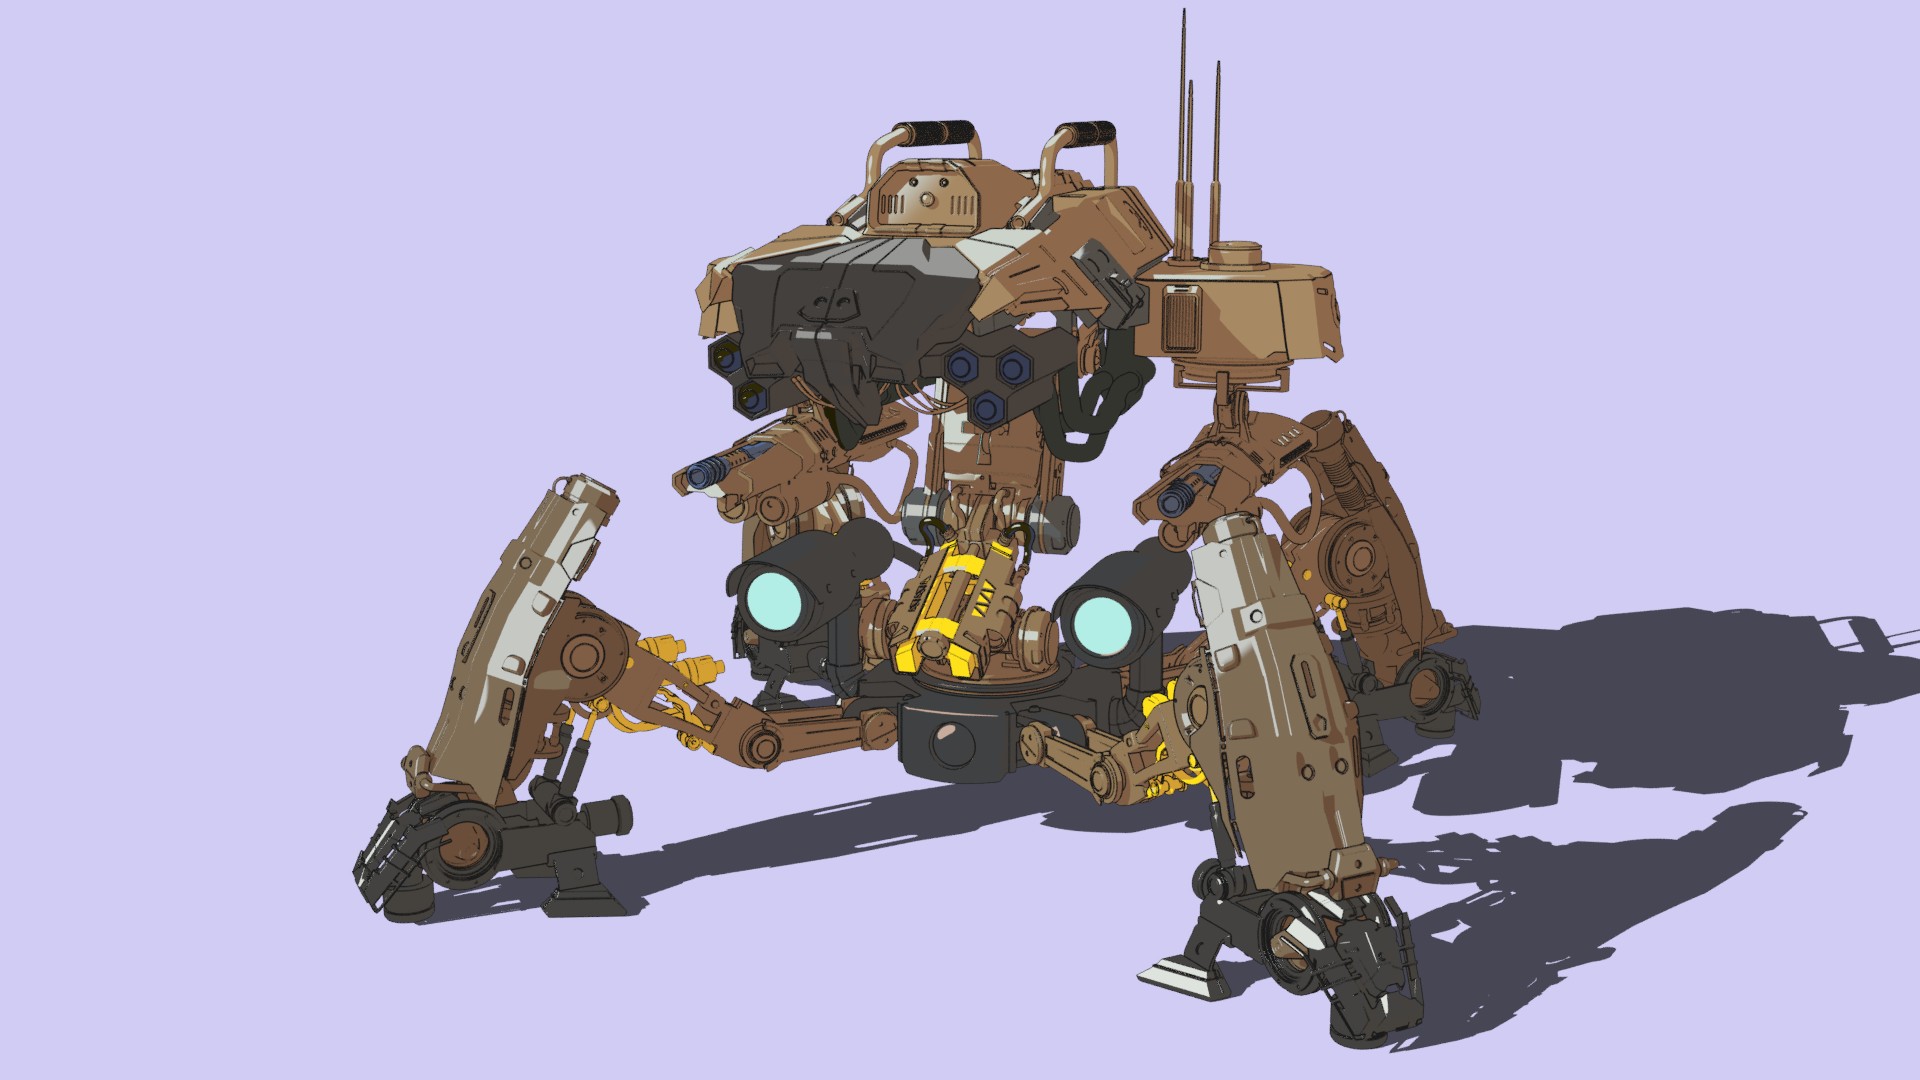
During the Render phase of the project that I talked about earlier, I used the EEVEE render engine in Blender 2.8. EEVEE is fast, and the quality is amazing, especially using the principled BSDF Node and the textures I created in 3D-Coat.
I used two lights, a sun and an area light, for the lights.
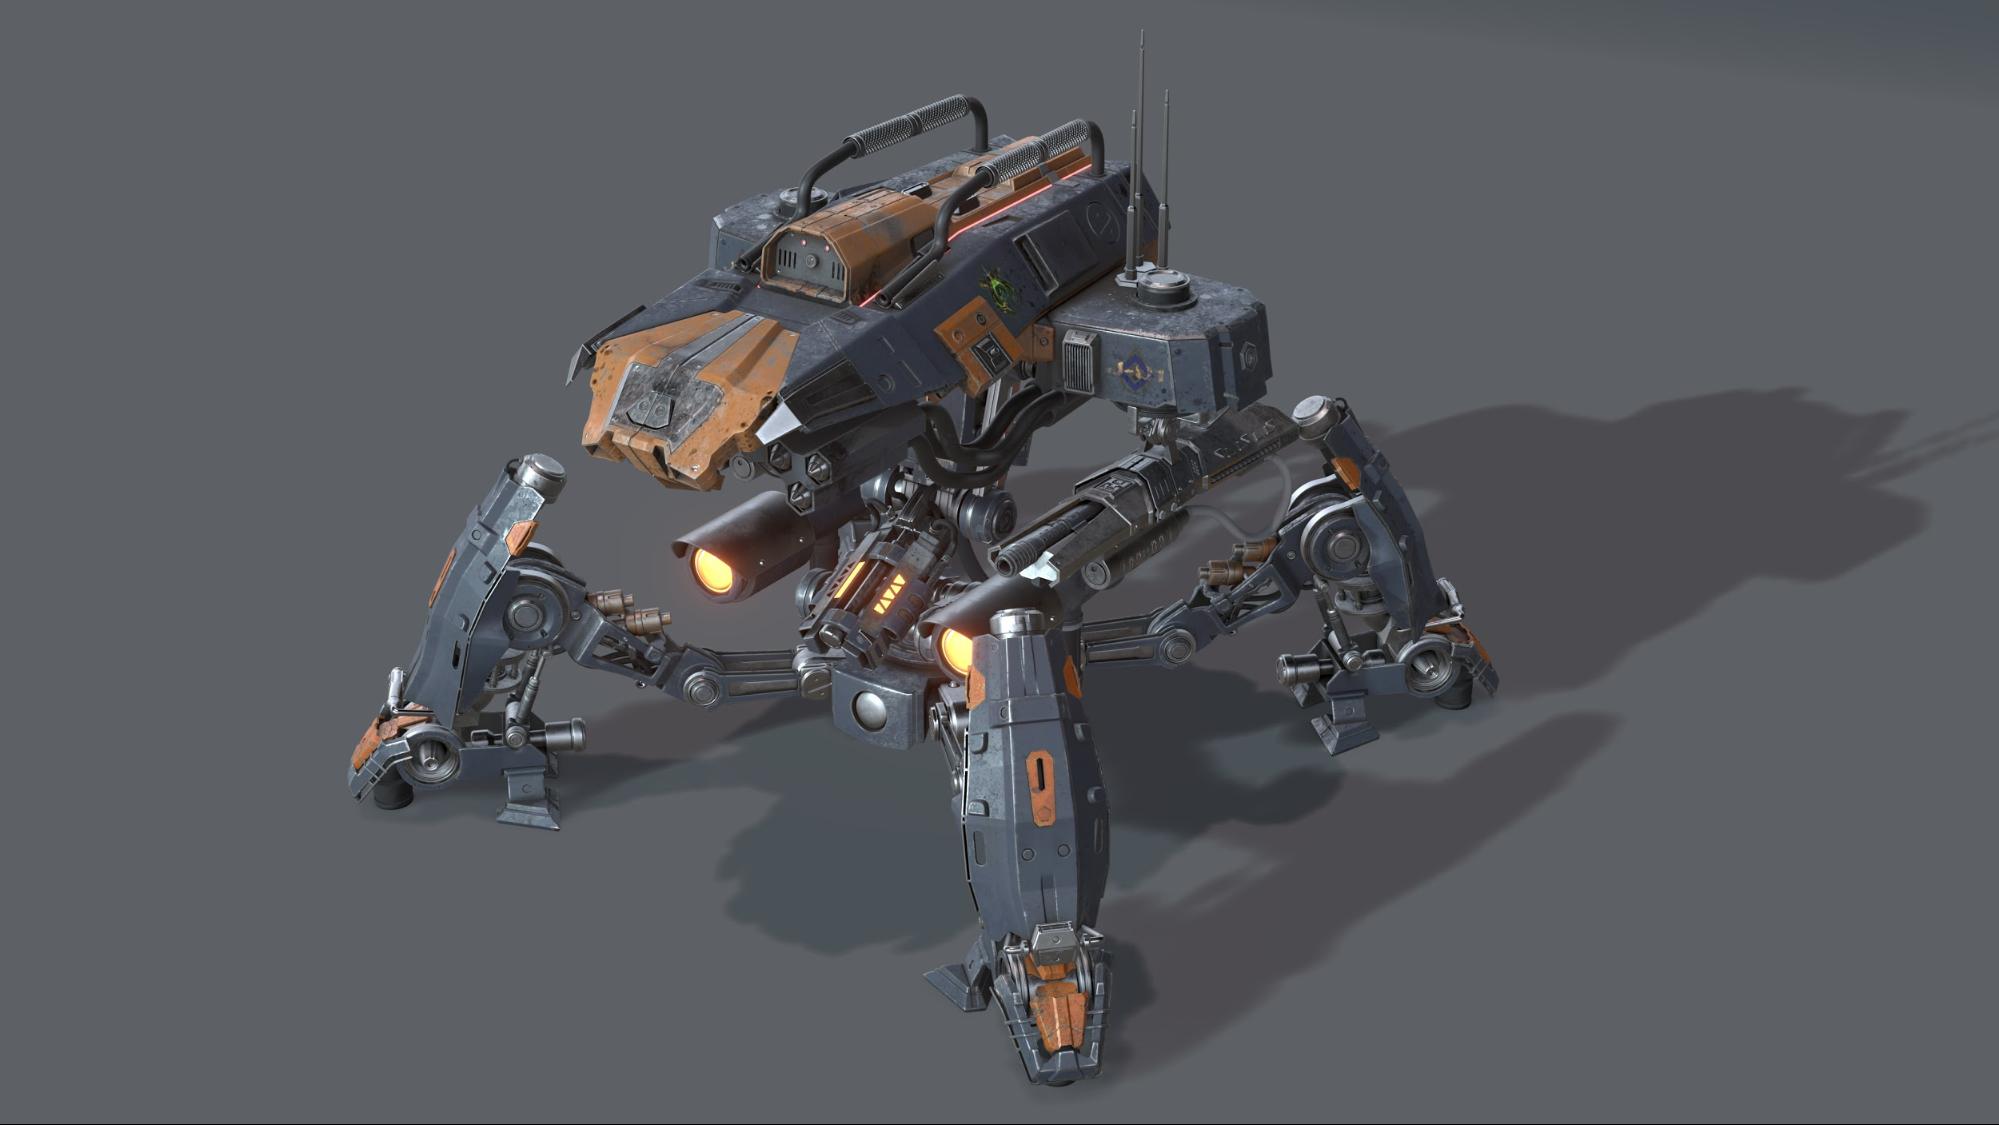

Since I bought the Toonkit add-on for the NPR render, I couldn’t not try it on this model. Well, what do I have to say? Now I can’t live without it. It works perfectly, and it gives you the ability to create Cel Shader images with great results, despite the use of lots of settings and nodes.
This is the result of the render with Toonkit:
About the Artist
 Massimo Zuanazzi


Really great work here!!
Thanks
very sorry for the time laps no