Behind the Scenes: In the Wind
Hi there! I’m Cheryl Chen, and I’m a student in London. I’ve been learning Blender for the past 5 years by poring over YouTube tutorials, getting feedback from online forums, and just trying and failing a lot. I don’t particularly have any other background in 3D, but I really enjoy making characters. For a bit more about that, I also did a Meet the Artist article a little while ago. :)
Inspiration
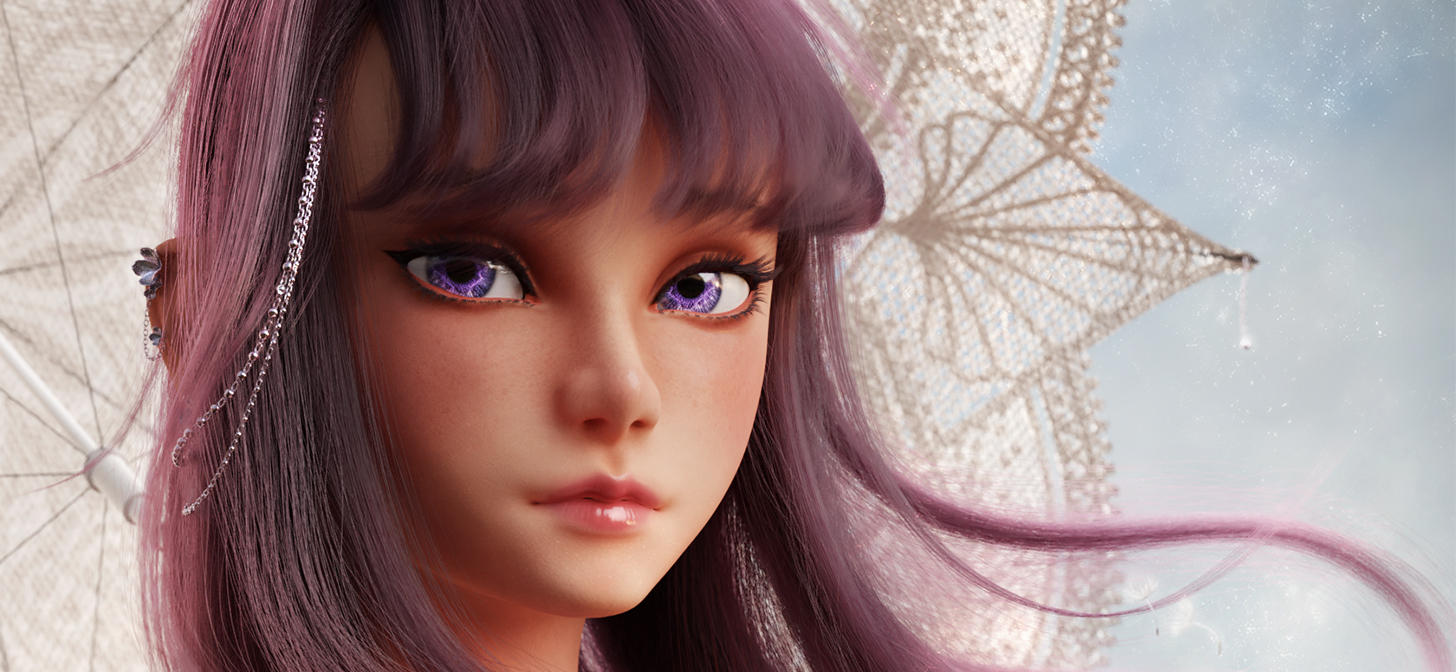
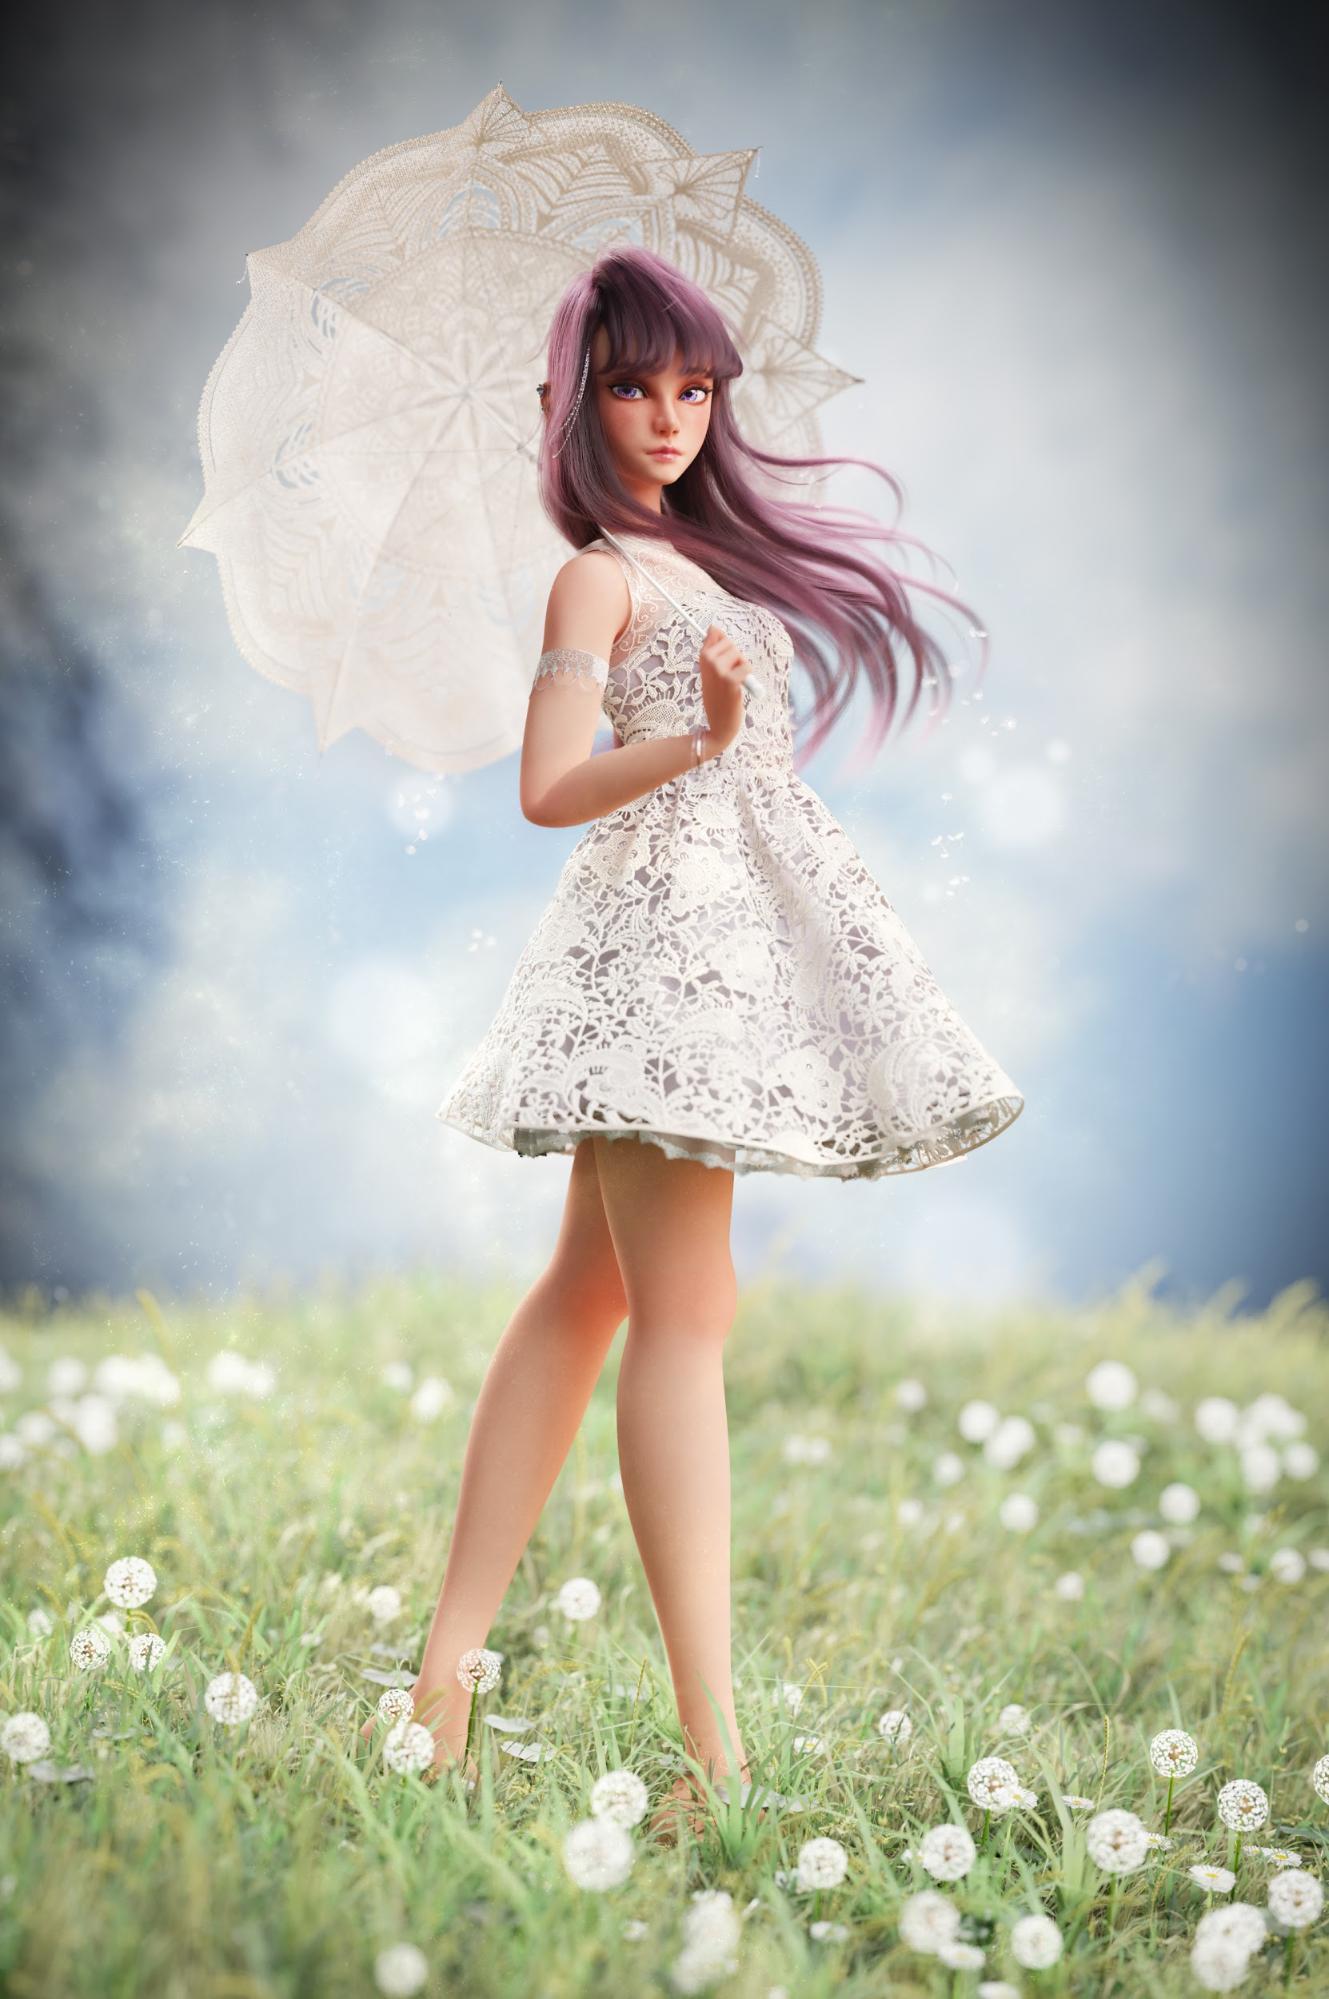
A lot of my ideas are based off of characters in anime and manga. For this piece, I was inspired by the dark, glossy mane of Tomohito Oda’s character, Komi Shouko. While this project wasn’t aimed to directly recreate the character, I particularly wanted to capture the style of her hair and her aloof expression.
???????????? pic.twitter.com/xguoWXgBpT
— ?????? (@ooodaaaatooo) March 20, 2019
Character
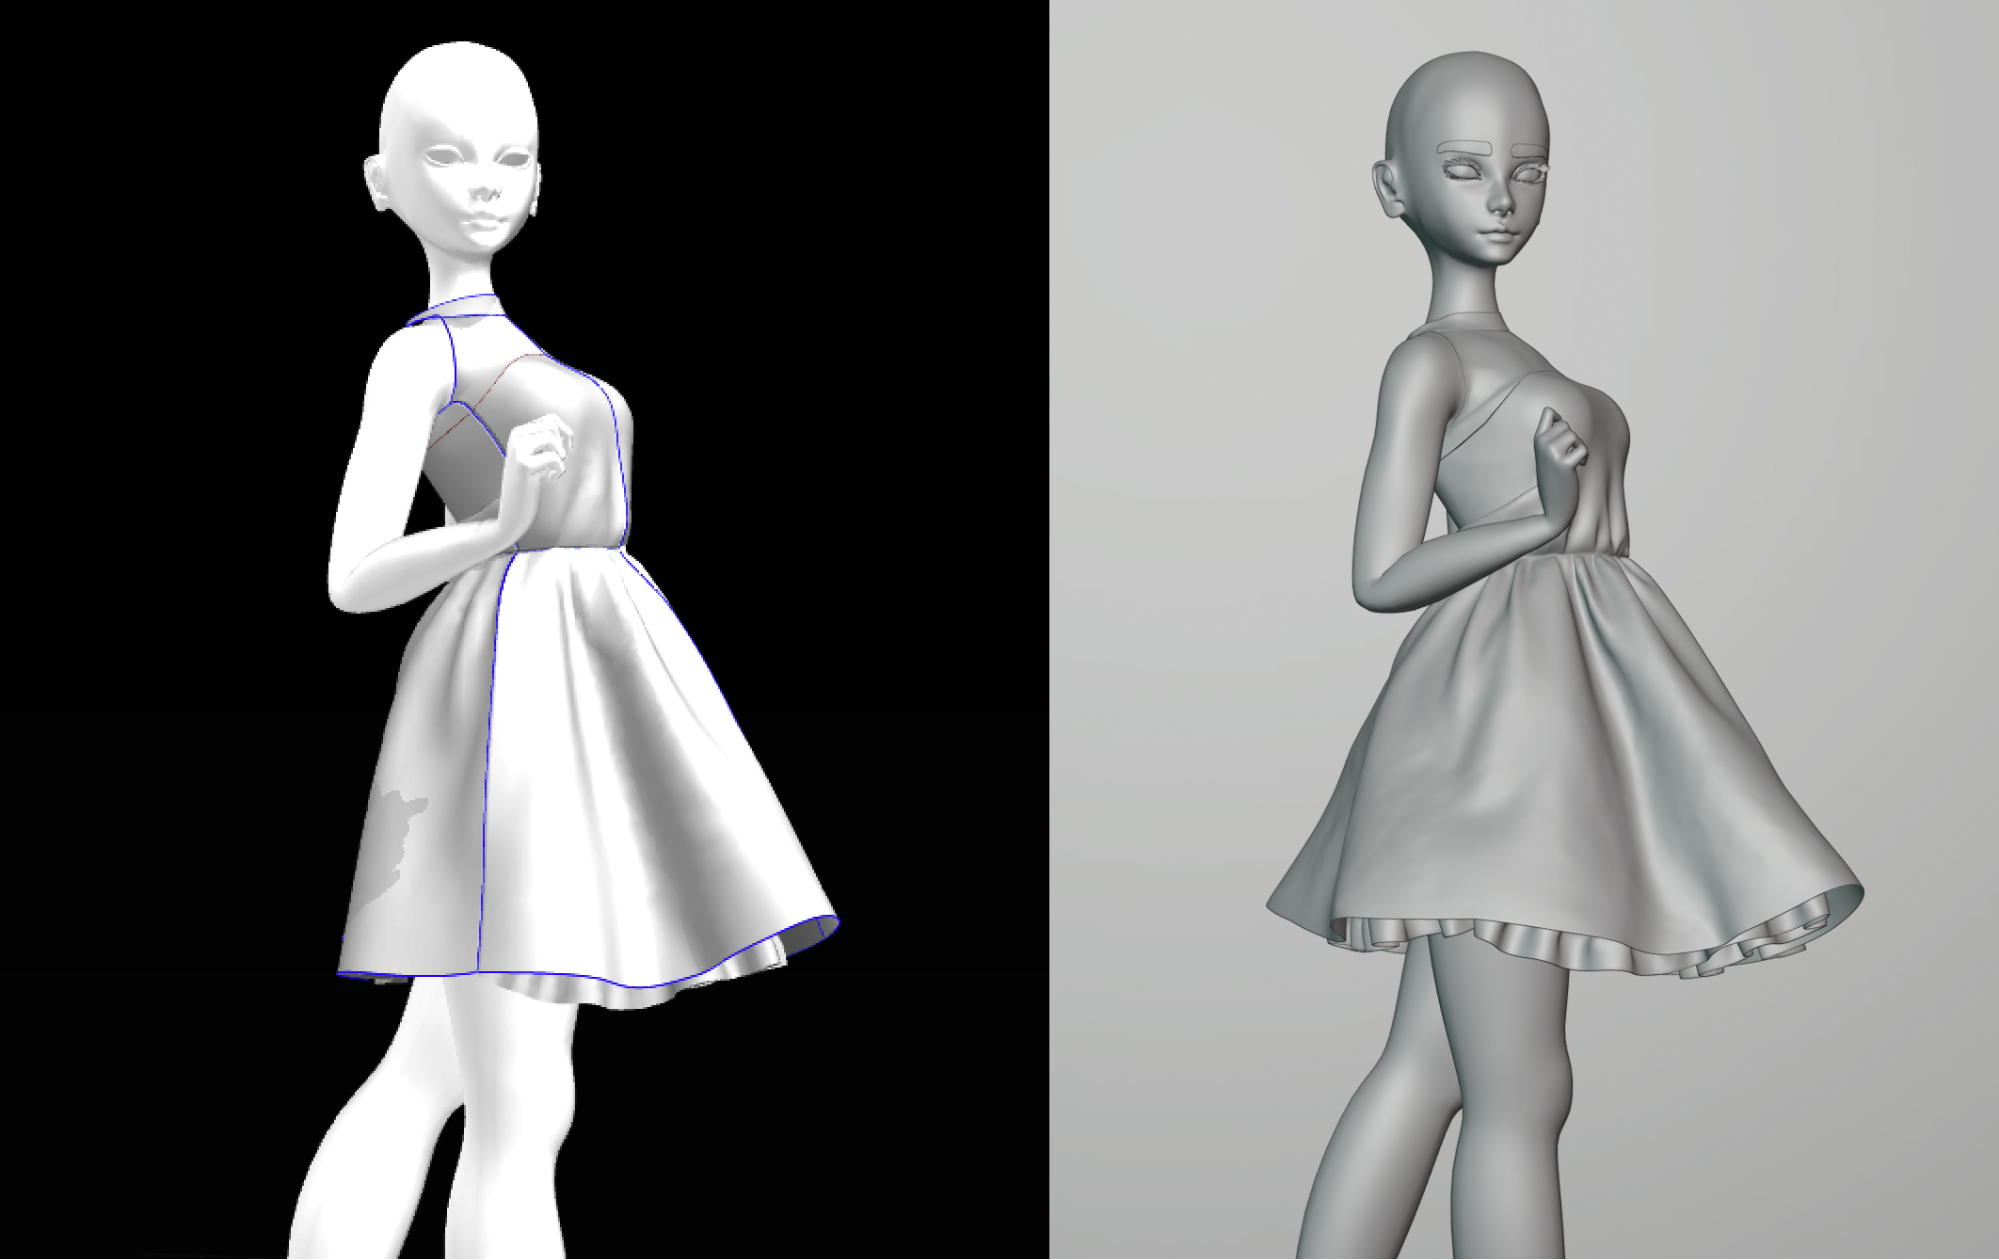
The character modelling and rigging is done in Blender. I made a simple base-mesh with a basic rig and posed it to get a better idea of my composition.
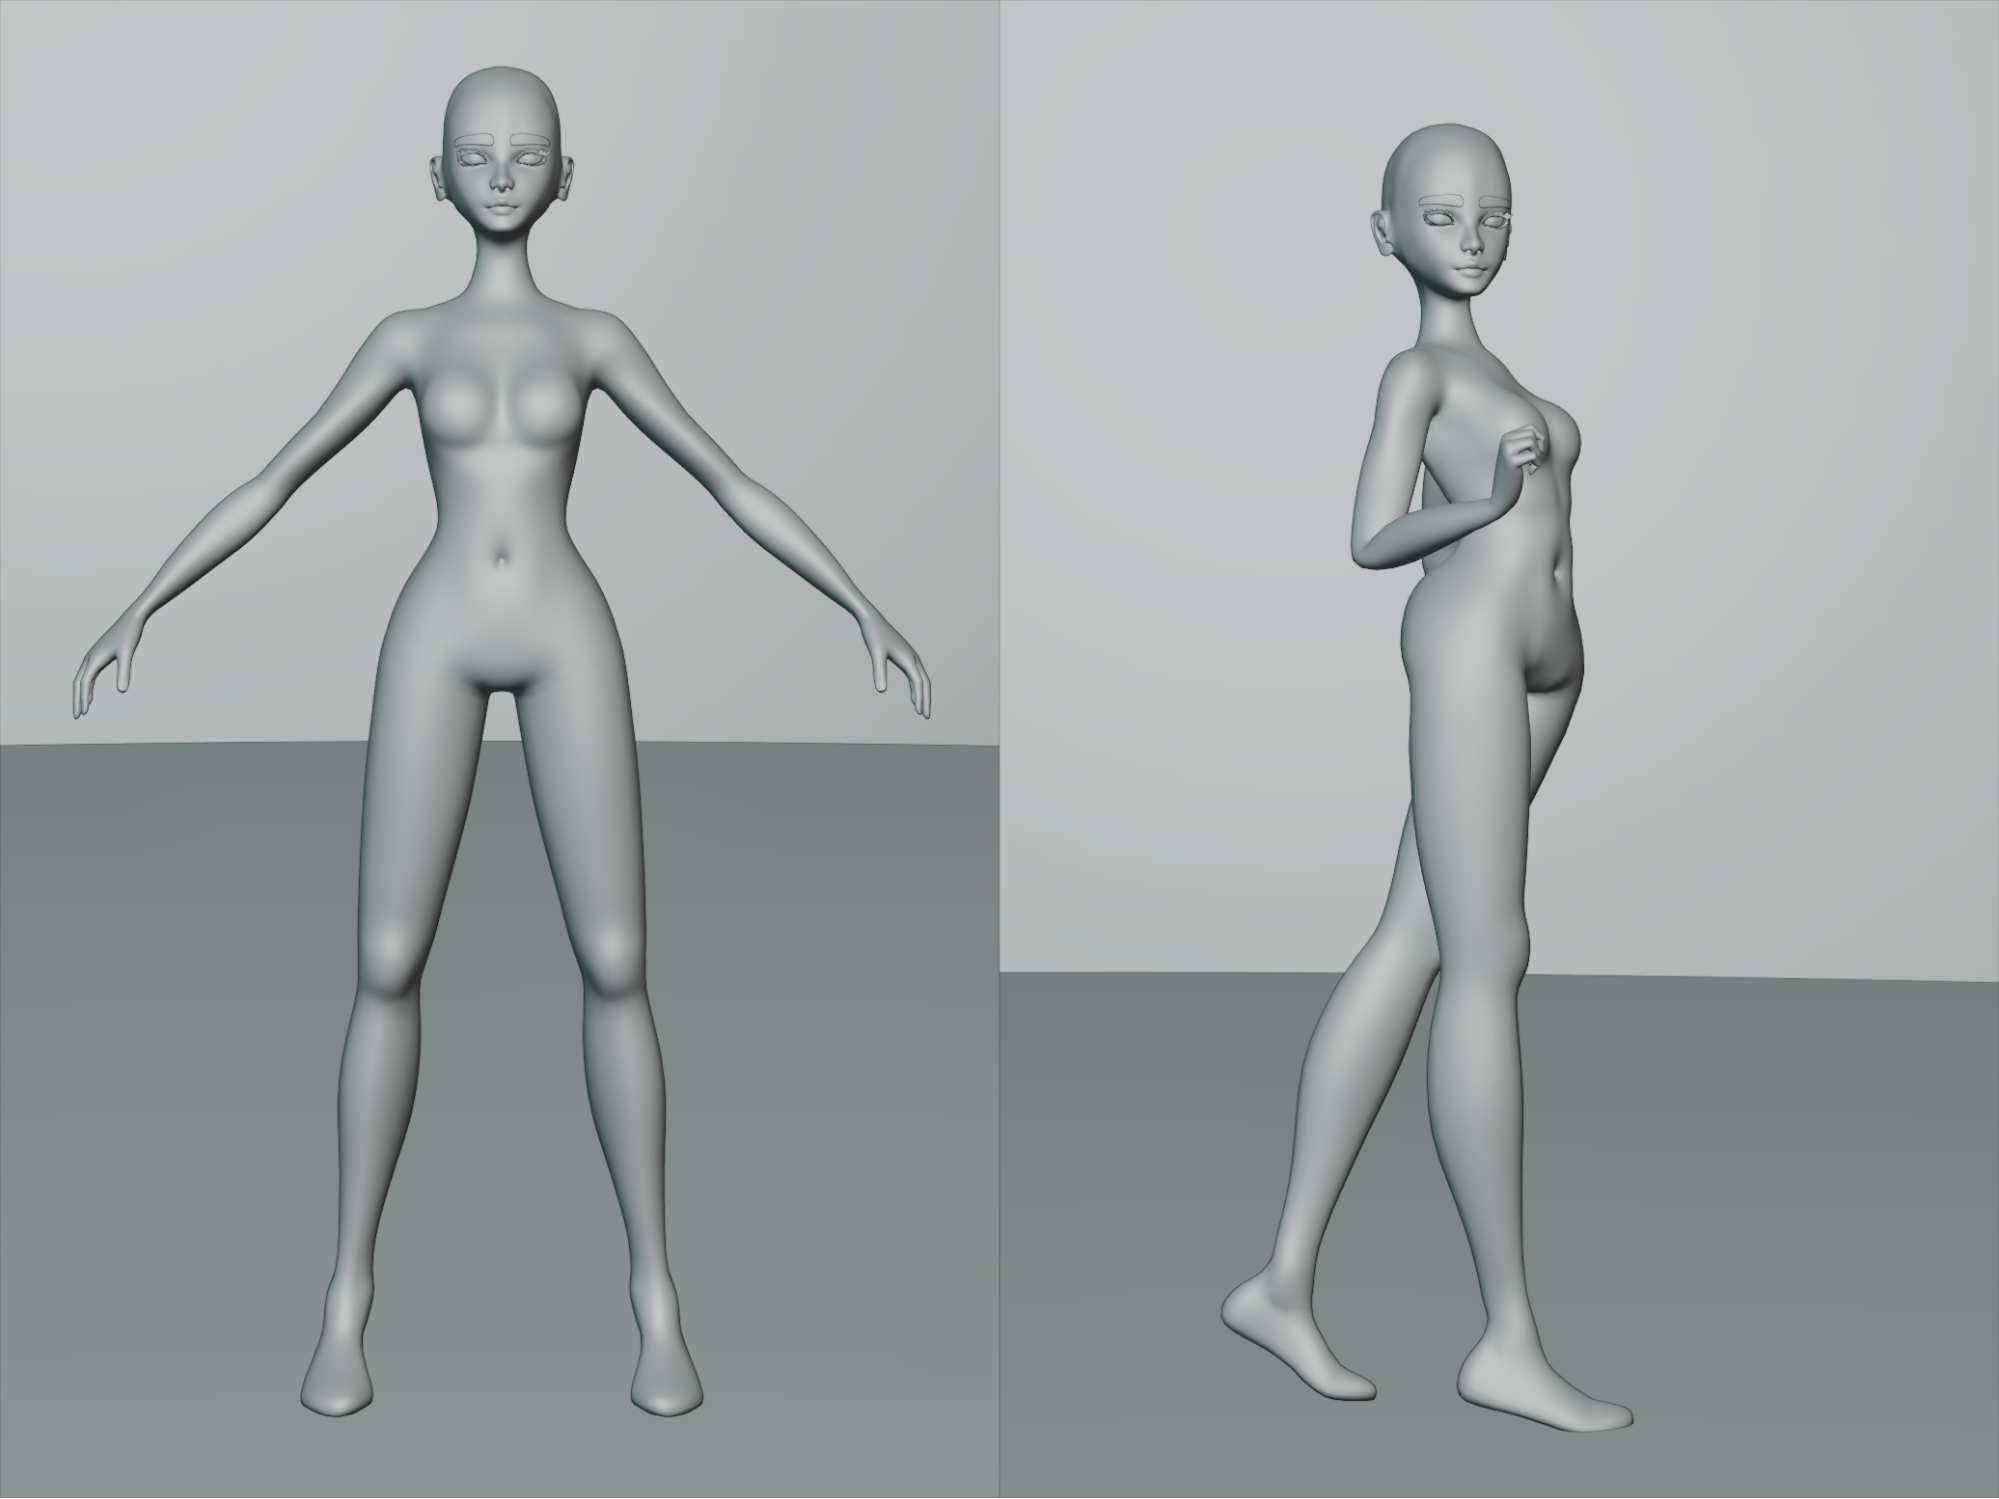
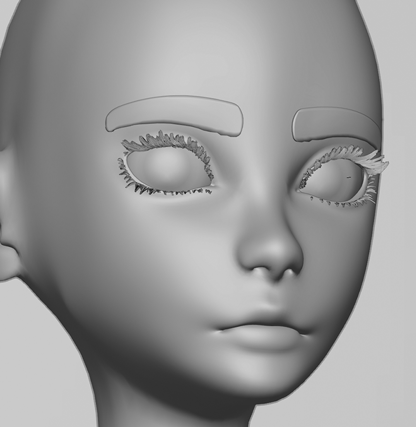
My faces usually start off looking pretty uncanny, but I tweak the facial features a lot throughout my process. I have a tendency to make mistakes and backtrack, so I like to use shape-keys as a way to save my progress. This way I can go back to an old version of some facial feature that I liked better, or blend shape keys together. When I’m happy with the look, I can create a new shape from the mix to combine all my changes together.
Clothes
I usually simulate my clothes in Marvelous Designer, and then sculpt them some more in Blender to give them more shape.
Textures and Details
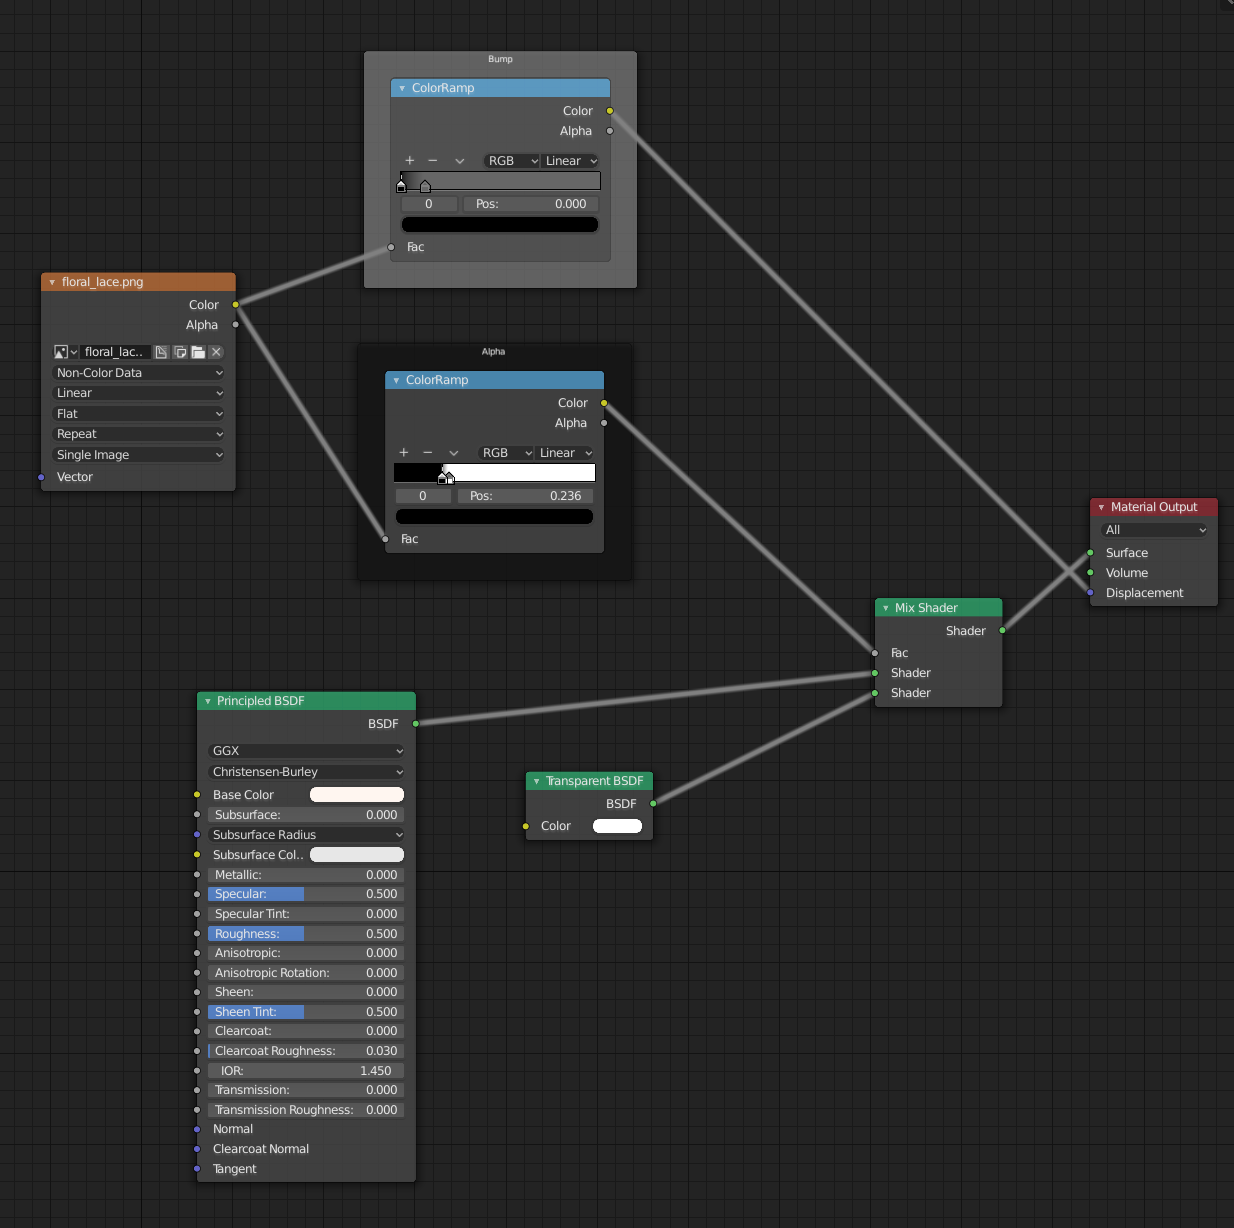
The lace detailing in her clothing and umbrella all came from textures.The umbrella texture used a mandala as the base texture, which also gave the umbrella the flowery shape. So that it wasn’t too smooth, I also layered mesh textures on top of the mandala.
For the lace on the dress, I warped and mirrored some photos of lace to make them seamless. To create the bump and transparency maps, I put the textures through colour ramps to adjust the levels. The cloth material is quite simple; it’s just the Principled BSDF node combined with the generated maps.
For more organic textures, such as skin, I paint the textures in Substance Painter.
I also added a bed of grass to the scene for her to stand on (and to hide her lack of toes). This was pretty straight-forward with the magic of the Grass Free addon.
Hair
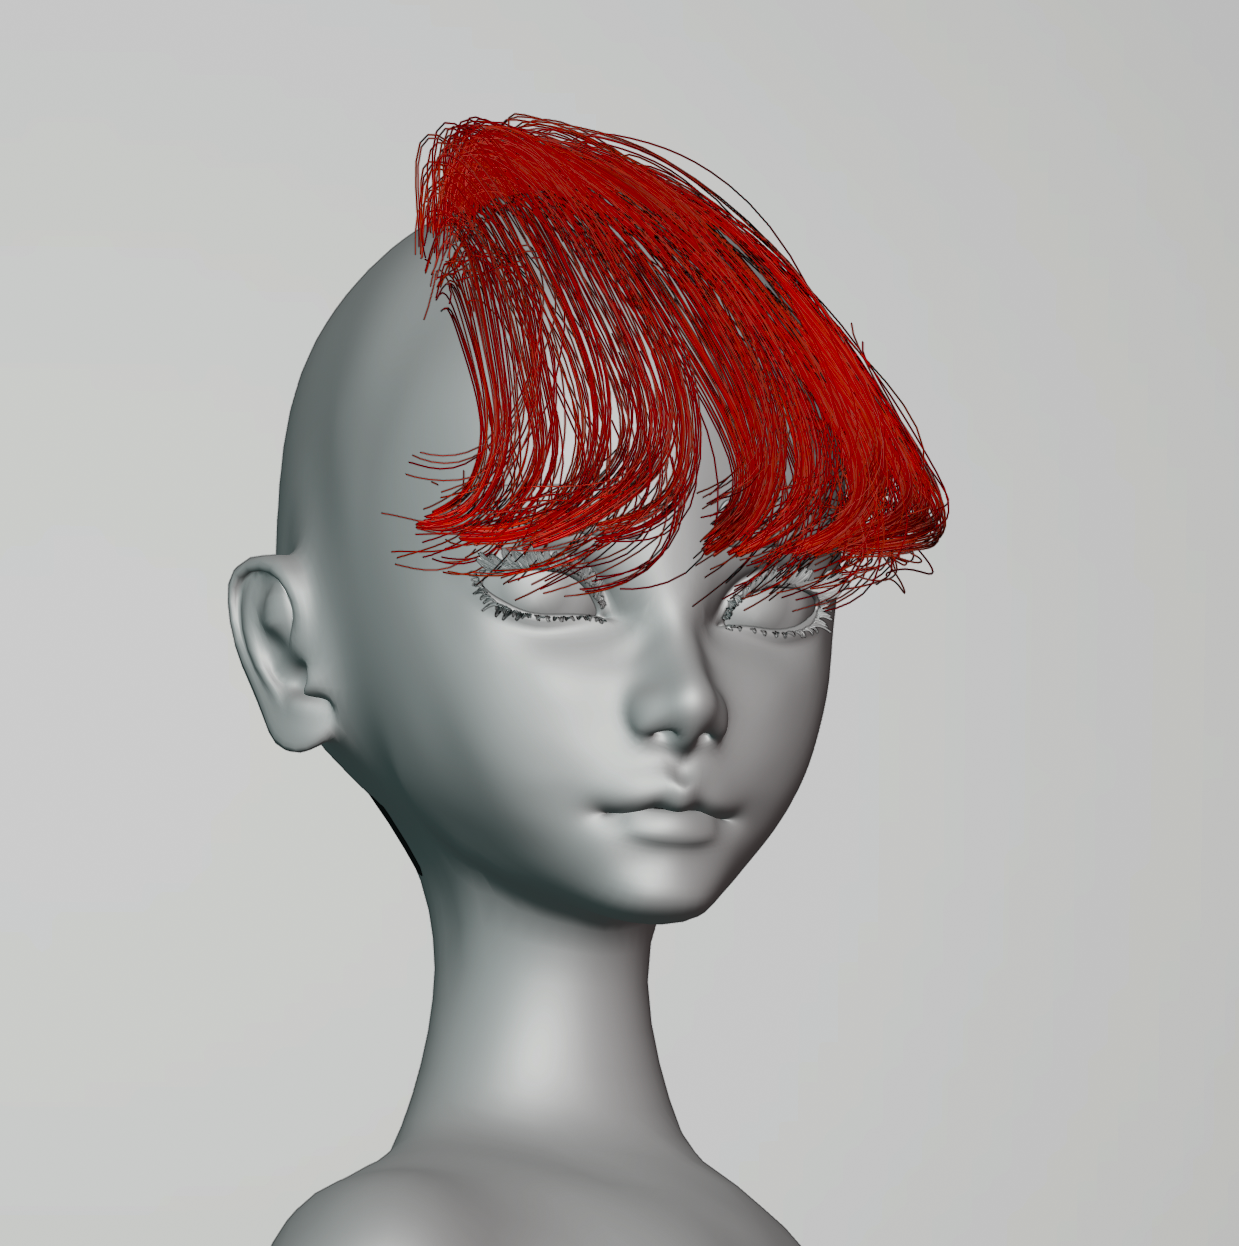
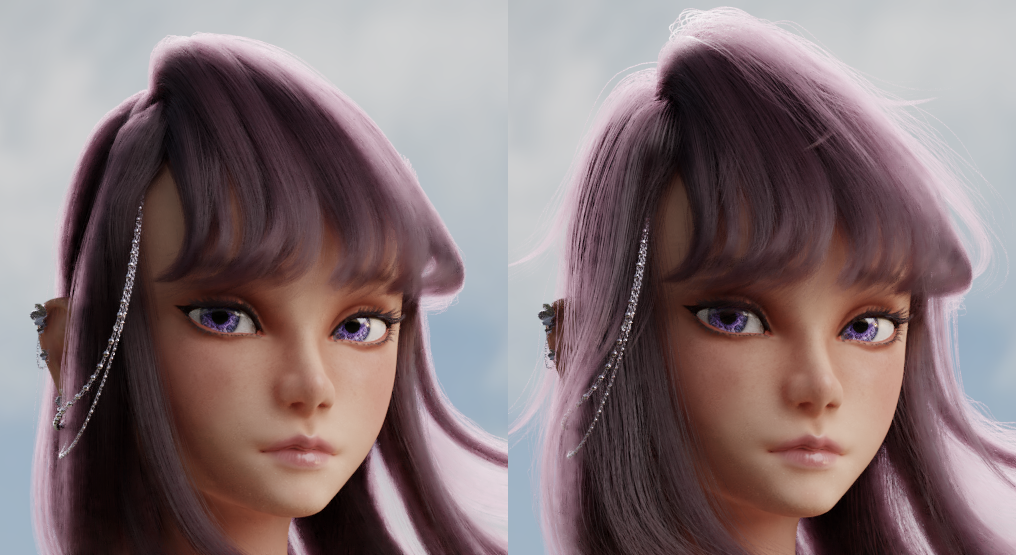
I used Blender’s particle hair system for the hair. The material just uses Principled Hair BSDF. For the particles themselves, I break the hair into multiple particle systems. The fringe was a defining characteristic of the hair, so I put it in its own particle system so that I could see the shape and comb it more easily.
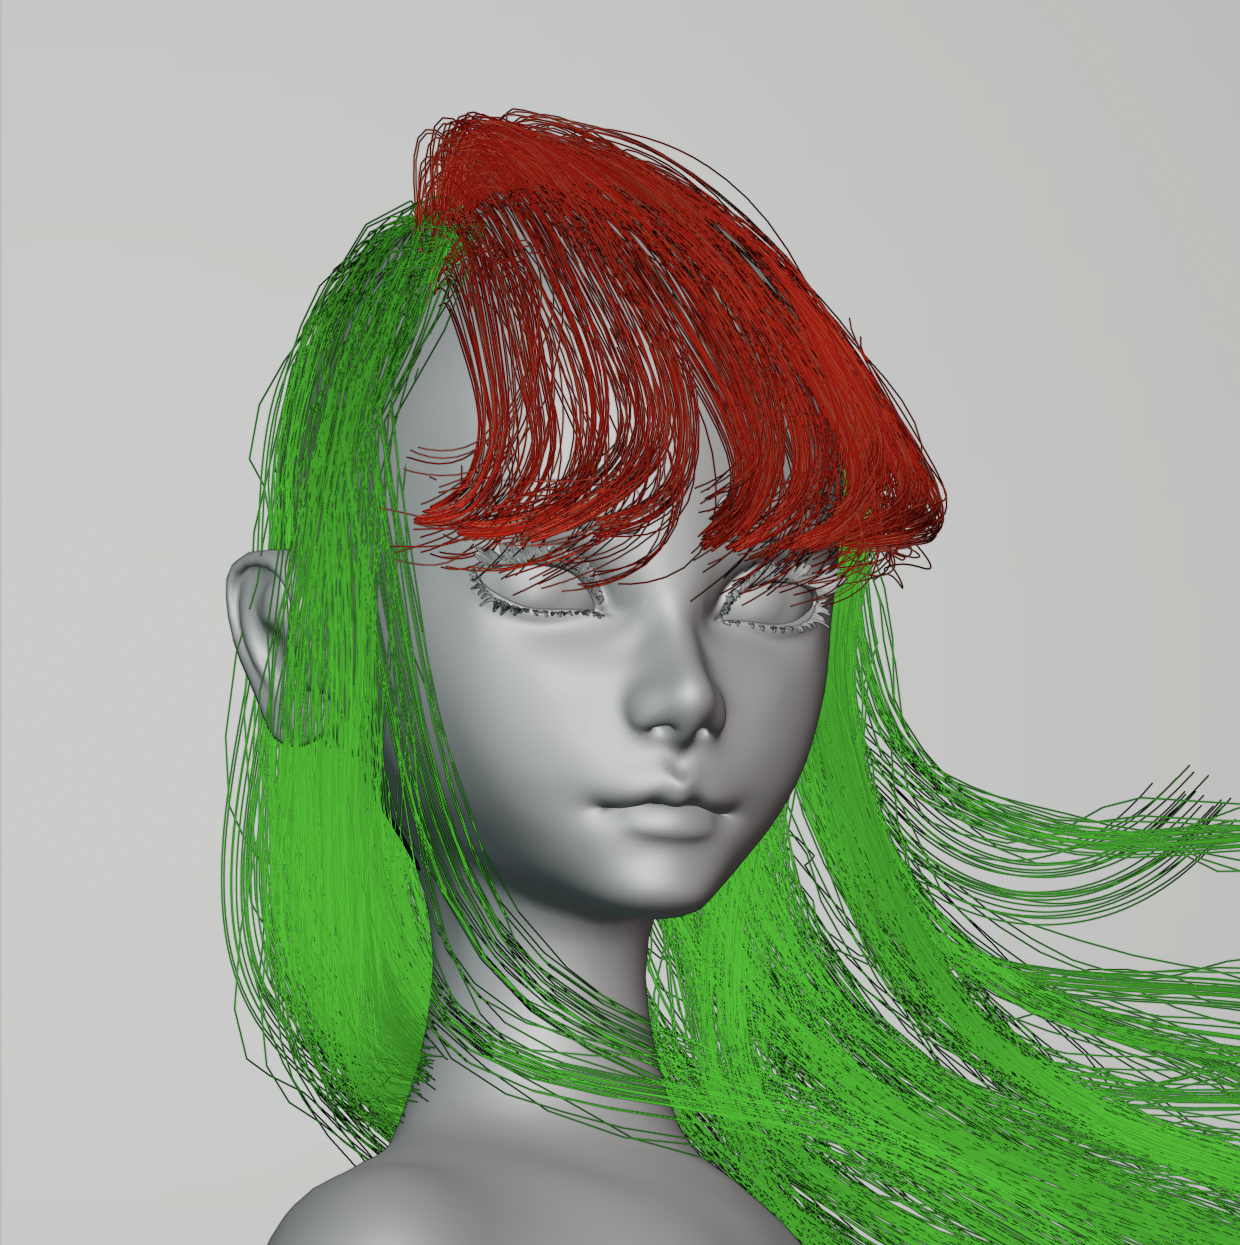
The other main particle systems filled out the bulk of the hair on her head: one to cover the rest of the scalp, and another with hairs starting midway down the scalp to give the hair more depth. These particles have a small amount of randomness to break up uniformity in the children and have a round base that tapers off slowly.
The final two particle systems add more detail to the hair. One is comprised of a few thin wisps that stick out from the shape of the hair. The other has wide, sparse strands with more randomness to break up the uniformity of the main strands.
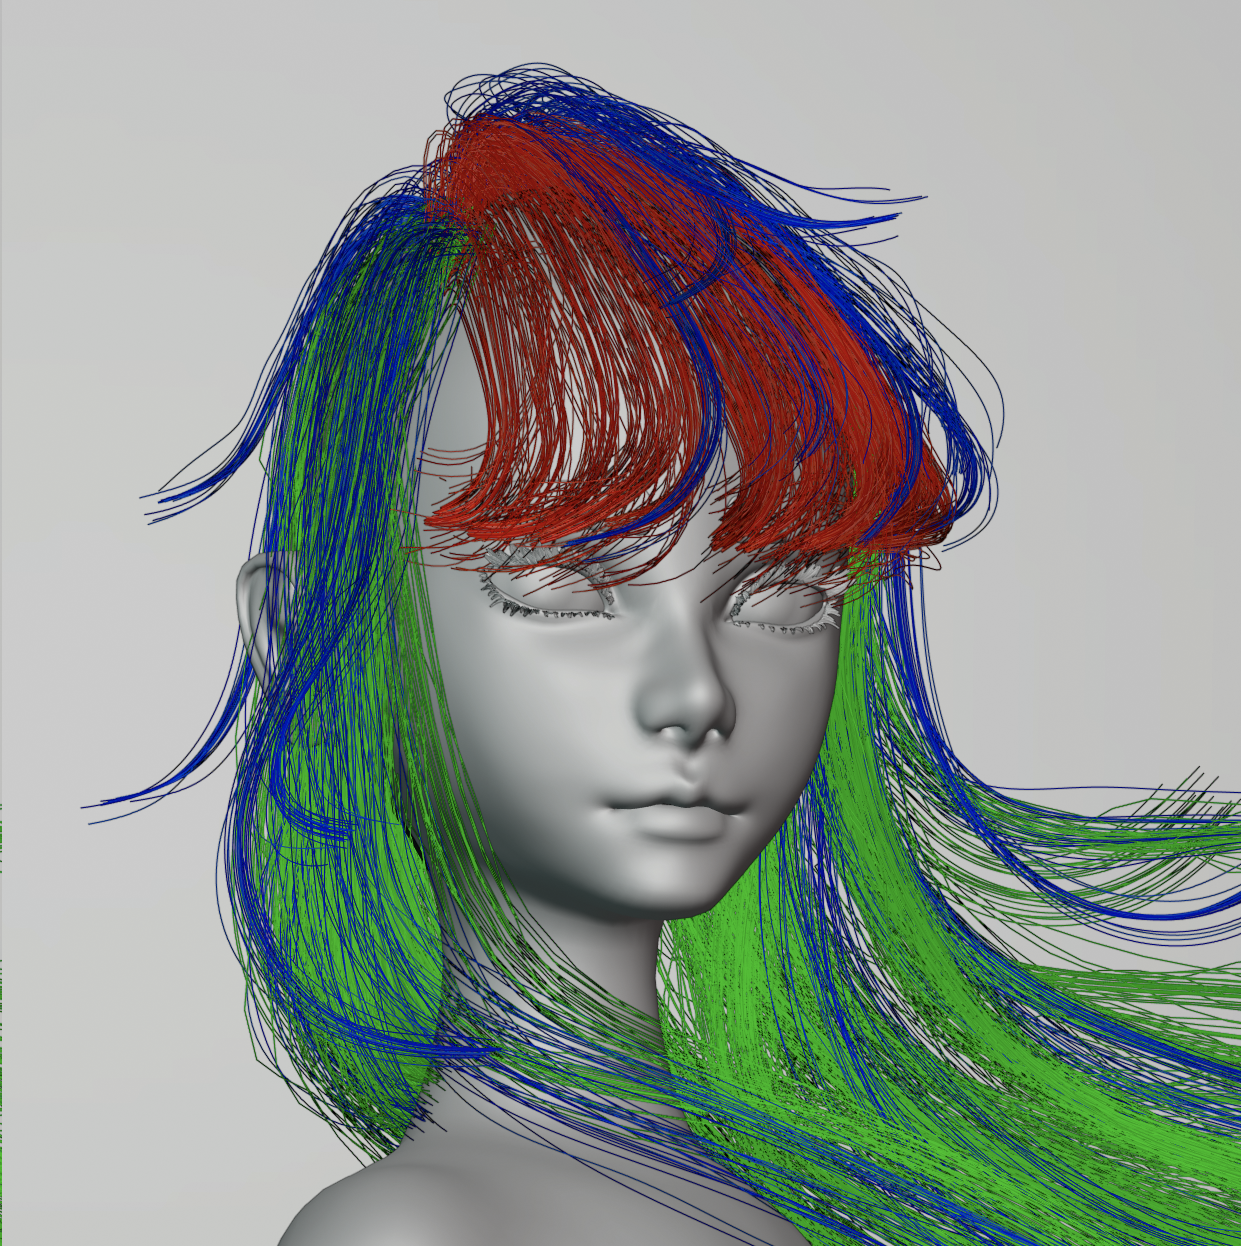
Without these I find that my hair looks too flat and smooth. The messy strands also catch more back-lighting and can give the hair a softer glow.
Final Image
And after some colour adjustments and added light speckles in Photoshop, here we have the final result!
Anyway, that’s all for now. Thanks for making it here to the end! 😃
About the Author
 Cheryl Chen, Blender Hobbyist


Very impressive character!
Thank you :)
A tip here for lace referencing as a texture resource. If you head off over to http://www.antiquepatternlibrary.org/html/warm/lace.htm you can find a steady scale 1:1 resource of lace patterns for textures.
I’ll give that a shot. Thank you for sharing! :D