Behind the Scenes: No More Dragons!
About
Hello, my name is Oleg Zherebin. I was born in a very small town of the Chelyabinsk region in Russia, and 5 years ago I moved to London.
I work as a lead artist at PokerStars, for the most part I do mobile app design. I devote all my free time to my hobby – development of concept art. I have been doing concept work for about 3 years. Sometimes I combine freelancing with the main job.
I started using Blender on a daily basis last autumn. I made numerous attempts to learn it, but all of them were unsuccessful, until I realised the true power of it, when I saw awesome artworks by Jama Jurabaev and what he was capable of doing with the upcoming 2.8 version.
Before that I had used 3ds Max for more than 10 years, first for architectural modeling and rendering in V-Ray, later I added 3D-Coat, Keyshot and Marvelous Designer to my toolbox.
The most knowledge in concept art I picked up from a few courses on Learnsquared. Teachers gave me an incredible boost in confidence and from that point I wanted to devote all my spare time to create concepts for films and games.
Idea and Inspiration
I am currently working on a Big::Medium::Small project with a very good friend and super artist Jama Jurabaev.
The idea is to give artists and modelers the opportunity to translate their ideas into reality with the help of our ready-made packs. To create a high-quality and well-developed concept or illustration, a lot of time is spent searching for refs, creating 3D models, searching for high-quality textures, and so on. All this is a very labor-intensive process, which takes a lot of the project’s time, and very little time remains for the creative part itself. We want to provide ready-made sets of various themes, designs and historical eras, where everything will be available that is necessary to create a new world. We optimised all assets for Blender and they works really well in EEVEE.
The main purpose of this series with the king was to show what artists can do with our Medieval pack if they have a good idea and some knowledge of necessary software.
I am a big fan of the medieval era and the Game of Thrones show, so I decided to create a small project in a fantasy world. Which fantasy doesn’t have a dragon, right? I thought, maybe a badass squad of knights would present their prey to the king in front of a big crowd. That sounded interesting to me.
References
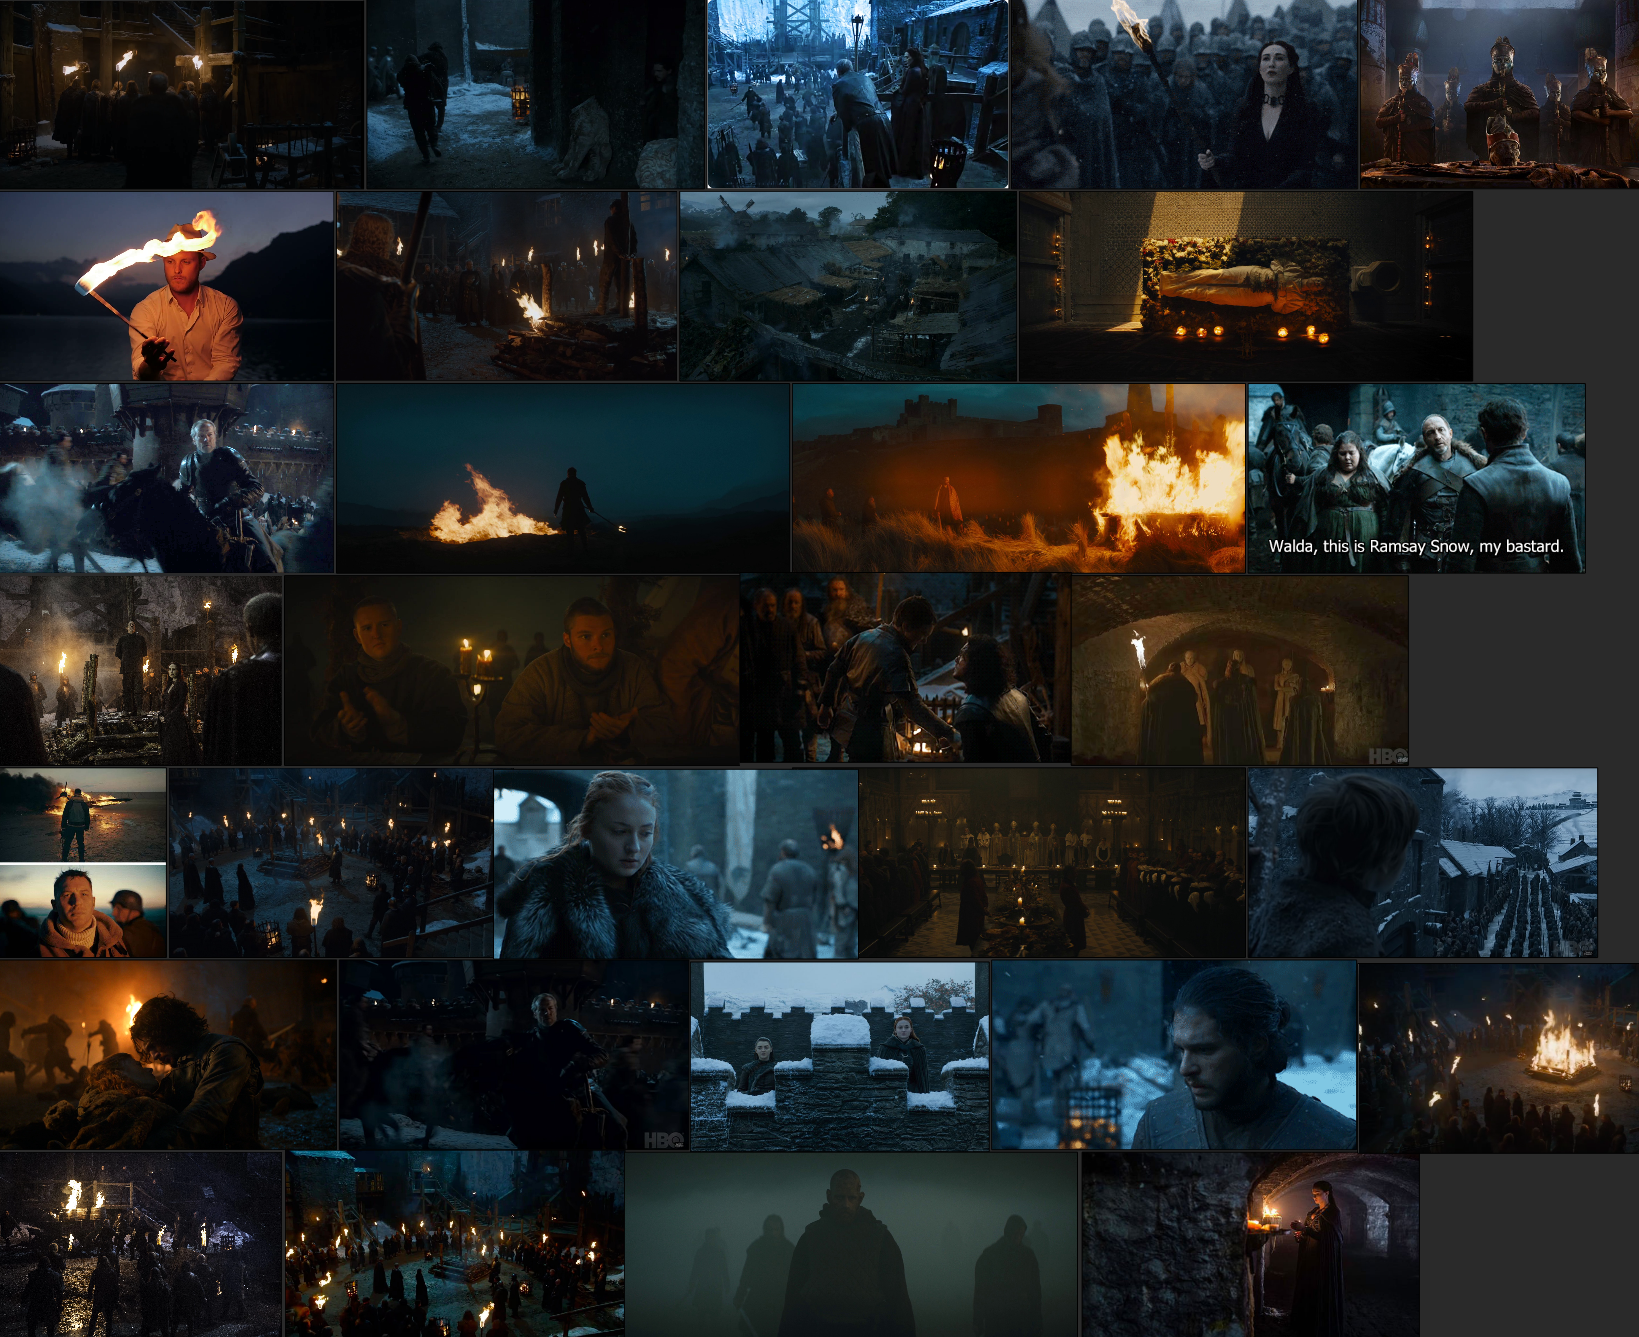
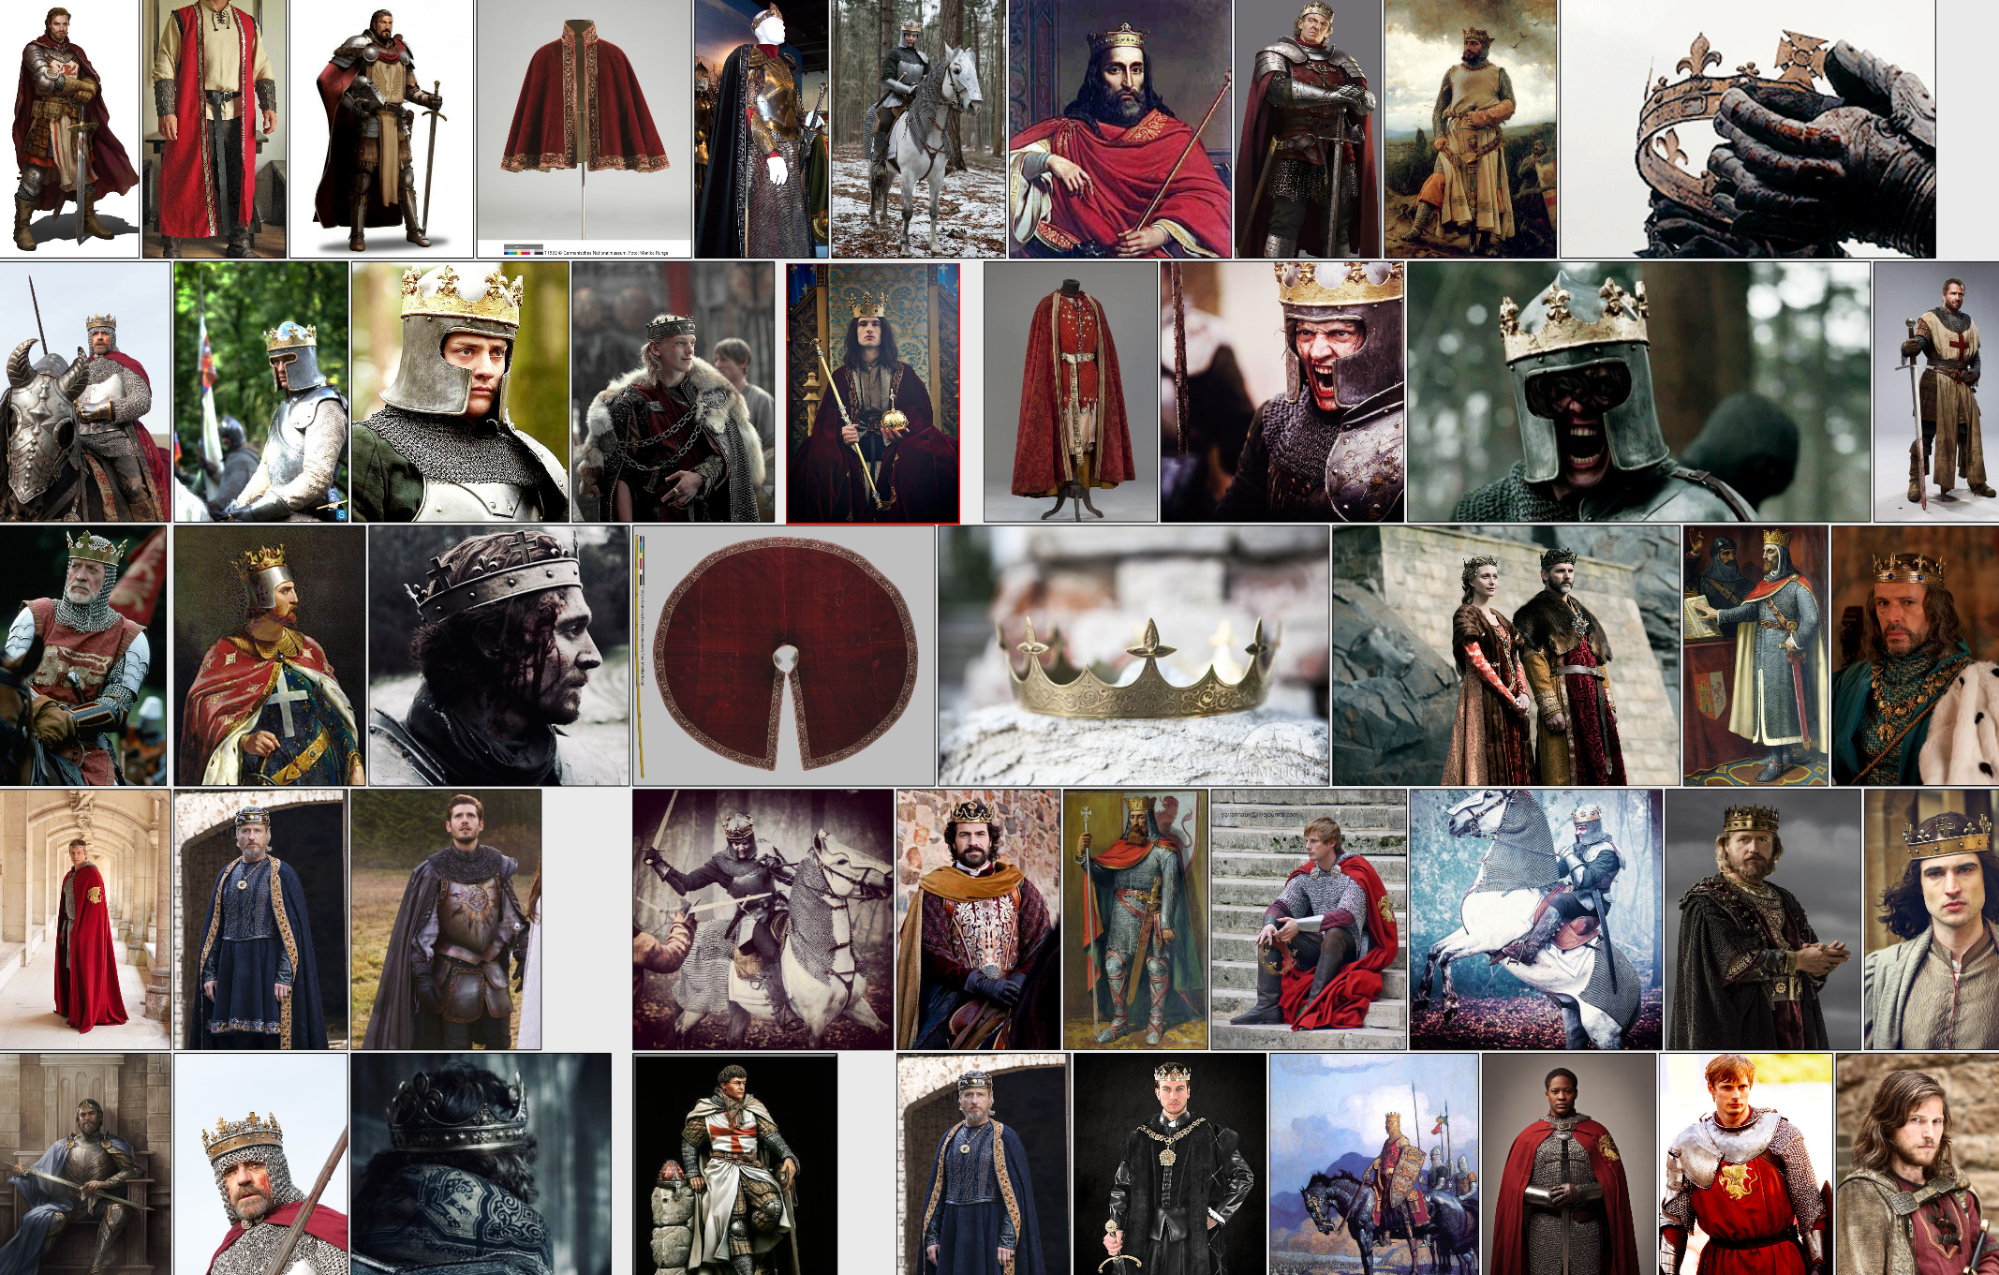
I wanted to make the mood very dark, and it had to be very grounded and believable. I made a board of references in PureRef. Mostly it was images from GOT and some movies.
King modeling & texturing
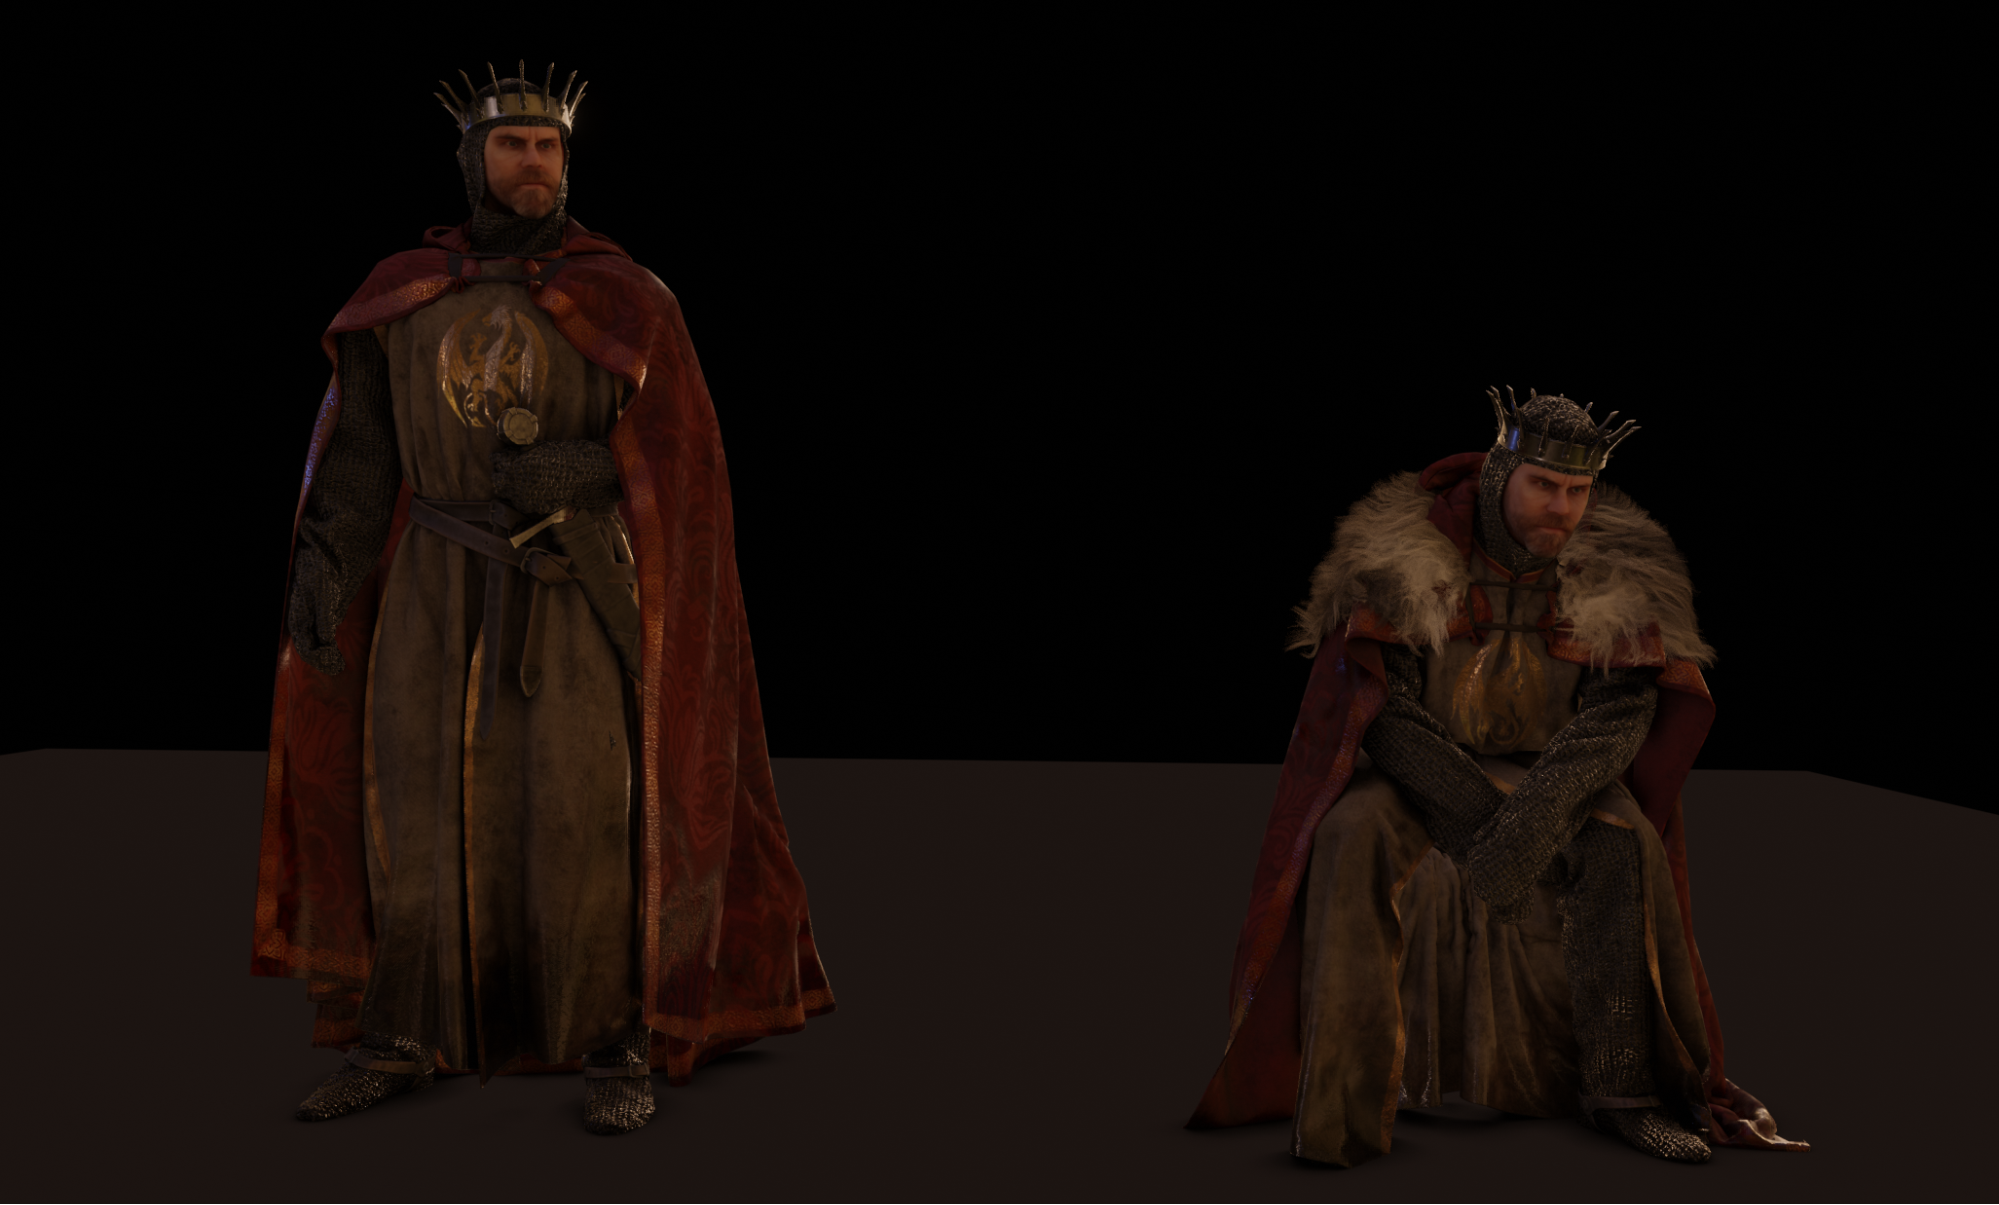
I actually started the project with the King, because he was going to be one of the most important focal points of the series.
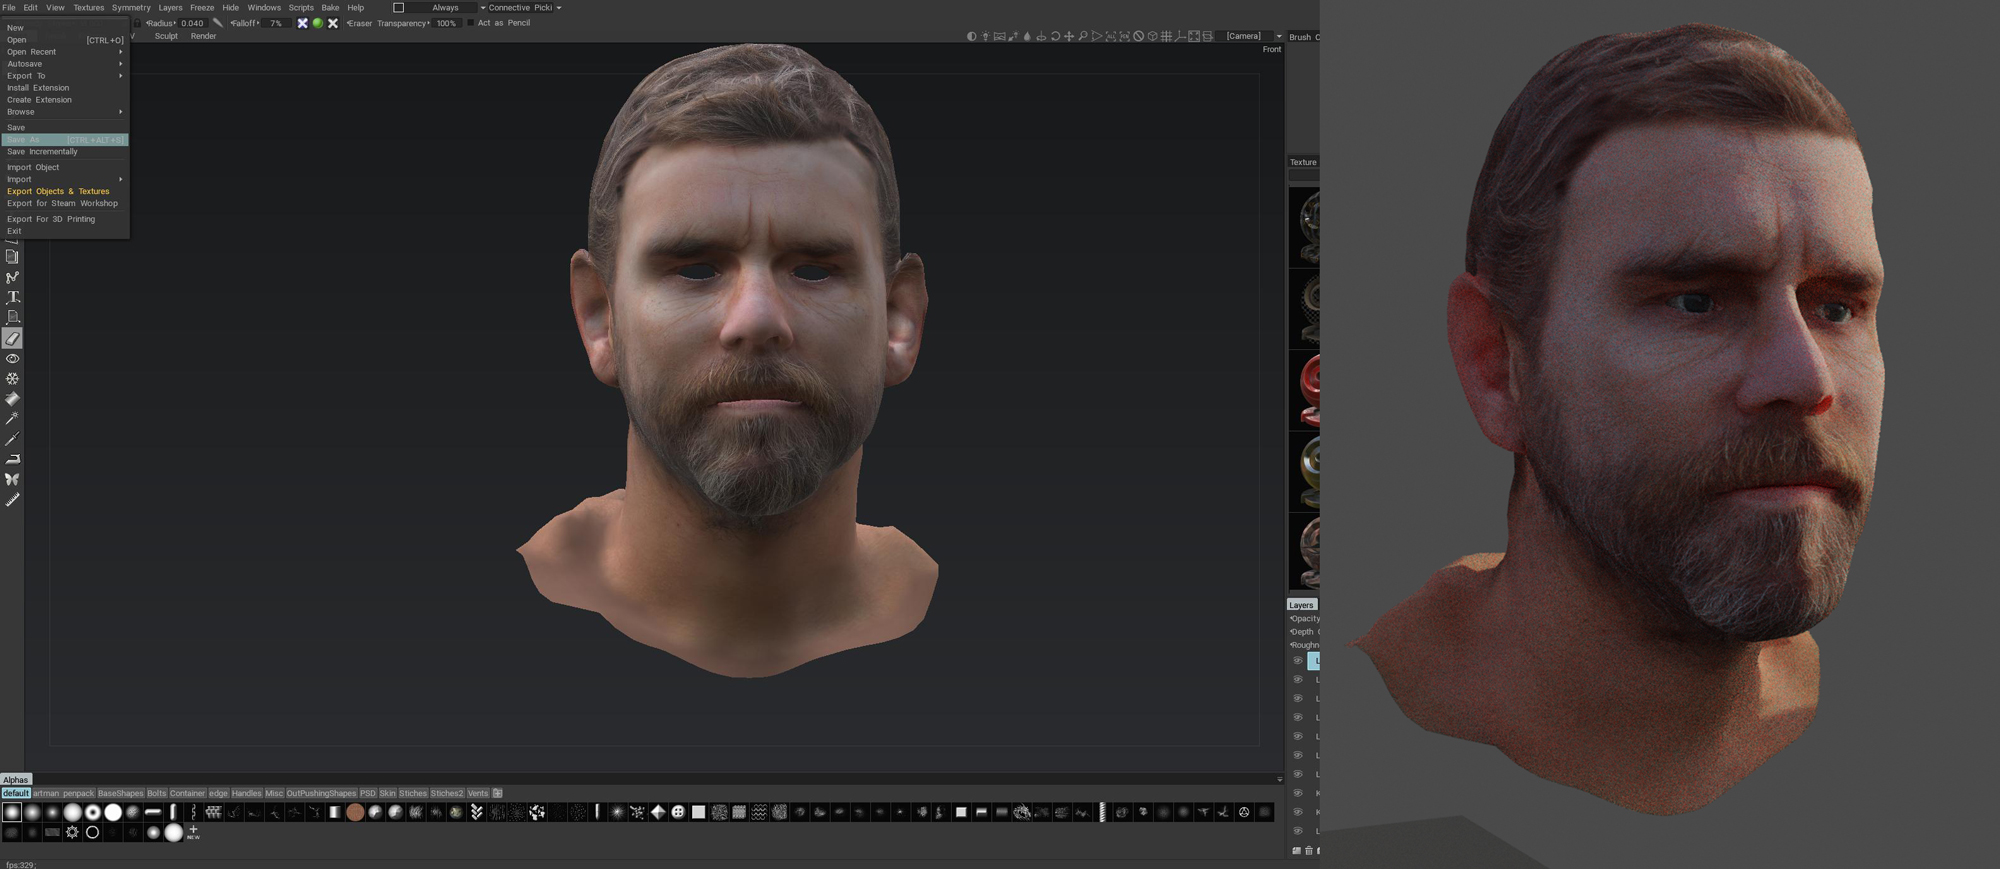
His head was sculpted and textured in 3D-Coat.
I spent some time in Marvelous Designer customising garments for particular poses.
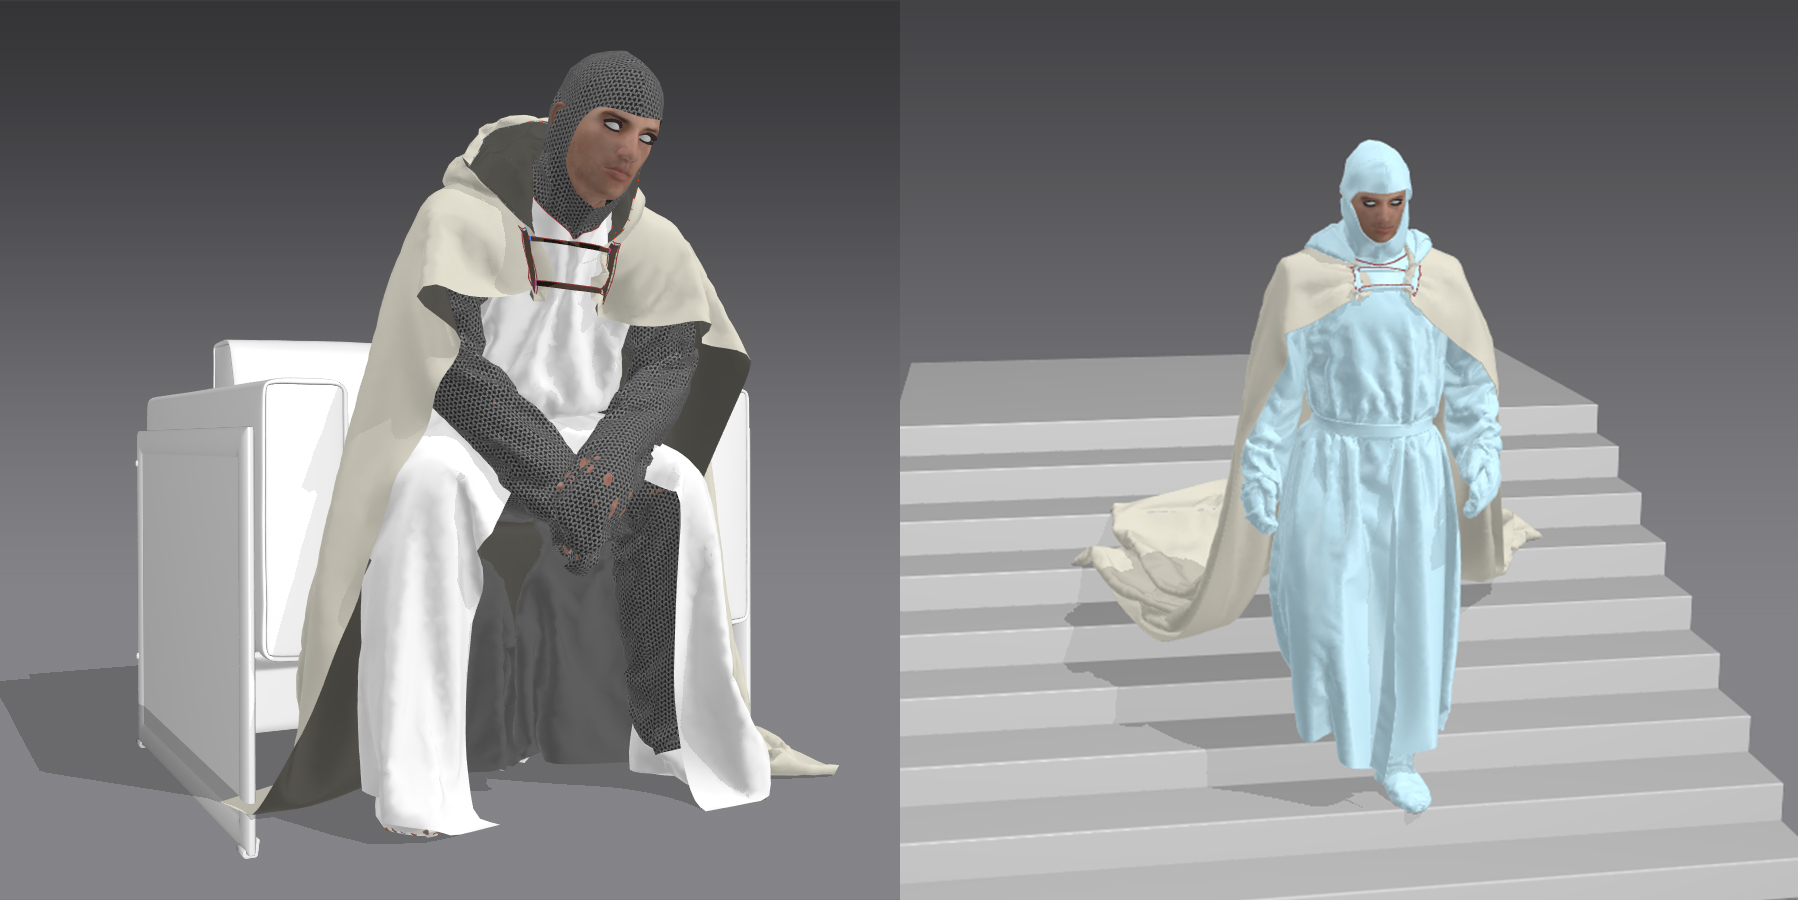
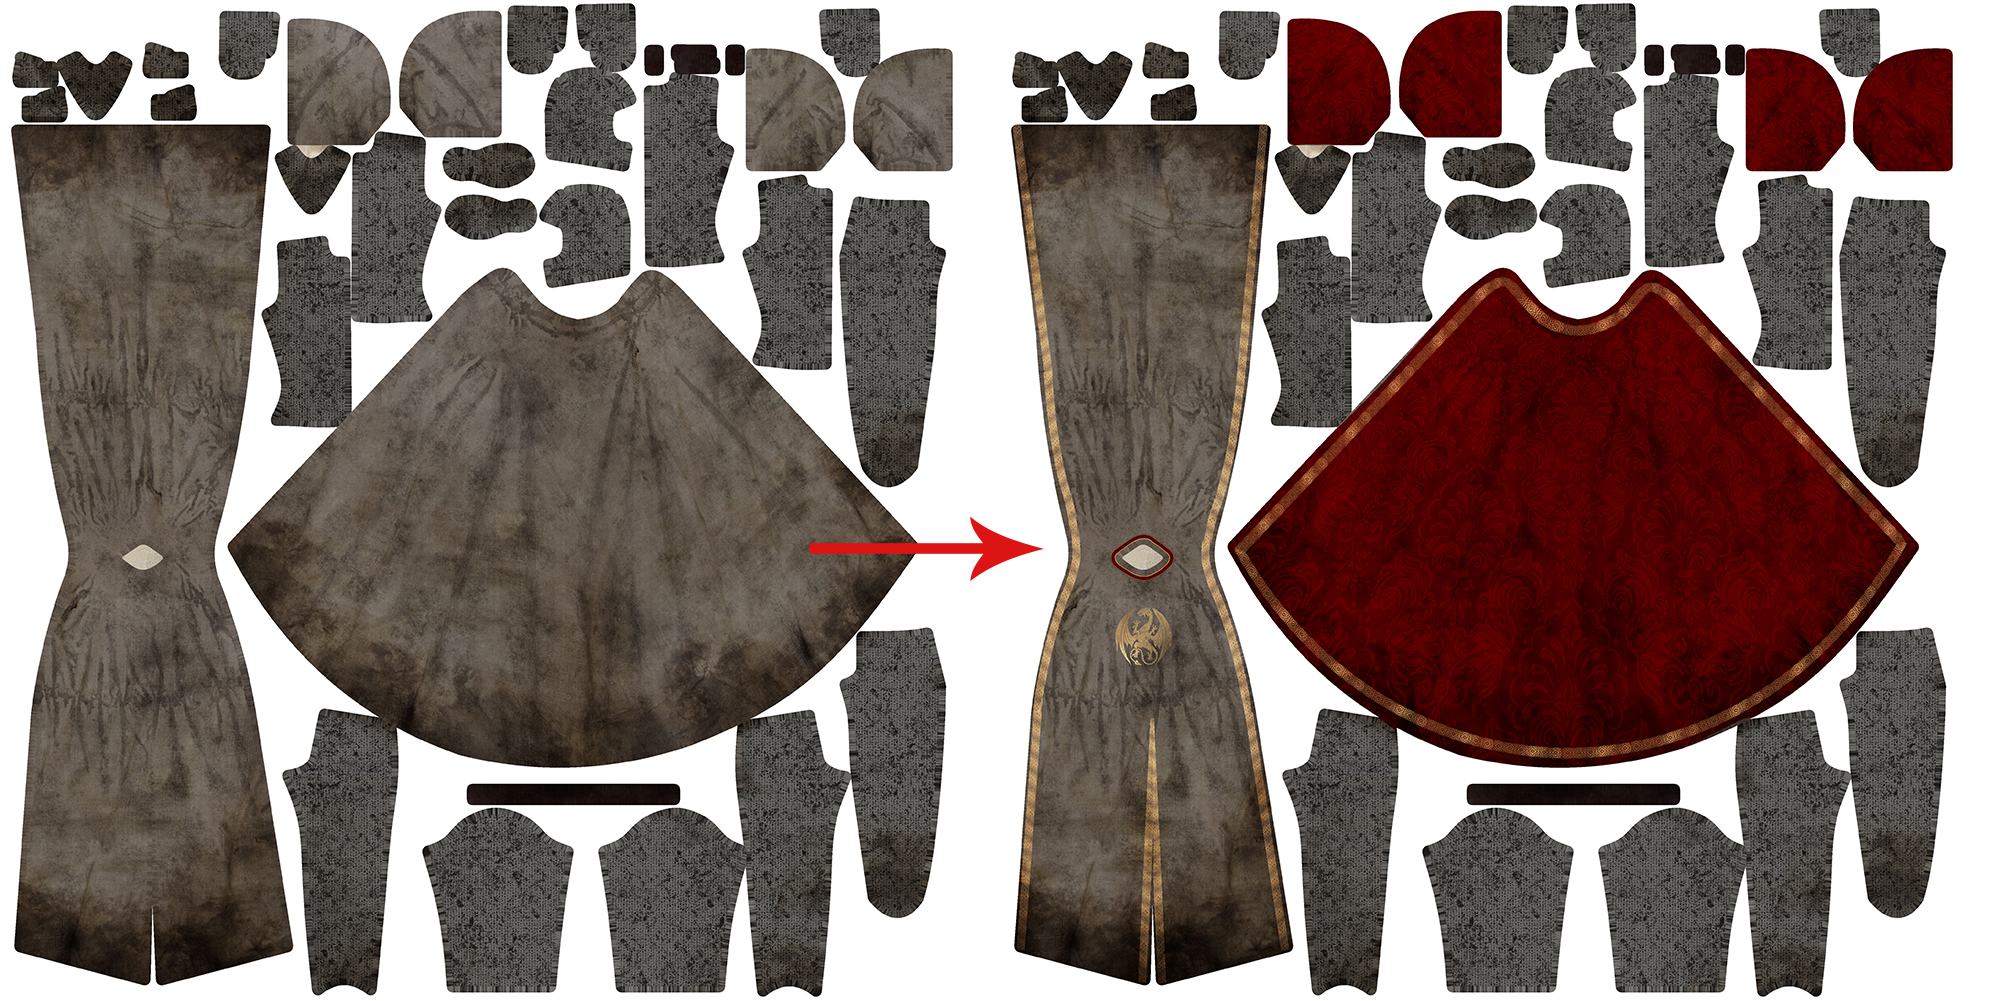
Also I was using the textures from the base model from our pack. It actually was very easy to create the king’s clothing by just painting and photobashing some textures on top of the existing UV mapped texture.
I was quite happy with the result at this point. I did a real-time test in EEVEE. I forgot to mention that for the first time I tried to use hair simulation in Blender. Mesh and final hairs weren’t perfect, but for the concept and later overpaint it was ok.
Dragon head modeling
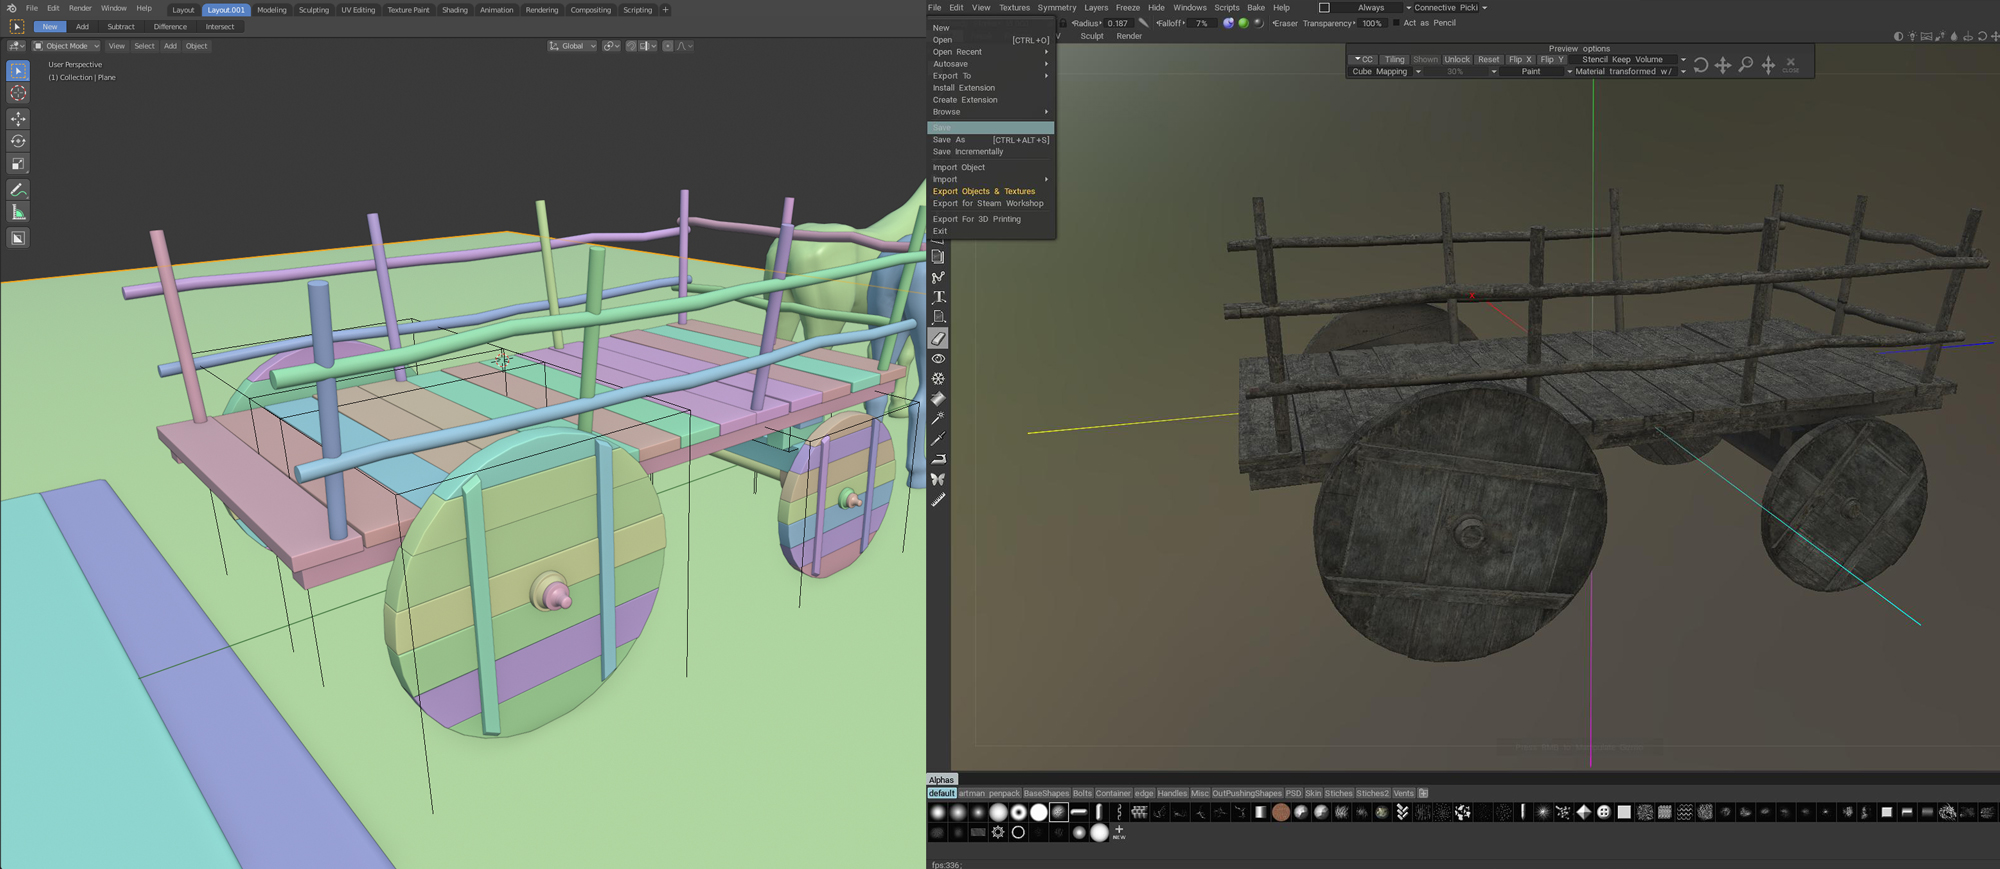
The next step was to create a dragon head and wagon. I use 3D-Coat very often for sculpting, retopo and texturing; it’s that type of software where you can create ready-to-use final models from scratch. The dragon head was sculpted and textured very quickly, my focus was not to spend a lot of time on unnecessary detailing, because most of it would be either in shadow or covered by fog and snow.

Pipeline for asset creation
I made a very simple base for the wagon in Blender. HardOps and Boxcutter are very useful in that type of modeling. I textured in 3D-Coat. From this point the pipeline would be the same as for other small assets in the scene, like the throne, stairs, etc.
Scene setup
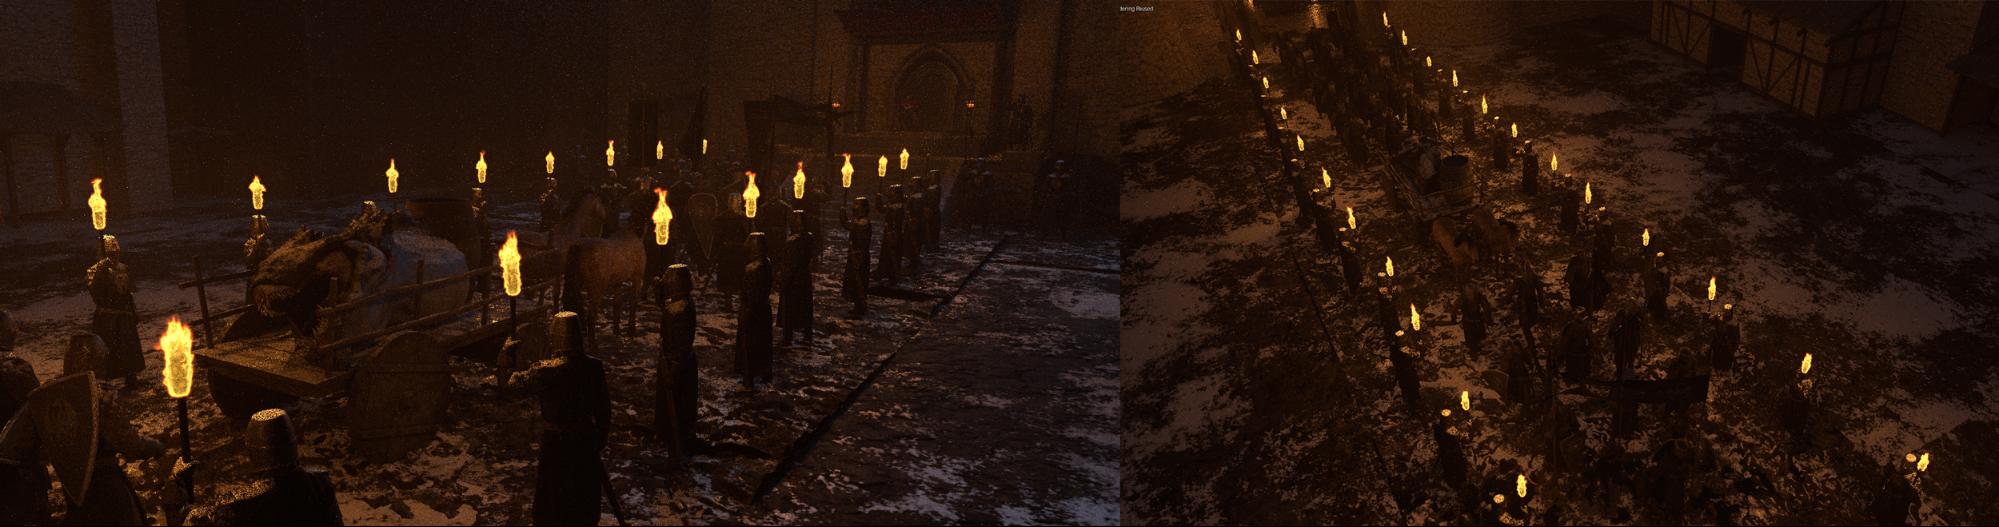
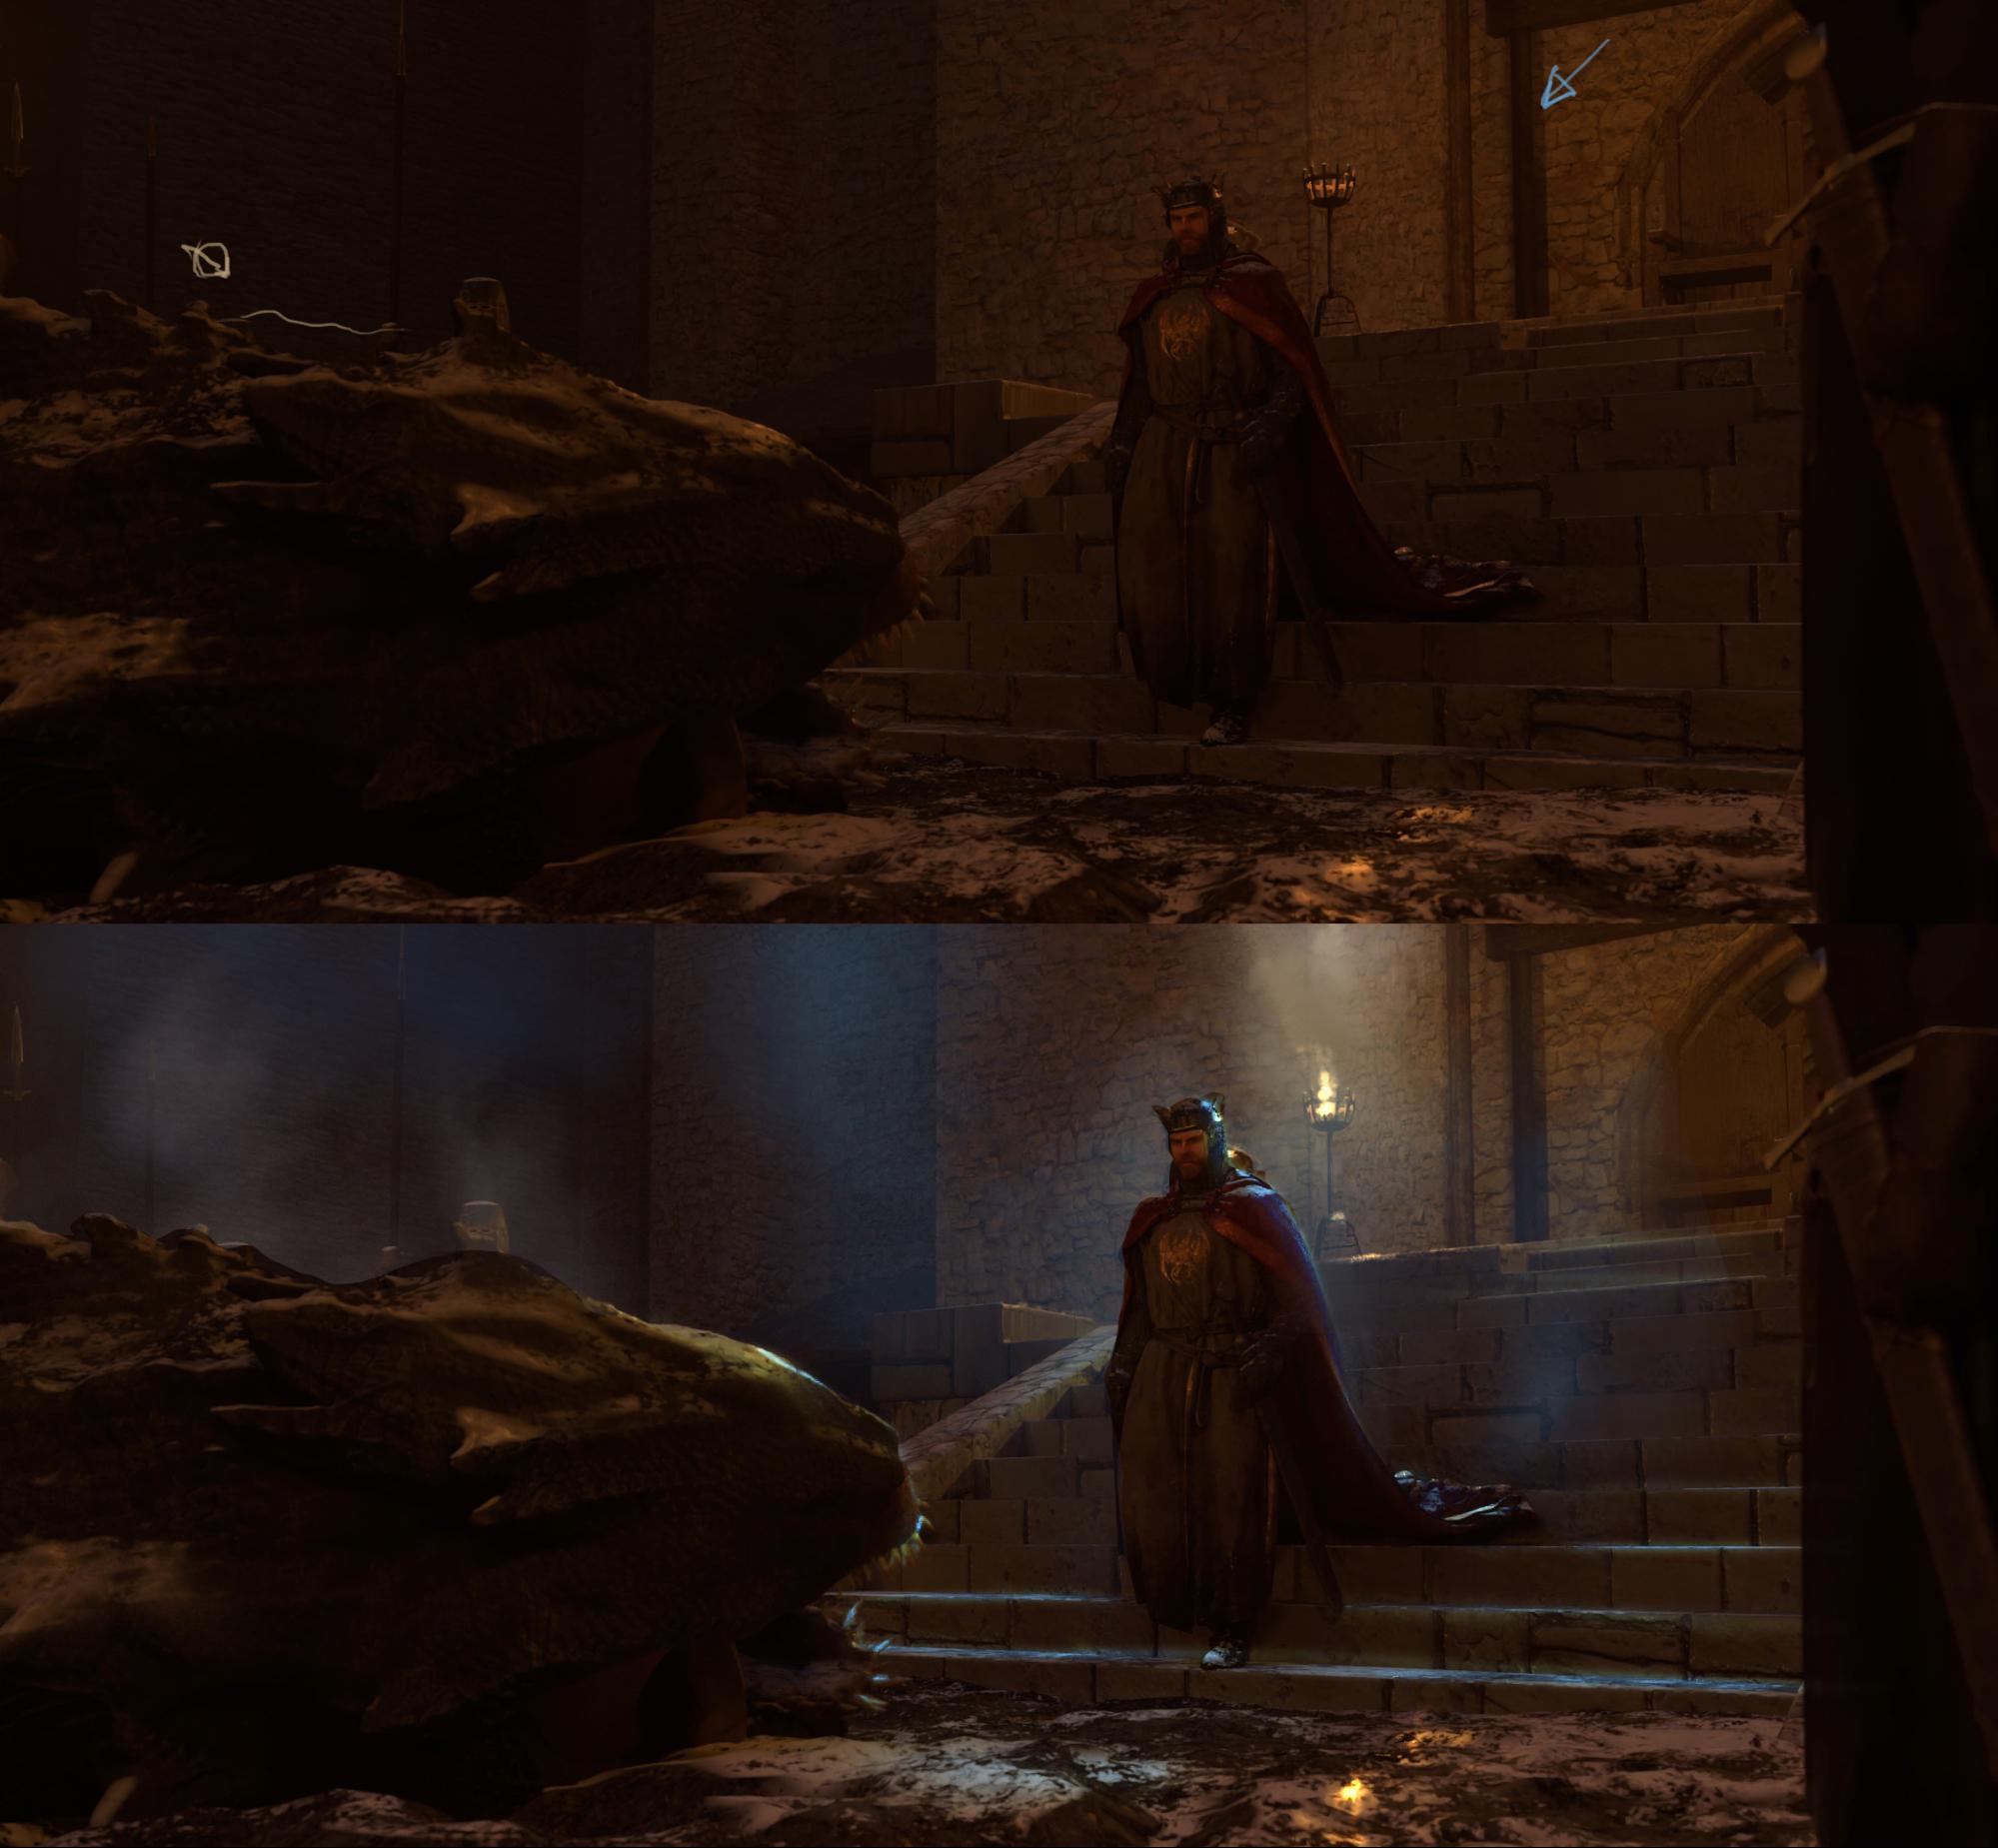
When I had finished creating all the assets, the fun part of the project started. I began to add models to the scene in Blender, set up lighting, and arranged the environment. Here are the first few lighting tests I did.
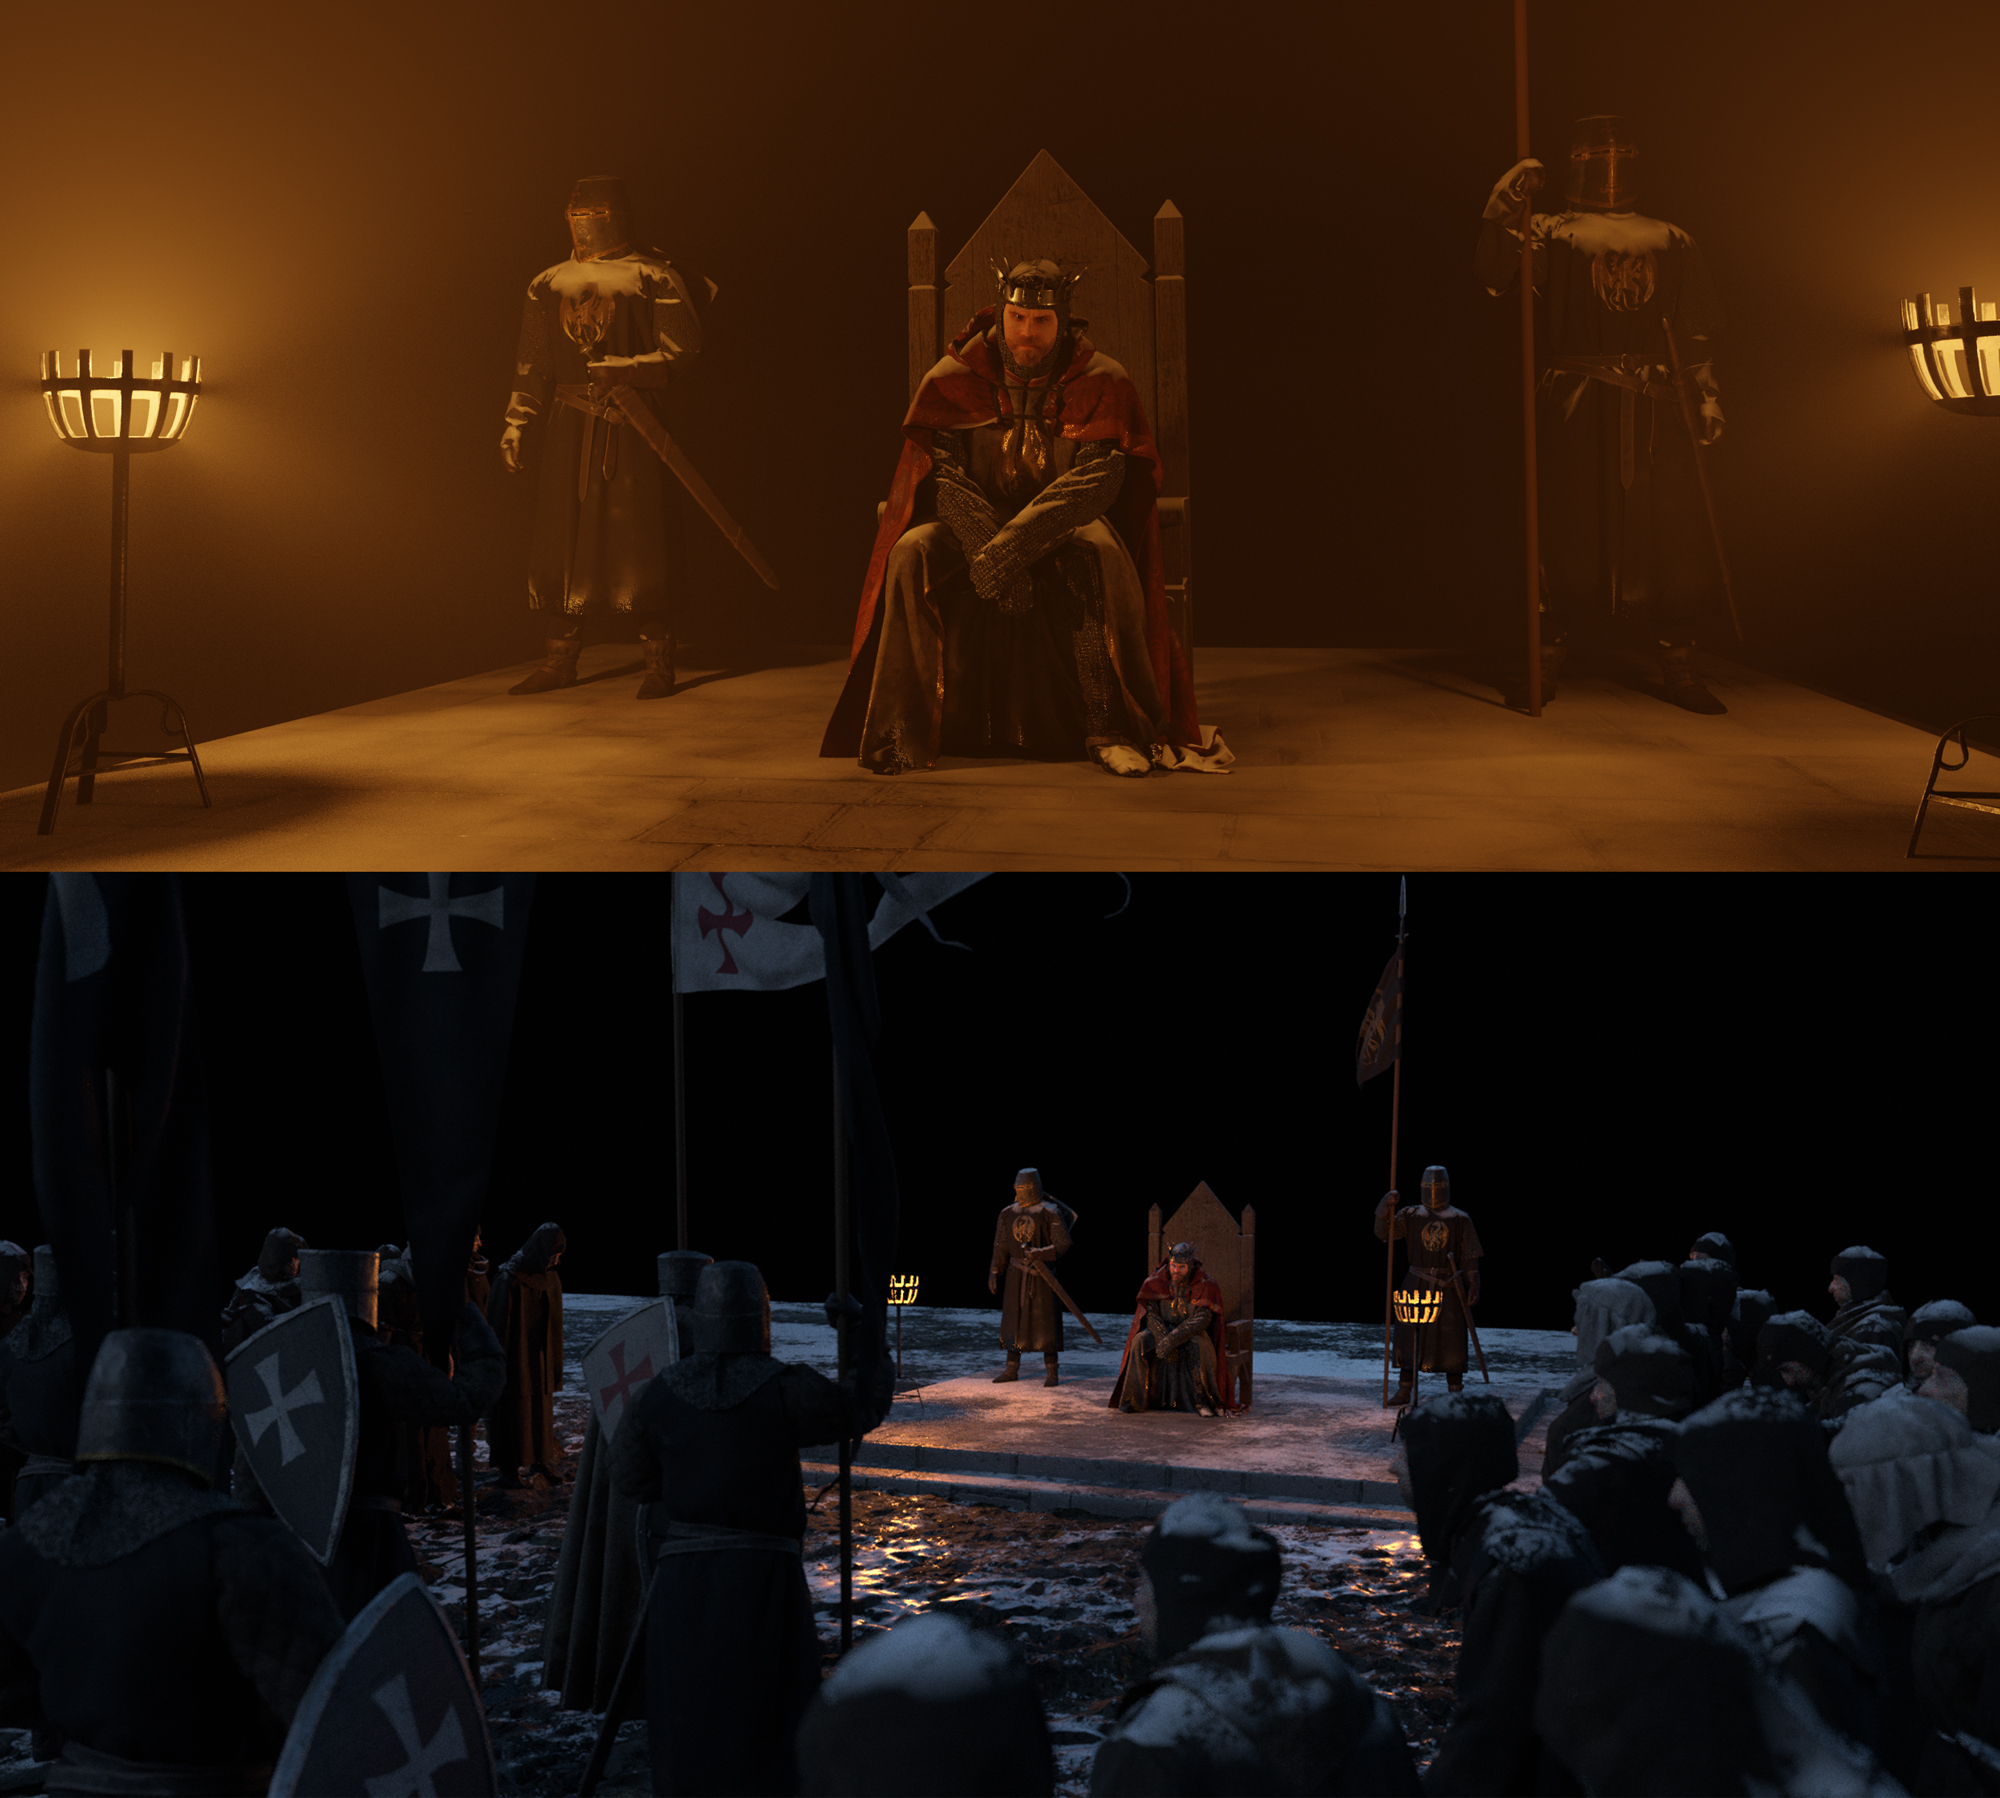
Castle and all surroundings were easy to assemble, because all models from Big::Medium::Small pack are modular and already textured. So I just made a quick layout. EEVEE helped me a lot on that stage with real-time preview.
At this point the scene was very close to its final state. I tried to find interesting camera angles and fine tune lighting.
But I thought, something was missing there, there was no epicness in it. A friend gladly provided valuable feedback and after that I was on the final stage.
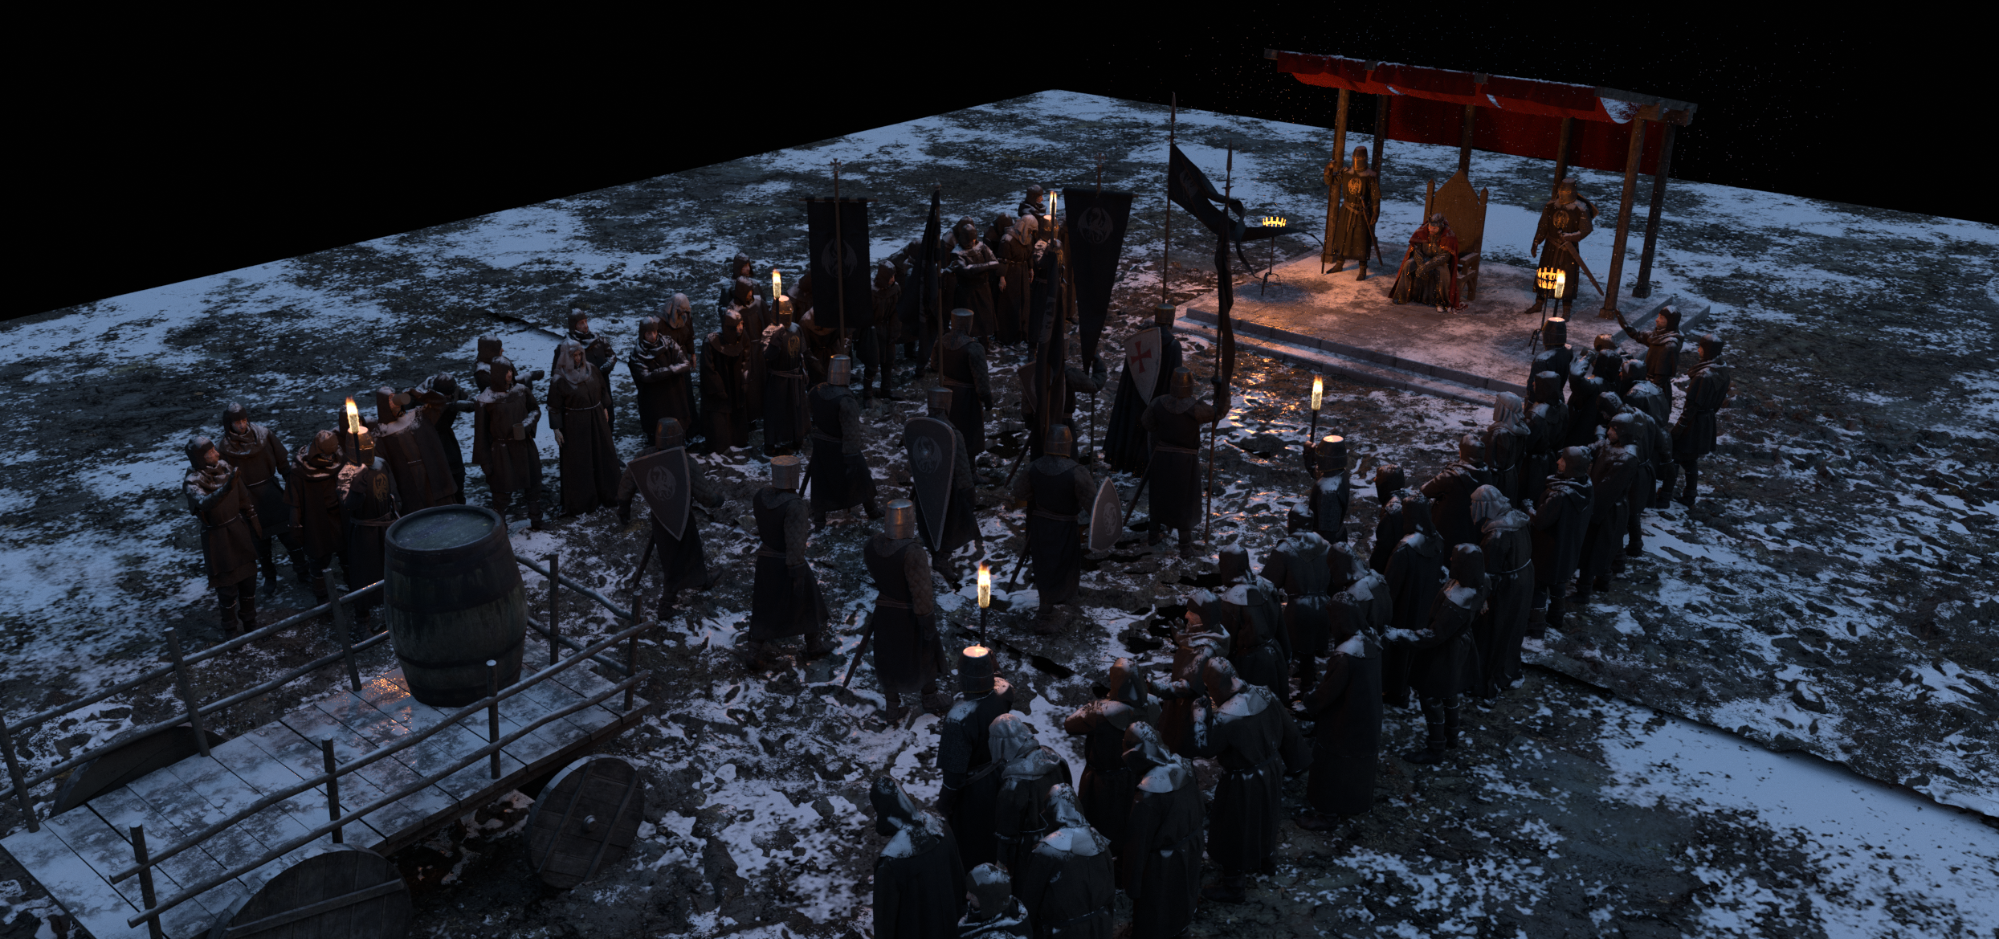
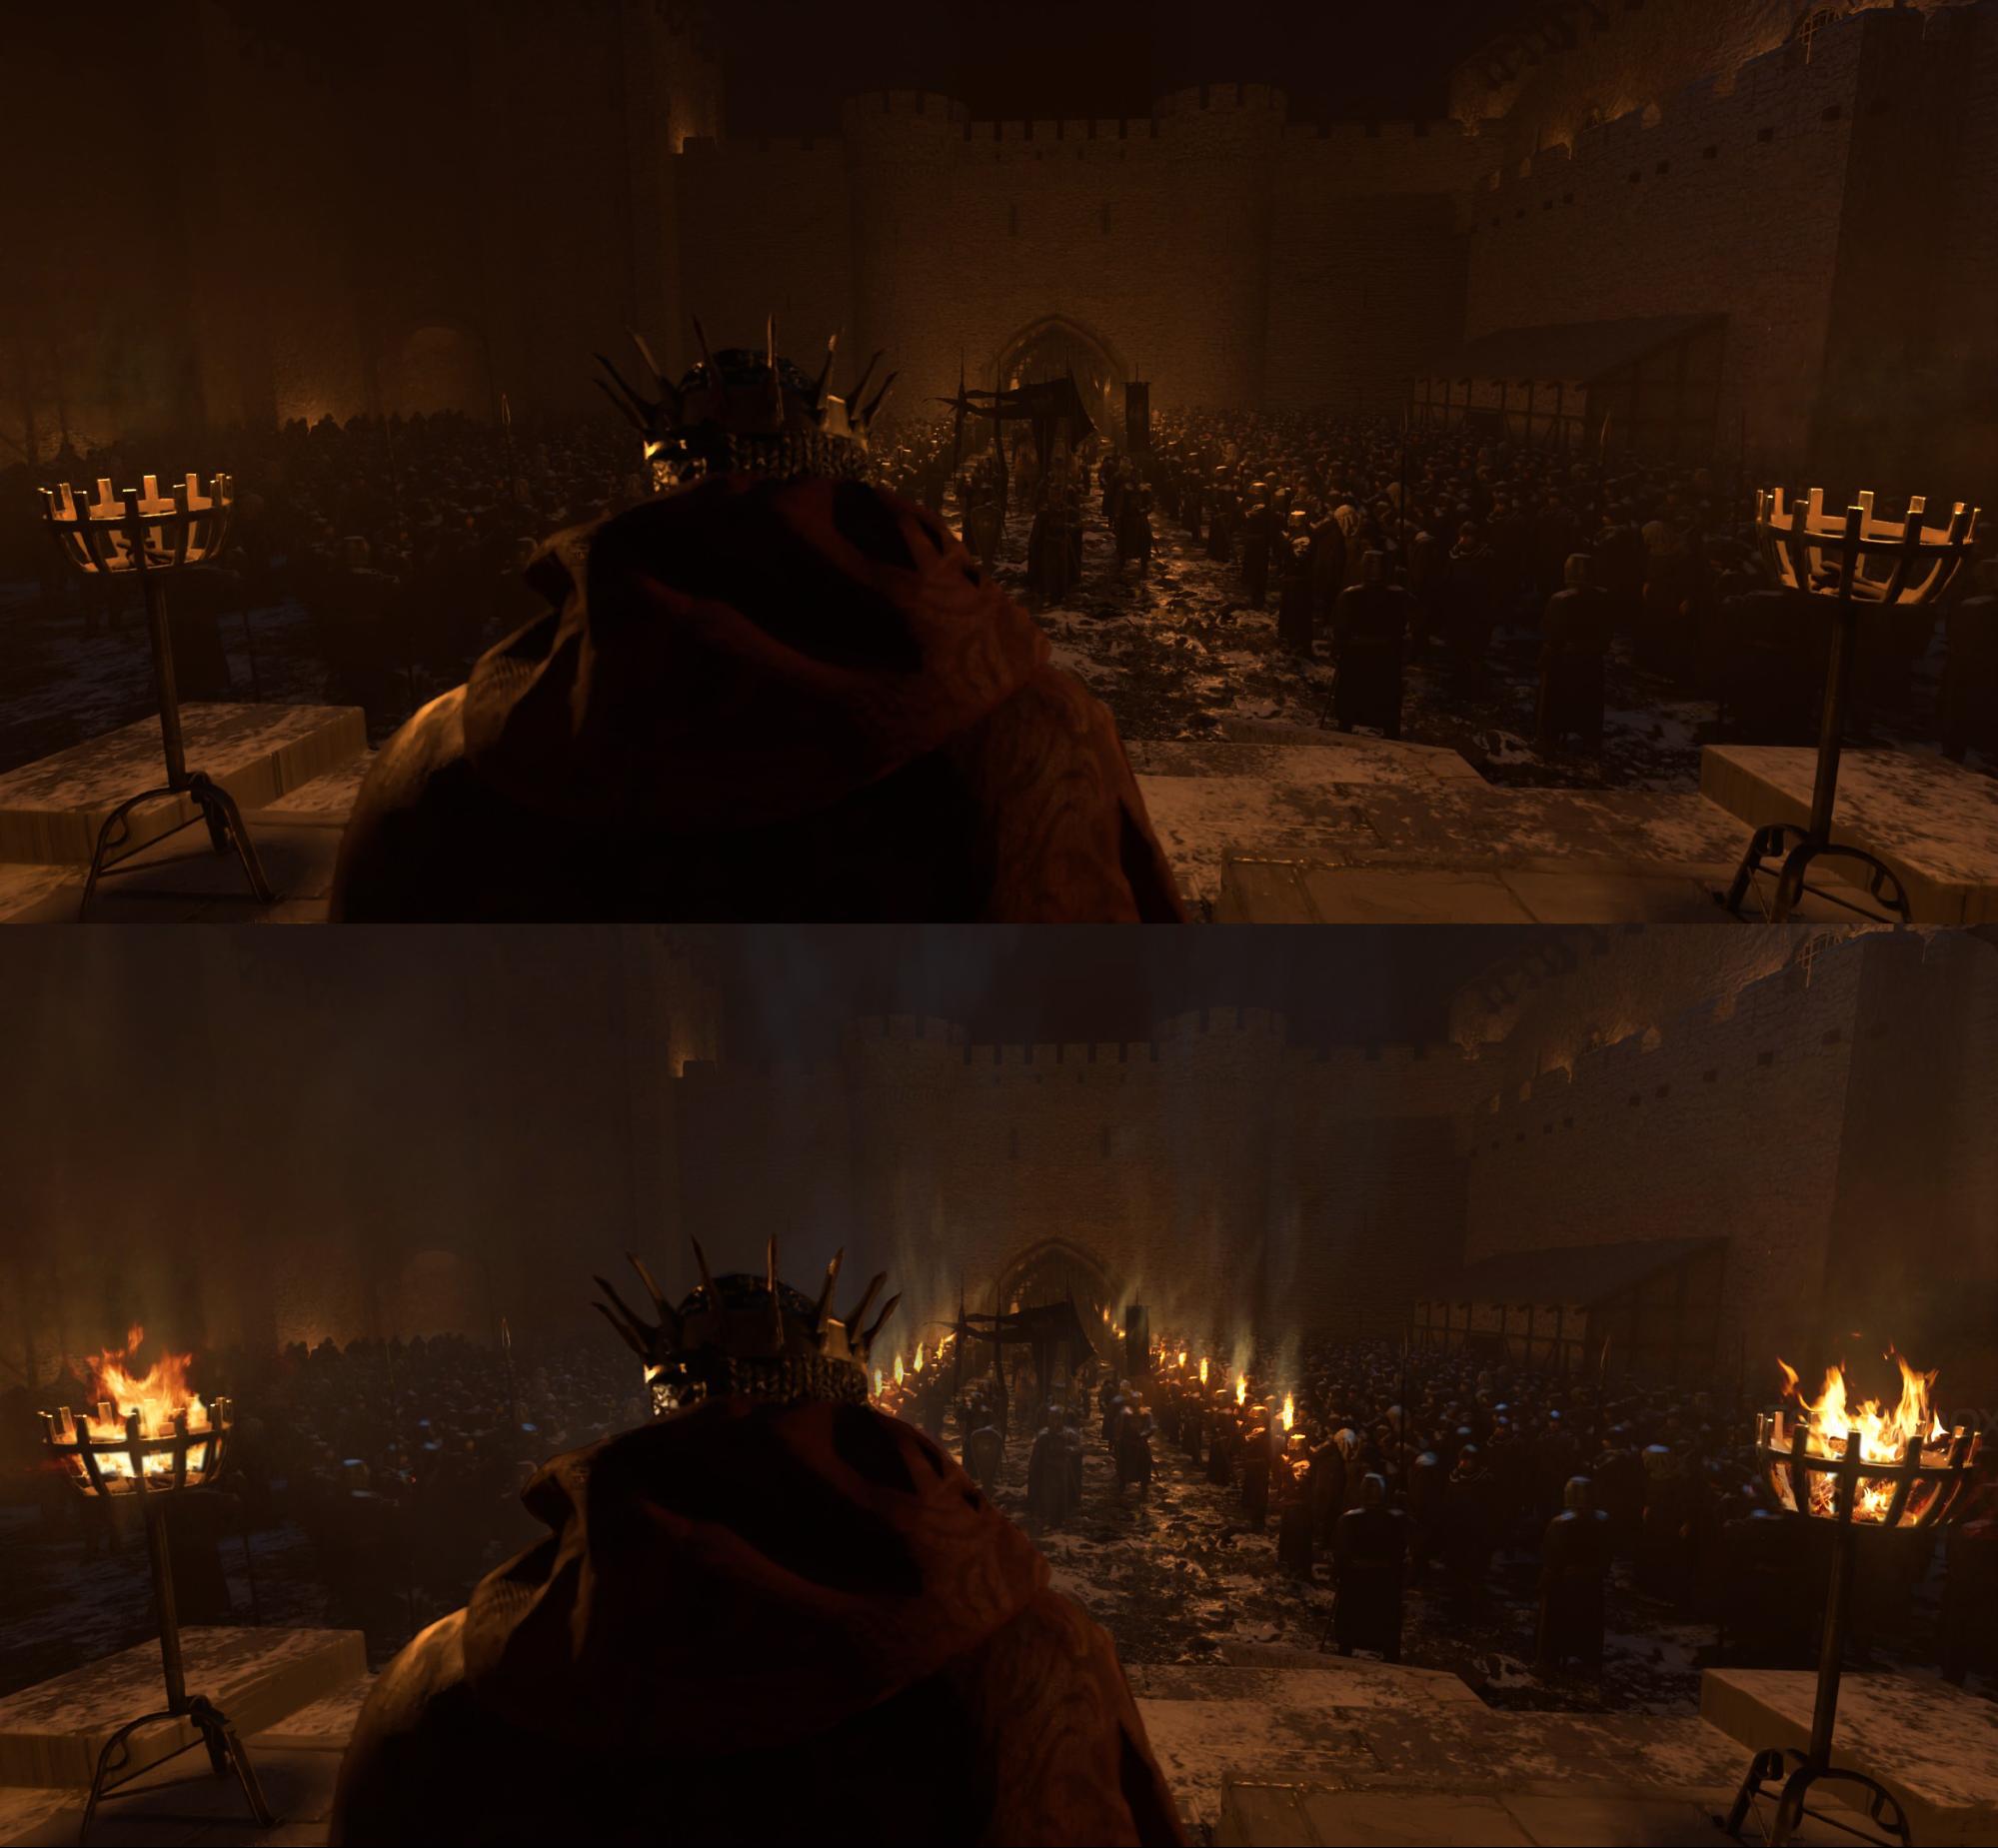
A couple more rough renders:
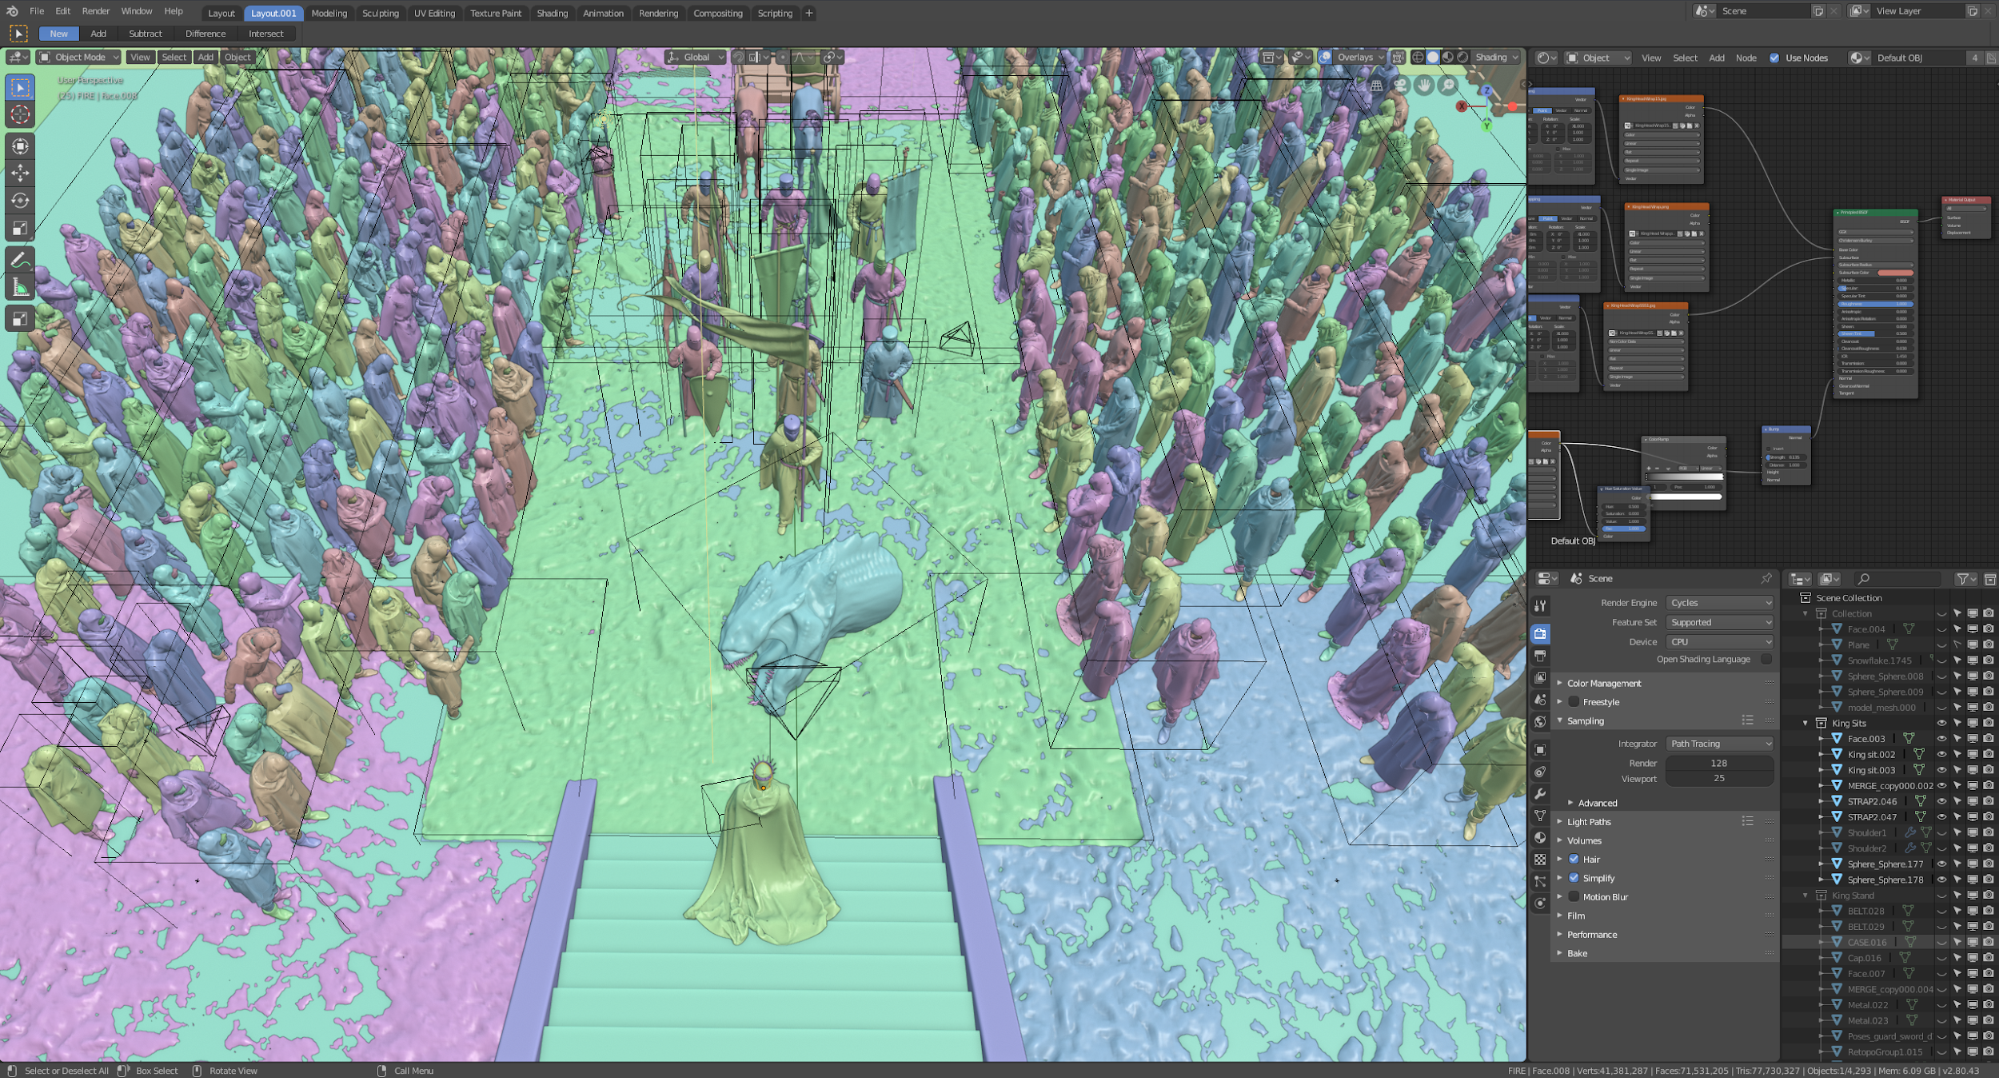
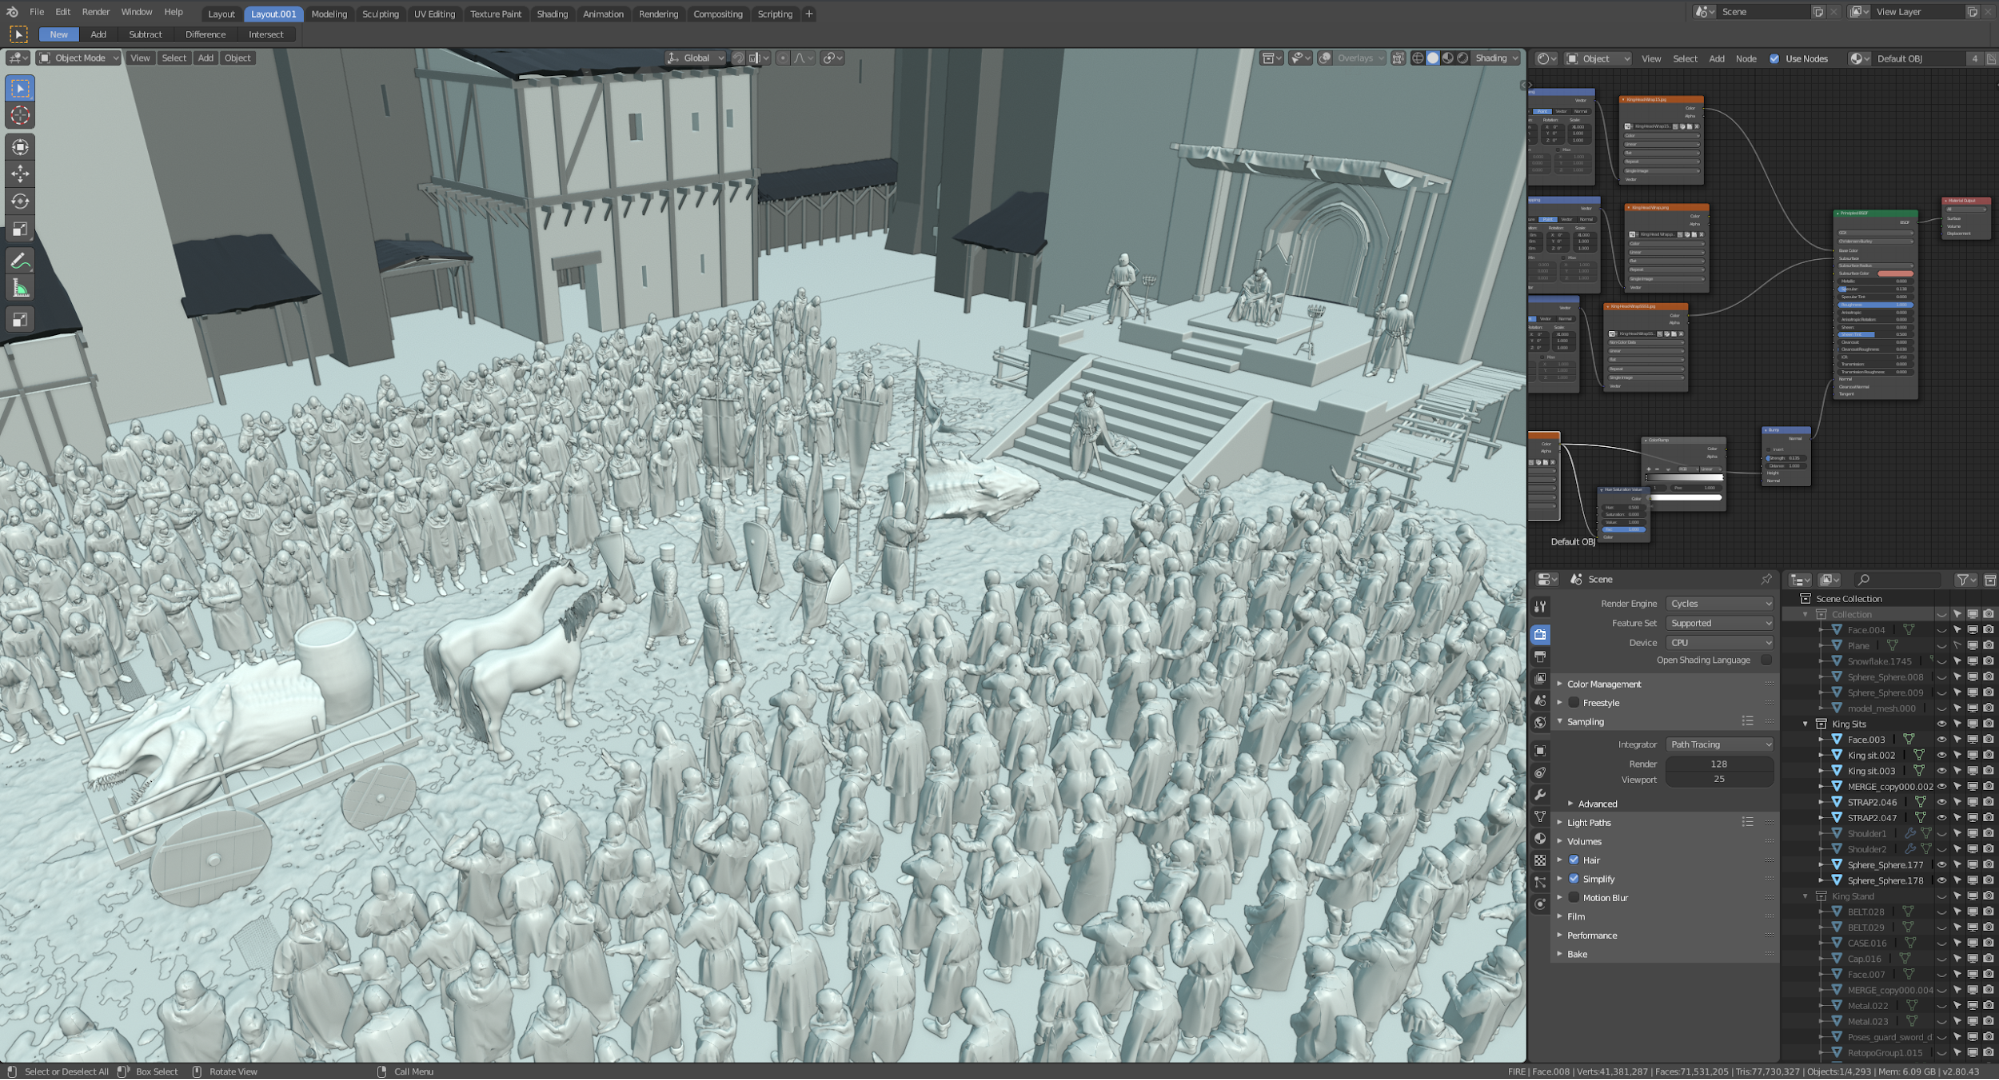
Here is the final layout of the scene. I was surprised by how many polygons Blender can handle. In some cases there were more than 130 million. I know it sounds crazy, but I don’t really care about polycount because my PC can make it happen and I don’t really need optimisation for the final image.
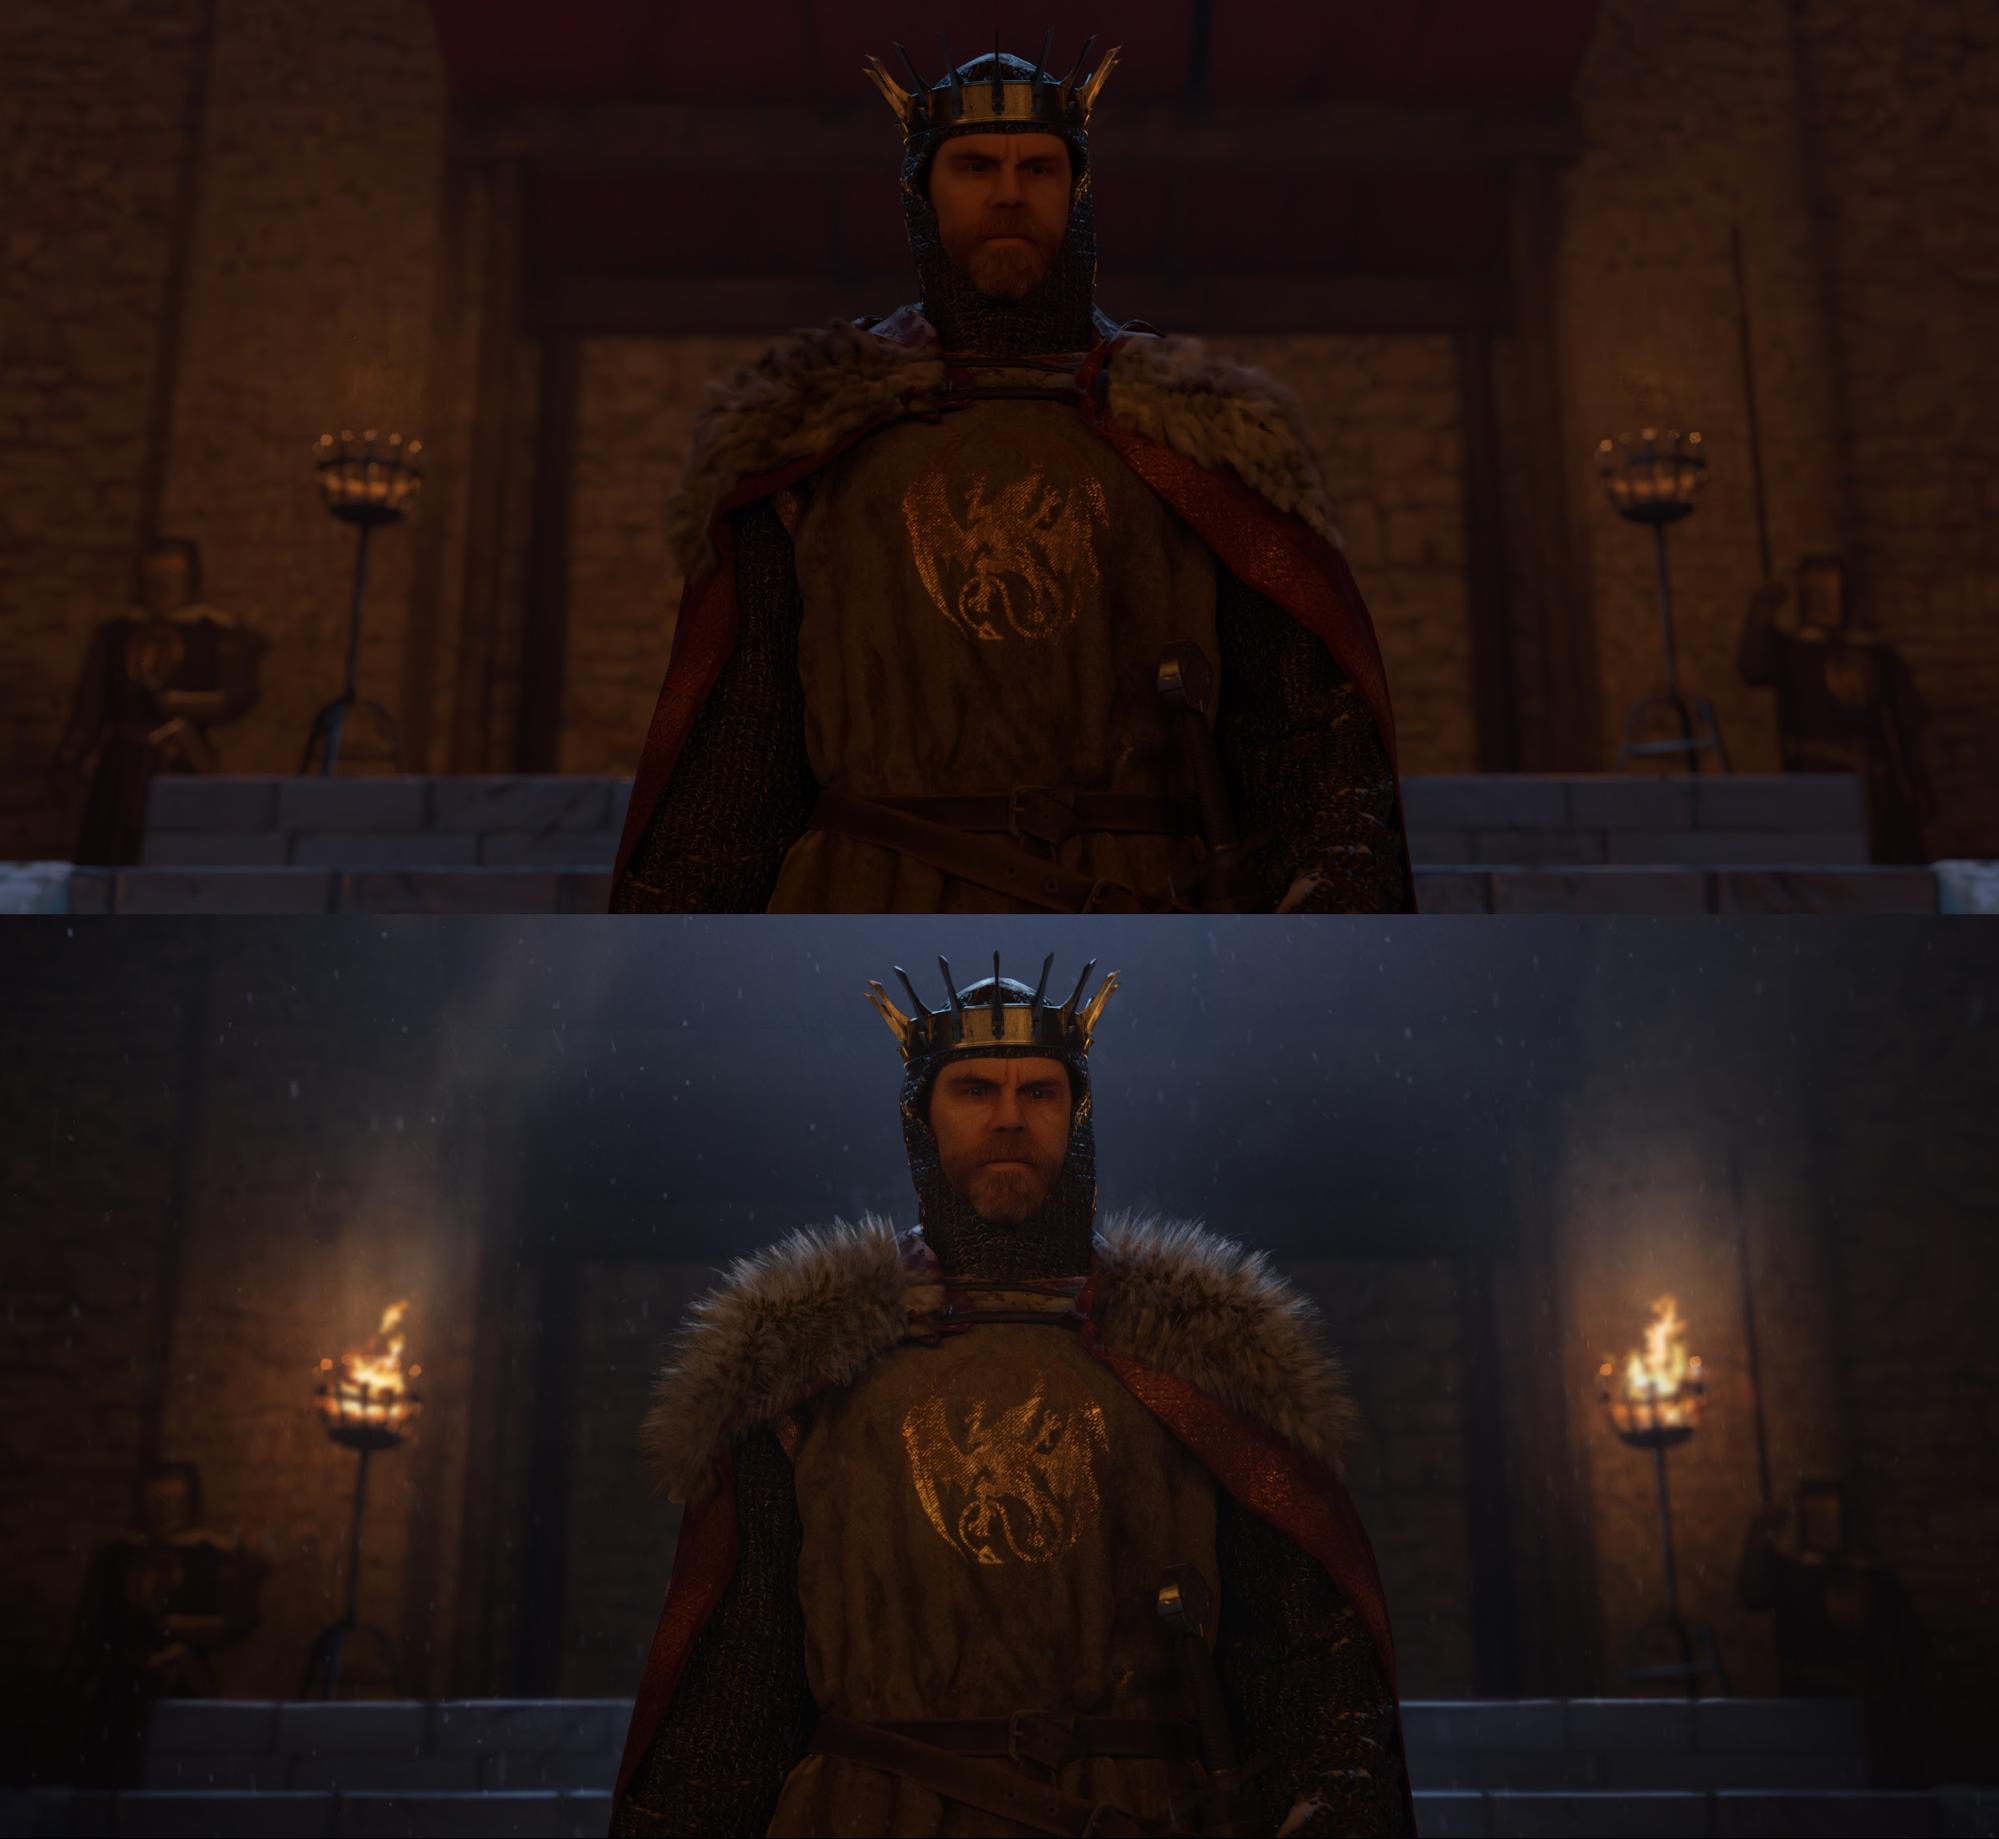
Overpaint for render improvements
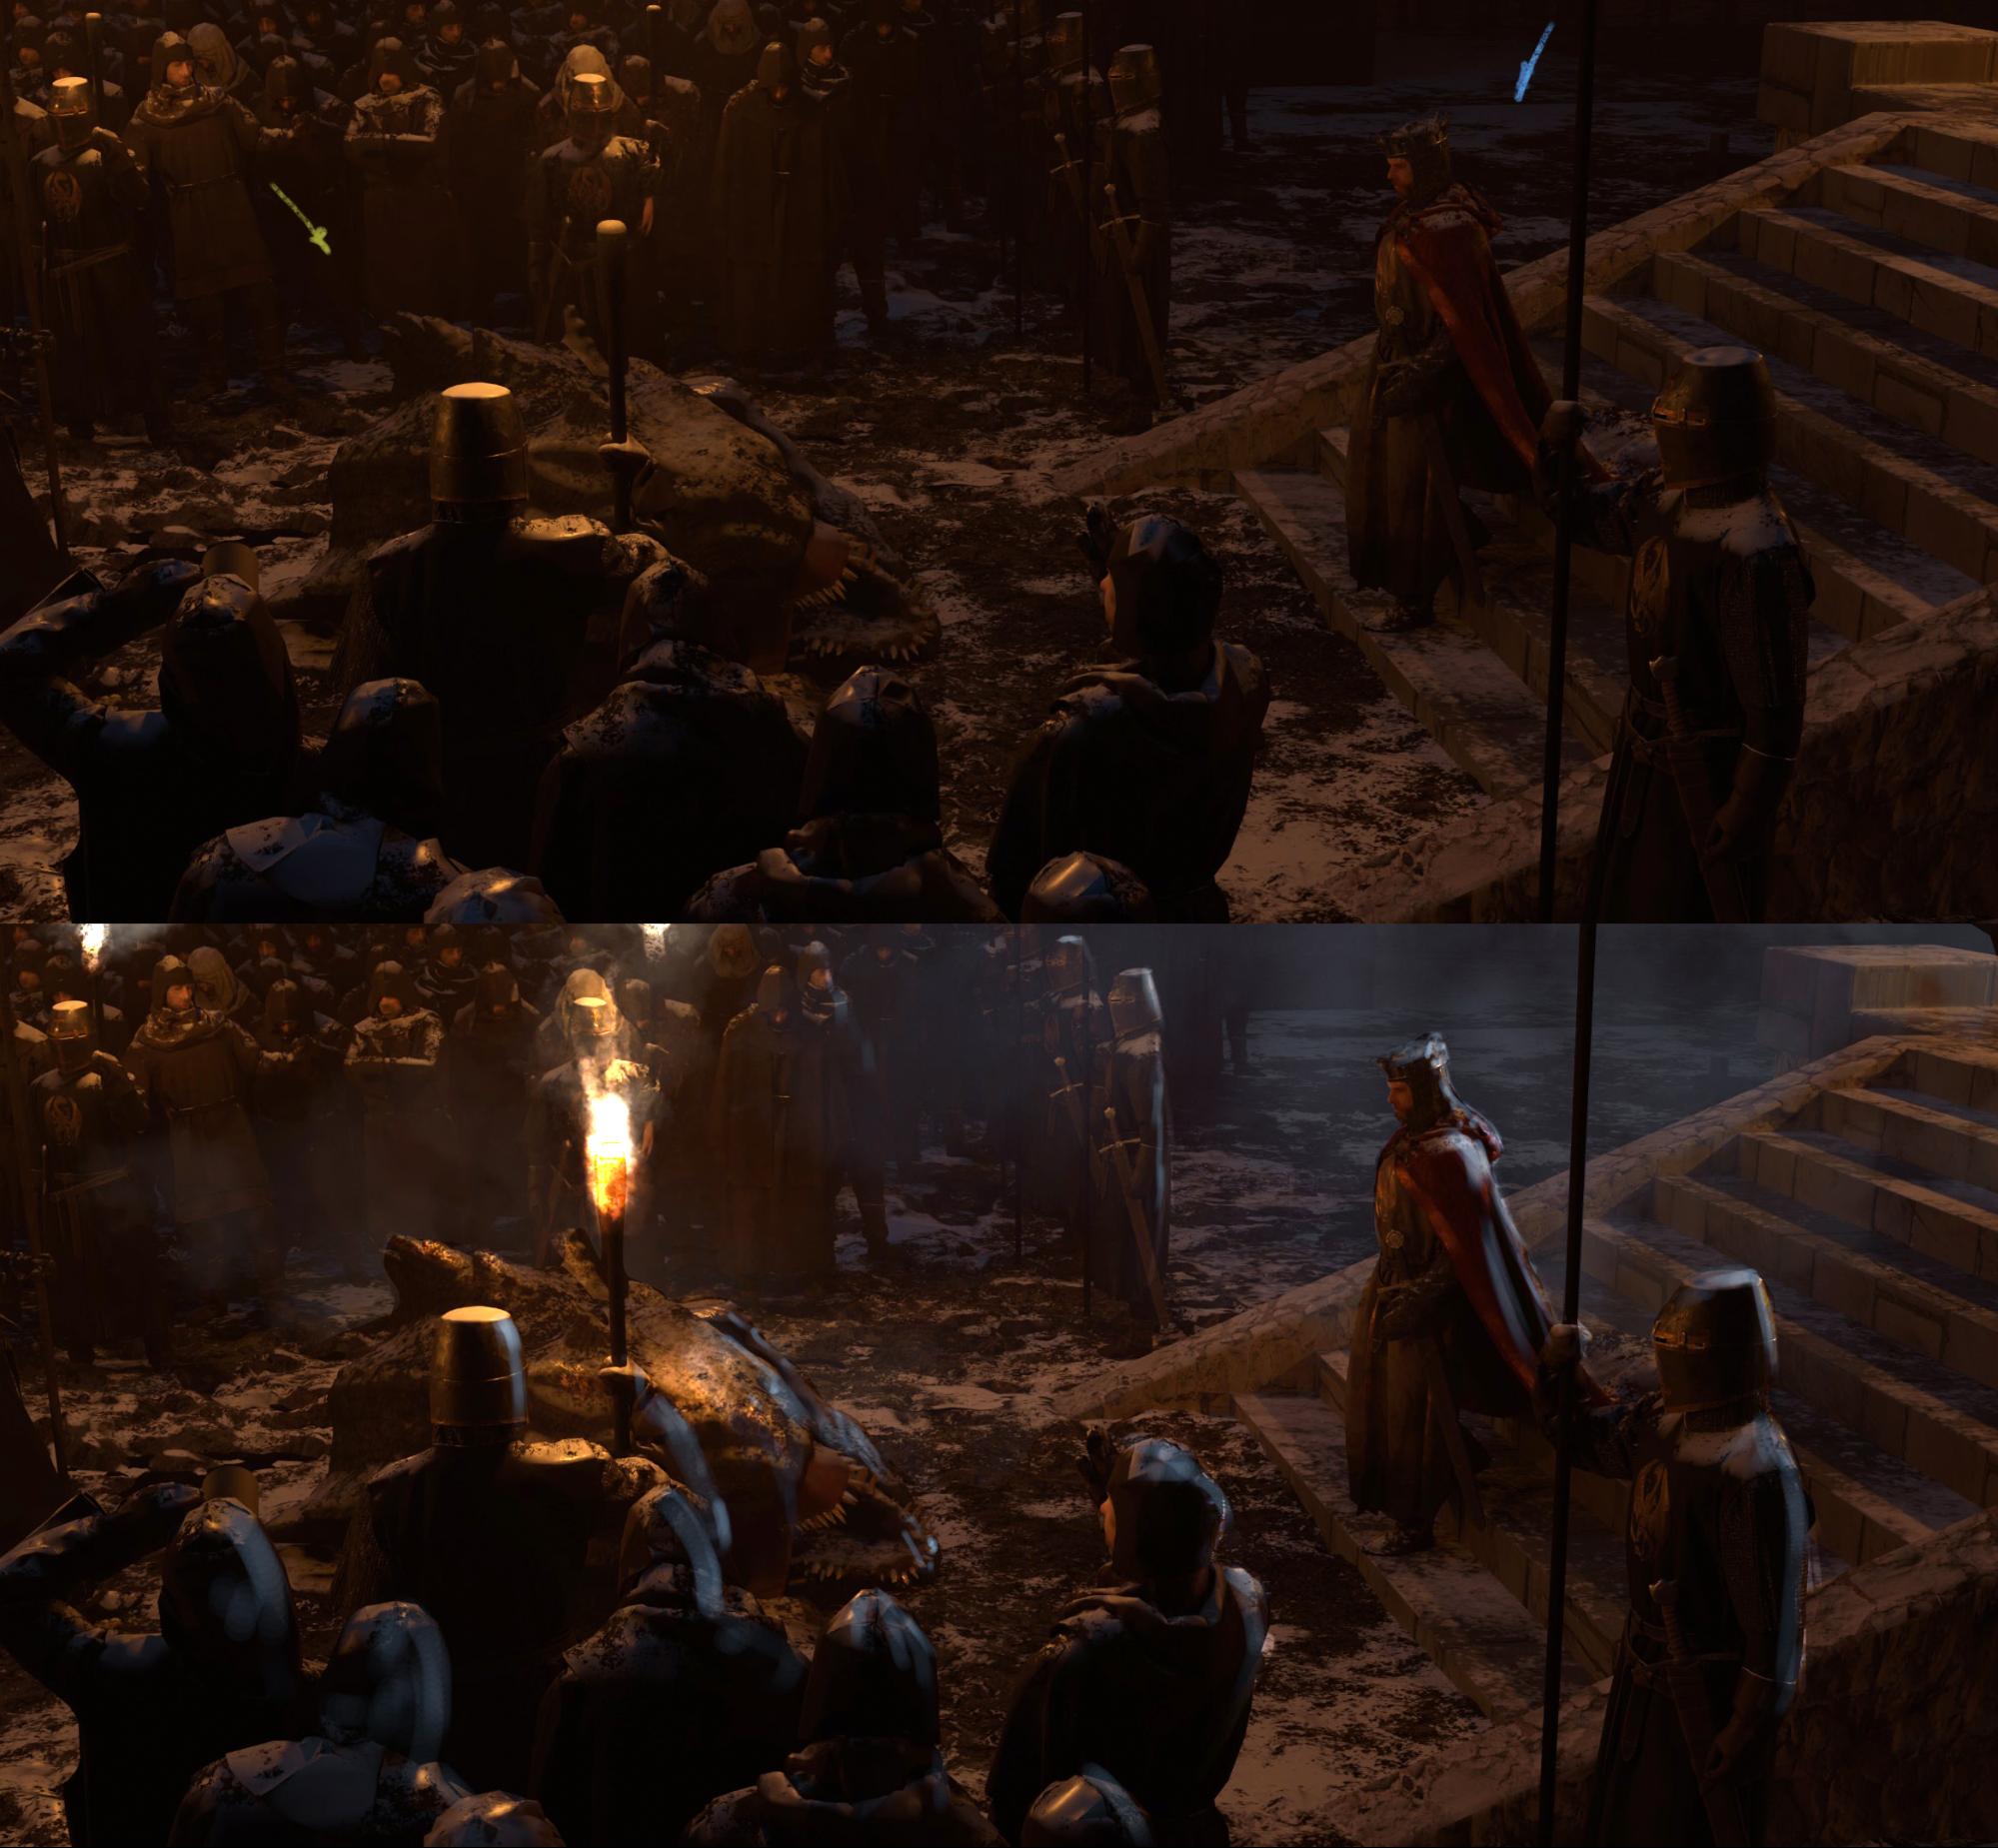
I did temporary renders of scenes and then made a quick overpaint for myself, just to explore how I needed to change lighting for the final renders.

Render Settings
I used pretty simplified settings for final renders. I didn’t need a noise free image with high sample count, and it could take ages to render it with so many polygons and lights in the scene. So my solution was low bounces count, simplified AO bounces, 2000 samples and D-Noise by Remington Graphics at the end. Each frame took about an hour to be rendered.
When I got renders, I started overpaintings. At this stage is was very important to render different passes for final compositing, such as material or object pass, zdepth pass and maybe a mist pass. Choosing the focal point, adding some effects on top, reducing visual noise in unnecessary parts of the image, some photobashing and a little bit of overpainting and we were done.
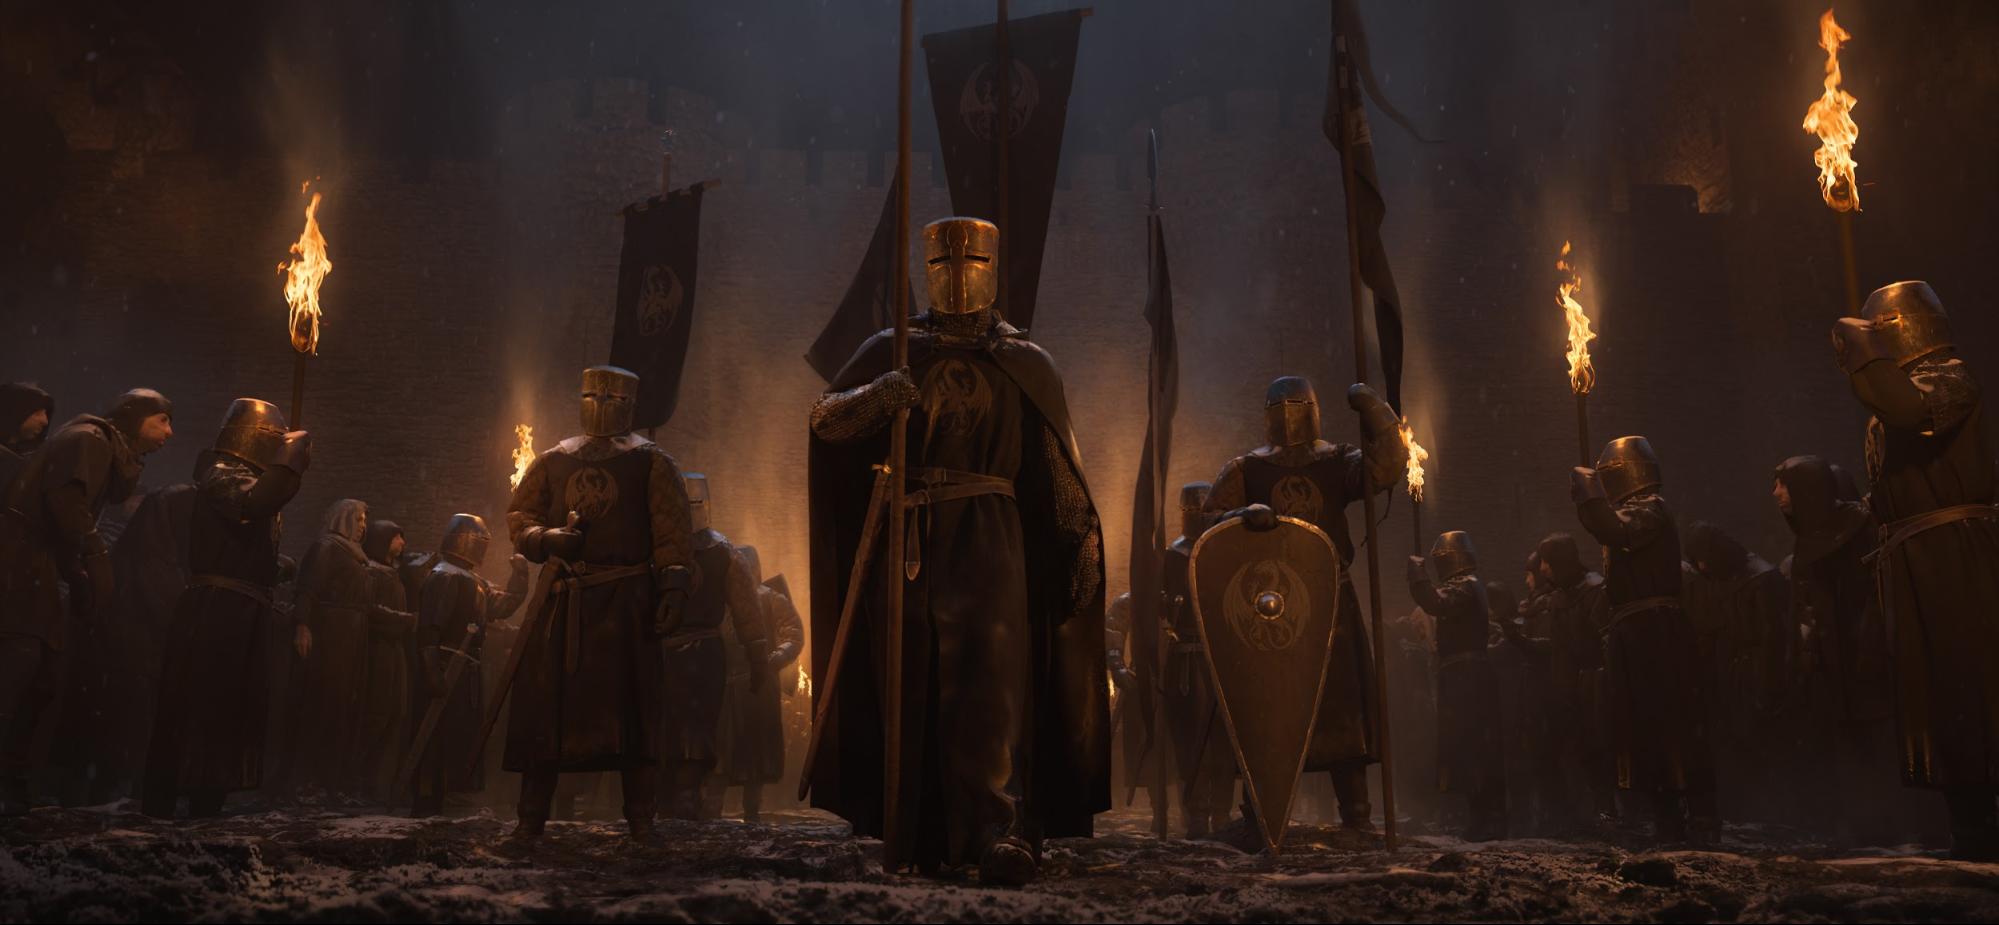
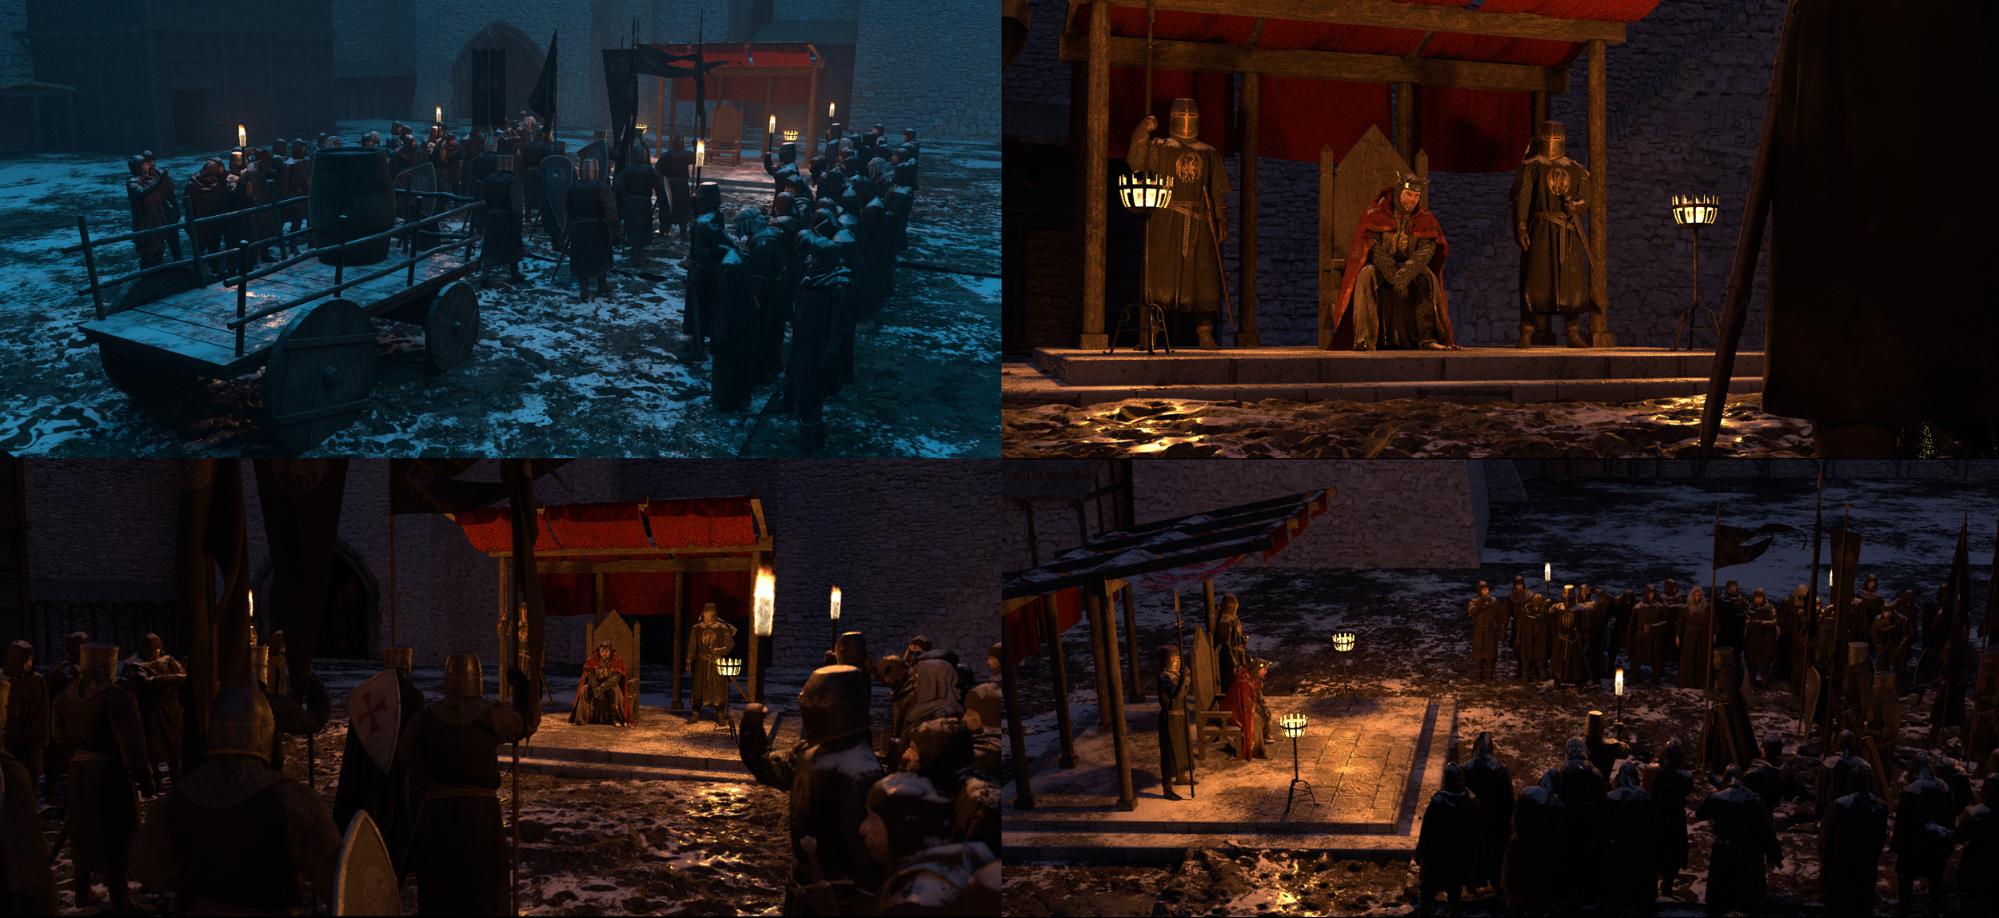
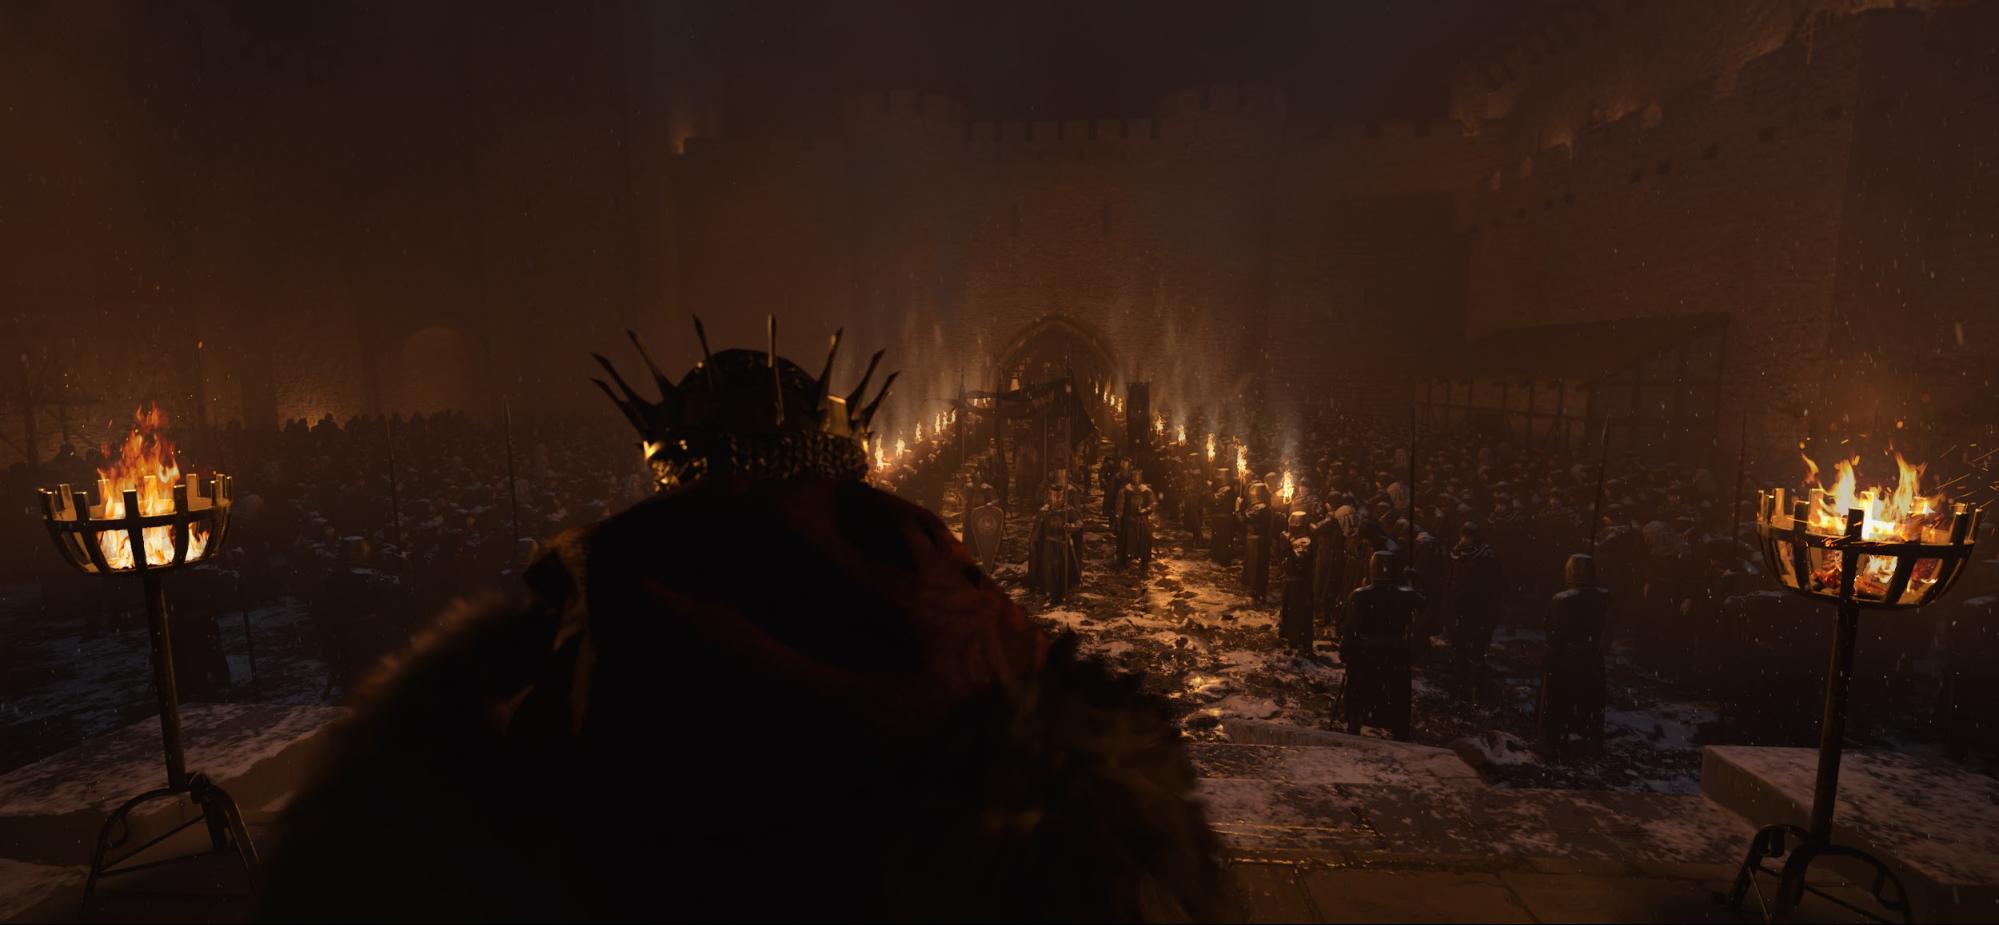
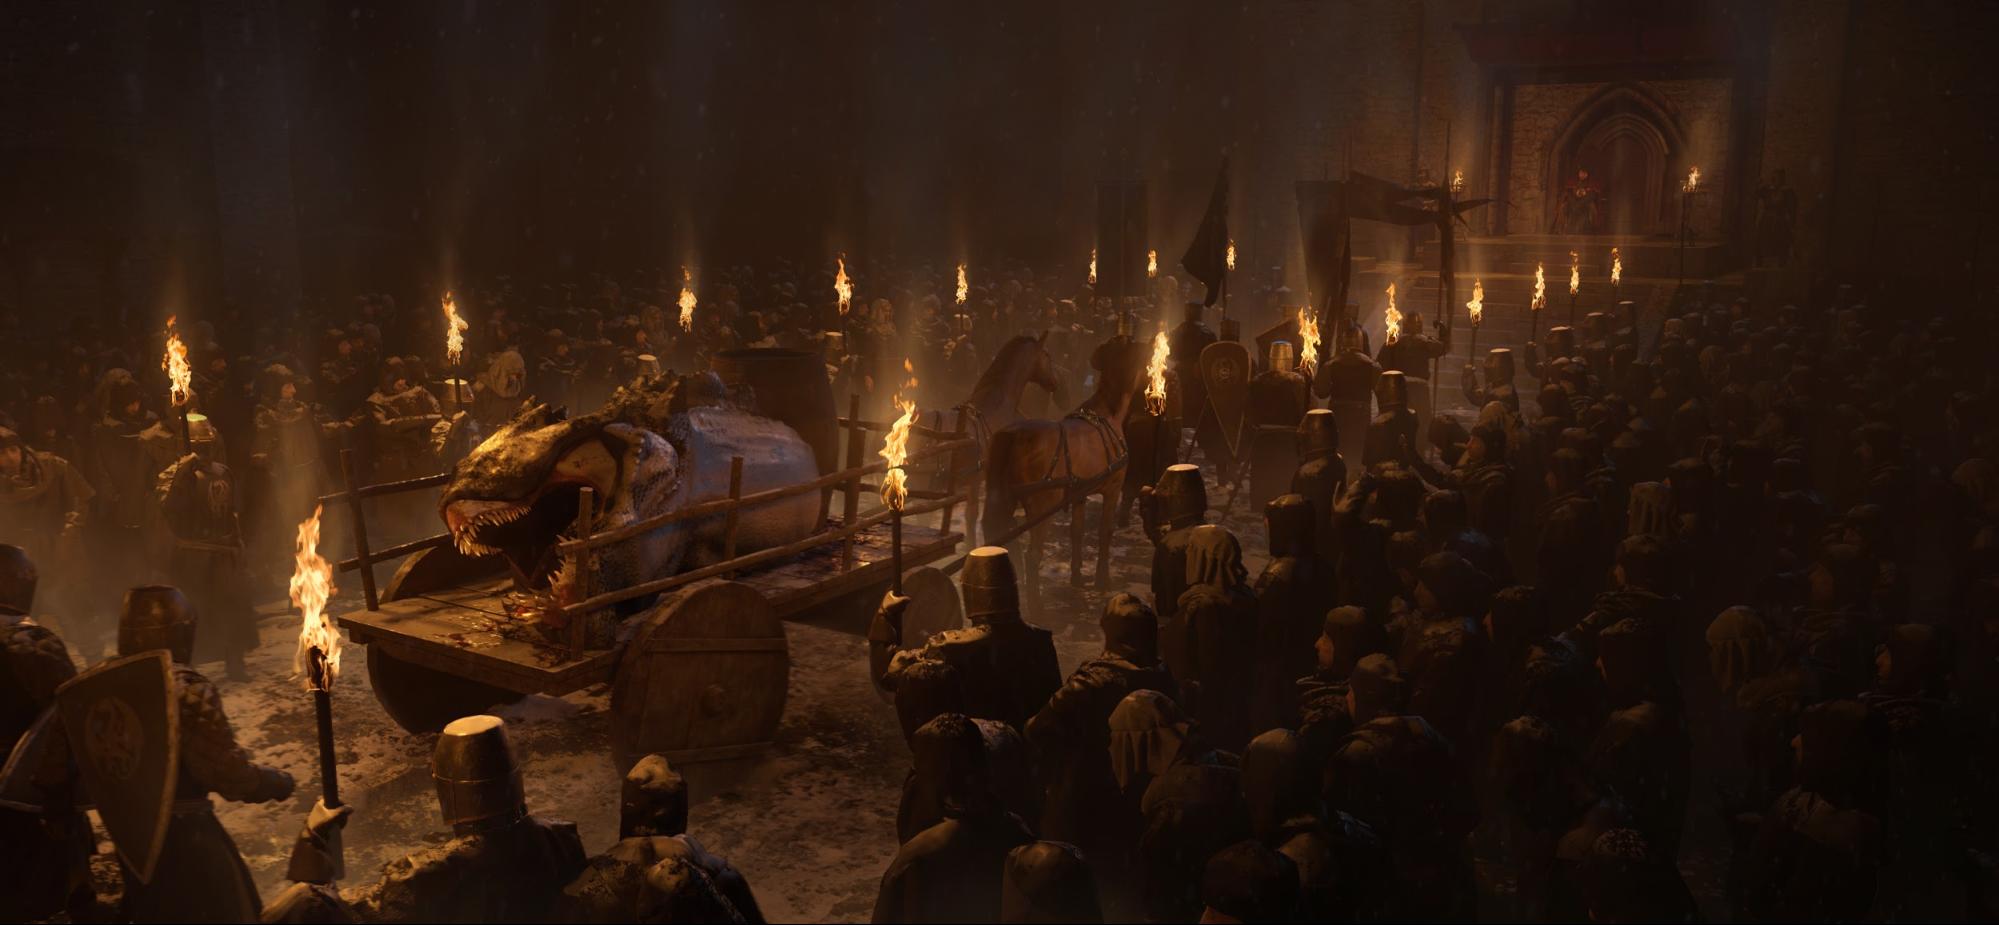
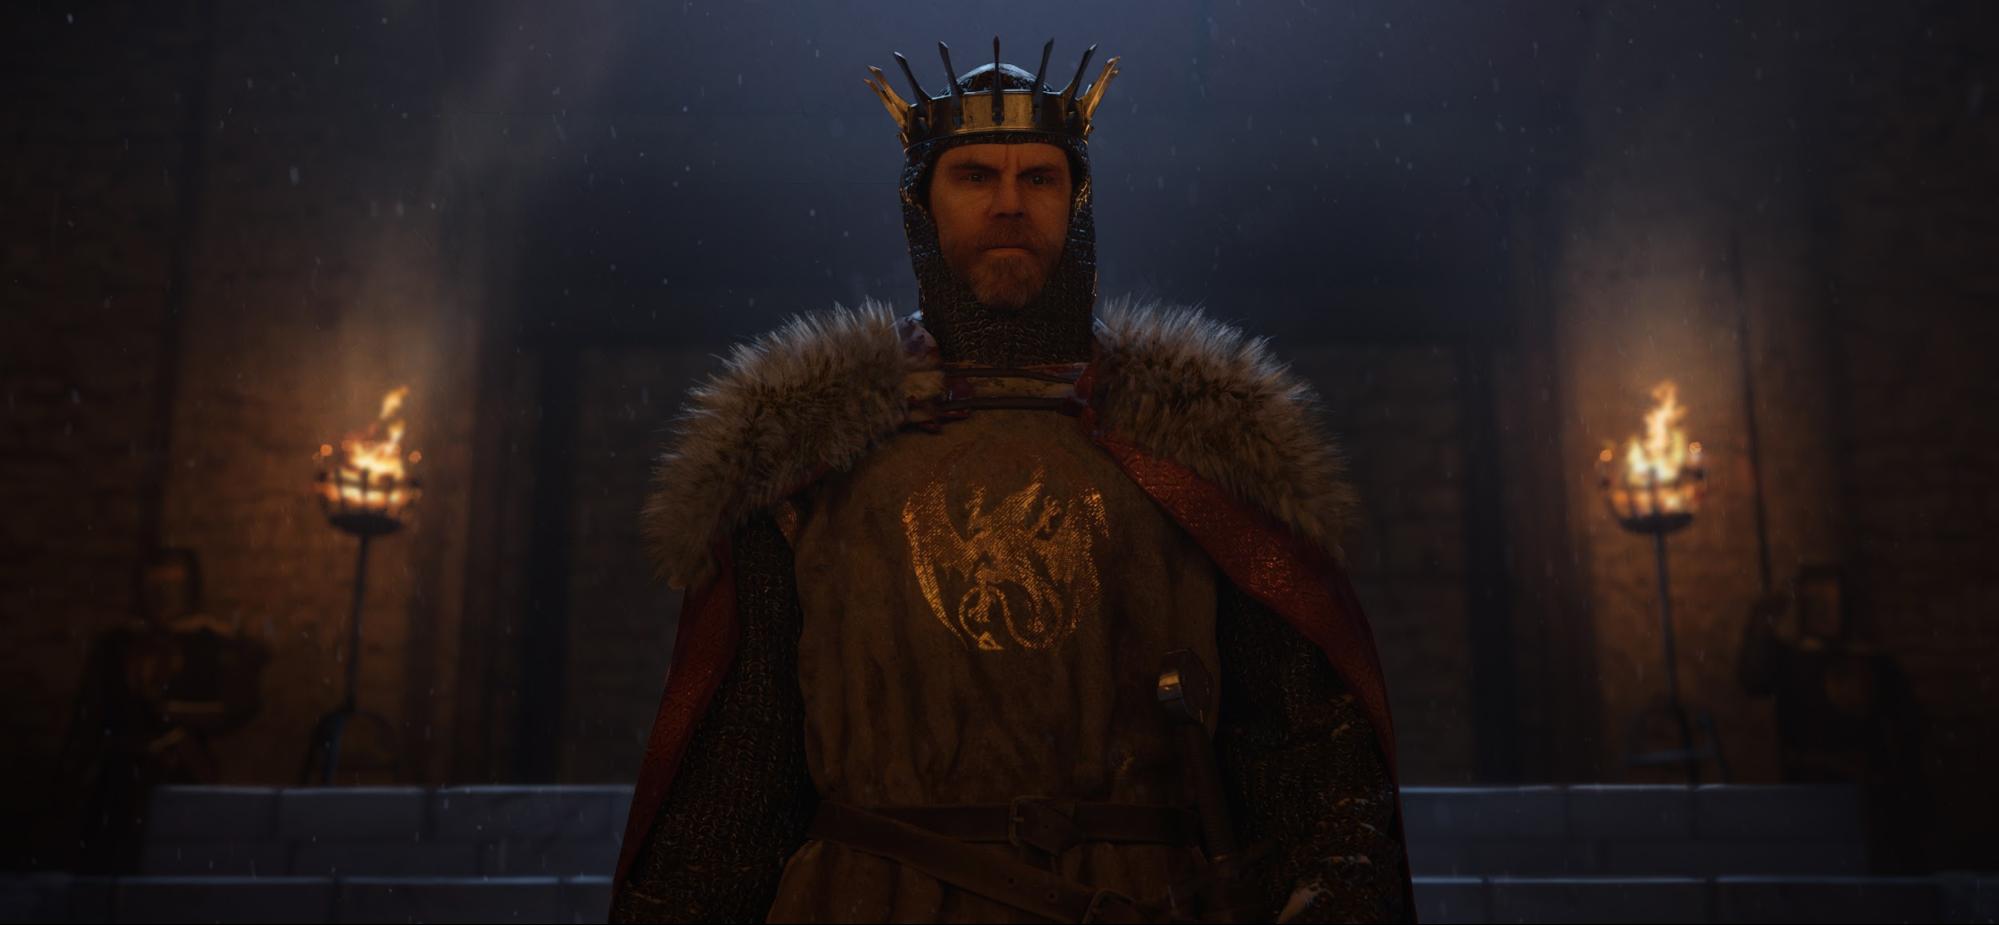
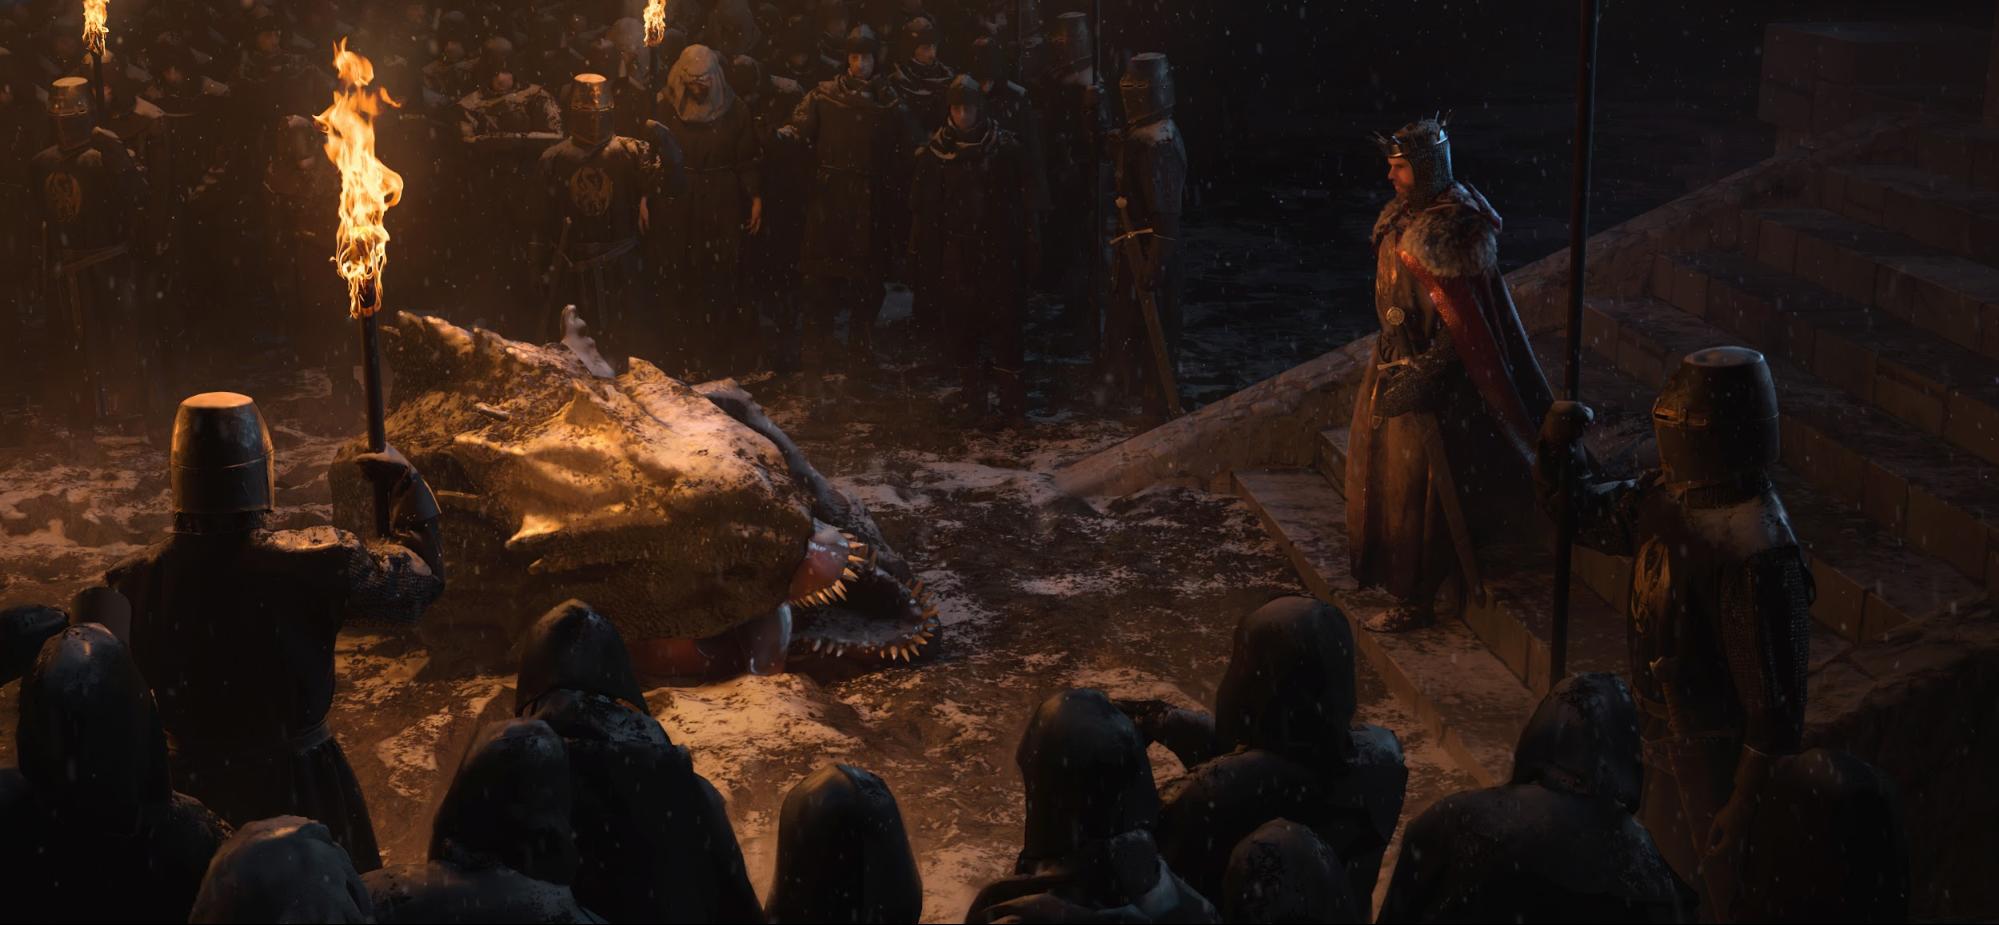
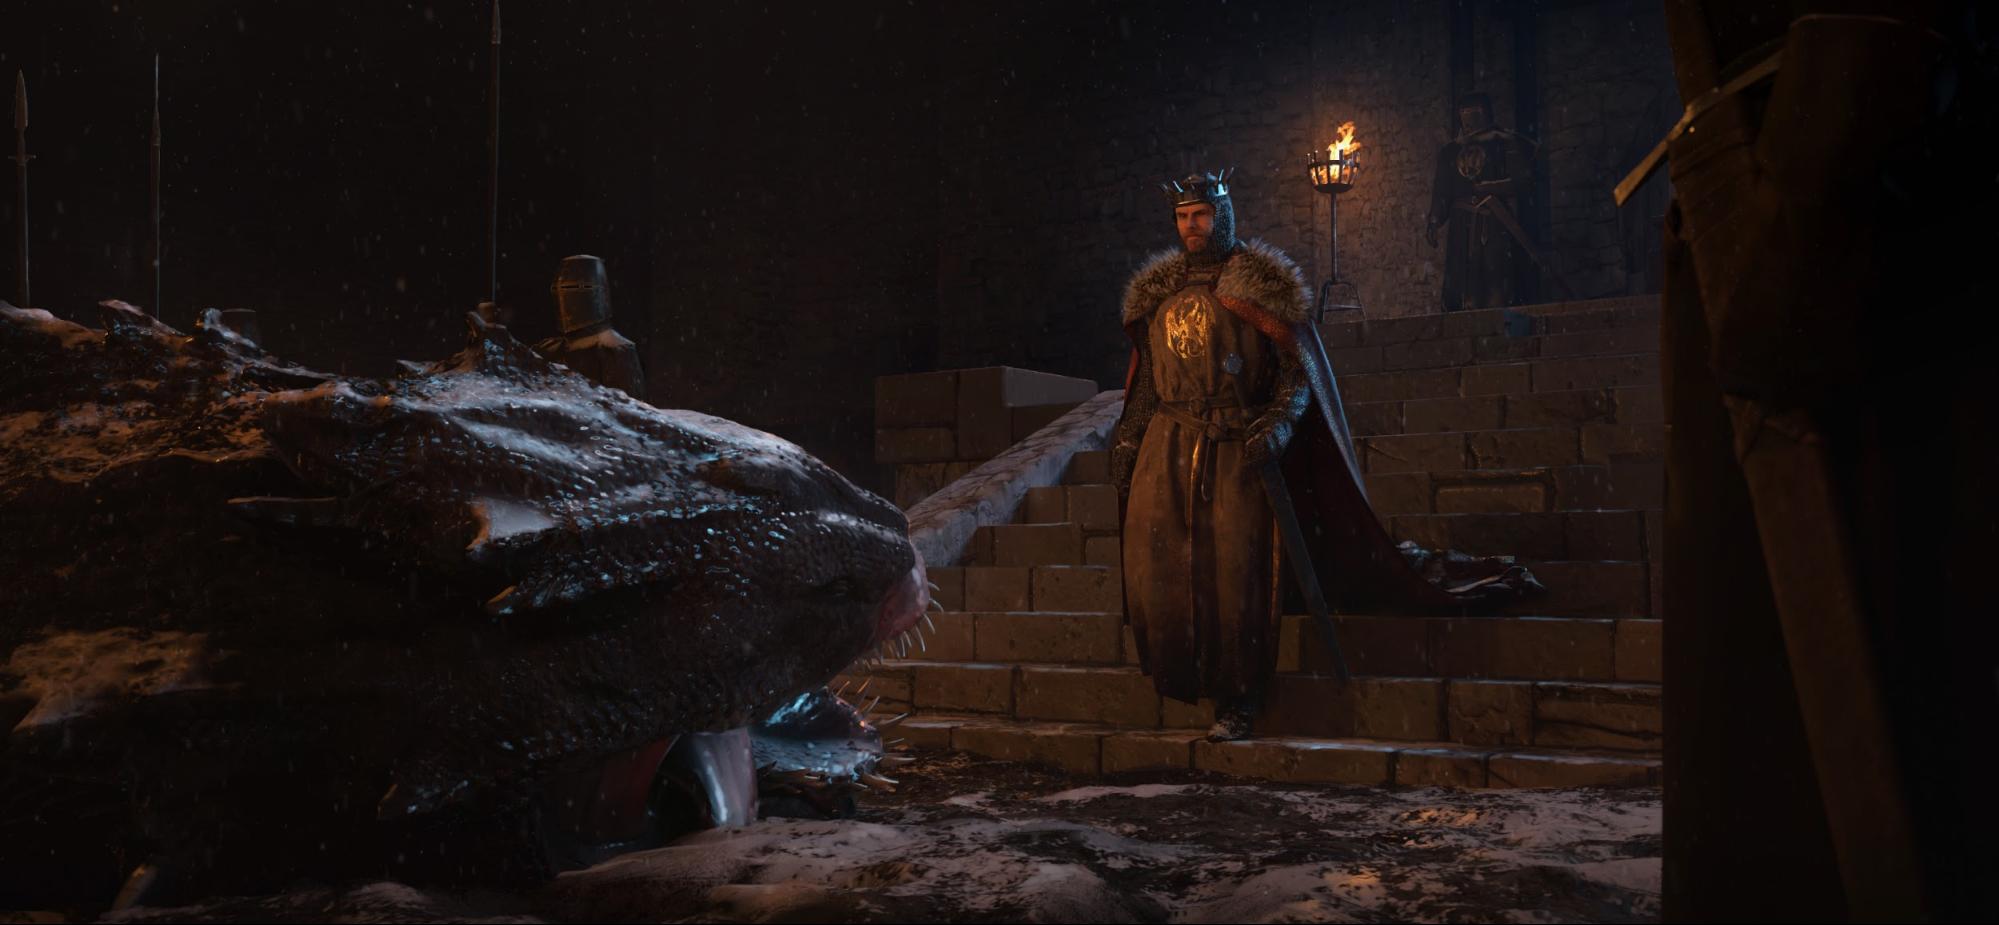
The final renders
Here are the final frames of the “No More Dragons” project:
Final notes
This project took around a week or maybe a little more. I learned a lot of new stuff like fire simulation, hair creation, particles and many, many more. Also I loved Blender even more after that.
I hope you have enjoyed it and maybe learned something useful! Thanks for reading, and if you have any questions, don’t hesitate to message me on my Artstation or Instagram. You can find knights, peasants and castle assets here.
P.S There is a prequel to this story I did recently, don’t miss out on it :)
About the Author
 Oleg Zherebin, Concept Artist | Designer


