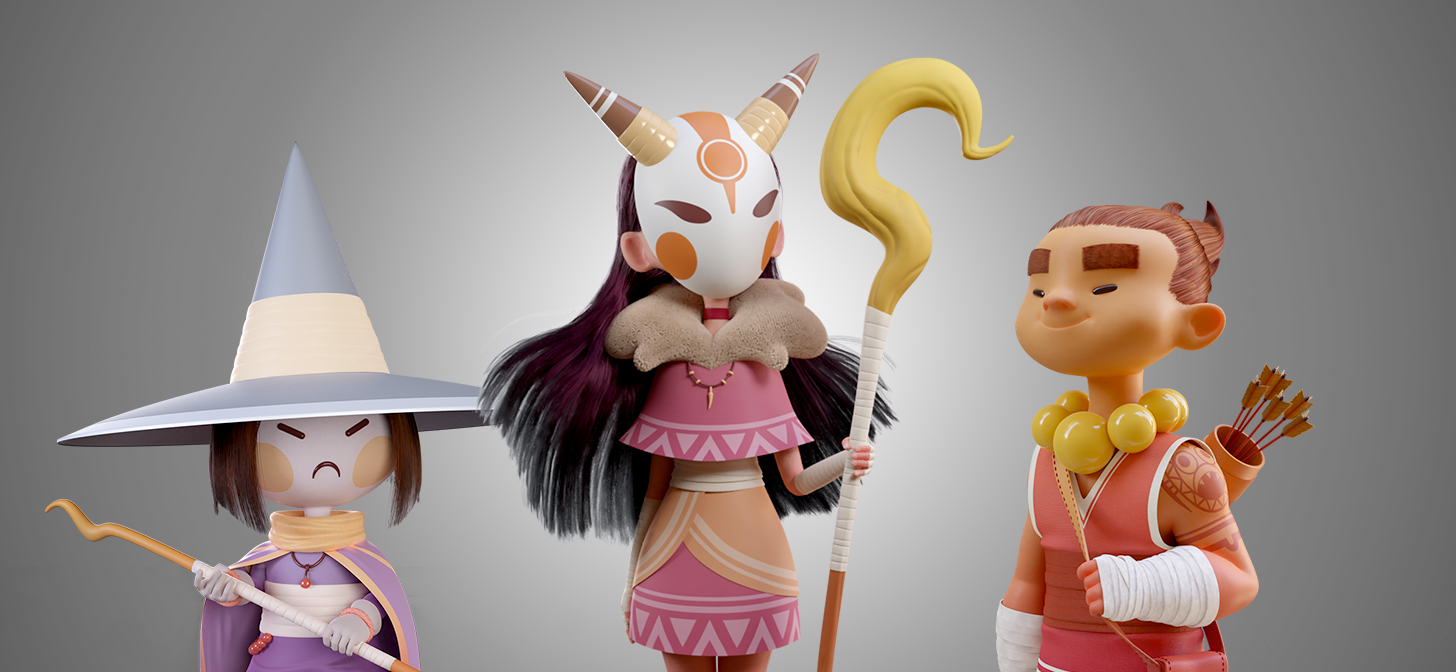
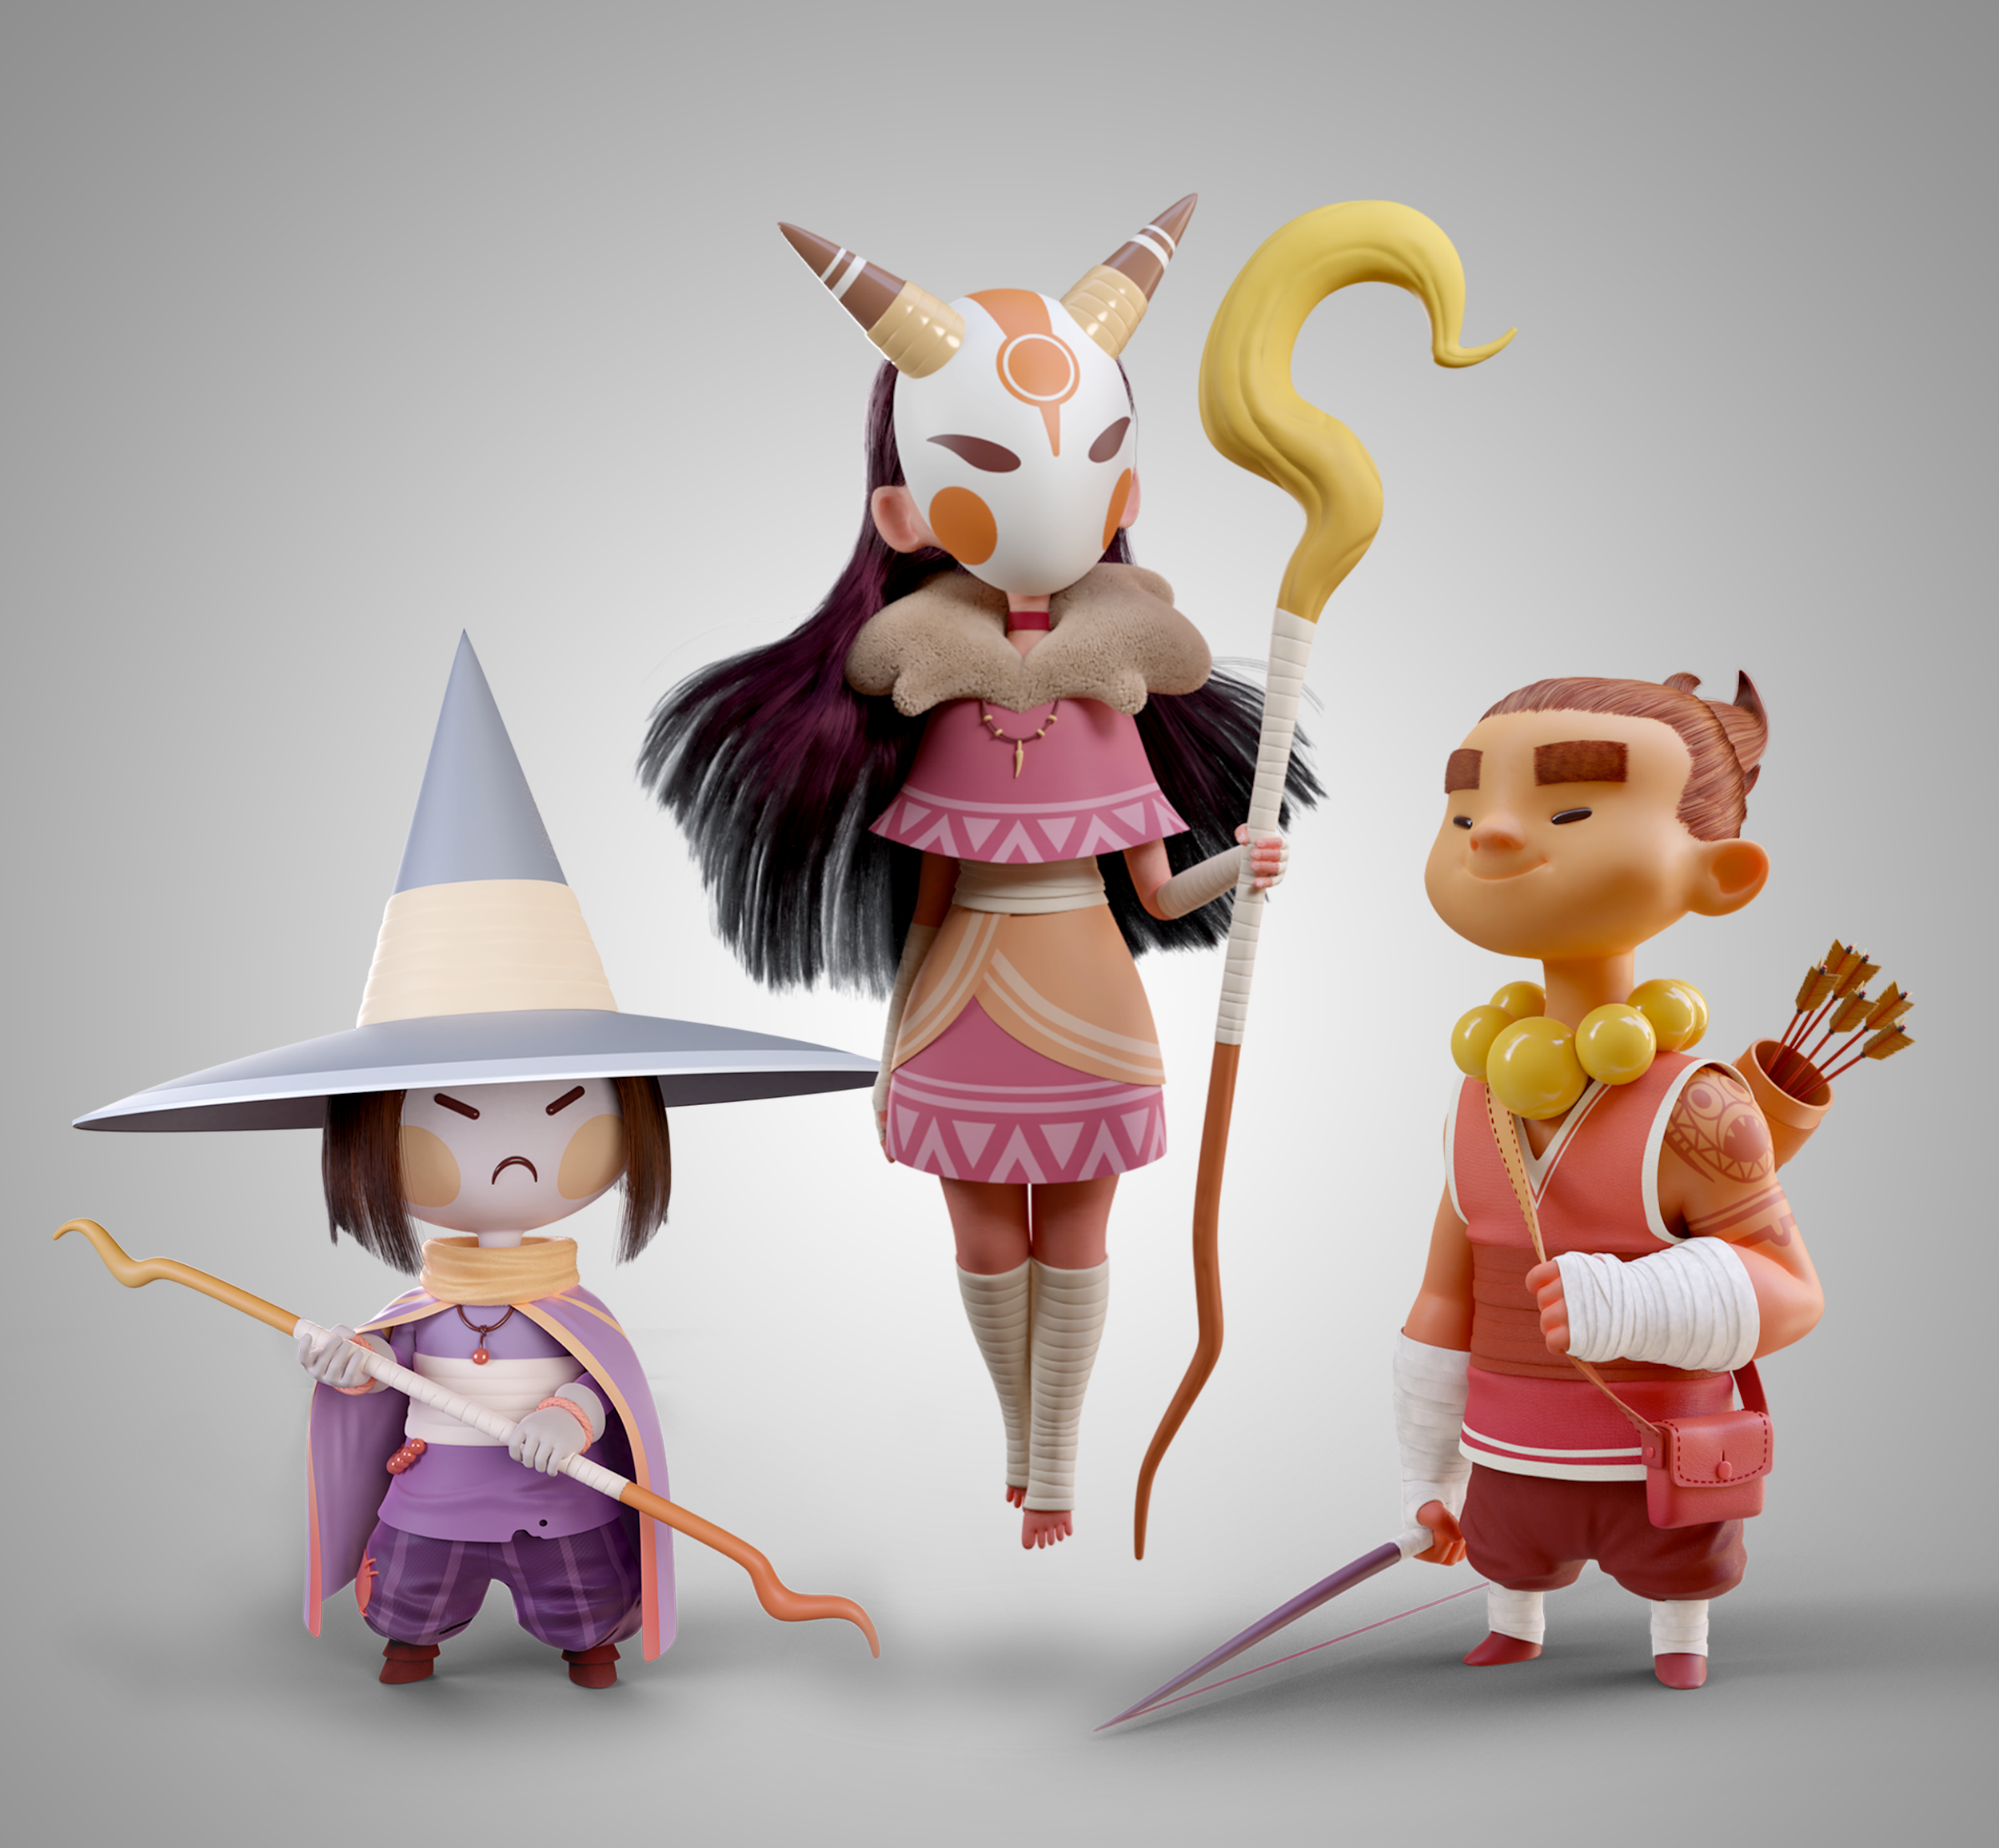
Behind the Scenes: Team of Three
About
Hello, My name is Thiago R. Soares (TySoares), graphic designer and 3D artist, I’m 35 years old and I’m from Brasilia, Brazil.
My first contact with 3D started in 2008, before graduating in graphic design from Universidade Paulista – UNIP. I tried several times to learn how to model on my own, but I only began to take it seriously in 2014, when I met the ZBrush online course at Melies that opened my mind.
Inspiration
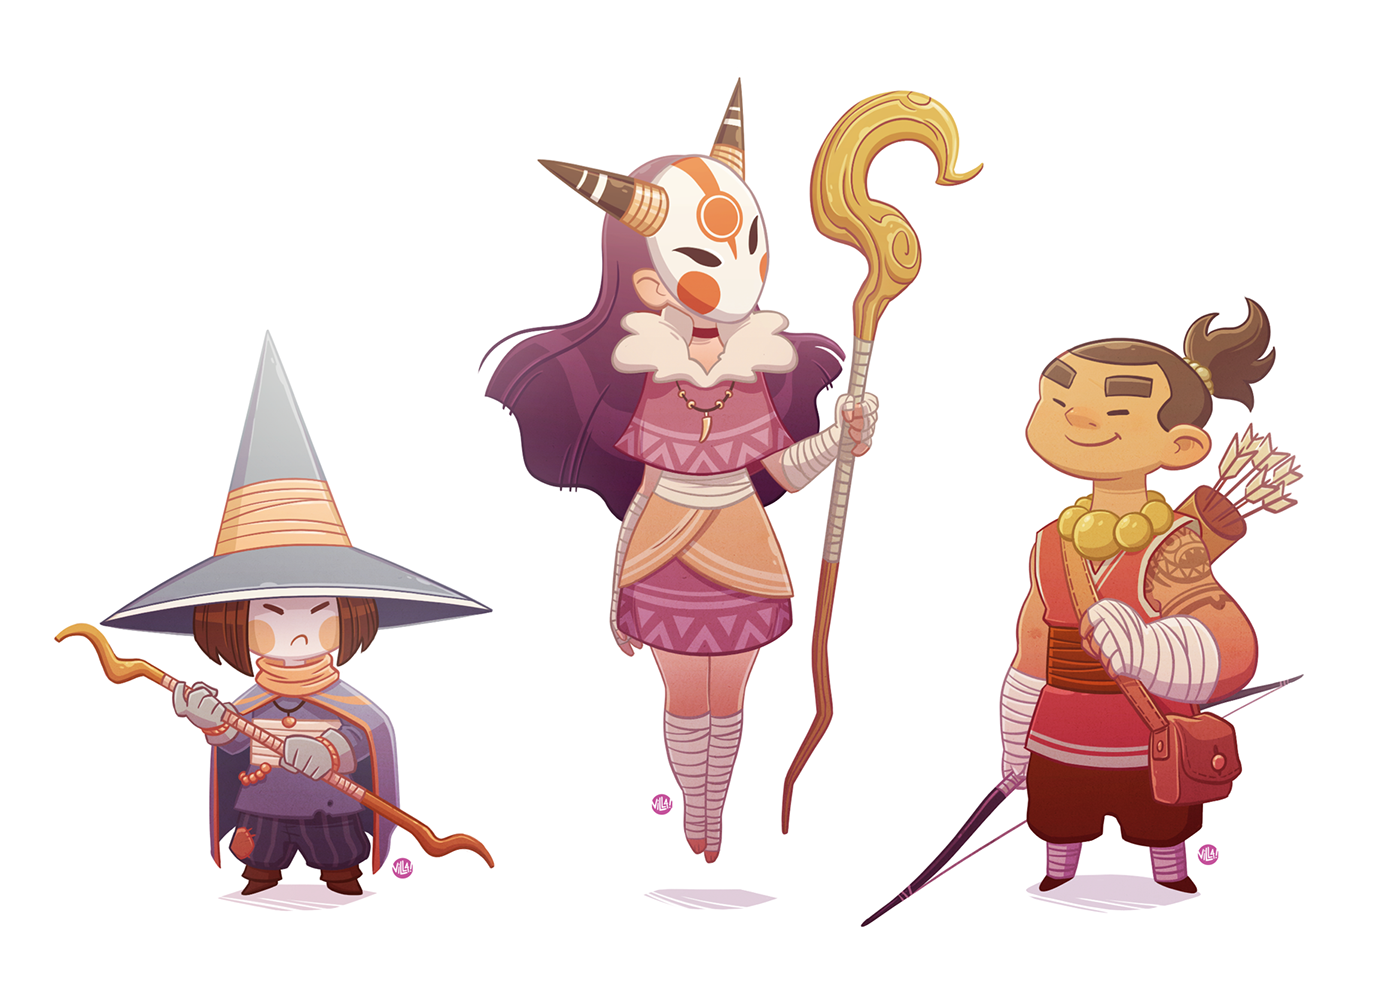
My inspiration for this project was the work of Jordi Villaverde and his captivating illustrations.
I was looking for models that caught my attention for colors and shapes and that somehow, would get me out of the comfort zone and contribute to the learning of the tool. Team of three has all these characteristics; it was the concept I chose to expand my studies with Blender hair particles.
References
Tools
Hardware:
- I5-4670
- RAM: 16GB
- VGA: AMD RX580 8GB
- Old (but gold) Wacom bamboo pen and touch
Softwares:
- ZBrush
- Blender 2.79
- Add-ons:
- Hair Net
- Light Studio
- Retopoflow
- Add-ons:
- Photoshop (post production)
Sculpting
I will show the process in detail of one of the characters, since I used the same workflow for all three.
I start with the character block using ZSpheres until I find the proportions.
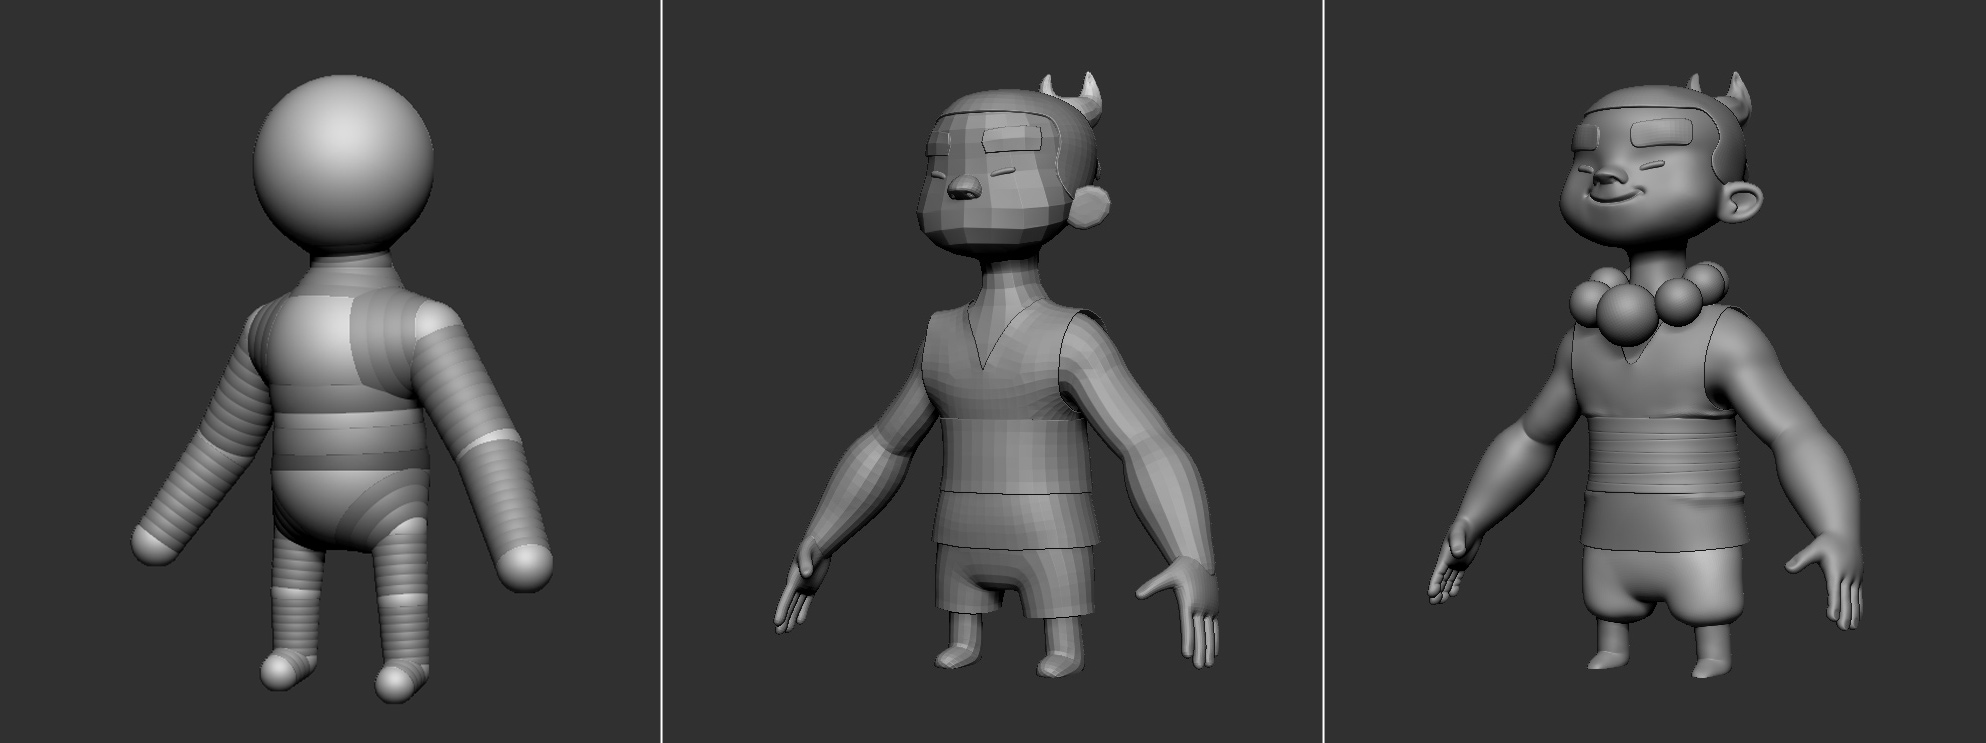
Before exporting to Blender, I decimate the mesh using decimation master, it triangulates the model, leaving the mesh lighter and without loss of detail.
Retopology
I use the great retopoflow addon tools for retopology.
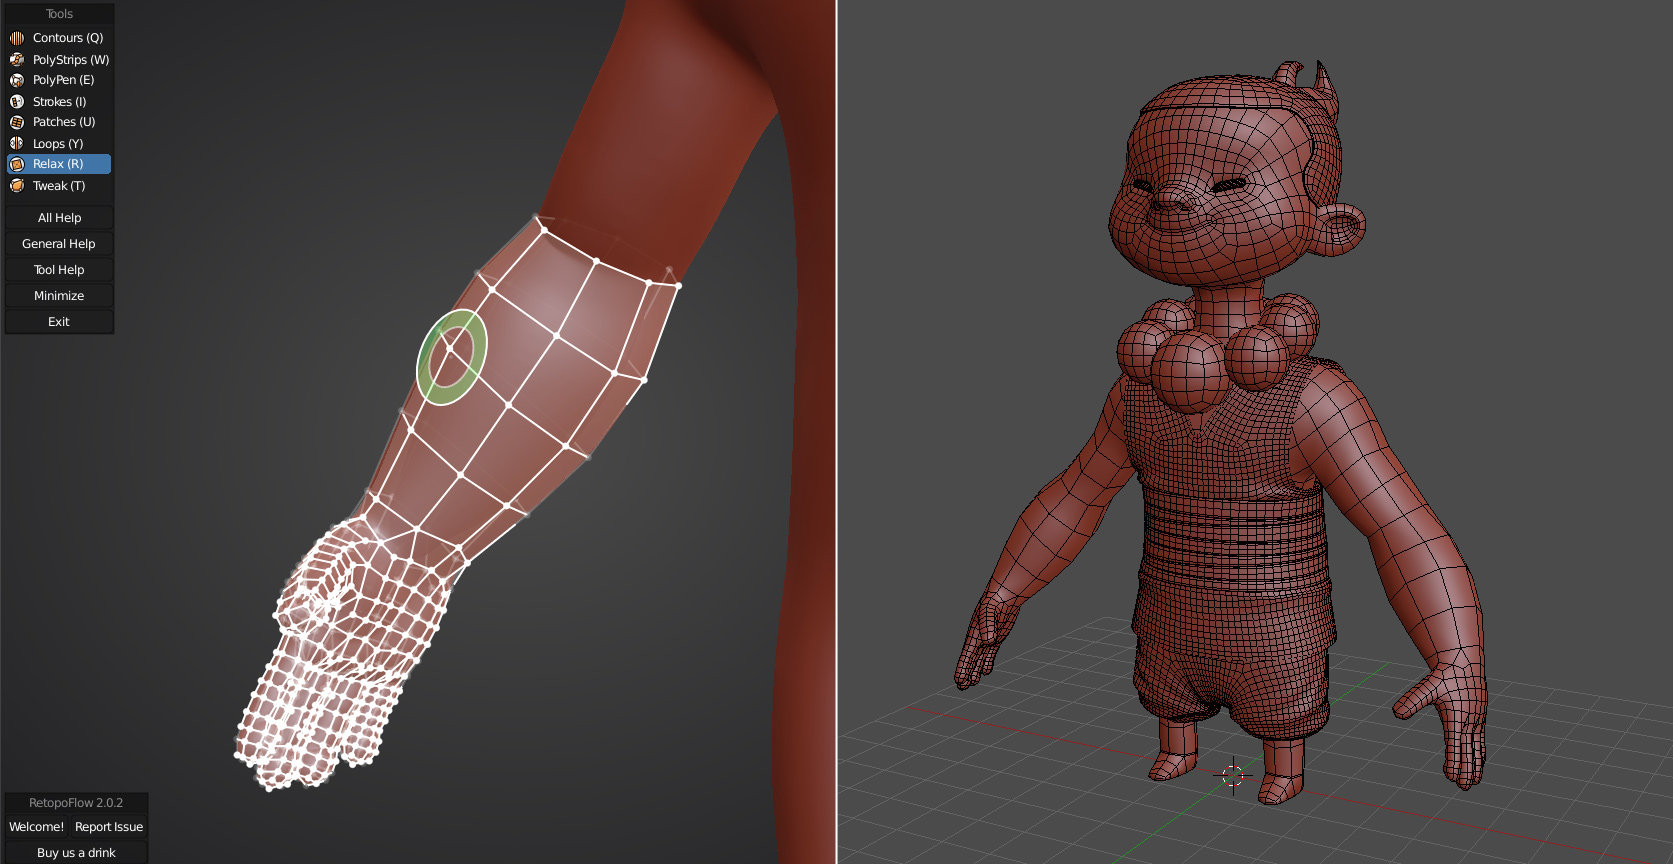
With the mesh now uniform, it’s time for the UVs and texture application.

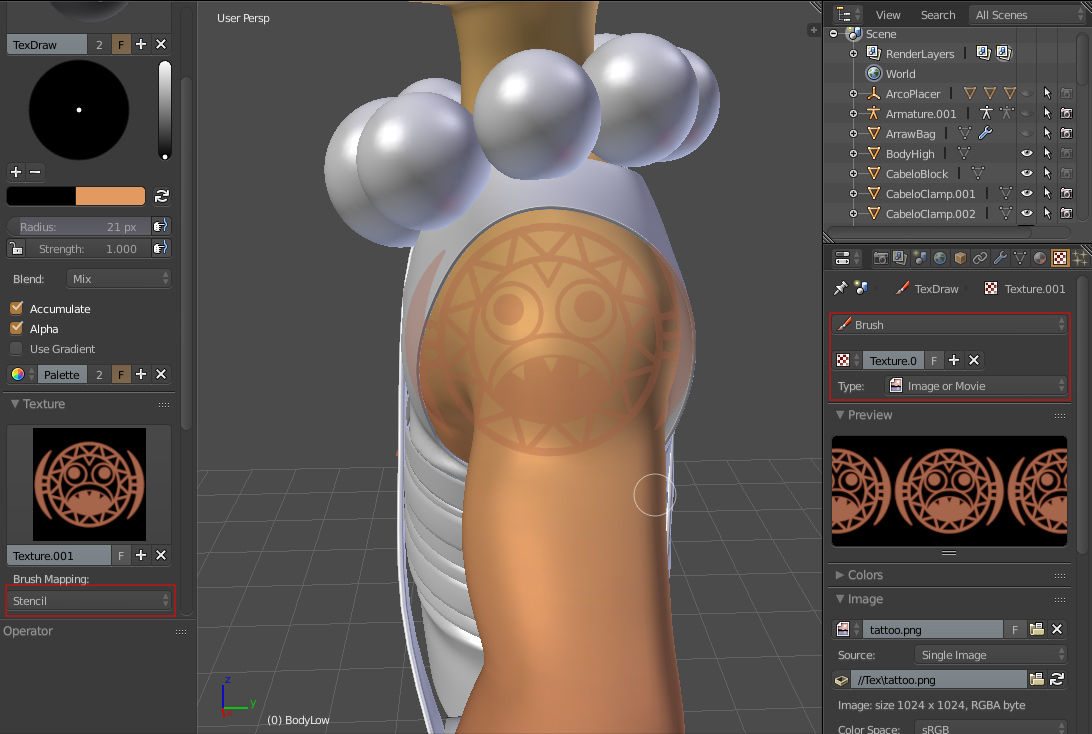
Texture
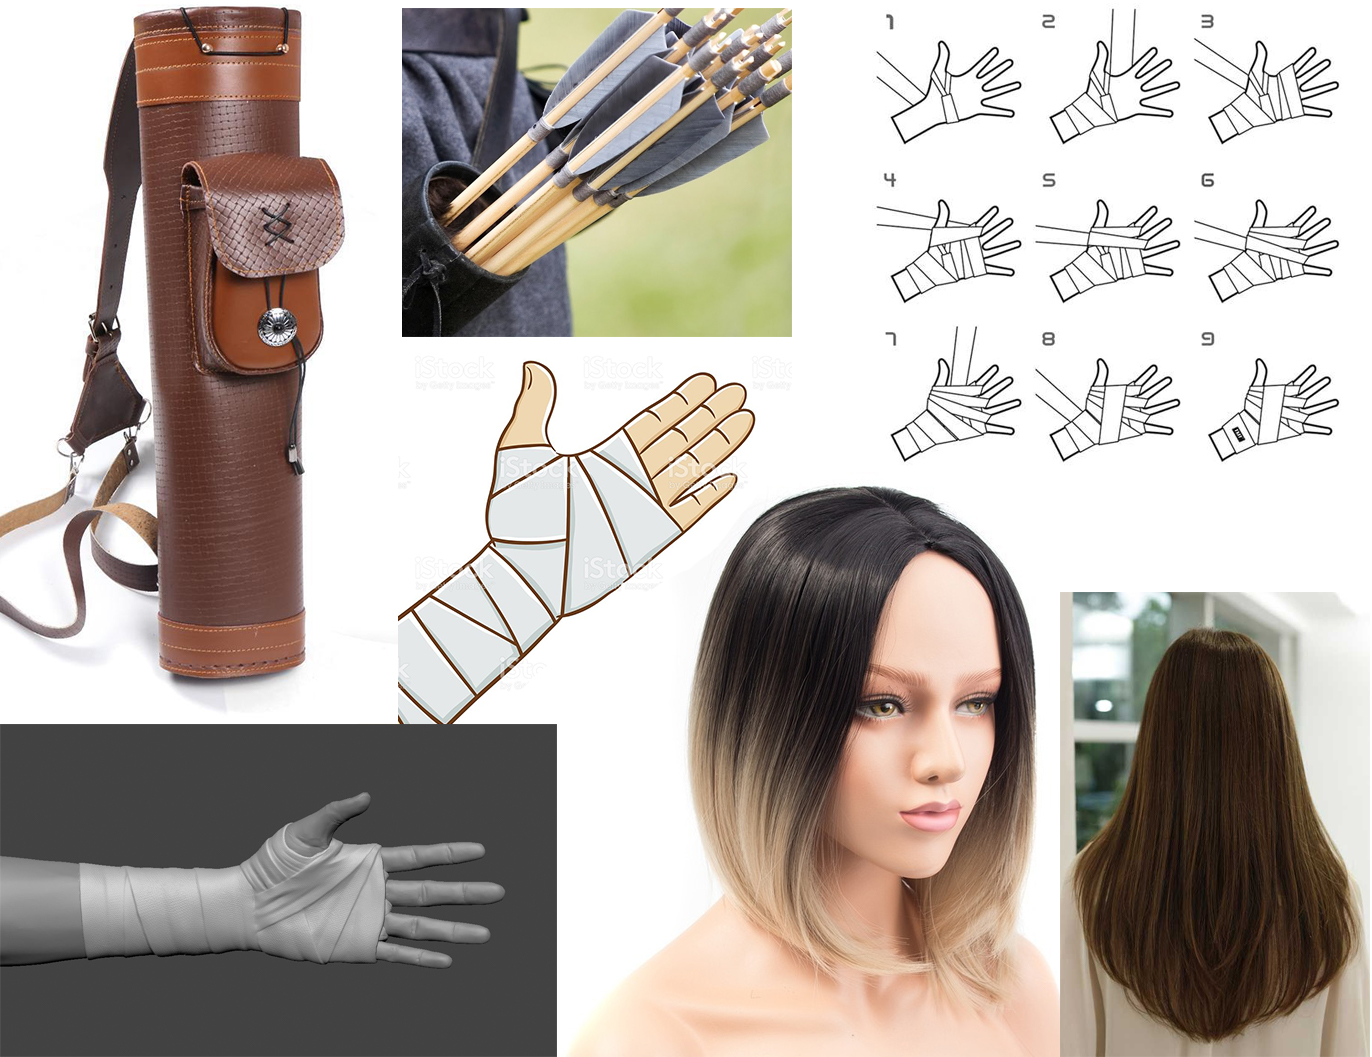
I used Blender’s texture paint tool to paint the textures directly onto the model, basically gradients. For tattoos, I imported an image I had drawn and used it in stencil mode. I exported the textures and adjusted them in Photoshop.
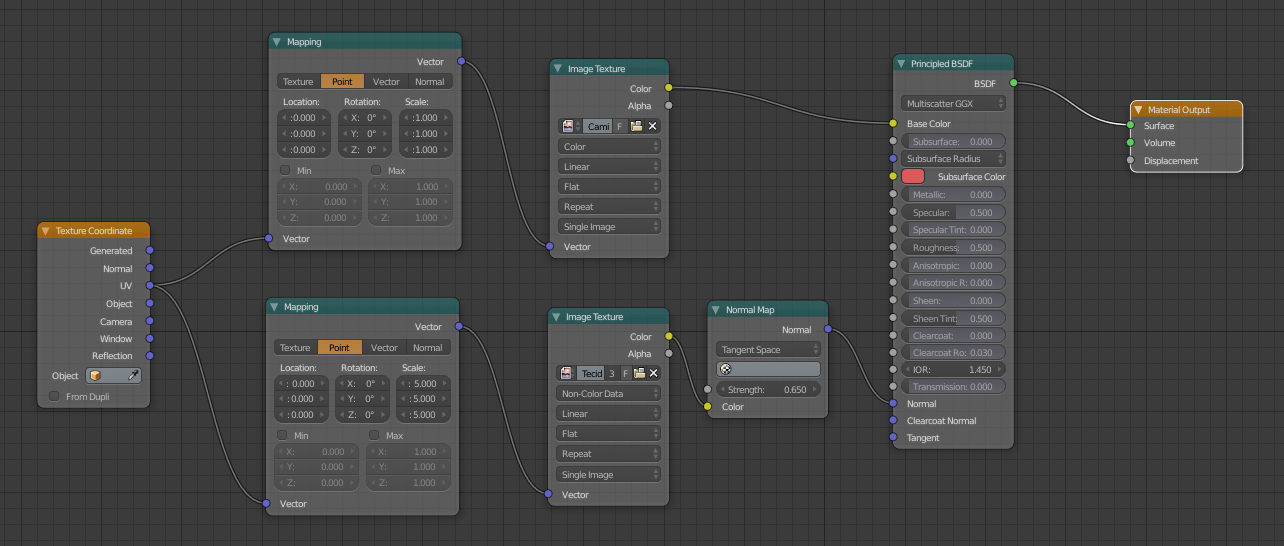
With the exception of hair, I used the principled shader for all materials.
In the clothes of all the characters, I used this setup.
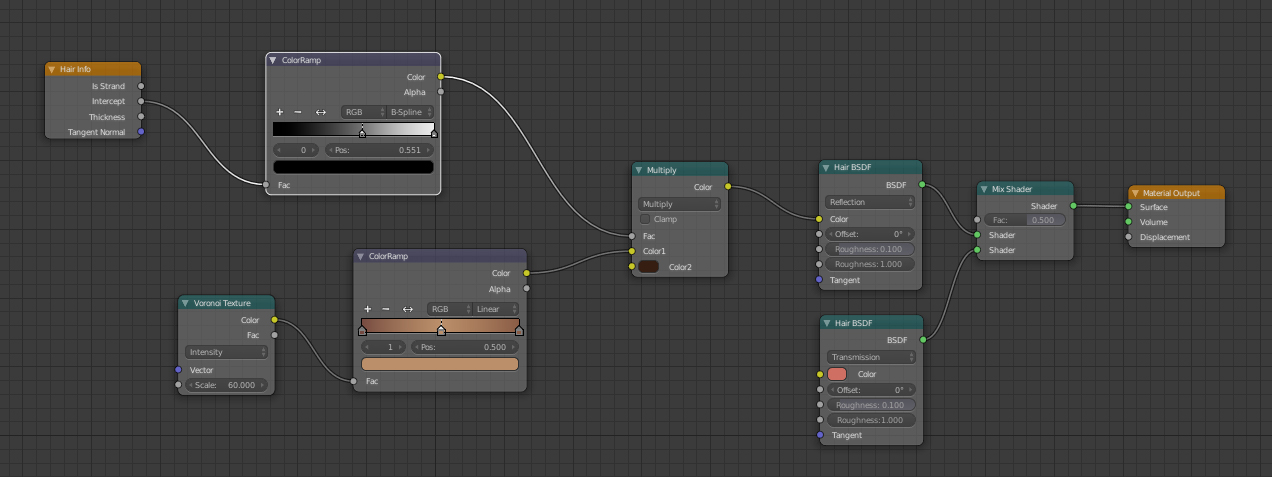
Hair
I created the hairstyle using tube groom with the help of the Hair Net addon.

Hair Shader
I used as a reference Nazar Noschenko’s tutorial for creating the shader.
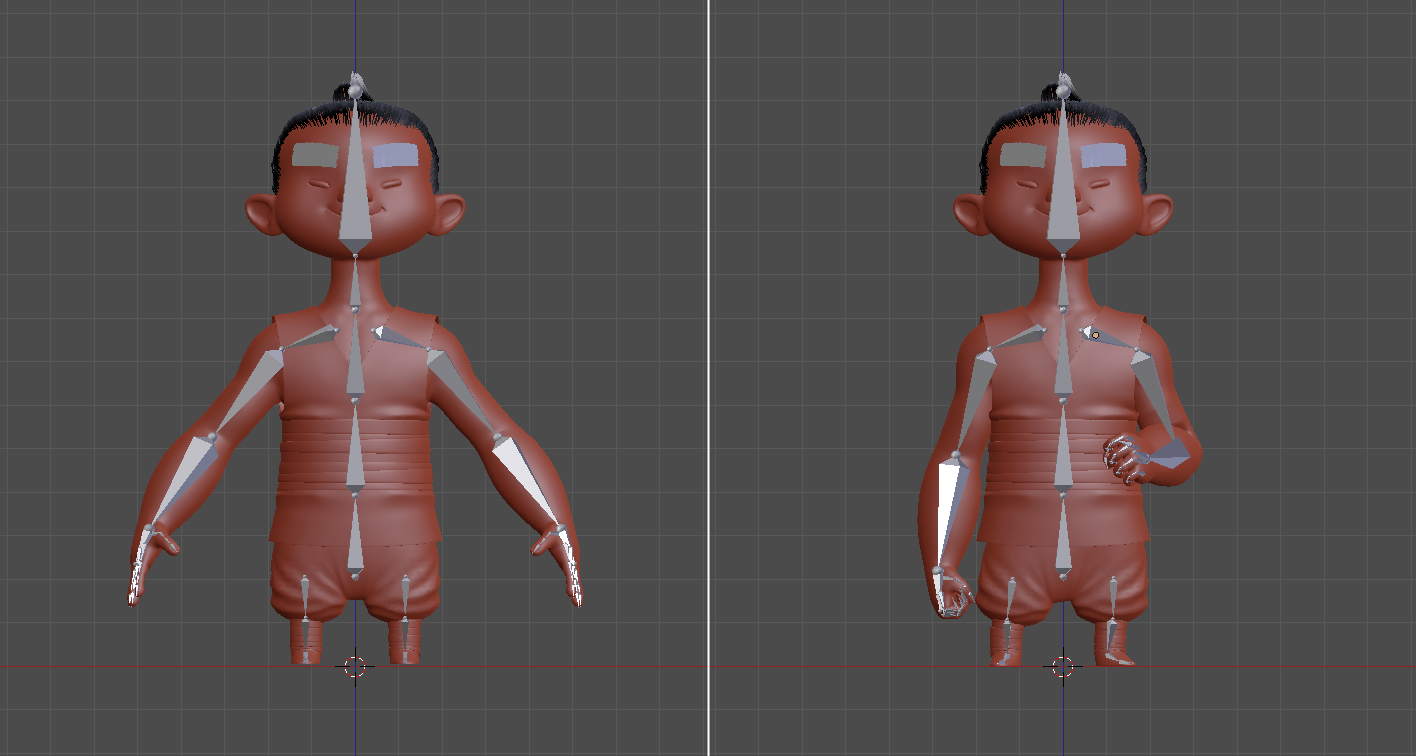
Rig
My rig is basic, because the character’s pose is very simple.
Corrections
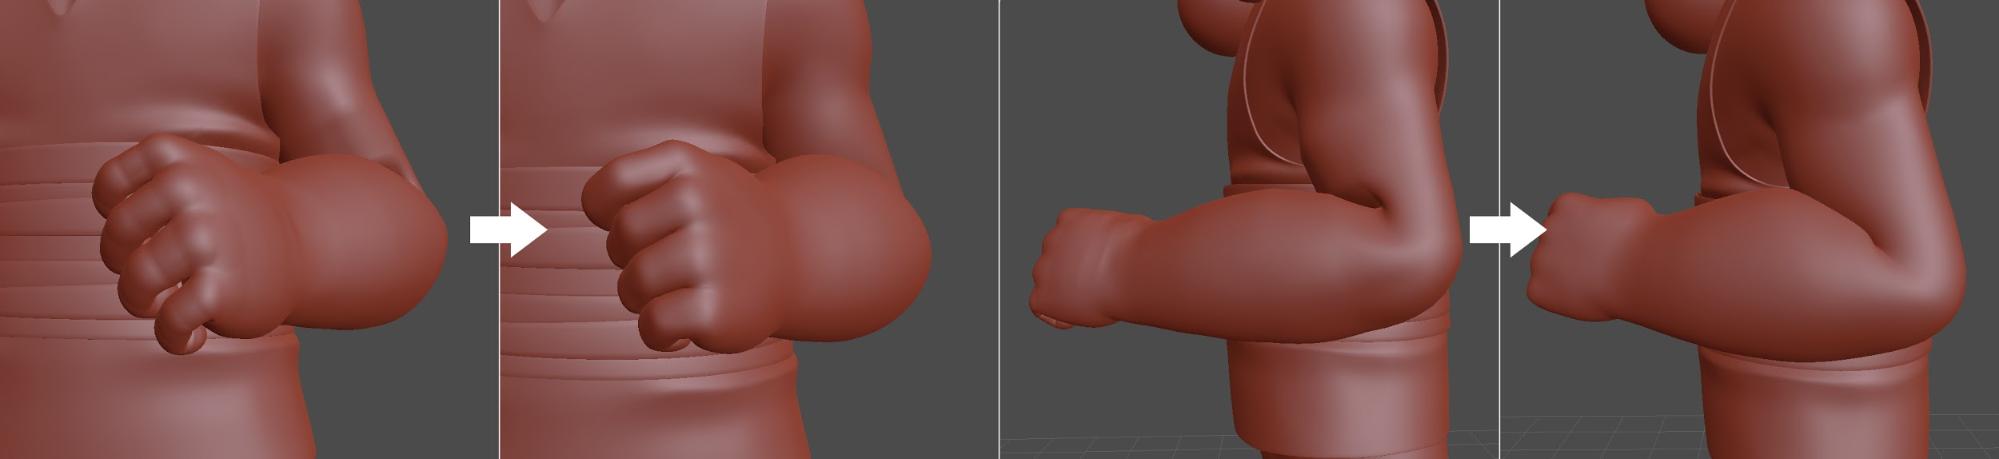
Because it is a static model, I apply the rig and correct some imperfections in sculpt mode.
Accessories
For sewing, I extracted 2 edges from the bag strap and converted them to curves, I modeled the rice-shaped seam and used the array + curve modifier.
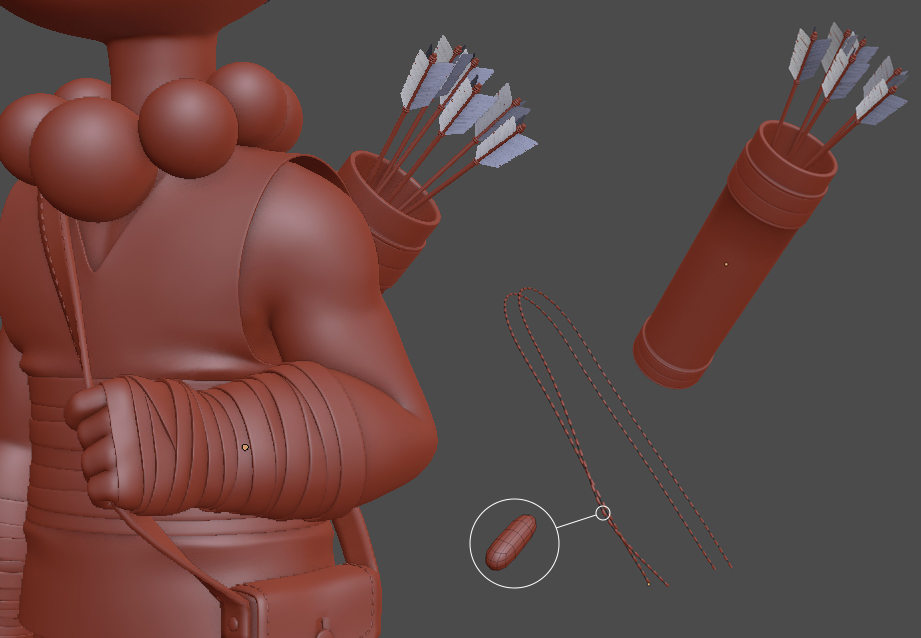
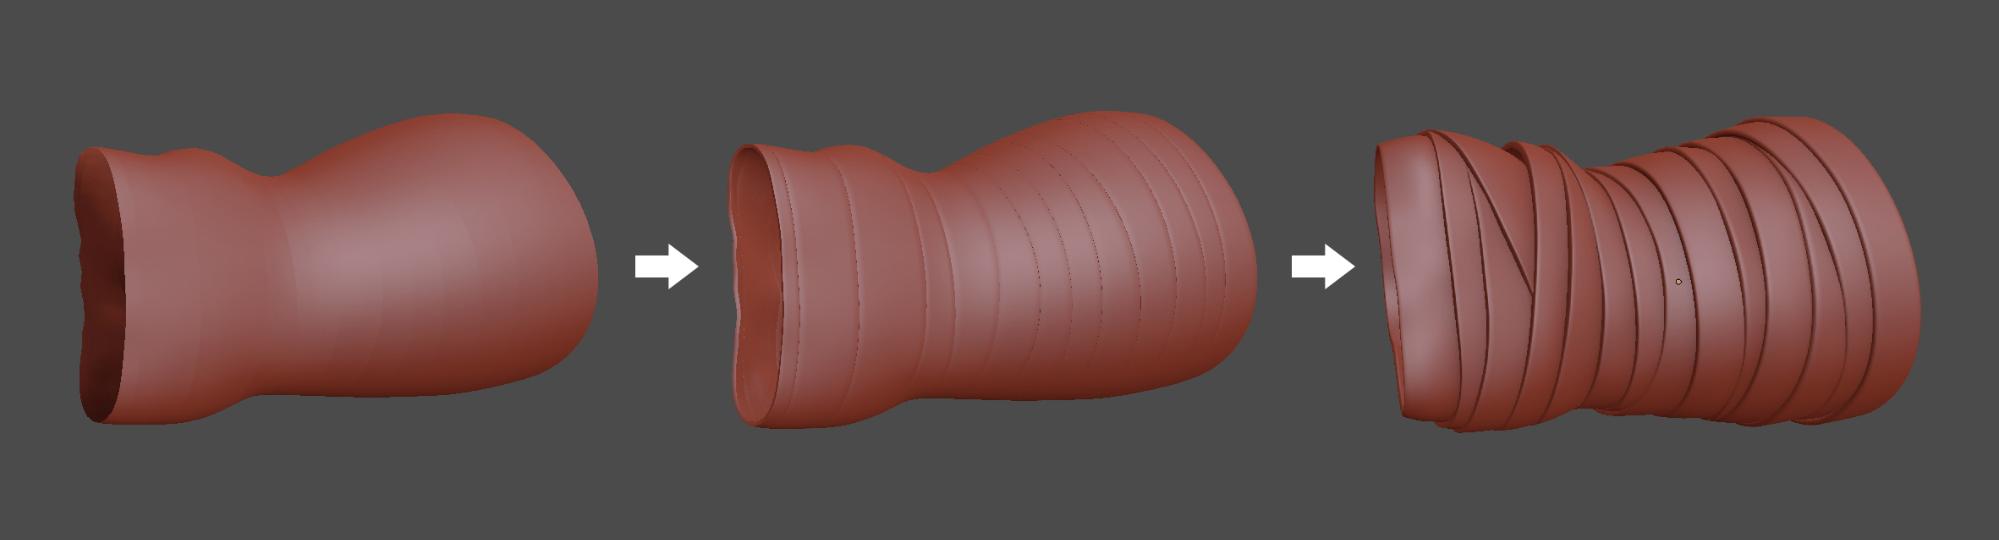
The bandages were created using a technique similar to that of Max Puliero in this video.
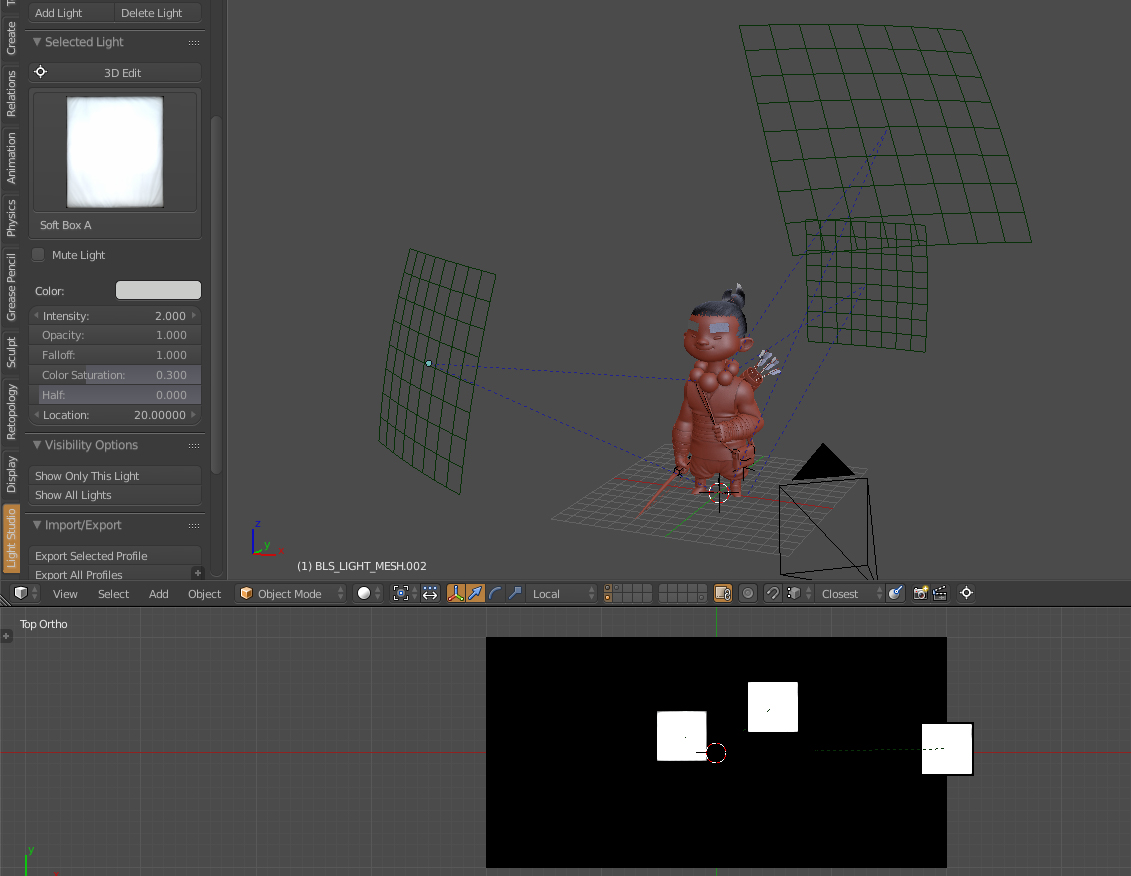
Light Setup
I used an HDRI image and three points of light using the Light Studio add-on.
Final Render and Composition
I rendered the models individually using Cycles, a transparent background and a plane as a shadow catcher.
Then I put together the three images and did the composition in Photoshop.
I can not figure out exactly how long it took to finish this project, since I worked on it in my spare time and used it as a transition from Maya to Blender.
That’s all folks, I hope you enjoyed it.
About the Author
 Thiago R. Soares, 3D artist.


Lovely! Thanks for sharing your workflow.
Awesome work and write-up, really useful info…thanks so much for taking the time!
nice one. thanks for sharing!
This is so cool!
Or.. parabéns, cara! Mandou muito bem!