
Background
Hi, my name is Michi Brandstetter and I am a freelance digital artist based in Vienna, Austria. I’m 37 years old and have been working in the CG industry for about 14 years now. I started 3D back in the days (2000) when there were hardly any resources to learn from, except a couple of books and, of course, trial and error. Therefore I have been working with a lot of different 3D softwares so far. As a general XSI-user I had to think about a new software to work with in the future. Not even a year ago I started using (learning) Blender and have to say ‘I love it!’. Especially the community behind Blender is awesome! To all the Blender supporters out there, 'YOU ROCK!'
I started as a graphic- and 3D-artist in a games-studio here in Vienna. After more or less 3 years as an employee, I turned freelance and became a partner in a mid size 3D production firm, but after 6 more years of intense work and over hours, I quit and did it on my own.
This change gave me the opportunity to work on a lot of different projects ranging from illustrations for snowboards, wakeboards and t-shirts to cover artworks, videos for games and advertising, characters, TV, etc.
I now closely work together with a team of very experienced and reliable artists who all work freelance. For bigger projects we team up to get done whatever comes our way. The spectrum of jobs is quite big and we like the challenge. That’s why you are never too old to learn something new.
In general I have to say, I love art and especially creating it.
Steps
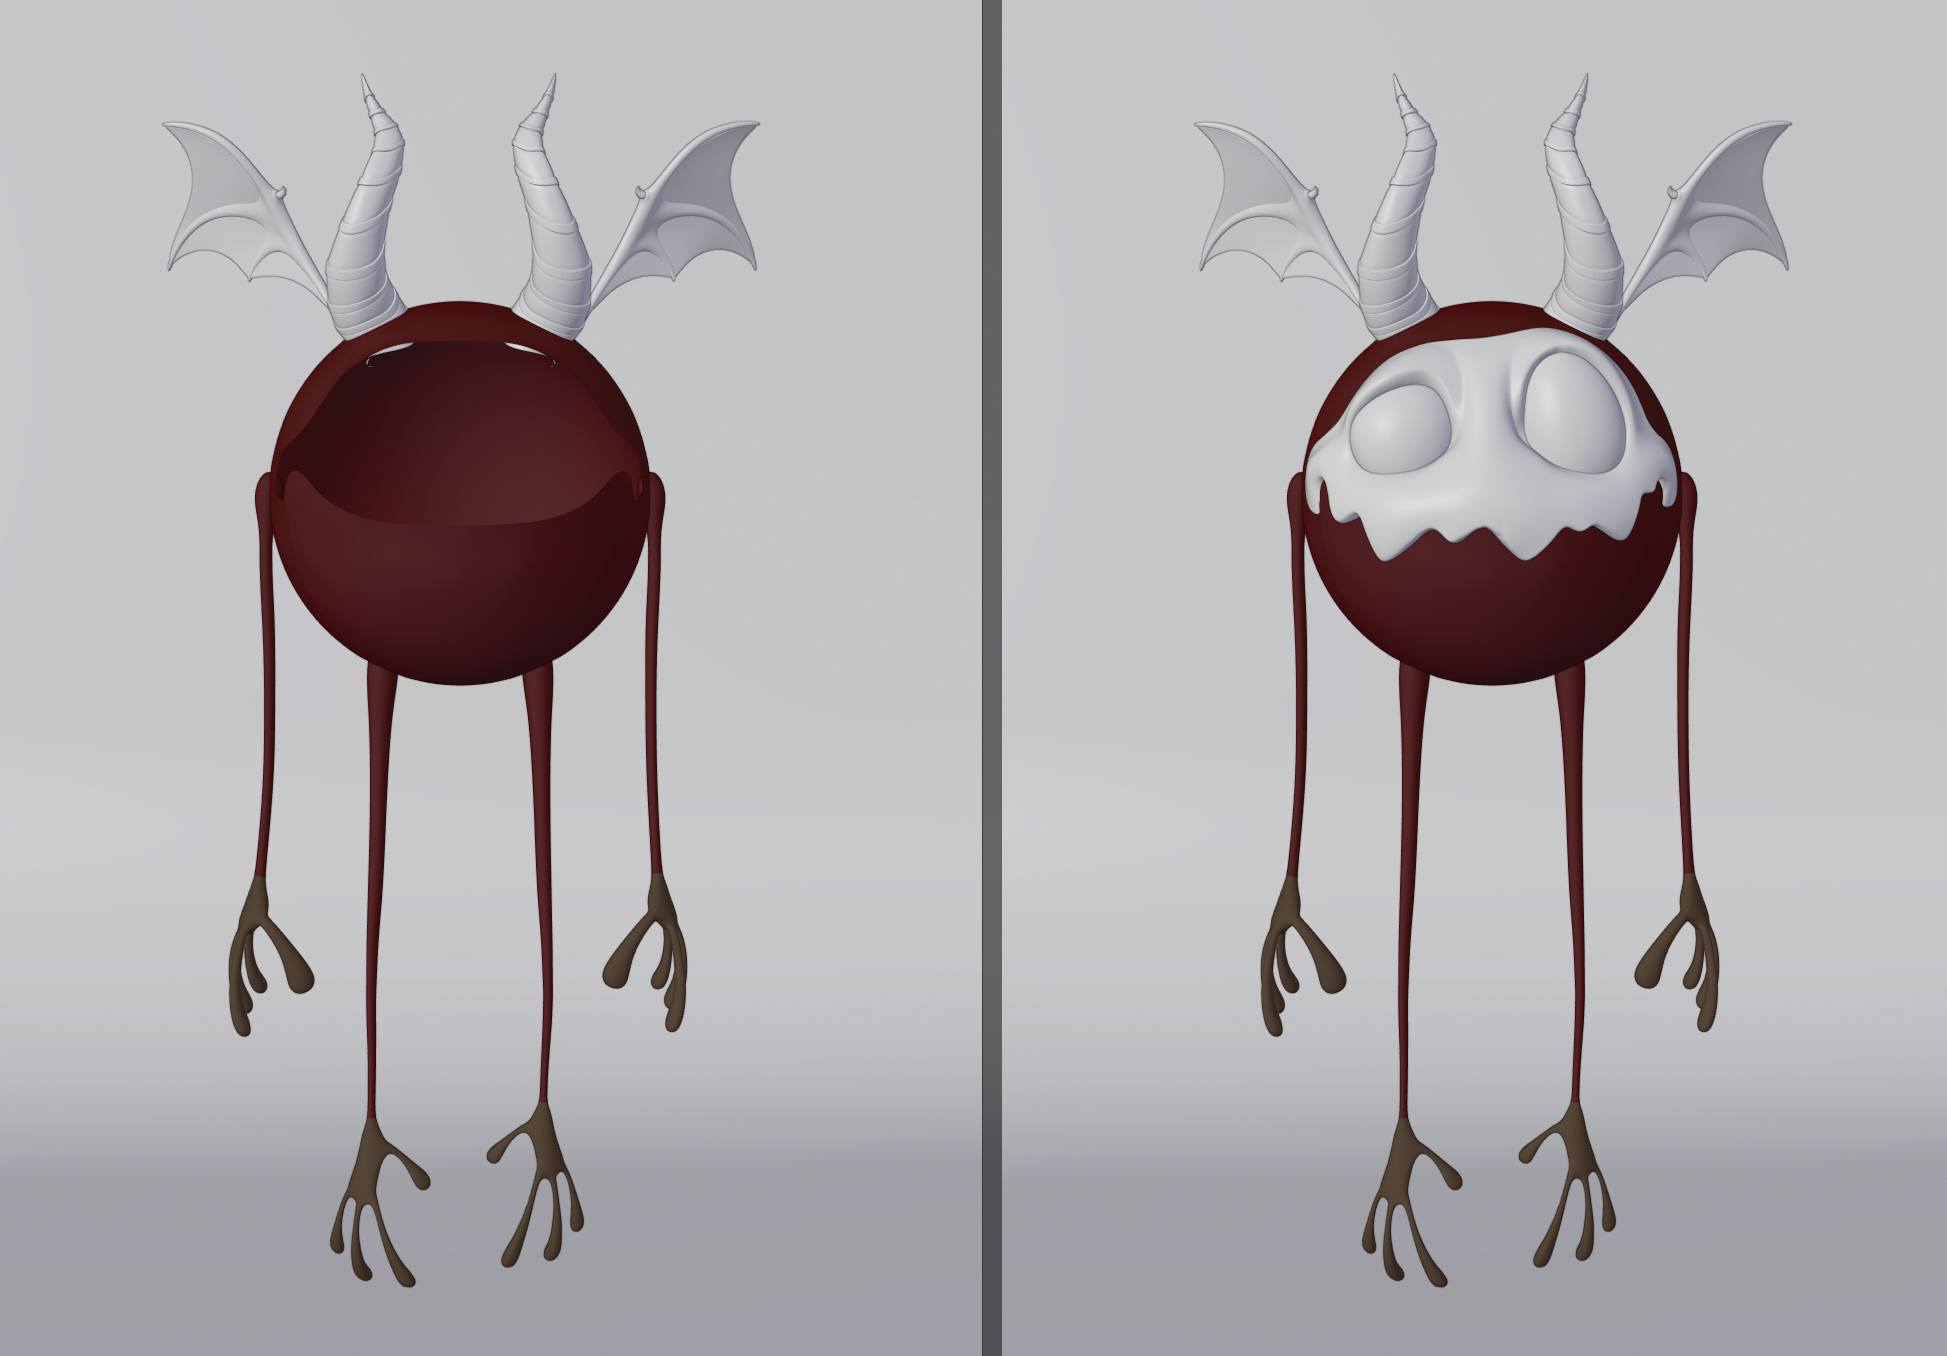
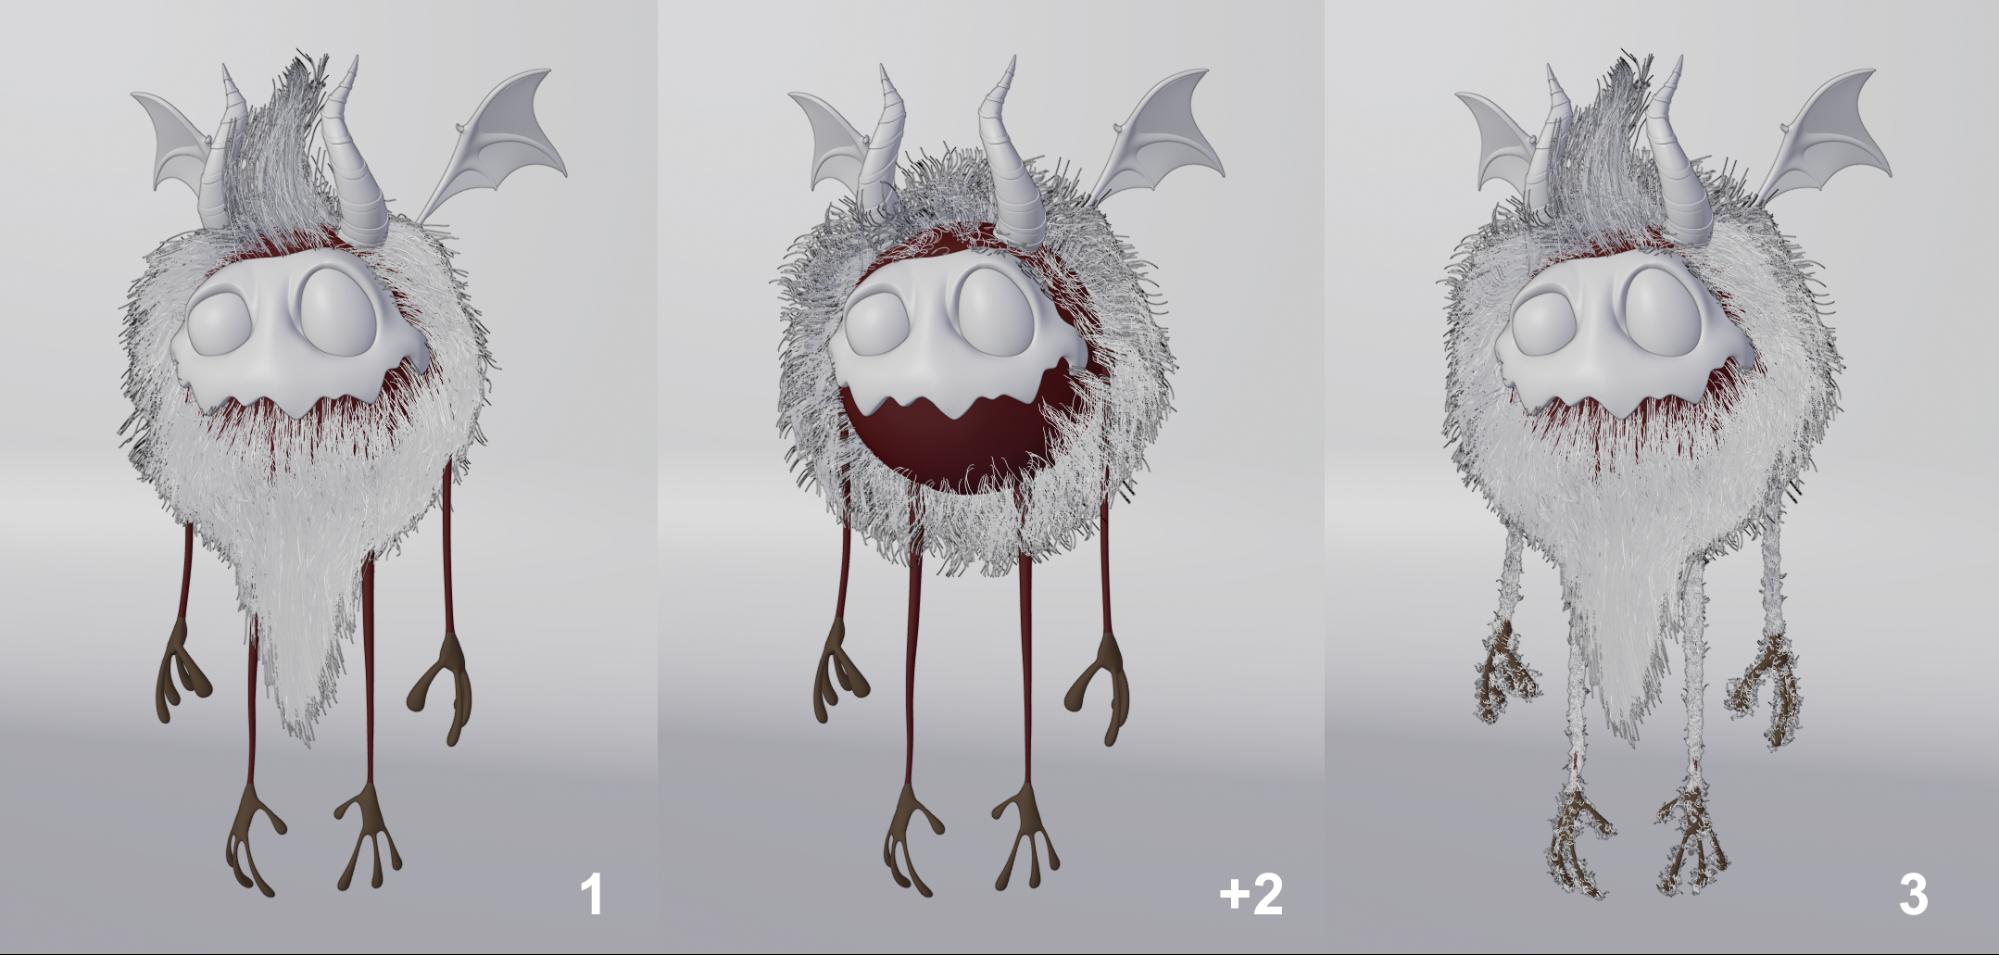
The reason I created the little flying monster was that I wanted to get acquainted with the hair-workflow in Blender. I wanted to create a simple character, that I could set up quite quickly, without the hassle of rigging and posing. So I had a rough concept in mind, but the final model evolved during the creation process. Basically it is a sphere with a face, dangling arms and legs, wings, and hair. The base form I sculpted in ZBrush and sent over to Blender via GoB. The sphere and the face are separate objects and the sphere is emitting the hair.
Because it gave me more control, I UV-unwrapped everything in Blender and sent it back to ZBrush to paint the color maps and the detail on the face. All textures (face, wings, hands), color, normal-, displacement- and cavity-map, where generated in ZBrush and exported to Blender. (All this could be done in Blender as well, but I have to admit, I am not familiar with the workflow yet.) Therefore currently ZBrush is more convenient for me.
Only the striped parts of the arms and legs where created using a procedural checker-map to make the stripes. This way I had better control adjusting the shape of the stripes.
Hair settings
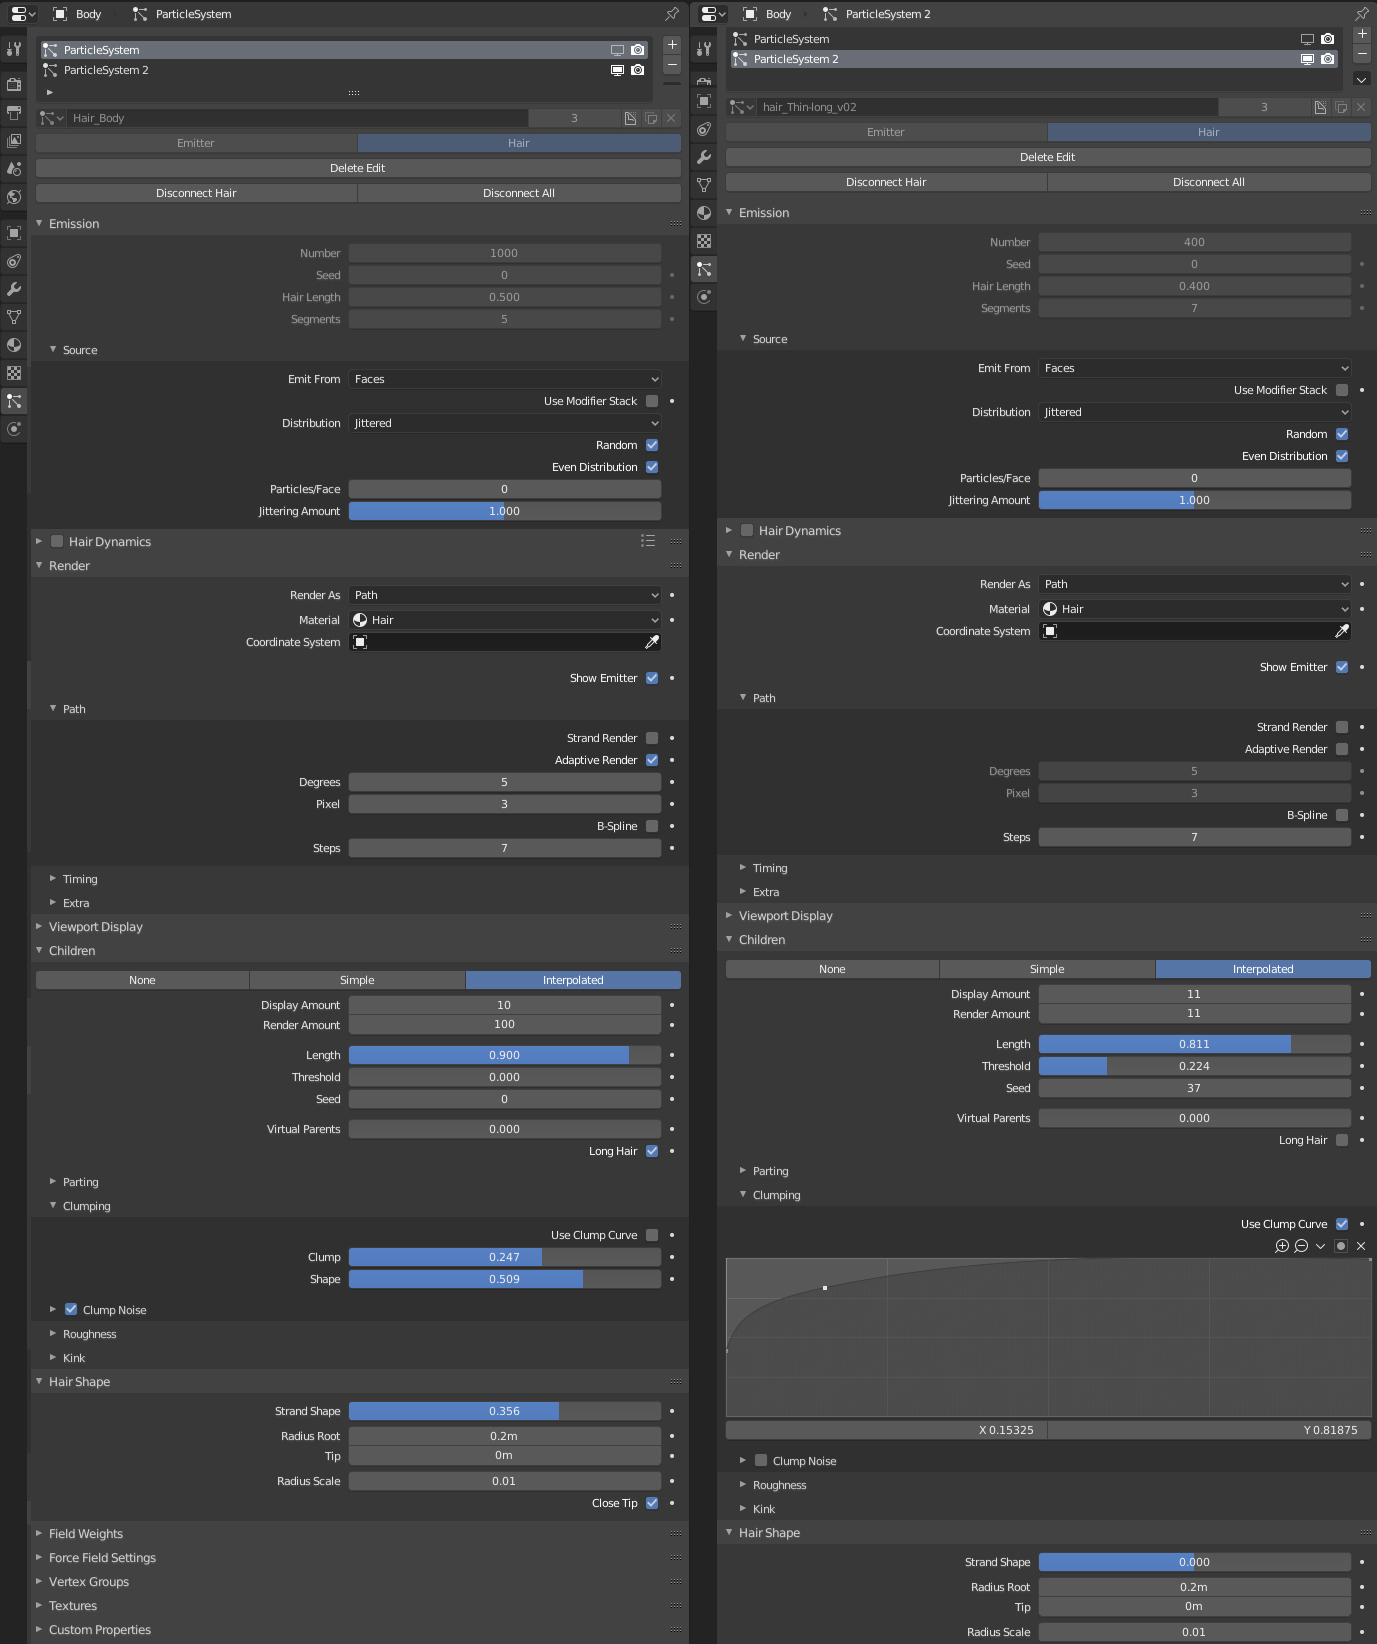
I used two particle-systems for each object. The first system was the base of the hair in form and shape, the second one was just to make some additional hair to break the general form a bit.
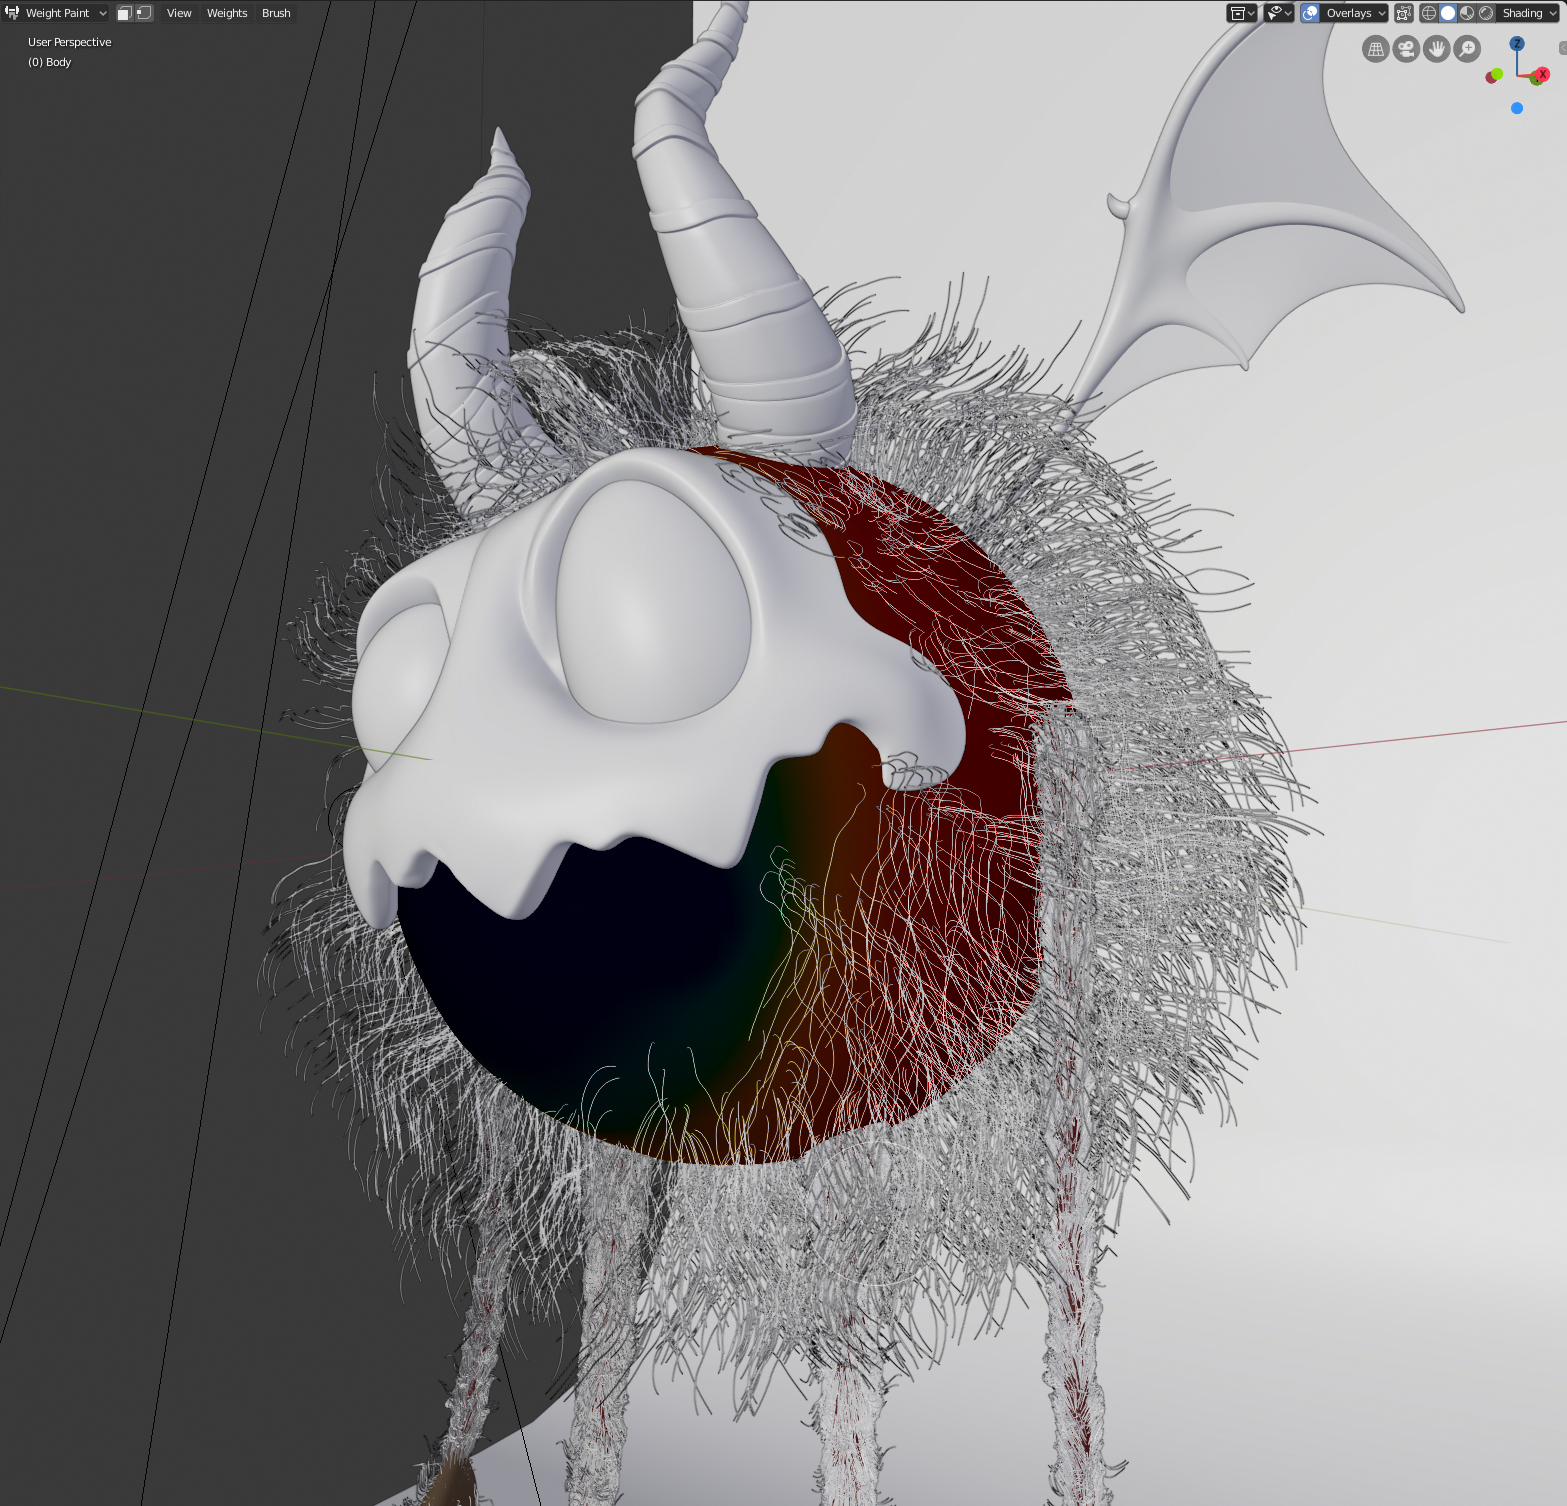
Once I was satisfied with the hair-settings, I used the comb tool to get them into form. Same for the arms and legs. The weight painting tool came in very handy for adjusting the distribution of the hair properly.
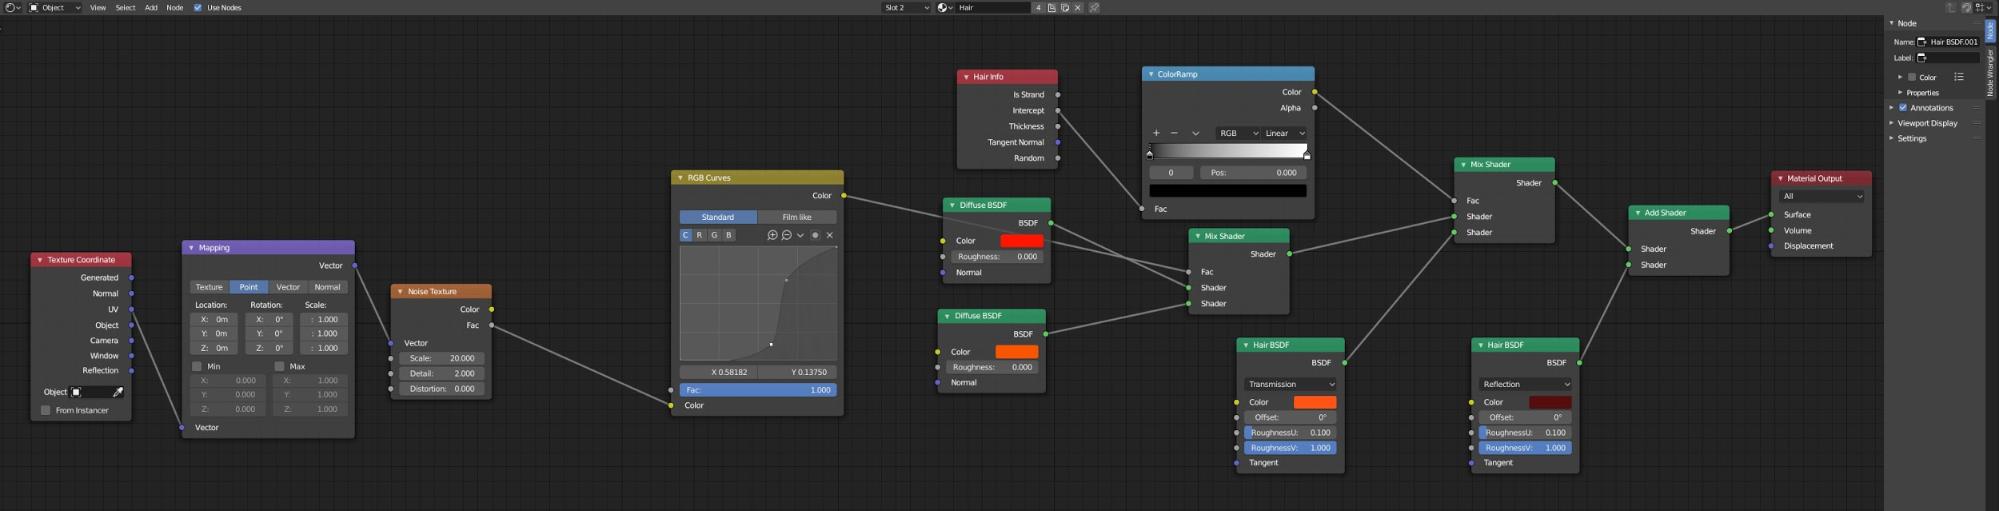
The shader of the hair is basically the same everywhere, only the colour feeds are different textures, depending on the emitter texture. Here is a picture of the main hair-shader-tree.
The Background is a Backdrop with a stretched noise texture to make it a bit more interesting than just plain colour. At that point I played around a bit with colours, textures, and further lighting.
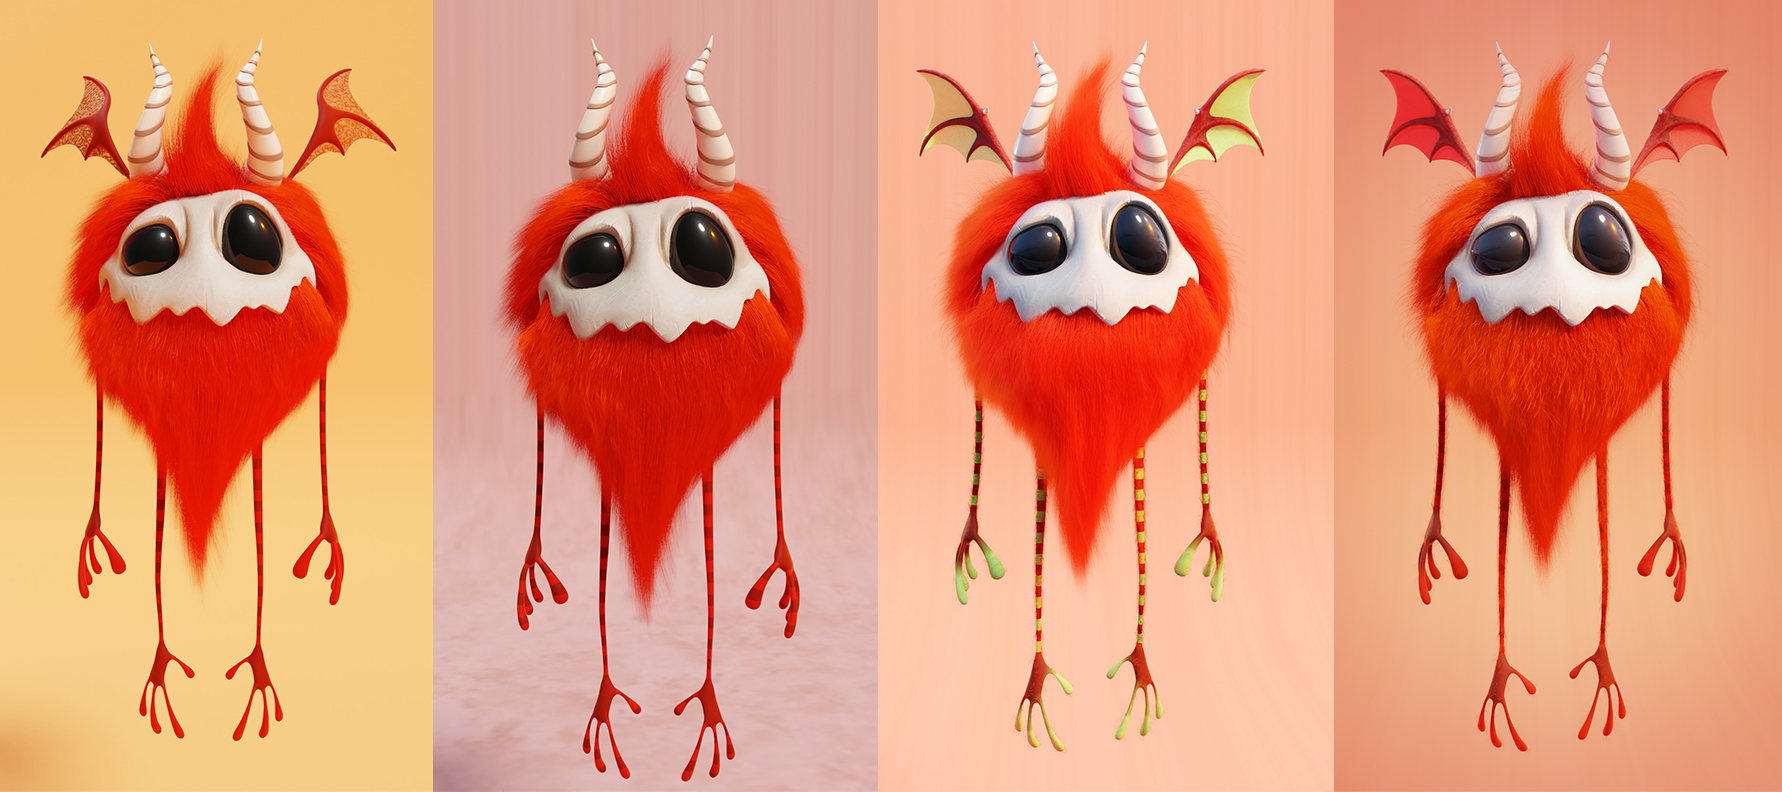
The final image was rendered with 230 samples and denoising. Not a lot of post was necessary to complete the final image. I used beauty, AO, spec, mist and SSS passes for the compositing. The flairs I put on top using personal footage, as a final touch.


About The Author
 Michael Brandstetter, Freelance CG Artist
4 Comments
Sehr cool, danke!
Thank you so much
Cool! Nice seeing the making off... I think this one gave me the push to try such a character. I like it really a lot
Congratulations - great job and absolutely understandable how you have solved this project. I like it - Thanks