Behind the Scenes: Sabrina the Teenage Witch
About
My name is Jhonatan Lechar, I’m 21 years old and I’m from Rio de Janeiro, Brazil. I’ve completely stopped trying to learn 3D a lot of times, but I started using Blender when I was 12 and started taking it seriously about 8 months ago. I am self-taught (mostly through YouTube tutorials) and my background is in 2D art, character design, and animation.
I have, also, written another article for BlenderNation about my fanart of Hagrid. Feel free to check that out if you want to know more about my workflow!
I don’t work as a 3D artist (yet). I mostly make animations, 2D illustrations and 3D models of stylized characters.
Inspiration
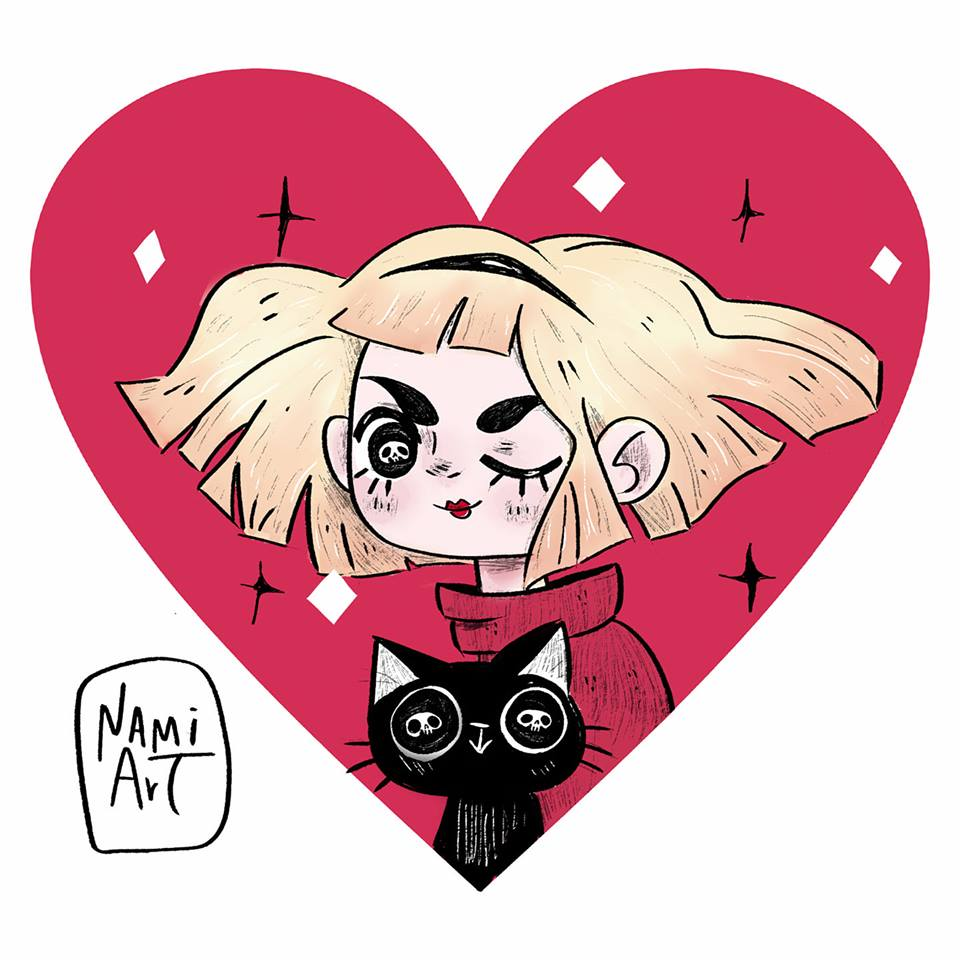
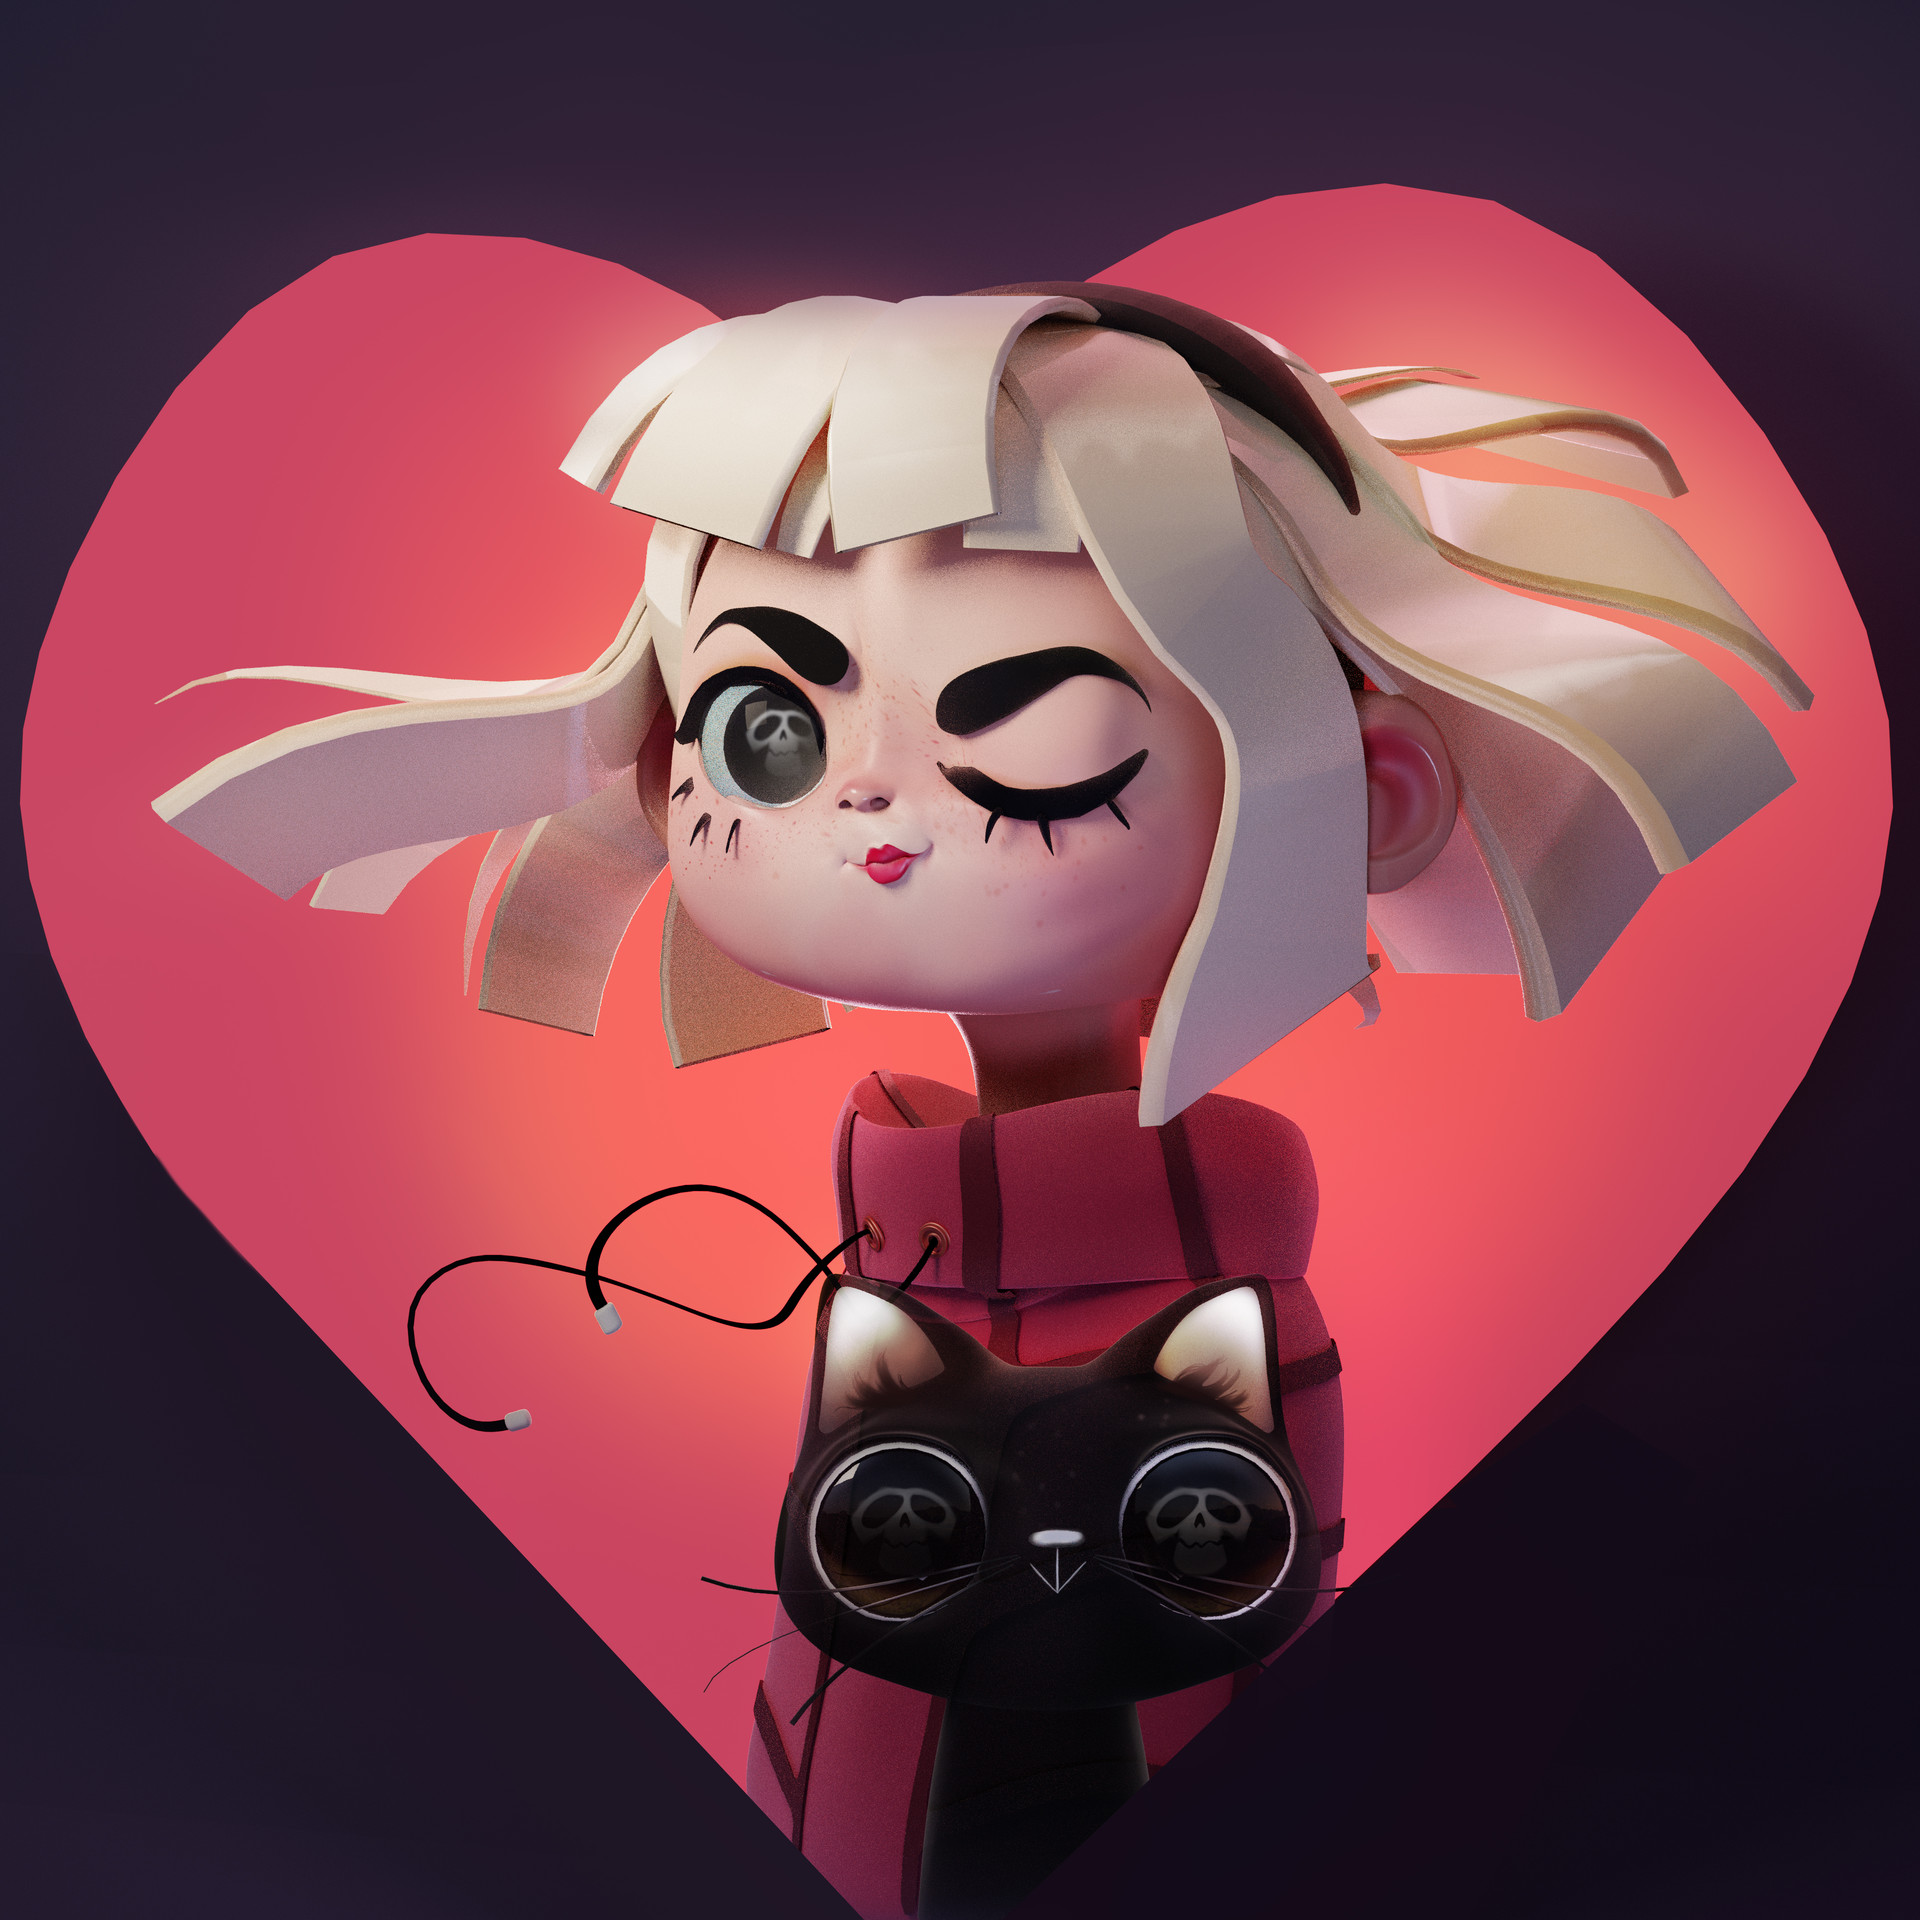
I saw this concept by Nami Art (on Facebook) and instantly wanted to make a 3D version of it. I don’t usually model from other people’s concepts, so this was an awesome way to start! I asked for permission and she helped me through her process so that I could translate her ideas into 3D.
Process
I then went to a drawing software to plan out the main shapes that I needed to translate to 3D. Here’s the sketch:
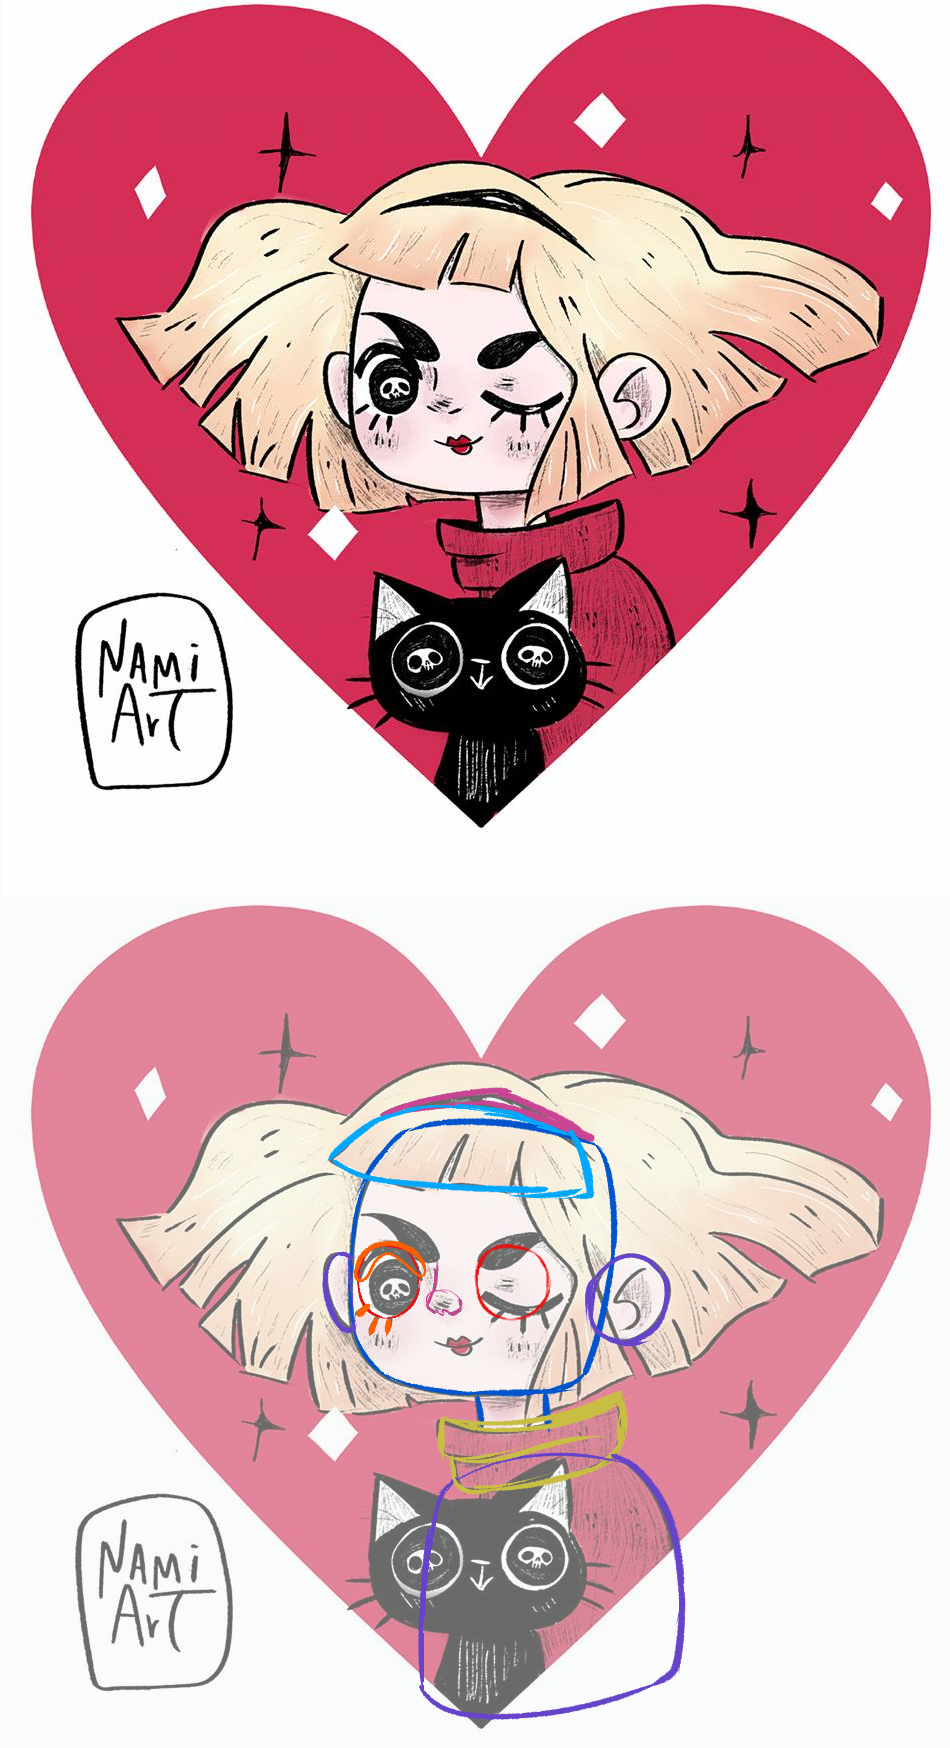
As you can see, I wasn’t too worried about the cat as he is made out of really simple shapes.
Initial Blocking
I sculpted Sabrina’s model in ZBrush. You can definitely do what I did in Blender, I just like ZBrush better for sculpting. The focus was on translating the appeal and the shape the drawing had.
I would suggest drawing over the concept and then blocking out each shape separately before merging everything.
Hopefully, you’ll be able to see the shapes as a sort of foundation for the model, even at the final render.
Sculpting
This is what I had after I was done with the sculpting:
I usually make hair using curves in Blender so I didn’t see a reason to waste time sculpting it in ZBrush.
I then drew over this screenshot to plan the hair and face topology:

Blender
On this project, I used Blender for retopo, UVs, hair, texture painting, shading, lighting and rendering.
The add-on RetopoFlow is immensely helpful! Don’t hesitate to buy it if you can, it has a lot of tools that will make the retopology process flow easier (pun intended).
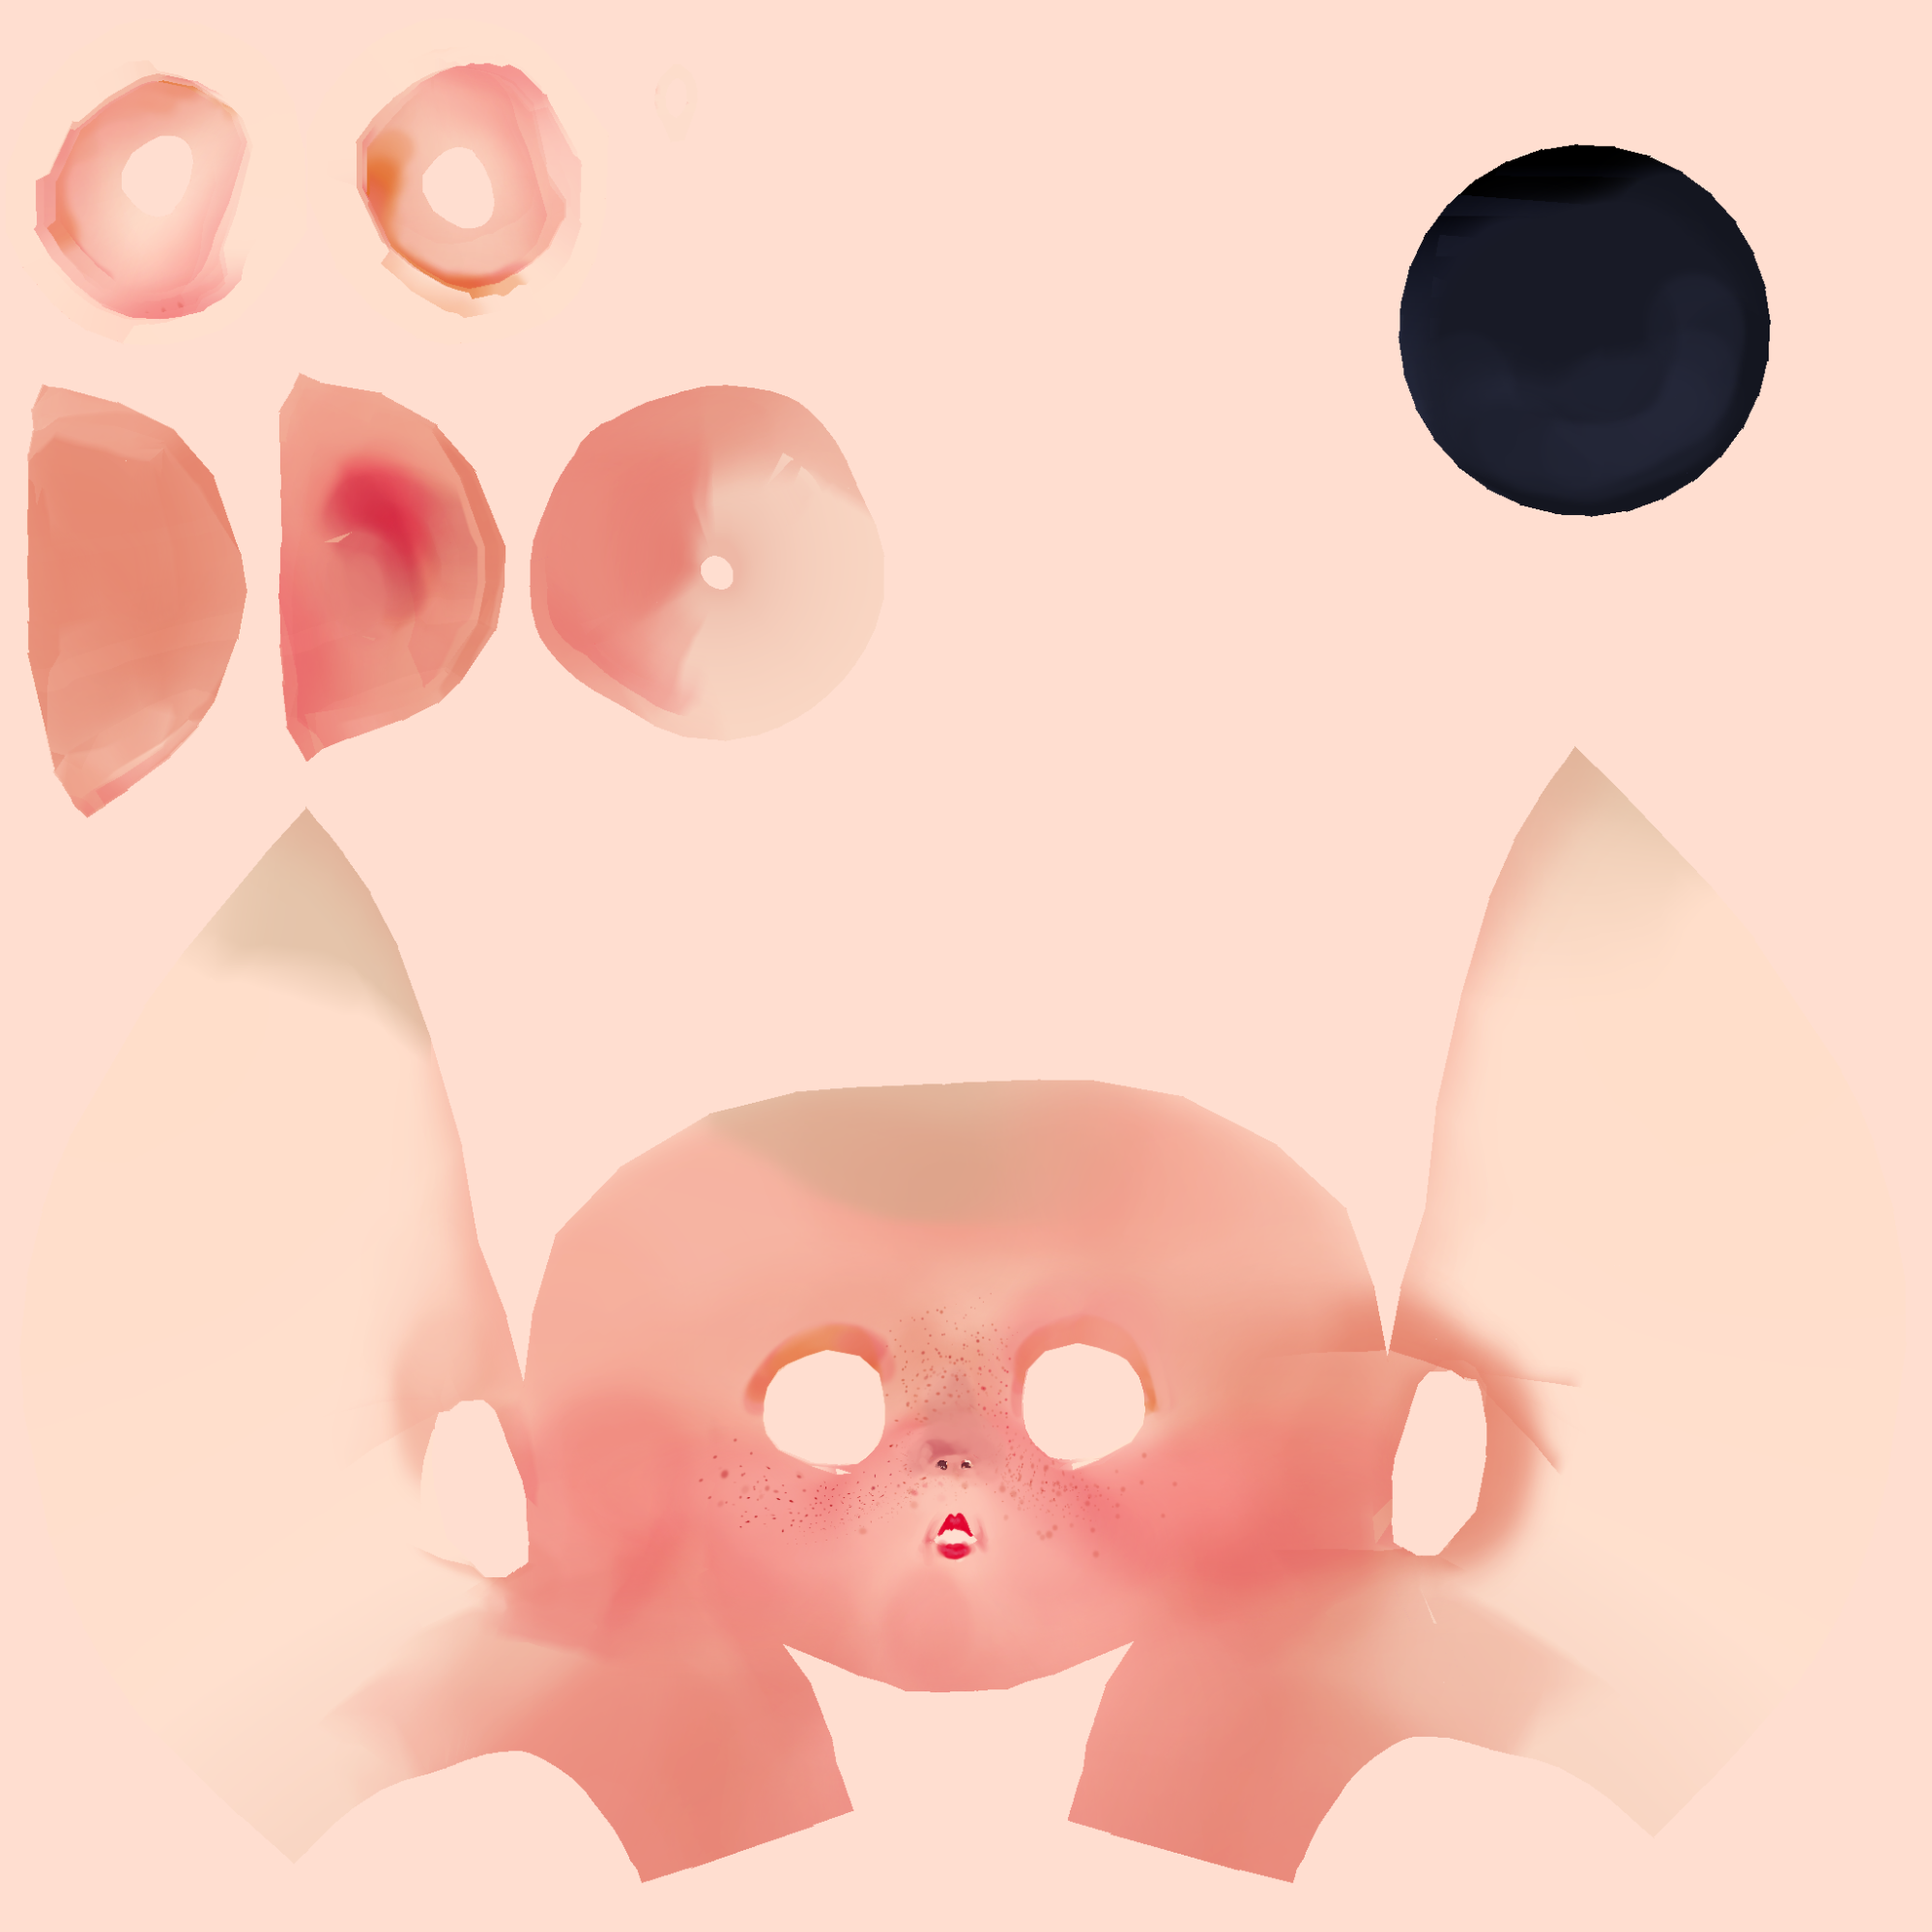
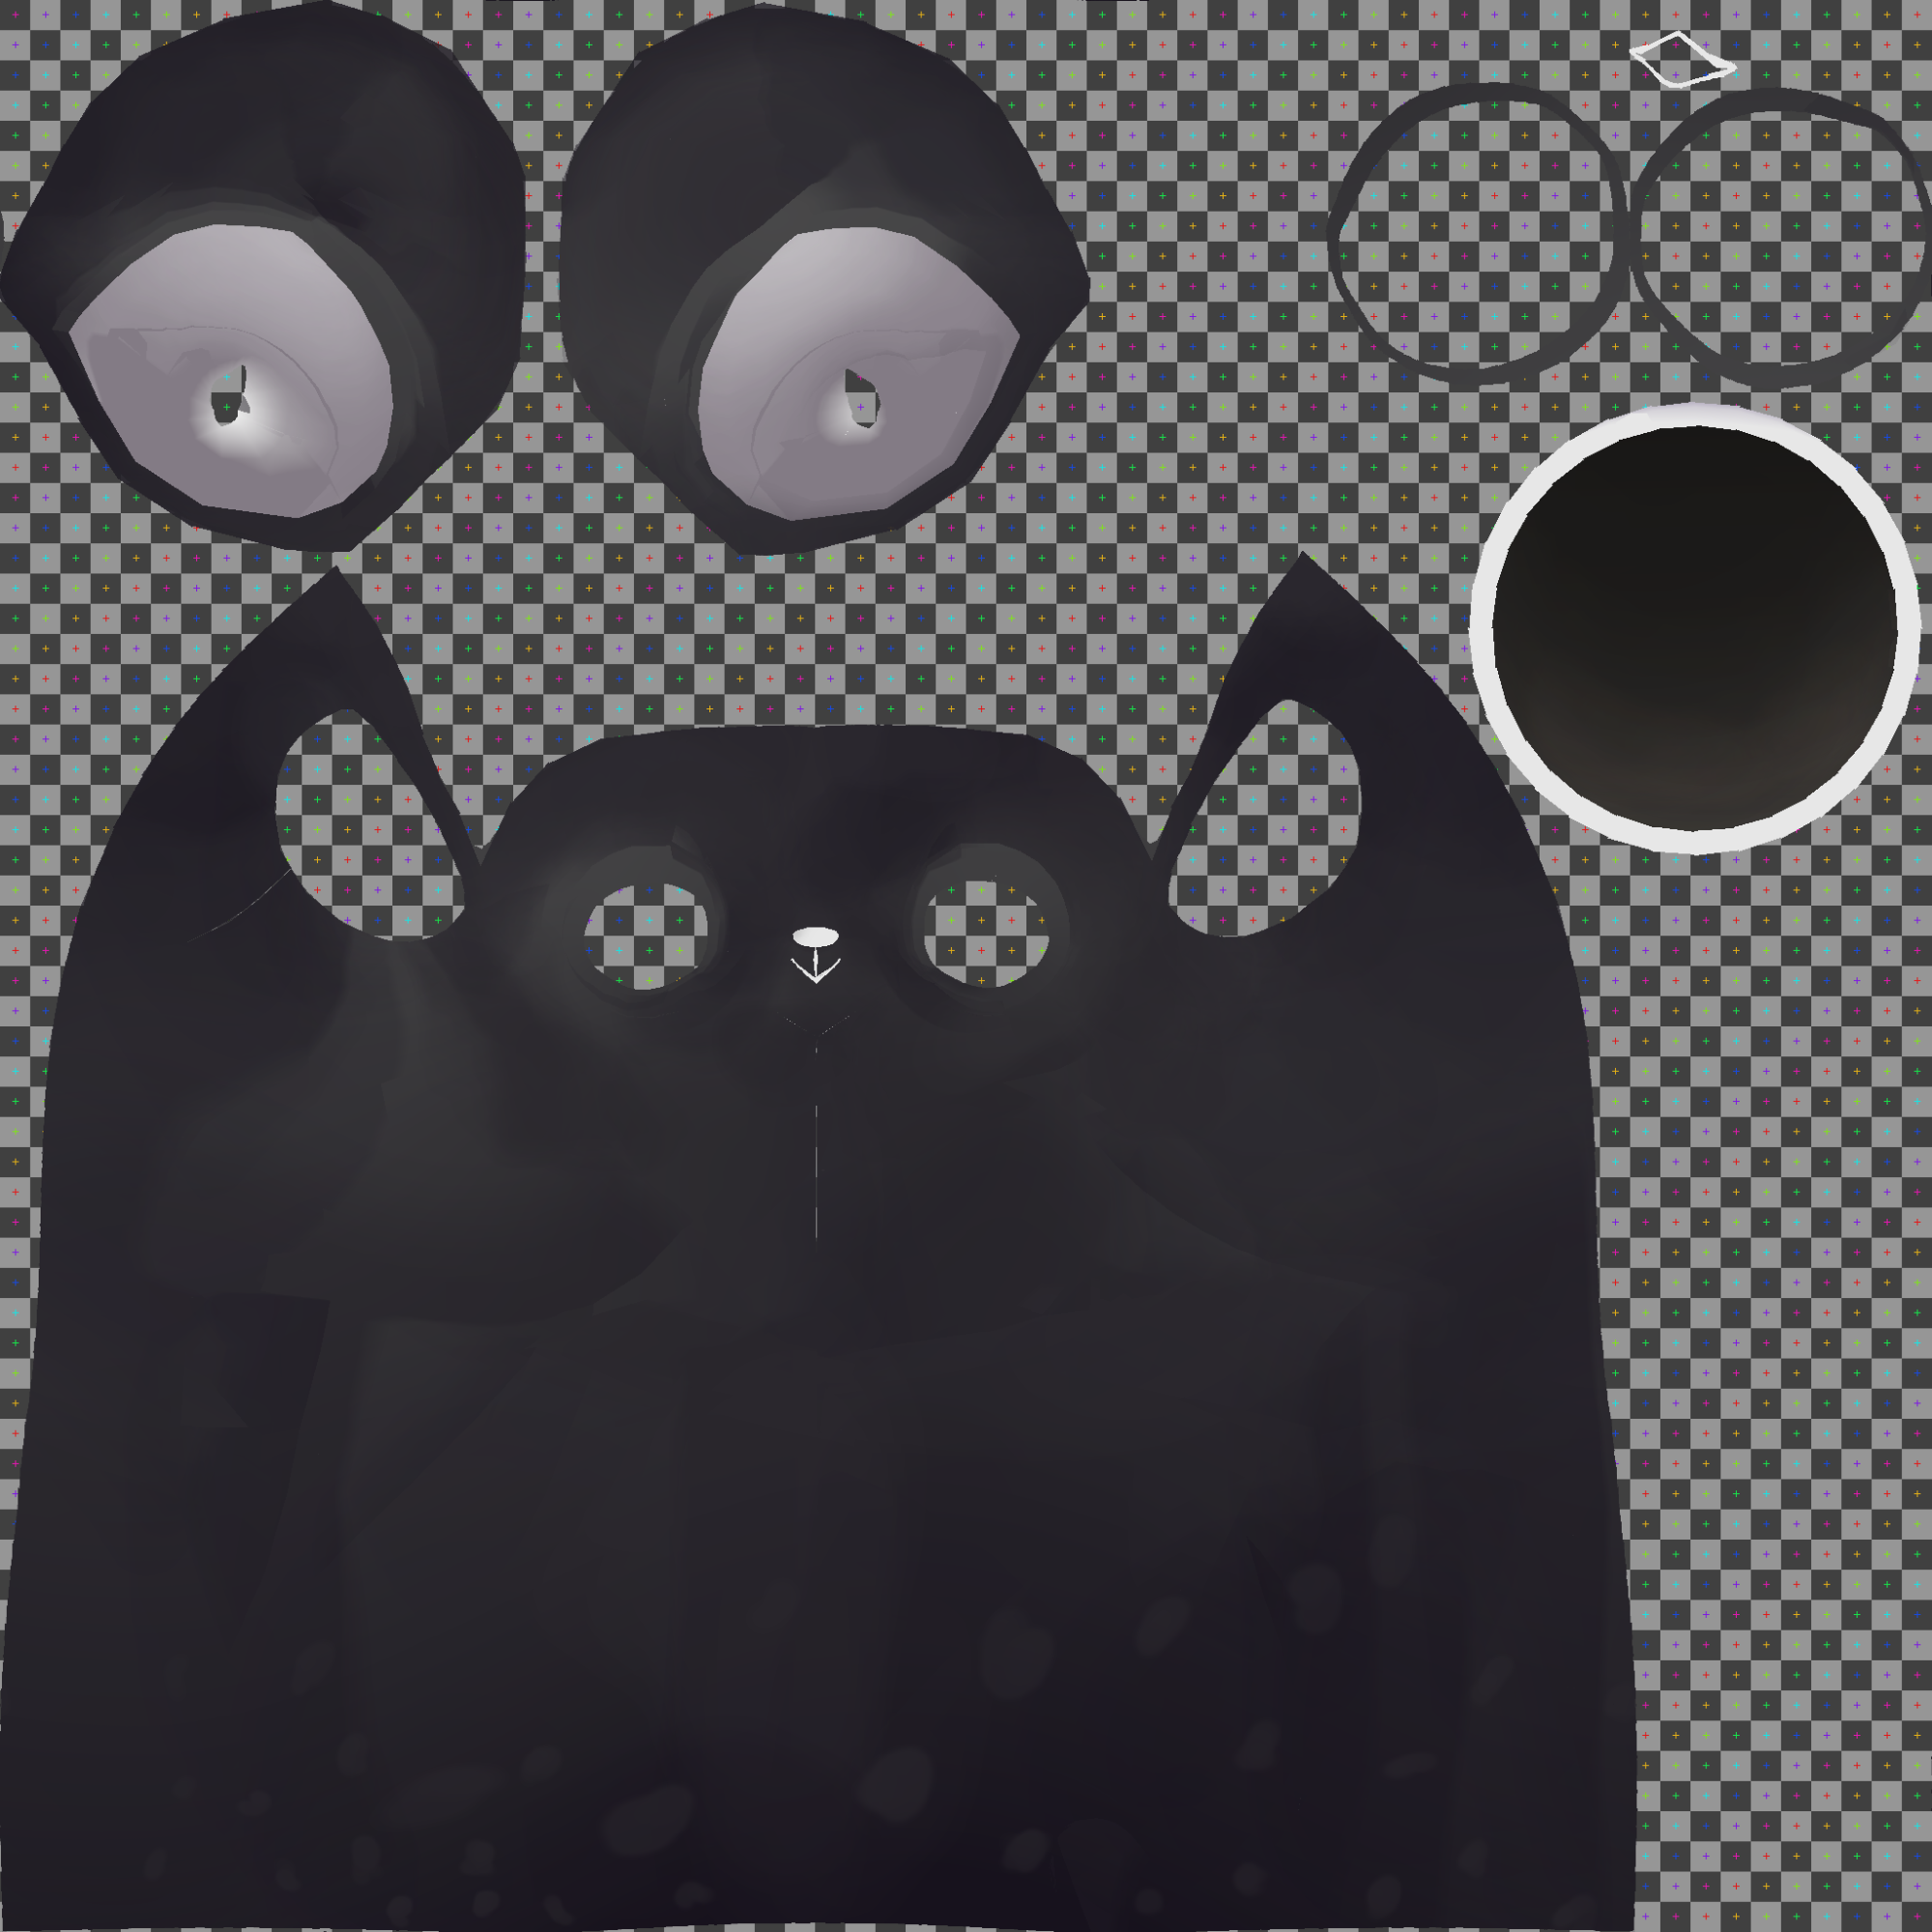
UV/Textures
This is what her UVs looked like. I painted the textures in Blender because Substance Painter doesn’t work on my computer.

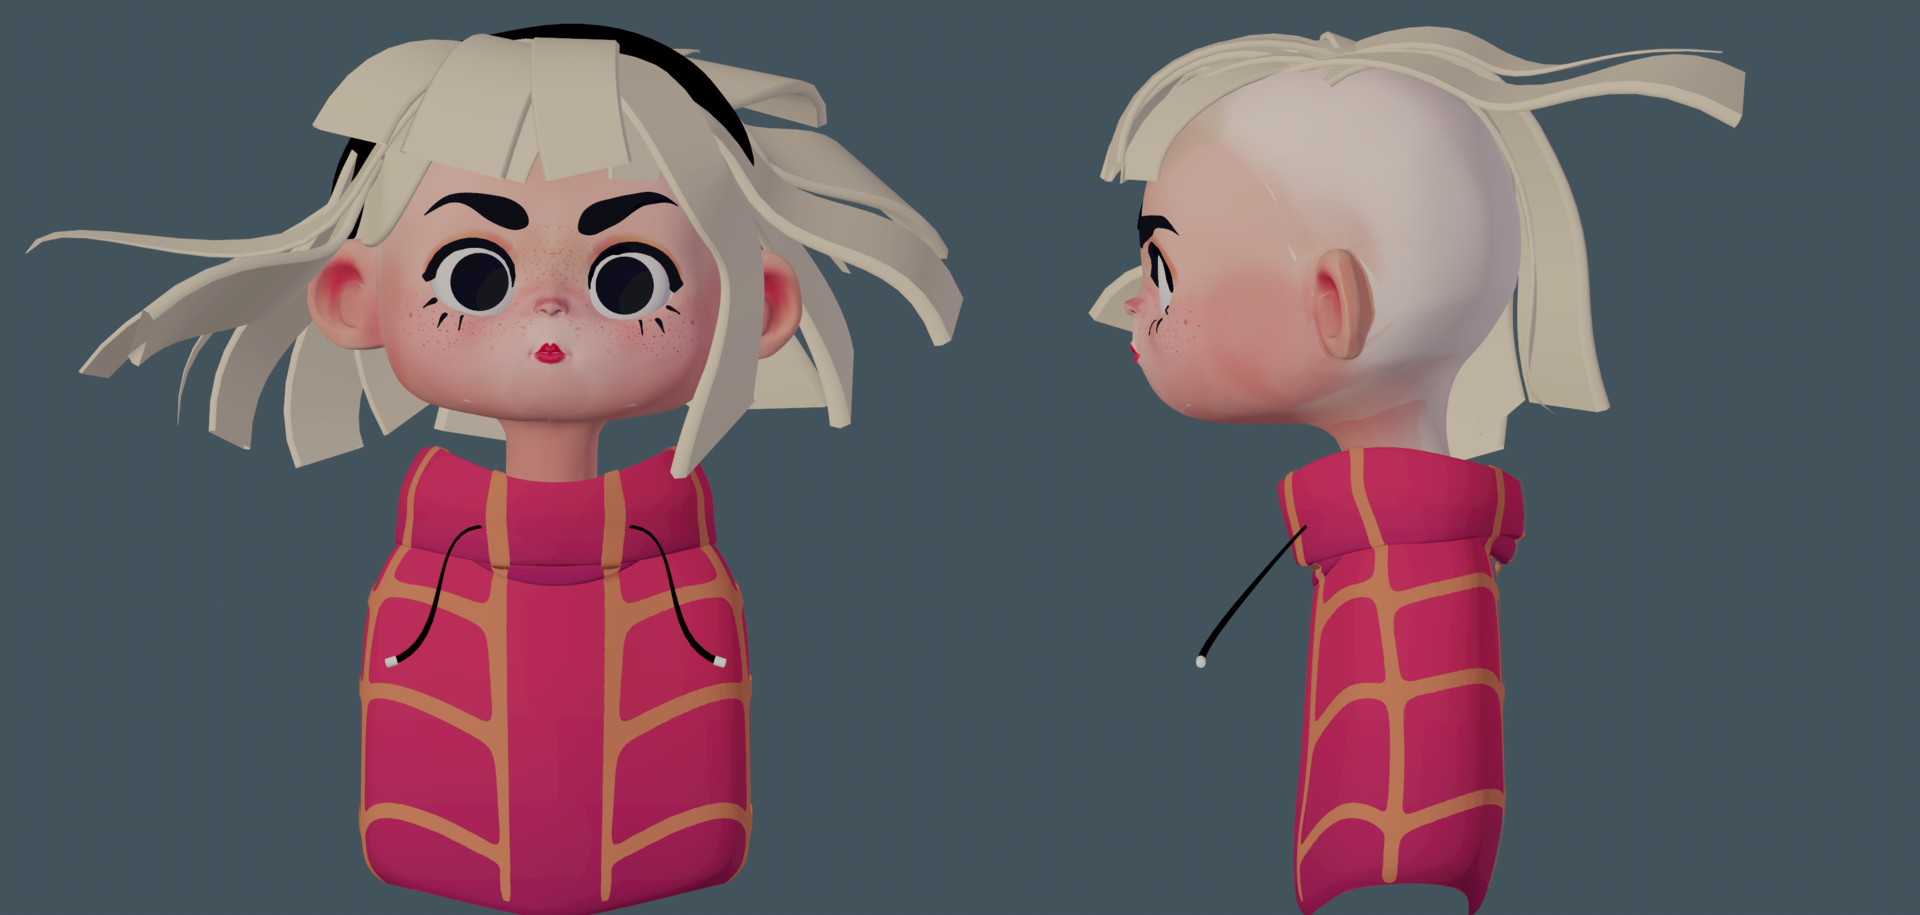
I did the hair using curves in Blender. The trick it layering and drawing it out so that you can have a plan with the directions you want it to go to. Also, don’t forget to get variations in the size of the hairs!
Shading
For the hair shader I used a gradient texture to get variations on the color, with a diffuse shader mixed with an anisotropic shader using a fresnel node as a factor.
For everything else I used a diffuse shader with the textures.
Rendering
I rendered the model with Cycles and exported all the passes to composite in Photoshop. This is what I had before compositing (beauty pass):
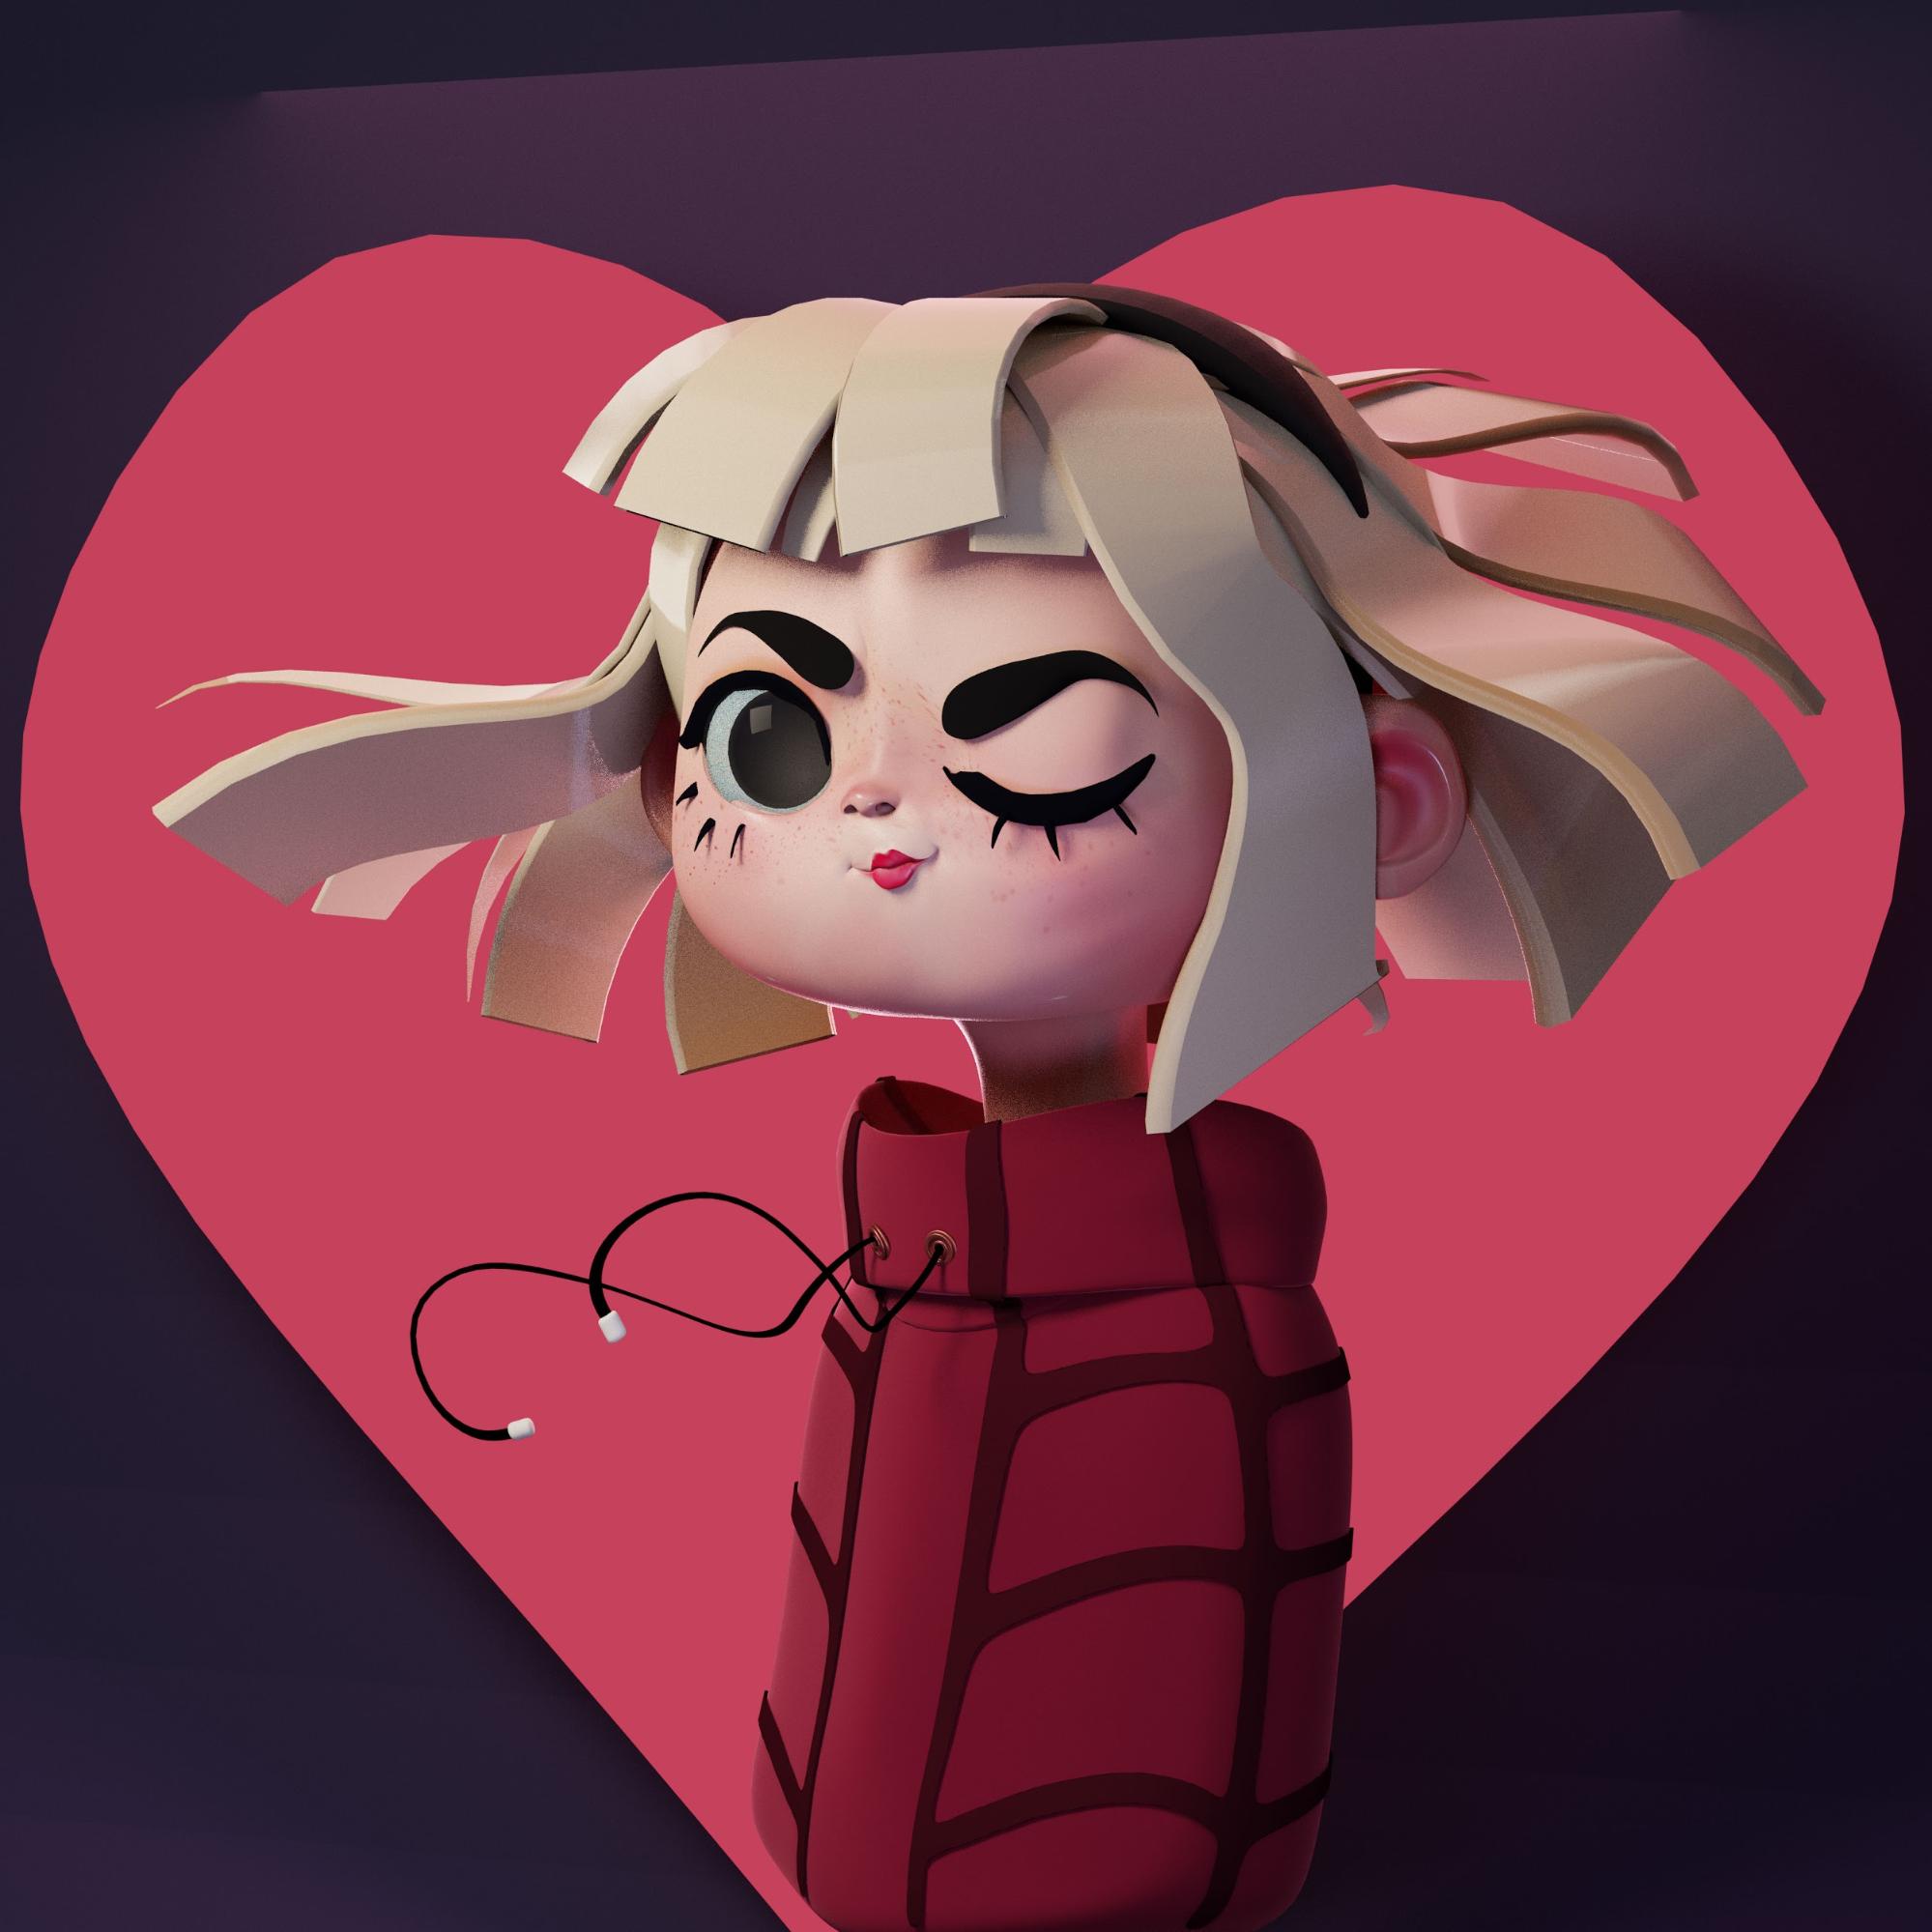
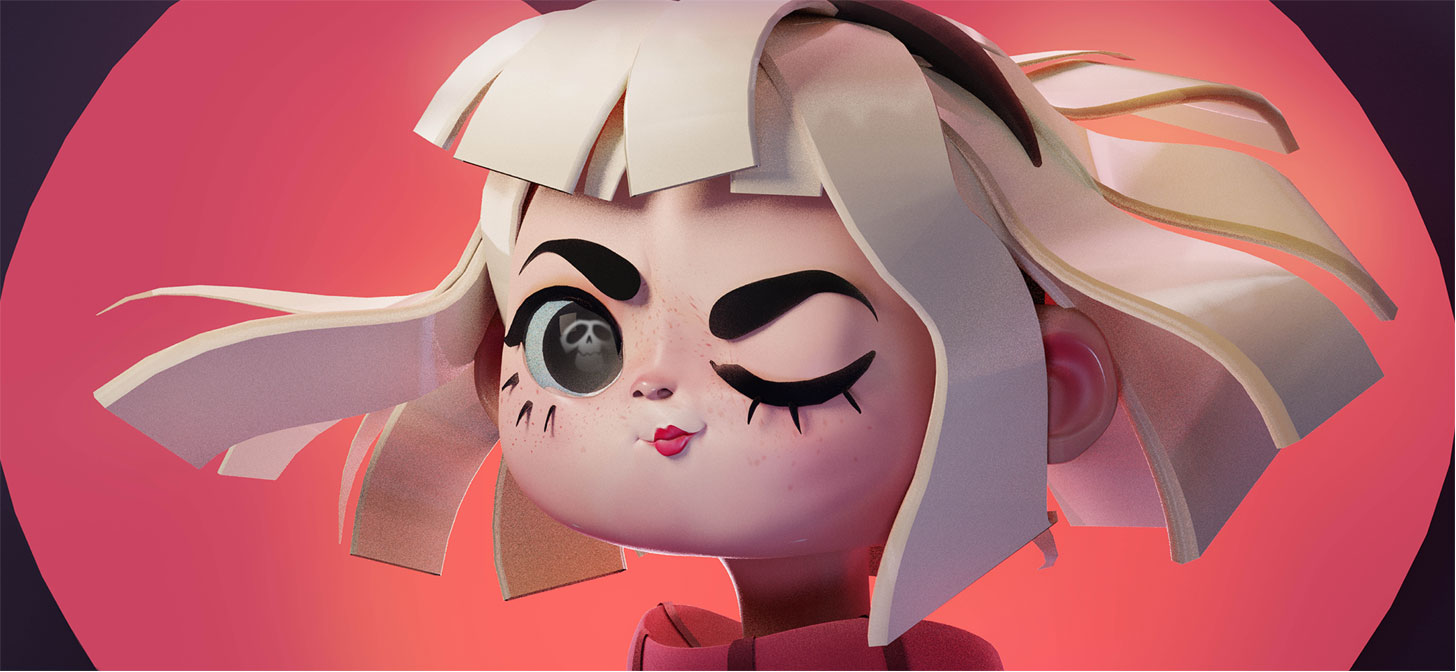
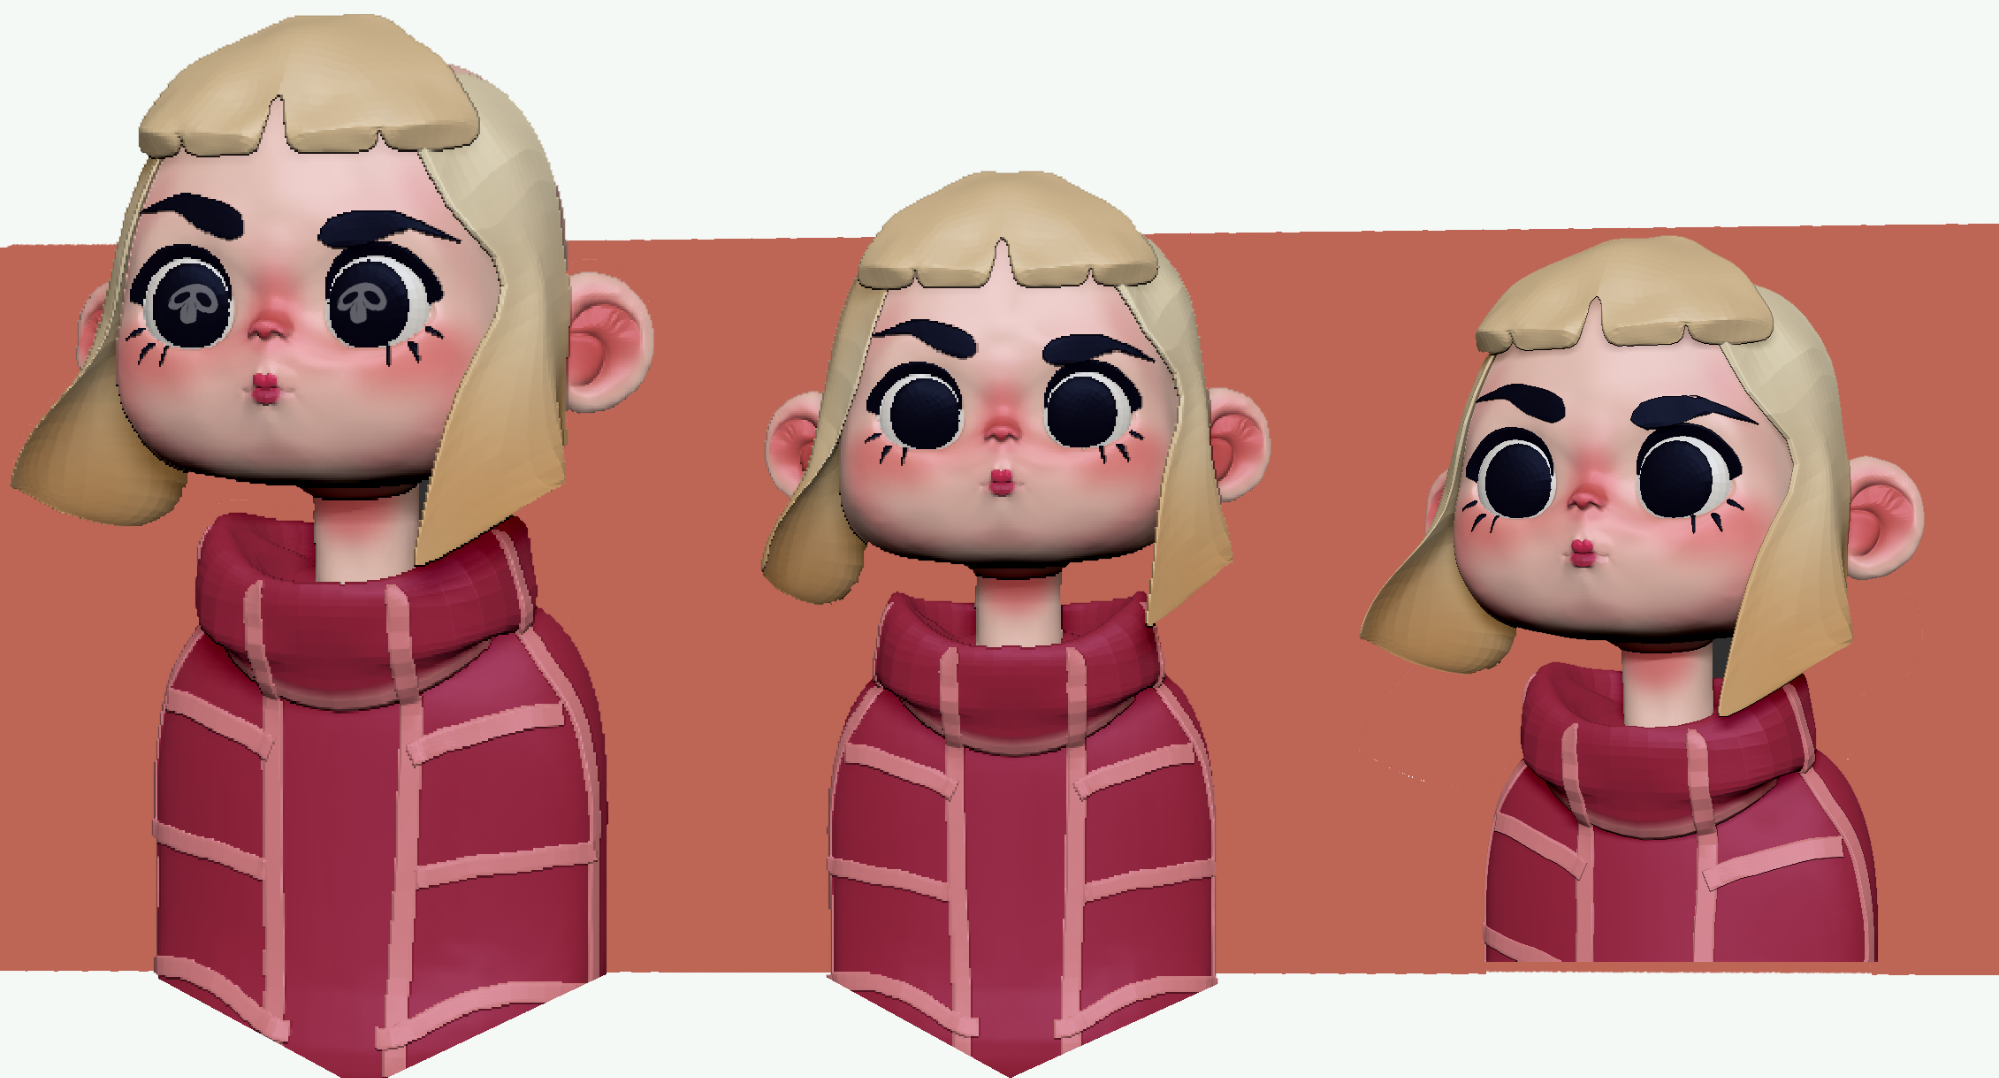
Final Image
After some light compositing, I had the final image! The only different thing I did for the cat was painting the fur in his ear.
I hope this was helpful! This is my workflow as of now, but I’m relatively new to 3D in general so it might change later.
If you have any questions or would like to contact me for work, feel free to send me a message!
About The Author
 Jhonatan Lechar, 3D modeler, Character Designer and Animator.


