
About
Hello everyone!
My name is Luther S. Schmidt and I’m a self-taught 3D Artist from Brazil.
For the past few years I’ve been working with modeling and animation for games, mostly low-poly art, and also managing assets and building levels in Unity. But I always keep my roots in what brought me to 3D in the first place - the renders and compositions.
My journey with Blender began many years ago, back in the 2.4x era. And from that time until now, is has been my main tool. During the time that I was focusing on game assets, I was not using Blender’s full potential, but when I saw the first things about the 2.8 version, it was like rediscovering Blender once again and got me really excited.
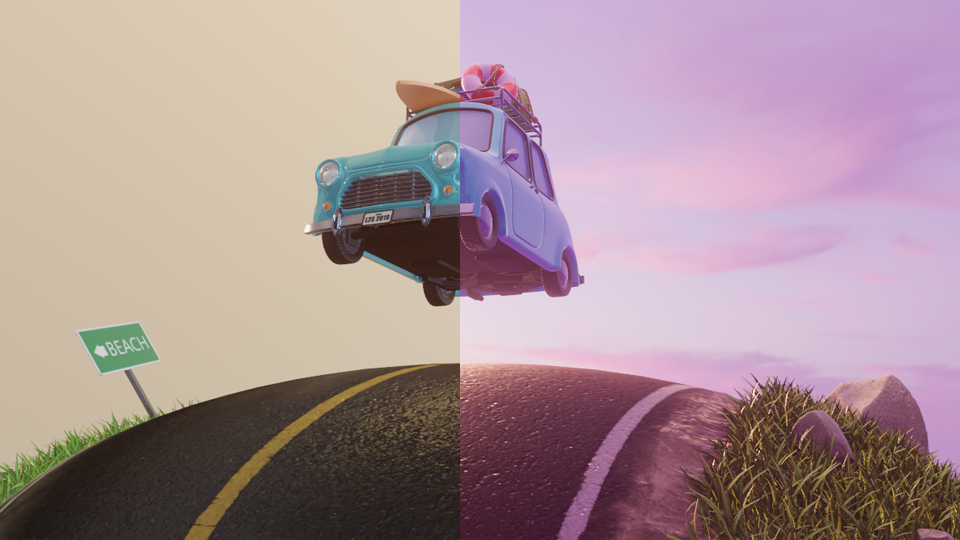
So let’s say that the “Vacation art” was the result of an old idea and new inspirations.
Inspiration
The idea for this artwork goes back to 2012 when I decided to make something inspired by the art of Akira Toriyama. But instead of focusing on the characters and battles displayed in his works, I decided to approach the landscapes and vehicles that he made.When I came up with the basic sketch for the scene, I knew the main elements that would be in it: the rounded road, the grass, the car, and the pinkish sky.
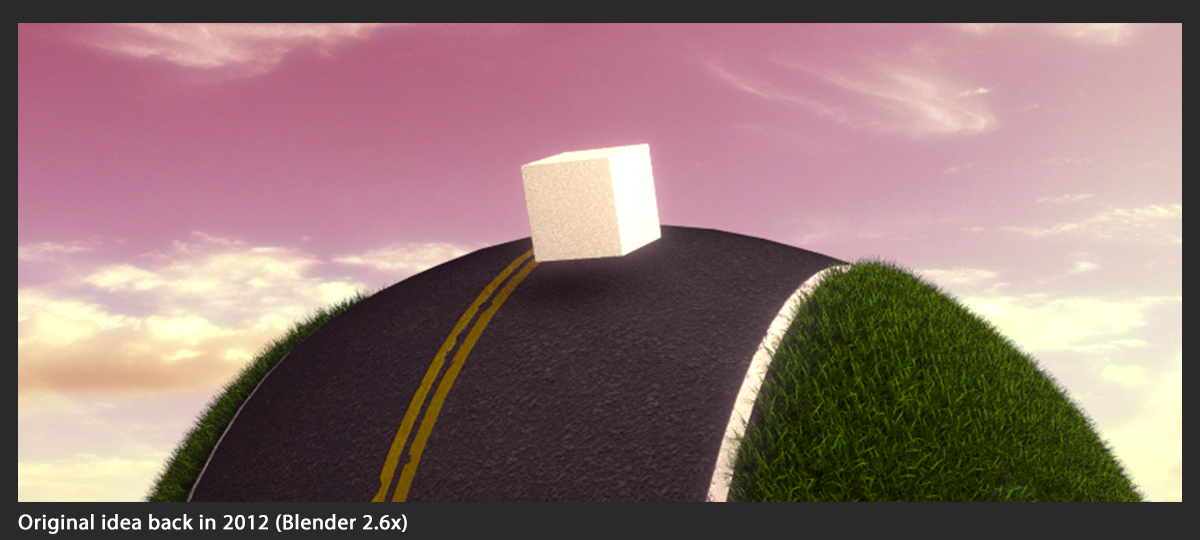
By that time the project was not going exactly as I had expected, so I put it aside for a few years. But since Blender 2.8 came out, I have been digging it. After seeing EEVEE I decided to remake my old work from scratch, keeping the roots and going further.
The Car
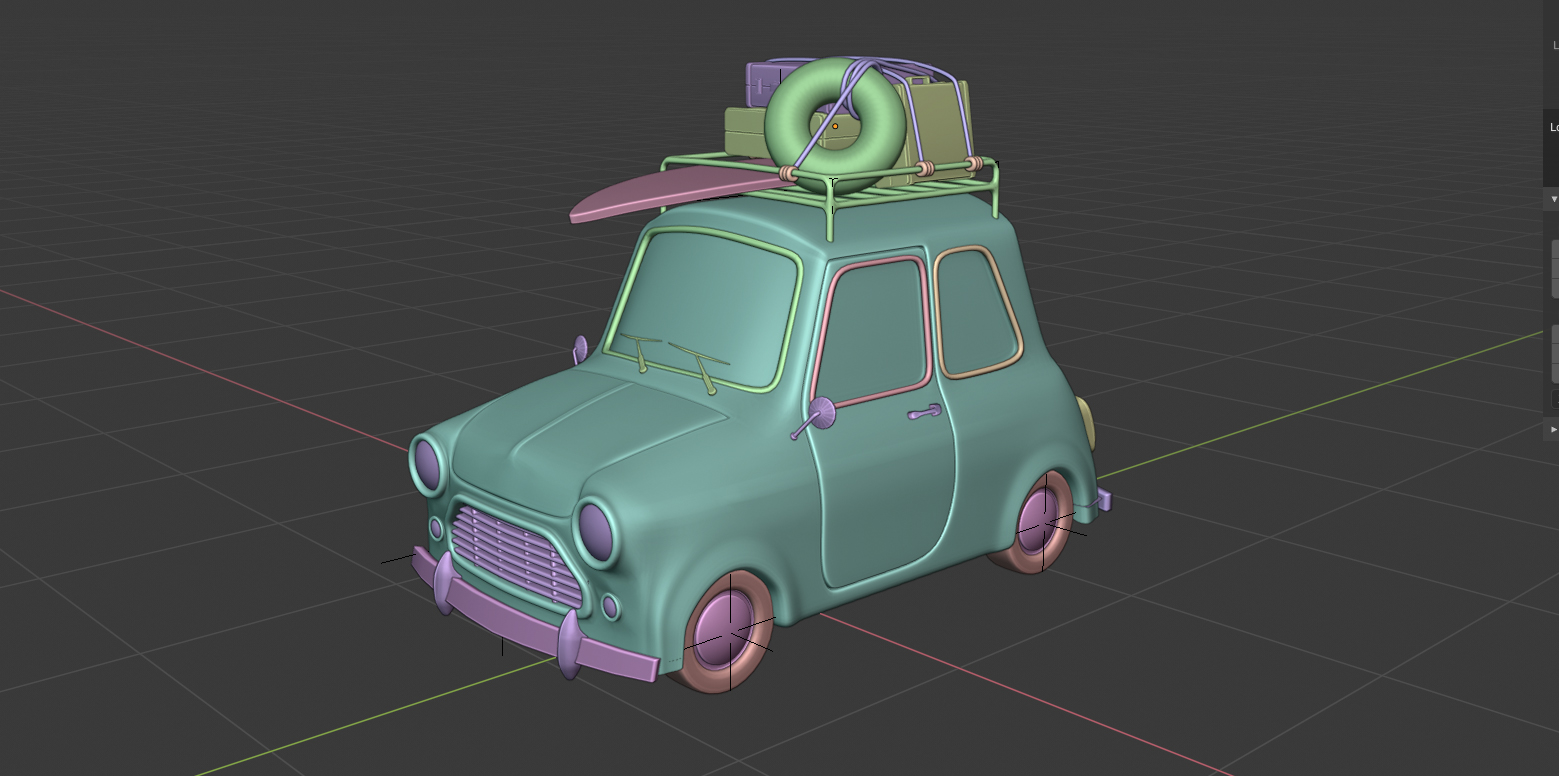
To create the car, I used one of Toriyama’s cars as a main reference, but by doing this I ended up without proper references to model the car itself. So I did some research and I found some references including some Fiat cars from the 50’s that were close enough to Toriyama’s drawing.
During the process I used the Mirror modifier and even though I added the Subdivision Surface, I left it turned off while I was modeling, keeping a clean model and only using it to check the result. I also used Curves to create the ropes and the Skin modifier to create the roof rack and also the window seals.

The car is composed of several parts, in order to keep the file easy to be edited and also easy to move on the scene, I created a Collection for all things related to the car, so I would be able to used it as a Collection Instance.
The Road
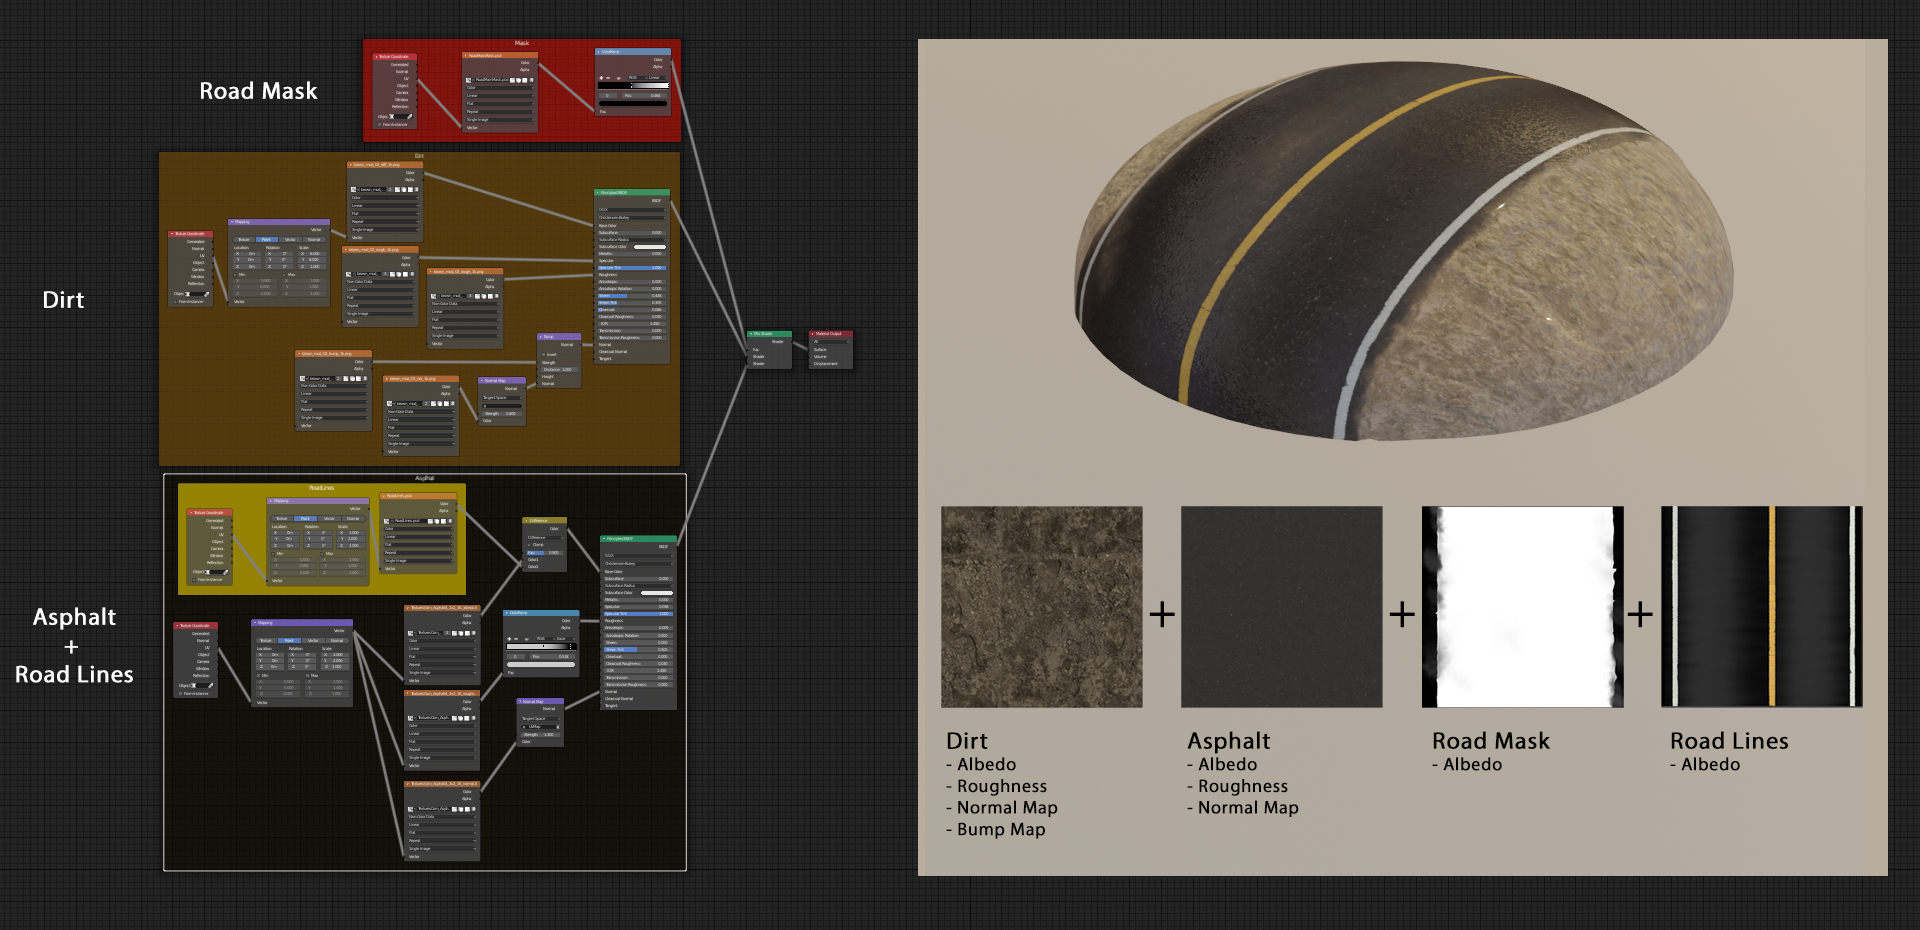
For the road, the composition is very straightforward. But I would like to highlight 3 points in the process: the road textures, the grass and the rocks.
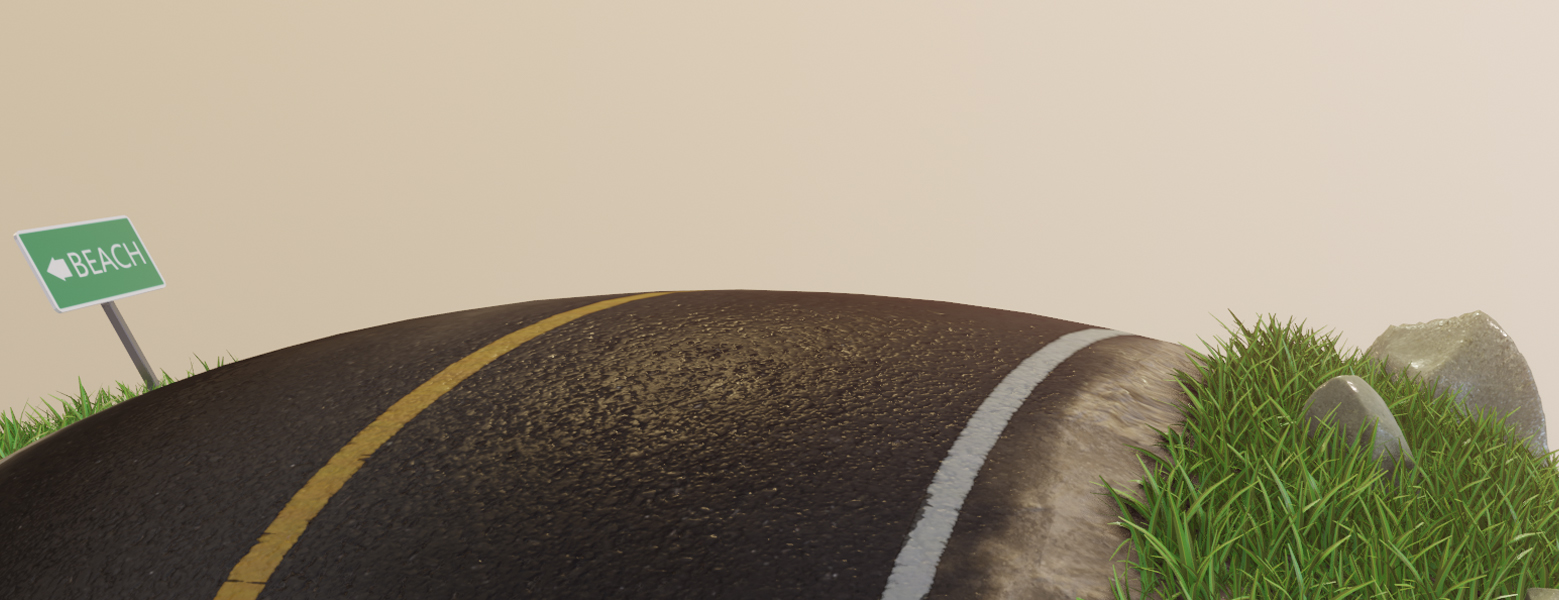
To create the road, I used a Mix Shader to blend the Asphalt texture with the Dirt texture and used a Mask in the Factor to control how much it would be blending. For the Road Lines I mixed the texture with the Asphalt texture using a MixRGB node set as difference, so the black from the texture would be extracted and the colors would remain.
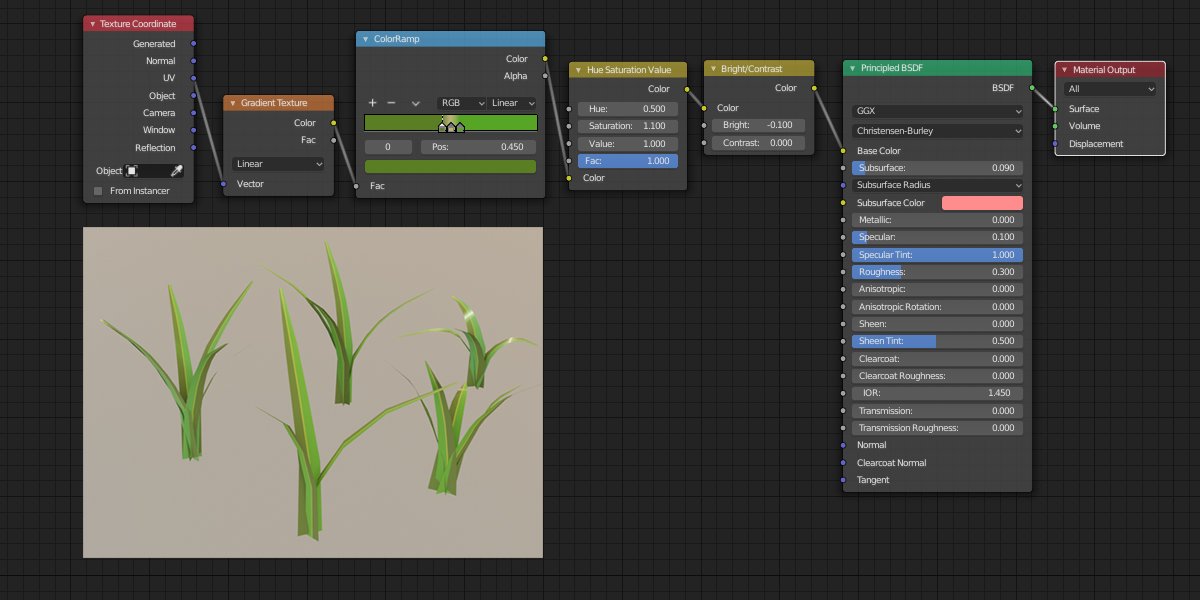
To create the grass I didn’t use textures, only a material. The material was created by giving a Base Color to the grass using a Color Ramp, and then I added a HUE Saturation node and a Bright Contrast node to have a little more control. And to add even more variation to the scene, I create 5 types of grass with different sizes and shapes, then I placed all of them inside a Collection to use as a Collection Instance in the particle system.
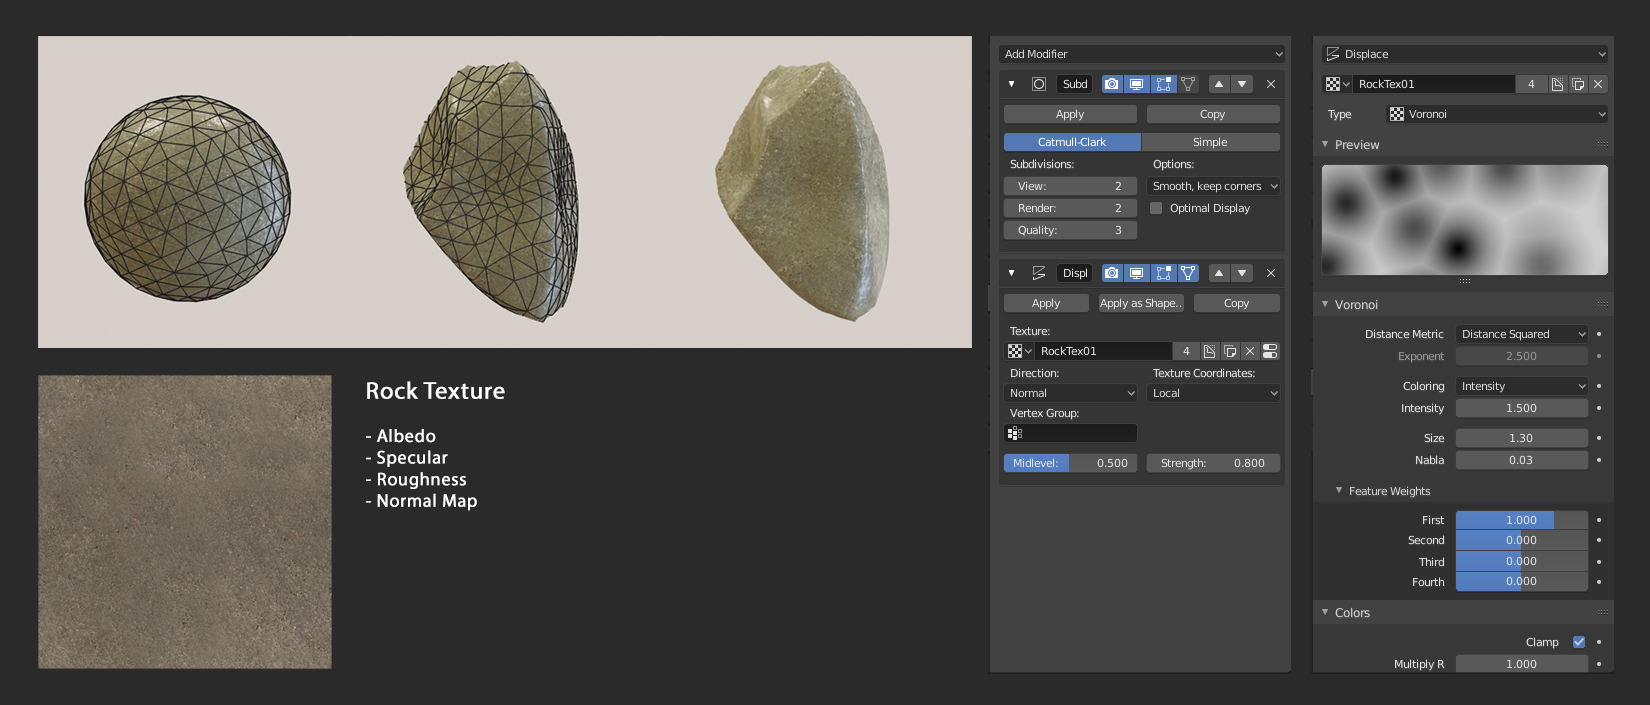
For the rocks, instead of sculpting them, I decided to work with modifiers. I created a sphere and added Subdivision Surface to have enough vertices to work with, then I also added a Displacement modifier. To achieve the style I wanted, I created a Voronoi texture and I played with the Intensity and Size.This method works fine for basic rocks, but for more complex ones, sculpt would be a better way to do it.
The Composition
Once all the elements were placed on the right spots in the scene, I started to work on the lighting. For the scene, I used an HDR image to set Base Color, and to achieve the pinkish color, I mixed the HDR image with a Background node set as pink. As a main source of light I added a Sunlight coming from behind the objects and lastly an Area light on the top to balance the shadows.
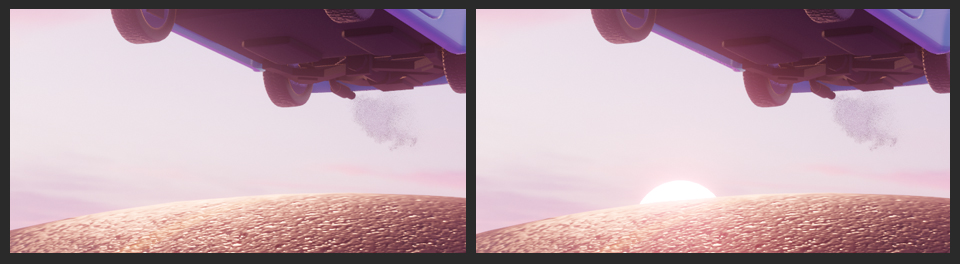
Even though the HDR image has a bright spot, I added a sphere with a Emission shader to create a sense of sun rising. By doing this I’m able to draw attention to the center of the image and not focus only on the car.
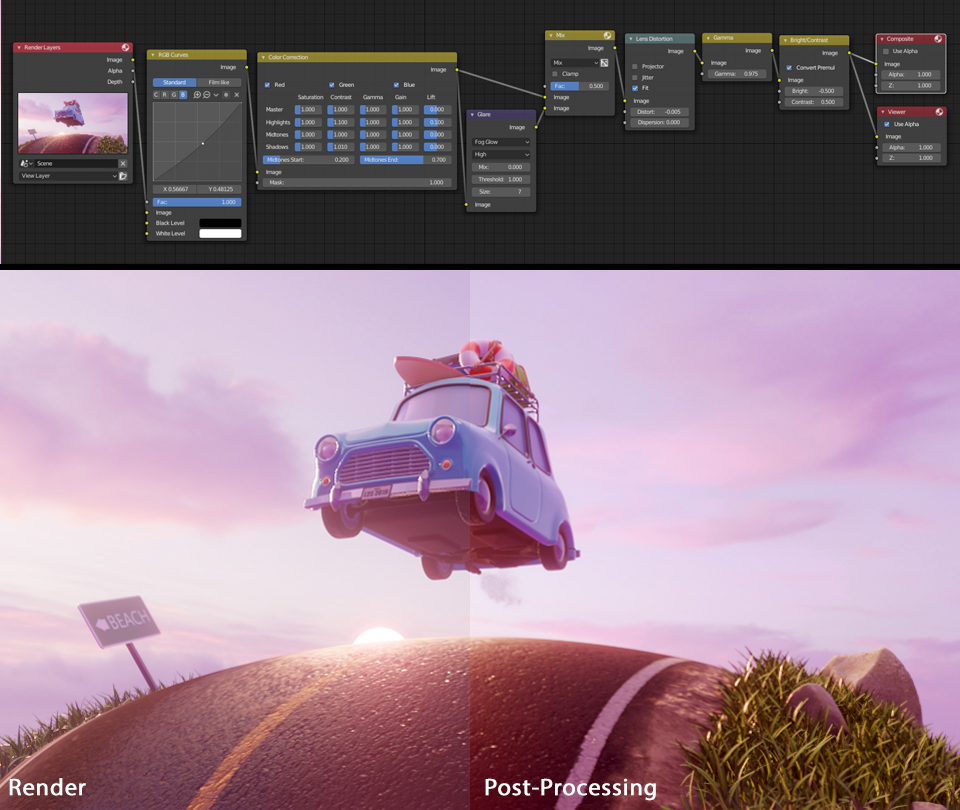
One of the main goals within this project was to keep all post-processing stages inside of Blender and not use other image softwares to tweak the colors and the composition.
So once the final render was done, I only did some small tweaks on the colors and saturation. Then I also added a Glare node to improve the Bloom effect already present on the scene and I added Lens Distortion to increase the perspective of the scene.
My final thoughts about this projects are that it was really nice that I had the chance to remake a project from almost 7 years ago and that EEVEE was the main star of the project. EEVEE allowed me to experiment with things really quickly.
Thanks BlenderNation for giving me the chance to make this article.
About the Author
 Luther S. Schmidt, 3D Artist
7 Comments
Nice work, Luther. I really enjoyed how you explained the process and the references.
Keep up the good work!
Great job! Thanks for sharing your process.
Wonderfull.
This really inspires me! Great work!
Thanks! I'm glad you guys enjoyed.
Thank you! Love your break down and render.
GREAT JOB !
I like it very very much !
Compliments, also for your explanations, very clear.
Vincenzo Benincasa