
About Me
Hi everybody, my name is Danilo Castro and I’m a freelance 3D and Motion Graphics artist based in São Paulo (Brazil). My passion for 3D comes from my childhood when I was playing a lot of video games. I’m a graduate in Advertising and Marketing, but now I’m working as a motion designer. I have already worked for production companies, broadcast stations, advertising agencies and I made models for games. Today the focus of my work is 3D projects for games and videos. I hope to someday work with 3D art in movies.
Inspiration
I have always been interested in movies and animation with Sci-fi and robotics themes. My inspiration is technology. For this project I wanted a weapon with a space theme and a retro look. I started researching 2D art concepts and came across this art, which reminded me of the drawings of The Jetsons cartoon. This concept attracted attention by the simple visual, with balanced shapes and elements. It belongs to the studio Sabor Design.
Tools and Hardware
In this project I used only Blender, Substance Painter, Photoshop and After Effects. The software I use depends on each project I'm going to work on. In the 3D art pipeline I use basically Photoshop, Blender, Maya, Substance Painter, Substance Designer, ZBrush, After Effects and Illustrator (others when necessary).
The hardware I use is made up of a Microsoft Windows operating system that I put together. It is an Intel i7 5280k of 12 cores, 16GB of RAM, 2 GTX 980 TI with a 240GB SSD for the operating system and a second 480GB SSD for work (temporary). There is another 2TB for storing completed projects. It's a great machine but I still plan on upgrading the processor soon. After all, technology is evolving very fast in this area!
Multi-purpose Raygun
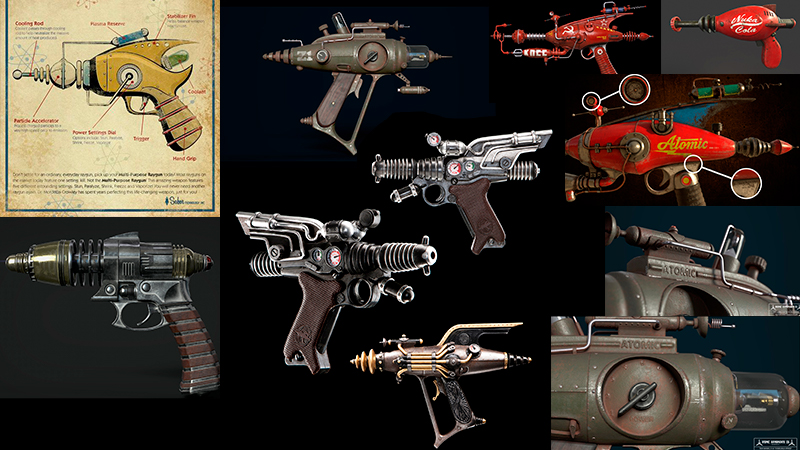
Before starting the project, I did research on the chosen theme and set up a board with the selected art references. This board helps in developing the detail of the object, but the research also serves to understand more about the project. During the survey we can also gather information on how our model works. Consequently with all the information acquired and applied, we have something more convincing, real and unique.
Modeling
First Part
With the research done, now is time to start the project. We begin the blocking by modeling larger pieces with simple shapes to visualize the model as a whole. Without much detail, the intention is to understand its shapes and silhouette.
Second part
This is the modeling stage of the parts and smaller details. No textures yet. In this step we focus on finalizing all the modeling of the elements.
UV Map
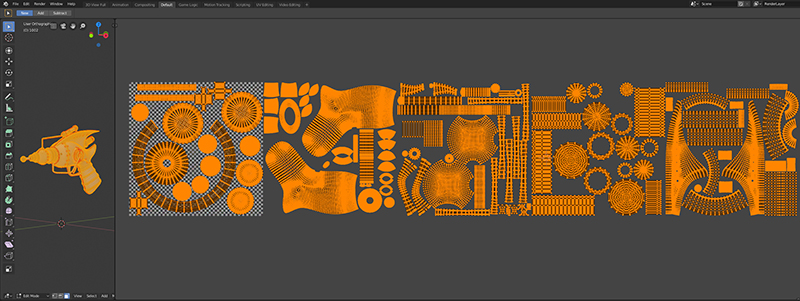
We need to open the UV mesh before exporting to Substance Painter for texturing. I used Blender's standard UV tool in conjunction with the UV Packmaster Add-on and TexTools to organize the mesh that was split into a 5 UV Set (UDIM).
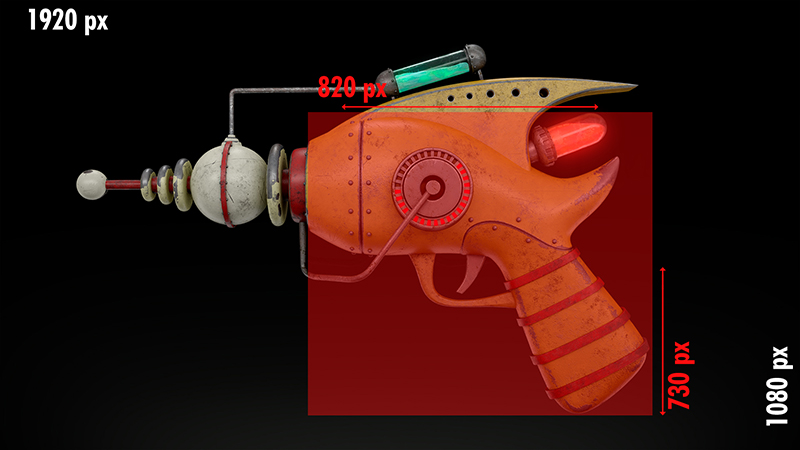
We have to keep in mind that when we open the mesh it should not have any distortion. For this you have to be attentive to the cuts of the mesh. Depending on where you make the cut, it may not open properly. To do this you can use the Checker Map option on the TexTools add-on that shows the textures in the viewport, so you can see if there is any distortion in the mesh. Another concern is how much space the UV mesh will occupy. We have to know how close to the camera this object will be, to get an idea of the resolution and space that it will occupy in the UV. The closer to the camera, the greater the space in the UV. Otherwise, we will not see the details in the render.
In this first image, we have the camera view. The model body occupies only part of the screen. This is a render with 1920x1080 resolution.
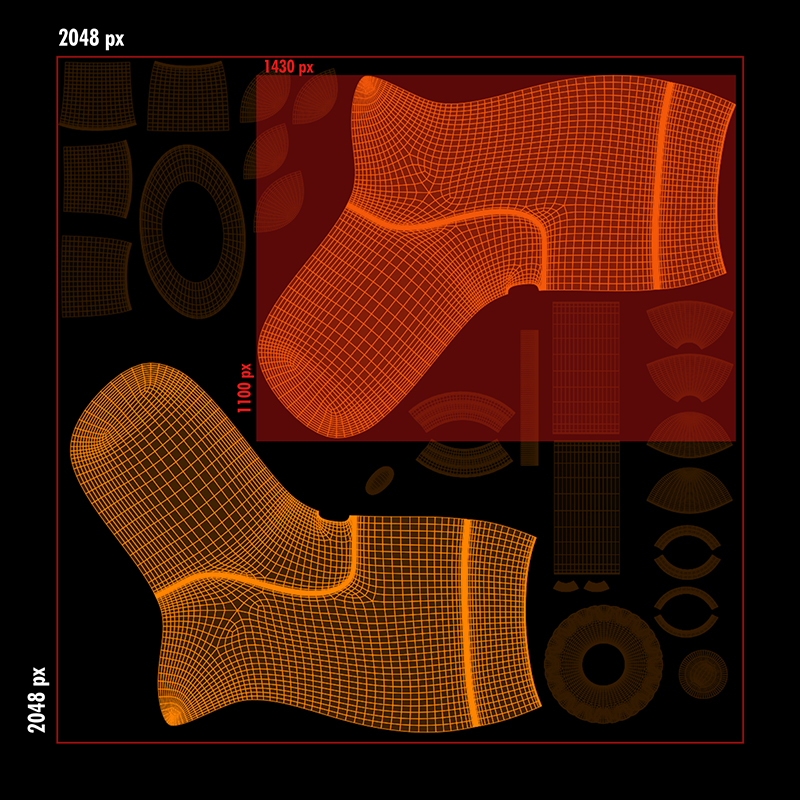
The second image is the UV open mesh. The area occupied by UV, in pixels, is almost double that used by the rendered model. This ensures great detail quality in rendering.
Lighting
When it comes to illuminating a scene, we must think that all lighting has a hierarchy. Whoever sees the image should be able to see the hierarchy of lights and realize that the object has a volume, even if they only recognize it unconsciously. In this scene you have the 3 basic light points: key, fill and back (or rim). And a few more lights were also used as a filler. When I set the scene light, I used a simple yet reflective material. This makes rendering lighter, and makes it easier to see how the light is projected and reflected in the elements of the scene.


Texture and Materials
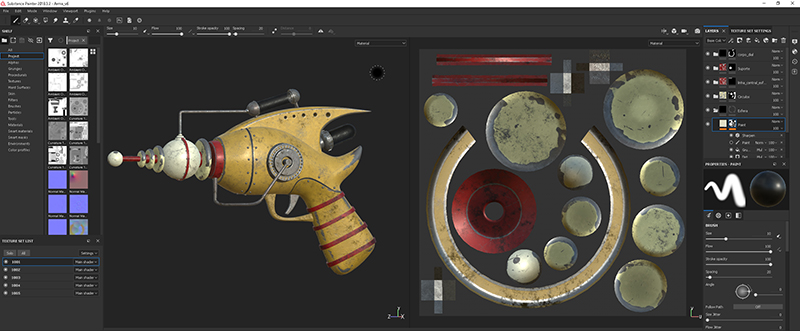
Substance Painter was used to paint the materials. But this step starts with a basic material in each piece, already with the desired color. It’s interesting to see the model with all the colors before we start adding the details. In this model the colors are not very saturated. This gives a more realistic look and makes it look less like a drawing. With grooves and natural wear we tell the story of our model, a used and old weapon. I export the maps using the PBR MetalRough setting in Substance Painter.
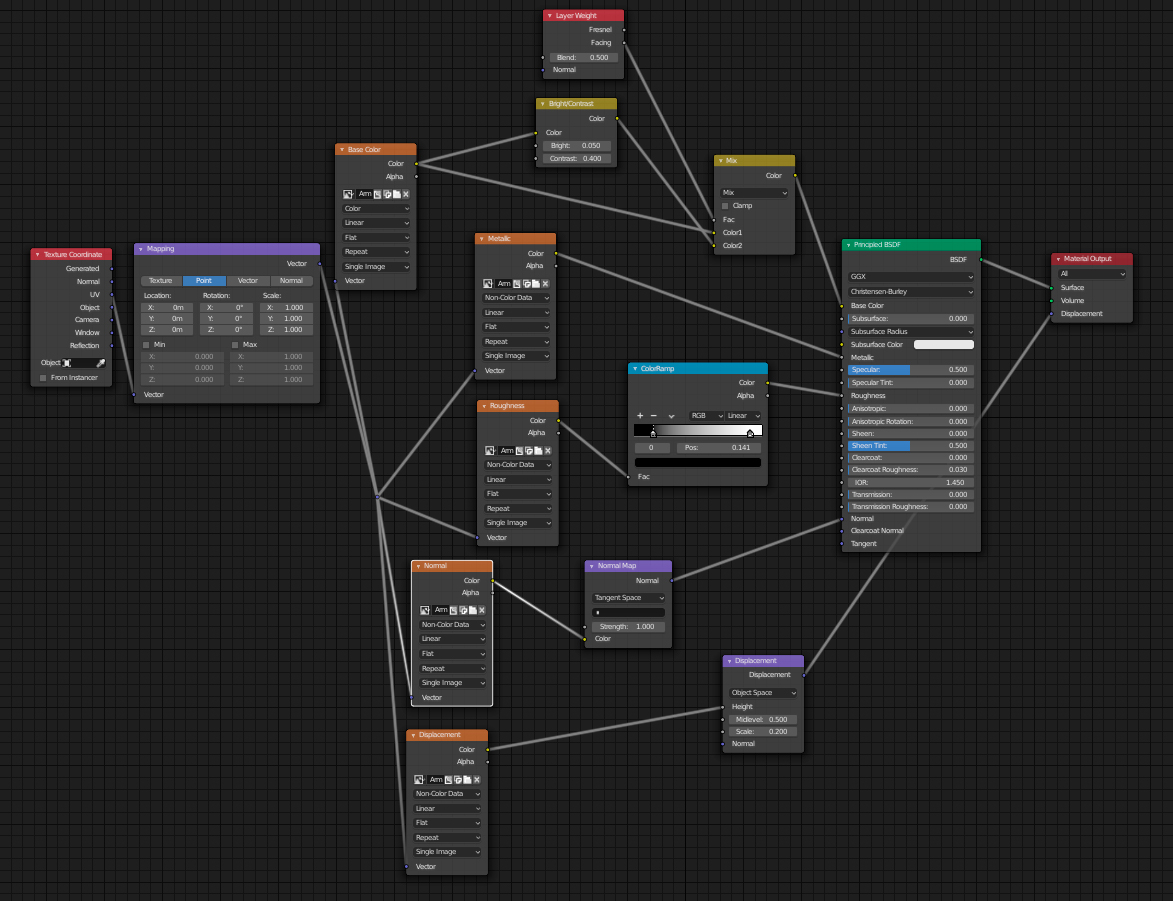
Now we can configure the materials in Blender with the textures that we exported from Substance Painter. In the node editor, with the Principled BSDF node selected, we use the command CTRL + Shift + T that allows us to connect directly to the maps. In some maps, I've added correctors with the ColorRamp node. There are corrections on roughness maps or color maps and, if necessary, you can add nodes on these two items. I also duplicate the color map and make a saturation adjustment in one of the maps. We have two color nodes connected to the mixRBG node and the Layer Weight node connected to the FAC channel, creating a sense of volume and depth in the color channel.
Post Production
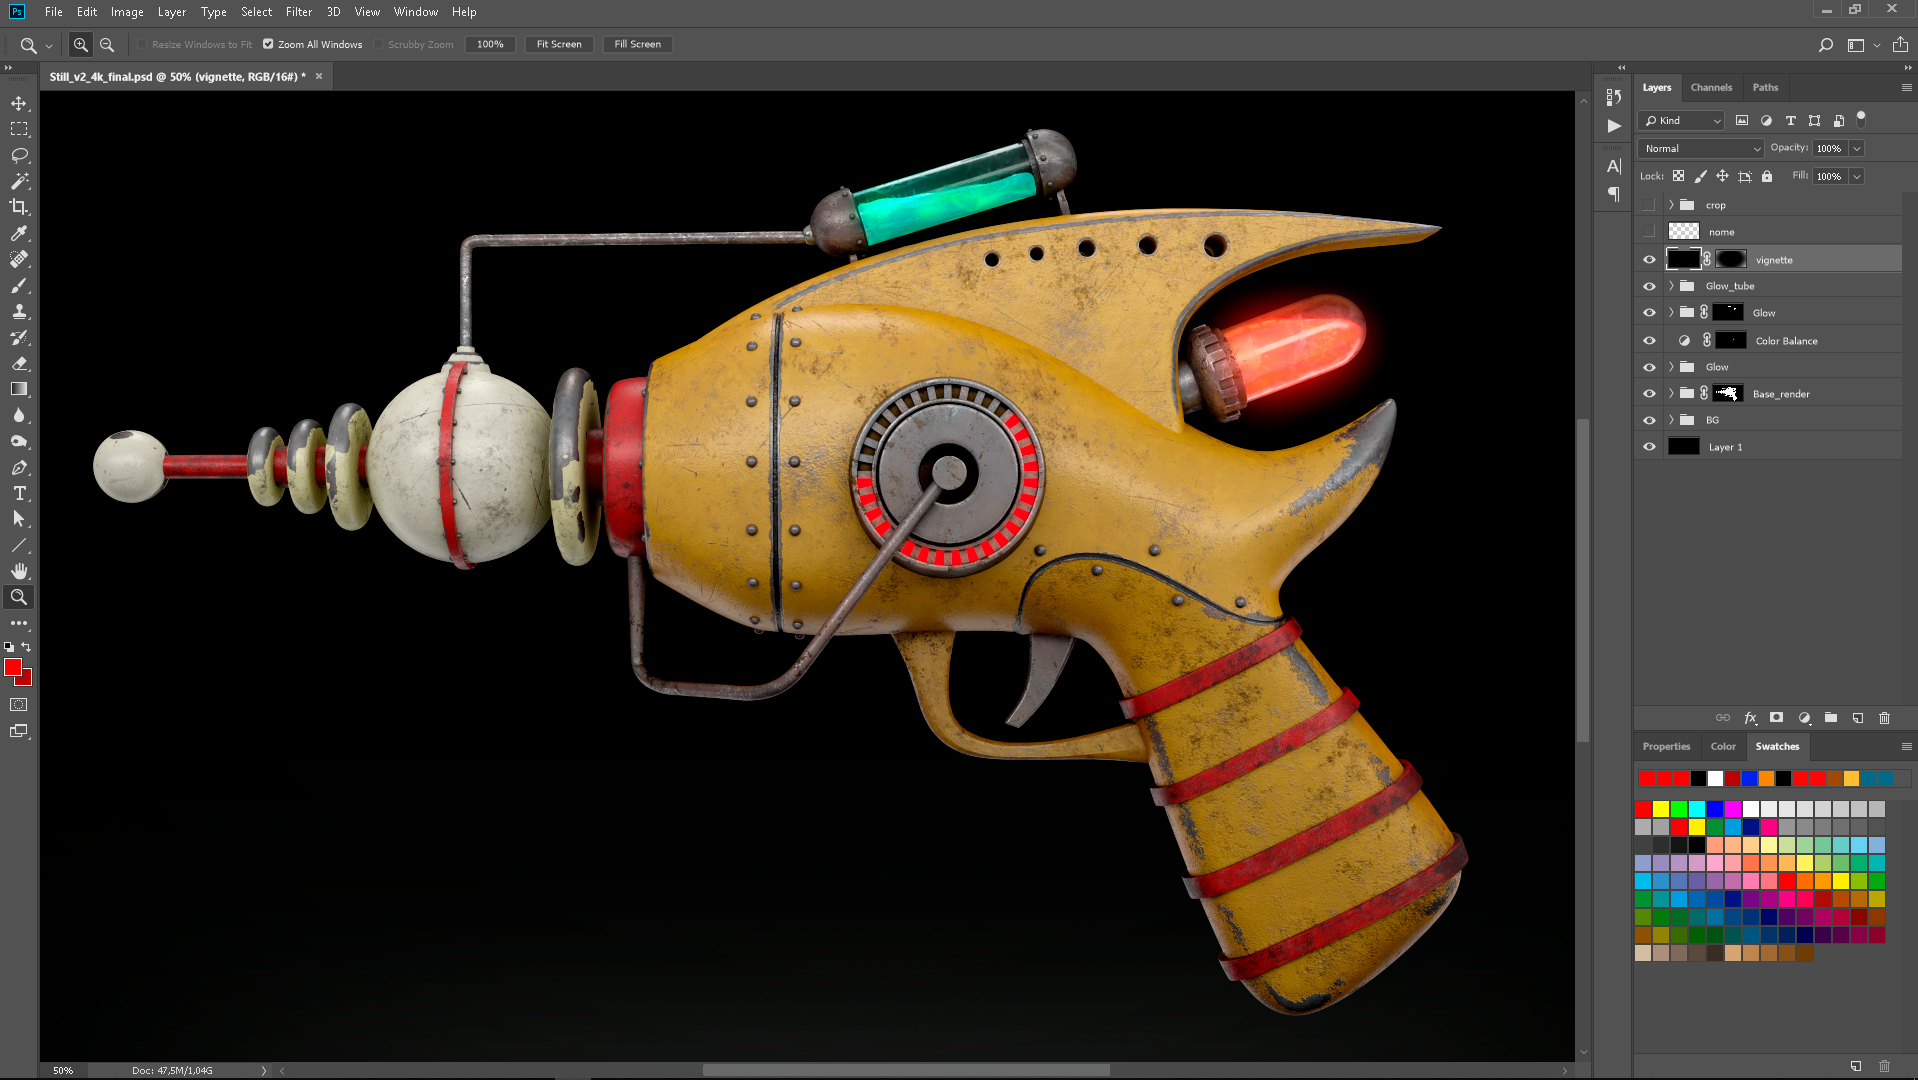
Some adjustments were made on the final render in Photoshop. Levels corrections and saturation were made to make the render feel more alive. The ambient occlusion layer was added on the top of all the other layers and the blending mode was set to multiply with 30% transparency. Some additions of brightness were made in the liquid tube, to make it look more sci-fi.
Conclusion
That’s it for now. We’ve come to the end of this article, I want to thank BlenderNation for this space. I feel honored to contribute and I hope that you find this content helpful. If you have any questions, feel free to contact me through my social media networks. Thank you for your time.
About the Artist
 Danilo Castro, 3D artist
1 Comment
Very nice work!!!