
Hi there,
My name is Matthias, I am an Applied Computer Science B. Sc. and Game Engineering and Visual Computing Master student from Germany. I started to dabble in Blender in the 2.4x era, but when 2.5 came around it really stuck. Since then I have worked on 3D animation projects, games, 3D printing, VR and AR, animatronics, and visual effects. Blender was always involved in some way, often as the central tool in my software arsenal.
Thanks very much to BlenderNation for the opportunity to share some details about this project.
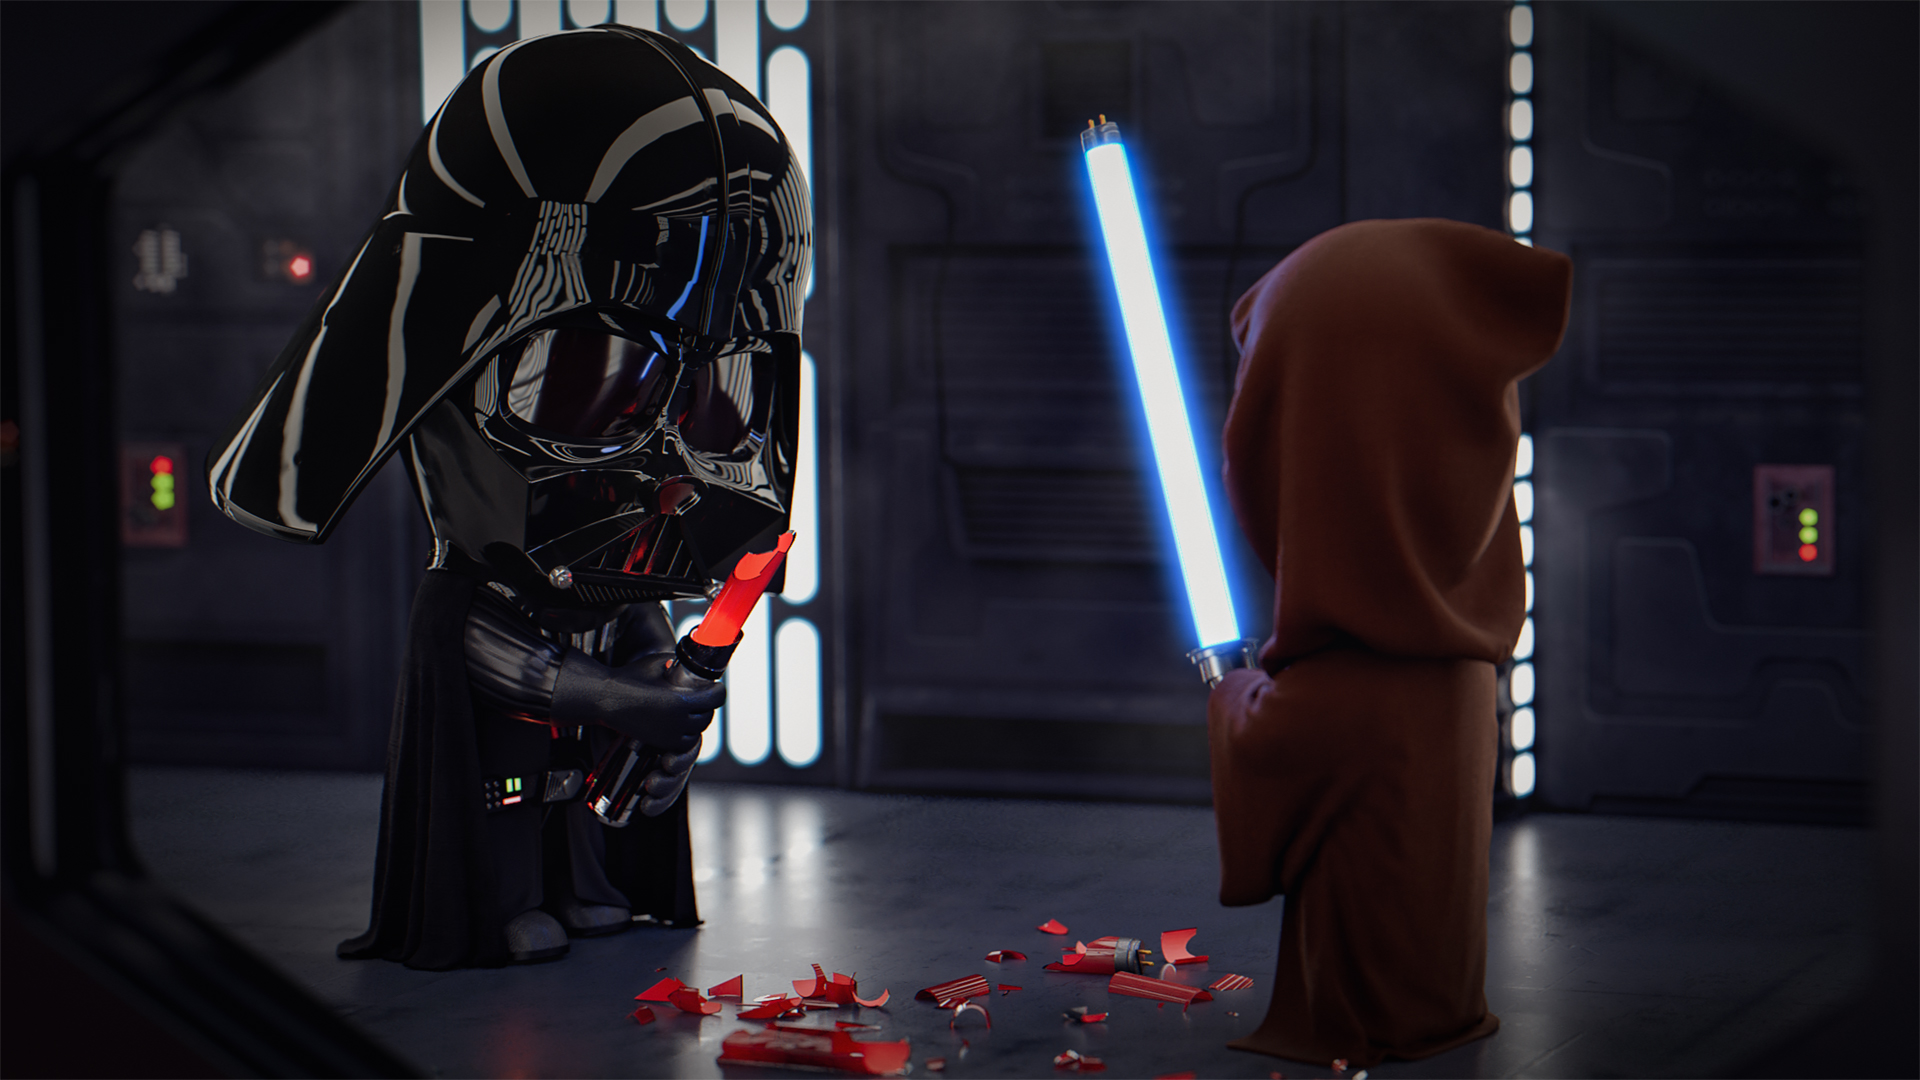
Only a master of evil, kind of…
The Plan
Over a year ago Blenderartists hosted a weekend challenge with the theme “Neon”. Somehow, I immediately thought of a Jedi with a broken lightsaber made of a fluorescent tube. Specifically, I found the notion of Darth Vader looking down somewhat puzzled on his shattered blade quite funny. So I started to gather reference materials in PureRef:
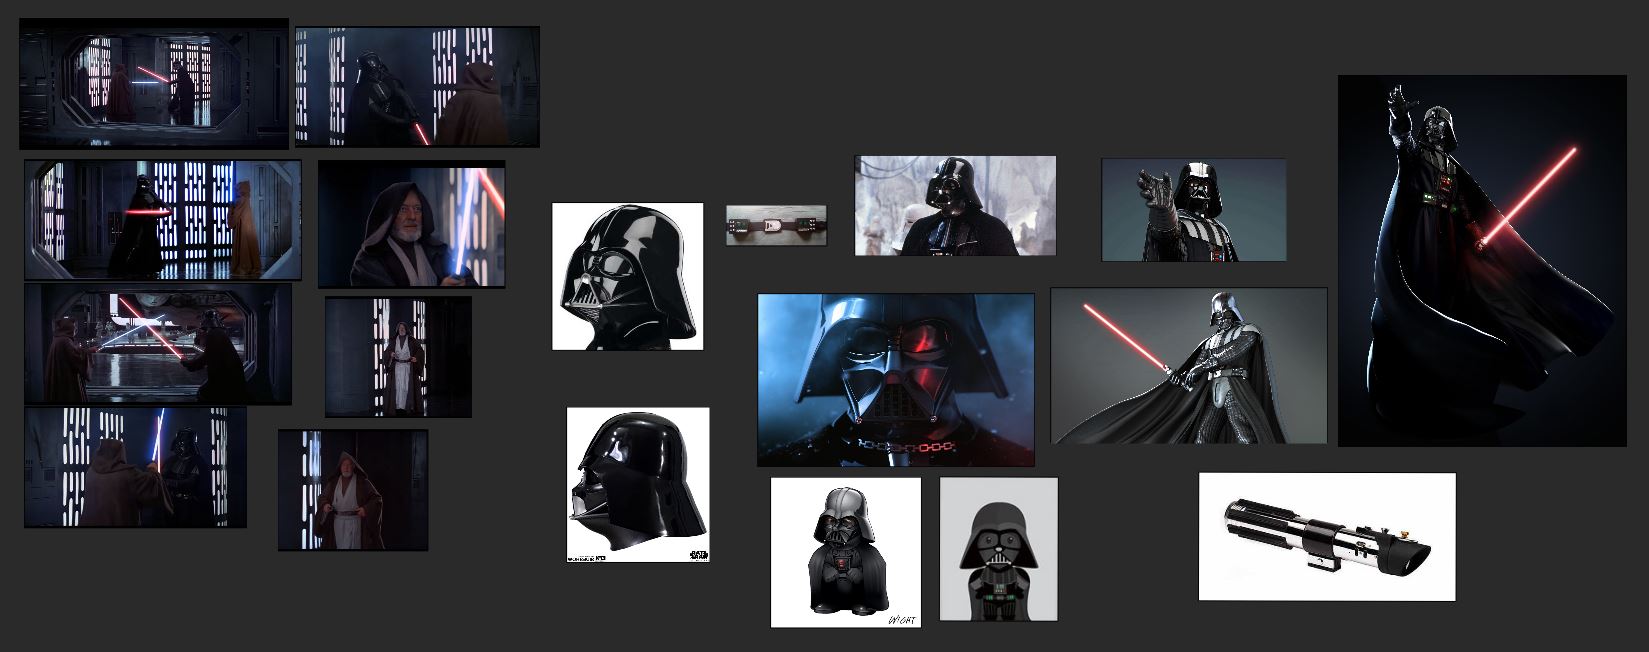
Especially the tiny Lord Vader on the bottom right would become the reference for proportions of the model.
Modelling
The figure of Vader is quite low-poly, but especially on the helmet I used creases in combination with the subsurface modifier to get those nice, rounded edges while maintaining a smooth surface.
The body is very low poly, too. I used it as a target to shrink-wrap the belt around it, as well as a lattice, to bend the chest piece into place. For the buttons on his chest and belt I followed the reference images very closely to make them look authentic.
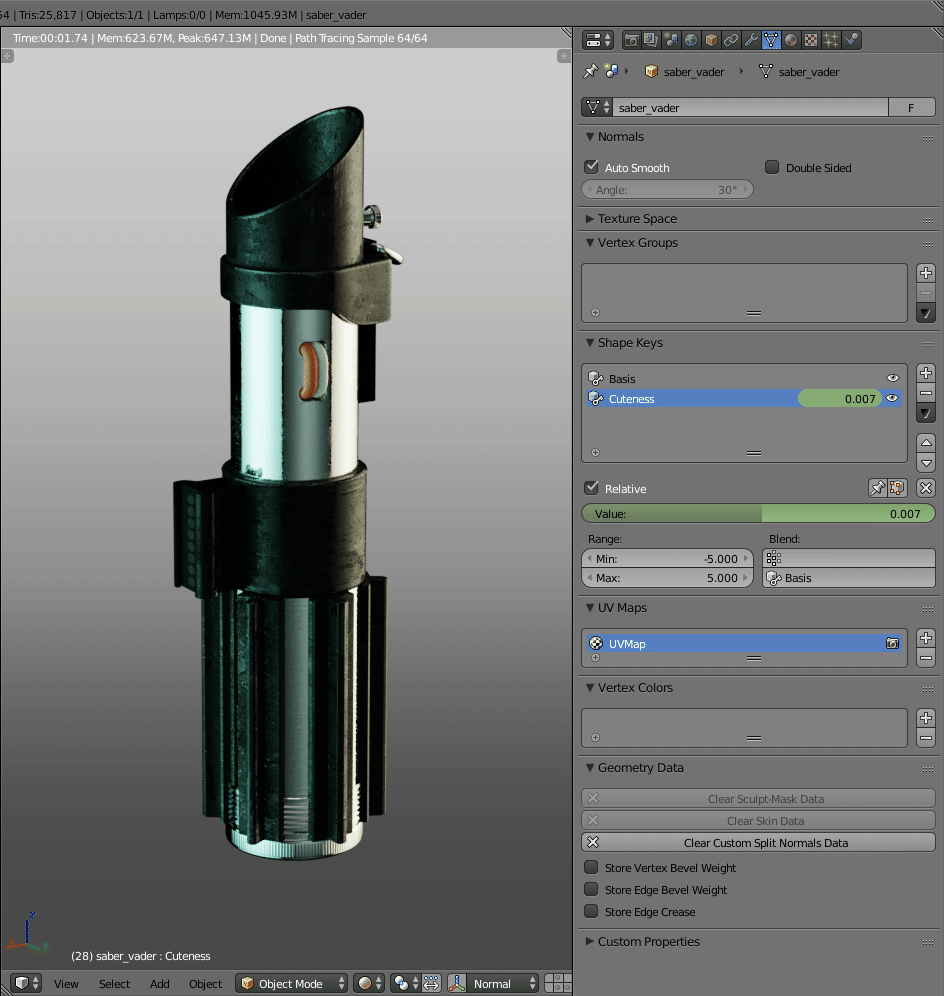
For the background I used parts from the “Imperial Corridor” Videocopilot Star Wars model pack, from which I also adapted the lightsaber model and blend-shaped it into a cuter form:
Simulation
At first I tried to simulate Obi Wan’s cloak and Vader’s cape in Blender.
With a little more effort I think I could have gotten a good result, but instead I used this project as an excuse to test out Houdini’s new cloth simulation tools. (I am also looking forward to trying Blender 2.8’s new cloth tools, they look amazing.)
I had used Houdini in the past and am quite familiar with it, and I really like the combination of Blender and Houdini; I think they complement each other quite well.
At first I exported a base collision mesh from Blender to Houdini, which I animated with a basic rig to change from a T-pose to the final pose. Then I procedurally build the cloth in Houdini, draped it onto the T-posed collision mesh, and finally simulated it into the final pose. The final step was to clean up the geometry a bit and to give it some thickness before I exported it back to Blender.
The fragments of the broken lightsaber were also simulated in Houdini. I specifically used the material fracture tools, which give nice results for glass and hide the often noticeable “Voronoi look”.
The rigid body sim could have been done pretty much the same in Blender, but exporting would have been more work than just to quickly simulate it in Houdini.
Shading
There is nothing much to say about shading. I abundantly used the principled shader and some simple noise textures. I like the look of the shards, they look quite nice even though shading could not be simpler.


Lighting
Most of the light in the scene comes from the emissive textures on the wall. I added an area light behind Obi Wan to give him a bit of a light rim and positioned another emissive plane over Vader’s helmet to add some reflections, to better separate the helmet from the background. I also added a huge mesh light with a still image of the “A New Hope” scene I am referencing set to emissive, but this ended up not contributing much.

Rendering & Compositing
The scene was rendered in Cycles in three layers (background, characters, blast door) with 2000 samples at 120% 1080p, as I intended to add a little camera distortion. I assembled and tweaked the layers in Photoshop.
Thank you for reading and thanks again to the BlenderNation team for letting me share this little Behind the Scenes article.
About the Author
 Matthias Heim, Programmer and Technical Artist
2 Comments
I don't think enough projects implement an explicit "cuteness" parameter.
Hehe. Well done! Thank You for sharing Your workflow