Behind the Scenes: Summer Color
About
Hi, my name is Alessio, alias Zale. I’m from Italy and I’m studying to become a 3D artist.
I started to learn Blender three years ago, after I finished high school where I studied Computer Science, but I interrupted my studies to start working for a software house. While working there I continued to model in my free time and only a few months ago I quit that job to start studying art seriously by following a course.
In the past I tried many times to get into the art world, with traditional painting, illustration, vfx and more, but none of these fields fully satisfied me like 3D graphics does.
(My first ever approach to the digital arts was trying to reproduce the spells from the TV series “Wizards of Waverly Place”.)
I still don’t know what I will do in the future as an artist, I just know that I like to do this kind of stuff.
The Concept
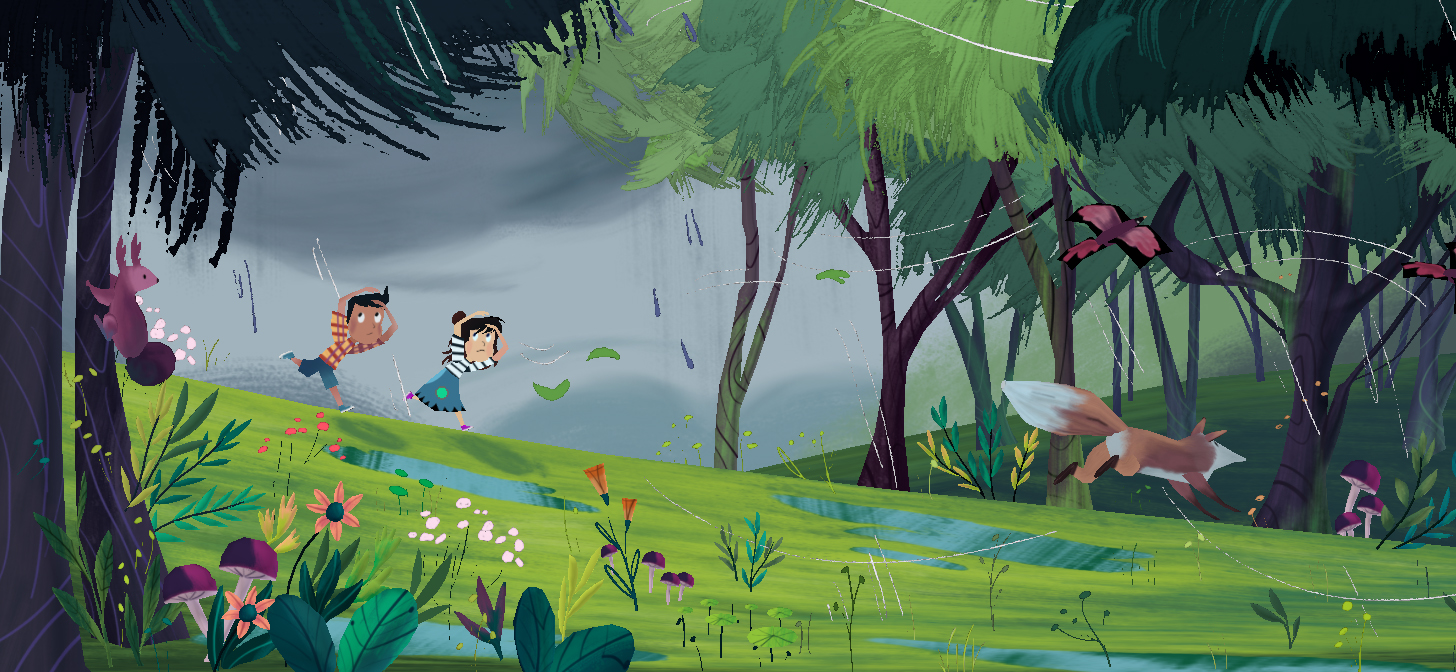
I like the illustrations made for children books, because they convey positive feelings, and I would like to carry that style and those good vibes into my 3D models. The model is based on one of the illustrations made by Zoe Persico for the book Summer Color! written by Diana Murray.
Tools & Hardware
I used Blender for modeling and Affinity Photo for texturing.
My hardware setup is really minimalistic, I do everything with a 13” Macbook Pro, a basic Wacom Intuos tablet pen, and a mouse, of course. I definitely need an external display.
Modelling
I used Blender 2.79 for the modelling part (I will switch to the 2.8 version in the future). I didn’t use any particular tool of the program, especially because I still don’t know most of them. I relied on the most “common” functions, like extrusion, loop cut, move/scale/rotate etc, in this particular model I didn’t even used the mirror tool.
My modelling workflow consists of creating the outline of my objects, extruding single vertices one by one to obtain the general shape, and then I fill the internal space, creating the faces, trying meanwhile to optimise the object to avoid triangles. When my object is complete I start working on it with the proportional editing active, to keep smooth the curves that I created earlier.
I like the fact that Blender allows me to use most of its tools using shortcuts; this really improves my work speed. And the interface is really modular – it’s really easy and fast to change the content, the position, and the dimension of each “window”, allowing me to always have everything I need at my disposal.
I would say that the key to creating a model like this is to try to match the model with the original illustration.
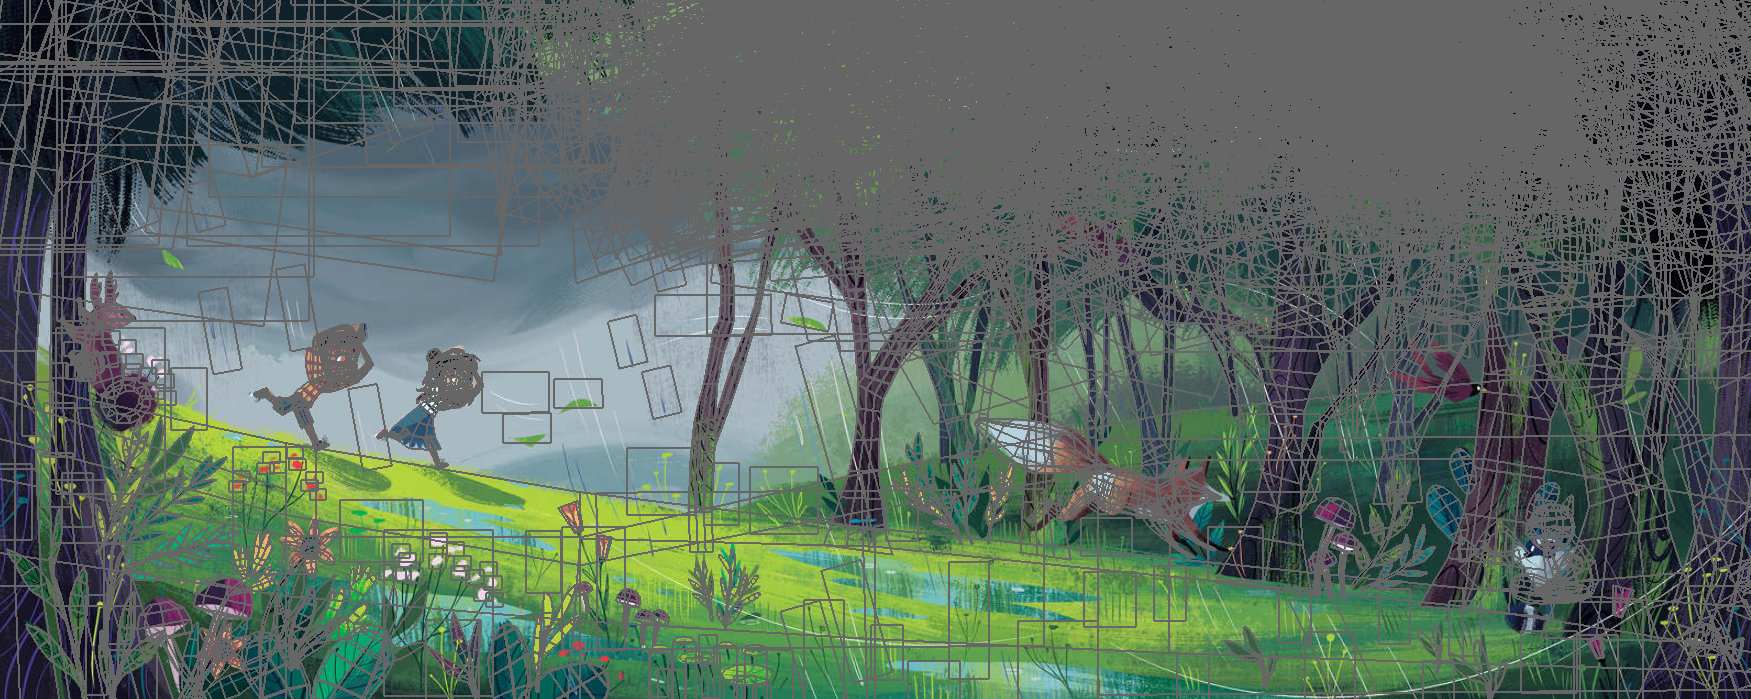
I loaded the illustration as background and, using the front orthogonal view, I started to model every single piece of the scene without rotating the view.
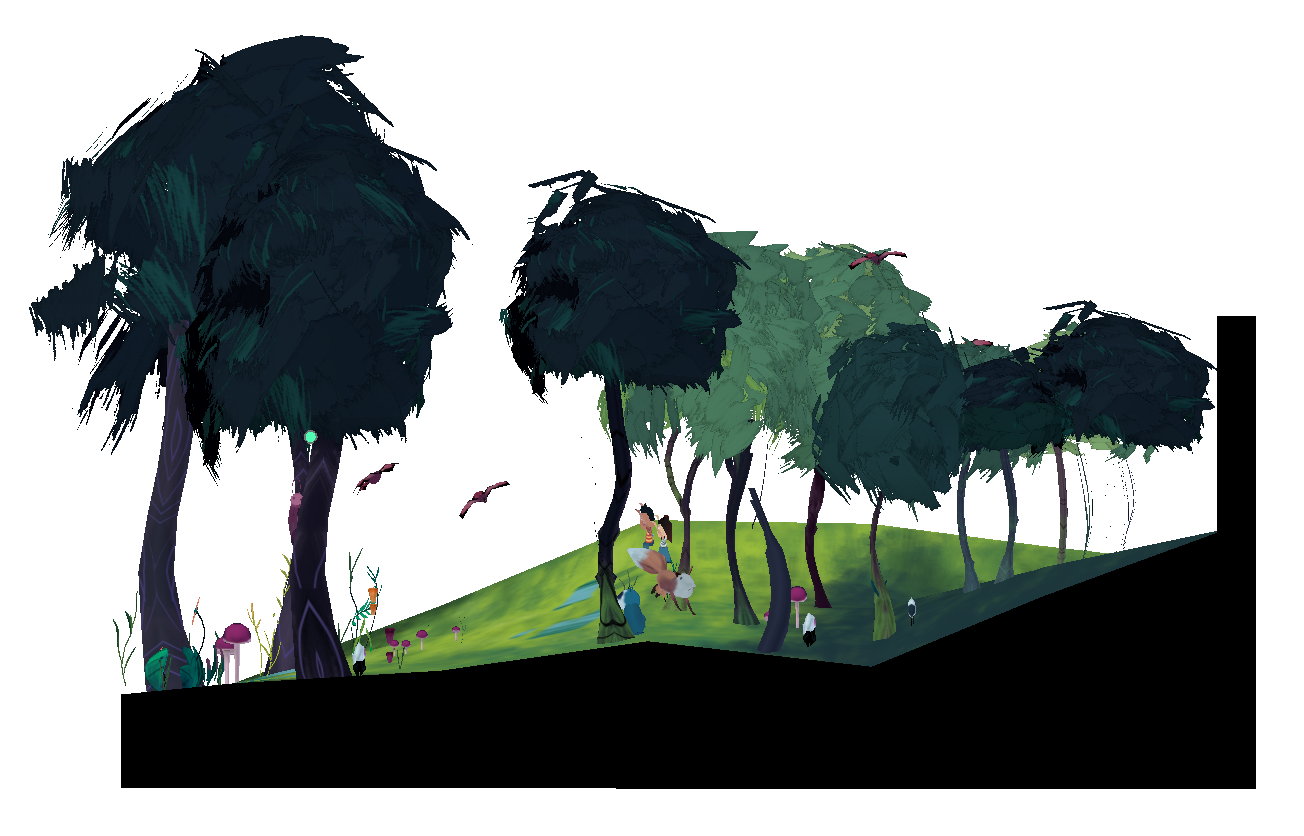
When the model was done it was time to add a bit of a 3D effect because modelling something only using the front view makes everything flat, so I started to rotate and deform everything from the other views (top, right/left).
Modelling the terrain using this perspective is kinda complicated. To make sure that all the areas were shown (in the orthogonal view mode the horizontal surfaces aren’t shown by the camera), I had to work on their depth and angle. By combining these elements I was able to reproduce pretty accurately the original picture. This trick makes the terrain lean towards the camera, but with the right balance between angle and width I managed to have a realistic proportion.
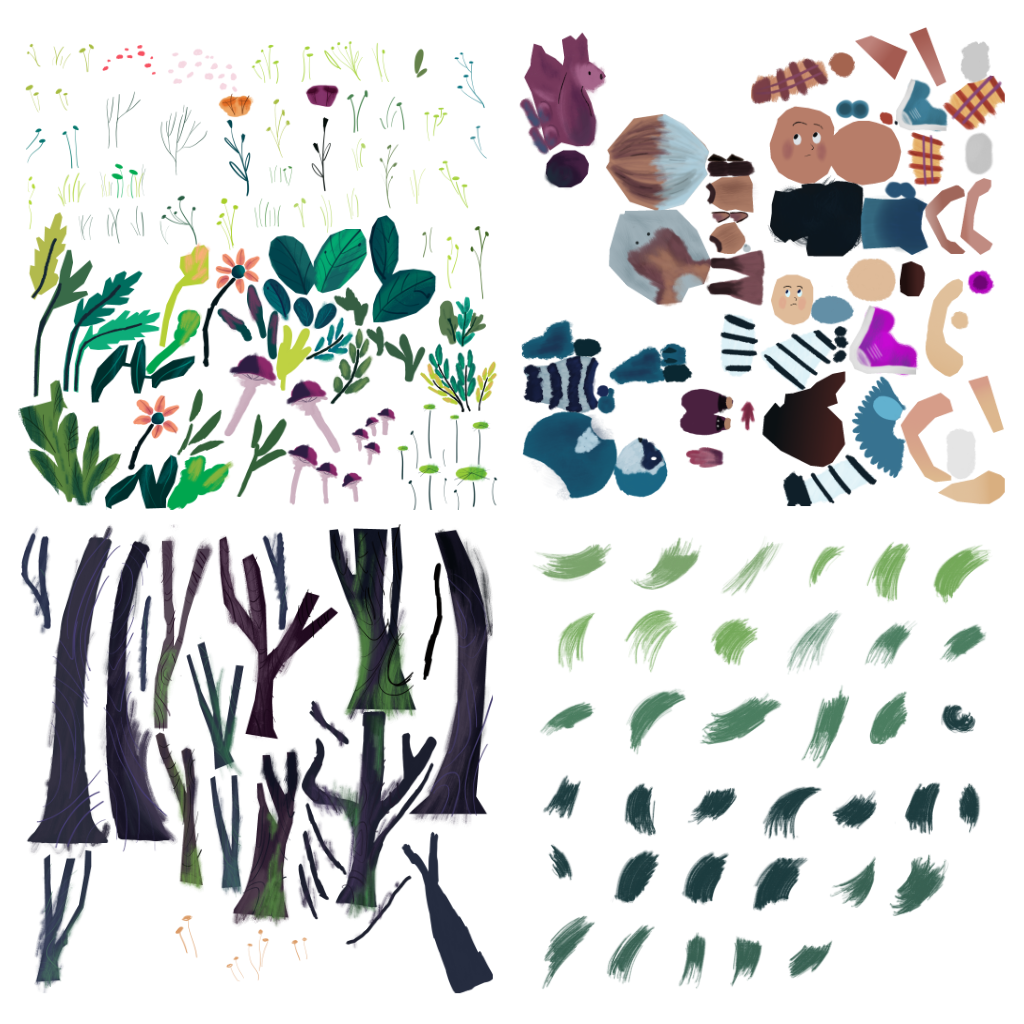
The most difficult and time consuming part was modelling the leaves of the trees, because they are not properly leaves but brush strokes and I wanted to maintain the hand-painted style in the 3D space.
I created some transparent textures with all the brush strokes that I would need, like a “color palette”, and then I started to copy-paste tons of single planes while moving the UV on the brush strokes that I wanted to use.
The sky background is a bit weird because it’s just like a wall without depth, but I like to imagine it like a theatre scene, where the sky, or the background, most of the time, is just a painted wall.
This is something that I have to improve, a spheric background would really improve the immersion during the visualisation.
To fill the empty spaces I copied some elements, scaling them and hiding them behind the foreground objects, because I didn’t want to alter the frontal view.
Texturing
To paint the textures I used Affinity Photo, using only the default brushes. Maybe there are better softwares than this for painting, but it’s kinda cheap and it offers me all the tools that I need with an interface very similar to Photoshop.
The texturing was kinda difficult, because I had to reproduce the original paint style, try to understand what kinds of brushes were used, pick the right colours, etc.
It’s something like a reverse engineering of the illustration.
It might sound bad, but I just tried to imitate the original illustration converting it to textures. I don’t really know how to explain it, because I think that it is just as I said – the important thing is to try to paint like the original illustrator.
Sketchfab Setup
Then I used Sketchfab to share the model.
My settings on Sketchfab are really essential :
- The textures are in shadeless mode to not have the shadows linked to a light source.
- The camera has a 1° FOV to match the orthogonal view that I used in Blender.
As to the post processing effects that I used :
- The grain effect gives a more natural aspect, so that it seems like it was coloured with real crayons.
- A bit of sharpness to make the textures more defined.
- And bloom, because it adds, I don’t know, a magical look to every scene, and I like it.
The Sketchfab suite is perfect to show my works, especially to the people who don’t know anything about 3D stuff. I just have to pick up my phone, and show them my models using the AR mode, to make everything looks even more cool and magical.
About the Author
 Alessio (aka Zale), 3D Artist


This is so cool!!!
do u have tutorial or course