Behind the Scenes: White Interior
About
My name is Rio Suryonugroho (rioreo), I live in Jakarta, Indonesia. I am an architect and interior designer.
Currently I am working freelance at – rioreo.Studio – for architectural and interior design, also for 3D architectural and interior visualization.
The majority of my knowledge of architecture and interior design comes from when I was studying at the architecture engineering faculty.
When I first learned 3D, I used 3ds Max and I used it for a long time. Then in 2016 I learned software that I think is very good and very easy to use, Blender … and I started using Blender more and more and slowly I left 3ds Max. I used Blender completely, doing everything from modeling to materials / texturing to rendering, and sometimes I even use Blender for post pro.
Hope you enjoy …
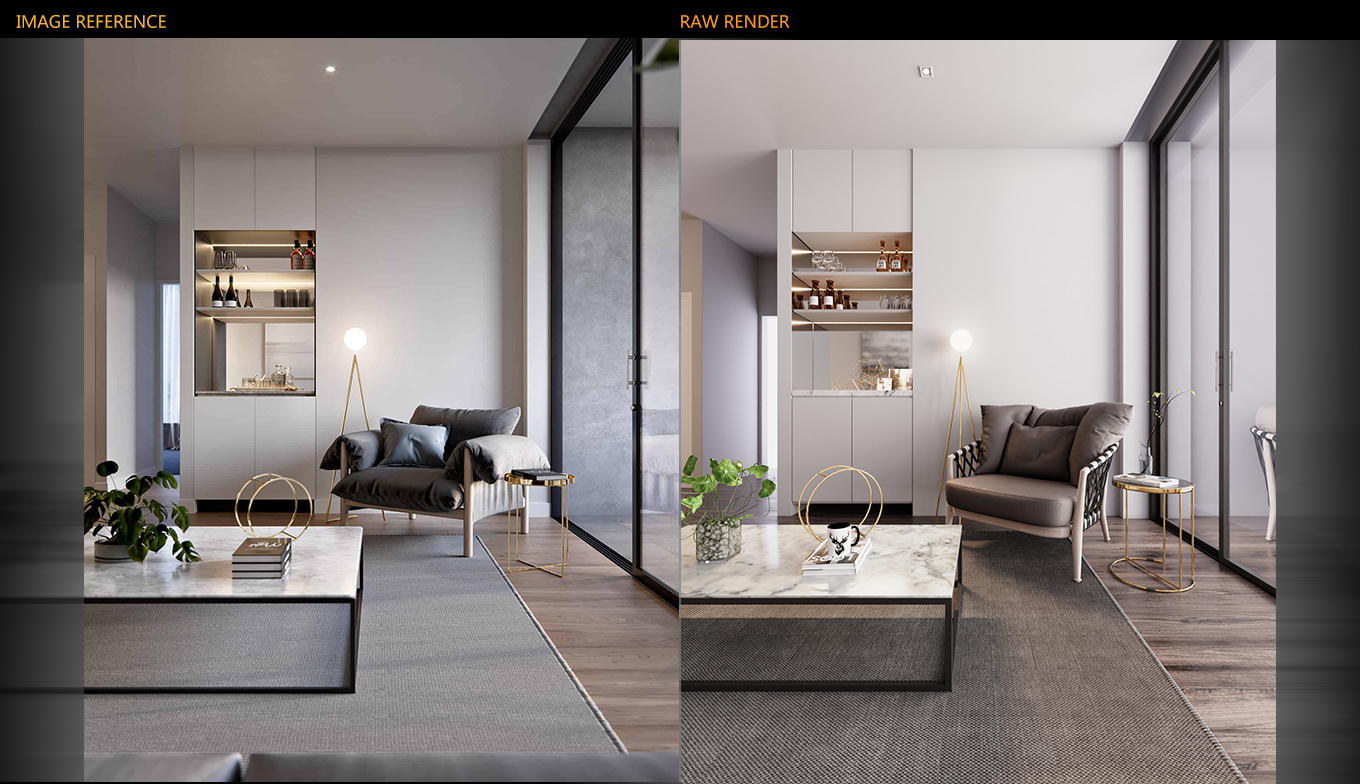
IMAGE REFERENCE
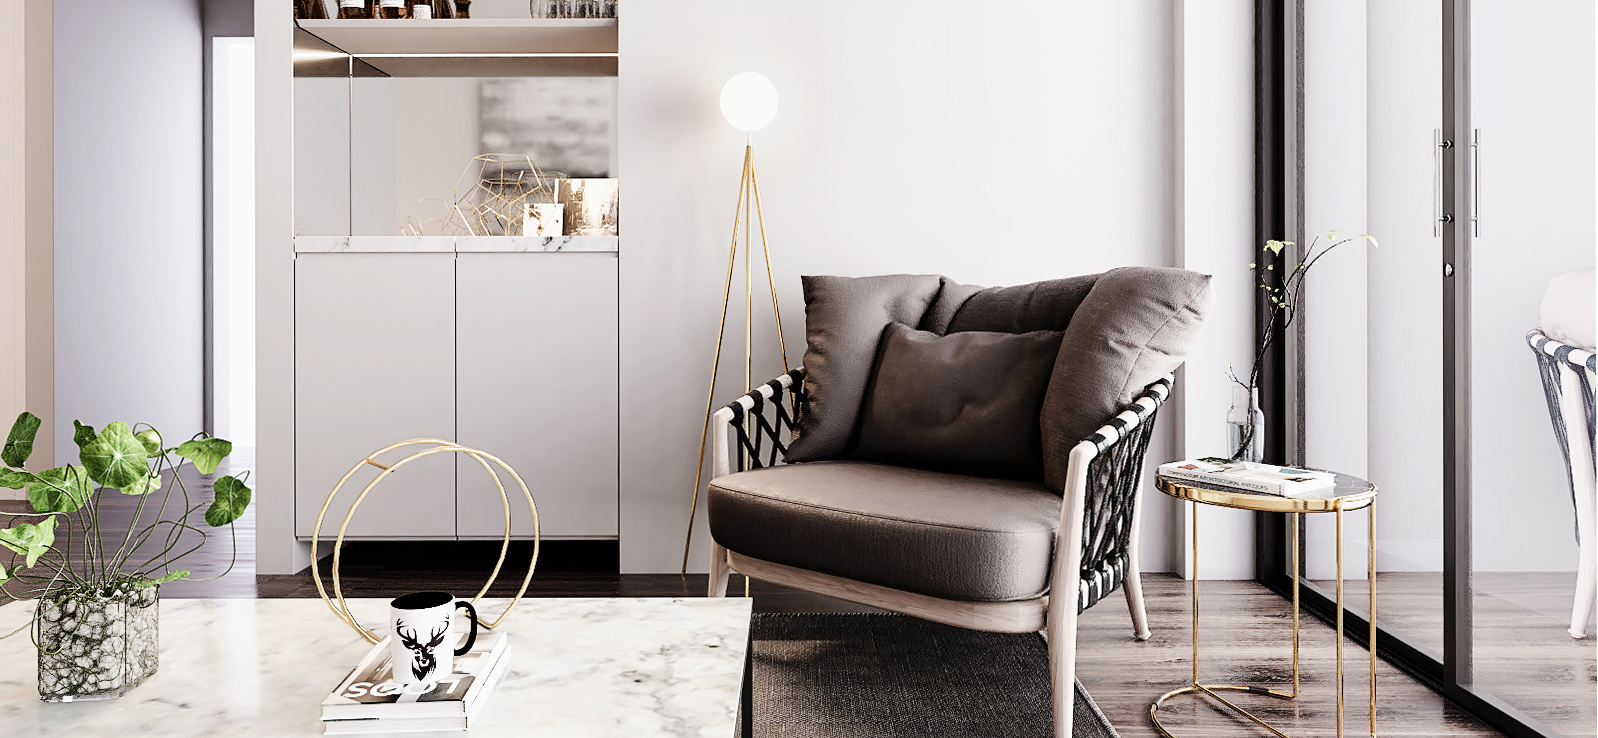
This is my image reference selection. I took it from the blankcanvas.studios website, because, in my opinion, this picture has a very good composition of furniture placement and camera composition, as well as very natural lighting.
PROCESS

Camera Setup
- Add image reference to background.
- Image axis, choose camera.
- Camera resolution set according to the reference image.
- If it’s appropriate then prepare for modeling….
Modeling
- Modeling the room and looking at the floor and wall lines.
- Adjust furniture models and placement with reference images.
- Then place accessories similar to image reference.
- If all the modeling processes have finished, then give the texture to each object…
Don’t forget to preview all models, make sure all models are well….
Texturing

Make sure all objects have been given material….
Lighting
World and outdoor light are the main light sources, and the others only balance the composition…

World emission: This world is the main source of lighting, I fill the surface with emission R: 0.750 G: 0800 B: 1,000 and a strength value of 1,500, and I activate ambient occlusion with values like in the picture.
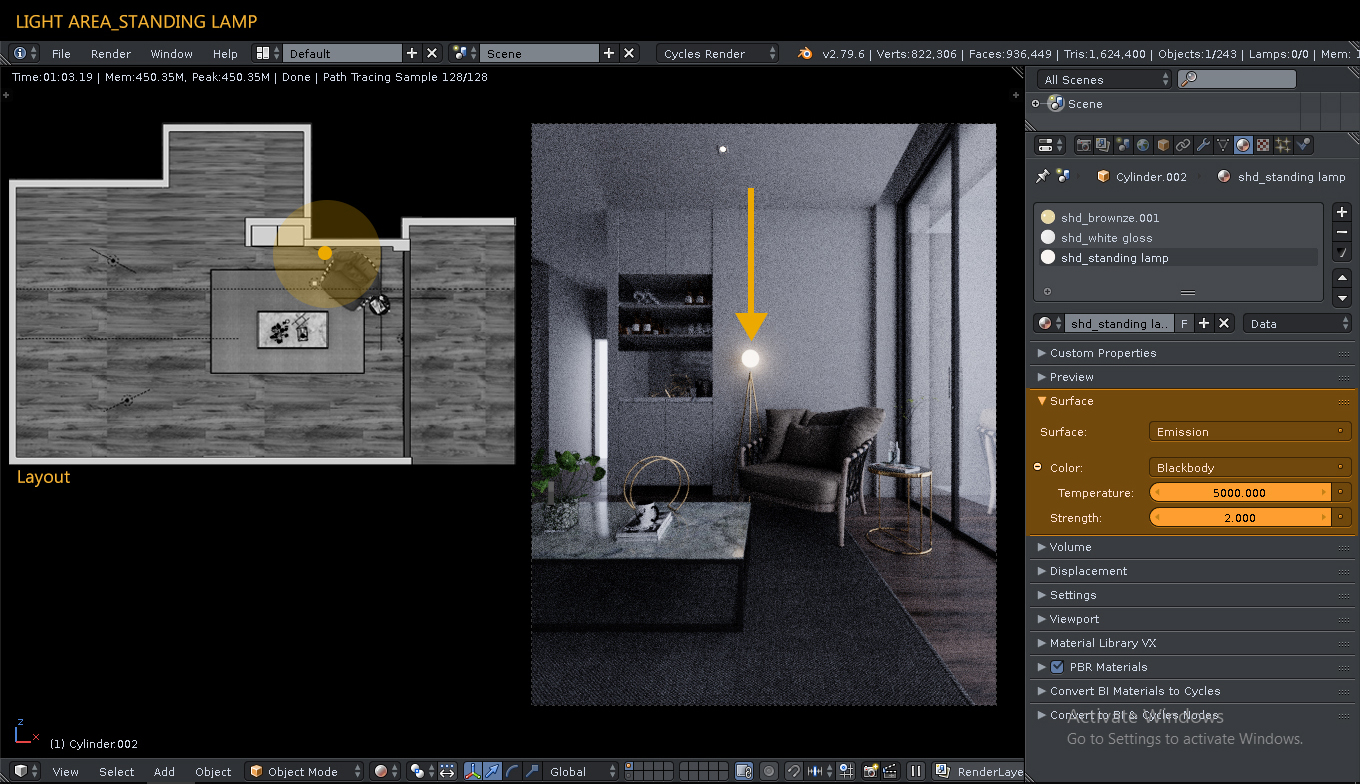
Standing Lamp: for this standing lamp I use emission with a value of 2,000 and a color blackbody with a value of 5000,000 to make it more realistic in the light.
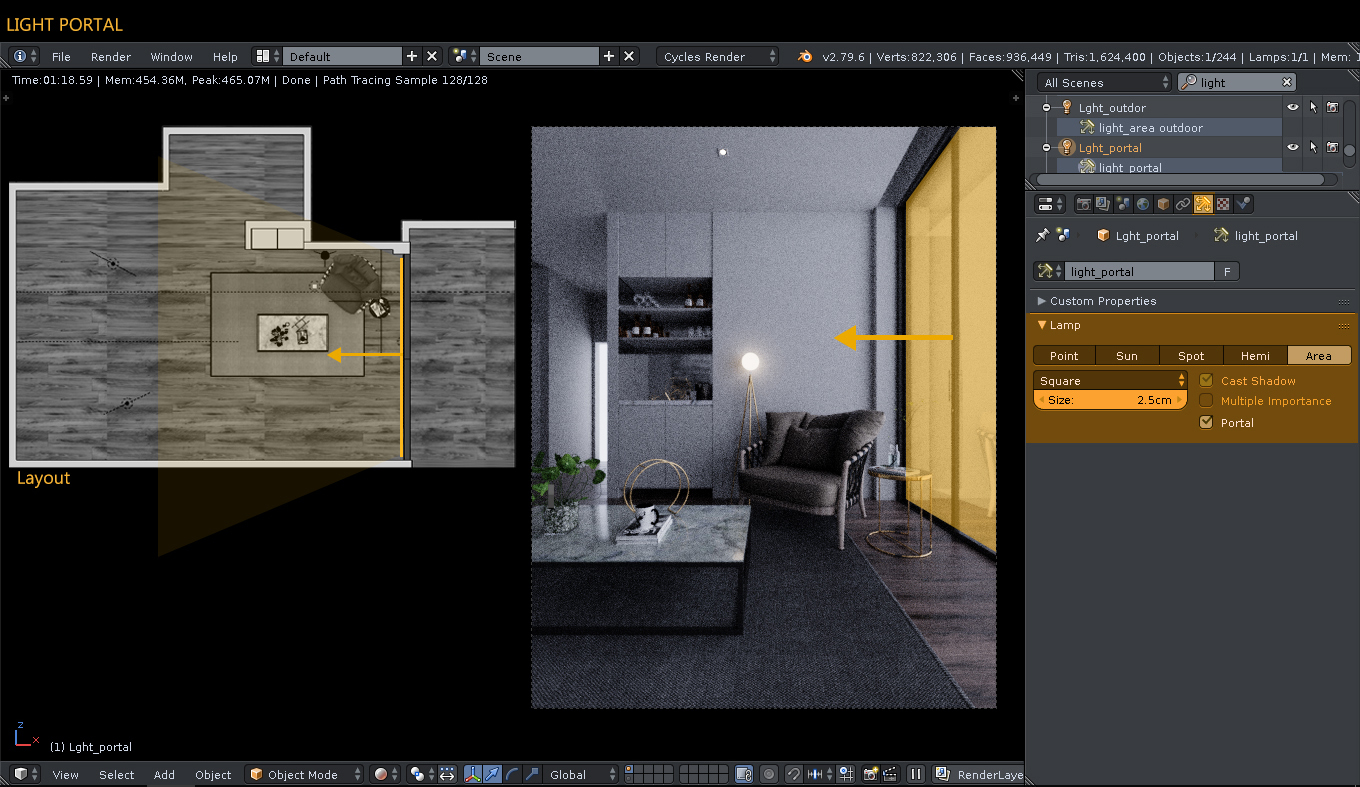
Portal Light: I add a portal light in front of the window to enhance the light coming from outside the room.
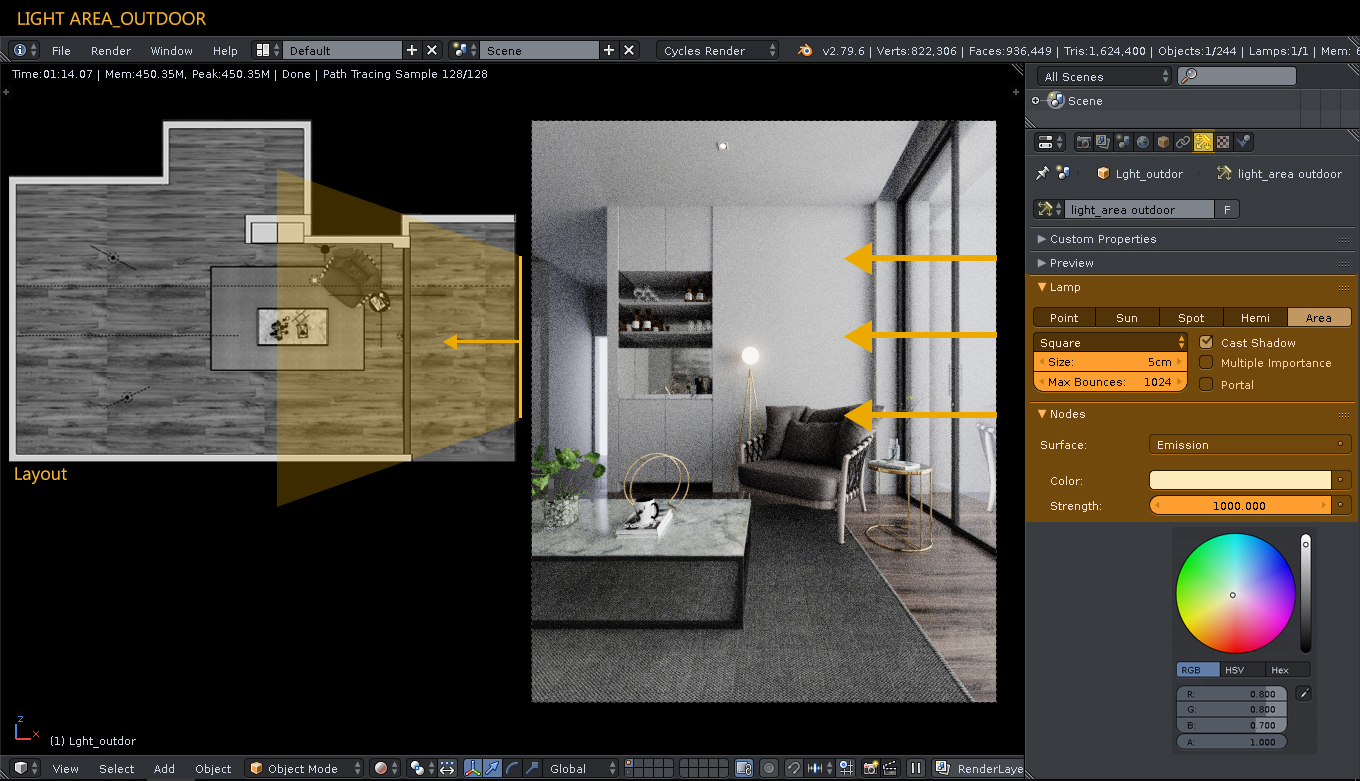
Light Area Outdoor: And this is the second light source from outside the room, with a strength value of 1000,000 so that the light entering the room is evenly distributed. It is slightly bluish with values of R: 0800 G: 0800 B: 0.700.
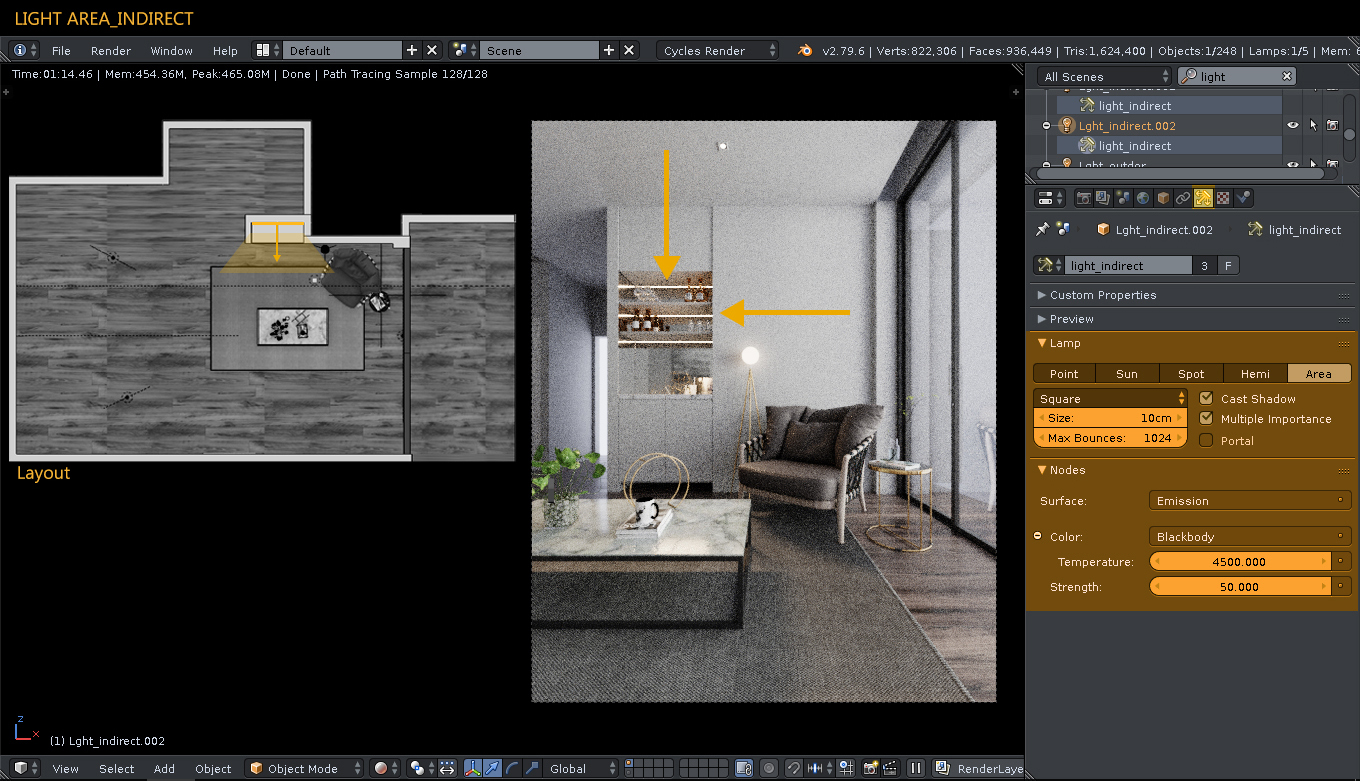
Indirect Light: This is only lighting accessories for furniture and mirrors.

Artificial Light #1: With this light I’m just trying to give dimensions to the space that isn’t too visible.
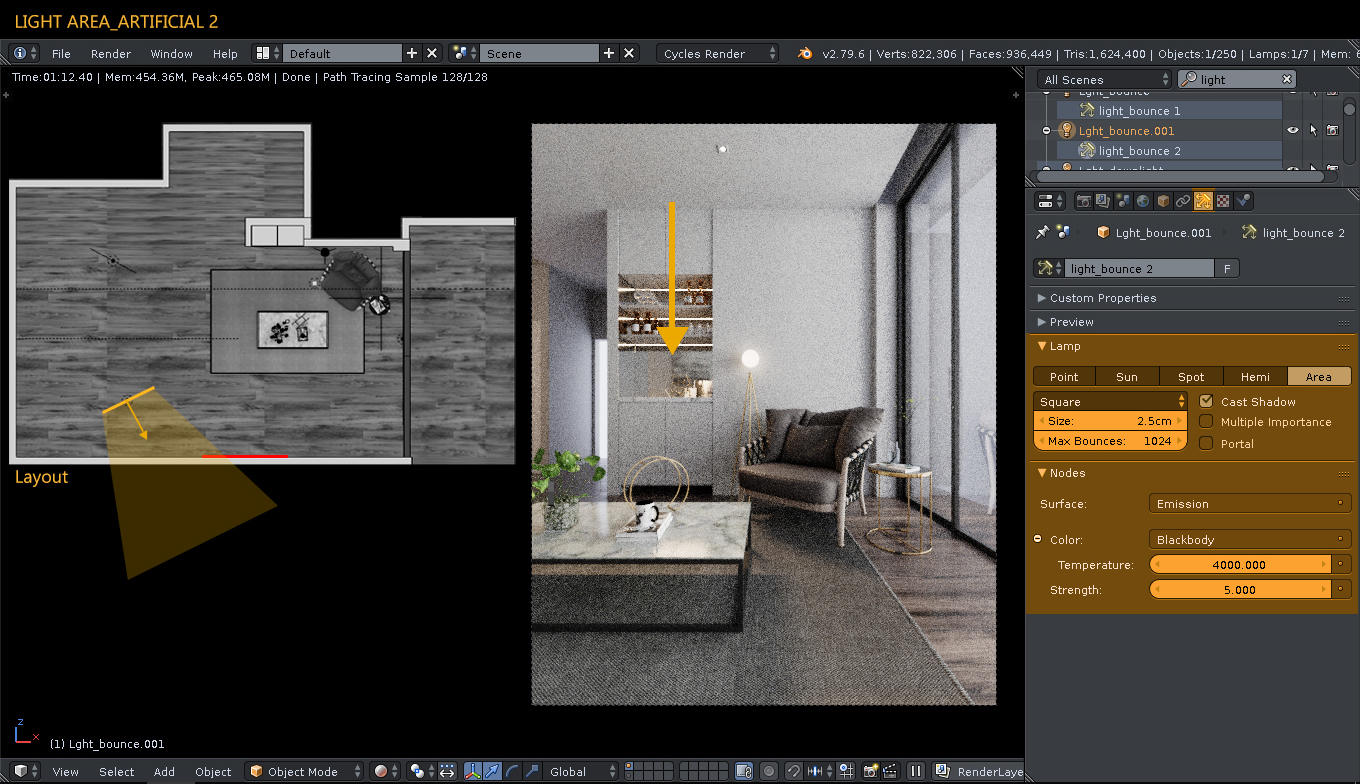
Artificial Light #2 : I want this light to reflect on the mirror of the painting and light from Artificial Light #1.
Downlight: Actually this light is not too influential, it’s just enough to make light on the wall effective.
Camera Settings
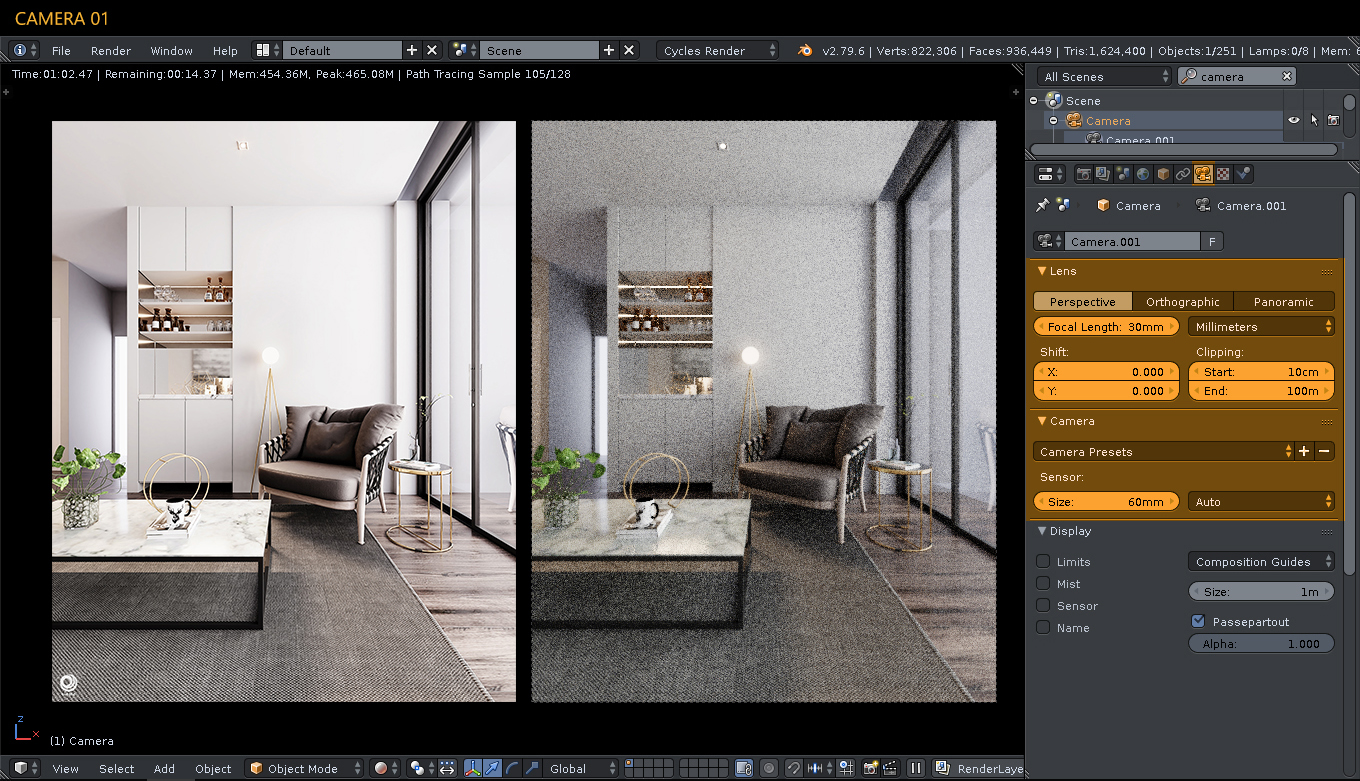
Camera 01: I needed to be sure to adjust this camera to match the reference image.
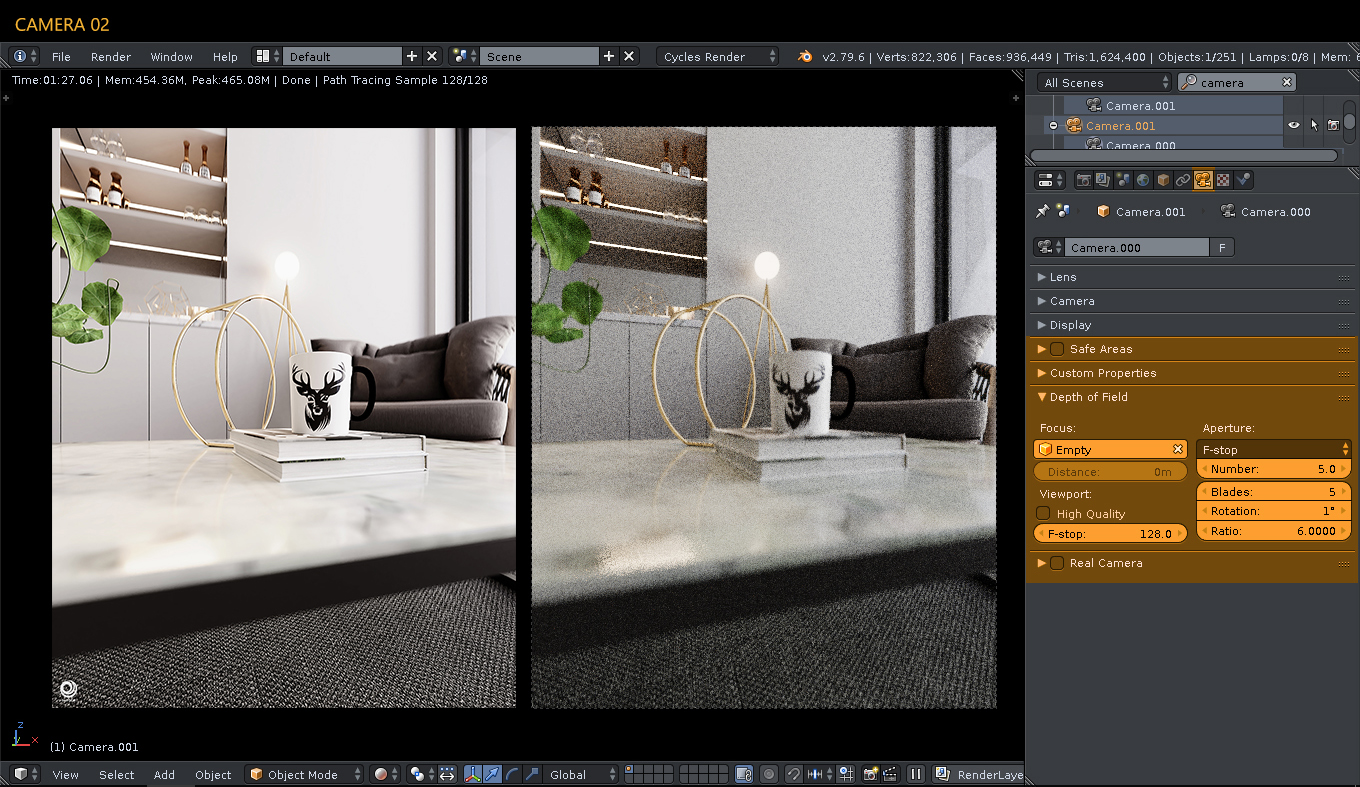
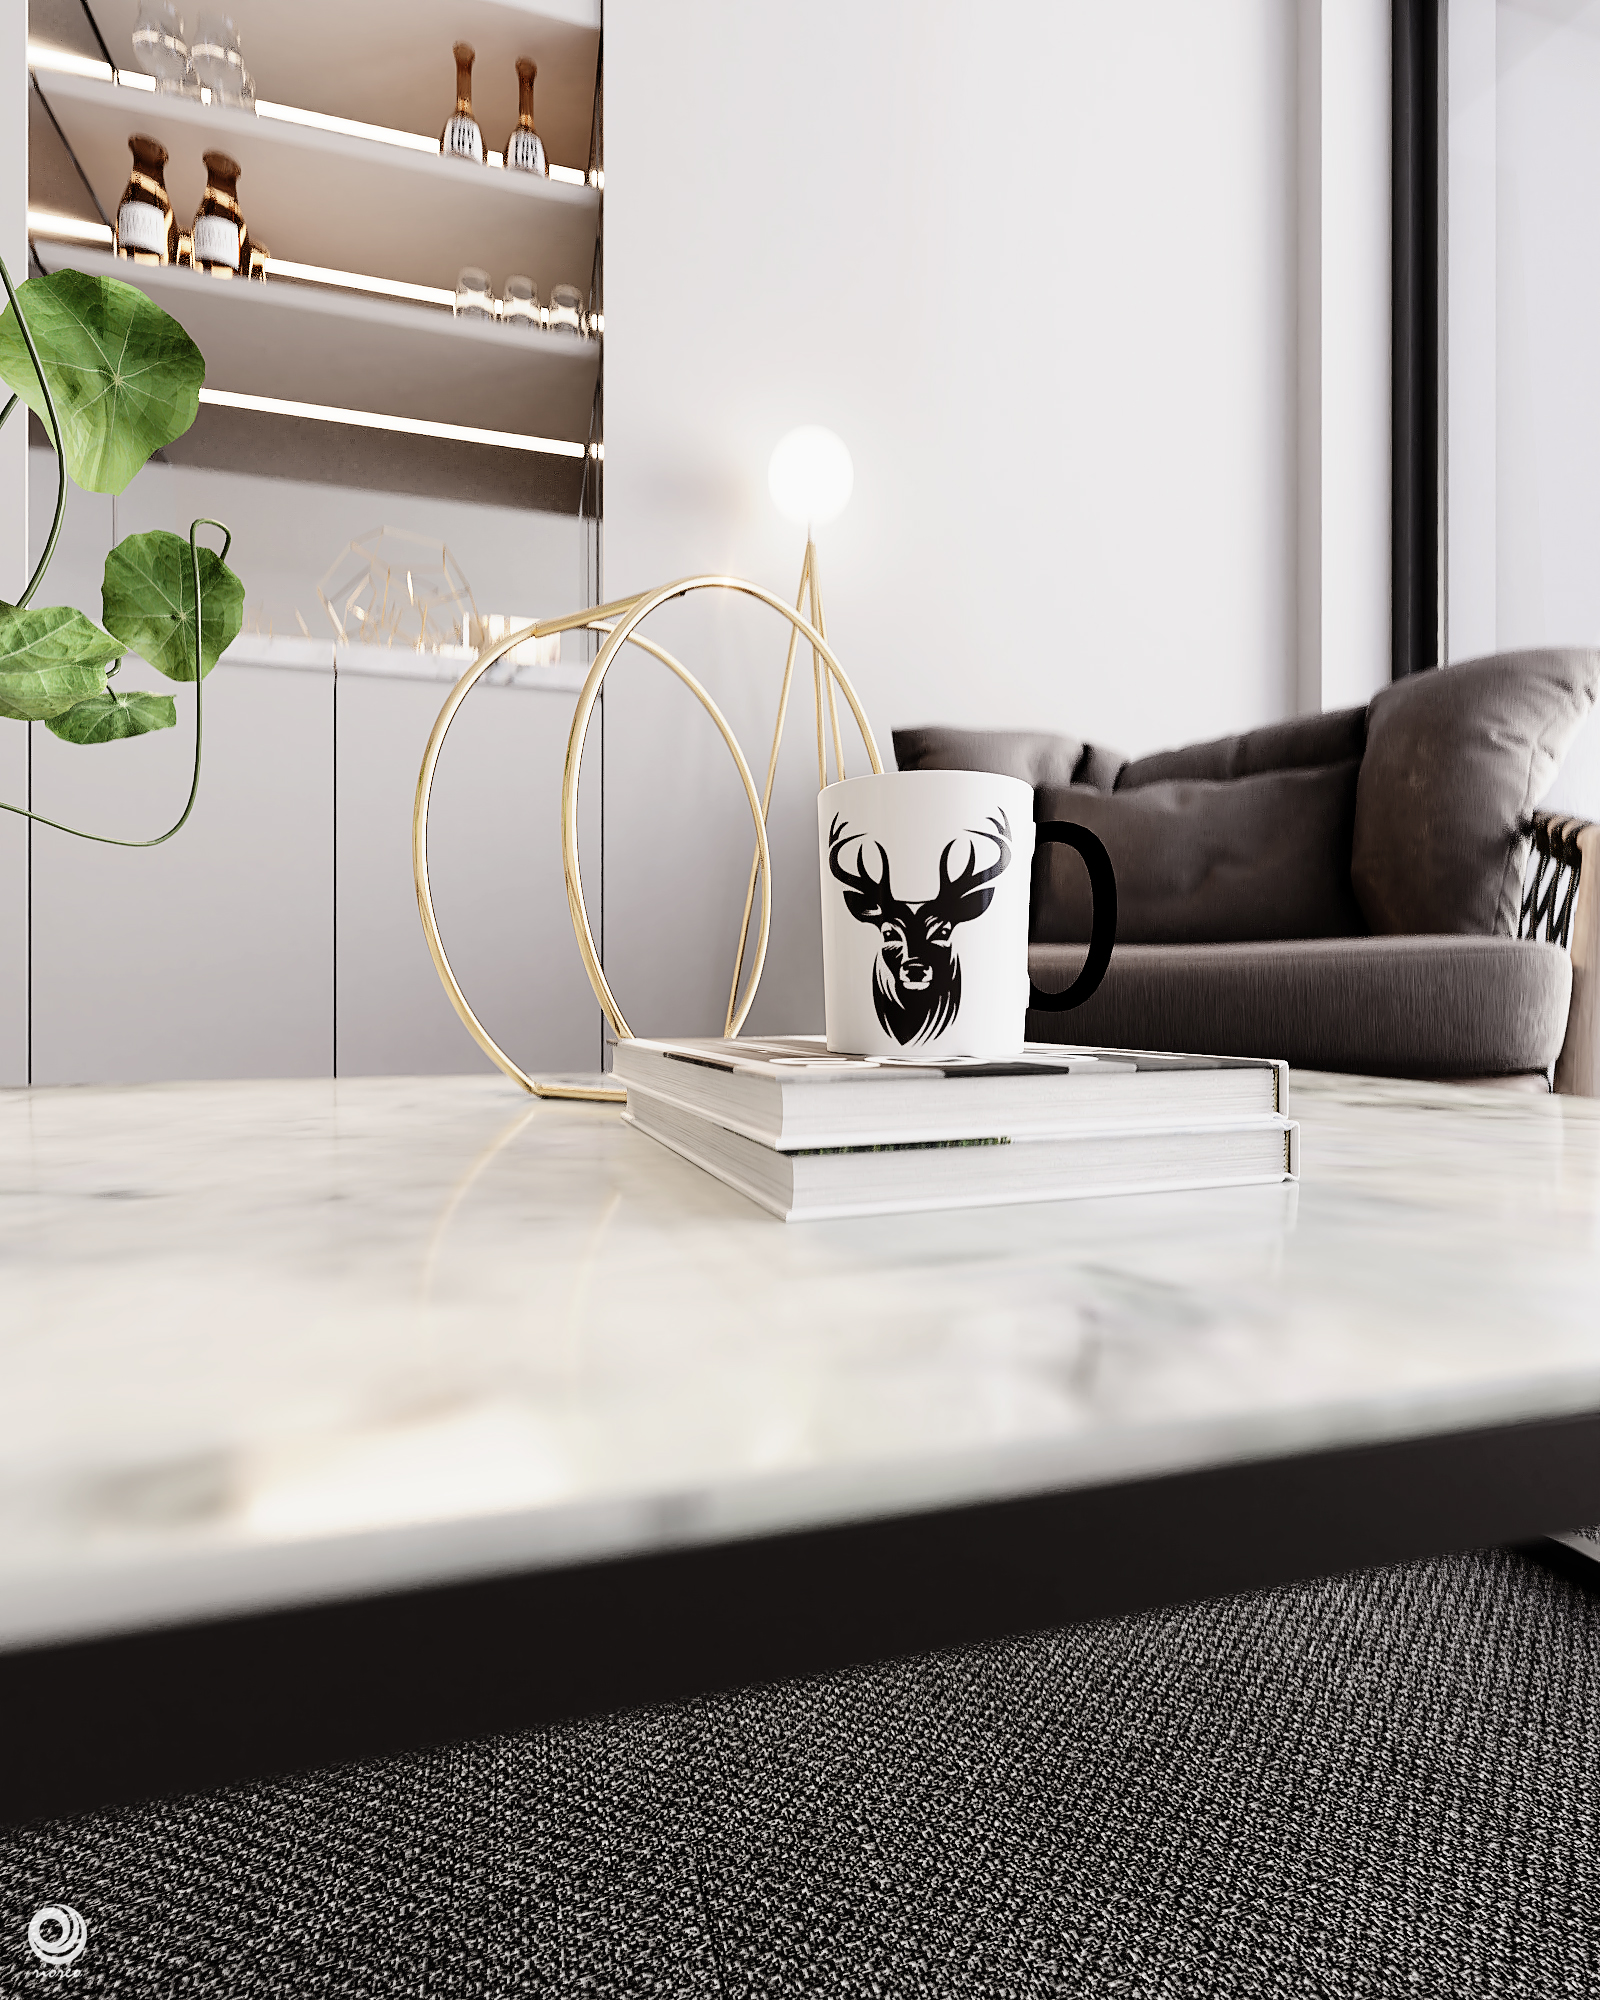
Camera 02: On this camera I improvised by trying to add depth of field with a camera value as shown.

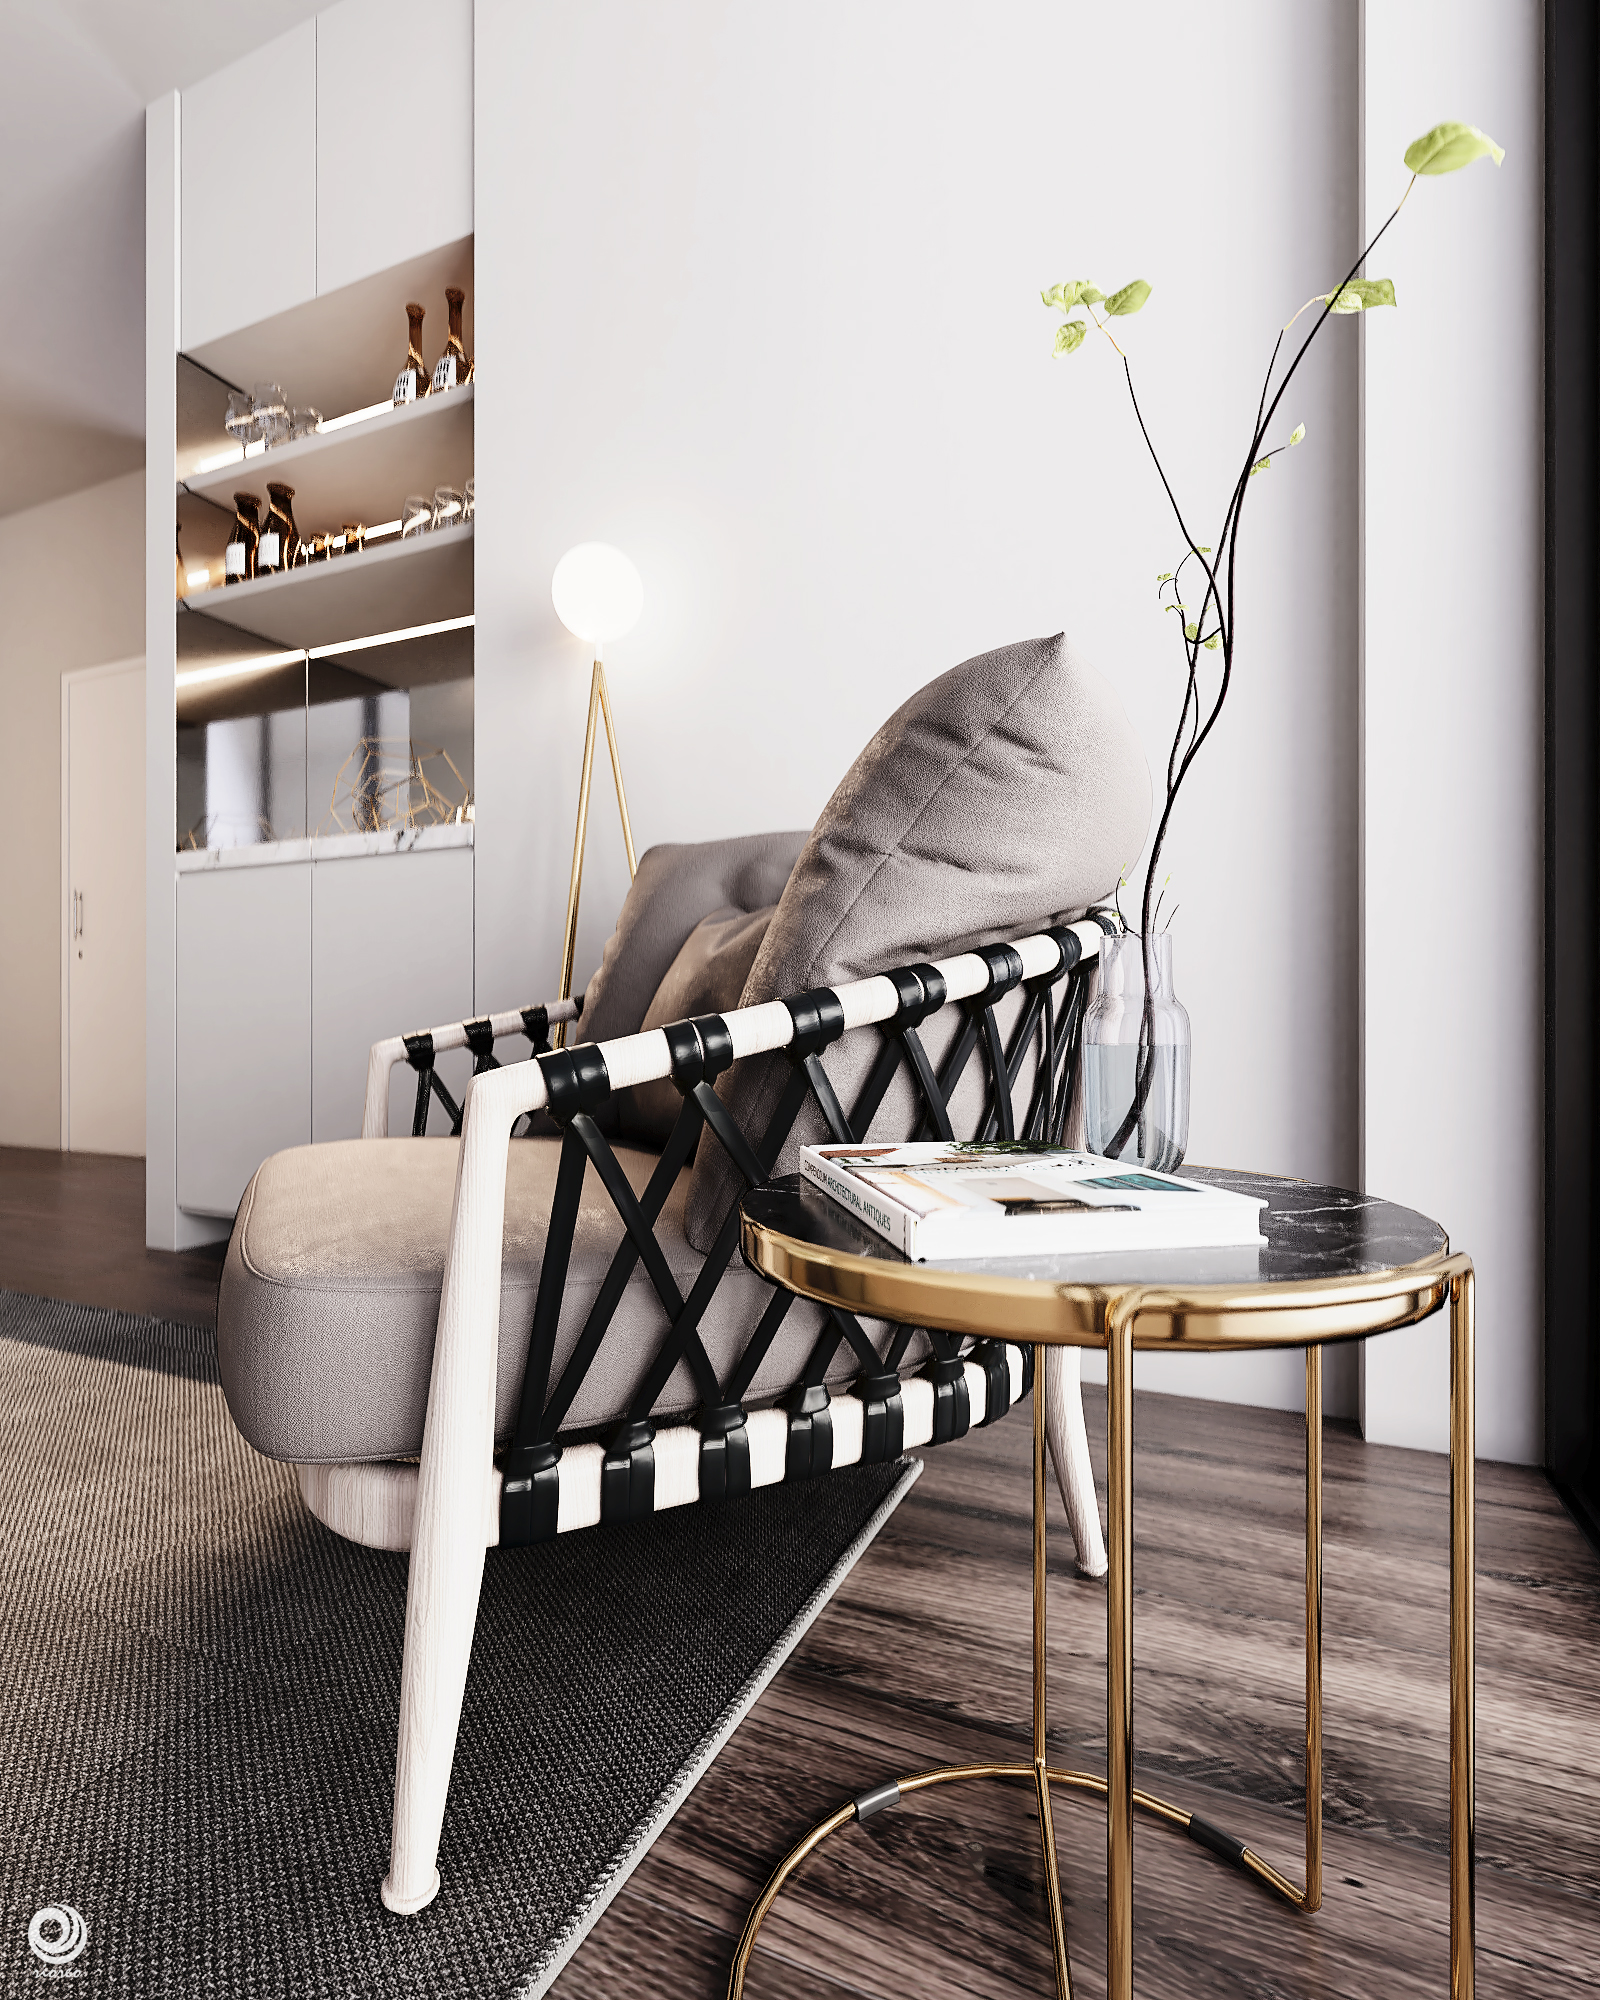
Camera 03: Also with camera 03 I tried to add depth of field with a different camera value as shown.
Render Settings
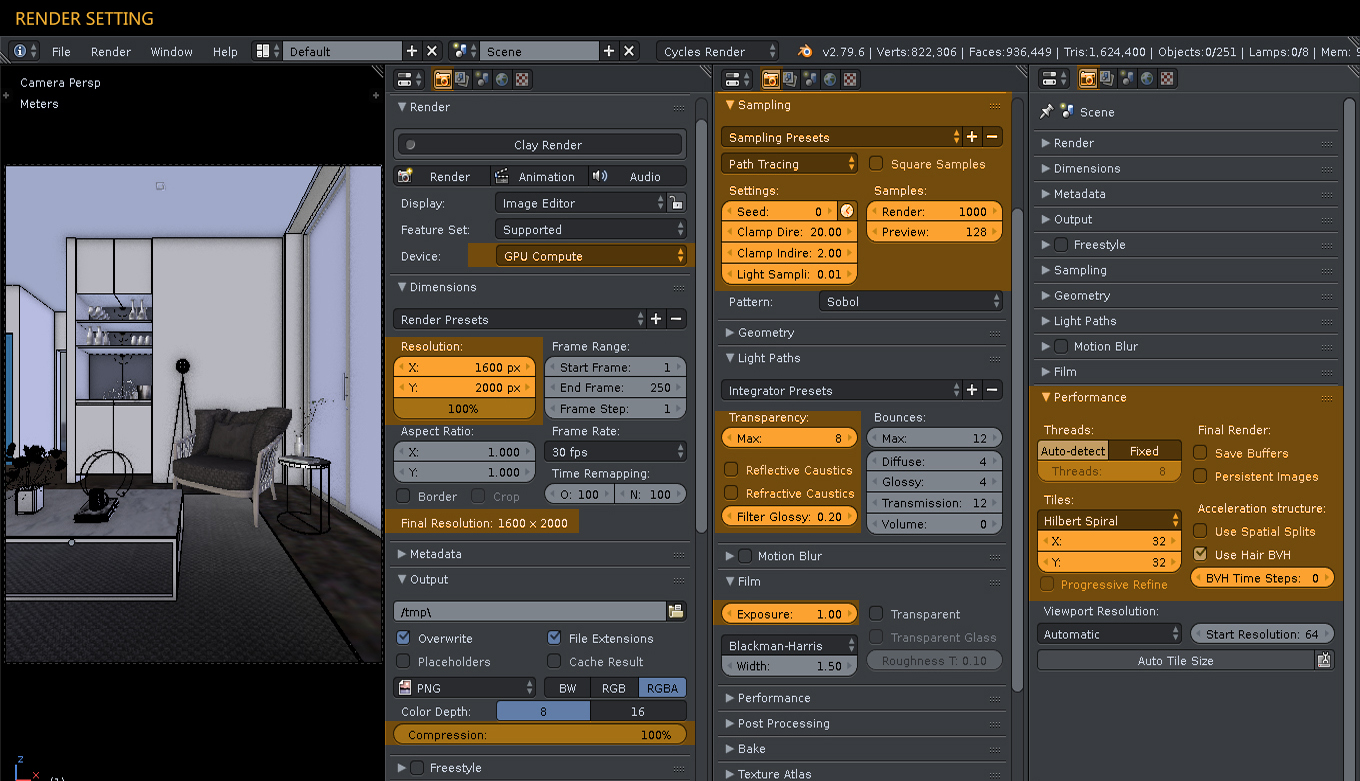
Render Setting: Here I made a 1600px X 2000px resolution with 1000 samples, for good results.
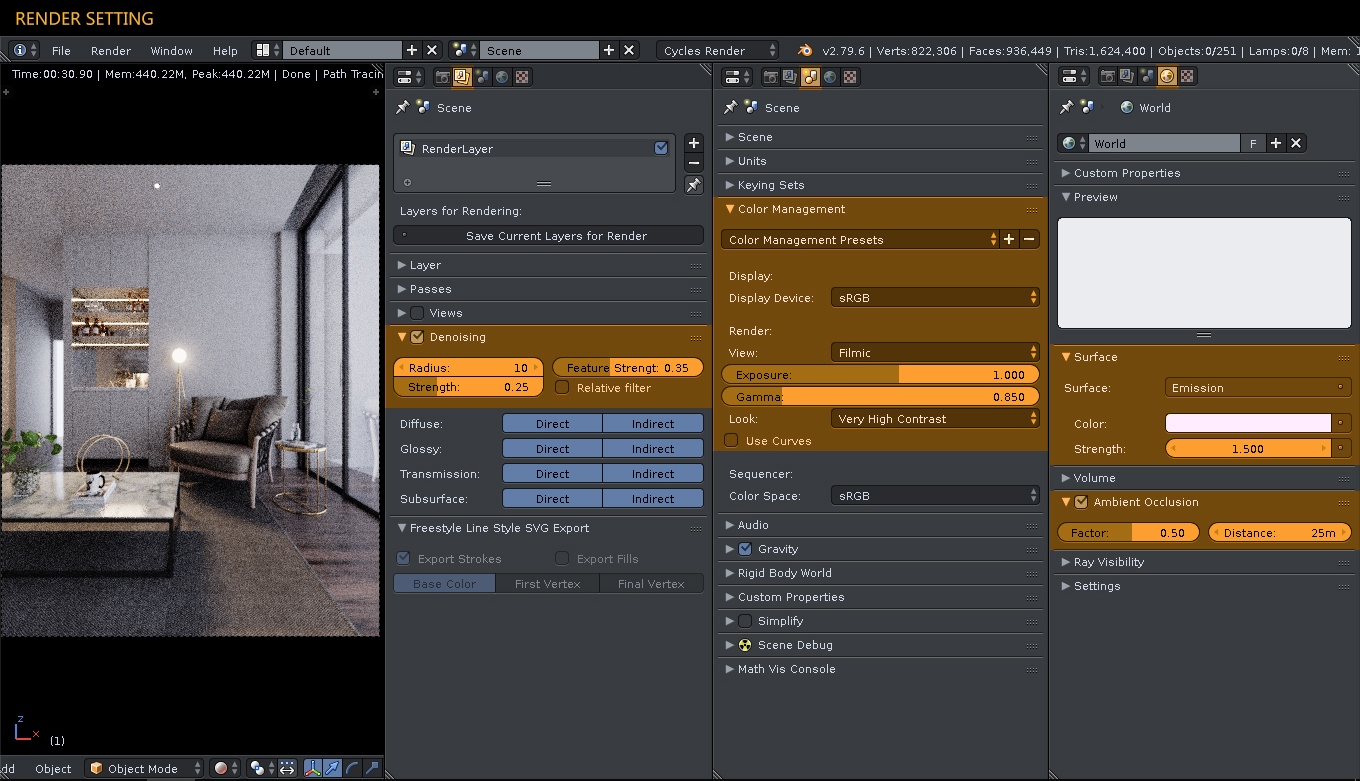
Render Setting: I activated denoising with a Radius value: 10 feature strength: 0.35 and strength: 0.25.
I set color management to filmic and I set the exposure value: 1.00, gamma: 0.85 and look: very high contrast.
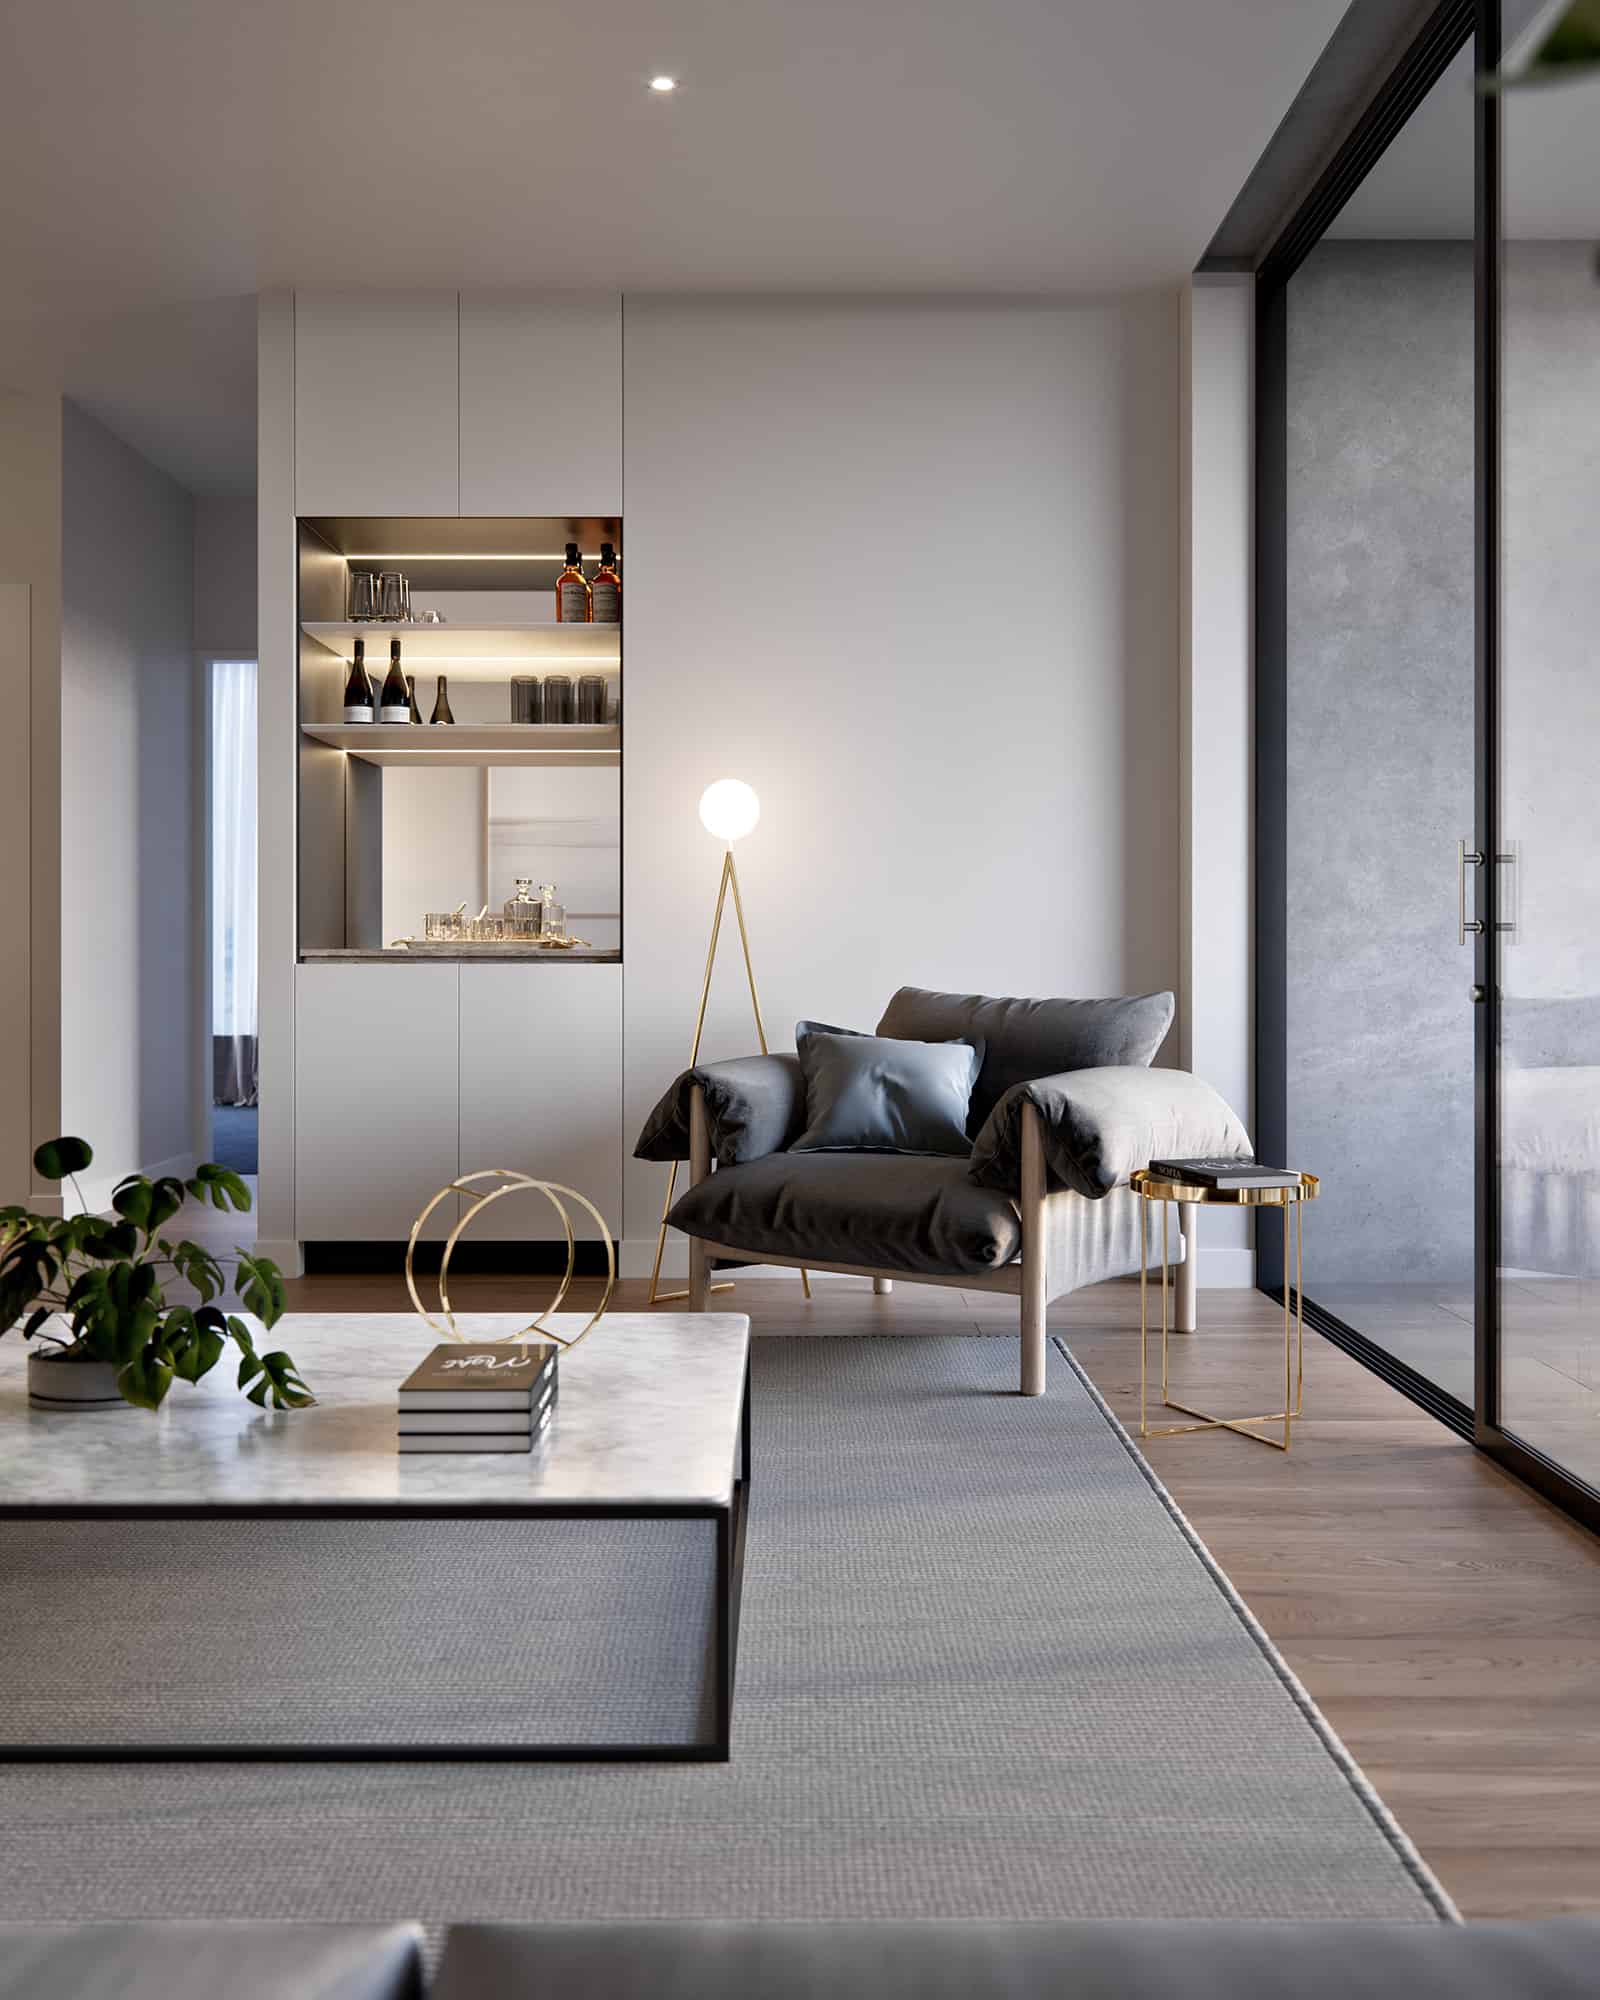
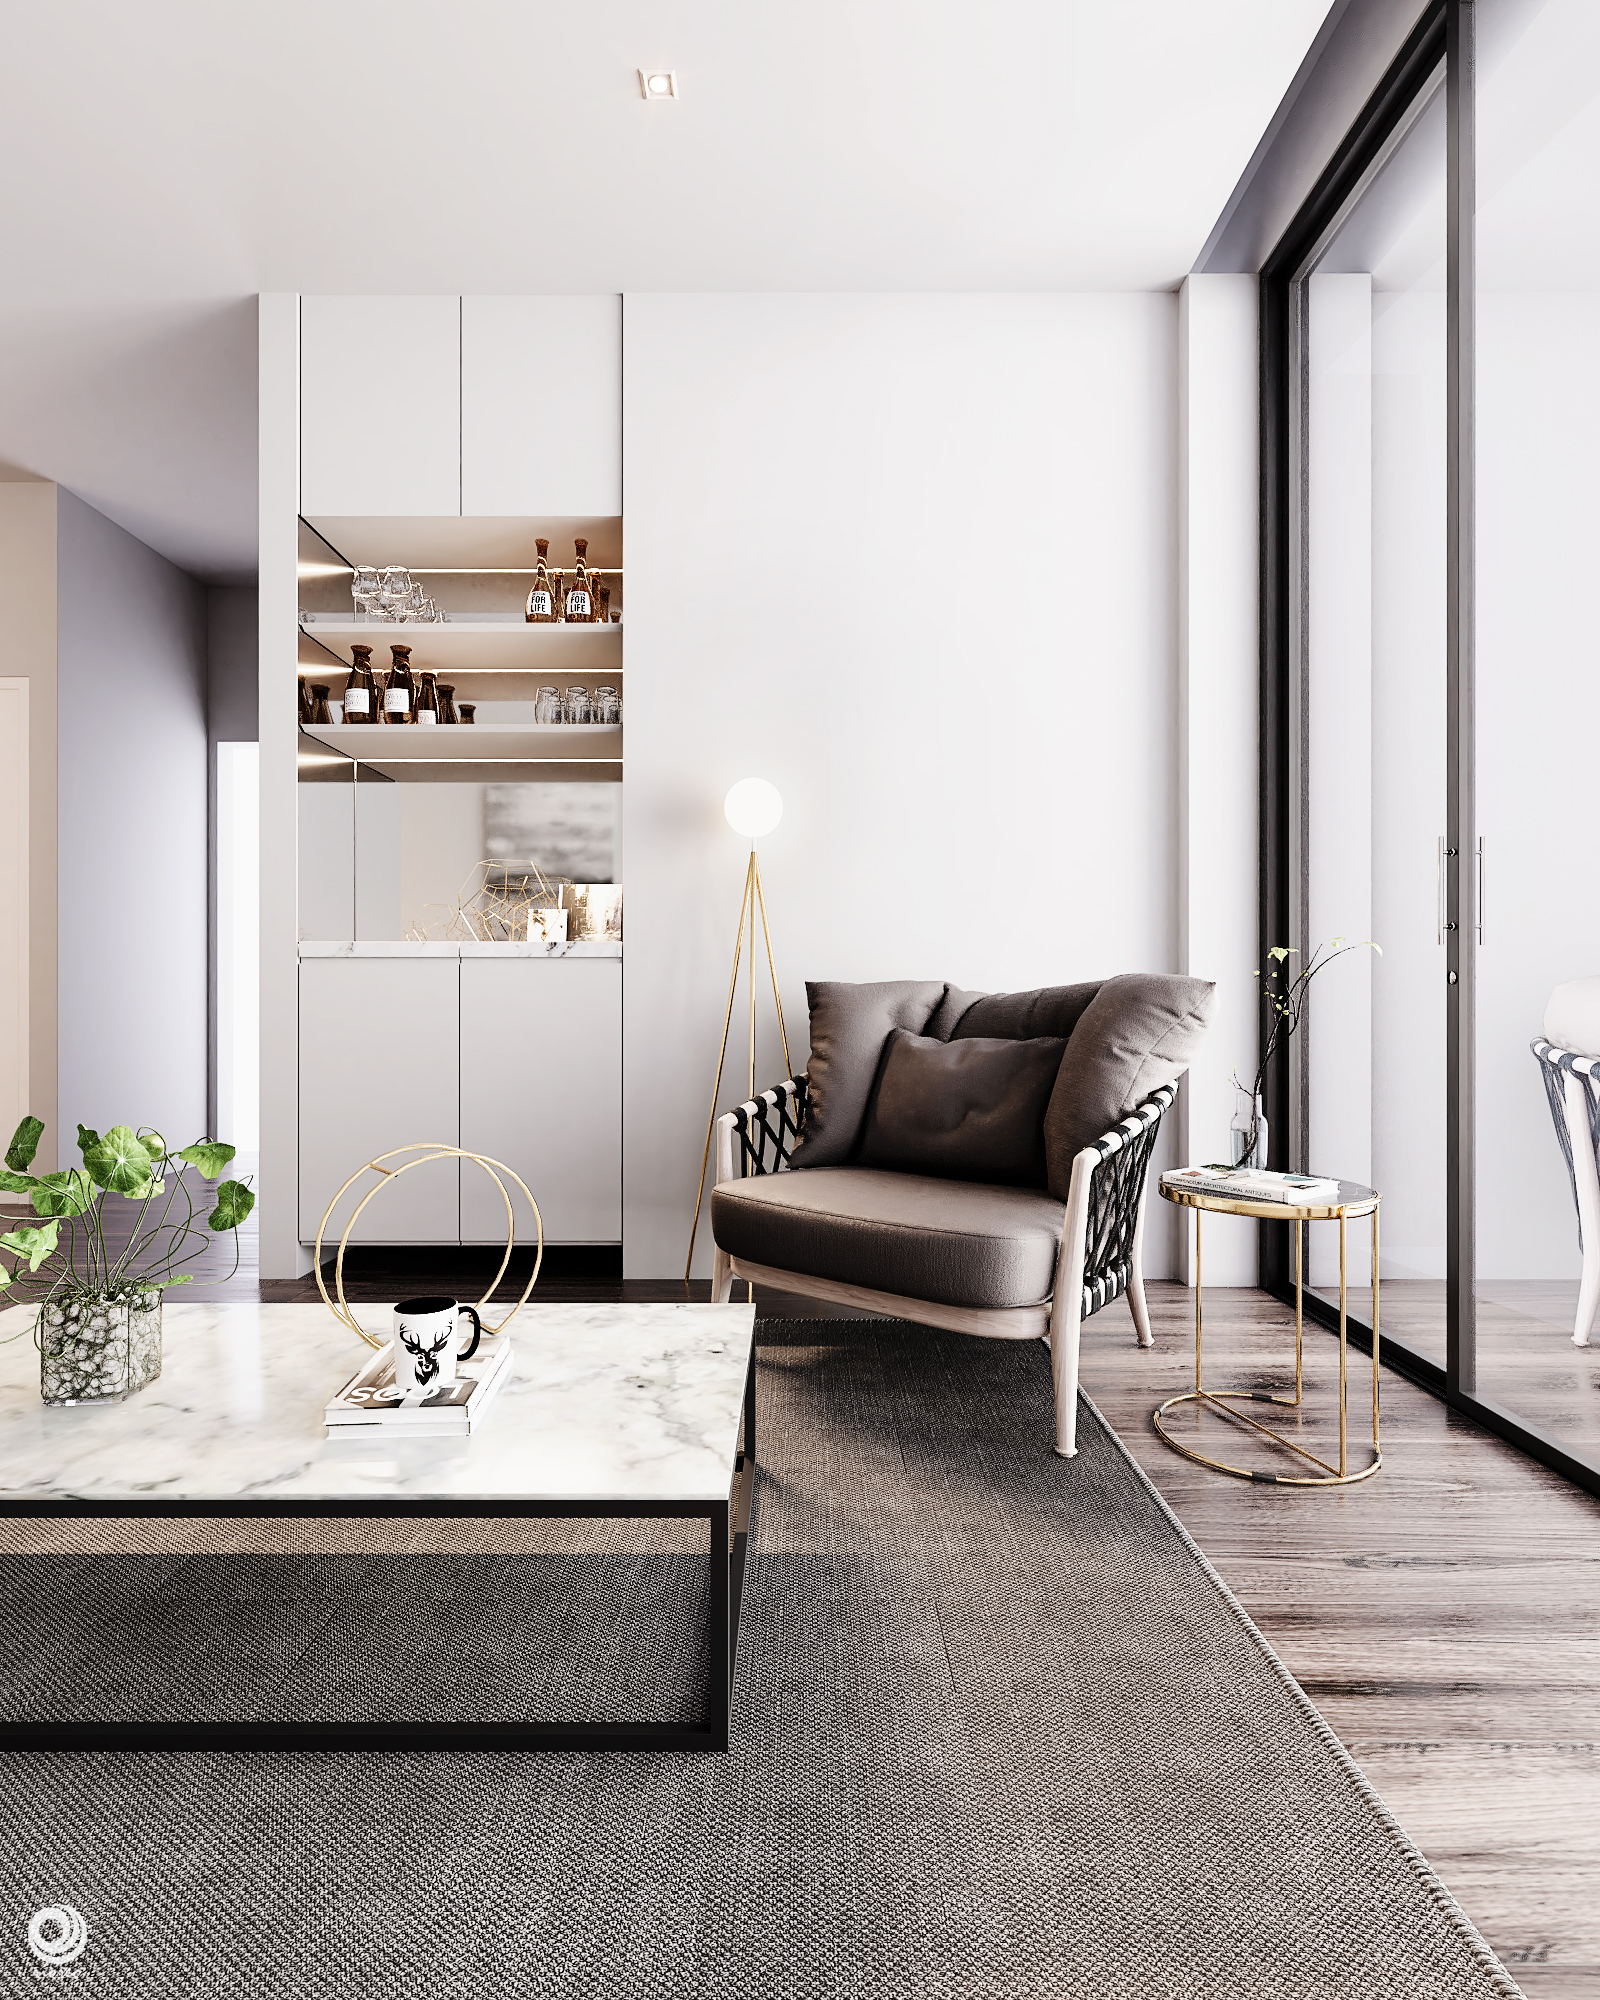
Results

About the Author
 Rioreo, Architect | interior design | 3D Artist


Great walk-through! Beautiful.
My only question/concern – do portals actually work for you? I’ve tried portals many times, compared render slots, researched on Blenderartists about other’s experiences, and I still haven’t come to any conclusion. In my tests, I’ve actually seen more noise when using the portals. And in some instances, they’ve decreased illumination slightly. So I’m at a loss.
Hi! I used to have the same concern. But now I just realize portal will work only with environment light and nothing else, it will increase render time as well. Hope this will answer your question. Cheers!
as long as I use it, it’s really very helpful for lighting :)
Wow, that’s quite a nice reproduction! Amazing you managed to get the model and lighting so close to the reference. What renderer are you using? Doesn’t look like Vray.
Did you have to do much post production in photoshop?
Keep up the good work.
cheers,
Eugene
http://www.cleanpix.com.au
thanks, @EUGENE I use cycles rendering, not in the post pro I only do color correction and color balance..